> Scope: Getting started: How to start and how picogame works — the intro, the step-by-step tutorials, and the concept/explanation pages.
> Generated 2026-07-31 | docs commit fbd2d56 | picogame-libs 0.1.20 | API_LEVEL 1
# picogame
> Make little games for tiny handhelds in Python. Try them in your browser or on your PC, then play on a supported  board.
## What is picogame? [Section titled “What is picogame?”](#what-is-picogame) **picogame is a small 2D game engine for microcontrollers like the RP2040**, the chip inside the [PicoPad](https://picopad.eu) pocket console. You write your game **in Python** and try it in your browser or the desktop simulator. When it is ready, copy it to a [supported board](/supported-hardware/). You do not need C, a firmware build, or hardware to start. ## See it in action [Section titled “See it in action”](#see-it-in-action) A whole game, designed and built with picogame: [A game built with picogame](https://player.mediadelivery.net/embed/689358/321ad936-1df9-4397-b552-2fabf4892da1?autoplay=false\&loop=false\&muted=false\&preload=false\&responsive=true) ## What picogame gives you [Section titled “What picogame gives you”](#what-picogame-gives-you) Start in your browser in five minutes, then run the same code on the device — picogame handles the rest: A complete engine Sprites, tilemaps, collisions, a camera, sound, and text are built in — the parts every game needs, ready to use. Smooth motion at 30+ FPS The engine repaints only what changed each frame, so games stay fluid — even on the modest RP2040. The low-level work is done The hard parts — display driver, blitter, text, collisions — run in native C. You write your game in plain Python. Built for small RAM Built to use as little memory as it can — full-screen effects need no extra buffer, so even big scenes fit the RP2040’s small RAM. ## What can you build? [Section titled “What can you build?”](#what-can-you-build) Games across several genres, runnable in your browser and on supported devices: 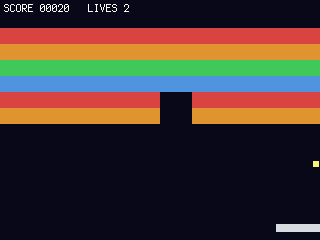 **Breakout** 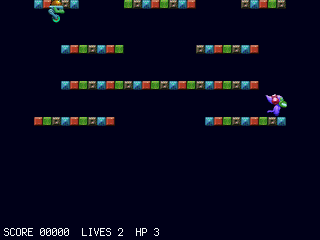 **Platformer** 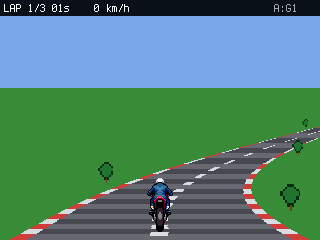 **Pseudo-3D racer** 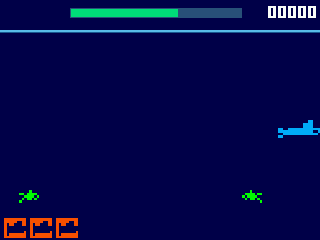 **Vertical shooter** 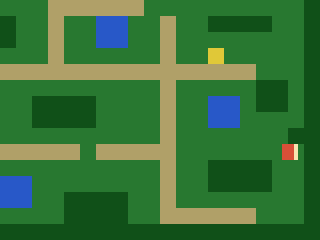 **Top-down RPG** 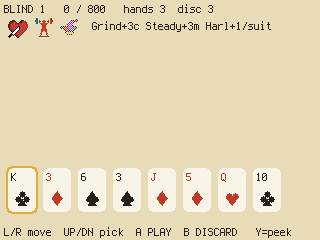 **Card roguelite** Sprites, scrolling tilemaps, a moving camera, particles, sound, and saved high scores. **[See all the games — and play them in your browser →](/examples/)** ## Try it now, right in your browser [Section titled “Try it now, right in your browser”](#try-it-now-right-in-your-browser) ## Get it on your device [Section titled “Get it on your device”](#get-it-on-your-device) Two steps and you’re playing: flash the firmware, then copy a ready-made pack of games onto the drive. A [launcher](/launcher/) boots so you can pick a game and play — no coding needed. [⬇ 1. Download firmware](/supported-hardware/#download-firmware)Pick the .uf2 for your board (PicoPad, Fruit Jam, PicoSystem, plain Pico, ...) and drag it onto the BOOTSEL drive. [⬇ 2. Get the games pack](/start/quickstart/)Choose the pack for your board — RP2040, RP2350, or Fruit Jam — extract onto CIRCUITPY, and a game menu boots. ## Pick your path [Section titled “Pick your path”](#pick-your-path) [🌱 New to making games](/start/first-game/)Start from zero. Get something moving in five minutes, no hardware needed, then build up step by step. [🔁 Made games before](/concepts/coming-from/)Coming from Pygame or PICO-8? The concept map translates what you already know into picogame's names, then points you to the reference. [🧰 Know CircuitPython](/concepts/coming-from/#coming-from-displayio)Fluent in displayio, or have a screen-based project to bring over? The displayio bridge takes you from screens to games. [🛠️ Already building with picogame](/reference/)Straight to the API cheat sheet, the feature guide, and how to do things efficiently (RAM, framerate, deploy). [🤖 Building with an AI agent](/ai-agents/)Give your coding agent the game-design skill or point it at /llms.txt — it'll design and build picogame games with the right patterns. New to game words like *sprite* or *tilemap*? Start with the **[Glossary](/concepts/glossary/)**. ## Where the code lives [Section titled “Where the code lives”](#where-the-code-lives) **Clone the main repository for the simulator, games, tutorials, and helper libraries.** [👾 picogame →](https://github.com/MakerClassCZ/picogame)The main repo: the desktop simulator, ready-to-play games, step-by-step tutorials, and the picogame\_\* helper libraries. The other repositories serve specific deployment and compatibility needs: [📚 picogame-libs](https://github.com/MakerClassCZ/picogame-libs)The helper libraries on their own, when you want them à la carte or to follow their releases. [🐍 circuitpython (fork)](https://github.com/MakerClassCZ/circuitpython)The firmware source, only to build a .uf2 for your own board (the PicoPad's is prebuilt). [🕹️ picogame-stage](https://github.com/MakerClassCZ/picogame-stage)A Stage compat layer for running existing stage / ugame games on picogame.
# Coming from another engine
> Map what you already know from Pygame, displayio, PICO-8 or Arcade onto picogame — and see what the engine does and doesn't do.
Use the table below to map concepts from Pygame, `displayio`, PICO-8, or Arcade onto picogame. If you know `displayio`, continue with the [term-by-term bridge](#coming-from-displayio). See [How picogame works](/concepts/how-it-works/) for the underlying model and the [API reference](/reference/) for signatures. ## Concept map [Section titled “Concept map”](#concept-map) | You want… | Pygame | displayio (CircuitPython) | PICO-8 | **picogame** | | -------------------- | ------------------ | ------------------------- | --------------------- | --------------------------------------------------------------------------------------- | | An image | `Surface` | `Bitmap` + `Palette` | sprite sheet | `pg.Bitmap(data, w, h, …)` (PAL8 or RGB565, multi-frame atlas) | | A movable object | `sprite.Sprite` | `TileGrid` | `spr()` | `pg.Sprite(bitmap, x, y)` (anchor, flip, frame, **scale**, **angle**) | | The scene/world | `Group`/manual | `Group` | the screen | `pg.Scene(...)` — retained, dirty-rect | | Draw it | `screen.blit()` | add to `Group` | `spr()`/`map()` | `scene.add(obj)` once; then `scene.refresh()` per frame | | A tiled level | your own | `TileGrid`+`Bitmap` | `map()` | `pg.Tilemap(tiles, cols, rows)` — `tile(x, y, value)` | | A scrolling camera | manual offset | `Group.x/y` | `camera()` | `scene.set_view(ox, oy)` (world bigger than screen) | | The main loop | `while`, `flip()` | `while`, `refresh()` | `_update()`/`_draw()` | `while: buttons.poll(); …; scene.refresh(); clock.tick()` | | Input | `pygame.event` | `keypad`/pins | `btn()` | `picogame_input.Buttons` → `is_pressed()` / `just_pressed()` (`poll()` for the bitmask) | | Sound | `mixer` | `audiocore`/`audiopwmio` | `sfx()`/`music()` | `picogame_audio` (`tone()`, `.wav`) | | Collision | `Rect.colliderect` | manual | manual | `pg.collide(...)` / `a.overlaps(b)` / `a.near(b, r)` (zero-alloc, off sprites) | | Text | `font.render` | `label` | `print()` | `picogame_ui` HUD / `picogame_font` → Bitmap | | Many bullets/enemies | sprite groups | manual | manual | `picogame_pool.Pool` (fixed pool, no per-frame alloc) | | Transforms | `transform.rotate` | limited | `spr` flips | `sprite.scale` (float) + `sprite.angle` (deg), nearest-neighbour | ## Coming from displayio [Section titled “Coming from displayio”](#coming-from-displayio) If you’ve used CircuitPython’s `displayio`, you already know most of picogame; it’s the same world with games-shaped names and the redraw bookkeeping done for you: | In `displayio` you used… | In picogame it’s… | | ------------------------------------------ | ------------------------------------------------------------------------------------------------------------------ | | `displayio.TileGrid` — a positioned bitmap | a **[Sprite](/concepts/glossary/)** — but it also flips, scales, rotates and animates | | `displayio.Group` — a stack of things | a **[Scene](/concepts/glossary/)** — holds [layers](/concepts/glossary/), painted in order | | `while True: display.refresh()` | the **[game loop](/concepts/glossary/)**: read input → update → `scene.refresh()` → wait | | `bitmap` + `palette` + RGB565 | the same — but build colours with `pg.rgb565(r, g, b)` ([wire-order](/concepts/glossary/)), never a raw `0xRRGGBB` | | managing redraws by hand | nothing — picogame is **[retained mode](/concepts/glossary/)**: you change objects, it repaints only what moved | The main shift is that you describe the scene instead of driving each display update yourself. ## The main difference: retained mode and dirty regions [Section titled “The main difference: retained mode and dirty regions”](#the-main-difference-retained-mode-and-dirty-regions) Many 2D engines are **immediate mode**: every frame you clear the screen and redraw everything. picogame is **retained mode**: you build a `Scene` of objects once, then each frame you *mutate* them and call `scene.refresh()`. The engine figures out which rectangles changed and **redraws only those**. On SPI displays, only those pixels are sent to the panel. Framebuffer targets such as Fruit Jam repaint the same regions in scanout memory. In both cases, the scene tracks the changes. One consequence: moving or swapping a sprite is tracked automatically, but an **in-place** pixel edit needs a `sprite.touch()` to register (see [effects](/helpers/effects/)). ## What picogame can do [Section titled “What picogame can do”](#what-picogame-can-do) * **Arbitrary-size sprites** with anchors, flips, multi-frame animation atlases. * **Runtime scale and rotation** per sprite (nearest-neighbour affine, no FPU needed), about an anchor. * **Tilemaps** you read and write at runtime (use them as game boards, not just backgrounds). * A **moving camera** (`set_view`) over a world larger than the screen, with fixed (HUD) layers. * **Particles**, a drawing **Canvas** (retained shapes), and **StripDraw** (full-frame effects without a retained pixel buffer). * **Audio** (PWM tones + `.wav`), **NVM save** for high scores/settings, a bundled **font** + HUD helpers. * A **desktop simulator**: the same game code runs on your PC (headless screenshots or a live window), so you build and debug without hardware. ## Design within the limits [Section titled “Design within the limits”](#design-within-the-limits) * **RAM depends on the board and firmware.** Large pixel buffers and sprite sheets dominate the budget. Tile large worlds, stream large sheets, and use StripDraw when you do not need retained pixels. See [Fit it in RAM](/memory/) for measured budgets and alternatives. * **One display, no GPU.** No shaders, no alpha blending. Transparency is a single transparent index/colour; for a darken effect there’s a `shadow` mode. Transforms are nearest-neighbour (crisp at integer scales, shimmery at fractional). * **Paletted art.** PAL8 is 1 byte/pixel (cheap); RGB565 is 2 bytes/pixel. Build colours with `rgb565(r, g, b)`, never raw `0xRRGGBB`. * **Few buttons.** D-pad + A/B (and sometimes X/Y). Design controls accordingly. * **Ship `.mpy`, not big `.py`.** Compiling a large source file on-device can `MemoryError`; pre-compile to `.mpy`. See [Run on hardware](/hardware/). ## Start here [Section titled “Start here”](#start-here) 1. Read [How picogame works](/concepts/how-it-works/) for the loop and dirty-region model. 2. Copy the [first game](/start/first-game/) and run it in your browser or the [desktop simulator](/simulator/) to feel the API. 3. Keep the [API cheat sheet](/reference/) and [feature guide](/features/) open while you build. 4. Adapt patterns from the [examples](/examples/) to your genre.
# Drawing paths — which to use
> Choose a retained or immediate drawing path for worlds, HUDs, panels, and one-off screens.
Choose the path by when the content changes and whether it needs stored pixels: * Use a retained `Scene` for a world that persists between frames. * Use `pg.render()` for a one-off screen or a reserved HUD band. * Use `StripDraw` when pixels can be regenerated instead of stored in a Canvas. ## One compositor, two output backends [Section titled “One compositor, two output backends”](#one-compositor-two-output-backends) Every draw uses the same layer compositor. On SPI targets, it walks each dirty region in horizontal **strips** and sends them to the panel. On scanout targets such as Fruit Jam, it composites dirty regions directly into the framebuffer. There the buffer’s colour depth decides the pixel format the compositor writes: a 16-bit framebuffer takes RGB565 as-is, while an 8-bit one (the only depth picodvi offers at 640×480) has each finished band quantized 565→332 as it’s published — you still author in `pg.rgb565(...)` either way. The layer choice determines how much additional pixel memory your game retains. A full-screen `StripDraw` keeps no pixel buffer; a 320×240 RGB565 `Canvas` keeps about 150 KB. The scanout framebuffer, where present, belongs to the display backend and is separate from both. 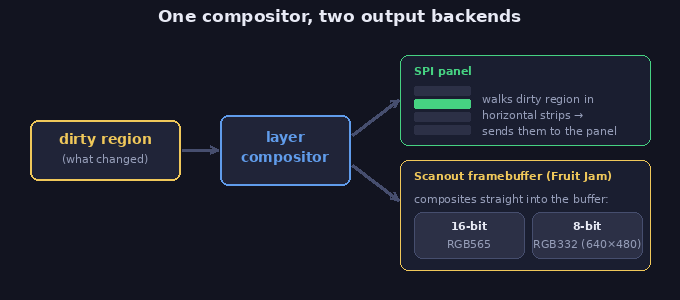 ## Two drivers (how drawing is triggered) [Section titled “Two drivers (how drawing is triggered)”](#two-drivers-how-drawing-is-triggered) | Driver | Use it for | Repaints | | ------------------------------------------------------------------------------- | -------------------------------------------------------------------------------------------------------------------------------------------------------------------- | ---------------------- | | **`scene.refresh()`** — retained, dirty-rect | the persistent game world: add layers, mutate them, refresh. Camera (`set_view`), `fixed` (camera-independent) layers, reserved bands (`top=/bottom=/left=/right=`). | only the dirty regions | | **`pg.render(display, items, buffer, x0,y0,x1,y1, *, background)`** — immediate | a one-shot push, on demand, *outside* a scene: a HUD in a reserved band, a title / level-done / game-over screen. | when you call it | Both drivers accept the **same layer kinds**: a `pg.render` list can hold Sprites, a `StripDraw`, a `Canvas`, a `Tilemap`, or `Particles`, exactly like the scene. ## Five layer kinds (what you draw) — and their RAM [Section titled “Five layer kinds (what you draw) — and their RAM”](#five-layer-kinds-what-you-draw--and-their-ram) | Kind | RAM | Use for | | ----------------------------- | ------------------------------------------------------------------ | ---------------------------------------------------------------------------------------------------------------------------------------------------------------------------------------------------------------------------------------- | | **Sprite** (wraps a `Bitmap`) | the bitmap: PAL8 = `w*h` (1 B/px), RGB565 = `w*h*2` | moving objects, characters, bullets | | **Tilemap** | `cols*rows` (1 B/cell) + the tileset | big static / scrolling boards — very cheap per area | | **Canvas** | `w*h*2` **retained** | a surface drawn **occasionally and reused** — a static panel, a dialog box | | **StripDraw** | **0 retained pixel bytes** (a view onto the current render target) | **dynamic full-frame / strip content** — sky, road, gradients, **and dynamic HUD / screen text**. Repaints every frame by default, or **on demand** (`always_dirty=False` + `.invalidate()`) for a buffer-less panel inside a live scene | | **Particles** | a fixed pool | sparks, trails, pops | 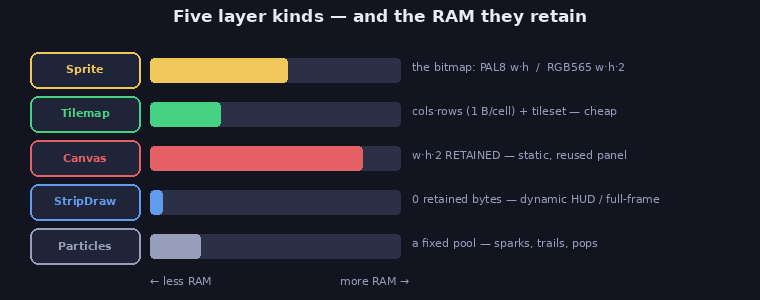 ### Text rides on these [Section titled “Text rides on these”](#text-rides-on-these) * **`Canvas.text(x, y, s, fg, font, bg=None)`** composites glyphs in C straight into a surface: no glyph cache, no per-call Bitmap/Sprite. The surface can be a **retained Canvas** *or* a **`StripDraw` view** (which points at the live strip). The same one method covers both. * **`picogame_font.render_text(...)`** rasterizes a string into a PAL8 `Bitmap` you show as a Sprite, good for **moving** text (floating damage numbers), where a sprite is what you want anyway. Dynamic text drawn through a `StripDraw` view retains no glyph or panel bitmap. Its callback still uses CPU whenever the region repaints. ### Pseudo-3D rides on these too [Section titled “Pseudo-3D rides on these too”](#pseudo-3d-rides-on-these-too) * **`Canvas.mode7(...)`** fills the rows below a horizon with a **Mode-7 perspective floor** of a power-of-2 texture — draw it into a **`StripDraw` view** for a full-screen ground plane at **0 retained RAM** (the `picogame_mode7.Camera` helper computes its fixed-point args from a camera pose). * **`picogame_ray.Raycaster`** builds first-person walls the same way — a DDA cast per column, each wall a `fill_rect` column into a `StripDraw` view. Both are the pseudo-3D case of “dynamic full-frame content”, so they live on StripDraw (never a 150 KB full-screen Canvas). See [Pseudo-3D](/helpers/pseudo-3d/). ## The decision matrix (HUDs, panels, screens) [Section titled “The decision matrix (HUDs, panels, screens)”](#the-decision-matrix-huds-panels-screens) | What | Right path | RAM | | --------------------------------------------------------------------- | ----------------------------------------------------------------------------------------------- | ----------------------------------------------------------- | | **Dynamic, thin HUD** (score / lives bar) | `StripDraw` (+ `view.text`), via `scene` or `pg.render` | **0 retained pixels** | | **Static, large panel** (side panel, title art, help text) | a **`Canvas` drawn once** (`canvas.text`), kept as a layer | `w*h*2` (justified — drawn once, reused, not re-rasterized) | | **Static panel + a few live numbers** | static `Canvas` for the fixed part **+** a small `StripDraw` for the numbers | small | | **A panel/dialog/menu inside a live scene** (repaints only on change) | **on-demand `StripDraw`** (`always_dirty=False`, `.invalidate()` on change), added to the scene | **0 retained pixels** | | **One-off screen** (title / level-done / game-over) | `pg.render([stripdraw])` — procedural bg + `view.text`, no scene needed | **0 retained pixels** | | **Moving text** (floating damage numbers) | `picogame_font.render_text` → Sprite | text-sized bitmap | The trap to avoid: **a `Canvas` band for a *dynamic* HUD.** A `Canvas` is retained `w*h*2`; for a 320×16 bar that is 10 KB that lives forever, and for a full-height side panel far more. A dynamic HUD is dynamic strip content, so it belongs on a **`StripDraw`**, re-rasterized in C when it changes. Reach for a `Canvas` only when the content is **static** (drawn once and reused). A second trap: **immediate `pg.render` over a live retained scene.** The scene doesn’t know `render()` changed the pixels, so its next `refresh()` repaints only its own dirty rects and leaves stale fragments of your overlay on screen. If the rendered region overlaps the scene’s play rect (pause screen, menu, cutscene, banner), call **`scene.invalidate()`** afterwards — or use **`picogame_game.overlay(...)`**, which is `pg.render` + `scene.invalidate()` in one call. HUD bands outside the play rect (the `top=`/`bottom=` reserves) don’t need this: the scene never touches them. ## A HUD without a retained panel buffer [Section titled “A HUD without a retained panel buffer”](#a-hud-without-a-retained-panel-buffer) `picogame_ui.HudBar` already does this: it is a buffer-less `StripDraw` pushed via `pg.render` on change. The same pattern by hand, for a reserved-band HUD:
```python
scene, bufA, bufB = picogame_game.setup(background=BG, strip_h=BAR, top=BAR)
hud = ui.HudBar(pg, board.DISPLAY, bufA, 0, 0, W, BAR, BG) # 0 retained RAM
score = hud.label(FONT, 4, 3, INK, "SCORE 0") # returns a text handle
# ... on a change:
score.set("SCORE %d" % pts)
hud.draw() # re-composites in C, no cache
```
**Format on change, not per frame.** `.set()` gates the *redraw* (it no-ops on an unchanged string), but the `"%"`-formatting itself allocates a fresh string every call — done every frame it is pure GC churn. Format at the place the value *changes* (as above), or if you poll in the loop, guard with shadow ints: `if pts != shown_pts: shown_pts = pts; score.set("SCORE %d" % pts)`. For continuously moving values, quantize to the displayed unit first (seconds, percent). Or fully by hand (e.g. a title screen, no scene, no buffers of your own):
```python
def draw_title(view, vx, vy, vw, vh):
view.clear(SKY)
view.text(60 - vx, 90 - vy, "PRESS A", INK, FONT) # view-local = screen - (vx, vy)
title = pg.StripDraw(draw_title, 0, 0, W, H)
pg.render(board.DISPLAY, [title], bufA, 0, 0, W, H, background=SKY) # 0 retained pixels
```
`view`-local `(0,0)` is screen `(vx, vy)`, so to draw at a screen position subtract `(vx, vy)`. ## On-demand repaint: a buffer-less panel inside a live scene [Section titled “On-demand repaint: a buffer-less panel inside a live scene”](#on-demand-repaint-a-buffer-less-panel-inside-a-live-scene) A `StripDraw` defaults to repainting **every frame** (`always_dirty=True`), right for a sky/road that changes constantly. But construct it with **`always_dirty=False`** and it repaints only when you call **`.invalidate()`** (or another dirty layer overlaps it). That gives a panel that lives inside a scene\*\* (a dialog box, status panel, or menu) which sits idle (no re-rasterize, no re-push) until its content actually changes, then repaints once. It is the buffer-less alternative to a retained `Canvas` for content that is mostly static but must update occasionally.
```python
panel = pg.StripDraw(draw_panel, x, y, w, h, always_dirty=False) # idle until invalidated
scene.add(panel, fixed=True)
# ... when the text changes:
panel.invalidate() # repaints once on the next refresh
```
This is how `picogame_ui.SceneBox` and `SceneMenu` work: a buffer-less in-scene dialog or menu that repaints on `show`/`hide`/`set_line`, not every frame. ## Rules of thumb [Section titled “Rules of thumb”](#rules-of-thumb) * **Moving object → Sprite. Big board → Tilemap. Dynamic full-frame/strip or HUD → StripDraw. Occasional static panel → Canvas (drawn once).** * A dynamic HUD never needs a `Canvas`. If you typed `pg.Canvas(W, BAR, ...)` for a HUD, switch to a `StripDraw`. * A `Canvas` is justified only when the content is static and reused; then the buffer pays for itself by not re-rasterizing each frame. * Both `scene.refresh()` and `pg.render()` take every layer kind, so choose the driver by *when* it should repaint (every dirty refresh vs. on demand), not by what you need to draw. ## See also [Section titled “See also”](#see-also) * Fighting a `MemoryError`? See [Memory & RAM](/memory/) for the budget, how to measure it, and the arena fix. * Exact signatures for `Canvas`, `StripDraw`, `pg.render` and `Sprite`: the [Reference](/reference/). * Ready-made HUD / dialog / menu widgets built on these paths: [Text & UI](/helpers/text-ui/). * Backing a `Canvas` with reused memory instead of a fresh buffer: [Saving & memory](/helpers/data/) (`picogame_arena`).
# Glossary
> Plain-language definitions of the game-making words used across these docs — written for people who know CircuitPython but are new to games.
This glossary explains the game-development terms used throughout the docs. Where useful, it connects them to concepts from CircuitPython `displayio`. ## Sprite [Section titled “Sprite”](#sprite) A movable picture: the player, an enemy, a bullet, a coin. It wraps a `Bitmap` and has a position you change each frame. Closest `displayio` analogy: a single `TileGrid` you reposition, except a picogame sprite also flips, scales, rotates, and animates. ## Layer [Section titled “Layer”](#layer) One thing the scene draws, stacked back-to-front like sheets of glass. A sprite, a tilemap, a canvas and so on are all “layer kinds”; the order you add them is the order they’re painted. ## Tilemap [Section titled “Tilemap”](#tilemap) A big area built from a small set of repeating tile pictures (a background, a brick wall, a level grid), stored as **1 byte per cell** (the tile number), so it’s far cheaper than one sprite per cell. Like a grid of `displayio` `TileGrid` cells. ## Scene and retained mode [Section titled “Scene and retained mode”](#scene-and-retained-mode) picogame is **retained mode**: you build the objects once with `scene.add(...)`, and the engine *remembers* them. Each frame you change what moved and call `scene.refresh()`; you don’t redraw everything yourself. (The opposite, **immediate mode**, means you clear and redraw the whole screen every frame by hand.) A `Scene` is the container holding all your layers. ## Dirty rectangle [Section titled “Dirty rectangle”](#dirty-rectangle) The region that changed since the last frame. Because the scene remembers everything (above), it can work out which regions moved and **repaint only those**. “Dirty” means “changed and needs repainting.” ## Blit [Section titled “Blit”](#blit) To copy a picture’s pixels onto the screen (or into another drawing surface). `displayio` hides this behind Groups and TileGrids, so you may never have typed it; in picogame it’s the basic “stamp this bitmap here” operation. ## Game loop [Section titled “Game loop”](#game-loop) The heartbeat of every game: each frame, **read input → update the world → draw → wait a bit**, then repeat. picogame games are all this same shape. ## Frame [Section titled “Frame”](#frame) This word means two different things, so watch the context: * a **screen frame** — one turn of the game loop (one repaint), as in “each frame you move the player”; * an **animation frame** — one picture in a bitmap’s strip of pictures, as in “advance `sprite.frame` to the next walk pose.” ## Anchor [Section titled “Anchor”](#anchor) The pivot point a sprite scales and rotates around, given as fractions of its size: `(0.5, 0.5)` is the centre, `(0.5, 1.0)` the bottom-centre. Its position and rotation are measured about this point. ## AABB [Section titled “AABB”](#aabb) A box overlap test, short for *axis-aligned bounding box*, a plain (non-rotated) rectangle drawn around a sprite. “Do these two AABBs overlap?” is the cheapest way to check if two things collide. ## Object pool [Section titled “Object pool”](#object-pool) A fixed set of sprites you create **once** and recycle (spawn / free) instead of making and deleting them mid-game. Creating and destroying objects each frame fragments the tiny RAM; a pool avoids that. Reach for `picogame_pool` for bullets, enemies, coins, anything that comes and goes. ## Wire-order colour [Section titled “Wire-order colour”](#wire-order-colour) The byte order the display panel expects over SPI, which is **not** the same as a plain `0xRRGGBB` literal. Always build colours with `pg.rgb565(r, g, b)`; passing a raw hex literal gives wrong colours. (This is the one colour footgun coming from `displayio`.) ## Juice [Section titled “Juice”](#juice) The small, cheap touches that make a game *feel* good: a hit-flash, a screen shake, a spark, a beep on the key action. Standard game-maker slang; `picogame_fx` provides most of it. ## Parallax [Section titled “Parallax”](#parallax) Background layers that scroll **slower** than the foreground, creating an illusion of depth (think of distant hills drifting by slower than the roadside). ## Coyote time and jump buffering [Section titled “Coyote time and jump buffering”](#coyote-time-and-jump-buffering) Two small fairness tricks: **coyote time** lets the player still jump for a few frames after walking off a ledge; **jump buffering** honours a jump pressed just before landing. Both make controls feel forgiving (`picogame_input.Timer`). ## Ghost lap [Section titled “Ghost lap”](#ghost-lap) In racing games, a translucent replay of your best lap shown on the track so you can race against your own record. ## State machine [Section titled “State machine”](#state-machine) The game switches between named modes (title → playing → game-over). One `state` variable decides what updates and draws each frame. ## Stride [Section titled “Stride”](#stride) How many **pixels** one row of a bitmap’s source data spans. Leave it `0` and the engine assumes the data is tightly packed (one row is `width × frames` pixels, the full horizontal atlas); set it only when you’re pointing at a **sub-window of a larger image**, where each row in memory is wider than the part you’re drawing. A constructor argument on `Bitmap(...)`. ## StripDraw and Canvas [Section titled “StripDraw and Canvas”](#stripdraw-and-canvas) Two ways to draw custom pixels, traded off by memory (see [Drawing paths](/concepts/drawing-paths/) for the full picture): * **Canvas** — a retained pixel buffer (`width × height × 2` bytes) you draw onto and reuse; right for a panel that changes rarely. * **StripDraw** — a buffer-less layer that draws into each live strip. It retains **0 pixel bytes**, but its callback still uses CPU each time the region repaints. Use it for full-frame effects and dynamic HUD or text.
# How picogame works
> Scenes, the game loop, and dirty-region rendering in picogame.
picogame keeps your scene objects between frames. You change their state, call `scene.refresh()`, and the engine redraws the affected regions. This page explains that model and the game loop around it. New to game terms? Any unfamiliar word here is defined in the [Glossary](/concepts/glossary/). ## The big idea: describe the scene, then say what moved [Section titled “The big idea: describe the scene, then say what moved”](#the-big-idea-describe-the-scene-then-say-what-moved) Most of a game’s screen doesn’t change from frame to frame: the background stays put, only a few things move. picogame is built around that. You **describe a scene once** (these sprites, this tilemap, this background), and then each frame you just **change what moved** (`ball.x += 3`) and call `scene.refresh()`. The engine works out which little rectangles actually changed (each a [dirty rectangle](/concepts/glossary/)) and **redraws only those**; it doesn’t repaint the whole screen. Nothing moved? Nothing is sent to the display. For the levers that keep a game at a steady 30 FPS as it grows, see [Performance](/performance/). The work usually follows how much *changed*, not the full screen size. Camera movement and always-dirty layers are the main exceptions because they repaint the play area. The engine tracks the regions for you. 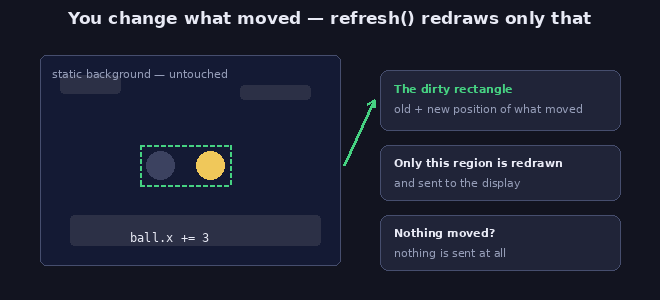 ## The pieces you build a scene from [Section titled “The pieces you build a scene from”](#the-pieces-you-build-a-scene-from) These are the main objects you can put in a scene: * **Sprite** — a movable picture: the player, an enemy, a bullet, a coin. It has a position, can be flipped, animated through frames, scaled and rotated. * **Tilemap** — a big grid built from a small set of tile pictures: a level, a tiled background, a brick wall. Cheap, because the grid stores one number per cell instead of every pixel. * **Bitmap** — the actual picture a sprite or tile draws. You can generate one in code (a circle, a rectangle) or convert it from a PNG. * **Scene** — the container that holds all of the above and draws them in order. Each thing it draws is a [layer](/concepts/glossary/) (one thing the scene draws, stacked back-to-front); you add things to it, then refresh it each frame. * A **camera** — the scene has a viewpoint you can move (`set_view`), so the world can be bigger than the screen and scroll as the player walks. There are a few more specialised pieces (a drawing **Canvas**, full-frame **StripDraw** effects, **Particles**); you’ll reach for those once you need them. See the [feature guide](/features/) for “which one when”. ## The game loop [Section titled “The game loop”](#the-game-loop) Every picogame game is the same shape: 1. **Read input** — which buttons are down. 2. **Update** — move things, run game rules, spawn and remove objects. 3. **Refresh** — `scene.refresh()` draws the changes. 4. **Wait** — a clock caps the framerate so the game runs at a steady speed.
```python
while True:
buttons.poll() # 1. input
ball.x += speed # 2. update
scene.refresh() # 3. draw what changed
clock.tick() # 4. hold the framerate
```
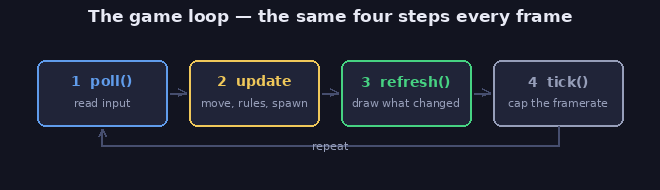 Collisions, sound, scoring, and other game rules belong in step 2. This 4-step shape is universal. Once a game has more than one screen (title / play / game-over) and needs to restart, hold its state in one object and move this loop into a `main()` function — see [Game patterns](/concepts/patterns/) for that shape and why. ## You build before touching hardware [Section titled “You build before touching hardware”](#you-build-before-touching-hardware) The same game code runs off the device, so you design, debug and iterate there first. The browser-based option is the **Playground**; for hands-on local work there’s also a **[desktop simulator](/simulator/)** (headless screenshots for quick checks, or a live window). All three environments share the game-facing API - but not the runtime: RAM limits, timing, input feel, audio and panel-specific effects only exist for real on the device. Smoke-test on hardware regularly during development, not once at the end. ## Where to go next [Section titled “Where to go next”](#where-to-go-next) New here? Build [your first game](/start/first-game/), then continue with the tutorials. Use the feature guide and reference when you need to choose a tool or check a signature. **Already know an engine (or `displayio`)?** Skip the tutorial and jump to the [concept map](/concepts/coming-from/) and [glossary](/concepts/glossary/), then the [reference](/reference/). * **[Make your first game](/start/first-game/)** — put this into practice in five minutes. * **[The tutorials](/tutorials/)** — three games, one idea per step. * **[Feature guide](/features/)** — once you know the shape, this is “which tool for which job”. * **[API reference](/reference/)** — the precise, complete list when you need exact signatures.
# Making it fun
> Tune a working game loop through clear actions, immediate feedback, paced difficulty, and a controlled scope.
Once the game loop works, tune four things: the player’s main action, feedback, difficulty, and scope. The bar is not “it runs” — it’s **fun in the first 10 seconds**. The [patterns](/concepts/patterns/) page provides code for the ideas below. ## Start with the main action [Section titled “Start with the main action”](#start-with-the-main-action) Before naming the verb, decide the fantasy — what the player gets to *be*. “Catch” is a different game as a frantic short-order cook, a goalie, or someone saving falling stars. Pick the fantasy, then name the verb in one word: jump, shoot, steer, match, dodge. Build the loop around it: **act → see the result → respond → act again under changed conditions**. A loop this tight should be legible just by *watching* it for ten seconds, and fun with no art and no sound. Prototype with generated shapes from `picogame_shapes` before committing to final art — if the action isn’t fun as a rectangle chasing a circle, better art won’t save it. Fix the rules and feedback first. ## Give actions immediate feedback [Section titled “Give actions immediate feedback”](#give-actions-immediate-feedback) Feedback connects an input or collision to a result the player can see and hear, applied in the same update that handles the event — a delayed response reads as sluggish even at 30 fps. Not all feedback is equally cheap. Roughly in order of fun gained per byte spent: 1. **A sound on the main action** — the single best return for the least code; a beep confirms what the eye already saw. The simplest beep needs no `.wav` file:
```python
beep = picogame_audio.tone(880, 90) # a short high blip, built once
audio.sfx(beep) # fire it the frame the catch happens
```
What carries the meaning is the *contour* — high reads as good, low as bad. The ready-made [`picogame_sfx`](/helpers/audio/) kit gives you both: Catch (a light blip): [](/audio/sfx_blip.mp3)\ Miss (a low, downward tone): [](/audio/sfx_hurt.mp3) 2. **A short hit-flash** — set a sprite’s opaque pixels to flat white for 1-3 frames, then clear it. Almost free:
```python
spr.flash = pg.rgb565(255, 255, 255) # on impact
spr.flash = 0 # 2 frames later: back to normal
```
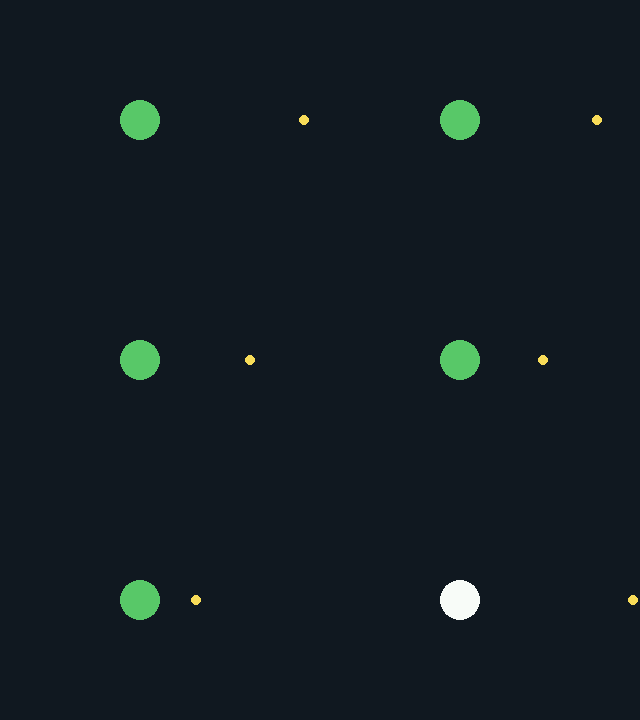 3. **A restrained screen shake** — `picogame_fx.Shake`, a few pixels, decaying fast. More reads as noise, not impact:
```python
shaker.add(0.6) # on a hit — trauma is squared, so small events barely shake
shaker.tick(0, 0) # every frame (feed a camera offset here if you have one)
```
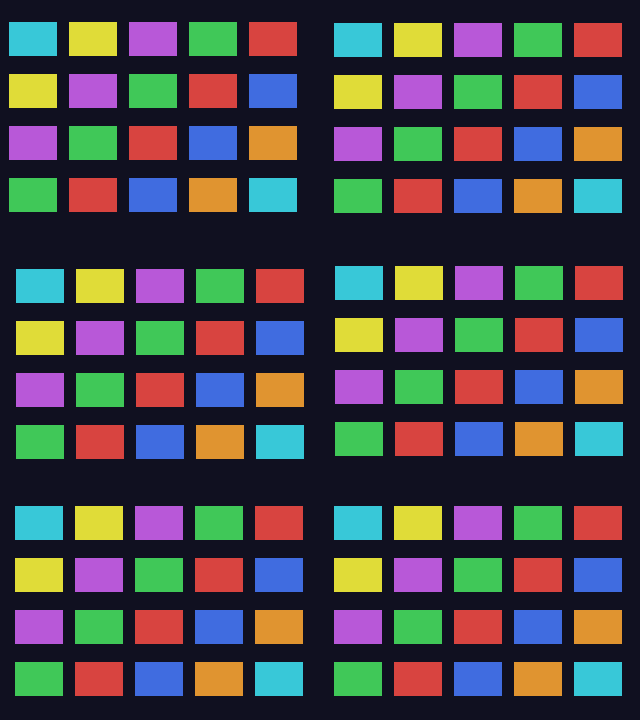 4. **A brief hit-stop** — freeze the sim for 2-8 frames on a big hit; it makes the impact *connect*. No engine primitive — you skip your own ticks:
```python
freeze = 4 # on a big impact
if freeze > 0: # at the top of the loop, while frozen:
freeze -= 1; clock.tick(); continue
```
5. **A small particle burst** — a pop or ring on catch or score:
```python
ps.emit(x, y, 16, 4, 24, pg.rgb565(255, 210, 120)) # burst on the event
ps.tick() # every frame
```
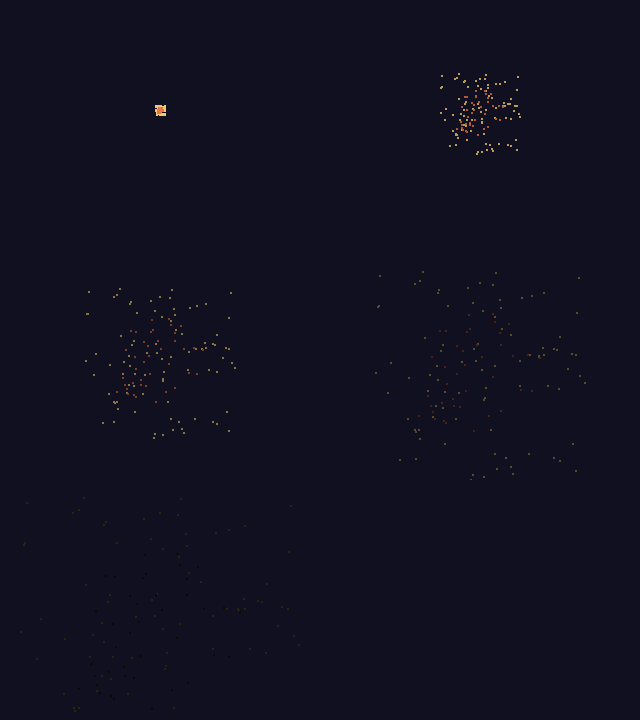 Spend the first item before reaching for the fifth — one good sound beats five weak particle effects. Match strength to the event and keep the play area readable; `picogame_fx` and the native blit effects cover most of this, see [effects](/helpers/effects/) and the [patterns](/concepts/patterns/) page. Flashing safety Never flash the whole screen faster than about 3 Hz (≥10 frames apart at 30 fps), and watch for many hit-flashes clustering past that — it’s a seizure risk. Prefer a localized `sprite.flash` to a full-screen white frame, and offer a reduced-effects toggle. ## Difficulty that breathes [Section titled “Difficulty that breathes”](#difficulty-that-breathes) Difficulty should rise in a **sawtooth**, not a straight climb: build tension for 20-40 seconds, release it at a milestone (a cleared wave, a checkpoint), then re-engage about 10% harder. A flat ramp goes boring by minute two; a monotonic climb never lets the player exhale. * **Ramp speed, density, or variety before adding health.** This changes the play pattern instead of padding the same encounter. * **Telegraph every threat.** A readable wind-up, and enough time to react — the human floor is about 250 ms (roughly 8 frames at 30 fps). Below that, a hit stops feeling like the player’s fault. * **Be generous** — this is what makes a game feel *fair*, not easy: coyote time and a jump buffer (`picogame_input.Timer`), i-frames after a hit so one mistake can’t chain-kill, a hitbox smaller than the player’s sprite. * **Restart in under half a second.** Re-initialise the run in place; never send the player through a menu to try again. ## Scope is a feature [Section titled “Scope is a feature”](#scope-is-a-feature) Build the smallest complete version of the main loop, play it, and add from there. Cut a feature if it doesn’t change the player’s decisions or the strength of the feedback — a fourth enemy type that plays exactly like the first three is not depth. The device’s [RAM](/memory/) and [timing](/performance/) limits are a useful boundary, not just a constraint to fight. ## What players remember [Section titled “What players remember”](#what-players-remember) A run is remembered by its peak and its ending, not its average frame. Give each run a clear high point, and land the ending deliberately: on failure, show the result, add one last visual or audio beat, and offer a restart with no delay. A flourish on death costs little and is what makes the player reach for the button again. ## Before → after: a catch game [Section titled “Before → after: a catch game”](#before--after-a-catch-game) A one-button game — move left/right, catch falling shapes, three misses and you’re out. Bland version: silent, shapes fall at one constant speed forever, “GAME OVER” text, no restart hint. Applying the ideas above, cheapest first: * **Sound** — a blip on every catch, a distinct low thud on every miss. One `picogame_sfx.Kit` call; changes how every catch *feels* immediately. * **Hit-flash** — the caught shape flashes white for 2 frames before it leaves the pool. * **Shake** — a 3-4 px `picogame_fx.Shake` on a miss only, decaying over half a second — not on every catch, or it drowns the good feedback in noise. * **Fairness** — the catcher’s hitbox is a few pixels narrower than its sprite, and a shape that grazes the edge still counts. Without this, misses feel like the game’s fault, not a slow reaction. * **Difficulty sawtooth** — fall speed and spawn rate step up every 5 catches, each step \~10% harder, with the two seconds after a step-up left untouched to let the new speed register. * **Peak-end** — the run’s best streak is shown, large, at the top of the game-over screen, above the score; A instantly starts a new run. None of this changed the rules of catch. It changed how catching *feels* — and that’s the whole page. *** Next: the [patterns](/concepts/patterns/) turn each of these into code; the [tutorials](/tutorials/) build three games applying them.
# Game patterns
> Small recipes for state, levels, camera, scoring, collision, and feedback.
These recipes show the *shape* of code reused across genres — the structure and the why. For the paste-ready code of a specific task (HUD updates, pools, restart, shuffle, input timing), see [Snippets](/snippets/); the [API reference](/reference/) gives exact signatures and the [examples](/examples/) show complete games. Keep actors distinguishable by both shape and colour so they stay readable on a small screen and without colour cues. ## Game structure: state machine + restart [Section titled “Game structure: state machine + restart”](#game-structure-state-machine--restart) Hold all mutable game state in one **`State`** object, put the per-frame loop in a **function** (`main`), and branch on `st.mode`. The function keeps the loop’s name lookups fast (locals instead of module-global dict lookups — a measured win on device), and the single object makes restart a one-liner.
```python
class State:
def __init__(self): self.reset()
def reset(self):
self.mode = "title" # "title" -> "play" -> "over"
self.score = 0; self.lives = 3
st = State()
def new_game():
st.reset(); st.mode = "play" # re-init IN PLACE (clear pools, re-show sprites)
def main(): # the loop lives in a function -> its names are fast locals
poll, refresh, tick = btn.poll, scene.refresh, clock.tick # hoist hot calls to locals
while True:
poll()
if st.mode == "play":
... # move, collide, score; on death: st.mode = "over"
elif btn.just_pressed(btn.A):
new_game() # title / game-over -> instant restart, no reload
refresh(); tick()
main()
```
A tiny game (a few state vars) can stay module-level, but this `State` + `main()` shape scales cleanly and is the recommended default. Ready-to-run skeleton: [try it in the browser](/playground/?ex=game-skeleton). ## Object pool [Section titled “Object pool”](#object-pool) Reuse a fixed pool for short-lived things such as bullets, coins, blocks, and sparks.
```python
pool = picogame_pool.Pool(scene, BMP, 16, anchor=(0.5, 0.5))
s = pool.spawn() # None if full; .visible is the alive flag
if s: s.move(x, y); s.data = ... # pool.free(s) to recycle
```
## Tilemap level [Section titled “Tilemap level”](#tilemap-level) The board for mazes, bricks, platforms, RPG maps: 1 byte/cell, read and written at runtime.
```python
level = pg.Tilemap(tileset, cols, rows); scene.add(level)
level.tile(cx, cy, EMPTY) # write a cell: eat a pellet, break a brick
hit = level.tile(cx, cy) in WALLS # read a cell for collision
```
## Solid-tile collision (per-axis) [Section titled “Solid-tile collision (per-axis)”](#solid-tile-collision-per-axis) For platformer walls and floors, move and resolve **one axis at a time** (X, then Y) so the body never wedges in corners; probe the leading edge at two points, and step a fast fall one pixel at a time so a big `vy` can’t tunnel through a floor. It’s plain per-object Python: cheap, no special engine call.
```python
def move_x(x, y, dx, hw): # stop at the wall, don't enter it
e = x + (hw if dx > 0 else -hw)
return x if solid(e, y - 2) or solid(e, y - 14) else x + dx
def move_y(x, y, vy, hw): # step down so a big vy can't tunnel through the floor
if vy > 0:
for _ in range(vy):
if solid(x, y + 1) or solid(x - hw, y + 1) or solid(x + hw, y + 1):
return y, 0, True # landed: y held, vy zeroed, grounded
y += 1
return y + vy, vy, False
```
## Scrolling camera [Section titled “Scrolling camera”](#scrolling-camera) When the world is bigger than the screen: follow and clamp the view; keep the HUD on a `fixed` layer.
```python
scene.set_view(clamp(player.x - W // 2, 0, world_w - W), 0)
```
## Turn-based loop [Section titled “Turn-based loop”](#turn-based-loop) Puzzle, tactics, RPG: wait for input, resolve one move, redraw. Most frames draw nothing, so it’s cheap.
```python
if btn.just_pressed(btn.A):
resolve_move() # advance exactly one turn
scene.refresh() # only the changed cells repaint
```
## Impact feedback [Section titled “Impact feedback”](#impact-feedback) Combine a sound, short flash, restrained shake, [hit-stop](/helpers/effects/), or particles according to the size of the event.
```python
spr.flash = WHITE # flat, 1-3 frames
shake.add(0.4) # picogame_fx.Shake; shake.tick() each frame
if audio: audio.sfx(picogame_audio.tone(150, 70))
```
## Damage forgiveness: hitbox & i-frames [Section titled “Damage forgiveness: hitbox & i-frames”](#damage-forgiveness-hitbox--i-frames) Make a timing game feel fair: a hitbox smaller than the sprite, plus a mercy window after a hit.
```python
if inv == 0 and threat.near(player, 12): # hitbox < sprite art
inv = 45 # i-frames; blink the player while inv > 0
```
## Score chain [Section titled “Score chain”](#score-chain) Reward greed: consecutive hits ramp a multiplier; a miss resets it.
```python
# on a hit: chain += 1; mult = 1 + chain // 5; score += pts * mult
# on a miss: chain = 0; mult = 1
```
To *display* the score on screen, see [Text & UI](/helpers/text-ui/). ## Difficulty ramp [Section titled “Difficulty ramp”](#difficulty-ramp) Ramp speed/density (not HP), in a sawtooth: build, ease at a milestone, re-engage harder.
```python
interval = max(11, 30 - t // 160) # spawns speed up over time
if (t % 600) >= 54 and t % interval == 0: # with a ~1.8s lull every ~20s
spawn()
```
## Scrolling background [Section titled “Scrolling background”](#scrolling-background) A few wrapping sprites create an endless parallax background without a full-screen background bitmap.
```python
for s in stars:
s.fy += s.speed
if s.fy > H: s.fy = -2; s.fx = rng.below(W) # wrap to the top
```
*** For the design *why* (the one verb, juice, difficulty, scope) see [Making it fun](/concepts/making-it-fun/); for the mental model, [How picogame works](/concepts/how-it-works/); the [tutorials](/tutorials/) build Breakout, a shooter, and an RPG step by step.
# Your first game
> Get something moving on screen in five minutes, right in your browser. No install, no hardware.
**Goal:** a red ball you drive around the screen with the arrow keys. About five minutes, right in your browser - nothing to install. If you can read a dozen lines of Python, you can do this. ## 1. Write it, press Try it [Section titled “1. Write it, press Try it”](#1-write-it-press-try-it) Here is the whole game, about a dozen lines. Press **Try it** to run it live in your browser, then drive the ball with the arrow keys.
```python
import picogame as pg
import picogame_game # one-call setup
import picogame_input # buttons
import picogame_clock # frame timing
import picogame_shapes as shapes # make simple bitmaps in code
# Take over the screen and get a scene to draw into.
scene, _, _ = picogame_game.setup(background=pg.rgb565(20, 24, 40))
buttons = picogame_input.Buttons()
clock = picogame_clock.Clock(30) # aim for 30 frames per second
# A red ball — a 24px circle drawn in code, so we need no art yet.
ball = pg.Sprite(shapes.circle(24, pg.rgb565(230, 80, 80)), 150, 110)
scene.add(ball)
# The game loop: read input, move, redraw — forever.
while True:
buttons.poll()
ball.x += (buttons.is_pressed(buttons.RIGHT) - buttons.is_pressed(buttons.LEFT)) * 3
ball.y += (buttons.is_pressed(buttons.DOWN) - buttons.is_pressed(buttons.UP)) * 3
scene.refresh()
clock.tick()
```
[▶ Try it in the browser](/playground/?ex=first-game) That is the picogame engine (the native C module, compiled to WASM) running in your browser. Edit the code, press Run, and your change shows instantly. When you want more room to tinker, open it in the [Playground](/playground/). ## 2. What the code does [Section titled “2. What the code does”](#2-what-the-code-does) Only four ideas carry the whole game; the rest is detail you’ll meet later: | Line | Idea | | ------------------------------------------------- | ------------------------------------------------------------------------------------------------------------------------------------------------------------------------------- | | [`picogame_game.setup(...)`](/helpers/boot-loop/) | Returns the **scene** you draw into (plus two helper buffers you don’t need yet, the `_, _` in `scene, _, _`). This one call hides all the display setup and clears the screen. | | `pg.Sprite(shapes.circle(...), x, y)` | A **sprite** is a movable picture. Here the picture is a circle we generated in code; later it’ll be your own art. | | `scene.add(ball)` | Put the sprite **in the scene** so it gets drawn. | | the `while` loop | The **game loop**: every frame, read input, change things, then `scene.refresh()`. The engine redraws only what moved. | ## 3. Take it further [Section titled “3. Take it further”](#3-take-it-further) * **Build on your PC.** Want a faster local loop, or to work with your own art files? Run the same game in the [desktop simulator](/simulator/): one `git clone`, then `python3 sim/run.py`. * **Learn step by step.** The [tutorials](/tutorials/) build a Breakout, then a shooter, then an RPG, one new idea per step. * **Get the mental model.** [How picogame works](/concepts/how-it-works/) explains the engine in five minutes, so the next things you build make sense. * **Put it on a device.** When you’re ready for hardware, see [Run on hardware](/hardware/).
# Get it on your device
> Flash the picogame firmware, then download the ready-made games pack for your board — a launcher boots so you can pick a game and play.
Two steps put a menu of ready-to-play games on your handheld: flash the firmware once, then copy the pack for your board onto the drive. No coding needed — a [launcher](/launcher/) boots and lets you pick a game with the D-pad. ## 1. Flash the firmware [Section titled “1. Flash the firmware”](#1-flash-the-firmware) The firmware **is** the picogame engine — a CircuitPython build with the native-C module baked in. You flash it once per board. Download the `.uf2` for your board from [Supported hardware](/supported-hardware/#download-firmware), hold **BOOTSEL** while you plug the board in, and drag the `.uf2` onto the drive that appears. The board reboots and shows up as a **`CIRCUITPY`** drive. ## 2. Download the pack for your board [Section titled “2. Download the pack for your board”](#2-download-the-pack-for-your-board) Each pack is a ready `CIRCUITPY` layout — the launcher, the games and demos (compiled `.mpy`), the helper libraries and fonts. Pick the one for your board and **extract it onto the `CIRCUITPY` drive**. * **[RP2040 — PicoPad, plain Pico](/download/picogame-rp2040.zip)** — a tight-RAM set (8 games + 10 demos) tuned to fit the RP2040. Start here on a PicoPad or a bare Pico. * **[RP2350 — PicoPad 2, Pico 2](/download/picogame-rp2350.zip)** — the full portfolio (every game and demo) with intro splashes, for RP2350-class boards with RAM to spare. * **[Fruit Jam](/download/picogame-fruitjam.zip)** — the full portfolio plus a `settings.toml` that sets the Fruit Jam audio levels and DVI display. Not sure which chip your board has? See [Supported hardware](/supported-hardware/). ## 3. Play [Section titled “3. Play”](#3-play) Eject the drive and reset the board. The launcher lists the games — **UP/DOWN** to move, **A** to play, the board’s **RESET** button to come back to the menu. ## Next [Section titled “Next”](#next) * Add your own game to the menu, or see how the launcher finds games → [The games menu](/launcher/). * Want to build a game rather than play the packs? → [Your first game](/start/first-game/) and [Run on hardware](/hardware/).
# What you can build
> The genres picogame is genuinely good at - platformers, scrolling shooters, top-down RPGs, even a pseudo-3D racer - with playable examples.
picogame is a retained-mode 2D engine: it redraws only what moved, so it shines where a mostly-still screen carries a few busy things on top. In practice that makes it strong at: * **Tile-based worlds** — top-down RPGs and maze games: big boards for almost no RAM. * **Scrolling shoot-’em-ups** — pooled bullets and enemies streaming across the screen. * **Single-screen arcade & platformers** — a hero, platforms, animated art, a framed HUD. * **Pseudo-3D racing** — a perspective road that bends as you steer, drawn by **StripDraw** with no extra RAM. 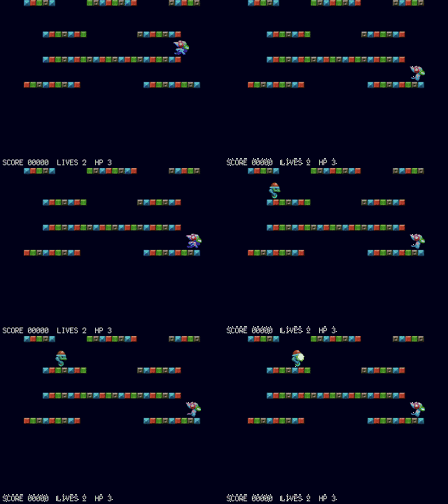 **Platformer** — hero on platforms, animated art. 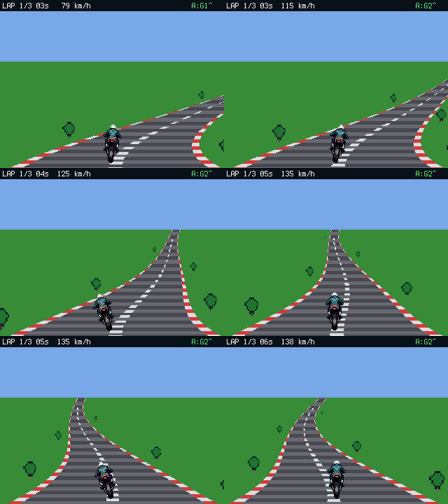 **Pseudo-3D racer** — a StripDraw road that bends, ghost lap. 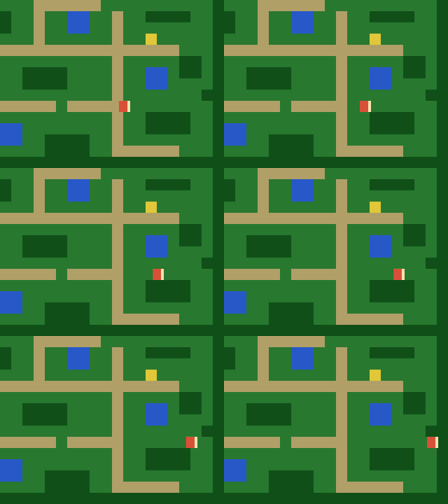 **Top-down RPG** — tilemap world, NPCs, encounters. 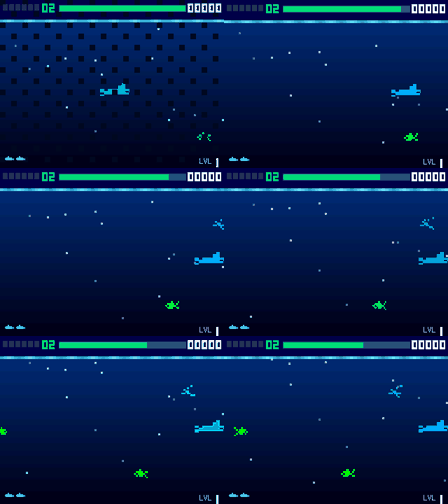 **Scrolling shooter** — pooled sprites, torpedoes to dodge. 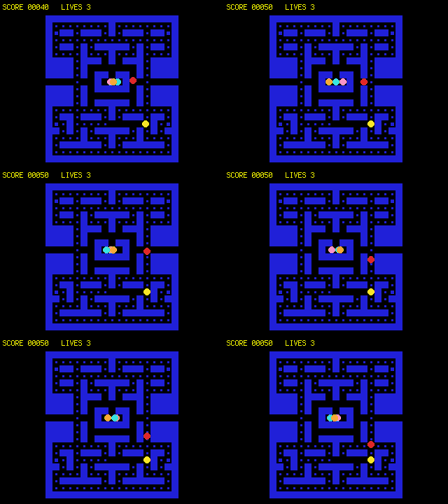 **Maze chase** — tilemap board, ghost AI. 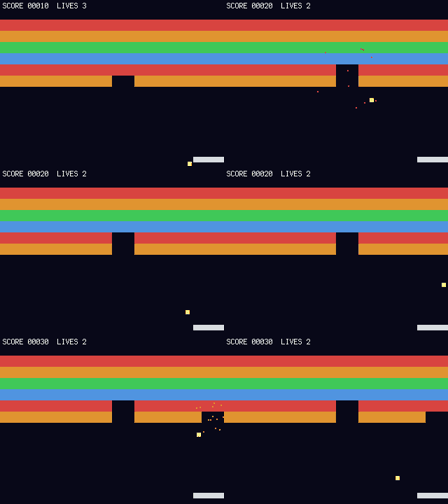 **Breakout** — paddle, brick wall, particles. [▶ Open the full gallery & playany of them in your browser — Asteroids, Snake, Tetris, Flappy, soccer, pinball & more](/examples/) Every title is downloadable from the [picogame repo](https://github.com/MakerClassCZ/picogame), and its header comment lists exactly what it uses — so the closest example doubles as your template. ## Small effects, clear feedback [Section titled “Small effects, clear feedback”](#small-effects-clear-feedback) The same engine gives you the juice that makes a game *feel* good — screen shake, particles, eased motion, palette tricks — each a couple of lines:  **Screenshake** — trauma-based, on every hit.  **Particles** — bursts and fountains. 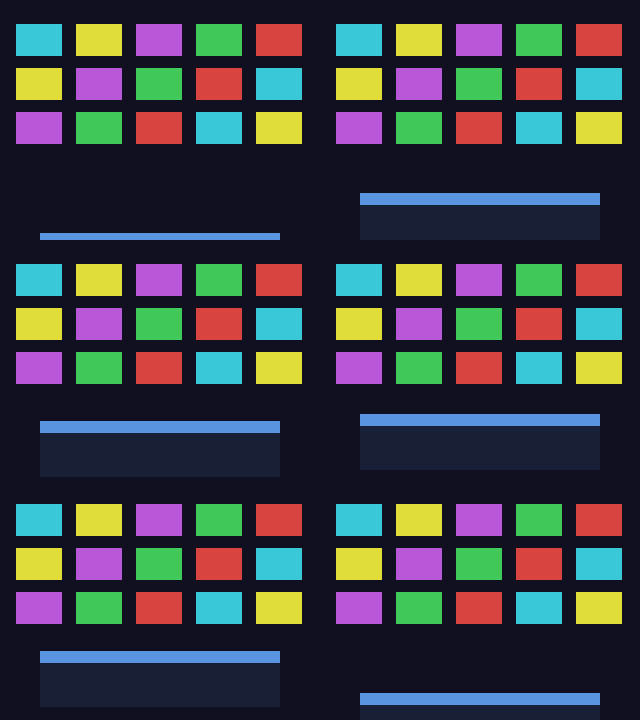 **Tweens** — eased motion, no snapping. 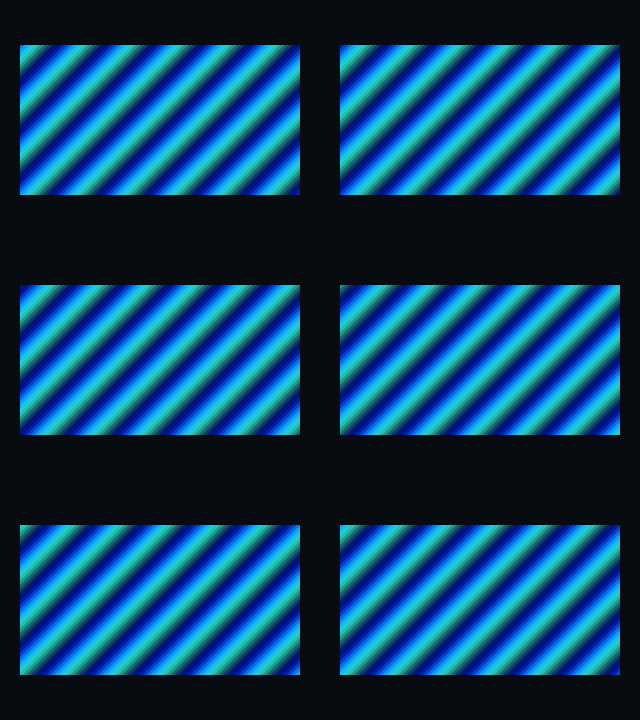 **Palette tricks** — recolour with no extra art. [Effects referencefor developers: the API and when to reach for each](/helpers/effects/) **What it’s not:** picogame is 2D — not a 3D engine, no heavy physics, and on the RP2040 not full-screen 60 FPS. Design within those limits and lean into them. ## Ready to make one? [Section titled “Ready to make one?”](#ready-to-make-one) * **[Make your first game](/start/first-game/)** — five minutes to something moving. * **[The tutorials](/tutorials/)** — build a Breakout, a shooter, and an RPG step by step.
# picogame tutorials — learn the engine by building games
> These tutorials introduce the picogame engine one group of mechanics at a time. Every step is a complete, runnable program, and the next step builds on it.
These tutorials introduce the picogame engine **one group of mechanics at a time**. Every step is a complete, runnable program, and the next step builds on it. Compare `stepN` and `stepN+1` side by side to see the code added for the new concept. Each tutorial ends with a small completed game: | Tutorial | Genre | What it teaches | | ------------------------------------------------------------------------------------------------------------------------------- | ---------------------- | ------------------------------------------------------------------------------------------------------------------------------------------------------------------------------------------------------------------------------------------------------------------------------------------------------------ | | **[01-bounce](/tutorials/01-bounce/)** ([source](https://github.com/MakerClassCZ/picogame/tree/main/tutorials/01-bounce)) | Breakout / Arkanoid | the render loop, input, sub-pixel movement, wall and paddle bounces, box collision, a `Tilemap` brick wall, a HUD, particles, and sound. Placeholder shapes and imported art both use a `Bitmap` on the same `Sprite`, so replacing the artwork does not change the game logic. | | **[02-starship](/tutorials/02-starship/)** ([source](https://github.com/MakerClassCZ/picogame/tree/main/tutorials/02-starship)) | top-down space shooter | rotation via pre-baked frames, vector thrust + screen wrap, **object pools** (bullets, enemies), circular collision + splitting, escalating waves, explosions/exhaust particles, audio, and a **title → play → game-over state machine**. | | **[03-quest](/tutorials/03-quest/)** ([source](https://github.com/MakerClassCZ/picogame/tree/main/tutorials/03-quest)) | top-down RPG | a **world bigger than the screen** + a following **camera** (`set_view` with clamping), **tile-based wall collision**, a directional **walk animation**, collectible items + a fixed HUD, an **NPC + dialog**, bump **combat** (HP, i-frames), and a **quest** (objective → unlock a door → reach the goal). | Do them **in order**: each assumes the fundamentals of the ones before it. ## How to run a step [Section titled “How to run a step”](#how-to-run-a-step) You can run each step in the browser with the **Try it** button. To run a step file locally, use the desktop simulator (no hardware needed; it can render headless, saves a PNG):
```bash
python3 sim/run.py tutorials/01-bounce/step3_ball.py --shot /tmp/out.png
```
Useful flags: `--frames N` (how long to run), `--hold RIGHT,B` (hold buttons for the whole run, so you can test input headlessly), `--backend pygame` (a live, playable window if you have pygame installed). On the **PicoPad** (or any supported board): copy the step file plus the `lib/` helpers it imports to `CIRCUITPY/` and name it `code.py` (or import it). Each file’s header comment lists what it needs. ## How each step is structured [Section titled “How each step is structured”](#how-each-step-is-structured) * The **header comment** states *what you learn*, *what’s new vs the previous step*, and the exact run command. * Inline comments mark the **new lines** so you can see the change at a glance. * The README in each tutorial folder explains why each addition is useful and ends each step with a small **Try it** change. ## The engine pieces you’ll meet [Section titled “The engine pieces you’ll meet”](#the-engine-pieces-youll-meet) All the helpers live in `lib/` (pure Python, work on device and in the simulator): | Helper | Role | | --------------------------------- | ---------------------------------------------------------------------------------- | | `picogame_game.setup()` | resolve the display and create a Scene; on SPI targets, also create render strips | | `picogame` (C module) | `Sprite`, `Bitmap`, `Tilemap`, `Particles`, `Canvas`, `Scene`, `collide`, `rgb565` | | `picogame_input` | buttons → bitmask, `is_pressed` / `just_pressed` | | `picogame_clock` | frame-rate cap + `dt`; a fixed-timestep accumulator | | `picogame_shapes` | generate solid/round/polygon bitmaps (rectangles, balls, ships) | | `picogame_pool` | a fixed-size sprite pool for spawners (bullets, enemies) | | `sprite.overlaps` / `sprite.near` | zero-alloc box / circular collision, built into Sprite | | `picogame_ui` | `SceneLabel` (in-scene HUD text), text box, menu | | `picogame_font` | render strings to bitmaps with the bundled font | | `picogame_audio` | beeps (`tone()`) and `.wav` playback | ## After the tutorials: move to the scene editor [Section titled “After the tutorials: move to the scene editor”](#after-the-tutorials-move-to-the-scene-editor) Once you understand the mechanics, the **editor** (`editor/`) can replace hand-placing every tile and sprite in Python. It lets you paint maps, place sprites, and assign tile properties, then export a **scene** that the `picogame_scene` loader builds. The same data runs on device and in the simulator. See `examples/picogame_platformer_scene.py` for a full game whose level (tiles, collisions, coins, enemies, camera) is loaded from editor data, with only the gameplay left in Python. The tutorials teach the mechanics; the editor moves level layout into data. ## Next steps after the tutorials [Section titled “Next steps after the tutorials”](#next-steps-after-the-tutorials) After the tutorials, continue with: * **[Game patterns](/concepts/patterns/)** + **[Snippets](/snippets/)** — the reusable game-loop + `State` shape every bigger game grows into, plus a ready-to-run **game skeleton** to start your own project from (open it in the [Playground](/playground/?ex=game-skeleton)). This is the natural next step now that you’ve built three games by hand. * **[Feature guide](/features/)** — the task-oriented tour of everything the engine can do (which drawing surface to pick, sprite transforms, collision, HUDs, audio, RAM budgeting), with alternatives for each. Use it when choosing a tool for a task. * **The helpers** (`lib/`) — the pure-Python modules you met above (`picogame_pool`, `picogame_ui`, `picogame_clock`, `picogame_anim`, …); the feature guide links each to its use. * **[Glossary](/concepts/glossary/)** — short, plain-language definitions of any unfamiliar term such as sprite, tilemap, dirty region, AABB, or parallax.
# Tutorial 1 — Bounce
> Build a Breakout/Arkanoid game one mechanic at a time, then replace generated rectangles with finished bitmap art.
We build a complete brick-breaker, one mechanic per step. Each `stepN_*.py` runs on its own: read the code below and press **Try it** to run that step right in the browser, or run it locally with: Run these from the cloned `picogame` folder (the one from [Your first game](/start/first-game/)).
```bash
python3 sim/run.py tutorials/01-bounce/stepN_name.py --shot /tmp/out.png
```
(add `--hold RIGHT` etc. to hold a button, or `--backend pygame` to play it live.) The first eight steps use generated rectangles. The final step replaces their bitmaps without changing the game loop. Keeping art separate from mechanics also lets the editor change a scene’s graphics without changing its gameplay code. *** ### step 1 — `step1_hello.py` · the render loop [Section titled “step 1 — step1\_hello.py · the render loop”](#step-1--step1_hellopy--the-render-loop)  picogame uses [**retained mode**](/concepts/glossary/) (you add objects once and then just change what moved, instead of redrawing the screen yourself): you `scene.add()` objects once to the [`Scene`](/reference/), then each frame you change their state and call `scene.refresh()` and the engine redraws. A “paddle” is a [`Sprite`](/reference/) whose bitmap is a solid rectangle from [`picogame_shapes`](/reference/)’s `shp.rect(w, h, colour)`. [`picogame_game.setup()`](/helpers/boot-loop/) does the display boilerplate and returns `(scene, buffer_a, buffer_b)`. On SPI targets the last two values are reusable render strips; on framebuffer targets they are `None`. This step needs only the scene, so it uses `scene, _, _`. [`picogame_clock`](/reference/)’s `Clock(40)` caps the loop to 40 FPS. **You see:** a grey bar near the bottom. **Try it:** change the rectangle’s size/colour.
```diff
W, H = 320, 240
PADDLE_W, PADDLE_H = 44, 8
# setup() takes over the display and gives us a Scene + its two strip buffers.
+scene, _, _ = picogame_game.setup(background=pg.rgb565(8, 10, 24))
+clock = picogame_clock.Clock(40) # cap the loop to 40 FPS
# A "paddle" is just a Sprite whose bitmap is a solid rectangle. shp.rect(w,h,color)
# makes that bitmap -- a rectangle and an image sprite are the SAME kind of object
# (we'll prove that in step 9 by swapping the bitmap for art, with no other change).
+paddle = pg.Sprite(shp.rect(PADDLE_W, PADDLE_H, pg.rgb565(220, 220, 230)),
(W - PADDLE_W) // 2, H - 16)
+scene.add(paddle) # add it to the scene ONCE
+while True:
+ scene.refresh() # the engine draws the scene
+ clock.tick() # sleep to the next frame
```
[▶ Try it in the browser](/playground/?ex=01-bounce-step1_hello) ### step 2 — `step2_move.py` · input [Section titled “step 2 — step2\_move.py · input”](#step-2--step2_movepy--input)  [`picogame_input`](/reference/)’s `Buttons()` samples the buttons each `poll()`. `is_pressed(RIGHT) - is_pressed(LEFT)` is a tidy −1/0/+1 axis; we move the paddle and clamp it inside the screen. **You see:** the paddle slides with LEFT/RIGHT. **Try it:** change `SPEED`.
```diff
W, H = 320, 240
PADDLE_W, PADDLE_H = 44, 8
SPEED = 5
scene, _, _ = picogame_game.setup(background=pg.rgb565(8, 10, 24))
+btn = picogame_input.Buttons() # NEW: the buttons
clock = picogame_clock.Clock(40)
paddle = pg.Sprite(shp.rect(PADDLE_W, PADDLE_H, pg.rgb565(220, 220, 230)),
(W - PADDLE_W) // 2, H - 16)
scene.add(paddle)
while True:
+ btn.poll() # sample the buttons once per frame
+# RIGHT minus LEFT gives -1 / 0 / +1 -- a tidy way to read a 1-axis control.
+ delta_x = btn.is_pressed(btn.RIGHT) - btn.is_pressed(btn.LEFT)
+if delta_x:
+ x = paddle.x + delta_x * SPEED
+ x = max(0, min(W - PADDLE_W, x)) # clamp inside the screen
+ paddle.move(x, paddle.y)
scene.refresh()
clock.tick()
```
[▶ Try it in the browser](/playground/?ex=01-bounce-step2_move) ### step 3 — `step3_ball.py` · velocity (whole pixels) [Section titled “step 3 — step3\_ball.py · velocity (whole pixels)”](#step-3--step3_ballpy--velocity-whole-pixels) 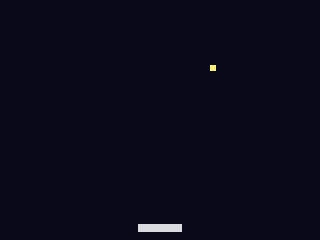 Velocity is just how many whole pixels a thing moves each frame: `velocity_x` across, `velocity_y` down. Add the velocity to the ball’s position every frame and it travels in a straight line. Here we keep it simple: integer velocity, integer position, whole-pixel steps. **You see:** the ball flies off-screen (we fix that next). **Try it:** change `velocity_x, velocity_y`.
```diff
W, H = 320, 240
PADDLE_W, PADDLE_H = 44, 8
BALL = 6
scene, _, _ = picogame_game.setup(background=pg.rgb565(8, 10, 24))
btn = picogame_input.Buttons()
clock = picogame_clock.Clock(40)
paddle = pg.Sprite(shp.rect(PADDLE_W, PADDLE_H, pg.rgb565(220, 220, 230)),
(W - PADDLE_W) // 2, H - 16)
+ball = pg.Sprite(shp.rect(BALL, BALL, pg.rgb565(255, 240, 120)), W // 2, H // 2)
scene.add(paddle)
+scene.add(ball)
+velocity_x, velocity_y = 3, -3 # NEW: whole pixels moved per frame
while True:
btn.poll()
delta_x = btn.is_pressed(btn.RIGHT) - btn.is_pressed(btn.LEFT)
if delta_x:
paddle.move(max(0, min(W - PADDLE_W, paddle.x + delta_x * 5)), paddle.y)
+# move the ball by its velocity (whole pixels)
+ ball.move(ball.x + velocity_x, ball.y + velocity_y)
scene.refresh()
clock.tick()
```
[▶ Try it in the browser](/playground/?ex=01-bounce-step3_ball) ### step 4 — `step4_walls.py` · reflection [Section titled “step 4 — step4\_walls.py · reflection”](#step-4--step4_wallspy--reflection) 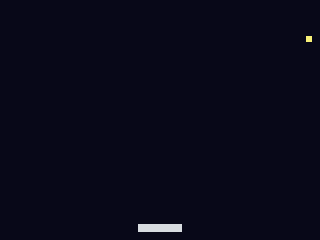 A bounce is just flipping the velocity component heading into a wall and pinning the ball to the edge so it can’t tunnel out. Left/right flip `velocity_x`, the top flips `velocity_y`. Still whole-pixel velocity here. The bottom stays open; falling past it is a “miss”. **You see:** the ball bounces around three walls forever. **Try it:** make the top open too and watch it escape.
```diff
W, H = 320, 240
PADDLE_W, PADDLE_H = 44, 8
BALL = 6
scene, _, _ = picogame_game.setup(background=pg.rgb565(8, 10, 24))
btn = picogame_input.Buttons()
clock = picogame_clock.Clock(40)
paddle = pg.Sprite(shp.rect(PADDLE_W, PADDLE_H, pg.rgb565(220, 220, 230)),
(W - PADDLE_W) // 2, H - 16)
ball = pg.Sprite(shp.rect(BALL, BALL, pg.rgb565(255, 240, 120)), W // 2, H // 2)
scene.add(paddle)
scene.add(ball)
velocity_x, velocity_y = 3, -3
while True:
btn.poll()
delta_x = btn.is_pressed(btn.RIGHT) - btn.is_pressed(btn.LEFT)
if delta_x:
paddle.move(max(0, min(W - PADDLE_W, paddle.x + delta_x * 5)), paddle.y)
ball.move(ball.x + velocity_x, ball.y + velocity_y)
+# walls: flip the component heading into the wall, and pin to the edge
+if ball.x < 0:
+ ball.move(0, ball.y)
+ velocity_x = -velocity_x
+elif ball.x > W - BALL:
+ ball.move(W - BALL, ball.y)
+ velocity_x = -velocity_x
+if ball.y < 0:
+ ball.move(ball.x, 0)
+ velocity_y = -velocity_y
scene.refresh()
clock.tick()
```
[▶ Try it in the browser](/playground/?ex=01-bounce-step4_walls) ### step 5 — `step5_paddle.py` · box collision + feel [Section titled “step 5 — step5\_paddle.py · box collision + feel”](#step-5--step5_paddlepy--box-collision--feel)  `pg.collide(ax1,ay1,ax2,ay2, bx1,by1,bx2,by2)` is a fast [box-overlap test](/concepts/glossary/) (AABB, axis-aligned bounding box): it just checks whether two upright rectangles overlap. On a paddle hit (only while moving down) we send the ball up and nudge `velocity_x` by *where* on the paddle it landed, so you can aim. That variable bounce angle is **why we now need sub-pixel movement**: a steered ball travels at speeds like 1.4 px/frame, *fractions* of a pixel that whole-pixel integers can’t express. So the ball now keeps a sub-pixel position in `ball.fx`/`ball.fy` (floats) with a float velocity; `ball.x`/`ball.y` are just those values rounded to whole pixels for drawing and collision. Falling past the bottom costs a life and re-serves. **You see:** a volley you can keep alive. **Try it:** change the `0.06` steering factor.
```diff
W, H = 320, 240
PADDLE_W, PADDLE_H = 44, 8
BALL = 6
scene, _, _ = picogame_game.setup(background=pg.rgb565(8, 10, 24))
btn = picogame_input.Buttons()
clock = picogame_clock.Clock(40)
paddle = pg.Sprite(shp.rect(PADDLE_W, PADDLE_H, pg.rgb565(220, 220, 230)),
(W - PADDLE_W) // 2, H - 16)
ball = pg.Sprite(shp.rect(BALL, BALL, pg.rgb565(255, 240, 120)), W // 2, H // 2)
scene.add(paddle)
scene.add(ball)
velocity_x, velocity_y = 2.4, -2.6 # NEW: float velocity (fractions of a pixel)
lives = 3
+def serve():
+global velocity_x, velocity_y
+ ball.move(W // 2, H // 2)
+ velocity_x, velocity_y = 2.4, -2.6
while True:
btn.poll()
delta_x = btn.is_pressed(btn.RIGHT) - btn.is_pressed(btn.LEFT)
if delta_x:
paddle.move(max(0, min(W - PADDLE_W, paddle.x + delta_x * 5)), paddle.y)
+# integrate the float velocity into the ball's sub-pixel position
+ ball.fx += velocity_x
+ ball.fy += velocity_y
+if ball.fx < 0:
+ ball.fx = 0; velocity_x = -velocity_x
+elif ball.fx > W - BALL:
+ ball.fx = W - BALL; velocity_x = -velocity_x
+if ball.fy < 0:
+ ball.fy = 0; velocity_y = -velocity_y
+# paddle bounce: only when moving DOWN and the boxes overlap
+if velocity_y > 0 and pg.collide(ball.x, ball.y, ball.x + BALL, ball.y + BALL,
paddle.x, paddle.y, paddle.x + PADDLE_W, paddle.y + PADDLE_H):
+ velocity_y = -abs(velocity_y)
+# steer: distance of ball centre from paddle centre -> sideways speed
+ velocity_x += (ball.x + BALL / 2 - (paddle.x + PADDLE_W / 2)) * 0.06
+if ball.fy > H: # missed the ball
+ lives -= 1
+if lives <= 0:
+ lives = 3
+serve()
scene.refresh()
clock.tick()
```
[▶ Try it in the browser](/playground/?ex=01-bounce-step5_paddle) ### step 6 — `step6_bricks.py` · the Tilemap [Section titled “step 6 — step6\_bricks.py · the Tilemap”](#step-6--step6_brickspy--the-tilemap) 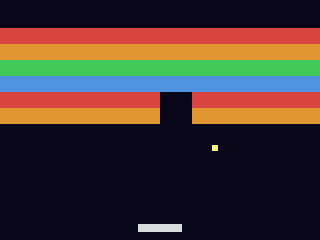 A [`Tilemap`](/reference/) is a grid of identical tiles that share one image, instead of one sprite per cell. It’s backed by one tileset bitmap, 1 byte per cell, far cheaper than a sprite per brick. `shp.tileset_colors(w, h, [colours])` builds a sheet where value 0 is empty and 1..N are colours. Map the ball’s pixel to a tile (`tile_x = pixel_x // BRICK_W`), read it, and set it to 0 to clear it. Clear the wall → rebuild. **You see:** a 10×6 wall you break. **Try it:** change `ROWS` or the brick colours.
```diff
W, H = 320, 240
PADDLE_W, PADDLE_H = 44, 8
BALL = 6
+BRICK_W, BRICK_H = 32, 16 # brick (tile) size
+COLS, ROWS = W // BRICK_W, 6 # 10 x 6 wall
+BRICK_Y = 28 # wall top (leaves a HUD strip)
scene, _, _ = picogame_game.setup(background=pg.rgb565(8, 10, 24))
btn = picogame_input.Buttons()
clock = picogame_clock.Clock(40)
# tileset: value 0 empty, 1..4 = four brick colours
+brick_colors = [pg.rgb565(220, 70, 70), pg.rgb565(230, 150, 50),
+ pg.rgb565(70, 200, 90), pg.rgb565(80, 150, 230)]
+bricks = pg.Tilemap(shp.tileset_colors(BRICK_W, BRICK_H, brick_colors), COLS, ROWS)
+bricks.move(0, BRICK_Y)
+def build_wall():
+global bricks_left
+for tile_y in range(ROWS):
+for tile_x in range(COLS):
+ bricks.tile(tile_x, tile_y, 1 + (tile_y % 4)) # row -> colour 1..4
+ bricks_left = COLS * ROWS
build_wall()
paddle = pg.Sprite(shp.rect(PADDLE_W, PADDLE_H, pg.rgb565(220, 220, 230)),
(W - PADDLE_W) // 2, H - 16)
ball = pg.Sprite(shp.rect(BALL, BALL, pg.rgb565(255, 240, 120)), W // 2, H // 2)
+scene.add(bricks) # add the wall first (drawn under the ball)
scene.add(paddle)
scene.add(ball)
velocity_x, velocity_y = 2.4, -2.6
lives = 3
def serve():
global velocity_x, velocity_y
ball.move(W // 2, H // 2)
velocity_x, velocity_y = 2.4, -2.6
+# brick hit: the tile under the ball's centre
+ center_x, center_y = ball.x + BALL // 2, ball.y + BALL // 2
+ tile_x = center_x // BRICK_W
+ tile_y = (center_y - BRICK_Y) // BRICK_H
+if 0 <= tile_x < COLS and 0 <= tile_y < ROWS and bricks.tile(tile_x, tile_y):
+ bricks.tile(tile_x, tile_y, 0) # clear the brick
+ bricks_left -= 1
+ velocity_y = -velocity_y
+if bricks_left == 0: # cleared the wall -> rebuild
+build_wall()
+serve()
if ball.fy > H:
lives -= 1
if lives <= 0:
lives = 3
build_wall()
serve()
scene.refresh()
clock.tick()
```
[▶ Try it in the browser](/playground/?ex=01-bounce-step6_bricks) ### step 7 — `step7_hud.py` · text / status bar [Section titled “step 7 — step7\_hud.py · text / status bar”](#step-7--step7_hudpy--text--status-bar) 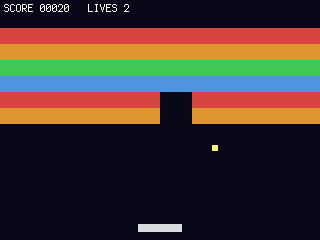 [`picogame_ui`](/reference/)’s `SceneLabel` renders text into the scene as a **fixed** layer (drawn by `refresh()`, and camera-independent, handy once the world scrolls). It uses the bundled `terminalio.FONT`, so no font asset. `label.set(...)` re-renders only when the text changes. **You see:** `SCORE / LIVES` across the top. **Try it:** add the brick count.
```diff
W, H = 320, 240
PADDLE_W, PADDLE_H = 44, 8
BALL = 6
BRICK_W, BRICK_H = 32, 16
COLS, ROWS = W // BRICK_W, 6
BRICK_Y = 28
BACKGROUND = pg.rgb565(8, 10, 24)
scene, _, _ = picogame_game.setup(background=BACKGROUND)
btn = picogame_input.Buttons()
clock = picogame_clock.Clock(40)
brick_colors = [pg.rgb565(220, 70, 70), pg.rgb565(230, 150, 50),
pg.rgb565(70, 200, 90), pg.rgb565(80, 150, 230)]
bricks = pg.Tilemap(shp.tileset_colors(BRICK_W, BRICK_H, brick_colors), COLS, ROWS)
bricks.move(0, BRICK_Y)
def build_wall():
global bricks_left
for tile_y in range(ROWS):
for tile_x in range(COLS):
bricks.tile(tile_x, tile_y, 1 + (tile_y % 4))
bricks_left = COLS * ROWS
build_wall()
paddle = pg.Sprite(shp.rect(PADDLE_W, PADDLE_H, pg.rgb565(220, 220, 230)),
(W - PADDLE_W) // 2, H - 16)
ball = pg.Sprite(shp.rect(BALL, BALL, pg.rgb565(255, 240, 120)), W // 2, H // 2)
scene.add(bricks)
scene.add(paddle)
scene.add(ball)
# NEW: a HUD label. Adding it to the scene happens inside SceneLabel (as a fixed layer).
+hud = ui.SceneLabel(scene, pg, terminalio.FONT, 4, 2, pg.rgb565(255, 255, 255), BACKGROUND)
velocity_x, velocity_y = 2.4, -2.6
+score = 0
lives = 3
def serve():
global velocity_x, velocity_y
ball.move(W // 2, H // 2)
velocity_x, velocity_y = 2.4, -2.6
while True:
btn.poll()
delta_x = btn.is_pressed(btn.RIGHT) - btn.is_pressed(btn.LEFT)
if delta_x:
paddle.move(max(0, min(W - PADDLE_W, paddle.x + delta_x * 5)), paddle.y)
bricks.tile(tile_x, tile_y, 0)
bricks_left -= 1
+ score += 10 # NEW: score on a hit
velocity_y = -velocity_y
if bricks_left == 0:
build_wall()
serve()
if ball.fy > H:
lives -= 1
if lives <= 0:
lives = 3
score = 0
build_wall()
serve()
+ hud.set("SCORE %05d LIVES %d" % (score, lives)) # update text, then draw it
scene.refresh() # draws the scene incl. the HUD
clock.tick()
```
[▶ Try it in the browser](/playground/?ex=01-bounce-step7_hud) ### step 8 — `step8_particles.py` · juice (particles + sound) [Section titled “step 8 — step8\_particles.py · juice (particles + sound)”](#step-8--step8_particlespy--juice-particles--sound) 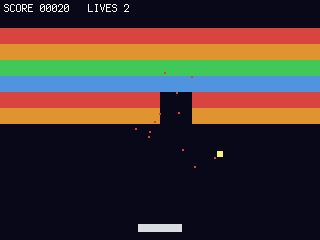 Now we add some [juice](/concepts/glossary/), the small touches that make a hit feel good. [`Particles`](/reference/) is a cheap burst system: `emit(x, y, count, speed, life, colour)` then `tick()` each frame. We burst in the brick’s colour on every break. `picogame_audio.tone()` makes a beep with no `.wav`, a blip per hit. (Audio is wrapped in `try/except`, so it’s silent but safe where there’s no audio output, like the simulator.) **You see:** coloured sparks + (on hardware) a blip. **Try it:** change the particle `count`/`gravity`.
```diff
W, H = 320, 240
PADDLE_W, PADDLE_H = 44, 8
BALL = 6
BRICK_W, BRICK_H = 32, 16
COLS, ROWS = W // BRICK_W, 6
BRICK_Y = 28
BACKGROUND = pg.rgb565(8, 10, 24)
scene, _, _ = picogame_game.setup(background=BACKGROUND)
btn = picogame_input.Buttons()
clock = picogame_clock.Clock(40)
+# optional audio: a beep on each hit (no asset needed). None if no audio backend.
+try:
+import picogame_audio
+ audio = picogame_audio.Audio()
+ blip = picogame_audio.tone(660, 35)
+ lose = picogame_audio.tone(150, 160) # low tone when a ball is missed
+except Exception:
+ audio = None
+ blip = lose = None
brick_colors = [pg.rgb565(220, 70, 70), pg.rgb565(230, 150, 50),
pg.rgb565(70, 200, 90), pg.rgb565(80, 150, 230)]
brick_ts = shp.tileset_colors(BRICK_W, BRICK_H, brick_colors)
bricks = pg.Tilemap(brick_ts, COLS, ROWS)
bricks.move(0, BRICK_Y)
def build_wall():
+global bricks_left
for tile_y in range(ROWS):
for tile_x in range(COLS):
bricks.tile(tile_x, tile_y, 1 + (tile_y % 4))
bricks_left = COLS * ROWS
build_wall()
paddle = pg.Sprite(shp.rect(PADDLE_W, PADDLE_H, pg.rgb565(220, 220, 230)),
(W - PADDLE_W) // 2, H - 16)
ball = pg.Sprite(shp.rect(BALL, BALL, pg.rgb565(255, 240, 120)), W // 2, H // 2)
particles = pg.Particles(96, size=2, gravity=0.12) # NEW
scene.add(bricks)
scene.add(particles) # behind paddle+ball
scene.add(paddle)
scene.add(ball)
if 0 <= tile_x < COLS and 0 <= tile_y < ROWS:
cell = bricks.tile(tile_x, tile_y)
if cell:
bricks.tile(tile_x, tile_y, 0)
bricks_left -= 1
score += 10
velocity_y = -velocity_y
+# burst in the brick's colour at the brick's centre
+ brick_x = tile_x * BRICK_W + BRICK_W // 2
+ brick_y = BRICK_Y + tile_y * BRICK_H + BRICK_H // 2
+ particles.emit(brick_x, brick_y, 14, 3, 22, brick_colors[cell - 1])
+if audio:
+ audio.sfx(blip)
if bricks_left == 0:
build_wall()
serve()
if ball.fy > H:
lives -= 1
if audio:
+ audio.sfx(lose) # low tone on a missed ball
if lives <= 0:
lives = 3
score = 0
build_wall()
serve()
+ particles.tick() # advance the burst each frame
hud.set("SCORE %05d LIVES %d" % (score, lives))
scene.refresh()
clock.tick()
```
[▶ Try it in the browser](/playground/?ex=01-bounce-step8_particles) ### step 9 — `step9_sprites.py` · rectangles → sprites [Section titled “step 9 — step9\_sprites.py · rectangles → sprites”](#step-9--step9_spritespy--rectangles--sprites)  The payoff. We change **only the two bitmaps**: the ball becomes a round disc (`shp.circle`) and the paddle gets a multi-colour [`Bitmap`](/reference/) with a highlight. Diff this file against step 8: the entire game loop is byte-for-byte identical. A `Sprite` doesn’t care whether its bitmap is a rectangle, a generated shape, or a PNG you imported in the editor. **You see:** the same game, now with a round ball and a shaded paddle. **Try it:** load a a PNG through the editor → scene pipeline (open it in the [web editor](/tools/editor/)) and assign it as the bitmap.
```diff
W, H = 320, 240
PADDLE_W, PADDLE_H = 44, 8
BALL = 6
BRICK_W, BRICK_H = 32, 16
COLS, ROWS = W // BRICK_W, 6
BRICK_Y = 28
BACKGROUND = pg.rgb565(8, 10, 24)
scene, _, _ = picogame_game.setup(background=BACKGROUND)
btn = picogame_input.Buttons()
clock = picogame_clock.Clock(40)
try:
import picogame_audio
audio = picogame_audio.Audio()
blip = picogame_audio.tone(660, 35)
lose = picogame_audio.tone(150, 160) # low tone when a ball is missed
except Exception:
audio = None
blip = lose = None
+def paddle_art(w, h):
+"""A 2-colour paddle bitmap: blue body + a lighter highlight on the top row.
This is what 'real sprite art' is -- a PAL8 bitmap with more than one colour."""
+ palette = array.array("H", [pg.rgb565(0, 0, 0), pg.rgb565(70, 110, 210), pg.rgb565(150, 190, 255)])
+ data = bytearray(b"\x01" * (w * h)) # index 1 = body
+for x in range(w):
+ data[x] = 2 # index 2 = highlight on the top row
+return pg.Bitmap(data, w, h, format=pg.PAL8, palette=palette, frames=1, stride=w, transparent=0)
+brick_colors = [pg.rgb565(220, 70, 70), pg.rgb565(230, 150, 50),
+ pg.rgb565(70, 200, 90), pg.rgb565(80, 150, 230)]
paddle = pg.Sprite(paddle_art(PADDLE_W, PADDLE_H), (W - PADDLE_W) // 2, H - 16)
ball = pg.Sprite(shp.circle(BALL, pg.rgb565(255, 240, 120)), W // 2, H // 2)
```
[▶ Try it in the browser](/playground/?ex=01-bounce-step9_sprites) *** **Where to go next:** [02-starship](/tutorials/02-starship/) (pools, rotation, shooting, state machine), or jump to the [web editor](/tools/editor/) and the [scene format](/scene-format/) to build levels as data instead of by hand. There’s also [03-quest](/tutorials/03-quest/) if you want a longer game to pull apart.
# Tutorial 2 — Starship
> Build a top-down Asteroids-style shooter in 8 steps with rotation, thrust, object pools, splitting enemies, and a game-state machine.
In this tutorial, you’ll build a small Asteroids-style shooter. It assumes you’ve completed **01-bounce** (render loop, input, sub-pixel movement, collision, HUD, and particles). This time you’ll add rotation, vector thrust, object pools, splitting enemies, and a game-state machine. The full source for this tutorial lives on GitHub: [tutorials/02-starship](https://github.com/MakerClassCZ/picogame/tree/main/tutorials/02-starship). Run any step:
```bash
python3 sim/run.py tutorials/02-starship/stepN_name.py --hold UP,B --shot /tmp/out.png
```
*** ### step 1 — `step1_ship.py` · a shaped sprite [Section titled “step 1 — step1\_ship.py · a shaped sprite”](#step-1--step1_shippy--a-shaped-sprite)  [`picogame_game.setup`](/helpers/boot-loop/) prepares the display and returns `(scene, buffer_a, buffer_b)`. On an SPI display, the last two values are reusable strip buffers; on a framebuffer display, they are `None`. This step only needs the [`Scene`](/reference/), so it ignores the other two values (`scene, _, _`). [`picogame_shapes`](/reference/) (imported as `shp`) builds bitmaps: `shp.from_mask` turns an ASCII picture into a one-colour [`Bitmap`](/reference/). We wrap it in a [`Sprite`](/reference/) and `anchor=(0.5, 0.5)` puts the sprite’s reference point at its centre, the right choice for something that rotates and wraps. **You see:** a little ship in the middle. **Try it:** redraw the mask.
```diff
W, H = 320, 240
BACKGROUND = pg.rgb565(0, 0, 8)
scene, _, _ = picogame_game.setup(background=BACKGROUND)
clock = picogame_clock.Clock(30)
+SHIP_MASK = [
+" # ",
+" # ",
+" ### ",
+" ### ",
+"#####",
+"## ##",
+]
+ship = pg.Sprite(shp.from_mask(SHIP_MASK, pg.rgb565(200, 220, 255)), W // 2, H // 2)
+ship.anchor = (0.5, 0.5) # rotate/position about the centre
+scene.add(ship)
while True:
scene.refresh()
clock.tick()
```
[▶ Try it in the browser](/playground/?ex=02-starship-step1_ship) ### step 2 — `step2_fly.py` · rotation, thrust, wrap [Section titled “step 2 — step2\_fly.py · rotation, thrust, wrap”](#step-2--step2_flypy--rotation-thrust-wrap)  For a ship that spins constantly, we bake the rotation into frames. This is sharper and cheaper than changing `sprite.angle` at runtime: `shp.poly_frames(size, points, N, colour)` renders a polygon at N angles into one multi-frame bitmap, and `ship.frame = angle` selects one of them. A `DIRS` table holds each angle’s unit vector; UP accelerates along the facing vector into the velocity, with a top-speed cap and gentle drag. `wrap()` teleports across the edges. **You see:** a ship you fly Asteroids-style. **Try it:** change the thrust `0.25` or the drag `0.99`.
```diff
W, H = 320, 240
BACKGROUND = pg.rgb565(0, 0, 8)
FRAMES = 16 # number of baked rotation frames
scene, _, _ = picogame_game.setup(background=BACKGROUND)
btn = picogame_input.Buttons()
clock = picogame_clock.Clock(30)
# a ship polygon (points around the centre, +y is down), baked at FRAMES angles
+ship_bitmap = shp.poly_frames(18, [(0, -8), (6, 7), (0, 4), (-6, 7)], FRAMES, pg.rgb565(200, 220, 255))
# facing unit vector for each frame: frame 0 points up (-y)
+DIRS = [(math.sin(frame * 2 * math.pi / FRAMES), -math.cos(frame * 2 * math.pi / FRAMES)) for frame in range(FRAMES)]
ship = pg.Sprite(ship_bitmap, W // 2, H // 2)
ship.anchor = (0.5, 0.5)
scene.add(ship)
angle = 0 # current rotation frame
velocity_x = velocity_y = 0.0 # velocity
+def wrap(x, y):
+return x % W, y % H
while True:
+ btn.poll()
+if btn.is_pressed(btn.LEFT):
+ angle = (angle - 1) % FRAMES
+if btn.is_pressed(btn.RIGHT):
+ angle = (angle + 1) % FRAMES
+ delta_x, delta_y = DIRS[angle]
+if btn.is_pressed(btn.UP):
+ velocity_x += delta_x * 0.25 # accelerate along the facing vector
+ velocity_y += delta_y * 0.25
+ speed = math.sqrt(velocity_x * velocity_x + velocity_y * velocity_y) # cap top speed
+if speed > 5:
+ velocity_x *= 5 / speed
+ velocity_y *= 5 / speed
+ velocity_x *= 0.99 # gentle drag
+ velocity_y *= 0.99
+ ship.fx, ship.fy = wrap(ship.fx + velocity_x, ship.fy + velocity_y) # sub-pixel position + wrap
+ ship.frame = angle # show the matching rotation
scene.refresh()
clock.tick()
```
[▶ Try it in the browser](/playground/?ex=02-starship-step2_fly) ### step 3 — `step3_shoot.py` · object pools [Section titled “step 3 — step3\_shoot.py · object pools”](#step-3--step3_shootpy--object-pools)  Repeatedly creating and discarding sprites can fragment the heap. Instead, [`picogame_pool`](/reference/)’s `Pool(scene, bitmap, N)` pre-allocates N hidden sprites once; `spawn()` reveals a free one, `free()` hides it, and `sprite.visible` *is* the alive flag. Each bullet keeps its velocity + remaining life in `sprite.data`, and its position in `fx`/`fy`. A cooldown caps the fire rate; [`picogame_input`](/reference/)’s `just_pressed(B)` fires once when B is pressed. **You see:** a stream of bullets that expire. **Try it:** change the pool size or `fire_cooldown`.
```diff
W, H = 320, 240
BACKGROUND = pg.rgb565(0, 0, 8)
FRAMES = 16
scene, _, _ = picogame_game.setup(background=BACKGROUND)
btn = picogame_input.Buttons()
clock = picogame_clock.Clock(30)
ship_bitmap = shp.poly_frames(18, [(0, -8), (6, 7), (0, 4), (-6, 7)], FRAMES, pg.rgb565(200, 220, 255))
DIRS = [(math.sin(frame * 2 * math.pi / FRAMES), -math.cos(frame * 2 * math.pi / FRAMES)) for frame in range(FRAMES)]
+bullet_bitmap = shp.circle(4, pg.rgb565(255, 255, 120))
ship = pg.Sprite(ship_bitmap, W // 2, H // 2)
ship.anchor = (0.5, 0.5)
+bullets = picogame_pool.Pool(scene, bullet_bitmap, 6, anchor=(0.5, 0.5)) # NEW: 6-bullet pool
scene.add(ship) # add ship AFTER the pool so it draws on top
angle = 0
velocity_x = velocity_y = 0.0
+fire_cooldown = 0
def wrap(x, y):
return x % W, y % H
while True:
btn.poll()
fire_cooldown -= 1
if btn.is_pressed(btn.LEFT):
angle = (angle - 1) % FRAMES
if btn.is_pressed(btn.RIGHT):
angle = (angle + 1) % FRAMES
delta_x, delta_y = DIRS[angle]
if btn.is_pressed(btn.UP):
velocity_x += delta_x * 0.25
velocity_y += delta_y * 0.25
speed = math.sqrt(velocity_x * velocity_x + velocity_y * velocity_y)
if speed > 5:
velocity_x *= 5 / speed; velocity_y *= 5 / speed
velocity_x *= 0.99; velocity_y *= 0.99
ship.fx, ship.fy = wrap(ship.fx + velocity_x, ship.fy + velocity_y)
ship.frame = angle
+# fire: a fresh B press, if the cooldown has elapsed and a slot is free
+if btn.just_pressed(btn.B) and fire_cooldown <= 0:
+ bullet = bullets.spawn()
+if bullet:
+ bullet.data = {"velocity_x": delta_x * 7, "velocity_y": delta_y * 7, "life": 30}
+ bullet.move(ship.x, ship.y)
+ fire_cooldown = 6
+# advance live bullets; retire them when their life runs out
+for bullet in bullets.items:
+if not bullet.visible:
+continue
+ bullet.data["life"] -= 1
+if bullet.data["life"] <= 0:
+ bullets.free(bullet)
+continue
+ bullet.fx, bullet.fy = wrap(bullet.fx + bullet.data["velocity_x"], bullet.fy + bullet.data["velocity_y"])
scene.refresh()
clock.tick()
```
[▶ Try it in the browser](/playground/?ex=02-starship-step3_shoot) ### step 4 — `step4_rocks.py` · a second pool + waves [Section titled “step 4 — step4\_rocks.py · a second pool + waves”](#step-4--step4_rockspy--a-second-pool--waves)  Reuse the pool pattern for enemies. Rocks come in 3 sizes; we keep the size in `sprite.data` and pick the matching ring bitmap with `sprite.bitmap`. `new_wave(n)` spreads n rocks around the screen, each drifting. **You see:** drifting rock rings. **Try it:** change the wave count or rock speed.
```diff
W, H = 320, 240
BACKGROUND = pg.rgb565(0, 0, 8)
FRAMES = 16
scene, _, _ = picogame_game.setup(background=BACKGROUND)
btn = picogame_input.Buttons()
clock = picogame_clock.Clock(30)
ship_bitmap = shp.poly_frames(18, [(0, -8), (6, 7), (0, 4), (-6, 7)], FRAMES, pg.rgb565(200, 220, 255))
DIRS = [(math.sin(frame * 2 * math.pi / FRAMES), -math.cos(frame * 2 * math.pi / FRAMES)) for frame in range(FRAMES)]
bullet_bitmap = shp.circle(4, pg.rgb565(255, 255, 120))
+ROCK_BITMAP = [shp.ring(40, pg.rgb565(170, 140, 100), 3), # size 0 = big
+ shp.ring(24, pg.rgb565(170, 140, 100), 3), # size 1 = medium
+ shp.ring(13, pg.rgb565(170, 140, 100), 2)] # size 2 = small
ship = pg.Sprite(ship_bitmap, W // 2, H // 2)
ship.anchor = (0.5, 0.5)
+rocks = picogame_pool.Pool(scene, ROCK_BITMAP[0], 16, anchor=(0.5, 0.5)) # NEW
bullets = picogame_pool.Pool(scene, bullet_bitmap, 6, anchor=(0.5, 0.5))
scene.add(ship)
angle = 0
velocity_x = velocity_y = 0.0
fire_cooldown = 0
wave = 3
def wrap(x, y):
return x % W, y % H
+def spawn_rock(size, x, y, velocity_x, velocity_y):
+ rock = rocks.spawn()
+if rock is None:
+return
+ rock.data = {"size": size, "velocity_x": velocity_x, "velocity_y": velocity_y}
+ rock.bitmap = ROCK_BITMAP[size] # pick the bitmap for this size
+ rock.fx, rock.fy = float(x), float(y)
+def new_wave(count):
+for i in range(count):
+ angle_rad = i * 2 * math.pi / count
+spawn_rock(0, (W // 2 + int(140 * math.cos(angle_rad))) % W,
(H // 2 + int(110 * math.sin(angle_rad))) % H,
math.cos(angle_rad) * 1.2, math.sin(angle_rad) * 1.2)
+new_wave(wave)
+# drift the rocks
+for rock in rocks.items:
+if not rock.visible:
+continue
+ rock.fx, rock.fy = wrap(rock.fx + rock.data["velocity_x"], rock.fy + rock.data["velocity_y"])
scene.refresh()
clock.tick()
```
[▶ Try it in the browser](/playground/?ex=02-starship-step4_rocks) ### step 5 — `step5_collide.py` · circular hits + splitting [Section titled “step 5 — step5\_collide.py · circular hits + splitting”](#step-5--step5_collidepy--circular-hits--splitting)  `a.near(b, r)` is a fast, no-sqrt distance test on the sprites’ centres, ideal for round things. A bullet that hits a rock frees both; a big/medium rock **splits** into two smaller ones flying apart. A rock reaching the ship costs a life, grants brief invulnerability (i-frames, shown by blinking `ship.visible`), and respawns. **You see:** you can shoot rocks apart and get hit. **Try it:** change `ROCK_RADIUS` or the split velocities.
```diff
W, H = 320, 240
BACKGROUND = pg.rgb565(0, 0, 8)
FRAMES = 16
scene, _, _ = picogame_game.setup(background=BACKGROUND)
btn = picogame_input.Buttons()
clock = picogame_clock.Clock(30)
ship_bitmap = shp.poly_frames(18, [(0, -8), (6, 7), (0, 4), (-6, 7)], FRAMES, pg.rgb565(200, 220, 255))
DIRS = [(math.sin(frame * 2 * math.pi / FRAMES), -math.cos(frame * 2 * math.pi / FRAMES)) for frame in range(FRAMES)]
bullet_bitmap = shp.circle(4, pg.rgb565(255, 255, 120))
ROCK_BITMAP = [shp.ring(40, pg.rgb565(170, 140, 100), 3),
shp.ring(24, pg.rgb565(170, 140, 100), 3),
shp.ring(13, pg.rgb565(170, 140, 100), 2)]
ROCK_RADIUS = [20, 12, 6] # collision radius per size
ship = pg.Sprite(ship_bitmap, W // 2, H // 2)
ship.anchor = (0.5, 0.5)
rocks = picogame_pool.Pool(scene, ROCK_BITMAP[0], 16, anchor=(0.5, 0.5))
bullets = picogame_pool.Pool(scene, bullet_bitmap, 6, anchor=(0.5, 0.5))
scene.add(ship)
angle = 0
velocity_x = velocity_y = 0.0
fire_cooldown = 0
+lives = 3
invincible = 60 # invincibility frames
wave = 3
+frame = 0
def wrap(x, y):
return x % W, y % H
def spawn_rock(size, x, y, velocity_x, velocity_y):
rock = rocks.spawn()
if rock is None:
return
rock.data = {"size": size, "velocity_x": velocity_x, "velocity_y": velocity_y}
rock.bitmap = ROCK_BITMAP[size]
rock.fx, rock.fy = float(x), float(y)
def new_wave(count):
for i in range(count):
angle_rad = i * 2 * math.pi / count
spawn_rock(0, (W // 2 + int(140 * math.cos(angle_rad))) % W,
(H // 2 + int(110 * math.sin(angle_rad))) % H,
math.cos(angle_rad) * 1.2, math.sin(angle_rad) * 1.2)
+def respawn():
+global velocity_x, velocity_y, invincible
+ ship.fx, ship.fy = float(W // 2), float(H // 2)
+ velocity_x = velocity_y = 0.0
+ invincible = 90
new_wave(wave)
while True:
btn.poll()
frame += 1
fire_cooldown -= 1
+if invincible > 0:
+ invincible -= 1
if btn.is_pressed(btn.LEFT):
+ size = rock.data["size"]
+ radius = ROCK_RADIUS[size]
+# bullet hits this rock?
+for bullet in bullets.items:
+if not bullet.visible:
+continue
+if bullet.near(rock, radius):
+ bullets.free(bullet)
+ rocks.free(rock)
+if size < 2: # split into two smaller, flying apart
+for sign in (-1, 1):
+spawn_rock(size + 1, rock.fx, rock.fy,
rock.data["velocity_x"] + sign * 0.8, rock.data["velocity_y"] - sign * 0.8)
+break
+# rock reaches the ship?
+if invincible <= 0 and rock.visible and ship.near(rock, radius + 6):
+ lives -= 1
+respawn()
+if lives < 0:
+ lives = 3
+ rocks.free_all()
+new_wave(wave)
+break
scene.refresh()
clock.tick()
```
[▶ Try it in the browser](/playground/?ex=02-starship-step5_collide) ### step 6 — `step6_waves.py` · score + progression [Section titled “step 6 — step6\_waves.py · score + progression”](#step-6--step6_wavespy--score--progression)  Smaller rocks score more. [`picogame_ui`](/reference/)’s [`SceneLabel`](/reference/) shows score + ships. When `rocks.count() == 0` the field is clear, so we launch the next, bigger wave, and the game ramps up. **You see:** a score that climbs and waves that grow. **Try it:** change the scoring or wave growth.
```diff
W, H = 320, 240
BACKGROUND = pg.rgb565(0, 0, 8)
FRAMES = 16
scene, _, _ = picogame_game.setup(background=BACKGROUND)
btn = picogame_input.Buttons()
clock = picogame_clock.Clock(30)
ship_bitmap = shp.poly_frames(18, [(0, -8), (6, 7), (0, 4), (-6, 7)], FRAMES, pg.rgb565(200, 220, 255))
DIRS = [(math.sin(frame * 2 * math.pi / FRAMES), -math.cos(frame * 2 * math.pi / FRAMES)) for frame in range(FRAMES)]
bullet_bitmap = shp.circle(4, pg.rgb565(255, 255, 120))
ROCK_BITMAP = [shp.ring(40, pg.rgb565(170, 140, 100), 3),
shp.ring(24, pg.rgb565(170, 140, 100), 3),
shp.ring(13, pg.rgb565(170, 140, 100), 2)]
ROCK_RADIUS = [20, 12, 6]
ship = pg.Sprite(ship_bitmap, W // 2, H // 2)
ship.anchor = (0.5, 0.5)
rocks = picogame_pool.Pool(scene, ROCK_BITMAP[0], 16, anchor=(0.5, 0.5))
bullets = picogame_pool.Pool(scene, bullet_bitmap, 6, anchor=(0.5, 0.5))
scene.add(ship)
hud = ui.SceneLabel(scene, pg, terminalio.FONT, 4, 4, pg.rgb565(255, 255, 255), BACKGROUND)
angle = 0
velocity_x = velocity_y = 0.0
fire_cooldown = 0
lives = 3
invincible = 60
wave = 3
+score = 0
frame = 0
+ score += (3 - size) * 20 # smaller rock -> more points
if size < 2:
for sign in (-1, 1):
spawn_rock(size + 1, rock.fx, rock.fy,
rock.data["velocity_x"] + sign * 0.8, rock.data["velocity_y"] - sign * 0.8)
break
if invincible <= 0 and rock.visible and ship.near(rock, radius + 6):
lives -= 1
respawn()
if lives < 0:
lives = 3
score = 0
rocks.free_all()
new_wave(wave)
break
+if rocks.count() == 0: # field cleared -> next, bigger wave
+ wave += 1
+new_wave(wave)
+ hud.set("SCORE %05d SHIPS %d" % (score, max(0, lives)))
scene.refresh()
clock.tick()
```
[▶ Try it in the browser](/playground/?ex=02-starship-step6_waves) ### step 7 — `step7_particles.py` · explosions, exhaust, sound [Section titled “step 7 — step7\_particles.py · explosions, exhaust, sound”](#step-7--step7_particlespy--explosions-exhaust-sound)  One [`Particles`](/reference/)`(fade=True)` system serves two effects: a burst when a rock is destroyed (many fast, fading sparks) and a thrust flame (a couple of short sparks behind the ship each frame while thrusting). `fade=True` dims particles as they age. `tone()` gives a fire beep and a lower boom. **You see:** explosions and an engine trail. **Try it:** change the explosion `count`/`life` or the beep frequencies.
```diff
W, H = 320, 240
BACKGROUND = pg.rgb565(0, 0, 8)
FRAMES = 16
scene, _, _ = picogame_game.setup(background=BACKGROUND)
btn = picogame_input.Buttons()
clock = picogame_clock.Clock(30)
+try:
+import picogame_audio
+ audio = picogame_audio.Audio()
+ snd_fire = picogame_audio.tone(880, 25)
+ snd_boom = picogame_audio.tone(160, 90)
+except Exception:
+ audio = None
ship_bitmap = shp.poly_frames(18, [(0, -8), (6, 7), (0, 4), (-6, 7)], FRAMES, pg.rgb565(200, 220, 255))
DIRS = [(math.sin(frame * 2 * math.pi / FRAMES), -math.cos(frame * 2 * math.pi / FRAMES)) for frame in range(FRAMES)]
bullet_bitmap = shp.circle(4, pg.rgb565(255, 255, 120))
ROCK_BITMAP = [shp.ring(40, pg.rgb565(170, 140, 100), 3),
shp.ring(24, pg.rgb565(170, 140, 100), 3),
shp.ring(13, pg.rgb565(170, 140, 100), 2)]
ROCK_RADIUS = [20, 12, 6]
ship = pg.Sprite(ship_bitmap, W // 2, H // 2)
ship.anchor = (0.5, 0.5)
rocks = picogame_pool.Pool(scene, ROCK_BITMAP[0], 16, anchor=(0.5, 0.5))
bullets = picogame_pool.Pool(scene, bullet_bitmap, 6, anchor=(0.5, 0.5))
sparks = pg.Particles(160, size=2, fade=True) # NEW
+scene.add(sparks)
+scene.add(ship)
+# thrust flame: a couple of orange sparks shot out the back
+ sparks.emit(ship.x - int(delta_x * 8), ship.y - int(delta_y * 8), 2, 2, 10, pg.rgb565(255, 150, 40))
speed = math.sqrt(velocity_x * velocity_x + velocity_y * velocity_y)
if speed > 5:
velocity_x *= 5 / speed; velocity_y *= 5 / speed
velocity_x *= 0.99; velocity_y *= 0.99
ship.fx, ship.fy = wrap(ship.fx + velocity_x, ship.fy + velocity_y)
ship.frame = angle
ship.visible = (invincible <= 0) or (frame & 1)
if btn.just_pressed(btn.B) and fire_cooldown <= 0:
bullet = bullets.spawn()
if bullet:
bullet.data = {"velocity_x": delta_x * 7, "velocity_y": delta_y * 7, "life": 30}
bullet.move(ship.x, ship.y)
fire_cooldown = 6
+if audio:
+ audio.sfx(snd_fire)
for bullet in bullets.items:
if not bullet.visible:
continue
bullet.data["life"] -= 1
if bullet.data["life"] <= 0:
bullets.free(bullet)
continue
bullet.fx, bullet.fy = wrap(bullet.fx + bullet.data["velocity_x"], bullet.fy + bullet.data["velocity_y"])
for rock in rocks.items:
if not rock.visible:
continue
rock.fx, rock.fy = wrap(rock.fx + rock.data["velocity_x"], rock.fy + rock.data["velocity_y"])
size = rock.data["size"]
radius = ROCK_RADIUS[size]
for bullet in bullets.items:
if not bullet.visible:
continue
if bullet.near(rock, radius):
bullets.free(bullet)
rocks.free(rock)
score += (3 - size) * 20
+ sparks.emit(rock.x, rock.y, 18, 3, 26, pg.rgb565(255, 200, 120)) # explosion
+if audio:
+ audio.sfx(snd_boom)
if size < 2:
for sign in (-1, 1):
spawn_rock(size + 1, rock.fx, rock.fy,
rock.data["velocity_x"] + sign * 0.8, rock.data["velocity_y"] - sign * 0.8)
break
if invincible <= 0 and rock.visible and ship.near(rock, radius + 6):
lives -= 1
+ sparks.emit(ship.x, ship.y, 24, 4, 30, pg.rgb565(120, 200, 255))
respawn()
if lives < 0:
lives = 3
score = 0
rocks.free_all()
new_wave(wave)
break
if rocks.count() == 0:
wave += 1
new_wave(wave)
+ sparks.tick() # advance all particles
hud.set("SCORE %05d SHIPS %d" % (score, max(0, lives)))
scene.refresh()
clock.tick()
```
[▶ Try it in the browser](/playground/?ex=02-starship-step7_particles) ### step 8 — `step8_states.py` · the state machine (capstone) [Section titled “step 8 — step8\_states.py · the state machine (capstone)”](#step-8--step8_statespy--the-state-machine-capstone) 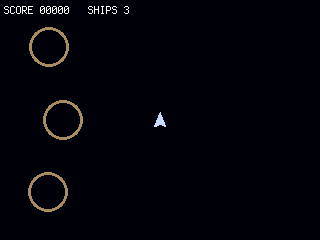 A finished game needs more than one mode — and it’s worth tidying the code as it grows. All the run’s mutable values move into one `State` object (`st`), re-initialised **in place** by `reset()`, and the whole loop moves into a `main()` function (inside a function its names resolve as fast locals — a small measured win on device). `st.mode` runs TITLE → PLAY → GAMEOVER; `new_game()` calls `st.reset()` to restart; one centred `SceneLabel` shows the message for the non-play states; death ends the run instead of silently restarting. This is the `State` + `main()` shape every bigger game grows into — see [Game patterns](/concepts/patterns/) and the ready-to-run [skeleton](/snippets/). **You see:** title → play → game over → title. **Try it:** add a high score that survives across games (keep it a module global, not in `State`; see [`picogame_save`](/reference/) for NVM persistence).
```diff
BACKGROUND = pg.rgb565(0, 0, 8)
FRAMES = 16
+TITLE, PLAY, GAMEOVER = 0, 1, 2
scene, _, _ = picogame_game.setup(background=BACKGROUND)
snd_fire = picogame_audio.tone(880, 25)
snd_boom = picogame_audio.tone(160, 90)
+ snd_start = picogame_audio.tone(660, 40) # bright blip: start / menu confirm
+ snd_die = picogame_audio.tone(120, 260) # low boom: game over (descending = lose)
except Exception:
audio = None
rocks = picogame_pool.Pool(scene, ROCK_BITMAP[0], 16, anchor=(0.5, 0.5))
bullets = picogame_pool.Pool(scene, bullet_bitmap, 6, anchor=(0.5, 0.5))
sparks = pg.Particles(160, size=2, fade=True)
scene.add(sparks)
scene.add(ship)
hud = ui.SceneLabel(scene, pg, terminalio.FONT, 4, 4, pg.rgb565(255, 255, 255), BACKGROUND)
+msg = ui.SceneLabel(scene, pg, terminalio.FONT, 96, 112, pg.rgb565(255, 255, 255), BACKGROUND)
+# ALL the run's mutable values in ONE object. reset() lists every field's default in one place, so a
+# restart is st.reset() -- and st is created ONCE below and never reassigned (a never-rebound singleton),
+# which is what lets main() and new_game() just mutate st.* with no `global`. Engine objects (ship, the
+# pools, sparks, clock, the labels) stay module-level names, NOT in State.
+class State:
+def __init__(self):
+self.reset()
+def reset(self):
+self.mode = TITLE # TITLE -> PLAY -> GAMEOVER
+self.angle = 0
+self.vx = self.vy = 0.0
+self.fire_cooldown = 0
+self.lives = 3
+self.invincible = 0
+self.wave = 3
+self.score = 0
+st = State()
def wrap(x, y):
return x % W, y % H
+def new_game():
+ st.reset() # every field back to its default, IN PLACE
+ st.mode = PLAY
+ st.invincible = 60 # a mercy window on the fresh run
ship.fx, ship.fy = float(W // 2), float(H // 2)
+ rocks.free_all()
+ bullets.free_all()
+ sparks.clear()
+new_wave(st.wave)
+def main():
# The per-frame loop lives in a FUNCTION: its names (st, the helpers, the loop's own frame counter)
+# resolve as fast array-indexed locals instead of globals-dict lookups.
+ frame = 0
+while True:
+ btn.poll()
+ frame += 1
+if st.mode == TITLE:
+ ship.visible = False
+ msg.set("STARSHIP PRESS A")
+if btn.just_pressed(btn.A):
if audio:
audio.sfx(snd_start) # confirm blip on start
+new_game()
+ scene.refresh()
+ clock.tick()
continue
+if st.mode == GAMEOVER:
+ msg.set("GAME OVER %05d A=MENU" % st.score)
+if btn.just_pressed(btn.A):
if audio:
audio.sfx(snd_start) # confirm blip back to menu
+ st.mode = TITLE
+ sparks.tick()
+ scene.refresh()
+ clock.tick()
+continue
+if st.mode == PLAY:
+ msg.set(" ")
+ st.fire_cooldown -= 1
+if st.invincible > 0:
+ st.invincible -= 1
+if btn.is_pressed(btn.LEFT):
+ st.angle = (st.angle - 1) % FRAMES
+if btn.is_pressed(btn.RIGHT):
+ st.angle = (st.angle + 1) % FRAMES
+ delta_x, delta_y = DIRS[st.angle]
+if btn.is_pressed(btn.UP):
+ st.vx += delta_x * 0.25; st.vy += delta_y * 0.25
+ sparks.emit(ship.x - int(delta_x * 8), ship.y - int(delta_y * 8), 2, 2, 10, pg.rgb565(255, 150, 40))
+ speed = math.sqrt(st.vx * st.vx + st.vy * st.vy)
+if speed > 5:
+ st.vx *= 5 / speed; st.vy *= 5 / speed
+ st.vx *= 0.99; st.vy *= 0.99
+ ship.fx, ship.fy = wrap(ship.fx + st.vx, ship.fy + st.vy)
+ ship.frame = st.angle
+ ship.visible = (st.invincible <= 0) or (frame & 1)
+if btn.just_pressed(btn.B) and st.fire_cooldown <= 0:
+ bullet = bullets.spawn()
+if bullet:
+ bullet.data = {"velocity_x": delta_x * 7, "velocity_y": delta_y * 7, "life": 30}
+ bullet.move(ship.x, ship.y)
+ st.fire_cooldown = 6
+if audio:
+ audio.sfx(snd_fire)
+for bullet in bullets.items:
+if not bullet.visible:
+continue
+ bullet.data["life"] -= 1
+if bullet.data["life"] <= 0:
+ bullets.free(bullet)
+continue
+ bullet.fx, bullet.fy = wrap(bullet.fx + bullet.data["velocity_x"], bullet.fy + bullet.data["velocity_y"])
+for rock in rocks.items:
+if not rock.visible:
+continue
+ rock.fx, rock.fy = wrap(rock.fx + rock.data["velocity_x"], rock.fy + rock.data["velocity_y"])
+ size = rock.data["size"]
+ radius = ROCK_RADIUS[size]
+for bullet in bullets.items:
+if not bullet.visible:
+continue
+if bullet.near(rock, radius):
+ bullets.free(bullet)
+ rocks.free(rock)
+ st.score += (3 - size) * 20
+ sparks.emit(rock.x, rock.y, 18, 3, 26, pg.rgb565(255, 200, 120))
+if audio:
+ audio.sfx(snd_boom)
+if size < 2:
+for sign in (-1, 1):
+spawn_rock(size + 1, rock.fx, rock.fy,
rock.data["velocity_x"] + sign * 0.8, rock.data["velocity_y"] - sign * 0.8)
+break
+if st.invincible <= 0 and rock.visible and ship.near(rock, radius + 6):
+ st.lives -= 1
+ sparks.emit(ship.x, ship.y, 24, 4, 30, pg.rgb565(120, 200, 255))
+ ship.fx, ship.fy = float(W // 2), float(H // 2)
+ st.vx = st.vy = 0.0
+ st.invincible = 90
+if st.lives < 0:
+if audio:
+ audio.sfx(snd_die) # low boom on game over
+ st.mode = GAMEOVER
+break
+if rocks.count() == 0:
+ st.wave += 1
+new_wave(st.wave)
sparks.tick()
hud.set("SCORE %05d SHIPS %d" % (st.score, max(0, st.lives)))
scene.refresh()
clock.tick()
+main()
```
[▶ Try it in the browser](/playground/?ex=02-starship-step8_states) *** **Where to go next:** the [web editor](/tools/editor/) + `picogame_scene`, to design levels as data and load them, instead of hand-coding placement. See the [scene format](/scene-format/) for how that data is structured, and try the sibling tutorials: [01-bounce](/tutorials/01-bounce/) and [03-quest](/tutorials/03-quest/).
# Tutorial 3 — Quest
> Build a top-down RPG in 8 steps — a scrolling map, camera, items, an NPC, combat, and a complete quest.
In this tutorial, you’ll build a small top-down RPG: walk through a scrolling map, collect coins, talk to an NPC, fight slimes, and complete a quest. It assumes you’ve completed [01-bounce](/tutorials/01-bounce/) and [02-starship](/tutorials/02-starship/). The main new ideas are the **camera** and using a **tilemap as the world**. The full source for this tutorial lives on GitHub: [tutorials/03-quest](https://github.com/MakerClassCZ/picogame/tree/main/tutorials/03-quest). Run any step:
```bash
python3 sim/run.py tutorials/03-quest/stepN_name.py --hold DOWN --shot /tmp/out.png
```
**Tip:** use `--backend pygame` for steps 6–8 if you want to interact with the dialog and quest. *** ### step 1 — `step1_world.py` · a world bigger than the screen [Section titled “step 1 — step1\_world.py · a world bigger than the screen”](#step-1--step1_worldpy--a-world-bigger-than-the-screen) 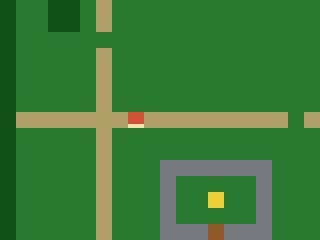 [`picogame_game.setup(...)`](/helpers/boot-loop/) returns `(scene, buffer_a, buffer_b)`. On an SPI display, the last two values are reusable strip buffers; on a framebuffer display, they are `None`. Early steps only need the [`Scene`](/reference/) and ignore the other two values (`scene, _, _`). Later dialog steps pass `buffer_a` to an immediate-mode helper; the framebuffer renderer does not need it. An ASCII map becomes a [`Tilemap`](/reference/) (30×20 tiles = 480×320 px, larger than the 320×240 screen). `shp.tileset_colors` builds the tileset (grass/path/water/tree/wall/door/goal). The hero is a [`Sprite`](/reference/) whose look comes from a [`Bitmap`](/reference/) — for now a **placeholder**: a red square with a brighter *facing edge* so you can see which way it points. Step 4 replaces it with a character assembled from ASCII masks. [`scene.set_view(offset_x, offset_y)`](/reference/) chooses the visible window; that’s the camera. The hero lives in **world** coordinates; the view offset decides where it lands on screen. **You see:** a patch of world with the hero centred. **Try it:** edit the `MAP` strings.
```python
# Quest -- step 1: a world bigger than the screen.
#
# This third tutorial builds a top-down RPG. It teaches what Bounce and Starship
# couldn't: a scrolling world larger than the display, a camera that follows the
# hero, tile-based wall collision, a walk animation, items, an NPC you talk to, and
# light combat. Do 01-bounce and 02-starship first.
#
# What you learn here: a Tilemap can be a whole WORLD (30x20 tiles = 480x320 px,
# bigger than the 320x240 screen). scene.set_view(offset_x, offset_y) chooses which part of the
# world is on screen -- that's the camera. We centre it on the hero. The hero lives
# in WORLD coordinates; the view offset decides where that lands on screen.
#
# New: a large Tilemap from an ASCII map, shp.tileset_colors, scene.set_view, and a
# placeholder hero (a red square with a facing edge). Step 4 gives it real drawn art.
#
# Run: python3 sim/run.py tutorials/03-quest/step1_world.py --shot /tmp/q1.png
import array
import picogame as pg
import picogame_game
import picogame_clock
import picogame_shapes as shp
W, H = 320, 240
TILE = 16
(240, 210, 60)] # GOAL
scene, _, _ = picogame_game.setup(background=pg.rgb565(0, 0, 0))
clock = picogame_clock.Clock(30)
tileset = shp.tileset_colors(TILE, TILE, [pg.rgb565(*color) for color in TILE_RGB])
world = pg.Tilemap(tileset, MAPCOLS, MAPROWS)
hero_x, hero_y = TILE, TILE # world pixel position of the hero
# build the Tilemap cell by cell from the ASCII map above
for tile_y in range(MAPROWS):
row = MAP[tile_y]
for tile_x in range(MAPCOLS):
char = row[tile_x] if tile_x < len(row) else "." # rows are full width; "." is just a safety net
world.tile(tile_x, tile_y, CHAR2TILE.get(char, GRASS)) # unknown chars fall back to GRASS
if char == "P":
hero_x, hero_y = tile_x * TILE, tile_y * TILE
scene.add(world)
# a PLACEHOLDER hero: a plain red square with a brighter bar on the facing edge, so you
# can see which way it points. 4 frames = 4 directions (frame = facing). We prototype
# with a shape now and draw a real animated character in step 4.
RED = pg.rgb565(210, 80, 60)
EDGE = pg.rgb565(255, 225, 170)
def hero_bitmap():
palette = array.array("H", [pg.rgb565(0, 0, 0), RED, EDGE]) # index 0 = transparent
stride = TILE * 4 # 4 frames side by side, 1 byte/px
data = bytearray(stride * TILE)
for facing in range(4): # 0 down, 1 up, 2 left, 3 right
for y in range(TILE):
for x in range(TILE):
on_facing_edge = ((facing == 0 and y >= TILE - 3) or (facing == 1 and y < 3) or
(facing == 2 and x < 3) or (facing == 3 and x >= TILE - 3))
data[y * stride + facing * TILE + x] = 2 if on_facing_edge else 1
return pg.Bitmap(data, TILE, TILE, format=pg.PAL8, palette=palette, frames=4, stride=stride)
hero = pg.Sprite(hero_bitmap(), hero_x, hero_y, frame=0)
scene.add(hero)
def camera_follow():
# centre the camera on the hero, clamped so we never show past the world edges
# The view offset = how far the world is shifted left/up on screen: 0 (world edge
# at screen edge) down to negative as we scroll right/down.
offset_x = W // 2 - (hero.x + TILE // 2) # centre the hero...
offset_x = min(0, offset_x) # ...but never past the left edge
offset_x = max(W - MAPCOLS * TILE, offset_x) # ...nor past the right edge
offset_y = H // 2 - (hero.y + TILE // 2) # centre the hero...
offset_y = min(0, offset_y) # ...but never past the top edge
offset_y = max(H - MAPROWS * TILE, offset_y) # ...nor past the bottom edge
scene.set_view(int(offset_x), int(offset_y))
camera_follow()
while True:
scene.refresh()
clock.tick()
```
[▶ Try it in the browser](/playground/?ex=03-quest-step1_world) ### step 2 — `step2_walk.py` · walk, camera follows [Section titled “step 2 — step2\_walk.py · walk, camera follows”](#step-2--step2_walkpy--walk-camera-follows) 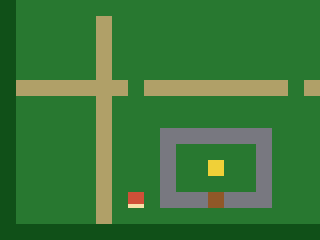 4-direction movement read with [`picogame_input`](/reference/); after each move `camera_follow()` re-centres the camera, **clamped** to the world so you never see past the edges (near an edge the hero walks toward the screen edge instead). The hero faces its movement direction — its `frame` picks down/up/left/right. No wall collision yet: you can walk over water. **You see:** the hero strides around with the camera following, clamped so the view never slips past the world’s edge. **Try it:** change `SPEED`.
```diff
import picogame as pg
import picogame_game
+import picogame_input
import picogame_clock
import picogame_shapes as shp
W, H = 320, 240
TILE = 16
+SPEED = 2
MAP = [
"##############################",
(150, 90, 40), # DOOR
(240, 210, 60)] # GOAL
+DOWN, UP, LEFT, RIGHT = 0, 1, 2, 3 # facing -> frame index
scene, _, _ = picogame_game.setup(background=pg.rgb565(0, 0, 0))
+btn = picogame_input.Buttons()
clock = picogame_clock.Clock(30)
tileset = shp.tileset_colors(TILE, TILE, [pg.rgb565(*color) for color in TILE_RGB])
world = pg.Tilemap(tileset, MAPCOLS, MAPROWS)
hero_x, hero_y = TILE, TILE
for tile_y in range(MAPROWS):
for tile_x in range(MAPCOLS):
char = MAP[tile_y][tile_x] if tile_x < len(MAP[tile_y]) else "."
world.tile(tile_x, tile_y, CHAR2TILE.get(char, GRASS))
if char == "P":
hero_x, hero_y = tile_x * TILE, tile_y * TILE
scene.add(world)
# a PLACEHOLDER hero: a plain red square with a brighter bar on the facing edge, so you
# can see which way it points. 4 frames = 4 directions (frame = facing). Step 4 replaces
# it with a real drawn character.
RED = pg.rgb565(210, 80, 60)
EDGE = pg.rgb565(255, 225, 170)
hero = pg.Sprite(hero_bitmap(), hero_x, hero_y, frame=DOWN)
scene.add(hero)
def camera_follow():
offset_x = max(W - MAPCOLS * TILE, min(0, W // 2 - (hero.x + TILE // 2)))
offset_y = max(H - MAPROWS * TILE, min(0, H // 2 - (hero.y + TILE // 2)))
scene.set_view(int(offset_x), int(offset_y))
camera_follow()
while True:
+ btn.poll()
+# True/False count as 1/0, so this is -1 (left), 0, or +1 (right)
+ delta_x = btn.is_pressed(btn.RIGHT) - btn.is_pressed(btn.LEFT)
+ delta_y = btn.is_pressed(btn.DOWN) - btn.is_pressed(btn.UP)
+if delta_x:
+ hero.frame = RIGHT if delta_x > 0 else LEFT # face horizontally
+elif delta_y:
+ hero.frame = DOWN if delta_y > 0 else UP # face vertically
+if delta_x or delta_y:
+ hero.move(hero.x + delta_x * SPEED, hero.y + delta_y * SPEED)
+camera_follow()
scene.refresh()
clock.tick()
```
[▶ Try it in the browser](/playground/?ex=03-quest-step2_walk) ### step 3 — `step3_walls.py` · tile collision [Section titled “step 3 — step3\_walls.py · tile collision”](#step-3--step3_wallspy--tile-collision) 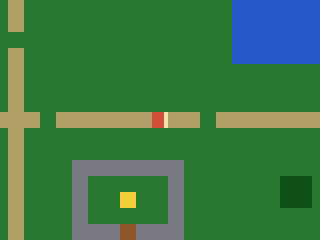 `solid_at(pixel_x, pixel_y)` maps a world pixel to a tile and checks a `SOLID` set; `can_walk()` probes the hero’s four corners. We test the X and Y moves **separately**, so you slide along a wall instead of sticking when pushing diagonally into it. (The engine also ships [`picogame_tiles`](/reference/) with ready-made tile probing if you’d rather not hand-roll it.) **You see:** water, trees and walls now block you. **Try it:** add a tile value to `SOLID` (or remove one).
```diff
(150, 90, 40), # DOOR
(240, 210, 60)] # GOAL
+SOLID = (WATER, TREE, WALL, DOOR) # these tiles block movement
DOWN, UP, LEFT, RIGHT = 0, 1, 2, 3 # facing -> frame index
scene, _, _ = picogame_game.setup(background=pg.rgb565(0, 0, 0))
+def solid_at(pixel_x, pixel_y):
+ tile_x, tile_y = pixel_x // TILE, pixel_y // TILE
+if tile_x < 0 or tile_x >= MAPCOLS or tile_y < 0 or tile_y >= MAPROWS:
+return True
+return world.tile(tile_x, tile_y) in SOLID
+def can_walk(pixel_x, pixel_y):
+# probe the hero's body corners (inset 2px) -- all must be free
+return not (solid_at(pixel_x + 2, pixel_y + 2) or solid_at(pixel_x + TILE - 3, pixel_y + 2) or
+solid_at(pixel_x + 2, pixel_y + TILE - 3) or solid_at(pixel_x + TILE - 3, pixel_y + TILE - 3))
def camera_follow():
offset_x = max(W - MAPCOLS * TILE, min(0, W // 2 - (hero.x + TILE // 2)))
delta_y = btn.is_pressed(btn.DOWN) - btn.is_pressed(btn.UP)
if delta_x:
hero.frame = RIGHT if delta_x > 0 else LEFT
elif delta_y:
hero.frame = DOWN if delta_y > 0 else UP
+ moved = False
if delta_x and can_walk(hero.x + delta_x * SPEED, hero.y): # test X alone
+ hero.move(hero.x + delta_x * SPEED, hero.y); moved = True
+if delta_y and can_walk(hero.x, hero.y + delta_y * SPEED): # then Y alone -> slide
+ hero.move(hero.x, hero.y + delta_y * SPEED); moved = True
+if moved:
camera_follow()
scene.refresh()
clock.tick()
```
[▶ Try it in the browser](/playground/?ex=03-quest-step3_walls) ### step 4 — `step4_anim.py` · walk animation [Section titled “step 4 — step4\_anim.py · walk animation”](#step-4--step4_animpy--walk-animation)  Now we replace the placeholder square with a character drawn from ASCII masks (down/up/side, with LEFT the side view mirrored by `flip_x`), with two **poses** per facing, driven by [`picogame_anim`](/reference/)`.AnimatedSprite`: `play(name)` picks the facing’s animation, `tick(dt)` advances it using the real `dt` from `clock.tick()` (so the walk speed is frame-rate independent). **You see:** a walk cycle in your direction of travel, and the rest pose when you stand still. **Try it:** change the animation `fps`.  The frames here are hand-drawn ASCII **masks**, so you can focus on the animation code. For custom artwork, draw an image sprite sheet and bake it to a Bitmap with `tools/png2picogame.py`, then animate by frame index — the *same* `AnimatedSprite` drives that too. See the [assets guide](/tutorials/assets/) and each tutorial’s `bonus_art.py`.
```diff
import picogame_input
import picogame_clock
+import picogame_anim
import picogame_shapes as shp
(240, 210, 60)] # GOAL
SOLID = (WATER, TREE, WALL, DOOR) # these tiles block movement
DOWN, UP, LEFT, RIGHT = 0, 1, 2, 3
+FACING_ANIM = ("down", "up", "side", "side") # animation per facing (left/right share the side art)
+WALK_FPS = 8
scene, _, _ = picogame_game.setup(background=pg.rgb565(0, 0, 0))
# --- the hero: ASCII pixel art you can edit. '#' = a pixel, '.' = transparent. One
# colour = a 1-bit silhouette; the FACING reads from the shape: DOWN has eyes, UP is
# the back of the head, SIDE is a profile with a nose (LEFT = SIDE mirrored at runtime
# with flip_x). Two poses per facing make the walk -- the legs scissor between A and B.
+HERO_COLOR = pg.rgb565(235, 90, 70)
+DOWN_A = [
"................",
".....####.......",
+"....######......",
+"....######......",
+"....#.##.#......", # eye gaps -> the face
+"....######......",
+".....####.......",
+"...########.....",
+"..##########....",
+"..##########....",
+"..##########....",
+"...########.....",
+"....##..##......",
+"...###..##......",
+"..###...##......", # left foot forward
+"..##............",
+]
+DOWN_B = [
+"................",
+".....####.......",
+"....######......",
+"....######......",
+"....#.##.#......",
+"....######......",
+".....####.......",
+"...########.....",
+"..##########....",
+"..##########....",
+"..##########....",
+"...########.....",
+"....##..##......",
+"....##..###.....",
+"....##...###....", # right foot forward
+"..........##....",
+]
+UP_A = [
+"................",
+".....####.......",
+"....######......",
+"....######......",
+"....######......", # solid head = the hero's back
+"....######......",
+".....####.......",
+"...########.....",
+"..##########....",
+"..##########....",
+"..##########....",
+"...########.....",
+"....##..##......",
+"...###..##......",
+"..###...##......",
+"..##............",
+]
+UP_B = [
+"................",
+".....####.......",
+"....######......",
+"....######......",
+"....######......",
+"....######......",
+".....####.......",
+"...########.....",
+"..##########....",
+"..##########....",
+"..##########....",
+"...########.....",
+"....##..##......",
+"....##..###.....",
+"....##...###....",
+"..........##....",
+]
+SIDE_A = [
+"................",
+".....####.......",
+"....#####.......",
+"....######......",
+"....#####.#.....", # nose nub -> faces right (flip_x -> left)
+"....######......",
+".....####.......",
+"....######......",
+"....######.#....", # arm swung forward
+"....######.#....",
+"....######......",
+".....####.......",
+"...##....##.....", # legs split
+"..##......##....",
+"..##......##....",
+"..#........#....",
+]
+SIDE_B = [
+"................",
+".....####.......",
+"....#####.......",
+"....######......",
+"....#####.#.....",
+"....######......",
+".....####.......",
+"....######......",
+"....######......", # arm tucked in
+"....######......",
+"....######......",
+".....####.......",
+".....####.......", # legs pass under the body
+".....####.......",
+"....##..##......",
+"....#....#......",
+]
+BM = {"down": [shp.from_mask(DOWN_A, HERO_COLOR), shp.from_mask(DOWN_B, HERO_COLOR)],
+"up": [shp.from_mask(UP_A, HERO_COLOR), shp.from_mask(UP_B, HERO_COLOR)],
+"side": [shp.from_mask(SIDE_A, HERO_COLOR), shp.from_mask(SIDE_B, HERO_COLOR)]}
hero = pg.Sprite(BM["down"][0], hero_x, hero_y)
+# each entry: name: (bitmap list, frames-per-second, loop?) -- AnimatedSprite accepts
+# a list of Bitmaps to swap in, not only frame indices into one sheet
+walk = picogame_anim.AnimatedSprite(hero, {
+"down": (BM["down"], WALK_FPS, True),
+"up": (BM["up"], WALK_FPS, True),
+"side": (BM["side"], WALK_FPS, True)})
scene.add(hero)
+facing = DOWN
def solid_at(pixel_x, pixel_y):
tile_x, tile_y = pixel_x // TILE, pixel_y // TILE
camera_follow()
+dt = 1 / 30 # assume one 30fps frame for the first tick; clock.tick() returns real dt after that
while True:
btn.poll()
+# True/False count as 1/0, so this is -1 (left), 0, or +1 (right)
delta_x = btn.is_pressed(btn.RIGHT) - btn.is_pressed(btn.LEFT)
delta_y = btn.is_pressed(btn.DOWN) - btn.is_pressed(btn.UP)
if delta_x:
facing = RIGHT if delta_x > 0 else LEFT
elif delta_y:
facing = DOWN if delta_y > 0 else UP
+ hero.flip_x = (facing == LEFT) # mirror the side art for LEFT
moved = False
if delta_x and can_walk(hero.x + delta_x * SPEED, hero.y):
hero.move(hero.x + delta_x * SPEED, hero.y); moved = True
if delta_y and can_walk(hero.x, hero.y + delta_y * SPEED):
hero.move(hero.x, hero.y + delta_y * SPEED); moved = True
if moved:
camera_follow()
+ walk.play(FACING_ANIM[facing]) # animate the walk while moving
+ walk.tick(dt)
+else:
+ hero.bitmap = BM[FACING_ANIM[facing]][0] # still: pose A of the current facing
scene.refresh()
dt = clock.tick()
```
[▶ Try it in the browser](/playground/?ex=03-quest-step4_anim) ### step 5 — `step5_items.py` · items + a fixed HUD [Section titled “step 5 — step5\_items.py · items + a fixed HUD”](#step-5--step5_itemspy--items--a-fixed-hud)  Coins are sprites placed from the map; being normal scene items, they **scroll with the world**. We collect one when the hero is close, hide it, and count it. [`picogame_ui`](/reference/)`.SceneLabel` is a **fixed** layer: it does NOT scroll, so the counter stays pinned to the corner. **You see:** coins dotted through the world that you scoop up close, and a counter pinned in the corner that doesn’t scroll. **Try it:** add more `*` coins to the map.
```diff
# Run: python3 sim/run.py tutorials/03-quest/step5_items.py --hold RIGHT --shot /tmp/q5.png
+import terminalio
import picogame as pg
import picogame_game
import picogame_input
import picogame_clock
import picogame_anim
import picogame_shapes as shp
+import picogame_ui as ui
W, H = 320, 240
FACING_ANIM = ("down", "up", "side", "side") # animation per facing (left/right share the side art)
WALK_FPS = 8
+BACKGROUND = pg.rgb565(0, 0, 0)
scene, _, _ = picogame_game.setup(background=BACKGROUND)
btn = picogame_input.Buttons()
clock = picogame_clock.Clock(30)
tileset = shp.tileset_colors(TILE, TILE, [pg.rgb565(*color) for color in TILE_RGB])
world = pg.Tilemap(tileset, MAPCOLS, MAPROWS)
hero_x, hero_y = TILE, TILE
+coin_spots = []
for tile_y in range(MAPROWS):
for tile_x in range(MAPCOLS):
char = MAP[tile_y][tile_x] if tile_x < len(MAP[tile_y]) else "."
world.tile(tile_x, tile_y, CHAR2TILE.get(char, GRASS))
if char == "P":
hero_x, hero_y = tile_x * TILE, tile_y * TILE
+elif char == "*":
+ coin_spots.append((tile_x * TILE, tile_y * TILE))
scene.add(world)
+coin_bitmap = shp.circle(8, pg.rgb565(245, 215, 60))
+coins = [pg.Sprite(coin_bitmap, x + 4, y + 4) for (x, y) in coin_spots] # +4 to centre in tile
+for coin in coins:
+ scene.add(coin)
# --- the hero: ASCII pixel art you can edit. '#' = a pixel, '.' = transparent. One
# colour = a 1-bit silhouette; the FACING reads from the shape: DOWN has eyes, UP is
"side": (BM["side"], WALK_FPS, True)})
scene.add(hero)
+hud = ui.SceneLabel(scene, pg, terminalio.FONT, 4, 4, pg.rgb565(255, 255, 255), BACKGROUND)
facing = DOWN
+coins_collected = 0
camera_follow()
dt = 1 / 30
while True:
btn.poll()
if moved:
camera_follow()
walk.play(FACING_ANIM[facing]); walk.tick(dt)
else:
hero.bitmap = BM[FACING_ANIM[facing]][0] # still: pose A of the current facing
+# pick up any coin we're standing on (within ~12px on both axes = close enough)
+for coin in coins:
+if coin.visible and abs(hero.x - coin.x) < 12 and abs(hero.y - coin.y) < 12:
+ coin.visible = False
+ coins_collected += 1
+ hud.set("COINS %d/%d" % (coins_collected, len(coins)))
scene.refresh()
dt = clock.tick()
```
[▶ Try it in the browser](/playground/?ex=03-quest-step5_items) ### step 6 — `step6_npc.py` · talk to an NPC [Section titled “step 6 — step6\_npc.py · talk to an NPC”](#step-6--step6_npcpy--talk-to-an-npc)  Stand next to the NPC and press **A** to switch into a **dialog mode**: the world keeps drawing underneath while `picogame_ui.TextBox` overlays a message; movement is frozen until you press a button. **You see:** a “PRESS A” prompt near the NPC, then a dialog box. **Try it:** change the dialog `LINES`. **A tidy-up: the `State` object.** The mutable variables are piling up, and as globals each needs a `global` line in every function that changes it. So we group them into one `class State` (`st.coins`, `st.mode`); objects that never change reference (the hero, the tilemap) stay module-level.
```diff
# Run: python3 sim/run.py tutorials/03-quest/step6_npc.py --shot /tmp/q6.png
+import board
import terminalio
import picogame as pg
SOLID = (WATER, TREE, WALL, DOOR) # these tiles block movement
DOWN, UP, LEFT, RIGHT = 0, 1, 2, 3
FACING_ANIM = ("down", "up", "side", "side") # animation per facing (left/right share the side art)
+EXPLORE, DIALOG = 0, 1 # game modes (int constants, not strings)
WALK_FPS = 8 # walk-animation speed (frames per second)
BACKGROUND = pg.rgb565(0, 0, 0)
+WHITE = pg.rgb565(255, 255, 255)
+NAVY = pg.rgb565(10, 10, 40)
+# buffer_a/buffer_b = the engine's two shared render strips; immediate-mode draws
+# (the dialog box below) paint straight into buffer_a
scene, buffer_a, buffer_b = picogame_game.setup(background=BACKGROUND)
btn = picogame_input.Buttons()
clock = picogame_clock.Clock(30)
tileset = shp.tileset_colors(TILE, TILE, [pg.rgb565(*color) for color in TILE_RGB])
world = pg.Tilemap(tileset, MAPCOLS, MAPROWS)
hero_x, hero_y = TILE, TILE
+npc_x, npc_y = TILE, TILE
coin_spots = []
for tile_y in range(MAPROWS):
for tile_x in range(MAPCOLS):
char = MAP[tile_y][tile_x] if tile_x < len(MAP[tile_y]) else "."
world.tile(tile_x, tile_y, CHAR2TILE.get(char, GRASS))
if char == "P":
hero_x, hero_y = tile_x * TILE, tile_y * TILE
+elif char == "N":
+ npc_x, npc_y = tile_x * TILE, tile_y * TILE
elif char == "*":
coin_spots.append((tile_x * TILE, tile_y * TILE))
scene.add(world)
coin_bitmap = shp.circle(8, pg.rgb565(245, 215, 60))
coins = [pg.Sprite(coin_bitmap, x + 4, y + 4) for (x, y) in coin_spots]
for coin in coins:
scene.add(coin)
+npc = pg.Sprite(shp.rect(TILE, TILE, pg.rgb565(230, 200, 60)), npc_x, npc_y)
+scene.add(npc)
"side": (BM["side"], WALK_FPS, True)})
scene.add(hero)
hud = ui.SceneLabel(scene, pg, terminalio.FONT, 4, 4, WHITE, BACKGROUND)
+dialog = ui.TextBox(pg, terminalio.FONT, 8, H - 64, W - 16, 58, WHITE, NAVY, maxlines=4)
+LINES = ["Villager:", "Beware the slimes in the", "tall grass, traveller.", "(press A)"]
+class State:
+"""All the mutable game variables in one place (was a pile of module globals). __init__ just calls
reset(), so every default lives in ONE spot and a restart would be a single call -- st.reset()."""
+def __init__(self):
+self.reset()
+def reset(self):
+self.facing = DOWN
+self.coins = 0
+self.mode = EXPLORE # EXPLORE = walking around, DIALOG = talking
+self.dlg_shown = False # draw the modal once, not every frame
+st = State()
def solid_at(pixel_x, pixel_y):
tile_x, tile_y = pixel_x // TILE, pixel_y // TILE
+def near_npc():
+return abs(hero.x - npc.x) <= TILE and abs(hero.y - npc.y) <= TILE
def camera_follow():
offset_x = max(W - MAPCOLS * TILE, min(0, W // 2 - (hero.x + TILE // 2)))
offset_y = max(H - MAPROWS * TILE, min(0, H // 2 - (hero.y + TILE // 2)))
scene.set_view(int(offset_x), int(offset_y))
camera_follow()
# The per-frame loop now lives in a FUNCTION (main), not at module scope. Inside a
+# function its names -- st, the loop's own delta_x/dt, the helpers -- resolve as fast
+# array-indexed locals instead of globals-dict lookups; on the device that's a
+# measured speed-up for the hot loop. It pairs naturally with the State tidy-up: one
+# st object + one main() is the shape every bigger game grows into.
+def main():
dt = 1 / 30 # seed the first frame; re-set from clock.tick() each loop
while True:
btn.poll()
+if st.mode == DIALOG:
+if not st.dlg_shown: # draw ONCE -> no per-frame flicker
+ scene.refresh() # world frozen under the box
+ dialog.draw(scene.display, buffer_a, LINES)
+ st.dlg_shown = True
+if btn.just_pressed(btn.A) or btn.just_pressed(btn.B):
+ st.mode = EXPLORE
+ scene.invalidate() # repaint over the box next frame
+ clock.tick()
+continue
+ delta_x = btn.is_pressed(btn.RIGHT) - btn.is_pressed(btn.LEFT)
+ delta_y = btn.is_pressed(btn.DOWN) - btn.is_pressed(btn.UP)
+if delta_x:
+ st.facing = RIGHT if delta_x > 0 else LEFT
+elif delta_y:
+ st.facing = DOWN if delta_y > 0 else UP
+ hero.flip_x = (st.facing == LEFT) # mirror the side art for LEFT
+ moved = False
+if delta_x and can_walk(hero.x + delta_x * SPEED, hero.y):
+ hero.move(hero.x + delta_x * SPEED, hero.y); moved = True
+if delta_y and can_walk(hero.x, hero.y + delta_y * SPEED):
+ hero.move(hero.x, hero.y + delta_y * SPEED); moved = True
+if moved:
+camera_follow()
+ walk.play(FACING_ANIM[st.facing]) # animate the walk while moving
walk.tick(dt)
+else:
+ hero.bitmap = BM[FACING_ANIM[st.facing]][0] # still: pose A of the current facing
+# pick up any coin we're standing on (within ~12px on both axes = close enough)
+for coin in coins:
+if coin.visible and abs(hero.x - coin.x) < 12 and abs(hero.y - coin.y) < 12:
+ coin.visible = False
+ st.coins += 1
+if near_npc():
hud.set("COINS %d/%d A: TALK" % (st.coins, len(coins)))
+if btn.just_pressed(btn.A):
+ st.mode = DIALOG
+ st.dlg_shown = False
+else:
+ hud.set("COINS %d/%d" % (st.coins, len(coins)))
scene.refresh()
+ dt = clock.tick()
+main()
```
[▶ Try it in the browser](/playground/?ex=03-quest-step6_npc) ### step 7 — `step7_combat.py` · enemies + bump combat [Section titled “step 7 — step7\_combat.py · enemies + bump combat”](#step-7--step7_combatpy--enemies--bump-combat)  Slimes chase the hero (slower than you, respecting walls). Touching one costs **HP** and briefly can’t be hurt again (a short cooldown); press **B** to swing at the tile you’re facing and defeat a slime. HP shows in the HUD; reaching 0 sends you back to start. **You see:** slimes converging on you, HP ticking down in the HUD on each hit, and a **B** swing that clears the tile you face. (A still talks.) **Try it:** change the slime speed or your starting HP.
```diff
SOLID = (WATER, TREE, WALL, DOOR) # these tiles block movement
DOWN, UP, LEFT, RIGHT = 0, 1, 2, 3
+DIR = {DOWN: (0, 1), UP: (0, -1), LEFT: (-1, 0), RIGHT: (1, 0)} # facing -> (dx, dy) step
FACING_ANIM = ("down", "up", "side", "side") # animation per facing (left/right share the side art)
EXPLORE, DIALOG = 0, 1 # game modes (int constants, not strings)
WALK_FPS = 8 # walk-animation speed (frames per second)
+MAX_HP = 6
+HURT_FRAMES = 40 # ~1.3s of mercy after a hit (at 30 fps)
+FLASH_FRAMES = 3 # how long the white hit-flash shows
BACKGROUND = pg.rgb565(0, 0, 0)
WHITE = pg.rgb565(255, 255, 255)
tileset = shp.tileset_colors(TILE, TILE, [pg.rgb565(*color) for color in TILE_RGB])
world = pg.Tilemap(tileset, MAPCOLS, MAPROWS)
+START = (TILE, TILE)
npc_x, npc_y = TILE, TILE
coin_spots, enemy_spots = [], []
for tile_y in range(MAPROWS):
for tile_x in range(MAPCOLS):
char = MAP[tile_y][tile_x] if tile_x < len(MAP[tile_y]) else "."
world.tile(tile_x, tile_y, CHAR2TILE.get(char, GRASS))
if char == "P":
START = (tile_x * TILE, tile_y * TILE)
elif char == "N":
npc_x, npc_y = tile_x * TILE, tile_y * TILE
elif char == "*":
coin_spots.append((tile_x * TILE, tile_y * TILE))
+elif char == "E":
+ enemy_spots.append((tile_x * TILE, tile_y * TILE))
scene.add(world)
coin_bitmap = shp.circle(8, pg.rgb565(245, 215, 60))
coins = [pg.Sprite(coin_bitmap, x + 4, y + 4) for (x, y) in coin_spots]
for coin in coins:
scene.add(coin)
+slime_bitmap = shp.circle(14, pg.rgb565(120, 200, 80))
+enemies = [pg.Sprite(slime_bitmap, x + 1, y + 1) for (x, y) in enemy_spots]
+for enemy in enemies:
+ scene.add(enemy)
npc = pg.Sprite(shp.rect(TILE, TILE, pg.rgb565(230, 200, 60)), npc_x, npc_y)
scene.add(npc)
"up": [shp.from_mask(UP_A, HERO_COLOR), shp.from_mask(UP_B, HERO_COLOR)],
"side": [shp.from_mask(SIDE_A, HERO_COLOR), shp.from_mask(SIDE_B, HERO_COLOR)]}
hero = pg.Sprite(BM["down"][0], START[0], START[1])
walk = picogame_anim.AnimatedSprite(hero, {
"down": (BM["down"], WALK_FPS, True),
"up": (BM["up"], WALK_FPS, True),
"side": (BM["side"], WALK_FPS, True)})
scene.add(hero)
hud = ui.SceneLabel(scene, pg, terminalio.FONT, 4, 4, WHITE, BACKGROUND)
dialog = ui.TextBox(pg, terminalio.FONT, 8, H - 64, W - 16, 58, WHITE, NAVY, maxlines=4)
+LINES = ["Villager:", "Slimes ahead! Press B to", "swing at them.", "(press A)"]
class State:
+"""All the mutable game variables in one place (grows as the game does). __init__ calls reset()."""
def __init__(self):
self.reset()
def reset(self):
self.facing = DOWN
self.coins = 0
+self.hp = MAX_HP
+self.hurt_cooldown = 0 # frames of mercy after a hit (i-frames)
self.mode = EXPLORE # EXPLORE = walking around, DIALOG = talking
+self.frame_count = 0 # frames elapsed (slimes chase every other frame)
self.dlg_shown = False # draw the modal once, not every frame
+def near(a, bx, by, d=TILE):
+# True if sprite a is within d px of the point (bx, by) on both axes (a box test)
+return abs(a.x - bx) < d and abs(a.y - by) < d
camera_follow()
def main(): # loop in a function -> its names are fast locals (see step 6)
dt = 1 / 30 # seed the first frame; re-set from clock.tick() each loop
while True:
btn.poll()
+ st.frame_count += 1
if st.mode == DIALOG:
if not st.dlg_shown: # draw ONCE -> no per-frame flicker
scene.refresh()
dialog.draw(scene.display, buffer_a, LINES)
st.dlg_shown = True
if btn.just_pressed(btn.A) or btn.just_pressed(btn.B):
st.mode = EXPLORE
scene.invalidate()
clock.tick()
continue
if moved:
camera_follow()
walk.play(FACING_ANIM[st.facing])
walk.tick(dt)
else:
hero.bitmap = BM[FACING_ANIM[st.facing]][0] # still: pose A of the current facing
+# attack: defeat a slime in the tile ahead of the facing
+if btn.just_pressed(btn.B):
+ ddx, ddy = DIR[st.facing]
+ ax, ay = hero.x + ddx * TILE, hero.y + ddy * TILE
+for enemy in enemies:
+if enemy.visible and abs(enemy.x - ax) < TILE and abs(enemy.y - ay) < TILE:
+ enemy.visible = False
+# slimes chase (slower: move every other frame) and respect walls
+if st.frame_count % 2 == 0:
+for enemy in enemies:
+if not enemy.visible:
+continue
+# which way to the hero: -1, 0 or +1 per axis (a compact sign())
+ chase_dx = (hero.x > enemy.x) - (hero.x < enemy.x)
+ chase_dy = (hero.y > enemy.y) - (hero.y < enemy.y)
+if chase_dx and can_walk(enemy.x + chase_dx, enemy.y):
+ enemy.move(enemy.x + chase_dx, enemy.y)
+if chase_dy and can_walk(enemy.x, enemy.y + chase_dy):
+ enemy.move(enemy.x, enemy.y + chase_dy)
+# take damage on contact (unless the cooldown from the last hit is still running)
+if st.hurt_cooldown > 0:
+ st.hurt_cooldown -= 1 # count the "safe" frames down
+if st.hurt_cooldown == HURT_FRAMES - FLASH_FRAMES: # ...and end the hit-flash after 3 frames
+ hero.flash = None
+else:
+for enemy in enemies:
+# 13px: slime radius (~7) + hero half-width (~8), i.e. they're touching
+if enemy.visible and near(enemy, hero.x, hero.y, 13):
+ st.hp -= 1
+ st.hurt_cooldown = HURT_FRAMES # frames where another touch can't hurt you
+ hero.flash = WHITE # white blit-flash for 3 frames: "I got hit"
+if st.hp <= 0: # down -> back to start, full HP
+ st.hp = MAX_HP
+ hero.move(START[0], START[1])
+camera_follow()
+break
# pick up any coin we're standing on (within ~12px on both axes = close enough)
for coin in coins:
if coin.visible and abs(hero.x - coin.x) < 12 and abs(hero.y - coin.y) < 12:
coin.visible = False
st.coins += 1
+if near(hero, npc.x, npc.y):
hud.set("HP %d COINS %d/%d A:TALK B:SWING" % (st.hp, st.coins, len(coins)))
if btn.just_pressed(btn.A):
st.mode = DIALOG
st.dlg_shown = False
else:
hud.set("HP %d COINS %d/%d" % (st.hp, st.coins, len(coins)))
scene.refresh()
dt = clock.tick()
main()
```
[▶ Try it in the browser](/playground/?ex=03-quest-step7_combat) ### step 8 — `step8_quest.py` · complete the quest [Section titled “step 8 — step8\_quest.py · complete the quest”](#step-8--step8_questpy--complete-the-quest)  Everything becomes a goal: the NPC asks for all the coins; once you have them, talking again **opens the door** (we rewrite those tiles from “door” to “path” so collision lets you through); stepping on the shrine tile **wins**. A `st.stage` field drives the dialog and the door, and the mode gains a third value (`WON`). Note `dialog_lines(st)` now *takes* the state object instead of reaching for globals — the payoff of keeping state in one place. **You see:** talk → collect → unlock → reach the shrine → “QUEST COMPLETE”. **Try it:** require defeating all slimes too before the door opens.
```diff
DIR = {DOWN: (0, 1), UP: (0, -1), LEFT: (-1, 0), RIGHT: (1, 0)} # facing -> (dx, dy) step
FACING_ANIM = ("down", "up", "side", "side") # animation per facing (left/right share the side art)
EXPLORE, DIALOG, WON = 0, 1, 2 # game modes (int constants, not strings)
WALK_FPS = 8 # walk-animation speed (frames per second)
MAX_HP = 6
# buffer_a/buffer_b = the engine's two shared render strips; immediate-mode draws
# (the dialog/win box below) paint straight into buffer_a
scene, buffer_a, buffer_b = picogame_game.setup(background=BACKGROUND)
btn = picogame_input.Buttons()
clock = picogame_clock.Clock(30)
+# optional audio: a talk blip + a bright win chime (no asset needed). None if no backend.
+try:
+import picogame_audio
+ audio = picogame_audio.Audio()
+ snd_talk = picogame_audio.tone(520, 30) # short blip on dialog advance
+ snd_win = picogame_audio.tone(880, 220) # bright chime on QUEST COMPLETE
+except Exception:
+ audio = None
+ snd_talk = snd_win = None
tileset = shp.tileset_colors(TILE, TILE, [pg.rgb565(*color) for color in TILE_RGB])
world = pg.Tilemap(tileset, MAPCOLS, MAPROWS)
START = (TILE, TILE)
npc_x, npc_y = TILE, TILE
coin_spots, enemy_spots, door_tiles = [], [], []
for tile_y in range(MAPROWS):
for tile_x in range(MAPCOLS):
elif char == "E":
enemy_spots.append((tile_x * TILE, tile_y * TILE))
+elif char == "D":
+ door_tiles.append((tile_x, tile_y))
scene.add(world)
hud = ui.SceneLabel(scene, pg, terminalio.FONT, 4, 4, WHITE, BACKGROUND)
dialog = ui.TextBox(pg, terminalio.FONT, 8, H - 64, W - 16, 58, WHITE, NAVY, maxlines=4)
+NUMCOINS = len(coins)
class State:
+"""The whole game's mutable state -- one object, passed where a function needs it. __init__ calls
reset()."""
def __init__(self):
self.reset()
def reset(self):
self.facing = DOWN
self.coins = 0
self.hp = MAX_HP
self.hurt_cooldown = 0
+self.stage = 0 # 0 not started, 1 collecting, 2 door open
self.mode = EXPLORE # EXPLORE / DIALOG / WON
self.frame_count = 0 # frames elapsed (slimes chase every other frame)
self.overlay_shown = False # draw dialog/win modal once, not every frame
+def dialog_lines(st):
+if st.stage == 0:
+return ["Villager:", "Bring me all %d coins and" % NUMCOINS,
+"I'll open the shrine door.", "(press A)"]
+if st.stage == 1 and st.coins < NUMCOINS:
+return ["Villager:", "You have %d of %d coins." % (st.coins, NUMCOINS),
+"Keep looking!", "(press A)"]
+return ["Villager:", "The door is open.",
+"Seek the shrine within.", "(press A)"]
+def open_door():
+for (tile_x, tile_y) in door_tiles:
+ world.tile(tile_x, tile_y, PATH) # door -> path (no longer SOLID)
+ scene.invalidate()
camera_follow()
def main(): # loop in a function -> its names are fast locals (see step 6)
dt = 1 / 30 # seed the first frame; re-set from clock.tick() each loop
while True:
btn.poll()
st.frame_count += 1
+if st.mode == WON:
+if not st.overlay_shown: # draw ONCE -> no per-frame flicker
+ scene.refresh()
+ dialog.draw(scene.display, buffer_a, ["You reached the shrine!", "", "QUEST COMPLETE", "(press A)"])
+if audio:
+ audio.sfx(snd_win) # bright chime on the win
+ st.overlay_shown = True
+if btn.just_pressed(btn.A):
+ st.mode = EXPLORE
+ scene.invalidate()
+ clock.tick()
+continue
if st.mode == DIALOG:
if not st.overlay_shown: # draw ONCE -> no per-frame flicker
scene.refresh()
dialog.draw(scene.display, buffer_a, dialog_lines(st))
st.overlay_shown = True
if btn.just_pressed(btn.A) or btn.just_pressed(btn.B):
+if audio:
+ audio.sfx(snd_talk) # blip on dialog advance
+if st.stage == 0:
+ st.stage = 1
+elif st.stage == 1 and st.coins >= NUMCOINS:
+ st.stage = 2
+open_door()
st.mode = EXPLORE
scene.invalidate()
if st.hurt_cooldown > 0:
st.hurt_cooldown -= 1
if st.hurt_cooldown == HURT_FRAMES - FLASH_FRAMES: # end the hit-flash after 3 frames
hero.flash = None
else:
for enemy in enemies:
# 13px: slime radius (~7) + hero half-width (~8), i.e. they're touching
if enemy.visible and near(enemy, hero.x, hero.y, 13):
st.hp -= 1
st.hurt_cooldown = HURT_FRAMES
hero.flash = WHITE # white hit-flash on damage
if st.hp <= 0:
st.hp = MAX_HP
hero.move(START[0], START[1])
st.coins += 1
+# reach the shrine (goal tile) once the door is open
+if st.stage >= 2:
+# the tile under the hero's centre
+ center_tile_x = (hero.x + TILE // 2) // TILE
+ center_tile_y = (hero.y + TILE // 2) // TILE
+if world.tile(center_tile_x, center_tile_y) == GOAL:
+ st.mode = WON
+ st.overlay_shown = False
if near(hero, npc.x, npc.y):
hud.set("HP %d COINS %d/%d A:TALK" % (st.hp, st.coins, NUMCOINS))
if btn.just_pressed(btn.A):
st.mode = DIALOG
st.overlay_shown = False
else:
+if st.stage < 1 or st.coins < NUMCOINS:
+ objective = "FIND THE COINS"
+elif st.stage >= 2:
+ objective = "DOOR OPEN!"
+else:
+ objective = "RETURN TO NPC"
hud.set("HP %d COINS %d/%d %s" % (st.hp, st.coins, NUMCOINS, objective))
scene.refresh()
dt = clock.tick()
main()
```
[▶ Try it in the browser](/playground/?ex=03-quest-step8_quest) *** You now have a small playable RPG. You don’t have to keep hand-coding maps: the [web editor](/tools/editor/) lets you paint this map, place the hero/NPC/coins, and flag tiles (solid/coin/goal) visually, and `picogame_scene` loads it. Everything `step8` does by hand becomes data. See the [scene format](/scene-format/) reference, and the bundled `examples/picogame_platformer_scene.py` example for a complete scene loaded from data. *** **Start your own game from here.** You’ve built three games by hand — here’s the reusable shape to start every new one from: the **State + `main()` pattern** ([Game patterns](/concepts/patterns/)) and a ready-to-run **game skeleton** ([Snippets](/snippets/), or open it in the [Playground](/playground/?ex=game-skeleton)). Drop your own art, tiles, and rules into that frame and you’re off.
# Art & assets
> picogame keeps art separate from code: you can prototype with shapes generated in code, then swap in pixel art without changing the game logic.
picogame keeps **art separate from code**: you can prototype with shapes generated in code, then swap in pixel art without changing the game logic. This page shows how to bring your own art in, where to get it free, and how the tutorials do it. Each tutorial ends with a **`bonus_art.py`**: the finished game re-skinned with free [CC0](https://creativecommons.org/publicdomain/zero/1.0/) pixel art. Compare it with `step8` or `step9`; the gameplay stays the same while the bitmap construction changes. | Tutorial | bonus uses | from (CC0) | | ----------- | --------------------------------------------------------------------------------------------------- | ----------------------- | | 01-bounce | brick wall = a CC0 brick texture **recoloured** into the 4 row colours (ball/paddle stay generated) | Kenney **Tiny Dungeon** | | 02-starship | ship (pre-rotated 16 frames) + laser bullet | Kenney **Pixel Shmup** | | 03-quest | tileset (floor/lava/barrel/brick/door/chest) + hero + slime + coin | Kenney **Tiny Dungeon** | Run one:
```bash
python3 sim/run.py tutorials/03-quest/bonus_art.py --shot /tmp/out.png
```
## The pipeline: any PNG → a picogame sprite [Section titled “The pipeline: any PNG → a picogame sprite”](#the-pipeline-any-png--a-picogame-sprite) `tools/png2picogame.py` turns a PNG into a Python module exposing `bitmap(pg)`:
```bash
python3 tools/png2picogame.py hero.png -o hero_art.py --frames 8
```
then in a game:
```python
import hero_art
hero = pg.Sprite(hero_art.bitmap(pg), x, y) # drop-in replacement for any shp.*()
```
Options: * `--frames N` — the PNG is a **horizontal strip** of N equal-width frames (left→right). * `--tile WxH` — the PNG is a **grid** of W×H tiles; repacks them into a horizontal atlas (use for grid sheets; output frame count = number of tiles). * format is auto (PAL8 if ≤256 colours, else RGB565); transparency comes from the PNG’s **alpha** (alpha ≥128 = opaque); colours are emitted in ST7789 wire order. ### Check it before you ship [Section titled “Check it before you ship”](#check-it-before-you-ship) Before you flash anything, drop the new sprite into a throwaway test file and run it in the desktop simulator with a screenshot — that’s the fastest way to confirm the palette, scale, and transparency came out right:
```bash
python3 sim/run.py .py --frames 1 --shot /tmp/art.png
```
If it looks wrong or is too big, here’s why: soft/anti-aliased edges quantise badly (you’ll see fringe or speckle around the sprite — redraw with hard alpha), and a source with >256 colours silently falls back to RGB565, which doubles the RAM the bitmap costs (cut the palette to keep it PAL8). ## Layout rules [Section titled “Layout rules”](#layout-rules) * **Horizontal strip**, equal-width frames. (Grids: use `--tile WxH`, or in Aseprite export `Sheet Type: Horizontal`, Trim OFF.) * **Transparency = the alpha channel** (one on/off key, no blending). Hard pixel edges; avoid soft/anti-aliased alpha — it quantises badly. * **Tilesets:** the engine draws tile value `v` as frame `v`, so make **frame 0 empty/ transparent** and put your tiles at 1, 2, 3… (that’s how `bonus_art` maps map values to tile graphics). * **Rotation:** for a constant stepped spin, you can bake rotations into frames; use `sprite.angle` for continuous or occasional runtime rotation. The Starship ship is the Kenney sprite rotated into 16 frames offline (see how `tools/`-side scripts build the strip), then `ship.frame = angle`. ## Using your own Aseprite art [Section titled “Using your own Aseprite art”](#using-your-own-aseprite-art) `File → Export Sprite Sheet → Sheet Type: Horizontal`, **Trim OFF**, Padding 0 → that’s exactly the strip `png2picogame` wants. Design in **Indexed** mode with a small palette (or RGBA with a transparent background). Animation **Frame Tags** can drive frame ranges. ## Where to get more (free) [Section titled “Where to get more (free)”](#where-to-get-more-free) * **[kenney.nl](https://kenney.nl)** — everything CC0, no attribution. (We used Pixel Shmup and Tiny Dungeon.) * **[Pixellab.ai](https://www.pixellab.ai/)** — generate pixel-art sprites and tilesets from a text prompt, handy for quick placeholders or a custom look. Check its export terms before you ship. * Recolouring CC0 art is allowed: the Bounce bricks use one grey Tiny Dungeon tile multiplied into four colours to match the game’s palette. * **[itch.io](https://itch.io)** (CC0 filter) and **[OpenGameArt](https://opengameart.org)** (filter CC0). Avoid CC-BY-SA / GPL art. ## Ship assets as .mpy (faster load, less RAM) [Section titled “Ship assets as .mpy (faster load, less RAM)”](#ship-assets-as-mpy-faster-load-less-ram) A baked-asset module is just Python, so you can precompile it to `.mpy` bytecode exactly like the helper libs — the device skips parsing the source, so it loads faster and uses less RAM (the same win `tools/build_mpy.sh` gives the libs). How:
```bash
mpy-cross your_assets.py -o your_assets.mpy
```
then copy the `.mpy` to `CIRCUITPY/lib/`. The mpy-cross build **must match the board’s CircuitPython version** (see `tools/build_mpy.sh` for the version it uses). Gotcha: a stale `.mpy` **shadows the `.py`** at import, so re-generate it after any edit — otherwise the device keeps loading the old art. ## One file with all your assets [Section titled “One file with all your assets”](#one-file-with-all-your-assets) For a game with several shared assets, keep related baked bitmaps and palettes in a **single module** such as `assets.py` that the game imports once, rather than scattering them across many tiny files — fewer imports, one place to manage, and one `.mpy` to ship. * `tools/pack_assets.py` does exactly this in one command: point it at a PNG glob (or a folder) and it packs them all into a single module with **one shared palette** reused by every bitmap (the RAM win), each exposed as a ready-to-use named `Bitmap`. Add `--mpy` to also ship the bytecode.
```bash
python3 tools/pack_assets.py art/*.png -o assets.py --mpy # then: import assets; pg.Sprite(assets.ship)
```
(If the combined colours overflow 255 it falls back to per-asset palettes, and any image with >255 of its own colours is emitted as RGB565 — same auto behaviour as `png2picogame`.) * `tools/png2picogame.py` converts a single PNG into a bitmap module — use it when you want just one image (it also has `--frames`, `--tile`, `--rle`, dithering, dedup). * For a whole tile/scene-based level, `tools/scene_build.py` bakes the assets **and** the layout into one `SCENE` file that `picogame_scene.load()` reads — one file for the entire level. ## Licensing / credits [Section titled “Licensing / credits”](#licensing--credits) All bundled art is **CC0** (public domain, no attribution required). The source PNGs we used live in `assets/kenney/` with `assets/kenney/CREDITS.txt`. Even for CC0 it’s good manners to keep a credits note when you publish a game.
board.
## What is picogame? [Section titled “What is picogame?”](#what-is-picogame) **picogame is a small 2D game engine for microcontrollers like the RP2040**, the chip inside the [PicoPad](https://picopad.eu) pocket console. You write your game **in Python** and try it in your browser or the desktop simulator. When it is ready, copy it to a [supported board](/supported-hardware/). You do not need C, a firmware build, or hardware to start. ## See it in action [Section titled “See it in action”](#see-it-in-action) A whole game, designed and built with picogame: [A game built with picogame](https://player.mediadelivery.net/embed/689358/321ad936-1df9-4397-b552-2fabf4892da1?autoplay=false\&loop=false\&muted=false\&preload=false\&responsive=true) ## What picogame gives you [Section titled “What picogame gives you”](#what-picogame-gives-you) Start in your browser in five minutes, then run the same code on the device — picogame handles the rest: A complete engine Sprites, tilemaps, collisions, a camera, sound, and text are built in — the parts every game needs, ready to use. Smooth motion at 30+ FPS The engine repaints only what changed each frame, so games stay fluid — even on the modest RP2040. The low-level work is done The hard parts — display driver, blitter, text, collisions — run in native C. You write your game in plain Python. Built for small RAM Built to use as little memory as it can — full-screen effects need no extra buffer, so even big scenes fit the RP2040’s small RAM. ## What can you build? [Section titled “What can you build?”](#what-can-you-build) Games across several genres, runnable in your browser and on supported devices:  **Breakout**  **Platformer**  **Pseudo-3D racer**  **Vertical shooter**  **Top-down RPG**  **Card roguelite** Sprites, scrolling tilemaps, a moving camera, particles, sound, and saved high scores. **[See all the games — and play them in your browser →](/examples/)** ## Try it now, right in your browser [Section titled “Try it now, right in your browser”](#try-it-now-right-in-your-browser) ## Get it on your device [Section titled “Get it on your device”](#get-it-on-your-device) Two steps and you’re playing: flash the firmware, then copy a ready-made pack of games onto the drive. A [launcher](/launcher/) boots so you can pick a game and play — no coding needed. [⬇ 1. Download firmware](/supported-hardware/#download-firmware)Pick the .uf2 for your board (PicoPad, Fruit Jam, PicoSystem, plain Pico, ...) and drag it onto the BOOTSEL drive. [⬇ 2. Get the games pack](/start/quickstart/)Choose the pack for your board — RP2040, RP2350, or Fruit Jam — extract onto CIRCUITPY, and a game menu boots. ## Pick your path [Section titled “Pick your path”](#pick-your-path) [🌱 New to making games](/start/first-game/)Start from zero. Get something moving in five minutes, no hardware needed, then build up step by step. [🔁 Made games before](/concepts/coming-from/)Coming from Pygame or PICO-8? The concept map translates what you already know into picogame's names, then points you to the reference. [🧰 Know CircuitPython](/concepts/coming-from/#coming-from-displayio)Fluent in displayio, or have a screen-based project to bring over? The displayio bridge takes you from screens to games. [🛠️ Already building with picogame](/reference/)Straight to the API cheat sheet, the feature guide, and how to do things efficiently (RAM, framerate, deploy). [🤖 Building with an AI agent](/ai-agents/)Give your coding agent the game-design skill or point it at /llms.txt — it'll design and build picogame games with the right patterns. New to game words like *sprite* or *tilemap*? Start with the **[Glossary](/concepts/glossary/)**. ## Where the code lives [Section titled “Where the code lives”](#where-the-code-lives) **Clone the main repository for the simulator, games, tutorials, and helper libraries.** [👾 picogame →](https://github.com/MakerClassCZ/picogame)The main repo: the desktop simulator, ready-to-play games, step-by-step tutorials, and the picogame\_\* helper libraries. The other repositories serve specific deployment and compatibility needs: [📚 picogame-libs](https://github.com/MakerClassCZ/picogame-libs)The helper libraries on their own, when you want them à la carte or to follow their releases. [🐍 circuitpython (fork)](https://github.com/MakerClassCZ/circuitpython)The firmware source, only to build a .uf2 for your own board (the PicoPad's is prebuilt). [🕹️ picogame-stage](https://github.com/MakerClassCZ/picogame-stage)A Stage compat layer for running existing stage / ugame games on picogame.
# Coming from another engine
> Map what you already know from Pygame, displayio, PICO-8 or Arcade onto picogame — and see what the engine does and doesn't do.
Use the table below to map concepts from Pygame, `displayio`, PICO-8, or Arcade onto picogame. If you know `displayio`, continue with the [term-by-term bridge](#coming-from-displayio). See [How picogame works](/concepts/how-it-works/) for the underlying model and the [API reference](/reference/) for signatures. ## Concept map [Section titled “Concept map”](#concept-map) | You want… | Pygame | displayio (CircuitPython) | PICO-8 | **picogame** | | -------------------- | ------------------ | ------------------------- | --------------------- | --------------------------------------------------------------------------------------- | | An image | `Surface` | `Bitmap` + `Palette` | sprite sheet | `pg.Bitmap(data, w, h, …)` (PAL8 or RGB565, multi-frame atlas) | | A movable object | `sprite.Sprite` | `TileGrid` | `spr()` | `pg.Sprite(bitmap, x, y)` (anchor, flip, frame, **scale**, **angle**) | | The scene/world | `Group`/manual | `Group` | the screen | `pg.Scene(...)` — retained, dirty-rect | | Draw it | `screen.blit()` | add to `Group` | `spr()`/`map()` | `scene.add(obj)` once; then `scene.refresh()` per frame | | A tiled level | your own | `TileGrid`+`Bitmap` | `map()` | `pg.Tilemap(tiles, cols, rows)` — `tile(x, y, value)` | | A scrolling camera | manual offset | `Group.x/y` | `camera()` | `scene.set_view(ox, oy)` (world bigger than screen) | | The main loop | `while`, `flip()` | `while`, `refresh()` | `_update()`/`_draw()` | `while: buttons.poll(); …; scene.refresh(); clock.tick()` | | Input | `pygame.event` | `keypad`/pins | `btn()` | `picogame_input.Buttons` → `is_pressed()` / `just_pressed()` (`poll()` for the bitmask) | | Sound | `mixer` | `audiocore`/`audiopwmio` | `sfx()`/`music()` | `picogame_audio` (`tone()`, `.wav`) | | Collision | `Rect.colliderect` | manual | manual | `pg.collide(...)` / `a.overlaps(b)` / `a.near(b, r)` (zero-alloc, off sprites) | | Text | `font.render` | `label` | `print()` | `picogame_ui` HUD / `picogame_font` → Bitmap | | Many bullets/enemies | sprite groups | manual | manual | `picogame_pool.Pool` (fixed pool, no per-frame alloc) | | Transforms | `transform.rotate` | limited | `spr` flips | `sprite.scale` (float) + `sprite.angle` (deg), nearest-neighbour | ## Coming from displayio [Section titled “Coming from displayio”](#coming-from-displayio) If you’ve used CircuitPython’s `displayio`, you already know most of picogame; it’s the same world with games-shaped names and the redraw bookkeeping done for you: | In `displayio` you used… | In picogame it’s… | | ------------------------------------------ | ------------------------------------------------------------------------------------------------------------------ | | `displayio.TileGrid` — a positioned bitmap | a **[Sprite](/concepts/glossary/)** — but it also flips, scales, rotates and animates | | `displayio.Group` — a stack of things | a **[Scene](/concepts/glossary/)** — holds [layers](/concepts/glossary/), painted in order | | `while True: display.refresh()` | the **[game loop](/concepts/glossary/)**: read input → update → `scene.refresh()` → wait | | `bitmap` + `palette` + RGB565 | the same — but build colours with `pg.rgb565(r, g, b)` ([wire-order](/concepts/glossary/)), never a raw `0xRRGGBB` | | managing redraws by hand | nothing — picogame is **[retained mode](/concepts/glossary/)**: you change objects, it repaints only what moved | The main shift is that you describe the scene instead of driving each display update yourself. ## The main difference: retained mode and dirty regions [Section titled “The main difference: retained mode and dirty regions”](#the-main-difference-retained-mode-and-dirty-regions) Many 2D engines are **immediate mode**: every frame you clear the screen and redraw everything. picogame is **retained mode**: you build a `Scene` of objects once, then each frame you *mutate* them and call `scene.refresh()`. The engine figures out which rectangles changed and **redraws only those**. On SPI displays, only those pixels are sent to the panel. Framebuffer targets such as Fruit Jam repaint the same regions in scanout memory. In both cases, the scene tracks the changes. One consequence: moving or swapping a sprite is tracked automatically, but an **in-place** pixel edit needs a `sprite.touch()` to register (see [effects](/helpers/effects/)). ## What picogame can do [Section titled “What picogame can do”](#what-picogame-can-do) * **Arbitrary-size sprites** with anchors, flips, multi-frame animation atlases. * **Runtime scale and rotation** per sprite (nearest-neighbour affine, no FPU needed), about an anchor. * **Tilemaps** you read and write at runtime (use them as game boards, not just backgrounds). * A **moving camera** (`set_view`) over a world larger than the screen, with fixed (HUD) layers. * **Particles**, a drawing **Canvas** (retained shapes), and **StripDraw** (full-frame effects without a retained pixel buffer). * **Audio** (PWM tones + `.wav`), **NVM save** for high scores/settings, a bundled **font** + HUD helpers. * A **desktop simulator**: the same game code runs on your PC (headless screenshots or a live window), so you build and debug without hardware. ## Design within the limits [Section titled “Design within the limits”](#design-within-the-limits) * **RAM depends on the board and firmware.** Large pixel buffers and sprite sheets dominate the budget. Tile large worlds, stream large sheets, and use StripDraw when you do not need retained pixels. See [Fit it in RAM](/memory/) for measured budgets and alternatives. * **One display, no GPU.** No shaders, no alpha blending. Transparency is a single transparent index/colour; for a darken effect there’s a `shadow` mode. Transforms are nearest-neighbour (crisp at integer scales, shimmery at fractional). * **Paletted art.** PAL8 is 1 byte/pixel (cheap); RGB565 is 2 bytes/pixel. Build colours with `rgb565(r, g, b)`, never raw `0xRRGGBB`. * **Few buttons.** D-pad + A/B (and sometimes X/Y). Design controls accordingly. * **Ship `.mpy`, not big `.py`.** Compiling a large source file on-device can `MemoryError`; pre-compile to `.mpy`. See [Run on hardware](/hardware/). ## Start here [Section titled “Start here”](#start-here) 1. Read [How picogame works](/concepts/how-it-works/) for the loop and dirty-region model. 2. Copy the [first game](/start/first-game/) and run it in your browser or the [desktop simulator](/simulator/) to feel the API. 3. Keep the [API cheat sheet](/reference/) and [feature guide](/features/) open while you build. 4. Adapt patterns from the [examples](/examples/) to your genre.
# Drawing paths — which to use
> Choose a retained or immediate drawing path for worlds, HUDs, panels, and one-off screens.
Choose the path by when the content changes and whether it needs stored pixels: * Use a retained `Scene` for a world that persists between frames. * Use `pg.render()` for a one-off screen or a reserved HUD band. * Use `StripDraw` when pixels can be regenerated instead of stored in a Canvas. ## One compositor, two output backends [Section titled “One compositor, two output backends”](#one-compositor-two-output-backends) Every draw uses the same layer compositor. On SPI targets, it walks each dirty region in horizontal **strips** and sends them to the panel. On scanout targets such as Fruit Jam, it composites dirty regions directly into the framebuffer. There the buffer’s colour depth decides the pixel format the compositor writes: a 16-bit framebuffer takes RGB565 as-is, while an 8-bit one (the only depth picodvi offers at 640×480) has each finished band quantized 565→332 as it’s published — you still author in `pg.rgb565(...)` either way. The layer choice determines how much additional pixel memory your game retains. A full-screen `StripDraw` keeps no pixel buffer; a 320×240 RGB565 `Canvas` keeps about 150 KB. The scanout framebuffer, where present, belongs to the display backend and is separate from both.  ## Two drivers (how drawing is triggered) [Section titled “Two drivers (how drawing is triggered)”](#two-drivers-how-drawing-is-triggered) | Driver | Use it for | Repaints | | ------------------------------------------------------------------------------- | -------------------------------------------------------------------------------------------------------------------------------------------------------------------- | ---------------------- | | **`scene.refresh()`** — retained, dirty-rect | the persistent game world: add layers, mutate them, refresh. Camera (`set_view`), `fixed` (camera-independent) layers, reserved bands (`top=/bottom=/left=/right=`). | only the dirty regions | | **`pg.render(display, items, buffer, x0,y0,x1,y1, *, background)`** — immediate | a one-shot push, on demand, *outside* a scene: a HUD in a reserved band, a title / level-done / game-over screen. | when you call it | Both drivers accept the **same layer kinds**: a `pg.render` list can hold Sprites, a `StripDraw`, a `Canvas`, a `Tilemap`, or `Particles`, exactly like the scene. ## Five layer kinds (what you draw) — and their RAM [Section titled “Five layer kinds (what you draw) — and their RAM”](#five-layer-kinds-what-you-draw--and-their-ram) | Kind | RAM | Use for | | ----------------------------- | ------------------------------------------------------------------ | ---------------------------------------------------------------------------------------------------------------------------------------------------------------------------------------------------------------------------------------- | | **Sprite** (wraps a `Bitmap`) | the bitmap: PAL8 = `w*h` (1 B/px), RGB565 = `w*h*2` | moving objects, characters, bullets | | **Tilemap** | `cols*rows` (1 B/cell) + the tileset | big static / scrolling boards — very cheap per area | | **Canvas** | `w*h*2` **retained** | a surface drawn **occasionally and reused** — a static panel, a dialog box | | **StripDraw** | **0 retained pixel bytes** (a view onto the current render target) | **dynamic full-frame / strip content** — sky, road, gradients, **and dynamic HUD / screen text**. Repaints every frame by default, or **on demand** (`always_dirty=False` + `.invalidate()`) for a buffer-less panel inside a live scene | | **Particles** | a fixed pool | sparks, trails, pops |  ### Text rides on these [Section titled “Text rides on these”](#text-rides-on-these) * **`Canvas.text(x, y, s, fg, font, bg=None)`** composites glyphs in C straight into a surface: no glyph cache, no per-call Bitmap/Sprite. The surface can be a **retained Canvas** *or* a **`StripDraw` view** (which points at the live strip). The same one method covers both. * **`picogame_font.render_text(...)`** rasterizes a string into a PAL8 `Bitmap` you show as a Sprite, good for **moving** text (floating damage numbers), where a sprite is what you want anyway. Dynamic text drawn through a `StripDraw` view retains no glyph or panel bitmap. Its callback still uses CPU whenever the region repaints. ### Pseudo-3D rides on these too [Section titled “Pseudo-3D rides on these too”](#pseudo-3d-rides-on-these-too) * **`Canvas.mode7(...)`** fills the rows below a horizon with a **Mode-7 perspective floor** of a power-of-2 texture — draw it into a **`StripDraw` view** for a full-screen ground plane at **0 retained RAM** (the `picogame_mode7.Camera` helper computes its fixed-point args from a camera pose). * **`picogame_ray.Raycaster`** builds first-person walls the same way — a DDA cast per column, each wall a `fill_rect` column into a `StripDraw` view. Both are the pseudo-3D case of “dynamic full-frame content”, so they live on StripDraw (never a 150 KB full-screen Canvas). See [Pseudo-3D](/helpers/pseudo-3d/). ## The decision matrix (HUDs, panels, screens) [Section titled “The decision matrix (HUDs, panels, screens)”](#the-decision-matrix-huds-panels-screens) | What | Right path | RAM | | --------------------------------------------------------------------- | ----------------------------------------------------------------------------------------------- | ----------------------------------------------------------- | | **Dynamic, thin HUD** (score / lives bar) | `StripDraw` (+ `view.text`), via `scene` or `pg.render` | **0 retained pixels** | | **Static, large panel** (side panel, title art, help text) | a **`Canvas` drawn once** (`canvas.text`), kept as a layer | `w*h*2` (justified — drawn once, reused, not re-rasterized) | | **Static panel + a few live numbers** | static `Canvas` for the fixed part **+** a small `StripDraw` for the numbers | small | | **A panel/dialog/menu inside a live scene** (repaints only on change) | **on-demand `StripDraw`** (`always_dirty=False`, `.invalidate()` on change), added to the scene | **0 retained pixels** | | **One-off screen** (title / level-done / game-over) | `pg.render([stripdraw])` — procedural bg + `view.text`, no scene needed | **0 retained pixels** | | **Moving text** (floating damage numbers) | `picogame_font.render_text` → Sprite | text-sized bitmap | The trap to avoid: **a `Canvas` band for a *dynamic* HUD.** A `Canvas` is retained `w*h*2`; for a 320×16 bar that is 10 KB that lives forever, and for a full-height side panel far more. A dynamic HUD is dynamic strip content, so it belongs on a **`StripDraw`**, re-rasterized in C when it changes. Reach for a `Canvas` only when the content is **static** (drawn once and reused). A second trap: **immediate `pg.render` over a live retained scene.** The scene doesn’t know `render()` changed the pixels, so its next `refresh()` repaints only its own dirty rects and leaves stale fragments of your overlay on screen. If the rendered region overlaps the scene’s play rect (pause screen, menu, cutscene, banner), call **`scene.invalidate()`** afterwards — or use **`picogame_game.overlay(...)`**, which is `pg.render` + `scene.invalidate()` in one call. HUD bands outside the play rect (the `top=`/`bottom=` reserves) don’t need this: the scene never touches them. ## A HUD without a retained panel buffer [Section titled “A HUD without a retained panel buffer”](#a-hud-without-a-retained-panel-buffer) `picogame_ui.HudBar` already does this: it is a buffer-less `StripDraw` pushed via `pg.render` on change. The same pattern by hand, for a reserved-band HUD:
```python
scene, bufA, bufB = picogame_game.setup(background=BG, strip_h=BAR, top=BAR)
hud = ui.HudBar(pg, board.DISPLAY, bufA, 0, 0, W, BAR, BG) # 0 retained RAM
score = hud.label(FONT, 4, 3, INK, "SCORE 0") # returns a text handle
# ... on a change:
score.set("SCORE %d" % pts)
hud.draw() # re-composites in C, no cache
```
**Format on change, not per frame.** `.set()` gates the *redraw* (it no-ops on an unchanged string), but the `"%"`-formatting itself allocates a fresh string every call — done every frame it is pure GC churn. Format at the place the value *changes* (as above), or if you poll in the loop, guard with shadow ints: `if pts != shown_pts: shown_pts = pts; score.set("SCORE %d" % pts)`. For continuously moving values, quantize to the displayed unit first (seconds, percent). Or fully by hand (e.g. a title screen, no scene, no buffers of your own):
```python
def draw_title(view, vx, vy, vw, vh):
view.clear(SKY)
view.text(60 - vx, 90 - vy, "PRESS A", INK, FONT) # view-local = screen - (vx, vy)
title = pg.StripDraw(draw_title, 0, 0, W, H)
pg.render(board.DISPLAY, [title], bufA, 0, 0, W, H, background=SKY) # 0 retained pixels
```
`view`-local `(0,0)` is screen `(vx, vy)`, so to draw at a screen position subtract `(vx, vy)`. ## On-demand repaint: a buffer-less panel inside a live scene [Section titled “On-demand repaint: a buffer-less panel inside a live scene”](#on-demand-repaint-a-buffer-less-panel-inside-a-live-scene) A `StripDraw` defaults to repainting **every frame** (`always_dirty=True`), right for a sky/road that changes constantly. But construct it with **`always_dirty=False`** and it repaints only when you call **`.invalidate()`** (or another dirty layer overlaps it). That gives a panel that lives inside a scene\*\* (a dialog box, status panel, or menu) which sits idle (no re-rasterize, no re-push) until its content actually changes, then repaints once. It is the buffer-less alternative to a retained `Canvas` for content that is mostly static but must update occasionally.
```python
panel = pg.StripDraw(draw_panel, x, y, w, h, always_dirty=False) # idle until invalidated
scene.add(panel, fixed=True)
# ... when the text changes:
panel.invalidate() # repaints once on the next refresh
```
This is how `picogame_ui.SceneBox` and `SceneMenu` work: a buffer-less in-scene dialog or menu that repaints on `show`/`hide`/`set_line`, not every frame. ## Rules of thumb [Section titled “Rules of thumb”](#rules-of-thumb) * **Moving object → Sprite. Big board → Tilemap. Dynamic full-frame/strip or HUD → StripDraw. Occasional static panel → Canvas (drawn once).** * A dynamic HUD never needs a `Canvas`. If you typed `pg.Canvas(W, BAR, ...)` for a HUD, switch to a `StripDraw`. * A `Canvas` is justified only when the content is static and reused; then the buffer pays for itself by not re-rasterizing each frame. * Both `scene.refresh()` and `pg.render()` take every layer kind, so choose the driver by *when* it should repaint (every dirty refresh vs. on demand), not by what you need to draw. ## See also [Section titled “See also”](#see-also) * Fighting a `MemoryError`? See [Memory & RAM](/memory/) for the budget, how to measure it, and the arena fix. * Exact signatures for `Canvas`, `StripDraw`, `pg.render` and `Sprite`: the [Reference](/reference/). * Ready-made HUD / dialog / menu widgets built on these paths: [Text & UI](/helpers/text-ui/). * Backing a `Canvas` with reused memory instead of a fresh buffer: [Saving & memory](/helpers/data/) (`picogame_arena`).
# Glossary
> Plain-language definitions of the game-making words used across these docs — written for people who know CircuitPython but are new to games.
This glossary explains the game-development terms used throughout the docs. Where useful, it connects them to concepts from CircuitPython `displayio`. ## Sprite [Section titled “Sprite”](#sprite) A movable picture: the player, an enemy, a bullet, a coin. It wraps a `Bitmap` and has a position you change each frame. Closest `displayio` analogy: a single `TileGrid` you reposition, except a picogame sprite also flips, scales, rotates, and animates. ## Layer [Section titled “Layer”](#layer) One thing the scene draws, stacked back-to-front like sheets of glass. A sprite, a tilemap, a canvas and so on are all “layer kinds”; the order you add them is the order they’re painted. ## Tilemap [Section titled “Tilemap”](#tilemap) A big area built from a small set of repeating tile pictures (a background, a brick wall, a level grid), stored as **1 byte per cell** (the tile number), so it’s far cheaper than one sprite per cell. Like a grid of `displayio` `TileGrid` cells. ## Scene and retained mode [Section titled “Scene and retained mode”](#scene-and-retained-mode) picogame is **retained mode**: you build the objects once with `scene.add(...)`, and the engine *remembers* them. Each frame you change what moved and call `scene.refresh()`; you don’t redraw everything yourself. (The opposite, **immediate mode**, means you clear and redraw the whole screen every frame by hand.) A `Scene` is the container holding all your layers. ## Dirty rectangle [Section titled “Dirty rectangle”](#dirty-rectangle) The region that changed since the last frame. Because the scene remembers everything (above), it can work out which regions moved and **repaint only those**. “Dirty” means “changed and needs repainting.” ## Blit [Section titled “Blit”](#blit) To copy a picture’s pixels onto the screen (or into another drawing surface). `displayio` hides this behind Groups and TileGrids, so you may never have typed it; in picogame it’s the basic “stamp this bitmap here” operation. ## Game loop [Section titled “Game loop”](#game-loop) The heartbeat of every game: each frame, **read input → update the world → draw → wait a bit**, then repeat. picogame games are all this same shape. ## Frame [Section titled “Frame”](#frame) This word means two different things, so watch the context: * a **screen frame** — one turn of the game loop (one repaint), as in “each frame you move the player”; * an **animation frame** — one picture in a bitmap’s strip of pictures, as in “advance `sprite.frame` to the next walk pose.” ## Anchor [Section titled “Anchor”](#anchor) The pivot point a sprite scales and rotates around, given as fractions of its size: `(0.5, 0.5)` is the centre, `(0.5, 1.0)` the bottom-centre. Its position and rotation are measured about this point. ## AABB [Section titled “AABB”](#aabb) A box overlap test, short for *axis-aligned bounding box*, a plain (non-rotated) rectangle drawn around a sprite. “Do these two AABBs overlap?” is the cheapest way to check if two things collide. ## Object pool [Section titled “Object pool”](#object-pool) A fixed set of sprites you create **once** and recycle (spawn / free) instead of making and deleting them mid-game. Creating and destroying objects each frame fragments the tiny RAM; a pool avoids that. Reach for `picogame_pool` for bullets, enemies, coins, anything that comes and goes. ## Wire-order colour [Section titled “Wire-order colour”](#wire-order-colour) The byte order the display panel expects over SPI, which is **not** the same as a plain `0xRRGGBB` literal. Always build colours with `pg.rgb565(r, g, b)`; passing a raw hex literal gives wrong colours. (This is the one colour footgun coming from `displayio`.) ## Juice [Section titled “Juice”](#juice) The small, cheap touches that make a game *feel* good: a hit-flash, a screen shake, a spark, a beep on the key action. Standard game-maker slang; `picogame_fx` provides most of it. ## Parallax [Section titled “Parallax”](#parallax) Background layers that scroll **slower** than the foreground, creating an illusion of depth (think of distant hills drifting by slower than the roadside). ## Coyote time and jump buffering [Section titled “Coyote time and jump buffering”](#coyote-time-and-jump-buffering) Two small fairness tricks: **coyote time** lets the player still jump for a few frames after walking off a ledge; **jump buffering** honours a jump pressed just before landing. Both make controls feel forgiving (`picogame_input.Timer`). ## Ghost lap [Section titled “Ghost lap”](#ghost-lap) In racing games, a translucent replay of your best lap shown on the track so you can race against your own record. ## State machine [Section titled “State machine”](#state-machine) The game switches between named modes (title → playing → game-over). One `state` variable decides what updates and draws each frame. ## Stride [Section titled “Stride”](#stride) How many **pixels** one row of a bitmap’s source data spans. Leave it `0` and the engine assumes the data is tightly packed (one row is `width × frames` pixels, the full horizontal atlas); set it only when you’re pointing at a **sub-window of a larger image**, where each row in memory is wider than the part you’re drawing. A constructor argument on `Bitmap(...)`. ## StripDraw and Canvas [Section titled “StripDraw and Canvas”](#stripdraw-and-canvas) Two ways to draw custom pixels, traded off by memory (see [Drawing paths](/concepts/drawing-paths/) for the full picture): * **Canvas** — a retained pixel buffer (`width × height × 2` bytes) you draw onto and reuse; right for a panel that changes rarely. * **StripDraw** — a buffer-less layer that draws into each live strip. It retains **0 pixel bytes**, but its callback still uses CPU each time the region repaints. Use it for full-frame effects and dynamic HUD or text.
# How picogame works
> Scenes, the game loop, and dirty-region rendering in picogame.
picogame keeps your scene objects between frames. You change their state, call `scene.refresh()`, and the engine redraws the affected regions. This page explains that model and the game loop around it. New to game terms? Any unfamiliar word here is defined in the [Glossary](/concepts/glossary/). ## The big idea: describe the scene, then say what moved [Section titled “The big idea: describe the scene, then say what moved”](#the-big-idea-describe-the-scene-then-say-what-moved) Most of a game’s screen doesn’t change from frame to frame: the background stays put, only a few things move. picogame is built around that. You **describe a scene once** (these sprites, this tilemap, this background), and then each frame you just **change what moved** (`ball.x += 3`) and call `scene.refresh()`. The engine works out which little rectangles actually changed (each a [dirty rectangle](/concepts/glossary/)) and **redraws only those**; it doesn’t repaint the whole screen. Nothing moved? Nothing is sent to the display. For the levers that keep a game at a steady 30 FPS as it grows, see [Performance](/performance/). The work usually follows how much *changed*, not the full screen size. Camera movement and always-dirty layers are the main exceptions because they repaint the play area. The engine tracks the regions for you.  ## The pieces you build a scene from [Section titled “The pieces you build a scene from”](#the-pieces-you-build-a-scene-from) These are the main objects you can put in a scene: * **Sprite** — a movable picture: the player, an enemy, a bullet, a coin. It has a position, can be flipped, animated through frames, scaled and rotated. * **Tilemap** — a big grid built from a small set of tile pictures: a level, a tiled background, a brick wall. Cheap, because the grid stores one number per cell instead of every pixel. * **Bitmap** — the actual picture a sprite or tile draws. You can generate one in code (a circle, a rectangle) or convert it from a PNG. * **Scene** — the container that holds all of the above and draws them in order. Each thing it draws is a [layer](/concepts/glossary/) (one thing the scene draws, stacked back-to-front); you add things to it, then refresh it each frame. * A **camera** — the scene has a viewpoint you can move (`set_view`), so the world can be bigger than the screen and scroll as the player walks. There are a few more specialised pieces (a drawing **Canvas**, full-frame **StripDraw** effects, **Particles**); you’ll reach for those once you need them. See the [feature guide](/features/) for “which one when”. ## The game loop [Section titled “The game loop”](#the-game-loop) Every picogame game is the same shape: 1. **Read input** — which buttons are down. 2. **Update** — move things, run game rules, spawn and remove objects. 3. **Refresh** — `scene.refresh()` draws the changes. 4. **Wait** — a clock caps the framerate so the game runs at a steady speed.
```python
while True:
buttons.poll() # 1. input
ball.x += speed # 2. update
scene.refresh() # 3. draw what changed
clock.tick() # 4. hold the framerate
```
 Collisions, sound, scoring, and other game rules belong in step 2. This 4-step shape is universal. Once a game has more than one screen (title / play / game-over) and needs to restart, hold its state in one object and move this loop into a `main()` function — see [Game patterns](/concepts/patterns/) for that shape and why. ## You build before touching hardware [Section titled “You build before touching hardware”](#you-build-before-touching-hardware) The same game code runs off the device, so you design, debug and iterate there first. The browser-based option is the **Playground**; for hands-on local work there’s also a **[desktop simulator](/simulator/)** (headless screenshots for quick checks, or a live window). All three environments share the game-facing API - but not the runtime: RAM limits, timing, input feel, audio and panel-specific effects only exist for real on the device. Smoke-test on hardware regularly during development, not once at the end. ## Where to go next [Section titled “Where to go next”](#where-to-go-next) New here? Build [your first game](/start/first-game/), then continue with the tutorials. Use the feature guide and reference when you need to choose a tool or check a signature. **Already know an engine (or `displayio`)?** Skip the tutorial and jump to the [concept map](/concepts/coming-from/) and [glossary](/concepts/glossary/), then the [reference](/reference/). * **[Make your first game](/start/first-game/)** — put this into practice in five minutes. * **[The tutorials](/tutorials/)** — three games, one idea per step. * **[Feature guide](/features/)** — once you know the shape, this is “which tool for which job”. * **[API reference](/reference/)** — the precise, complete list when you need exact signatures.
# Making it fun
> Tune a working game loop through clear actions, immediate feedback, paced difficulty, and a controlled scope.
Once the game loop works, tune four things: the player’s main action, feedback, difficulty, and scope. The bar is not “it runs” — it’s **fun in the first 10 seconds**. The [patterns](/concepts/patterns/) page provides code for the ideas below. ## Start with the main action [Section titled “Start with the main action”](#start-with-the-main-action) Before naming the verb, decide the fantasy — what the player gets to *be*. “Catch” is a different game as a frantic short-order cook, a goalie, or someone saving falling stars. Pick the fantasy, then name the verb in one word: jump, shoot, steer, match, dodge. Build the loop around it: **act → see the result → respond → act again under changed conditions**. A loop this tight should be legible just by *watching* it for ten seconds, and fun with no art and no sound. Prototype with generated shapes from `picogame_shapes` before committing to final art — if the action isn’t fun as a rectangle chasing a circle, better art won’t save it. Fix the rules and feedback first. ## Give actions immediate feedback [Section titled “Give actions immediate feedback”](#give-actions-immediate-feedback) Feedback connects an input or collision to a result the player can see and hear, applied in the same update that handles the event — a delayed response reads as sluggish even at 30 fps. Not all feedback is equally cheap. Roughly in order of fun gained per byte spent: 1. **A sound on the main action** — the single best return for the least code; a beep confirms what the eye already saw. The simplest beep needs no `.wav` file:
```python
beep = picogame_audio.tone(880, 90) # a short high blip, built once
audio.sfx(beep) # fire it the frame the catch happens
```
What carries the meaning is the *contour* — high reads as good, low as bad. The ready-made [`picogame_sfx`](/helpers/audio/) kit gives you both: Catch (a light blip): [](/audio/sfx_blip.mp3)\ Miss (a low, downward tone): [](/audio/sfx_hurt.mp3) 2. **A short hit-flash** — set a sprite’s opaque pixels to flat white for 1-3 frames, then clear it. Almost free:
```python
spr.flash = pg.rgb565(255, 255, 255) # on impact
spr.flash = 0 # 2 frames later: back to normal
```
 3. **A restrained screen shake** — `picogame_fx.Shake`, a few pixels, decaying fast. More reads as noise, not impact:
```python
shaker.add(0.6) # on a hit — trauma is squared, so small events barely shake
shaker.tick(0, 0) # every frame (feed a camera offset here if you have one)
```
 4. **A brief hit-stop** — freeze the sim for 2-8 frames on a big hit; it makes the impact *connect*. No engine primitive — you skip your own ticks:
```python
freeze = 4 # on a big impact
if freeze > 0: # at the top of the loop, while frozen:
freeze -= 1; clock.tick(); continue
```
5. **A small particle burst** — a pop or ring on catch or score:
```python
ps.emit(x, y, 16, 4, 24, pg.rgb565(255, 210, 120)) # burst on the event
ps.tick() # every frame
```
 Spend the first item before reaching for the fifth — one good sound beats five weak particle effects. Match strength to the event and keep the play area readable; `picogame_fx` and the native blit effects cover most of this, see [effects](/helpers/effects/) and the [patterns](/concepts/patterns/) page. Flashing safety Never flash the whole screen faster than about 3 Hz (≥10 frames apart at 30 fps), and watch for many hit-flashes clustering past that — it’s a seizure risk. Prefer a localized `sprite.flash` to a full-screen white frame, and offer a reduced-effects toggle. ## Difficulty that breathes [Section titled “Difficulty that breathes”](#difficulty-that-breathes) Difficulty should rise in a **sawtooth**, not a straight climb: build tension for 20-40 seconds, release it at a milestone (a cleared wave, a checkpoint), then re-engage about 10% harder. A flat ramp goes boring by minute two; a monotonic climb never lets the player exhale. * **Ramp speed, density, or variety before adding health.** This changes the play pattern instead of padding the same encounter. * **Telegraph every threat.** A readable wind-up, and enough time to react — the human floor is about 250 ms (roughly 8 frames at 30 fps). Below that, a hit stops feeling like the player’s fault. * **Be generous** — this is what makes a game feel *fair*, not easy: coyote time and a jump buffer (`picogame_input.Timer`), i-frames after a hit so one mistake can’t chain-kill, a hitbox smaller than the player’s sprite. * **Restart in under half a second.** Re-initialise the run in place; never send the player through a menu to try again. ## Scope is a feature [Section titled “Scope is a feature”](#scope-is-a-feature) Build the smallest complete version of the main loop, play it, and add from there. Cut a feature if it doesn’t change the player’s decisions or the strength of the feedback — a fourth enemy type that plays exactly like the first three is not depth. The device’s [RAM](/memory/) and [timing](/performance/) limits are a useful boundary, not just a constraint to fight. ## What players remember [Section titled “What players remember”](#what-players-remember) A run is remembered by its peak and its ending, not its average frame. Give each run a clear high point, and land the ending deliberately: on failure, show the result, add one last visual or audio beat, and offer a restart with no delay. A flourish on death costs little and is what makes the player reach for the button again. ## Before → after: a catch game [Section titled “Before → after: a catch game”](#before--after-a-catch-game) A one-button game — move left/right, catch falling shapes, three misses and you’re out. Bland version: silent, shapes fall at one constant speed forever, “GAME OVER” text, no restart hint. Applying the ideas above, cheapest first: * **Sound** — a blip on every catch, a distinct low thud on every miss. One `picogame_sfx.Kit` call; changes how every catch *feels* immediately. * **Hit-flash** — the caught shape flashes white for 2 frames before it leaves the pool. * **Shake** — a 3-4 px `picogame_fx.Shake` on a miss only, decaying over half a second — not on every catch, or it drowns the good feedback in noise. * **Fairness** — the catcher’s hitbox is a few pixels narrower than its sprite, and a shape that grazes the edge still counts. Without this, misses feel like the game’s fault, not a slow reaction. * **Difficulty sawtooth** — fall speed and spawn rate step up every 5 catches, each step \~10% harder, with the two seconds after a step-up left untouched to let the new speed register. * **Peak-end** — the run’s best streak is shown, large, at the top of the game-over screen, above the score; A instantly starts a new run. None of this changed the rules of catch. It changed how catching *feels* — and that’s the whole page. *** Next: the [patterns](/concepts/patterns/) turn each of these into code; the [tutorials](/tutorials/) build three games applying them.
# Game patterns
> Small recipes for state, levels, camera, scoring, collision, and feedback.
These recipes show the *shape* of code reused across genres — the structure and the why. For the paste-ready code of a specific task (HUD updates, pools, restart, shuffle, input timing), see [Snippets](/snippets/); the [API reference](/reference/) gives exact signatures and the [examples](/examples/) show complete games. Keep actors distinguishable by both shape and colour so they stay readable on a small screen and without colour cues. ## Game structure: state machine + restart [Section titled “Game structure: state machine + restart”](#game-structure-state-machine--restart) Hold all mutable game state in one **`State`** object, put the per-frame loop in a **function** (`main`), and branch on `st.mode`. The function keeps the loop’s name lookups fast (locals instead of module-global dict lookups — a measured win on device), and the single object makes restart a one-liner.
```python
class State:
def __init__(self): self.reset()
def reset(self):
self.mode = "title" # "title" -> "play" -> "over"
self.score = 0; self.lives = 3
st = State()
def new_game():
st.reset(); st.mode = "play" # re-init IN PLACE (clear pools, re-show sprites)
def main(): # the loop lives in a function -> its names are fast locals
poll, refresh, tick = btn.poll, scene.refresh, clock.tick # hoist hot calls to locals
while True:
poll()
if st.mode == "play":
... # move, collide, score; on death: st.mode = "over"
elif btn.just_pressed(btn.A):
new_game() # title / game-over -> instant restart, no reload
refresh(); tick()
main()
```
A tiny game (a few state vars) can stay module-level, but this `State` + `main()` shape scales cleanly and is the recommended default. Ready-to-run skeleton: [try it in the browser](/playground/?ex=game-skeleton). ## Object pool [Section titled “Object pool”](#object-pool) Reuse a fixed pool for short-lived things such as bullets, coins, blocks, and sparks.
```python
pool = picogame_pool.Pool(scene, BMP, 16, anchor=(0.5, 0.5))
s = pool.spawn() # None if full; .visible is the alive flag
if s: s.move(x, y); s.data = ... # pool.free(s) to recycle
```
## Tilemap level [Section titled “Tilemap level”](#tilemap-level) The board for mazes, bricks, platforms, RPG maps: 1 byte/cell, read and written at runtime.
```python
level = pg.Tilemap(tileset, cols, rows); scene.add(level)
level.tile(cx, cy, EMPTY) # write a cell: eat a pellet, break a brick
hit = level.tile(cx, cy) in WALLS # read a cell for collision
```
## Solid-tile collision (per-axis) [Section titled “Solid-tile collision (per-axis)”](#solid-tile-collision-per-axis) For platformer walls and floors, move and resolve **one axis at a time** (X, then Y) so the body never wedges in corners; probe the leading edge at two points, and step a fast fall one pixel at a time so a big `vy` can’t tunnel through a floor. It’s plain per-object Python: cheap, no special engine call.
```python
def move_x(x, y, dx, hw): # stop at the wall, don't enter it
e = x + (hw if dx > 0 else -hw)
return x if solid(e, y - 2) or solid(e, y - 14) else x + dx
def move_y(x, y, vy, hw): # step down so a big vy can't tunnel through the floor
if vy > 0:
for _ in range(vy):
if solid(x, y + 1) or solid(x - hw, y + 1) or solid(x + hw, y + 1):
return y, 0, True # landed: y held, vy zeroed, grounded
y += 1
return y + vy, vy, False
```
## Scrolling camera [Section titled “Scrolling camera”](#scrolling-camera) When the world is bigger than the screen: follow and clamp the view; keep the HUD on a `fixed` layer.
```python
scene.set_view(clamp(player.x - W // 2, 0, world_w - W), 0)
```
## Turn-based loop [Section titled “Turn-based loop”](#turn-based-loop) Puzzle, tactics, RPG: wait for input, resolve one move, redraw. Most frames draw nothing, so it’s cheap.
```python
if btn.just_pressed(btn.A):
resolve_move() # advance exactly one turn
scene.refresh() # only the changed cells repaint
```
## Impact feedback [Section titled “Impact feedback”](#impact-feedback) Combine a sound, short flash, restrained shake, [hit-stop](/helpers/effects/), or particles according to the size of the event.
```python
spr.flash = WHITE # flat, 1-3 frames
shake.add(0.4) # picogame_fx.Shake; shake.tick() each frame
if audio: audio.sfx(picogame_audio.tone(150, 70))
```
## Damage forgiveness: hitbox & i-frames [Section titled “Damage forgiveness: hitbox & i-frames”](#damage-forgiveness-hitbox--i-frames) Make a timing game feel fair: a hitbox smaller than the sprite, plus a mercy window after a hit.
```python
if inv == 0 and threat.near(player, 12): # hitbox < sprite art
inv = 45 # i-frames; blink the player while inv > 0
```
## Score chain [Section titled “Score chain”](#score-chain) Reward greed: consecutive hits ramp a multiplier; a miss resets it.
```python
# on a hit: chain += 1; mult = 1 + chain // 5; score += pts * mult
# on a miss: chain = 0; mult = 1
```
To *display* the score on screen, see [Text & UI](/helpers/text-ui/). ## Difficulty ramp [Section titled “Difficulty ramp”](#difficulty-ramp) Ramp speed/density (not HP), in a sawtooth: build, ease at a milestone, re-engage harder.
```python
interval = max(11, 30 - t // 160) # spawns speed up over time
if (t % 600) >= 54 and t % interval == 0: # with a ~1.8s lull every ~20s
spawn()
```
## Scrolling background [Section titled “Scrolling background”](#scrolling-background) A few wrapping sprites create an endless parallax background without a full-screen background bitmap.
```python
for s in stars:
s.fy += s.speed
if s.fy > H: s.fy = -2; s.fx = rng.below(W) # wrap to the top
```
*** For the design *why* (the one verb, juice, difficulty, scope) see [Making it fun](/concepts/making-it-fun/); for the mental model, [How picogame works](/concepts/how-it-works/); the [tutorials](/tutorials/) build Breakout, a shooter, and an RPG step by step.
# Your first game
> Get something moving on screen in five minutes, right in your browser. No install, no hardware.
**Goal:** a red ball you drive around the screen with the arrow keys. About five minutes, right in your browser - nothing to install. If you can read a dozen lines of Python, you can do this. ## 1. Write it, press Try it [Section titled “1. Write it, press Try it”](#1-write-it-press-try-it) Here is the whole game, about a dozen lines. Press **Try it** to run it live in your browser, then drive the ball with the arrow keys.
```python
import picogame as pg
import picogame_game # one-call setup
import picogame_input # buttons
import picogame_clock # frame timing
import picogame_shapes as shapes # make simple bitmaps in code
# Take over the screen and get a scene to draw into.
scene, _, _ = picogame_game.setup(background=pg.rgb565(20, 24, 40))
buttons = picogame_input.Buttons()
clock = picogame_clock.Clock(30) # aim for 30 frames per second
# A red ball — a 24px circle drawn in code, so we need no art yet.
ball = pg.Sprite(shapes.circle(24, pg.rgb565(230, 80, 80)), 150, 110)
scene.add(ball)
# The game loop: read input, move, redraw — forever.
while True:
buttons.poll()
ball.x += (buttons.is_pressed(buttons.RIGHT) - buttons.is_pressed(buttons.LEFT)) * 3
ball.y += (buttons.is_pressed(buttons.DOWN) - buttons.is_pressed(buttons.UP)) * 3
scene.refresh()
clock.tick()
```
[▶ Try it in the browser](/playground/?ex=first-game) That is the picogame engine (the native C module, compiled to WASM) running in your browser. Edit the code, press Run, and your change shows instantly. When you want more room to tinker, open it in the [Playground](/playground/). ## 2. What the code does [Section titled “2. What the code does”](#2-what-the-code-does) Only four ideas carry the whole game; the rest is detail you’ll meet later: | Line | Idea | | ------------------------------------------------- | ------------------------------------------------------------------------------------------------------------------------------------------------------------------------------- | | [`picogame_game.setup(...)`](/helpers/boot-loop/) | Returns the **scene** you draw into (plus two helper buffers you don’t need yet, the `_, _` in `scene, _, _`). This one call hides all the display setup and clears the screen. | | `pg.Sprite(shapes.circle(...), x, y)` | A **sprite** is a movable picture. Here the picture is a circle we generated in code; later it’ll be your own art. | | `scene.add(ball)` | Put the sprite **in the scene** so it gets drawn. | | the `while` loop | The **game loop**: every frame, read input, change things, then `scene.refresh()`. The engine redraws only what moved. | ## 3. Take it further [Section titled “3. Take it further”](#3-take-it-further) * **Build on your PC.** Want a faster local loop, or to work with your own art files? Run the same game in the [desktop simulator](/simulator/): one `git clone`, then `python3 sim/run.py`. * **Learn step by step.** The [tutorials](/tutorials/) build a Breakout, then a shooter, then an RPG, one new idea per step. * **Get the mental model.** [How picogame works](/concepts/how-it-works/) explains the engine in five minutes, so the next things you build make sense. * **Put it on a device.** When you’re ready for hardware, see [Run on hardware](/hardware/).
# Get it on your device
> Flash the picogame firmware, then download the ready-made games pack for your board — a launcher boots so you can pick a game and play.
Two steps put a menu of ready-to-play games on your handheld: flash the firmware once, then copy the pack for your board onto the drive. No coding needed — a [launcher](/launcher/) boots and lets you pick a game with the D-pad. ## 1. Flash the firmware [Section titled “1. Flash the firmware”](#1-flash-the-firmware) The firmware **is** the picogame engine — a CircuitPython build with the native-C module baked in. You flash it once per board. Download the `.uf2` for your board from [Supported hardware](/supported-hardware/#download-firmware), hold **BOOTSEL** while you plug the board in, and drag the `.uf2` onto the drive that appears. The board reboots and shows up as a **`CIRCUITPY`** drive. ## 2. Download the pack for your board [Section titled “2. Download the pack for your board”](#2-download-the-pack-for-your-board) Each pack is a ready `CIRCUITPY` layout — the launcher, the games and demos (compiled `.mpy`), the helper libraries and fonts. Pick the one for your board and **extract it onto the `CIRCUITPY` drive**. * **[RP2040 — PicoPad, plain Pico](/download/picogame-rp2040.zip)** — a tight-RAM set (8 games + 10 demos) tuned to fit the RP2040. Start here on a PicoPad or a bare Pico. * **[RP2350 — PicoPad 2, Pico 2](/download/picogame-rp2350.zip)** — the full portfolio (every game and demo) with intro splashes, for RP2350-class boards with RAM to spare. * **[Fruit Jam](/download/picogame-fruitjam.zip)** — the full portfolio plus a `settings.toml` that sets the Fruit Jam audio levels and DVI display. Not sure which chip your board has? See [Supported hardware](/supported-hardware/). ## 3. Play [Section titled “3. Play”](#3-play) Eject the drive and reset the board. The launcher lists the games — **UP/DOWN** to move, **A** to play, the board’s **RESET** button to come back to the menu. ## Next [Section titled “Next”](#next) * Add your own game to the menu, or see how the launcher finds games → [The games menu](/launcher/). * Want to build a game rather than play the packs? → [Your first game](/start/first-game/) and [Run on hardware](/hardware/).
# What you can build
> The genres picogame is genuinely good at - platformers, scrolling shooters, top-down RPGs, even a pseudo-3D racer - with playable examples.
picogame is a retained-mode 2D engine: it redraws only what moved, so it shines where a mostly-still screen carries a few busy things on top. In practice that makes it strong at: * **Tile-based worlds** — top-down RPGs and maze games: big boards for almost no RAM. * **Scrolling shoot-’em-ups** — pooled bullets and enemies streaming across the screen. * **Single-screen arcade & platformers** — a hero, platforms, animated art, a framed HUD. * **Pseudo-3D racing** — a perspective road that bends as you steer, drawn by **StripDraw** with no extra RAM.  **Platformer** — hero on platforms, animated art.  **Pseudo-3D racer** — a StripDraw road that bends, ghost lap.  **Top-down RPG** — tilemap world, NPCs, encounters.  **Scrolling shooter** — pooled sprites, torpedoes to dodge.  **Maze chase** — tilemap board, ghost AI.  **Breakout** — paddle, brick wall, particles. [▶ Open the full gallery & playany of them in your browser — Asteroids, Snake, Tetris, Flappy, soccer, pinball & more](/examples/) Every title is downloadable from the [picogame repo](https://github.com/MakerClassCZ/picogame), and its header comment lists exactly what it uses — so the closest example doubles as your template. ## Small effects, clear feedback [Section titled “Small effects, clear feedback”](#small-effects-clear-feedback) The same engine gives you the juice that makes a game *feel* good — screen shake, particles, eased motion, palette tricks — each a couple of lines:  **Screenshake** — trauma-based, on every hit.  **Particles** — bursts and fountains.  **Tweens** — eased motion, no snapping.  **Palette tricks** — recolour with no extra art. [Effects referencefor developers: the API and when to reach for each](/helpers/effects/) **What it’s not:** picogame is 2D — not a 3D engine, no heavy physics, and on the RP2040 not full-screen 60 FPS. Design within those limits and lean into them. ## Ready to make one? [Section titled “Ready to make one?”](#ready-to-make-one) * **[Make your first game](/start/first-game/)** — five minutes to something moving. * **[The tutorials](/tutorials/)** — build a Breakout, a shooter, and an RPG step by step.
# picogame tutorials — learn the engine by building games
> These tutorials introduce the picogame engine one group of mechanics at a time. Every step is a complete, runnable program, and the next step builds on it.
These tutorials introduce the picogame engine **one group of mechanics at a time**. Every step is a complete, runnable program, and the next step builds on it. Compare `stepN` and `stepN+1` side by side to see the code added for the new concept. Each tutorial ends with a small completed game: | Tutorial | Genre | What it teaches | | ------------------------------------------------------------------------------------------------------------------------------- | ---------------------- | ------------------------------------------------------------------------------------------------------------------------------------------------------------------------------------------------------------------------------------------------------------------------------------------------------------ | | **[01-bounce](/tutorials/01-bounce/)** ([source](https://github.com/MakerClassCZ/picogame/tree/main/tutorials/01-bounce)) | Breakout / Arkanoid | the render loop, input, sub-pixel movement, wall and paddle bounces, box collision, a `Tilemap` brick wall, a HUD, particles, and sound. Placeholder shapes and imported art both use a `Bitmap` on the same `Sprite`, so replacing the artwork does not change the game logic. | | **[02-starship](/tutorials/02-starship/)** ([source](https://github.com/MakerClassCZ/picogame/tree/main/tutorials/02-starship)) | top-down space shooter | rotation via pre-baked frames, vector thrust + screen wrap, **object pools** (bullets, enemies), circular collision + splitting, escalating waves, explosions/exhaust particles, audio, and a **title → play → game-over state machine**. | | **[03-quest](/tutorials/03-quest/)** ([source](https://github.com/MakerClassCZ/picogame/tree/main/tutorials/03-quest)) | top-down RPG | a **world bigger than the screen** + a following **camera** (`set_view` with clamping), **tile-based wall collision**, a directional **walk animation**, collectible items + a fixed HUD, an **NPC + dialog**, bump **combat** (HP, i-frames), and a **quest** (objective → unlock a door → reach the goal). | Do them **in order**: each assumes the fundamentals of the ones before it. ## How to run a step [Section titled “How to run a step”](#how-to-run-a-step) You can run each step in the browser with the **Try it** button. To run a step file locally, use the desktop simulator (no hardware needed; it can render headless, saves a PNG):
```bash
python3 sim/run.py tutorials/01-bounce/step3_ball.py --shot /tmp/out.png
```
Useful flags: `--frames N` (how long to run), `--hold RIGHT,B` (hold buttons for the whole run, so you can test input headlessly), `--backend pygame` (a live, playable window if you have pygame installed). On the **PicoPad** (or any supported board): copy the step file plus the `lib/` helpers it imports to `CIRCUITPY/` and name it `code.py` (or import it). Each file’s header comment lists what it needs. ## How each step is structured [Section titled “How each step is structured”](#how-each-step-is-structured) * The **header comment** states *what you learn*, *what’s new vs the previous step*, and the exact run command. * Inline comments mark the **new lines** so you can see the change at a glance. * The README in each tutorial folder explains why each addition is useful and ends each step with a small **Try it** change. ## The engine pieces you’ll meet [Section titled “The engine pieces you’ll meet”](#the-engine-pieces-youll-meet) All the helpers live in `lib/` (pure Python, work on device and in the simulator): | Helper | Role | | --------------------------------- | ---------------------------------------------------------------------------------- | | `picogame_game.setup()` | resolve the display and create a Scene; on SPI targets, also create render strips | | `picogame` (C module) | `Sprite`, `Bitmap`, `Tilemap`, `Particles`, `Canvas`, `Scene`, `collide`, `rgb565` | | `picogame_input` | buttons → bitmask, `is_pressed` / `just_pressed` | | `picogame_clock` | frame-rate cap + `dt`; a fixed-timestep accumulator | | `picogame_shapes` | generate solid/round/polygon bitmaps (rectangles, balls, ships) | | `picogame_pool` | a fixed-size sprite pool for spawners (bullets, enemies) | | `sprite.overlaps` / `sprite.near` | zero-alloc box / circular collision, built into Sprite | | `picogame_ui` | `SceneLabel` (in-scene HUD text), text box, menu | | `picogame_font` | render strings to bitmaps with the bundled font | | `picogame_audio` | beeps (`tone()`) and `.wav` playback | ## After the tutorials: move to the scene editor [Section titled “After the tutorials: move to the scene editor”](#after-the-tutorials-move-to-the-scene-editor) Once you understand the mechanics, the **editor** (`editor/`) can replace hand-placing every tile and sprite in Python. It lets you paint maps, place sprites, and assign tile properties, then export a **scene** that the `picogame_scene` loader builds. The same data runs on device and in the simulator. See `examples/picogame_platformer_scene.py` for a full game whose level (tiles, collisions, coins, enemies, camera) is loaded from editor data, with only the gameplay left in Python. The tutorials teach the mechanics; the editor moves level layout into data. ## Next steps after the tutorials [Section titled “Next steps after the tutorials”](#next-steps-after-the-tutorials) After the tutorials, continue with: * **[Game patterns](/concepts/patterns/)** + **[Snippets](/snippets/)** — the reusable game-loop + `State` shape every bigger game grows into, plus a ready-to-run **game skeleton** to start your own project from (open it in the [Playground](/playground/?ex=game-skeleton)). This is the natural next step now that you’ve built three games by hand. * **[Feature guide](/features/)** — the task-oriented tour of everything the engine can do (which drawing surface to pick, sprite transforms, collision, HUDs, audio, RAM budgeting), with alternatives for each. Use it when choosing a tool for a task. * **The helpers** (`lib/`) — the pure-Python modules you met above (`picogame_pool`, `picogame_ui`, `picogame_clock`, `picogame_anim`, …); the feature guide links each to its use. * **[Glossary](/concepts/glossary/)** — short, plain-language definitions of any unfamiliar term such as sprite, tilemap, dirty region, AABB, or parallax.
# Tutorial 1 — Bounce
> Build a Breakout/Arkanoid game one mechanic at a time, then replace generated rectangles with finished bitmap art.
We build a complete brick-breaker, one mechanic per step. Each `stepN_*.py` runs on its own: read the code below and press **Try it** to run that step right in the browser, or run it locally with: Run these from the cloned `picogame` folder (the one from [Your first game](/start/first-game/)).
```bash
python3 sim/run.py tutorials/01-bounce/stepN_name.py --shot /tmp/out.png
```
(add `--hold RIGHT` etc. to hold a button, or `--backend pygame` to play it live.) The first eight steps use generated rectangles. The final step replaces their bitmaps without changing the game loop. Keeping art separate from mechanics also lets the editor change a scene’s graphics without changing its gameplay code. *** ### step 1 — `step1_hello.py` · the render loop [Section titled “step 1 — step1\_hello.py · the render loop”](#step-1--step1_hellopy--the-render-loop)  picogame uses [**retained mode**](/concepts/glossary/) (you add objects once and then just change what moved, instead of redrawing the screen yourself): you `scene.add()` objects once to the [`Scene`](/reference/), then each frame you change their state and call `scene.refresh()` and the engine redraws. A “paddle” is a [`Sprite`](/reference/) whose bitmap is a solid rectangle from [`picogame_shapes`](/reference/)’s `shp.rect(w, h, colour)`. [`picogame_game.setup()`](/helpers/boot-loop/) does the display boilerplate and returns `(scene, buffer_a, buffer_b)`. On SPI targets the last two values are reusable render strips; on framebuffer targets they are `None`. This step needs only the scene, so it uses `scene, _, _`. [`picogame_clock`](/reference/)’s `Clock(40)` caps the loop to 40 FPS. **You see:** a grey bar near the bottom. **Try it:** change the rectangle’s size/colour.
```diff
W, H = 320, 240
PADDLE_W, PADDLE_H = 44, 8
# setup() takes over the display and gives us a Scene + its two strip buffers.
+scene, _, _ = picogame_game.setup(background=pg.rgb565(8, 10, 24))
+clock = picogame_clock.Clock(40) # cap the loop to 40 FPS
# A "paddle" is just a Sprite whose bitmap is a solid rectangle. shp.rect(w,h,color)
# makes that bitmap -- a rectangle and an image sprite are the SAME kind of object
# (we'll prove that in step 9 by swapping the bitmap for art, with no other change).
+paddle = pg.Sprite(shp.rect(PADDLE_W, PADDLE_H, pg.rgb565(220, 220, 230)),
(W - PADDLE_W) // 2, H - 16)
+scene.add(paddle) # add it to the scene ONCE
+while True:
+ scene.refresh() # the engine draws the scene
+ clock.tick() # sleep to the next frame
```
[▶ Try it in the browser](/playground/?ex=01-bounce-step1_hello) ### step 2 — `step2_move.py` · input [Section titled “step 2 — step2\_move.py · input”](#step-2--step2_movepy--input)  [`picogame_input`](/reference/)’s `Buttons()` samples the buttons each `poll()`. `is_pressed(RIGHT) - is_pressed(LEFT)` is a tidy −1/0/+1 axis; we move the paddle and clamp it inside the screen. **You see:** the paddle slides with LEFT/RIGHT. **Try it:** change `SPEED`.
```diff
W, H = 320, 240
PADDLE_W, PADDLE_H = 44, 8
SPEED = 5
scene, _, _ = picogame_game.setup(background=pg.rgb565(8, 10, 24))
+btn = picogame_input.Buttons() # NEW: the buttons
clock = picogame_clock.Clock(40)
paddle = pg.Sprite(shp.rect(PADDLE_W, PADDLE_H, pg.rgb565(220, 220, 230)),
(W - PADDLE_W) // 2, H - 16)
scene.add(paddle)
while True:
+ btn.poll() # sample the buttons once per frame
+# RIGHT minus LEFT gives -1 / 0 / +1 -- a tidy way to read a 1-axis control.
+ delta_x = btn.is_pressed(btn.RIGHT) - btn.is_pressed(btn.LEFT)
+if delta_x:
+ x = paddle.x + delta_x * SPEED
+ x = max(0, min(W - PADDLE_W, x)) # clamp inside the screen
+ paddle.move(x, paddle.y)
scene.refresh()
clock.tick()
```
[▶ Try it in the browser](/playground/?ex=01-bounce-step2_move) ### step 3 — `step3_ball.py` · velocity (whole pixels) [Section titled “step 3 — step3\_ball.py · velocity (whole pixels)”](#step-3--step3_ballpy--velocity-whole-pixels)  Velocity is just how many whole pixels a thing moves each frame: `velocity_x` across, `velocity_y` down. Add the velocity to the ball’s position every frame and it travels in a straight line. Here we keep it simple: integer velocity, integer position, whole-pixel steps. **You see:** the ball flies off-screen (we fix that next). **Try it:** change `velocity_x, velocity_y`.
```diff
W, H = 320, 240
PADDLE_W, PADDLE_H = 44, 8
BALL = 6
scene, _, _ = picogame_game.setup(background=pg.rgb565(8, 10, 24))
btn = picogame_input.Buttons()
clock = picogame_clock.Clock(40)
paddle = pg.Sprite(shp.rect(PADDLE_W, PADDLE_H, pg.rgb565(220, 220, 230)),
(W - PADDLE_W) // 2, H - 16)
+ball = pg.Sprite(shp.rect(BALL, BALL, pg.rgb565(255, 240, 120)), W // 2, H // 2)
scene.add(paddle)
+scene.add(ball)
+velocity_x, velocity_y = 3, -3 # NEW: whole pixels moved per frame
while True:
btn.poll()
delta_x = btn.is_pressed(btn.RIGHT) - btn.is_pressed(btn.LEFT)
if delta_x:
paddle.move(max(0, min(W - PADDLE_W, paddle.x + delta_x * 5)), paddle.y)
+# move the ball by its velocity (whole pixels)
+ ball.move(ball.x + velocity_x, ball.y + velocity_y)
scene.refresh()
clock.tick()
```
[▶ Try it in the browser](/playground/?ex=01-bounce-step3_ball) ### step 4 — `step4_walls.py` · reflection [Section titled “step 4 — step4\_walls.py · reflection”](#step-4--step4_wallspy--reflection)  A bounce is just flipping the velocity component heading into a wall and pinning the ball to the edge so it can’t tunnel out. Left/right flip `velocity_x`, the top flips `velocity_y`. Still whole-pixel velocity here. The bottom stays open; falling past it is a “miss”. **You see:** the ball bounces around three walls forever. **Try it:** make the top open too and watch it escape.
```diff
W, H = 320, 240
PADDLE_W, PADDLE_H = 44, 8
BALL = 6
scene, _, _ = picogame_game.setup(background=pg.rgb565(8, 10, 24))
btn = picogame_input.Buttons()
clock = picogame_clock.Clock(40)
paddle = pg.Sprite(shp.rect(PADDLE_W, PADDLE_H, pg.rgb565(220, 220, 230)),
(W - PADDLE_W) // 2, H - 16)
ball = pg.Sprite(shp.rect(BALL, BALL, pg.rgb565(255, 240, 120)), W // 2, H // 2)
scene.add(paddle)
scene.add(ball)
velocity_x, velocity_y = 3, -3
while True:
btn.poll()
delta_x = btn.is_pressed(btn.RIGHT) - btn.is_pressed(btn.LEFT)
if delta_x:
paddle.move(max(0, min(W - PADDLE_W, paddle.x + delta_x * 5)), paddle.y)
ball.move(ball.x + velocity_x, ball.y + velocity_y)
+# walls: flip the component heading into the wall, and pin to the edge
+if ball.x < 0:
+ ball.move(0, ball.y)
+ velocity_x = -velocity_x
+elif ball.x > W - BALL:
+ ball.move(W - BALL, ball.y)
+ velocity_x = -velocity_x
+if ball.y < 0:
+ ball.move(ball.x, 0)
+ velocity_y = -velocity_y
scene.refresh()
clock.tick()
```
[▶ Try it in the browser](/playground/?ex=01-bounce-step4_walls) ### step 5 — `step5_paddle.py` · box collision + feel [Section titled “step 5 — step5\_paddle.py · box collision + feel”](#step-5--step5_paddlepy--box-collision--feel)  `pg.collide(ax1,ay1,ax2,ay2, bx1,by1,bx2,by2)` is a fast [box-overlap test](/concepts/glossary/) (AABB, axis-aligned bounding box): it just checks whether two upright rectangles overlap. On a paddle hit (only while moving down) we send the ball up and nudge `velocity_x` by *where* on the paddle it landed, so you can aim. That variable bounce angle is **why we now need sub-pixel movement**: a steered ball travels at speeds like 1.4 px/frame, *fractions* of a pixel that whole-pixel integers can’t express. So the ball now keeps a sub-pixel position in `ball.fx`/`ball.fy` (floats) with a float velocity; `ball.x`/`ball.y` are just those values rounded to whole pixels for drawing and collision. Falling past the bottom costs a life and re-serves. **You see:** a volley you can keep alive. **Try it:** change the `0.06` steering factor.
```diff
W, H = 320, 240
PADDLE_W, PADDLE_H = 44, 8
BALL = 6
scene, _, _ = picogame_game.setup(background=pg.rgb565(8, 10, 24))
btn = picogame_input.Buttons()
clock = picogame_clock.Clock(40)
paddle = pg.Sprite(shp.rect(PADDLE_W, PADDLE_H, pg.rgb565(220, 220, 230)),
(W - PADDLE_W) // 2, H - 16)
ball = pg.Sprite(shp.rect(BALL, BALL, pg.rgb565(255, 240, 120)), W // 2, H // 2)
scene.add(paddle)
scene.add(ball)
velocity_x, velocity_y = 2.4, -2.6 # NEW: float velocity (fractions of a pixel)
lives = 3
+def serve():
+global velocity_x, velocity_y
+ ball.move(W // 2, H // 2)
+ velocity_x, velocity_y = 2.4, -2.6
while True:
btn.poll()
delta_x = btn.is_pressed(btn.RIGHT) - btn.is_pressed(btn.LEFT)
if delta_x:
paddle.move(max(0, min(W - PADDLE_W, paddle.x + delta_x * 5)), paddle.y)
+# integrate the float velocity into the ball's sub-pixel position
+ ball.fx += velocity_x
+ ball.fy += velocity_y
+if ball.fx < 0:
+ ball.fx = 0; velocity_x = -velocity_x
+elif ball.fx > W - BALL:
+ ball.fx = W - BALL; velocity_x = -velocity_x
+if ball.fy < 0:
+ ball.fy = 0; velocity_y = -velocity_y
+# paddle bounce: only when moving DOWN and the boxes overlap
+if velocity_y > 0 and pg.collide(ball.x, ball.y, ball.x + BALL, ball.y + BALL,
paddle.x, paddle.y, paddle.x + PADDLE_W, paddle.y + PADDLE_H):
+ velocity_y = -abs(velocity_y)
+# steer: distance of ball centre from paddle centre -> sideways speed
+ velocity_x += (ball.x + BALL / 2 - (paddle.x + PADDLE_W / 2)) * 0.06
+if ball.fy > H: # missed the ball
+ lives -= 1
+if lives <= 0:
+ lives = 3
+serve()
scene.refresh()
clock.tick()
```
[▶ Try it in the browser](/playground/?ex=01-bounce-step5_paddle) ### step 6 — `step6_bricks.py` · the Tilemap [Section titled “step 6 — step6\_bricks.py · the Tilemap”](#step-6--step6_brickspy--the-tilemap)  A [`Tilemap`](/reference/) is a grid of identical tiles that share one image, instead of one sprite per cell. It’s backed by one tileset bitmap, 1 byte per cell, far cheaper than a sprite per brick. `shp.tileset_colors(w, h, [colours])` builds a sheet where value 0 is empty and 1..N are colours. Map the ball’s pixel to a tile (`tile_x = pixel_x // BRICK_W`), read it, and set it to 0 to clear it. Clear the wall → rebuild. **You see:** a 10×6 wall you break. **Try it:** change `ROWS` or the brick colours.
```diff
W, H = 320, 240
PADDLE_W, PADDLE_H = 44, 8
BALL = 6
+BRICK_W, BRICK_H = 32, 16 # brick (tile) size
+COLS, ROWS = W // BRICK_W, 6 # 10 x 6 wall
+BRICK_Y = 28 # wall top (leaves a HUD strip)
scene, _, _ = picogame_game.setup(background=pg.rgb565(8, 10, 24))
btn = picogame_input.Buttons()
clock = picogame_clock.Clock(40)
# tileset: value 0 empty, 1..4 = four brick colours
+brick_colors = [pg.rgb565(220, 70, 70), pg.rgb565(230, 150, 50),
+ pg.rgb565(70, 200, 90), pg.rgb565(80, 150, 230)]
+bricks = pg.Tilemap(shp.tileset_colors(BRICK_W, BRICK_H, brick_colors), COLS, ROWS)
+bricks.move(0, BRICK_Y)
+def build_wall():
+global bricks_left
+for tile_y in range(ROWS):
+for tile_x in range(COLS):
+ bricks.tile(tile_x, tile_y, 1 + (tile_y % 4)) # row -> colour 1..4
+ bricks_left = COLS * ROWS
build_wall()
paddle = pg.Sprite(shp.rect(PADDLE_W, PADDLE_H, pg.rgb565(220, 220, 230)),
(W - PADDLE_W) // 2, H - 16)
ball = pg.Sprite(shp.rect(BALL, BALL, pg.rgb565(255, 240, 120)), W // 2, H // 2)
+scene.add(bricks) # add the wall first (drawn under the ball)
scene.add(paddle)
scene.add(ball)
velocity_x, velocity_y = 2.4, -2.6
lives = 3
def serve():
global velocity_x, velocity_y
ball.move(W // 2, H // 2)
velocity_x, velocity_y = 2.4, -2.6
+# brick hit: the tile under the ball's centre
+ center_x, center_y = ball.x + BALL // 2, ball.y + BALL // 2
+ tile_x = center_x // BRICK_W
+ tile_y = (center_y - BRICK_Y) // BRICK_H
+if 0 <= tile_x < COLS and 0 <= tile_y < ROWS and bricks.tile(tile_x, tile_y):
+ bricks.tile(tile_x, tile_y, 0) # clear the brick
+ bricks_left -= 1
+ velocity_y = -velocity_y
+if bricks_left == 0: # cleared the wall -> rebuild
+build_wall()
+serve()
if ball.fy > H:
lives -= 1
if lives <= 0:
lives = 3
build_wall()
serve()
scene.refresh()
clock.tick()
```
[▶ Try it in the browser](/playground/?ex=01-bounce-step6_bricks) ### step 7 — `step7_hud.py` · text / status bar [Section titled “step 7 — step7\_hud.py · text / status bar”](#step-7--step7_hudpy--text--status-bar)  [`picogame_ui`](/reference/)’s `SceneLabel` renders text into the scene as a **fixed** layer (drawn by `refresh()`, and camera-independent, handy once the world scrolls). It uses the bundled `terminalio.FONT`, so no font asset. `label.set(...)` re-renders only when the text changes. **You see:** `SCORE / LIVES` across the top. **Try it:** add the brick count.
```diff
W, H = 320, 240
PADDLE_W, PADDLE_H = 44, 8
BALL = 6
BRICK_W, BRICK_H = 32, 16
COLS, ROWS = W // BRICK_W, 6
BRICK_Y = 28
BACKGROUND = pg.rgb565(8, 10, 24)
scene, _, _ = picogame_game.setup(background=BACKGROUND)
btn = picogame_input.Buttons()
clock = picogame_clock.Clock(40)
brick_colors = [pg.rgb565(220, 70, 70), pg.rgb565(230, 150, 50),
pg.rgb565(70, 200, 90), pg.rgb565(80, 150, 230)]
bricks = pg.Tilemap(shp.tileset_colors(BRICK_W, BRICK_H, brick_colors), COLS, ROWS)
bricks.move(0, BRICK_Y)
def build_wall():
global bricks_left
for tile_y in range(ROWS):
for tile_x in range(COLS):
bricks.tile(tile_x, tile_y, 1 + (tile_y % 4))
bricks_left = COLS * ROWS
build_wall()
paddle = pg.Sprite(shp.rect(PADDLE_W, PADDLE_H, pg.rgb565(220, 220, 230)),
(W - PADDLE_W) // 2, H - 16)
ball = pg.Sprite(shp.rect(BALL, BALL, pg.rgb565(255, 240, 120)), W // 2, H // 2)
scene.add(bricks)
scene.add(paddle)
scene.add(ball)
# NEW: a HUD label. Adding it to the scene happens inside SceneLabel (as a fixed layer).
+hud = ui.SceneLabel(scene, pg, terminalio.FONT, 4, 2, pg.rgb565(255, 255, 255), BACKGROUND)
velocity_x, velocity_y = 2.4, -2.6
+score = 0
lives = 3
def serve():
global velocity_x, velocity_y
ball.move(W // 2, H // 2)
velocity_x, velocity_y = 2.4, -2.6
while True:
btn.poll()
delta_x = btn.is_pressed(btn.RIGHT) - btn.is_pressed(btn.LEFT)
if delta_x:
paddle.move(max(0, min(W - PADDLE_W, paddle.x + delta_x * 5)), paddle.y)
bricks.tile(tile_x, tile_y, 0)
bricks_left -= 1
+ score += 10 # NEW: score on a hit
velocity_y = -velocity_y
if bricks_left == 0:
build_wall()
serve()
if ball.fy > H:
lives -= 1
if lives <= 0:
lives = 3
score = 0
build_wall()
serve()
+ hud.set("SCORE %05d LIVES %d" % (score, lives)) # update text, then draw it
scene.refresh() # draws the scene incl. the HUD
clock.tick()
```
[▶ Try it in the browser](/playground/?ex=01-bounce-step7_hud) ### step 8 — `step8_particles.py` · juice (particles + sound) [Section titled “step 8 — step8\_particles.py · juice (particles + sound)”](#step-8--step8_particlespy--juice-particles--sound)  Now we add some [juice](/concepts/glossary/), the small touches that make a hit feel good. [`Particles`](/reference/) is a cheap burst system: `emit(x, y, count, speed, life, colour)` then `tick()` each frame. We burst in the brick’s colour on every break. `picogame_audio.tone()` makes a beep with no `.wav`, a blip per hit. (Audio is wrapped in `try/except`, so it’s silent but safe where there’s no audio output, like the simulator.) **You see:** coloured sparks + (on hardware) a blip. **Try it:** change the particle `count`/`gravity`.
```diff
W, H = 320, 240
PADDLE_W, PADDLE_H = 44, 8
BALL = 6
BRICK_W, BRICK_H = 32, 16
COLS, ROWS = W // BRICK_W, 6
BRICK_Y = 28
BACKGROUND = pg.rgb565(8, 10, 24)
scene, _, _ = picogame_game.setup(background=BACKGROUND)
btn = picogame_input.Buttons()
clock = picogame_clock.Clock(40)
+# optional audio: a beep on each hit (no asset needed). None if no audio backend.
+try:
+import picogame_audio
+ audio = picogame_audio.Audio()
+ blip = picogame_audio.tone(660, 35)
+ lose = picogame_audio.tone(150, 160) # low tone when a ball is missed
+except Exception:
+ audio = None
+ blip = lose = None
brick_colors = [pg.rgb565(220, 70, 70), pg.rgb565(230, 150, 50),
pg.rgb565(70, 200, 90), pg.rgb565(80, 150, 230)]
brick_ts = shp.tileset_colors(BRICK_W, BRICK_H, brick_colors)
bricks = pg.Tilemap(brick_ts, COLS, ROWS)
bricks.move(0, BRICK_Y)
def build_wall():
+global bricks_left
for tile_y in range(ROWS):
for tile_x in range(COLS):
bricks.tile(tile_x, tile_y, 1 + (tile_y % 4))
bricks_left = COLS * ROWS
build_wall()
paddle = pg.Sprite(shp.rect(PADDLE_W, PADDLE_H, pg.rgb565(220, 220, 230)),
(W - PADDLE_W) // 2, H - 16)
ball = pg.Sprite(shp.rect(BALL, BALL, pg.rgb565(255, 240, 120)), W // 2, H // 2)
particles = pg.Particles(96, size=2, gravity=0.12) # NEW
scene.add(bricks)
scene.add(particles) # behind paddle+ball
scene.add(paddle)
scene.add(ball)
if 0 <= tile_x < COLS and 0 <= tile_y < ROWS:
cell = bricks.tile(tile_x, tile_y)
if cell:
bricks.tile(tile_x, tile_y, 0)
bricks_left -= 1
score += 10
velocity_y = -velocity_y
+# burst in the brick's colour at the brick's centre
+ brick_x = tile_x * BRICK_W + BRICK_W // 2
+ brick_y = BRICK_Y + tile_y * BRICK_H + BRICK_H // 2
+ particles.emit(brick_x, brick_y, 14, 3, 22, brick_colors[cell - 1])
+if audio:
+ audio.sfx(blip)
if bricks_left == 0:
build_wall()
serve()
if ball.fy > H:
lives -= 1
if audio:
+ audio.sfx(lose) # low tone on a missed ball
if lives <= 0:
lives = 3
score = 0
build_wall()
serve()
+ particles.tick() # advance the burst each frame
hud.set("SCORE %05d LIVES %d" % (score, lives))
scene.refresh()
clock.tick()
```
[▶ Try it in the browser](/playground/?ex=01-bounce-step8_particles) ### step 9 — `step9_sprites.py` · rectangles → sprites [Section titled “step 9 — step9\_sprites.py · rectangles → sprites”](#step-9--step9_spritespy--rectangles--sprites)  The payoff. We change **only the two bitmaps**: the ball becomes a round disc (`shp.circle`) and the paddle gets a multi-colour [`Bitmap`](/reference/) with a highlight. Diff this file against step 8: the entire game loop is byte-for-byte identical. A `Sprite` doesn’t care whether its bitmap is a rectangle, a generated shape, or a PNG you imported in the editor. **You see:** the same game, now with a round ball and a shaded paddle. **Try it:** load a a PNG through the editor → scene pipeline (open it in the [web editor](/tools/editor/)) and assign it as the bitmap.
```diff
W, H = 320, 240
PADDLE_W, PADDLE_H = 44, 8
BALL = 6
BRICK_W, BRICK_H = 32, 16
COLS, ROWS = W // BRICK_W, 6
BRICK_Y = 28
BACKGROUND = pg.rgb565(8, 10, 24)
scene, _, _ = picogame_game.setup(background=BACKGROUND)
btn = picogame_input.Buttons()
clock = picogame_clock.Clock(40)
try:
import picogame_audio
audio = picogame_audio.Audio()
blip = picogame_audio.tone(660, 35)
lose = picogame_audio.tone(150, 160) # low tone when a ball is missed
except Exception:
audio = None
blip = lose = None
+def paddle_art(w, h):
+"""A 2-colour paddle bitmap: blue body + a lighter highlight on the top row.
This is what 'real sprite art' is -- a PAL8 bitmap with more than one colour."""
+ palette = array.array("H", [pg.rgb565(0, 0, 0), pg.rgb565(70, 110, 210), pg.rgb565(150, 190, 255)])
+ data = bytearray(b"\x01" * (w * h)) # index 1 = body
+for x in range(w):
+ data[x] = 2 # index 2 = highlight on the top row
+return pg.Bitmap(data, w, h, format=pg.PAL8, palette=palette, frames=1, stride=w, transparent=0)
+brick_colors = [pg.rgb565(220, 70, 70), pg.rgb565(230, 150, 50),
+ pg.rgb565(70, 200, 90), pg.rgb565(80, 150, 230)]
paddle = pg.Sprite(paddle_art(PADDLE_W, PADDLE_H), (W - PADDLE_W) // 2, H - 16)
ball = pg.Sprite(shp.circle(BALL, pg.rgb565(255, 240, 120)), W // 2, H // 2)
```
[▶ Try it in the browser](/playground/?ex=01-bounce-step9_sprites) *** **Where to go next:** [02-starship](/tutorials/02-starship/) (pools, rotation, shooting, state machine), or jump to the [web editor](/tools/editor/) and the [scene format](/scene-format/) to build levels as data instead of by hand. There’s also [03-quest](/tutorials/03-quest/) if you want a longer game to pull apart.
# Tutorial 2 — Starship
> Build a top-down Asteroids-style shooter in 8 steps with rotation, thrust, object pools, splitting enemies, and a game-state machine.
In this tutorial, you’ll build a small Asteroids-style shooter. It assumes you’ve completed **01-bounce** (render loop, input, sub-pixel movement, collision, HUD, and particles). This time you’ll add rotation, vector thrust, object pools, splitting enemies, and a game-state machine. The full source for this tutorial lives on GitHub: [tutorials/02-starship](https://github.com/MakerClassCZ/picogame/tree/main/tutorials/02-starship). Run any step:
```bash
python3 sim/run.py tutorials/02-starship/stepN_name.py --hold UP,B --shot /tmp/out.png
```
*** ### step 1 — `step1_ship.py` · a shaped sprite [Section titled “step 1 — step1\_ship.py · a shaped sprite”](#step-1--step1_shippy--a-shaped-sprite)  [`picogame_game.setup`](/helpers/boot-loop/) prepares the display and returns `(scene, buffer_a, buffer_b)`. On an SPI display, the last two values are reusable strip buffers; on a framebuffer display, they are `None`. This step only needs the [`Scene`](/reference/), so it ignores the other two values (`scene, _, _`). [`picogame_shapes`](/reference/) (imported as `shp`) builds bitmaps: `shp.from_mask` turns an ASCII picture into a one-colour [`Bitmap`](/reference/). We wrap it in a [`Sprite`](/reference/) and `anchor=(0.5, 0.5)` puts the sprite’s reference point at its centre, the right choice for something that rotates and wraps. **You see:** a little ship in the middle. **Try it:** redraw the mask.
```diff
W, H = 320, 240
BACKGROUND = pg.rgb565(0, 0, 8)
scene, _, _ = picogame_game.setup(background=BACKGROUND)
clock = picogame_clock.Clock(30)
+SHIP_MASK = [
+" # ",
+" # ",
+" ### ",
+" ### ",
+"#####",
+"## ##",
+]
+ship = pg.Sprite(shp.from_mask(SHIP_MASK, pg.rgb565(200, 220, 255)), W // 2, H // 2)
+ship.anchor = (0.5, 0.5) # rotate/position about the centre
+scene.add(ship)
while True:
scene.refresh()
clock.tick()
```
[▶ Try it in the browser](/playground/?ex=02-starship-step1_ship) ### step 2 — `step2_fly.py` · rotation, thrust, wrap [Section titled “step 2 — step2\_fly.py · rotation, thrust, wrap”](#step-2--step2_flypy--rotation-thrust-wrap)  For a ship that spins constantly, we bake the rotation into frames. This is sharper and cheaper than changing `sprite.angle` at runtime: `shp.poly_frames(size, points, N, colour)` renders a polygon at N angles into one multi-frame bitmap, and `ship.frame = angle` selects one of them. A `DIRS` table holds each angle’s unit vector; UP accelerates along the facing vector into the velocity, with a top-speed cap and gentle drag. `wrap()` teleports across the edges. **You see:** a ship you fly Asteroids-style. **Try it:** change the thrust `0.25` or the drag `0.99`.
```diff
W, H = 320, 240
BACKGROUND = pg.rgb565(0, 0, 8)
FRAMES = 16 # number of baked rotation frames
scene, _, _ = picogame_game.setup(background=BACKGROUND)
btn = picogame_input.Buttons()
clock = picogame_clock.Clock(30)
# a ship polygon (points around the centre, +y is down), baked at FRAMES angles
+ship_bitmap = shp.poly_frames(18, [(0, -8), (6, 7), (0, 4), (-6, 7)], FRAMES, pg.rgb565(200, 220, 255))
# facing unit vector for each frame: frame 0 points up (-y)
+DIRS = [(math.sin(frame * 2 * math.pi / FRAMES), -math.cos(frame * 2 * math.pi / FRAMES)) for frame in range(FRAMES)]
ship = pg.Sprite(ship_bitmap, W // 2, H // 2)
ship.anchor = (0.5, 0.5)
scene.add(ship)
angle = 0 # current rotation frame
velocity_x = velocity_y = 0.0 # velocity
+def wrap(x, y):
+return x % W, y % H
while True:
+ btn.poll()
+if btn.is_pressed(btn.LEFT):
+ angle = (angle - 1) % FRAMES
+if btn.is_pressed(btn.RIGHT):
+ angle = (angle + 1) % FRAMES
+ delta_x, delta_y = DIRS[angle]
+if btn.is_pressed(btn.UP):
+ velocity_x += delta_x * 0.25 # accelerate along the facing vector
+ velocity_y += delta_y * 0.25
+ speed = math.sqrt(velocity_x * velocity_x + velocity_y * velocity_y) # cap top speed
+if speed > 5:
+ velocity_x *= 5 / speed
+ velocity_y *= 5 / speed
+ velocity_x *= 0.99 # gentle drag
+ velocity_y *= 0.99
+ ship.fx, ship.fy = wrap(ship.fx + velocity_x, ship.fy + velocity_y) # sub-pixel position + wrap
+ ship.frame = angle # show the matching rotation
scene.refresh()
clock.tick()
```
[▶ Try it in the browser](/playground/?ex=02-starship-step2_fly) ### step 3 — `step3_shoot.py` · object pools [Section titled “step 3 — step3\_shoot.py · object pools”](#step-3--step3_shootpy--object-pools)  Repeatedly creating and discarding sprites can fragment the heap. Instead, [`picogame_pool`](/reference/)’s `Pool(scene, bitmap, N)` pre-allocates N hidden sprites once; `spawn()` reveals a free one, `free()` hides it, and `sprite.visible` *is* the alive flag. Each bullet keeps its velocity + remaining life in `sprite.data`, and its position in `fx`/`fy`. A cooldown caps the fire rate; [`picogame_input`](/reference/)’s `just_pressed(B)` fires once when B is pressed. **You see:** a stream of bullets that expire. **Try it:** change the pool size or `fire_cooldown`.
```diff
W, H = 320, 240
BACKGROUND = pg.rgb565(0, 0, 8)
FRAMES = 16
scene, _, _ = picogame_game.setup(background=BACKGROUND)
btn = picogame_input.Buttons()
clock = picogame_clock.Clock(30)
ship_bitmap = shp.poly_frames(18, [(0, -8), (6, 7), (0, 4), (-6, 7)], FRAMES, pg.rgb565(200, 220, 255))
DIRS = [(math.sin(frame * 2 * math.pi / FRAMES), -math.cos(frame * 2 * math.pi / FRAMES)) for frame in range(FRAMES)]
+bullet_bitmap = shp.circle(4, pg.rgb565(255, 255, 120))
ship = pg.Sprite(ship_bitmap, W // 2, H // 2)
ship.anchor = (0.5, 0.5)
+bullets = picogame_pool.Pool(scene, bullet_bitmap, 6, anchor=(0.5, 0.5)) # NEW: 6-bullet pool
scene.add(ship) # add ship AFTER the pool so it draws on top
angle = 0
velocity_x = velocity_y = 0.0
+fire_cooldown = 0
def wrap(x, y):
return x % W, y % H
while True:
btn.poll()
fire_cooldown -= 1
if btn.is_pressed(btn.LEFT):
angle = (angle - 1) % FRAMES
if btn.is_pressed(btn.RIGHT):
angle = (angle + 1) % FRAMES
delta_x, delta_y = DIRS[angle]
if btn.is_pressed(btn.UP):
velocity_x += delta_x * 0.25
velocity_y += delta_y * 0.25
speed = math.sqrt(velocity_x * velocity_x + velocity_y * velocity_y)
if speed > 5:
velocity_x *= 5 / speed; velocity_y *= 5 / speed
velocity_x *= 0.99; velocity_y *= 0.99
ship.fx, ship.fy = wrap(ship.fx + velocity_x, ship.fy + velocity_y)
ship.frame = angle
+# fire: a fresh B press, if the cooldown has elapsed and a slot is free
+if btn.just_pressed(btn.B) and fire_cooldown <= 0:
+ bullet = bullets.spawn()
+if bullet:
+ bullet.data = {"velocity_x": delta_x * 7, "velocity_y": delta_y * 7, "life": 30}
+ bullet.move(ship.x, ship.y)
+ fire_cooldown = 6
+# advance live bullets; retire them when their life runs out
+for bullet in bullets.items:
+if not bullet.visible:
+continue
+ bullet.data["life"] -= 1
+if bullet.data["life"] <= 0:
+ bullets.free(bullet)
+continue
+ bullet.fx, bullet.fy = wrap(bullet.fx + bullet.data["velocity_x"], bullet.fy + bullet.data["velocity_y"])
scene.refresh()
clock.tick()
```
[▶ Try it in the browser](/playground/?ex=02-starship-step3_shoot) ### step 4 — `step4_rocks.py` · a second pool + waves [Section titled “step 4 — step4\_rocks.py · a second pool + waves”](#step-4--step4_rockspy--a-second-pool--waves)  Reuse the pool pattern for enemies. Rocks come in 3 sizes; we keep the size in `sprite.data` and pick the matching ring bitmap with `sprite.bitmap`. `new_wave(n)` spreads n rocks around the screen, each drifting. **You see:** drifting rock rings. **Try it:** change the wave count or rock speed.
```diff
W, H = 320, 240
BACKGROUND = pg.rgb565(0, 0, 8)
FRAMES = 16
scene, _, _ = picogame_game.setup(background=BACKGROUND)
btn = picogame_input.Buttons()
clock = picogame_clock.Clock(30)
ship_bitmap = shp.poly_frames(18, [(0, -8), (6, 7), (0, 4), (-6, 7)], FRAMES, pg.rgb565(200, 220, 255))
DIRS = [(math.sin(frame * 2 * math.pi / FRAMES), -math.cos(frame * 2 * math.pi / FRAMES)) for frame in range(FRAMES)]
bullet_bitmap = shp.circle(4, pg.rgb565(255, 255, 120))
+ROCK_BITMAP = [shp.ring(40, pg.rgb565(170, 140, 100), 3), # size 0 = big
+ shp.ring(24, pg.rgb565(170, 140, 100), 3), # size 1 = medium
+ shp.ring(13, pg.rgb565(170, 140, 100), 2)] # size 2 = small
ship = pg.Sprite(ship_bitmap, W // 2, H // 2)
ship.anchor = (0.5, 0.5)
+rocks = picogame_pool.Pool(scene, ROCK_BITMAP[0], 16, anchor=(0.5, 0.5)) # NEW
bullets = picogame_pool.Pool(scene, bullet_bitmap, 6, anchor=(0.5, 0.5))
scene.add(ship)
angle = 0
velocity_x = velocity_y = 0.0
fire_cooldown = 0
wave = 3
def wrap(x, y):
return x % W, y % H
+def spawn_rock(size, x, y, velocity_x, velocity_y):
+ rock = rocks.spawn()
+if rock is None:
+return
+ rock.data = {"size": size, "velocity_x": velocity_x, "velocity_y": velocity_y}
+ rock.bitmap = ROCK_BITMAP[size] # pick the bitmap for this size
+ rock.fx, rock.fy = float(x), float(y)
+def new_wave(count):
+for i in range(count):
+ angle_rad = i * 2 * math.pi / count
+spawn_rock(0, (W // 2 + int(140 * math.cos(angle_rad))) % W,
(H // 2 + int(110 * math.sin(angle_rad))) % H,
math.cos(angle_rad) * 1.2, math.sin(angle_rad) * 1.2)
+new_wave(wave)
+# drift the rocks
+for rock in rocks.items:
+if not rock.visible:
+continue
+ rock.fx, rock.fy = wrap(rock.fx + rock.data["velocity_x"], rock.fy + rock.data["velocity_y"])
scene.refresh()
clock.tick()
```
[▶ Try it in the browser](/playground/?ex=02-starship-step4_rocks) ### step 5 — `step5_collide.py` · circular hits + splitting [Section titled “step 5 — step5\_collide.py · circular hits + splitting”](#step-5--step5_collidepy--circular-hits--splitting)  `a.near(b, r)` is a fast, no-sqrt distance test on the sprites’ centres, ideal for round things. A bullet that hits a rock frees both; a big/medium rock **splits** into two smaller ones flying apart. A rock reaching the ship costs a life, grants brief invulnerability (i-frames, shown by blinking `ship.visible`), and respawns. **You see:** you can shoot rocks apart and get hit. **Try it:** change `ROCK_RADIUS` or the split velocities.
```diff
W, H = 320, 240
BACKGROUND = pg.rgb565(0, 0, 8)
FRAMES = 16
scene, _, _ = picogame_game.setup(background=BACKGROUND)
btn = picogame_input.Buttons()
clock = picogame_clock.Clock(30)
ship_bitmap = shp.poly_frames(18, [(0, -8), (6, 7), (0, 4), (-6, 7)], FRAMES, pg.rgb565(200, 220, 255))
DIRS = [(math.sin(frame * 2 * math.pi / FRAMES), -math.cos(frame * 2 * math.pi / FRAMES)) for frame in range(FRAMES)]
bullet_bitmap = shp.circle(4, pg.rgb565(255, 255, 120))
ROCK_BITMAP = [shp.ring(40, pg.rgb565(170, 140, 100), 3),
shp.ring(24, pg.rgb565(170, 140, 100), 3),
shp.ring(13, pg.rgb565(170, 140, 100), 2)]
ROCK_RADIUS = [20, 12, 6] # collision radius per size
ship = pg.Sprite(ship_bitmap, W // 2, H // 2)
ship.anchor = (0.5, 0.5)
rocks = picogame_pool.Pool(scene, ROCK_BITMAP[0], 16, anchor=(0.5, 0.5))
bullets = picogame_pool.Pool(scene, bullet_bitmap, 6, anchor=(0.5, 0.5))
scene.add(ship)
angle = 0
velocity_x = velocity_y = 0.0
fire_cooldown = 0
+lives = 3
invincible = 60 # invincibility frames
wave = 3
+frame = 0
def wrap(x, y):
return x % W, y % H
def spawn_rock(size, x, y, velocity_x, velocity_y):
rock = rocks.spawn()
if rock is None:
return
rock.data = {"size": size, "velocity_x": velocity_x, "velocity_y": velocity_y}
rock.bitmap = ROCK_BITMAP[size]
rock.fx, rock.fy = float(x), float(y)
def new_wave(count):
for i in range(count):
angle_rad = i * 2 * math.pi / count
spawn_rock(0, (W // 2 + int(140 * math.cos(angle_rad))) % W,
(H // 2 + int(110 * math.sin(angle_rad))) % H,
math.cos(angle_rad) * 1.2, math.sin(angle_rad) * 1.2)
+def respawn():
+global velocity_x, velocity_y, invincible
+ ship.fx, ship.fy = float(W // 2), float(H // 2)
+ velocity_x = velocity_y = 0.0
+ invincible = 90
new_wave(wave)
while True:
btn.poll()
frame += 1
fire_cooldown -= 1
+if invincible > 0:
+ invincible -= 1
if btn.is_pressed(btn.LEFT):
+ size = rock.data["size"]
+ radius = ROCK_RADIUS[size]
+# bullet hits this rock?
+for bullet in bullets.items:
+if not bullet.visible:
+continue
+if bullet.near(rock, radius):
+ bullets.free(bullet)
+ rocks.free(rock)
+if size < 2: # split into two smaller, flying apart
+for sign in (-1, 1):
+spawn_rock(size + 1, rock.fx, rock.fy,
rock.data["velocity_x"] + sign * 0.8, rock.data["velocity_y"] - sign * 0.8)
+break
+# rock reaches the ship?
+if invincible <= 0 and rock.visible and ship.near(rock, radius + 6):
+ lives -= 1
+respawn()
+if lives < 0:
+ lives = 3
+ rocks.free_all()
+new_wave(wave)
+break
scene.refresh()
clock.tick()
```
[▶ Try it in the browser](/playground/?ex=02-starship-step5_collide) ### step 6 — `step6_waves.py` · score + progression [Section titled “step 6 — step6\_waves.py · score + progression”](#step-6--step6_wavespy--score--progression)  Smaller rocks score more. [`picogame_ui`](/reference/)’s [`SceneLabel`](/reference/) shows score + ships. When `rocks.count() == 0` the field is clear, so we launch the next, bigger wave, and the game ramps up. **You see:** a score that climbs and waves that grow. **Try it:** change the scoring or wave growth.
```diff
W, H = 320, 240
BACKGROUND = pg.rgb565(0, 0, 8)
FRAMES = 16
scene, _, _ = picogame_game.setup(background=BACKGROUND)
btn = picogame_input.Buttons()
clock = picogame_clock.Clock(30)
ship_bitmap = shp.poly_frames(18, [(0, -8), (6, 7), (0, 4), (-6, 7)], FRAMES, pg.rgb565(200, 220, 255))
DIRS = [(math.sin(frame * 2 * math.pi / FRAMES), -math.cos(frame * 2 * math.pi / FRAMES)) for frame in range(FRAMES)]
bullet_bitmap = shp.circle(4, pg.rgb565(255, 255, 120))
ROCK_BITMAP = [shp.ring(40, pg.rgb565(170, 140, 100), 3),
shp.ring(24, pg.rgb565(170, 140, 100), 3),
shp.ring(13, pg.rgb565(170, 140, 100), 2)]
ROCK_RADIUS = [20, 12, 6]
ship = pg.Sprite(ship_bitmap, W // 2, H // 2)
ship.anchor = (0.5, 0.5)
rocks = picogame_pool.Pool(scene, ROCK_BITMAP[0], 16, anchor=(0.5, 0.5))
bullets = picogame_pool.Pool(scene, bullet_bitmap, 6, anchor=(0.5, 0.5))
scene.add(ship)
hud = ui.SceneLabel(scene, pg, terminalio.FONT, 4, 4, pg.rgb565(255, 255, 255), BACKGROUND)
angle = 0
velocity_x = velocity_y = 0.0
fire_cooldown = 0
lives = 3
invincible = 60
wave = 3
+score = 0
frame = 0
+ score += (3 - size) * 20 # smaller rock -> more points
if size < 2:
for sign in (-1, 1):
spawn_rock(size + 1, rock.fx, rock.fy,
rock.data["velocity_x"] + sign * 0.8, rock.data["velocity_y"] - sign * 0.8)
break
if invincible <= 0 and rock.visible and ship.near(rock, radius + 6):
lives -= 1
respawn()
if lives < 0:
lives = 3
score = 0
rocks.free_all()
new_wave(wave)
break
+if rocks.count() == 0: # field cleared -> next, bigger wave
+ wave += 1
+new_wave(wave)
+ hud.set("SCORE %05d SHIPS %d" % (score, max(0, lives)))
scene.refresh()
clock.tick()
```
[▶ Try it in the browser](/playground/?ex=02-starship-step6_waves) ### step 7 — `step7_particles.py` · explosions, exhaust, sound [Section titled “step 7 — step7\_particles.py · explosions, exhaust, sound”](#step-7--step7_particlespy--explosions-exhaust-sound)  One [`Particles`](/reference/)`(fade=True)` system serves two effects: a burst when a rock is destroyed (many fast, fading sparks) and a thrust flame (a couple of short sparks behind the ship each frame while thrusting). `fade=True` dims particles as they age. `tone()` gives a fire beep and a lower boom. **You see:** explosions and an engine trail. **Try it:** change the explosion `count`/`life` or the beep frequencies.
```diff
W, H = 320, 240
BACKGROUND = pg.rgb565(0, 0, 8)
FRAMES = 16
scene, _, _ = picogame_game.setup(background=BACKGROUND)
btn = picogame_input.Buttons()
clock = picogame_clock.Clock(30)
+try:
+import picogame_audio
+ audio = picogame_audio.Audio()
+ snd_fire = picogame_audio.tone(880, 25)
+ snd_boom = picogame_audio.tone(160, 90)
+except Exception:
+ audio = None
ship_bitmap = shp.poly_frames(18, [(0, -8), (6, 7), (0, 4), (-6, 7)], FRAMES, pg.rgb565(200, 220, 255))
DIRS = [(math.sin(frame * 2 * math.pi / FRAMES), -math.cos(frame * 2 * math.pi / FRAMES)) for frame in range(FRAMES)]
bullet_bitmap = shp.circle(4, pg.rgb565(255, 255, 120))
ROCK_BITMAP = [shp.ring(40, pg.rgb565(170, 140, 100), 3),
shp.ring(24, pg.rgb565(170, 140, 100), 3),
shp.ring(13, pg.rgb565(170, 140, 100), 2)]
ROCK_RADIUS = [20, 12, 6]
ship = pg.Sprite(ship_bitmap, W // 2, H // 2)
ship.anchor = (0.5, 0.5)
rocks = picogame_pool.Pool(scene, ROCK_BITMAP[0], 16, anchor=(0.5, 0.5))
bullets = picogame_pool.Pool(scene, bullet_bitmap, 6, anchor=(0.5, 0.5))
sparks = pg.Particles(160, size=2, fade=True) # NEW
+scene.add(sparks)
+scene.add(ship)
+# thrust flame: a couple of orange sparks shot out the back
+ sparks.emit(ship.x - int(delta_x * 8), ship.y - int(delta_y * 8), 2, 2, 10, pg.rgb565(255, 150, 40))
speed = math.sqrt(velocity_x * velocity_x + velocity_y * velocity_y)
if speed > 5:
velocity_x *= 5 / speed; velocity_y *= 5 / speed
velocity_x *= 0.99; velocity_y *= 0.99
ship.fx, ship.fy = wrap(ship.fx + velocity_x, ship.fy + velocity_y)
ship.frame = angle
ship.visible = (invincible <= 0) or (frame & 1)
if btn.just_pressed(btn.B) and fire_cooldown <= 0:
bullet = bullets.spawn()
if bullet:
bullet.data = {"velocity_x": delta_x * 7, "velocity_y": delta_y * 7, "life": 30}
bullet.move(ship.x, ship.y)
fire_cooldown = 6
+if audio:
+ audio.sfx(snd_fire)
for bullet in bullets.items:
if not bullet.visible:
continue
bullet.data["life"] -= 1
if bullet.data["life"] <= 0:
bullets.free(bullet)
continue
bullet.fx, bullet.fy = wrap(bullet.fx + bullet.data["velocity_x"], bullet.fy + bullet.data["velocity_y"])
for rock in rocks.items:
if not rock.visible:
continue
rock.fx, rock.fy = wrap(rock.fx + rock.data["velocity_x"], rock.fy + rock.data["velocity_y"])
size = rock.data["size"]
radius = ROCK_RADIUS[size]
for bullet in bullets.items:
if not bullet.visible:
continue
if bullet.near(rock, radius):
bullets.free(bullet)
rocks.free(rock)
score += (3 - size) * 20
+ sparks.emit(rock.x, rock.y, 18, 3, 26, pg.rgb565(255, 200, 120)) # explosion
+if audio:
+ audio.sfx(snd_boom)
if size < 2:
for sign in (-1, 1):
spawn_rock(size + 1, rock.fx, rock.fy,
rock.data["velocity_x"] + sign * 0.8, rock.data["velocity_y"] - sign * 0.8)
break
if invincible <= 0 and rock.visible and ship.near(rock, radius + 6):
lives -= 1
+ sparks.emit(ship.x, ship.y, 24, 4, 30, pg.rgb565(120, 200, 255))
respawn()
if lives < 0:
lives = 3
score = 0
rocks.free_all()
new_wave(wave)
break
if rocks.count() == 0:
wave += 1
new_wave(wave)
+ sparks.tick() # advance all particles
hud.set("SCORE %05d SHIPS %d" % (score, max(0, lives)))
scene.refresh()
clock.tick()
```
[▶ Try it in the browser](/playground/?ex=02-starship-step7_particles) ### step 8 — `step8_states.py` · the state machine (capstone) [Section titled “step 8 — step8\_states.py · the state machine (capstone)”](#step-8--step8_statespy--the-state-machine-capstone)  A finished game needs more than one mode — and it’s worth tidying the code as it grows. All the run’s mutable values move into one `State` object (`st`), re-initialised **in place** by `reset()`, and the whole loop moves into a `main()` function (inside a function its names resolve as fast locals — a small measured win on device). `st.mode` runs TITLE → PLAY → GAMEOVER; `new_game()` calls `st.reset()` to restart; one centred `SceneLabel` shows the message for the non-play states; death ends the run instead of silently restarting. This is the `State` + `main()` shape every bigger game grows into — see [Game patterns](/concepts/patterns/) and the ready-to-run [skeleton](/snippets/). **You see:** title → play → game over → title. **Try it:** add a high score that survives across games (keep it a module global, not in `State`; see [`picogame_save`](/reference/) for NVM persistence).
```diff
BACKGROUND = pg.rgb565(0, 0, 8)
FRAMES = 16
+TITLE, PLAY, GAMEOVER = 0, 1, 2
scene, _, _ = picogame_game.setup(background=BACKGROUND)
snd_fire = picogame_audio.tone(880, 25)
snd_boom = picogame_audio.tone(160, 90)
+ snd_start = picogame_audio.tone(660, 40) # bright blip: start / menu confirm
+ snd_die = picogame_audio.tone(120, 260) # low boom: game over (descending = lose)
except Exception:
audio = None
rocks = picogame_pool.Pool(scene, ROCK_BITMAP[0], 16, anchor=(0.5, 0.5))
bullets = picogame_pool.Pool(scene, bullet_bitmap, 6, anchor=(0.5, 0.5))
sparks = pg.Particles(160, size=2, fade=True)
scene.add(sparks)
scene.add(ship)
hud = ui.SceneLabel(scene, pg, terminalio.FONT, 4, 4, pg.rgb565(255, 255, 255), BACKGROUND)
+msg = ui.SceneLabel(scene, pg, terminalio.FONT, 96, 112, pg.rgb565(255, 255, 255), BACKGROUND)
+# ALL the run's mutable values in ONE object. reset() lists every field's default in one place, so a
+# restart is st.reset() -- and st is created ONCE below and never reassigned (a never-rebound singleton),
+# which is what lets main() and new_game() just mutate st.* with no `global`. Engine objects (ship, the
+# pools, sparks, clock, the labels) stay module-level names, NOT in State.
+class State:
+def __init__(self):
+self.reset()
+def reset(self):
+self.mode = TITLE # TITLE -> PLAY -> GAMEOVER
+self.angle = 0
+self.vx = self.vy = 0.0
+self.fire_cooldown = 0
+self.lives = 3
+self.invincible = 0
+self.wave = 3
+self.score = 0
+st = State()
def wrap(x, y):
return x % W, y % H
+def new_game():
+ st.reset() # every field back to its default, IN PLACE
+ st.mode = PLAY
+ st.invincible = 60 # a mercy window on the fresh run
ship.fx, ship.fy = float(W // 2), float(H // 2)
+ rocks.free_all()
+ bullets.free_all()
+ sparks.clear()
+new_wave(st.wave)
+def main():
# The per-frame loop lives in a FUNCTION: its names (st, the helpers, the loop's own frame counter)
+# resolve as fast array-indexed locals instead of globals-dict lookups.
+ frame = 0
+while True:
+ btn.poll()
+ frame += 1
+if st.mode == TITLE:
+ ship.visible = False
+ msg.set("STARSHIP PRESS A")
+if btn.just_pressed(btn.A):
if audio:
audio.sfx(snd_start) # confirm blip on start
+new_game()
+ scene.refresh()
+ clock.tick()
continue
+if st.mode == GAMEOVER:
+ msg.set("GAME OVER %05d A=MENU" % st.score)
+if btn.just_pressed(btn.A):
if audio:
audio.sfx(snd_start) # confirm blip back to menu
+ st.mode = TITLE
+ sparks.tick()
+ scene.refresh()
+ clock.tick()
+continue
+if st.mode == PLAY:
+ msg.set(" ")
+ st.fire_cooldown -= 1
+if st.invincible > 0:
+ st.invincible -= 1
+if btn.is_pressed(btn.LEFT):
+ st.angle = (st.angle - 1) % FRAMES
+if btn.is_pressed(btn.RIGHT):
+ st.angle = (st.angle + 1) % FRAMES
+ delta_x, delta_y = DIRS[st.angle]
+if btn.is_pressed(btn.UP):
+ st.vx += delta_x * 0.25; st.vy += delta_y * 0.25
+ sparks.emit(ship.x - int(delta_x * 8), ship.y - int(delta_y * 8), 2, 2, 10, pg.rgb565(255, 150, 40))
+ speed = math.sqrt(st.vx * st.vx + st.vy * st.vy)
+if speed > 5:
+ st.vx *= 5 / speed; st.vy *= 5 / speed
+ st.vx *= 0.99; st.vy *= 0.99
+ ship.fx, ship.fy = wrap(ship.fx + st.vx, ship.fy + st.vy)
+ ship.frame = st.angle
+ ship.visible = (st.invincible <= 0) or (frame & 1)
+if btn.just_pressed(btn.B) and st.fire_cooldown <= 0:
+ bullet = bullets.spawn()
+if bullet:
+ bullet.data = {"velocity_x": delta_x * 7, "velocity_y": delta_y * 7, "life": 30}
+ bullet.move(ship.x, ship.y)
+ st.fire_cooldown = 6
+if audio:
+ audio.sfx(snd_fire)
+for bullet in bullets.items:
+if not bullet.visible:
+continue
+ bullet.data["life"] -= 1
+if bullet.data["life"] <= 0:
+ bullets.free(bullet)
+continue
+ bullet.fx, bullet.fy = wrap(bullet.fx + bullet.data["velocity_x"], bullet.fy + bullet.data["velocity_y"])
+for rock in rocks.items:
+if not rock.visible:
+continue
+ rock.fx, rock.fy = wrap(rock.fx + rock.data["velocity_x"], rock.fy + rock.data["velocity_y"])
+ size = rock.data["size"]
+ radius = ROCK_RADIUS[size]
+for bullet in bullets.items:
+if not bullet.visible:
+continue
+if bullet.near(rock, radius):
+ bullets.free(bullet)
+ rocks.free(rock)
+ st.score += (3 - size) * 20
+ sparks.emit(rock.x, rock.y, 18, 3, 26, pg.rgb565(255, 200, 120))
+if audio:
+ audio.sfx(snd_boom)
+if size < 2:
+for sign in (-1, 1):
+spawn_rock(size + 1, rock.fx, rock.fy,
rock.data["velocity_x"] + sign * 0.8, rock.data["velocity_y"] - sign * 0.8)
+break
+if st.invincible <= 0 and rock.visible and ship.near(rock, radius + 6):
+ st.lives -= 1
+ sparks.emit(ship.x, ship.y, 24, 4, 30, pg.rgb565(120, 200, 255))
+ ship.fx, ship.fy = float(W // 2), float(H // 2)
+ st.vx = st.vy = 0.0
+ st.invincible = 90
+if st.lives < 0:
+if audio:
+ audio.sfx(snd_die) # low boom on game over
+ st.mode = GAMEOVER
+break
+if rocks.count() == 0:
+ st.wave += 1
+new_wave(st.wave)
sparks.tick()
hud.set("SCORE %05d SHIPS %d" % (st.score, max(0, st.lives)))
scene.refresh()
clock.tick()
+main()
```
[▶ Try it in the browser](/playground/?ex=02-starship-step8_states) *** **Where to go next:** the [web editor](/tools/editor/) + `picogame_scene`, to design levels as data and load them, instead of hand-coding placement. See the [scene format](/scene-format/) for how that data is structured, and try the sibling tutorials: [01-bounce](/tutorials/01-bounce/) and [03-quest](/tutorials/03-quest/).
# Tutorial 3 — Quest
> Build a top-down RPG in 8 steps — a scrolling map, camera, items, an NPC, combat, and a complete quest.
In this tutorial, you’ll build a small top-down RPG: walk through a scrolling map, collect coins, talk to an NPC, fight slimes, and complete a quest. It assumes you’ve completed [01-bounce](/tutorials/01-bounce/) and [02-starship](/tutorials/02-starship/). The main new ideas are the **camera** and using a **tilemap as the world**. The full source for this tutorial lives on GitHub: [tutorials/03-quest](https://github.com/MakerClassCZ/picogame/tree/main/tutorials/03-quest). Run any step:
```bash
python3 sim/run.py tutorials/03-quest/stepN_name.py --hold DOWN --shot /tmp/out.png
```
**Tip:** use `--backend pygame` for steps 6–8 if you want to interact with the dialog and quest. *** ### step 1 — `step1_world.py` · a world bigger than the screen [Section titled “step 1 — step1\_world.py · a world bigger than the screen”](#step-1--step1_worldpy--a-world-bigger-than-the-screen)  [`picogame_game.setup(...)`](/helpers/boot-loop/) returns `(scene, buffer_a, buffer_b)`. On an SPI display, the last two values are reusable strip buffers; on a framebuffer display, they are `None`. Early steps only need the [`Scene`](/reference/) and ignore the other two values (`scene, _, _`). Later dialog steps pass `buffer_a` to an immediate-mode helper; the framebuffer renderer does not need it. An ASCII map becomes a [`Tilemap`](/reference/) (30×20 tiles = 480×320 px, larger than the 320×240 screen). `shp.tileset_colors` builds the tileset (grass/path/water/tree/wall/door/goal). The hero is a [`Sprite`](/reference/) whose look comes from a [`Bitmap`](/reference/) — for now a **placeholder**: a red square with a brighter *facing edge* so you can see which way it points. Step 4 replaces it with a character assembled from ASCII masks. [`scene.set_view(offset_x, offset_y)`](/reference/) chooses the visible window; that’s the camera. The hero lives in **world** coordinates; the view offset decides where it lands on screen. **You see:** a patch of world with the hero centred. **Try it:** edit the `MAP` strings.
```python
# Quest -- step 1: a world bigger than the screen.
#
# This third tutorial builds a top-down RPG. It teaches what Bounce and Starship
# couldn't: a scrolling world larger than the display, a camera that follows the
# hero, tile-based wall collision, a walk animation, items, an NPC you talk to, and
# light combat. Do 01-bounce and 02-starship first.
#
# What you learn here: a Tilemap can be a whole WORLD (30x20 tiles = 480x320 px,
# bigger than the 320x240 screen). scene.set_view(offset_x, offset_y) chooses which part of the
# world is on screen -- that's the camera. We centre it on the hero. The hero lives
# in WORLD coordinates; the view offset decides where that lands on screen.
#
# New: a large Tilemap from an ASCII map, shp.tileset_colors, scene.set_view, and a
# placeholder hero (a red square with a facing edge). Step 4 gives it real drawn art.
#
# Run: python3 sim/run.py tutorials/03-quest/step1_world.py --shot /tmp/q1.png
import array
import picogame as pg
import picogame_game
import picogame_clock
import picogame_shapes as shp
W, H = 320, 240
TILE = 16
(240, 210, 60)] # GOAL
scene, _, _ = picogame_game.setup(background=pg.rgb565(0, 0, 0))
clock = picogame_clock.Clock(30)
tileset = shp.tileset_colors(TILE, TILE, [pg.rgb565(*color) for color in TILE_RGB])
world = pg.Tilemap(tileset, MAPCOLS, MAPROWS)
hero_x, hero_y = TILE, TILE # world pixel position of the hero
# build the Tilemap cell by cell from the ASCII map above
for tile_y in range(MAPROWS):
row = MAP[tile_y]
for tile_x in range(MAPCOLS):
char = row[tile_x] if tile_x < len(row) else "." # rows are full width; "." is just a safety net
world.tile(tile_x, tile_y, CHAR2TILE.get(char, GRASS)) # unknown chars fall back to GRASS
if char == "P":
hero_x, hero_y = tile_x * TILE, tile_y * TILE
scene.add(world)
# a PLACEHOLDER hero: a plain red square with a brighter bar on the facing edge, so you
# can see which way it points. 4 frames = 4 directions (frame = facing). We prototype
# with a shape now and draw a real animated character in step 4.
RED = pg.rgb565(210, 80, 60)
EDGE = pg.rgb565(255, 225, 170)
def hero_bitmap():
palette = array.array("H", [pg.rgb565(0, 0, 0), RED, EDGE]) # index 0 = transparent
stride = TILE * 4 # 4 frames side by side, 1 byte/px
data = bytearray(stride * TILE)
for facing in range(4): # 0 down, 1 up, 2 left, 3 right
for y in range(TILE):
for x in range(TILE):
on_facing_edge = ((facing == 0 and y >= TILE - 3) or (facing == 1 and y < 3) or
(facing == 2 and x < 3) or (facing == 3 and x >= TILE - 3))
data[y * stride + facing * TILE + x] = 2 if on_facing_edge else 1
return pg.Bitmap(data, TILE, TILE, format=pg.PAL8, palette=palette, frames=4, stride=stride)
hero = pg.Sprite(hero_bitmap(), hero_x, hero_y, frame=0)
scene.add(hero)
def camera_follow():
# centre the camera on the hero, clamped so we never show past the world edges
# The view offset = how far the world is shifted left/up on screen: 0 (world edge
# at screen edge) down to negative as we scroll right/down.
offset_x = W // 2 - (hero.x + TILE // 2) # centre the hero...
offset_x = min(0, offset_x) # ...but never past the left edge
offset_x = max(W - MAPCOLS * TILE, offset_x) # ...nor past the right edge
offset_y = H // 2 - (hero.y + TILE // 2) # centre the hero...
offset_y = min(0, offset_y) # ...but never past the top edge
offset_y = max(H - MAPROWS * TILE, offset_y) # ...nor past the bottom edge
scene.set_view(int(offset_x), int(offset_y))
camera_follow()
while True:
scene.refresh()
clock.tick()
```
[▶ Try it in the browser](/playground/?ex=03-quest-step1_world) ### step 2 — `step2_walk.py` · walk, camera follows [Section titled “step 2 — step2\_walk.py · walk, camera follows”](#step-2--step2_walkpy--walk-camera-follows)  4-direction movement read with [`picogame_input`](/reference/); after each move `camera_follow()` re-centres the camera, **clamped** to the world so you never see past the edges (near an edge the hero walks toward the screen edge instead). The hero faces its movement direction — its `frame` picks down/up/left/right. No wall collision yet: you can walk over water. **You see:** the hero strides around with the camera following, clamped so the view never slips past the world’s edge. **Try it:** change `SPEED`.
```diff
import picogame as pg
import picogame_game
+import picogame_input
import picogame_clock
import picogame_shapes as shp
W, H = 320, 240
TILE = 16
+SPEED = 2
MAP = [
"##############################",
(150, 90, 40), # DOOR
(240, 210, 60)] # GOAL
+DOWN, UP, LEFT, RIGHT = 0, 1, 2, 3 # facing -> frame index
scene, _, _ = picogame_game.setup(background=pg.rgb565(0, 0, 0))
+btn = picogame_input.Buttons()
clock = picogame_clock.Clock(30)
tileset = shp.tileset_colors(TILE, TILE, [pg.rgb565(*color) for color in TILE_RGB])
world = pg.Tilemap(tileset, MAPCOLS, MAPROWS)
hero_x, hero_y = TILE, TILE
for tile_y in range(MAPROWS):
for tile_x in range(MAPCOLS):
char = MAP[tile_y][tile_x] if tile_x < len(MAP[tile_y]) else "."
world.tile(tile_x, tile_y, CHAR2TILE.get(char, GRASS))
if char == "P":
hero_x, hero_y = tile_x * TILE, tile_y * TILE
scene.add(world)
# a PLACEHOLDER hero: a plain red square with a brighter bar on the facing edge, so you
# can see which way it points. 4 frames = 4 directions (frame = facing). Step 4 replaces
# it with a real drawn character.
RED = pg.rgb565(210, 80, 60)
EDGE = pg.rgb565(255, 225, 170)
hero = pg.Sprite(hero_bitmap(), hero_x, hero_y, frame=DOWN)
scene.add(hero)
def camera_follow():
offset_x = max(W - MAPCOLS * TILE, min(0, W // 2 - (hero.x + TILE // 2)))
offset_y = max(H - MAPROWS * TILE, min(0, H // 2 - (hero.y + TILE // 2)))
scene.set_view(int(offset_x), int(offset_y))
camera_follow()
while True:
+ btn.poll()
+# True/False count as 1/0, so this is -1 (left), 0, or +1 (right)
+ delta_x = btn.is_pressed(btn.RIGHT) - btn.is_pressed(btn.LEFT)
+ delta_y = btn.is_pressed(btn.DOWN) - btn.is_pressed(btn.UP)
+if delta_x:
+ hero.frame = RIGHT if delta_x > 0 else LEFT # face horizontally
+elif delta_y:
+ hero.frame = DOWN if delta_y > 0 else UP # face vertically
+if delta_x or delta_y:
+ hero.move(hero.x + delta_x * SPEED, hero.y + delta_y * SPEED)
+camera_follow()
scene.refresh()
clock.tick()
```
[▶ Try it in the browser](/playground/?ex=03-quest-step2_walk) ### step 3 — `step3_walls.py` · tile collision [Section titled “step 3 — step3\_walls.py · tile collision”](#step-3--step3_wallspy--tile-collision)  `solid_at(pixel_x, pixel_y)` maps a world pixel to a tile and checks a `SOLID` set; `can_walk()` probes the hero’s four corners. We test the X and Y moves **separately**, so you slide along a wall instead of sticking when pushing diagonally into it. (The engine also ships [`picogame_tiles`](/reference/) with ready-made tile probing if you’d rather not hand-roll it.) **You see:** water, trees and walls now block you. **Try it:** add a tile value to `SOLID` (or remove one).
```diff
(150, 90, 40), # DOOR
(240, 210, 60)] # GOAL
+SOLID = (WATER, TREE, WALL, DOOR) # these tiles block movement
DOWN, UP, LEFT, RIGHT = 0, 1, 2, 3 # facing -> frame index
scene, _, _ = picogame_game.setup(background=pg.rgb565(0, 0, 0))
+def solid_at(pixel_x, pixel_y):
+ tile_x, tile_y = pixel_x // TILE, pixel_y // TILE
+if tile_x < 0 or tile_x >= MAPCOLS or tile_y < 0 or tile_y >= MAPROWS:
+return True
+return world.tile(tile_x, tile_y) in SOLID
+def can_walk(pixel_x, pixel_y):
+# probe the hero's body corners (inset 2px) -- all must be free
+return not (solid_at(pixel_x + 2, pixel_y + 2) or solid_at(pixel_x + TILE - 3, pixel_y + 2) or
+solid_at(pixel_x + 2, pixel_y + TILE - 3) or solid_at(pixel_x + TILE - 3, pixel_y + TILE - 3))
def camera_follow():
offset_x = max(W - MAPCOLS * TILE, min(0, W // 2 - (hero.x + TILE // 2)))
delta_y = btn.is_pressed(btn.DOWN) - btn.is_pressed(btn.UP)
if delta_x:
hero.frame = RIGHT if delta_x > 0 else LEFT
elif delta_y:
hero.frame = DOWN if delta_y > 0 else UP
+ moved = False
if delta_x and can_walk(hero.x + delta_x * SPEED, hero.y): # test X alone
+ hero.move(hero.x + delta_x * SPEED, hero.y); moved = True
+if delta_y and can_walk(hero.x, hero.y + delta_y * SPEED): # then Y alone -> slide
+ hero.move(hero.x, hero.y + delta_y * SPEED); moved = True
+if moved:
camera_follow()
scene.refresh()
clock.tick()
```
[▶ Try it in the browser](/playground/?ex=03-quest-step3_walls) ### step 4 — `step4_anim.py` · walk animation [Section titled “step 4 — step4\_anim.py · walk animation”](#step-4--step4_animpy--walk-animation)  Now we replace the placeholder square with a character drawn from ASCII masks (down/up/side, with LEFT the side view mirrored by `flip_x`), with two **poses** per facing, driven by [`picogame_anim`](/reference/)`.AnimatedSprite`: `play(name)` picks the facing’s animation, `tick(dt)` advances it using the real `dt` from `clock.tick()` (so the walk speed is frame-rate independent). **You see:** a walk cycle in your direction of travel, and the rest pose when you stand still. **Try it:** change the animation `fps`.  The frames here are hand-drawn ASCII **masks**, so you can focus on the animation code. For custom artwork, draw an image sprite sheet and bake it to a Bitmap with `tools/png2picogame.py`, then animate by frame index — the *same* `AnimatedSprite` drives that too. See the [assets guide](/tutorials/assets/) and each tutorial’s `bonus_art.py`.
```diff
import picogame_input
import picogame_clock
+import picogame_anim
import picogame_shapes as shp
(240, 210, 60)] # GOAL
SOLID = (WATER, TREE, WALL, DOOR) # these tiles block movement
DOWN, UP, LEFT, RIGHT = 0, 1, 2, 3
+FACING_ANIM = ("down", "up", "side", "side") # animation per facing (left/right share the side art)
+WALK_FPS = 8
scene, _, _ = picogame_game.setup(background=pg.rgb565(0, 0, 0))
# --- the hero: ASCII pixel art you can edit. '#' = a pixel, '.' = transparent. One
# colour = a 1-bit silhouette; the FACING reads from the shape: DOWN has eyes, UP is
# the back of the head, SIDE is a profile with a nose (LEFT = SIDE mirrored at runtime
# with flip_x). Two poses per facing make the walk -- the legs scissor between A and B.
+HERO_COLOR = pg.rgb565(235, 90, 70)
+DOWN_A = [
"................",
".....####.......",
+"....######......",
+"....######......",
+"....#.##.#......", # eye gaps -> the face
+"....######......",
+".....####.......",
+"...########.....",
+"..##########....",
+"..##########....",
+"..##########....",
+"...########.....",
+"....##..##......",
+"...###..##......",
+"..###...##......", # left foot forward
+"..##............",
+]
+DOWN_B = [
+"................",
+".....####.......",
+"....######......",
+"....######......",
+"....#.##.#......",
+"....######......",
+".....####.......",
+"...########.....",
+"..##########....",
+"..##########....",
+"..##########....",
+"...########.....",
+"....##..##......",
+"....##..###.....",
+"....##...###....", # right foot forward
+"..........##....",
+]
+UP_A = [
+"................",
+".....####.......",
+"....######......",
+"....######......",
+"....######......", # solid head = the hero's back
+"....######......",
+".....####.......",
+"...########.....",
+"..##########....",
+"..##########....",
+"..##########....",
+"...########.....",
+"....##..##......",
+"...###..##......",
+"..###...##......",
+"..##............",
+]
+UP_B = [
+"................",
+".....####.......",
+"....######......",
+"....######......",
+"....######......",
+"....######......",
+".....####.......",
+"...########.....",
+"..##########....",
+"..##########....",
+"..##########....",
+"...########.....",
+"....##..##......",
+"....##..###.....",
+"....##...###....",
+"..........##....",
+]
+SIDE_A = [
+"................",
+".....####.......",
+"....#####.......",
+"....######......",
+"....#####.#.....", # nose nub -> faces right (flip_x -> left)
+"....######......",
+".....####.......",
+"....######......",
+"....######.#....", # arm swung forward
+"....######.#....",
+"....######......",
+".....####.......",
+"...##....##.....", # legs split
+"..##......##....",
+"..##......##....",
+"..#........#....",
+]
+SIDE_B = [
+"................",
+".....####.......",
+"....#####.......",
+"....######......",
+"....#####.#.....",
+"....######......",
+".....####.......",
+"....######......",
+"....######......", # arm tucked in
+"....######......",
+"....######......",
+".....####.......",
+".....####.......", # legs pass under the body
+".....####.......",
+"....##..##......",
+"....#....#......",
+]
+BM = {"down": [shp.from_mask(DOWN_A, HERO_COLOR), shp.from_mask(DOWN_B, HERO_COLOR)],
+"up": [shp.from_mask(UP_A, HERO_COLOR), shp.from_mask(UP_B, HERO_COLOR)],
+"side": [shp.from_mask(SIDE_A, HERO_COLOR), shp.from_mask(SIDE_B, HERO_COLOR)]}
hero = pg.Sprite(BM["down"][0], hero_x, hero_y)
+# each entry: name: (bitmap list, frames-per-second, loop?) -- AnimatedSprite accepts
+# a list of Bitmaps to swap in, not only frame indices into one sheet
+walk = picogame_anim.AnimatedSprite(hero, {
+"down": (BM["down"], WALK_FPS, True),
+"up": (BM["up"], WALK_FPS, True),
+"side": (BM["side"], WALK_FPS, True)})
scene.add(hero)
+facing = DOWN
def solid_at(pixel_x, pixel_y):
tile_x, tile_y = pixel_x // TILE, pixel_y // TILE
camera_follow()
+dt = 1 / 30 # assume one 30fps frame for the first tick; clock.tick() returns real dt after that
while True:
btn.poll()
+# True/False count as 1/0, so this is -1 (left), 0, or +1 (right)
delta_x = btn.is_pressed(btn.RIGHT) - btn.is_pressed(btn.LEFT)
delta_y = btn.is_pressed(btn.DOWN) - btn.is_pressed(btn.UP)
if delta_x:
facing = RIGHT if delta_x > 0 else LEFT
elif delta_y:
facing = DOWN if delta_y > 0 else UP
+ hero.flip_x = (facing == LEFT) # mirror the side art for LEFT
moved = False
if delta_x and can_walk(hero.x + delta_x * SPEED, hero.y):
hero.move(hero.x + delta_x * SPEED, hero.y); moved = True
if delta_y and can_walk(hero.x, hero.y + delta_y * SPEED):
hero.move(hero.x, hero.y + delta_y * SPEED); moved = True
if moved:
camera_follow()
+ walk.play(FACING_ANIM[facing]) # animate the walk while moving
+ walk.tick(dt)
+else:
+ hero.bitmap = BM[FACING_ANIM[facing]][0] # still: pose A of the current facing
scene.refresh()
dt = clock.tick()
```
[▶ Try it in the browser](/playground/?ex=03-quest-step4_anim) ### step 5 — `step5_items.py` · items + a fixed HUD [Section titled “step 5 — step5\_items.py · items + a fixed HUD”](#step-5--step5_itemspy--items--a-fixed-hud)  Coins are sprites placed from the map; being normal scene items, they **scroll with the world**. We collect one when the hero is close, hide it, and count it. [`picogame_ui`](/reference/)`.SceneLabel` is a **fixed** layer: it does NOT scroll, so the counter stays pinned to the corner. **You see:** coins dotted through the world that you scoop up close, and a counter pinned in the corner that doesn’t scroll. **Try it:** add more `*` coins to the map.
```diff
# Run: python3 sim/run.py tutorials/03-quest/step5_items.py --hold RIGHT --shot /tmp/q5.png
+import terminalio
import picogame as pg
import picogame_game
import picogame_input
import picogame_clock
import picogame_anim
import picogame_shapes as shp
+import picogame_ui as ui
W, H = 320, 240
FACING_ANIM = ("down", "up", "side", "side") # animation per facing (left/right share the side art)
WALK_FPS = 8
+BACKGROUND = pg.rgb565(0, 0, 0)
scene, _, _ = picogame_game.setup(background=BACKGROUND)
btn = picogame_input.Buttons()
clock = picogame_clock.Clock(30)
tileset = shp.tileset_colors(TILE, TILE, [pg.rgb565(*color) for color in TILE_RGB])
world = pg.Tilemap(tileset, MAPCOLS, MAPROWS)
hero_x, hero_y = TILE, TILE
+coin_spots = []
for tile_y in range(MAPROWS):
for tile_x in range(MAPCOLS):
char = MAP[tile_y][tile_x] if tile_x < len(MAP[tile_y]) else "."
world.tile(tile_x, tile_y, CHAR2TILE.get(char, GRASS))
if char == "P":
hero_x, hero_y = tile_x * TILE, tile_y * TILE
+elif char == "*":
+ coin_spots.append((tile_x * TILE, tile_y * TILE))
scene.add(world)
+coin_bitmap = shp.circle(8, pg.rgb565(245, 215, 60))
+coins = [pg.Sprite(coin_bitmap, x + 4, y + 4) for (x, y) in coin_spots] # +4 to centre in tile
+for coin in coins:
+ scene.add(coin)
# --- the hero: ASCII pixel art you can edit. '#' = a pixel, '.' = transparent. One
# colour = a 1-bit silhouette; the FACING reads from the shape: DOWN has eyes, UP is
"side": (BM["side"], WALK_FPS, True)})
scene.add(hero)
+hud = ui.SceneLabel(scene, pg, terminalio.FONT, 4, 4, pg.rgb565(255, 255, 255), BACKGROUND)
facing = DOWN
+coins_collected = 0
camera_follow()
dt = 1 / 30
while True:
btn.poll()
if moved:
camera_follow()
walk.play(FACING_ANIM[facing]); walk.tick(dt)
else:
hero.bitmap = BM[FACING_ANIM[facing]][0] # still: pose A of the current facing
+# pick up any coin we're standing on (within ~12px on both axes = close enough)
+for coin in coins:
+if coin.visible and abs(hero.x - coin.x) < 12 and abs(hero.y - coin.y) < 12:
+ coin.visible = False
+ coins_collected += 1
+ hud.set("COINS %d/%d" % (coins_collected, len(coins)))
scene.refresh()
dt = clock.tick()
```
[▶ Try it in the browser](/playground/?ex=03-quest-step5_items) ### step 6 — `step6_npc.py` · talk to an NPC [Section titled “step 6 — step6\_npc.py · talk to an NPC”](#step-6--step6_npcpy--talk-to-an-npc)  Stand next to the NPC and press **A** to switch into a **dialog mode**: the world keeps drawing underneath while `picogame_ui.TextBox` overlays a message; movement is frozen until you press a button. **You see:** a “PRESS A” prompt near the NPC, then a dialog box. **Try it:** change the dialog `LINES`. **A tidy-up: the `State` object.** The mutable variables are piling up, and as globals each needs a `global` line in every function that changes it. So we group them into one `class State` (`st.coins`, `st.mode`); objects that never change reference (the hero, the tilemap) stay module-level.
```diff
# Run: python3 sim/run.py tutorials/03-quest/step6_npc.py --shot /tmp/q6.png
+import board
import terminalio
import picogame as pg
SOLID = (WATER, TREE, WALL, DOOR) # these tiles block movement
DOWN, UP, LEFT, RIGHT = 0, 1, 2, 3
FACING_ANIM = ("down", "up", "side", "side") # animation per facing (left/right share the side art)
+EXPLORE, DIALOG = 0, 1 # game modes (int constants, not strings)
WALK_FPS = 8 # walk-animation speed (frames per second)
BACKGROUND = pg.rgb565(0, 0, 0)
+WHITE = pg.rgb565(255, 255, 255)
+NAVY = pg.rgb565(10, 10, 40)
+# buffer_a/buffer_b = the engine's two shared render strips; immediate-mode draws
+# (the dialog box below) paint straight into buffer_a
scene, buffer_a, buffer_b = picogame_game.setup(background=BACKGROUND)
btn = picogame_input.Buttons()
clock = picogame_clock.Clock(30)
tileset = shp.tileset_colors(TILE, TILE, [pg.rgb565(*color) for color in TILE_RGB])
world = pg.Tilemap(tileset, MAPCOLS, MAPROWS)
hero_x, hero_y = TILE, TILE
+npc_x, npc_y = TILE, TILE
coin_spots = []
for tile_y in range(MAPROWS):
for tile_x in range(MAPCOLS):
char = MAP[tile_y][tile_x] if tile_x < len(MAP[tile_y]) else "."
world.tile(tile_x, tile_y, CHAR2TILE.get(char, GRASS))
if char == "P":
hero_x, hero_y = tile_x * TILE, tile_y * TILE
+elif char == "N":
+ npc_x, npc_y = tile_x * TILE, tile_y * TILE
elif char == "*":
coin_spots.append((tile_x * TILE, tile_y * TILE))
scene.add(world)
coin_bitmap = shp.circle(8, pg.rgb565(245, 215, 60))
coins = [pg.Sprite(coin_bitmap, x + 4, y + 4) for (x, y) in coin_spots]
for coin in coins:
scene.add(coin)
+npc = pg.Sprite(shp.rect(TILE, TILE, pg.rgb565(230, 200, 60)), npc_x, npc_y)
+scene.add(npc)
"side": (BM["side"], WALK_FPS, True)})
scene.add(hero)
hud = ui.SceneLabel(scene, pg, terminalio.FONT, 4, 4, WHITE, BACKGROUND)
+dialog = ui.TextBox(pg, terminalio.FONT, 8, H - 64, W - 16, 58, WHITE, NAVY, maxlines=4)
+LINES = ["Villager:", "Beware the slimes in the", "tall grass, traveller.", "(press A)"]
+class State:
+"""All the mutable game variables in one place (was a pile of module globals). __init__ just calls
reset(), so every default lives in ONE spot and a restart would be a single call -- st.reset()."""
+def __init__(self):
+self.reset()
+def reset(self):
+self.facing = DOWN
+self.coins = 0
+self.mode = EXPLORE # EXPLORE = walking around, DIALOG = talking
+self.dlg_shown = False # draw the modal once, not every frame
+st = State()
def solid_at(pixel_x, pixel_y):
tile_x, tile_y = pixel_x // TILE, pixel_y // TILE
+def near_npc():
+return abs(hero.x - npc.x) <= TILE and abs(hero.y - npc.y) <= TILE
def camera_follow():
offset_x = max(W - MAPCOLS * TILE, min(0, W // 2 - (hero.x + TILE // 2)))
offset_y = max(H - MAPROWS * TILE, min(0, H // 2 - (hero.y + TILE // 2)))
scene.set_view(int(offset_x), int(offset_y))
camera_follow()
# The per-frame loop now lives in a FUNCTION (main), not at module scope. Inside a
+# function its names -- st, the loop's own delta_x/dt, the helpers -- resolve as fast
+# array-indexed locals instead of globals-dict lookups; on the device that's a
+# measured speed-up for the hot loop. It pairs naturally with the State tidy-up: one
+# st object + one main() is the shape every bigger game grows into.
+def main():
dt = 1 / 30 # seed the first frame; re-set from clock.tick() each loop
while True:
btn.poll()
+if st.mode == DIALOG:
+if not st.dlg_shown: # draw ONCE -> no per-frame flicker
+ scene.refresh() # world frozen under the box
+ dialog.draw(scene.display, buffer_a, LINES)
+ st.dlg_shown = True
+if btn.just_pressed(btn.A) or btn.just_pressed(btn.B):
+ st.mode = EXPLORE
+ scene.invalidate() # repaint over the box next frame
+ clock.tick()
+continue
+ delta_x = btn.is_pressed(btn.RIGHT) - btn.is_pressed(btn.LEFT)
+ delta_y = btn.is_pressed(btn.DOWN) - btn.is_pressed(btn.UP)
+if delta_x:
+ st.facing = RIGHT if delta_x > 0 else LEFT
+elif delta_y:
+ st.facing = DOWN if delta_y > 0 else UP
+ hero.flip_x = (st.facing == LEFT) # mirror the side art for LEFT
+ moved = False
+if delta_x and can_walk(hero.x + delta_x * SPEED, hero.y):
+ hero.move(hero.x + delta_x * SPEED, hero.y); moved = True
+if delta_y and can_walk(hero.x, hero.y + delta_y * SPEED):
+ hero.move(hero.x, hero.y + delta_y * SPEED); moved = True
+if moved:
+camera_follow()
+ walk.play(FACING_ANIM[st.facing]) # animate the walk while moving
walk.tick(dt)
+else:
+ hero.bitmap = BM[FACING_ANIM[st.facing]][0] # still: pose A of the current facing
+# pick up any coin we're standing on (within ~12px on both axes = close enough)
+for coin in coins:
+if coin.visible and abs(hero.x - coin.x) < 12 and abs(hero.y - coin.y) < 12:
+ coin.visible = False
+ st.coins += 1
+if near_npc():
hud.set("COINS %d/%d A: TALK" % (st.coins, len(coins)))
+if btn.just_pressed(btn.A):
+ st.mode = DIALOG
+ st.dlg_shown = False
+else:
+ hud.set("COINS %d/%d" % (st.coins, len(coins)))
scene.refresh()
+ dt = clock.tick()
+main()
```
[▶ Try it in the browser](/playground/?ex=03-quest-step6_npc) ### step 7 — `step7_combat.py` · enemies + bump combat [Section titled “step 7 — step7\_combat.py · enemies + bump combat”](#step-7--step7_combatpy--enemies--bump-combat)  Slimes chase the hero (slower than you, respecting walls). Touching one costs **HP** and briefly can’t be hurt again (a short cooldown); press **B** to swing at the tile you’re facing and defeat a slime. HP shows in the HUD; reaching 0 sends you back to start. **You see:** slimes converging on you, HP ticking down in the HUD on each hit, and a **B** swing that clears the tile you face. (A still talks.) **Try it:** change the slime speed or your starting HP.
```diff
SOLID = (WATER, TREE, WALL, DOOR) # these tiles block movement
DOWN, UP, LEFT, RIGHT = 0, 1, 2, 3
+DIR = {DOWN: (0, 1), UP: (0, -1), LEFT: (-1, 0), RIGHT: (1, 0)} # facing -> (dx, dy) step
FACING_ANIM = ("down", "up", "side", "side") # animation per facing (left/right share the side art)
EXPLORE, DIALOG = 0, 1 # game modes (int constants, not strings)
WALK_FPS = 8 # walk-animation speed (frames per second)
+MAX_HP = 6
+HURT_FRAMES = 40 # ~1.3s of mercy after a hit (at 30 fps)
+FLASH_FRAMES = 3 # how long the white hit-flash shows
BACKGROUND = pg.rgb565(0, 0, 0)
WHITE = pg.rgb565(255, 255, 255)
tileset = shp.tileset_colors(TILE, TILE, [pg.rgb565(*color) for color in TILE_RGB])
world = pg.Tilemap(tileset, MAPCOLS, MAPROWS)
+START = (TILE, TILE)
npc_x, npc_y = TILE, TILE
coin_spots, enemy_spots = [], []
for tile_y in range(MAPROWS):
for tile_x in range(MAPCOLS):
char = MAP[tile_y][tile_x] if tile_x < len(MAP[tile_y]) else "."
world.tile(tile_x, tile_y, CHAR2TILE.get(char, GRASS))
if char == "P":
START = (tile_x * TILE, tile_y * TILE)
elif char == "N":
npc_x, npc_y = tile_x * TILE, tile_y * TILE
elif char == "*":
coin_spots.append((tile_x * TILE, tile_y * TILE))
+elif char == "E":
+ enemy_spots.append((tile_x * TILE, tile_y * TILE))
scene.add(world)
coin_bitmap = shp.circle(8, pg.rgb565(245, 215, 60))
coins = [pg.Sprite(coin_bitmap, x + 4, y + 4) for (x, y) in coin_spots]
for coin in coins:
scene.add(coin)
+slime_bitmap = shp.circle(14, pg.rgb565(120, 200, 80))
+enemies = [pg.Sprite(slime_bitmap, x + 1, y + 1) for (x, y) in enemy_spots]
+for enemy in enemies:
+ scene.add(enemy)
npc = pg.Sprite(shp.rect(TILE, TILE, pg.rgb565(230, 200, 60)), npc_x, npc_y)
scene.add(npc)
"up": [shp.from_mask(UP_A, HERO_COLOR), shp.from_mask(UP_B, HERO_COLOR)],
"side": [shp.from_mask(SIDE_A, HERO_COLOR), shp.from_mask(SIDE_B, HERO_COLOR)]}
hero = pg.Sprite(BM["down"][0], START[0], START[1])
walk = picogame_anim.AnimatedSprite(hero, {
"down": (BM["down"], WALK_FPS, True),
"up": (BM["up"], WALK_FPS, True),
"side": (BM["side"], WALK_FPS, True)})
scene.add(hero)
hud = ui.SceneLabel(scene, pg, terminalio.FONT, 4, 4, WHITE, BACKGROUND)
dialog = ui.TextBox(pg, terminalio.FONT, 8, H - 64, W - 16, 58, WHITE, NAVY, maxlines=4)
+LINES = ["Villager:", "Slimes ahead! Press B to", "swing at them.", "(press A)"]
class State:
+"""All the mutable game variables in one place (grows as the game does). __init__ calls reset()."""
def __init__(self):
self.reset()
def reset(self):
self.facing = DOWN
self.coins = 0
+self.hp = MAX_HP
+self.hurt_cooldown = 0 # frames of mercy after a hit (i-frames)
self.mode = EXPLORE # EXPLORE = walking around, DIALOG = talking
+self.frame_count = 0 # frames elapsed (slimes chase every other frame)
self.dlg_shown = False # draw the modal once, not every frame
+def near(a, bx, by, d=TILE):
+# True if sprite a is within d px of the point (bx, by) on both axes (a box test)
+return abs(a.x - bx) < d and abs(a.y - by) < d
camera_follow()
def main(): # loop in a function -> its names are fast locals (see step 6)
dt = 1 / 30 # seed the first frame; re-set from clock.tick() each loop
while True:
btn.poll()
+ st.frame_count += 1
if st.mode == DIALOG:
if not st.dlg_shown: # draw ONCE -> no per-frame flicker
scene.refresh()
dialog.draw(scene.display, buffer_a, LINES)
st.dlg_shown = True
if btn.just_pressed(btn.A) or btn.just_pressed(btn.B):
st.mode = EXPLORE
scene.invalidate()
clock.tick()
continue
if moved:
camera_follow()
walk.play(FACING_ANIM[st.facing])
walk.tick(dt)
else:
hero.bitmap = BM[FACING_ANIM[st.facing]][0] # still: pose A of the current facing
+# attack: defeat a slime in the tile ahead of the facing
+if btn.just_pressed(btn.B):
+ ddx, ddy = DIR[st.facing]
+ ax, ay = hero.x + ddx * TILE, hero.y + ddy * TILE
+for enemy in enemies:
+if enemy.visible and abs(enemy.x - ax) < TILE and abs(enemy.y - ay) < TILE:
+ enemy.visible = False
+# slimes chase (slower: move every other frame) and respect walls
+if st.frame_count % 2 == 0:
+for enemy in enemies:
+if not enemy.visible:
+continue
+# which way to the hero: -1, 0 or +1 per axis (a compact sign())
+ chase_dx = (hero.x > enemy.x) - (hero.x < enemy.x)
+ chase_dy = (hero.y > enemy.y) - (hero.y < enemy.y)
+if chase_dx and can_walk(enemy.x + chase_dx, enemy.y):
+ enemy.move(enemy.x + chase_dx, enemy.y)
+if chase_dy and can_walk(enemy.x, enemy.y + chase_dy):
+ enemy.move(enemy.x, enemy.y + chase_dy)
+# take damage on contact (unless the cooldown from the last hit is still running)
+if st.hurt_cooldown > 0:
+ st.hurt_cooldown -= 1 # count the "safe" frames down
+if st.hurt_cooldown == HURT_FRAMES - FLASH_FRAMES: # ...and end the hit-flash after 3 frames
+ hero.flash = None
+else:
+for enemy in enemies:
+# 13px: slime radius (~7) + hero half-width (~8), i.e. they're touching
+if enemy.visible and near(enemy, hero.x, hero.y, 13):
+ st.hp -= 1
+ st.hurt_cooldown = HURT_FRAMES # frames where another touch can't hurt you
+ hero.flash = WHITE # white blit-flash for 3 frames: "I got hit"
+if st.hp <= 0: # down -> back to start, full HP
+ st.hp = MAX_HP
+ hero.move(START[0], START[1])
+camera_follow()
+break
# pick up any coin we're standing on (within ~12px on both axes = close enough)
for coin in coins:
if coin.visible and abs(hero.x - coin.x) < 12 and abs(hero.y - coin.y) < 12:
coin.visible = False
st.coins += 1
+if near(hero, npc.x, npc.y):
hud.set("HP %d COINS %d/%d A:TALK B:SWING" % (st.hp, st.coins, len(coins)))
if btn.just_pressed(btn.A):
st.mode = DIALOG
st.dlg_shown = False
else:
hud.set("HP %d COINS %d/%d" % (st.hp, st.coins, len(coins)))
scene.refresh()
dt = clock.tick()
main()
```
[▶ Try it in the browser](/playground/?ex=03-quest-step7_combat) ### step 8 — `step8_quest.py` · complete the quest [Section titled “step 8 — step8\_quest.py · complete the quest”](#step-8--step8_questpy--complete-the-quest)  Everything becomes a goal: the NPC asks for all the coins; once you have them, talking again **opens the door** (we rewrite those tiles from “door” to “path” so collision lets you through); stepping on the shrine tile **wins**. A `st.stage` field drives the dialog and the door, and the mode gains a third value (`WON`). Note `dialog_lines(st)` now *takes* the state object instead of reaching for globals — the payoff of keeping state in one place. **You see:** talk → collect → unlock → reach the shrine → “QUEST COMPLETE”. **Try it:** require defeating all slimes too before the door opens.
```diff
DIR = {DOWN: (0, 1), UP: (0, -1), LEFT: (-1, 0), RIGHT: (1, 0)} # facing -> (dx, dy) step
FACING_ANIM = ("down", "up", "side", "side") # animation per facing (left/right share the side art)
EXPLORE, DIALOG, WON = 0, 1, 2 # game modes (int constants, not strings)
WALK_FPS = 8 # walk-animation speed (frames per second)
MAX_HP = 6
# buffer_a/buffer_b = the engine's two shared render strips; immediate-mode draws
# (the dialog/win box below) paint straight into buffer_a
scene, buffer_a, buffer_b = picogame_game.setup(background=BACKGROUND)
btn = picogame_input.Buttons()
clock = picogame_clock.Clock(30)
+# optional audio: a talk blip + a bright win chime (no asset needed). None if no backend.
+try:
+import picogame_audio
+ audio = picogame_audio.Audio()
+ snd_talk = picogame_audio.tone(520, 30) # short blip on dialog advance
+ snd_win = picogame_audio.tone(880, 220) # bright chime on QUEST COMPLETE
+except Exception:
+ audio = None
+ snd_talk = snd_win = None
tileset = shp.tileset_colors(TILE, TILE, [pg.rgb565(*color) for color in TILE_RGB])
world = pg.Tilemap(tileset, MAPCOLS, MAPROWS)
START = (TILE, TILE)
npc_x, npc_y = TILE, TILE
coin_spots, enemy_spots, door_tiles = [], [], []
for tile_y in range(MAPROWS):
for tile_x in range(MAPCOLS):
elif char == "E":
enemy_spots.append((tile_x * TILE, tile_y * TILE))
+elif char == "D":
+ door_tiles.append((tile_x, tile_y))
scene.add(world)
hud = ui.SceneLabel(scene, pg, terminalio.FONT, 4, 4, WHITE, BACKGROUND)
dialog = ui.TextBox(pg, terminalio.FONT, 8, H - 64, W - 16, 58, WHITE, NAVY, maxlines=4)
+NUMCOINS = len(coins)
class State:
+"""The whole game's mutable state -- one object, passed where a function needs it. __init__ calls
reset()."""
def __init__(self):
self.reset()
def reset(self):
self.facing = DOWN
self.coins = 0
self.hp = MAX_HP
self.hurt_cooldown = 0
+self.stage = 0 # 0 not started, 1 collecting, 2 door open
self.mode = EXPLORE # EXPLORE / DIALOG / WON
self.frame_count = 0 # frames elapsed (slimes chase every other frame)
self.overlay_shown = False # draw dialog/win modal once, not every frame
+def dialog_lines(st):
+if st.stage == 0:
+return ["Villager:", "Bring me all %d coins and" % NUMCOINS,
+"I'll open the shrine door.", "(press A)"]
+if st.stage == 1 and st.coins < NUMCOINS:
+return ["Villager:", "You have %d of %d coins." % (st.coins, NUMCOINS),
+"Keep looking!", "(press A)"]
+return ["Villager:", "The door is open.",
+"Seek the shrine within.", "(press A)"]
+def open_door():
+for (tile_x, tile_y) in door_tiles:
+ world.tile(tile_x, tile_y, PATH) # door -> path (no longer SOLID)
+ scene.invalidate()
camera_follow()
def main(): # loop in a function -> its names are fast locals (see step 6)
dt = 1 / 30 # seed the first frame; re-set from clock.tick() each loop
while True:
btn.poll()
st.frame_count += 1
+if st.mode == WON:
+if not st.overlay_shown: # draw ONCE -> no per-frame flicker
+ scene.refresh()
+ dialog.draw(scene.display, buffer_a, ["You reached the shrine!", "", "QUEST COMPLETE", "(press A)"])
+if audio:
+ audio.sfx(snd_win) # bright chime on the win
+ st.overlay_shown = True
+if btn.just_pressed(btn.A):
+ st.mode = EXPLORE
+ scene.invalidate()
+ clock.tick()
+continue
if st.mode == DIALOG:
if not st.overlay_shown: # draw ONCE -> no per-frame flicker
scene.refresh()
dialog.draw(scene.display, buffer_a, dialog_lines(st))
st.overlay_shown = True
if btn.just_pressed(btn.A) or btn.just_pressed(btn.B):
+if audio:
+ audio.sfx(snd_talk) # blip on dialog advance
+if st.stage == 0:
+ st.stage = 1
+elif st.stage == 1 and st.coins >= NUMCOINS:
+ st.stage = 2
+open_door()
st.mode = EXPLORE
scene.invalidate()
if st.hurt_cooldown > 0:
st.hurt_cooldown -= 1
if st.hurt_cooldown == HURT_FRAMES - FLASH_FRAMES: # end the hit-flash after 3 frames
hero.flash = None
else:
for enemy in enemies:
# 13px: slime radius (~7) + hero half-width (~8), i.e. they're touching
if enemy.visible and near(enemy, hero.x, hero.y, 13):
st.hp -= 1
st.hurt_cooldown = HURT_FRAMES
hero.flash = WHITE # white hit-flash on damage
if st.hp <= 0:
st.hp = MAX_HP
hero.move(START[0], START[1])
st.coins += 1
+# reach the shrine (goal tile) once the door is open
+if st.stage >= 2:
+# the tile under the hero's centre
+ center_tile_x = (hero.x + TILE // 2) // TILE
+ center_tile_y = (hero.y + TILE // 2) // TILE
+if world.tile(center_tile_x, center_tile_y) == GOAL:
+ st.mode = WON
+ st.overlay_shown = False
if near(hero, npc.x, npc.y):
hud.set("HP %d COINS %d/%d A:TALK" % (st.hp, st.coins, NUMCOINS))
if btn.just_pressed(btn.A):
st.mode = DIALOG
st.overlay_shown = False
else:
+if st.stage < 1 or st.coins < NUMCOINS:
+ objective = "FIND THE COINS"
+elif st.stage >= 2:
+ objective = "DOOR OPEN!"
+else:
+ objective = "RETURN TO NPC"
hud.set("HP %d COINS %d/%d %s" % (st.hp, st.coins, NUMCOINS, objective))
scene.refresh()
dt = clock.tick()
main()
```
[▶ Try it in the browser](/playground/?ex=03-quest-step8_quest) *** You now have a small playable RPG. You don’t have to keep hand-coding maps: the [web editor](/tools/editor/) lets you paint this map, place the hero/NPC/coins, and flag tiles (solid/coin/goal) visually, and `picogame_scene` loads it. Everything `step8` does by hand becomes data. See the [scene format](/scene-format/) reference, and the bundled `examples/picogame_platformer_scene.py` example for a complete scene loaded from data. *** **Start your own game from here.** You’ve built three games by hand — here’s the reusable shape to start every new one from: the **State + `main()` pattern** ([Game patterns](/concepts/patterns/)) and a ready-to-run **game skeleton** ([Snippets](/snippets/), or open it in the [Playground](/playground/?ex=game-skeleton)). Drop your own art, tiles, and rules into that frame and you’re off.
# Art & assets
> picogame keeps art separate from code: you can prototype with shapes generated in code, then swap in pixel art without changing the game logic.
picogame keeps **art separate from code**: you can prototype with shapes generated in code, then swap in pixel art without changing the game logic. This page shows how to bring your own art in, where to get it free, and how the tutorials do it. Each tutorial ends with a **`bonus_art.py`**: the finished game re-skinned with free [CC0](https://creativecommons.org/publicdomain/zero/1.0/) pixel art. Compare it with `step8` or `step9`; the gameplay stays the same while the bitmap construction changes. | Tutorial | bonus uses | from (CC0) | | ----------- | --------------------------------------------------------------------------------------------------- | ----------------------- | | 01-bounce | brick wall = a CC0 brick texture **recoloured** into the 4 row colours (ball/paddle stay generated) | Kenney **Tiny Dungeon** | | 02-starship | ship (pre-rotated 16 frames) + laser bullet | Kenney **Pixel Shmup** | | 03-quest | tileset (floor/lava/barrel/brick/door/chest) + hero + slime + coin | Kenney **Tiny Dungeon** | Run one:
```bash
python3 sim/run.py tutorials/03-quest/bonus_art.py --shot /tmp/out.png
```
## The pipeline: any PNG → a picogame sprite [Section titled “The pipeline: any PNG → a picogame sprite”](#the-pipeline-any-png--a-picogame-sprite) `tools/png2picogame.py` turns a PNG into a Python module exposing `bitmap(pg)`:
```bash
python3 tools/png2picogame.py hero.png -o hero_art.py --frames 8
```
then in a game:
```python
import hero_art
hero = pg.Sprite(hero_art.bitmap(pg), x, y) # drop-in replacement for any shp.*()
```
Options: * `--frames N` — the PNG is a **horizontal strip** of N equal-width frames (left→right). * `--tile WxH` — the PNG is a **grid** of W×H tiles; repacks them into a horizontal atlas (use for grid sheets; output frame count = number of tiles). * format is auto (PAL8 if ≤256 colours, else RGB565); transparency comes from the PNG’s **alpha** (alpha ≥128 = opaque); colours are emitted in ST7789 wire order. ### Check it before you ship [Section titled “Check it before you ship”](#check-it-before-you-ship) Before you flash anything, drop the new sprite into a throwaway test file and run it in the desktop simulator with a screenshot — that’s the fastest way to confirm the palette, scale, and transparency came out right:
```bash
python3 sim/run.py .py --frames 1 --shot /tmp/art.png
```
If it looks wrong or is too big, here’s why: soft/anti-aliased edges quantise badly (you’ll see fringe or speckle around the sprite — redraw with hard alpha), and a source with >256 colours silently falls back to RGB565, which doubles the RAM the bitmap costs (cut the palette to keep it PAL8). ## Layout rules [Section titled “Layout rules”](#layout-rules) * **Horizontal strip**, equal-width frames. (Grids: use `--tile WxH`, or in Aseprite export `Sheet Type: Horizontal`, Trim OFF.) * **Transparency = the alpha channel** (one on/off key, no blending). Hard pixel edges; avoid soft/anti-aliased alpha — it quantises badly. * **Tilesets:** the engine draws tile value `v` as frame `v`, so make **frame 0 empty/ transparent** and put your tiles at 1, 2, 3… (that’s how `bonus_art` maps map values to tile graphics). * **Rotation:** for a constant stepped spin, you can bake rotations into frames; use `sprite.angle` for continuous or occasional runtime rotation. The Starship ship is the Kenney sprite rotated into 16 frames offline (see how `tools/`-side scripts build the strip), then `ship.frame = angle`. ## Using your own Aseprite art [Section titled “Using your own Aseprite art”](#using-your-own-aseprite-art) `File → Export Sprite Sheet → Sheet Type: Horizontal`, **Trim OFF**, Padding 0 → that’s exactly the strip `png2picogame` wants. Design in **Indexed** mode with a small palette (or RGBA with a transparent background). Animation **Frame Tags** can drive frame ranges. ## Where to get more (free) [Section titled “Where to get more (free)”](#where-to-get-more-free) * **[kenney.nl](https://kenney.nl)** — everything CC0, no attribution. (We used Pixel Shmup and Tiny Dungeon.) * **[Pixellab.ai](https://www.pixellab.ai/)** — generate pixel-art sprites and tilesets from a text prompt, handy for quick placeholders or a custom look. Check its export terms before you ship. * Recolouring CC0 art is allowed: the Bounce bricks use one grey Tiny Dungeon tile multiplied into four colours to match the game’s palette. * **[itch.io](https://itch.io)** (CC0 filter) and **[OpenGameArt](https://opengameart.org)** (filter CC0). Avoid CC-BY-SA / GPL art. ## Ship assets as .mpy (faster load, less RAM) [Section titled “Ship assets as .mpy (faster load, less RAM)”](#ship-assets-as-mpy-faster-load-less-ram) A baked-asset module is just Python, so you can precompile it to `.mpy` bytecode exactly like the helper libs — the device skips parsing the source, so it loads faster and uses less RAM (the same win `tools/build_mpy.sh` gives the libs). How:
```bash
mpy-cross your_assets.py -o your_assets.mpy
```
then copy the `.mpy` to `CIRCUITPY/lib/`. The mpy-cross build **must match the board’s CircuitPython version** (see `tools/build_mpy.sh` for the version it uses). Gotcha: a stale `.mpy` **shadows the `.py`** at import, so re-generate it after any edit — otherwise the device keeps loading the old art. ## One file with all your assets [Section titled “One file with all your assets”](#one-file-with-all-your-assets) For a game with several shared assets, keep related baked bitmaps and palettes in a **single module** such as `assets.py` that the game imports once, rather than scattering them across many tiny files — fewer imports, one place to manage, and one `.mpy` to ship. * `tools/pack_assets.py` does exactly this in one command: point it at a PNG glob (or a folder) and it packs them all into a single module with **one shared palette** reused by every bitmap (the RAM win), each exposed as a ready-to-use named `Bitmap`. Add `--mpy` to also ship the bytecode.
```bash
python3 tools/pack_assets.py art/*.png -o assets.py --mpy # then: import assets; pg.Sprite(assets.ship)
```
(If the combined colours overflow 255 it falls back to per-asset palettes, and any image with >255 of its own colours is emitted as RGB565 — same auto behaviour as `png2picogame`.) * `tools/png2picogame.py` converts a single PNG into a bitmap module — use it when you want just one image (it also has `--frames`, `--tile`, `--rle`, dithering, dedup). * For a whole tile/scene-based level, `tools/scene_build.py` bakes the assets **and** the layout into one `SCENE` file that `picogame_scene.load()` reads — one file for the entire level. ## Licensing / credits [Section titled “Licensing / credits”](#licensing--credits) All bundled art is **CC0** (public domain, no attribution required). The source PNGs we used live in `assets/kenney/` with `assets/kenney/CREDITS.txt`. Even for CC0 it’s good manners to keep a credits note when you publish a game.