> Scope: This is the full developer documentation for picogame
> Generated 2026-07-31 | docs commit fbd2d56 | picogame-libs 0.1.20 | API_LEVEL 1
# picogame
> Make little games for tiny handhelds in Python. Try them in your browser or on your PC, then play on a supported  board.
## What is picogame?
[Section titled “What is picogame?”](#what-is-picogame)
**picogame is a small 2D game engine for microcontrollers like the RP2040**, the chip inside the [PicoPad](https://picopad.eu) pocket console. You write your game **in Python** and try it in your browser or the desktop simulator. When it is ready, copy it to a [supported board](/supported-hardware/). You do not need C, a firmware build, or hardware to start.
## See it in action
[Section titled “See it in action”](#see-it-in-action)
A whole game, designed and built with picogame:
[A game built with picogame](https://player.mediadelivery.net/embed/689358/321ad936-1df9-4397-b552-2fabf4892da1?autoplay=false\&loop=false\&muted=false\&preload=false\&responsive=true)
## What picogame gives you
[Section titled “What picogame gives you”](#what-picogame-gives-you)
Start in your browser in five minutes, then run the same code on the device — picogame handles the rest:
A complete engine
Sprites, tilemaps, collisions, a camera, sound, and text are built in — the parts every game needs, ready to use.
Smooth motion at 30+ FPS
The engine repaints only what changed each frame, so games stay fluid — even on the modest RP2040.
The low-level work is done
The hard parts — display driver, blitter, text, collisions — run in native C. You write your game in plain Python.
Built for small RAM
Built to use as little memory as it can — full-screen effects need no extra buffer, so even big scenes fit the RP2040’s small RAM.
## What can you build?
[Section titled “What can you build?”](#what-can-you-build)
Games across several genres, runnable in your browser and on supported devices:
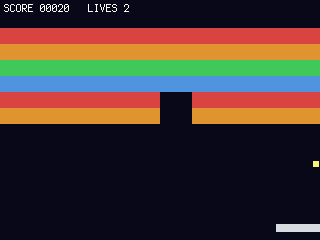
**Breakout**
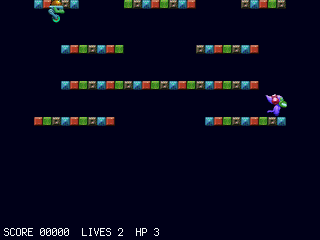
**Platformer**
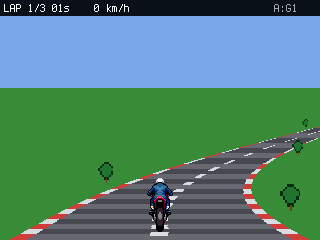
**Pseudo-3D racer**
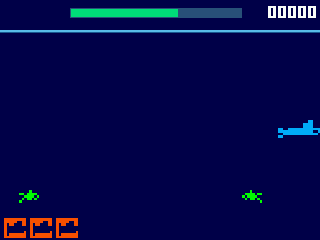
**Vertical shooter**
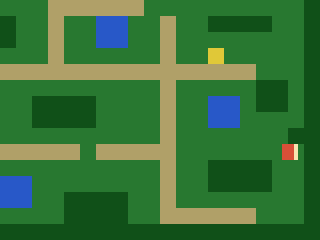
**Top-down RPG**
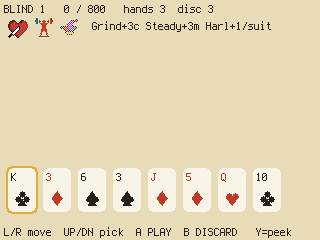
**Card roguelite**
Sprites, scrolling tilemaps, a moving camera, particles, sound, and saved high scores. **[See all the games — and play them in your browser →](/examples/)**
## Try it now, right in your browser
[Section titled “Try it now, right in your browser”](#try-it-now-right-in-your-browser)
No install, nothing to set up
* **[▶ Playground](/playground/)** — write Python against the picogame API and run it in the browser. Load an example or start from scratch.
* **[🎨 Level editor](/tools/editor/)** — paint a scrolling level with the mouse, place sprites and a camera, then export a scene your game loads.
## Get it on your device
[Section titled “Get it on your device”](#get-it-on-your-device)
Two steps and you’re playing: flash the firmware, then copy a ready-made pack of games onto the drive. A [launcher](/launcher/) boots so you can pick a game and play — no coding needed.
[⬇ 1. Download firmware](/supported-hardware/#download-firmware)Pick the .uf2 for your board (PicoPad, Fruit Jam, PicoSystem, plain Pico, ...) and drag it onto the BOOTSEL drive.
[⬇ 2. Get the games pack](/start/quickstart/)Choose the pack for your board — RP2040, RP2350, or Fruit Jam — extract onto CIRCUITPY, and a game menu boots.
## Pick your path
[Section titled “Pick your path”](#pick-your-path)
[🌱 New to making games](/start/first-game/)Start from zero. Get something moving in five minutes, no hardware needed, then build up step by step.
[🔁 Made games before](/concepts/coming-from/)Coming from Pygame or PICO-8? The concept map translates what you already know into picogame's names, then points you to the reference.
[🧰 Know CircuitPython](/concepts/coming-from/#coming-from-displayio)Fluent in displayio, or have a screen-based project to bring over? The displayio bridge takes you from screens to games.
[🛠️ Already building with picogame](/reference/)Straight to the API cheat sheet, the feature guide, and how to do things efficiently (RAM, framerate, deploy).
[🤖 Building with an AI agent](/ai-agents/)Give your coding agent the game-design skill or point it at /llms.txt — it'll design and build picogame games with the right patterns.
New to game words like *sprite* or *tilemap*? Start with the **[Glossary](/concepts/glossary/)**.
Two parts: engine + helpers
picogame comes in two parts: the **engine** (a CircuitPython module on the device) and the Python **helpers** you import in your game. You only need to think about the split when you deploy — see [Run on hardware](/hardware/).
## Where the code lives
[Section titled “Where the code lives”](#where-the-code-lives)
**Clone the main repository for the simulator, games, tutorials, and helper libraries.**
[👾 picogame →](https://github.com/MakerClassCZ/picogame)The main repo: the desktop simulator, ready-to-play games, step-by-step tutorials, and the picogame\_\* helper libraries.
The other repositories serve specific deployment and compatibility needs:
[📚 picogame-libs](https://github.com/MakerClassCZ/picogame-libs)The helper libraries on their own, when you want them à la carte or to follow their releases.
[🐍 circuitpython (fork)](https://github.com/MakerClassCZ/circuitpython)The firmware source, only to build a .uf2 for your own board (the PicoPad's is prebuilt).
[🕹️ picogame-stage](https://github.com/MakerClassCZ/picogame-stage)A Stage compat layer for running existing stage / ugame games on picogame.
# Credits & licenses
> picogame — the native engine, the Python helpers, the simulator, the tools, the editor, and these docs — is original work under the MIT License.
picogame — the native engine, the Python helpers, the simulator, the tools, the editor, and these docs — is original work under the **MIT License**.
With thanks to the projects it builds on and borrows from:
* **[PicoLibSDK](https://github.com/Panda381/PicoLibSDK)** — Miroslav Němeček. The engine borrows rendering techniques from it, and a few example games and their assets are ports of PicoLibSDK originals.
* **[circuitpython-stage](https://github.com/python-ugame/circuitpython-stage)** — Radomir Dopieralski. The `stage`/`ugame` compatibility layer and the bundled bitmap font build on it.
* **TinyJoypad** — Daniel C. Inspiration for a genre example.
* **[Kenney](https://kenney.nl)** — the free pixel art used in the tutorials.
* **[CircuitPython](https://circuitpython.org)** — the runtime picogame runs on.
Where picogame ships anything derived from these, the upstream author’s copyright and license travel inside the source file itself. That’s the authoritative record, so we don’t repeat the per-file details here.
# Build with an AI agent
> A ready-made Claude skill and LLM-readable docs so coding agents design and build picogame games correctly.
picogame ships two things that make AI coding agents (like Claude Code) genuinely good at building games for it: a **ready-made skill** that teaches the agent how to design and implement a picogame game, and **LLM-readable documentation** it can pull in wholesale.
## The picogame game-design skill
[Section titled “The picogame game-design skill”](#the-picogame-game-design-skill)
`picogame-game-design` is an **Agent Skill** — a packaged set of instructions and references an agent loads when you ask it to make a game. It carries:
* **Game-design fundamentals** — core loop, game feel & juice, difficulty & fairness, scope discipline, so the result is actually *fun*, not just running.
* **The engine, mapped** — every building block and what it costs in RAM, plus the full API reference (exact signatures for the native C engine **and** every helper library).
* **Genre playbooks** — Breakout, shmup, platformer, racing, first-person raycaster dungeon, and more — each with the core loop, controls, real tuning numbers, pitfalls and an MVP.
* **Technique recipes** — state machines, enemy AI, collision, procedural generation, pseudo-3D (Mode-7 & raycasting), each mapped to picogame.
* A runnable **starter game** and a **desktop-simulator** workflow, so the agent builds and checks with screenshots without any hardware.
### Install it
[Section titled “Install it”](#install-it)
Download and unzip it into your agent’s skills folder:
* **[Download the skill (.zip)](/download/picogame-game-design-skill.zip)**
For [Claude Code](https://claude.com/claude-code) that folder is `~/.claude/skills/`:
```sh
cd ~/.claude/skills
unzip ~/Downloads/picogame-game-design-skill.zip
```
Then just ask — *“make a tiny shooter for picogame”* — and the skill loads automatically.
The skill’s source lives in the [public repo](https://github.com/MakerClassCZ/picogame) under `skills/`.
## LLM-readable docs (llms.txt)
[Section titled “LLM-readable docs (llms.txt)”](#llm-readable-docs-llmstxt)
For agents that read documentation directly, the whole site is available as clean markdown following the [llms.txt](https://llmstxt.org/) convention — point your agent at these instead of scraping HTML:
* **[/llms.txt](/llms.txt)** — the index
* **[/llms-full.txt](/llms-full.txt)** — the entire documentation as one markdown file
* **[/\_llms-txt/api.txt](/_llms-txt/api.txt)** — just the API (reference + engine + helpers), for writing code
* **[/\_llms-txt/getting-started.txt](/_llms-txt/getting-started.txt)** — the intro, tutorials and concepts
# Coming from another engine
> Map what you already know from Pygame, displayio, PICO-8 or Arcade onto picogame — and see what the engine does and doesn't do.
Use the table below to map concepts from Pygame, `displayio`, PICO-8, or Arcade onto picogame. If you know `displayio`, continue with the [term-by-term bridge](#coming-from-displayio). See [How picogame works](/concepts/how-it-works/) for the underlying model and the [API reference](/reference/) for signatures.
## Concept map
[Section titled “Concept map”](#concept-map)
| You want… | Pygame | displayio (CircuitPython) | PICO-8 | **picogame** |
| -------------------- | ------------------ | ------------------------- | --------------------- | --------------------------------------------------------------------------------------- |
| An image | `Surface` | `Bitmap` + `Palette` | sprite sheet | `pg.Bitmap(data, w, h, …)` (PAL8 or RGB565, multi-frame atlas) |
| A movable object | `sprite.Sprite` | `TileGrid` | `spr()` | `pg.Sprite(bitmap, x, y)` (anchor, flip, frame, **scale**, **angle**) |
| The scene/world | `Group`/manual | `Group` | the screen | `pg.Scene(...)` — retained, dirty-rect |
| Draw it | `screen.blit()` | add to `Group` | `spr()`/`map()` | `scene.add(obj)` once; then `scene.refresh()` per frame |
| A tiled level | your own | `TileGrid`+`Bitmap` | `map()` | `pg.Tilemap(tiles, cols, rows)` — `tile(x, y, value)` |
| A scrolling camera | manual offset | `Group.x/y` | `camera()` | `scene.set_view(ox, oy)` (world bigger than screen) |
| The main loop | `while`, `flip()` | `while`, `refresh()` | `_update()`/`_draw()` | `while: buttons.poll(); …; scene.refresh(); clock.tick()` |
| Input | `pygame.event` | `keypad`/pins | `btn()` | `picogame_input.Buttons` → `is_pressed()` / `just_pressed()` (`poll()` for the bitmask) |
| Sound | `mixer` | `audiocore`/`audiopwmio` | `sfx()`/`music()` | `picogame_audio` (`tone()`, `.wav`) |
| Collision | `Rect.colliderect` | manual | manual | `pg.collide(...)` / `a.overlaps(b)` / `a.near(b, r)` (zero-alloc, off sprites) |
| Text | `font.render` | `label` | `print()` | `picogame_ui` HUD / `picogame_font` → Bitmap |
| Many bullets/enemies | sprite groups | manual | manual | `picogame_pool.Pool` (fixed pool, no per-frame alloc) |
| Transforms | `transform.rotate` | limited | `spr` flips | `sprite.scale` (float) + `sprite.angle` (deg), nearest-neighbour |
## Coming from displayio
[Section titled “Coming from displayio”](#coming-from-displayio)
If you’ve used CircuitPython’s `displayio`, you already know most of picogame; it’s the same world with games-shaped names and the redraw bookkeeping done for you:
| In `displayio` you used… | In picogame it’s… |
| ------------------------------------------ | ------------------------------------------------------------------------------------------------------------------ |
| `displayio.TileGrid` — a positioned bitmap | a **[Sprite](/concepts/glossary/)** — but it also flips, scales, rotates and animates |
| `displayio.Group` — a stack of things | a **[Scene](/concepts/glossary/)** — holds [layers](/concepts/glossary/), painted in order |
| `while True: display.refresh()` | the **[game loop](/concepts/glossary/)**: read input → update → `scene.refresh()` → wait |
| `bitmap` + `palette` + RGB565 | the same — but build colours with `pg.rgb565(r, g, b)` ([wire-order](/concepts/glossary/)), never a raw `0xRRGGBB` |
| managing redraws by hand | nothing — picogame is **[retained mode](/concepts/glossary/)**: you change objects, it repaints only what moved |
The main shift is that you describe the scene instead of driving each display update yourself.
## The main difference: retained mode and dirty regions
[Section titled “The main difference: retained mode and dirty regions”](#the-main-difference-retained-mode-and-dirty-regions)
Many 2D engines are **immediate mode**: every frame you clear the screen and redraw everything. picogame is **retained mode**: you build a `Scene` of objects once, then each frame you *mutate* them and call `scene.refresh()`. The engine figures out which rectangles changed and **redraws only those**. On SPI displays, only those pixels are sent to the panel. Framebuffer targets such as Fruit Jam repaint the same regions in scanout memory. In both cases, the scene tracks the changes.
One consequence: moving or swapping a sprite is tracked automatically, but an **in-place** pixel edit needs a `sprite.touch()` to register (see [effects](/helpers/effects/)).
## What picogame can do
[Section titled “What picogame can do”](#what-picogame-can-do)
* **Arbitrary-size sprites** with anchors, flips, multi-frame animation atlases.
* **Runtime scale and rotation** per sprite (nearest-neighbour affine, no FPU needed), about an anchor.
* **Tilemaps** you read and write at runtime (use them as game boards, not just backgrounds).
* A **moving camera** (`set_view`) over a world larger than the screen, with fixed (HUD) layers.
* **Particles**, a drawing **Canvas** (retained shapes), and **StripDraw** (full-frame effects without a retained pixel buffer).
* **Audio** (PWM tones + `.wav`), **NVM save** for high scores/settings, a bundled **font** + HUD helpers.
* A **desktop simulator**: the same game code runs on your PC (headless screenshots or a live window), so you build and debug without hardware.
## Design within the limits
[Section titled “Design within the limits”](#design-within-the-limits)
* **RAM depends on the board and firmware.** Large pixel buffers and sprite sheets dominate the budget. Tile large worlds, stream large sheets, and use StripDraw when you do not need retained pixels. See [Fit it in RAM](/memory/) for measured budgets and alternatives.
* **One display, no GPU.** No shaders, no alpha blending. Transparency is a single transparent index/colour; for a darken effect there’s a `shadow` mode. Transforms are nearest-neighbour (crisp at integer scales, shimmery at fractional).
* **Paletted art.** PAL8 is 1 byte/pixel (cheap); RGB565 is 2 bytes/pixel. Build colours with `rgb565(r, g, b)`, never raw `0xRRGGBB`.
* **Few buttons.** D-pad + A/B (and sometimes X/Y). Design controls accordingly.
* **Ship `.mpy`, not big `.py`.** Compiling a large source file on-device can `MemoryError`; pre-compile to `.mpy`. See [Run on hardware](/hardware/).
## Start here
[Section titled “Start here”](#start-here)
1. Read [How picogame works](/concepts/how-it-works/) for the loop and dirty-region model.
2. Copy the [first game](/start/first-game/) and run it in your browser or the [desktop simulator](/simulator/) to feel the API.
3. Keep the [API cheat sheet](/reference/) and [feature guide](/features/) open while you build.
4. Adapt patterns from the [examples](/examples/) to your genre.
# Drawing paths — which to use
> Choose a retained or immediate drawing path for worlds, HUDs, panels, and one-off screens.
Choose the path by when the content changes and whether it needs stored pixels:
* Use a retained `Scene` for a world that persists between frames.
* Use `pg.render()` for a one-off screen or a reserved HUD band.
* Use `StripDraw` when pixels can be regenerated instead of stored in a Canvas.
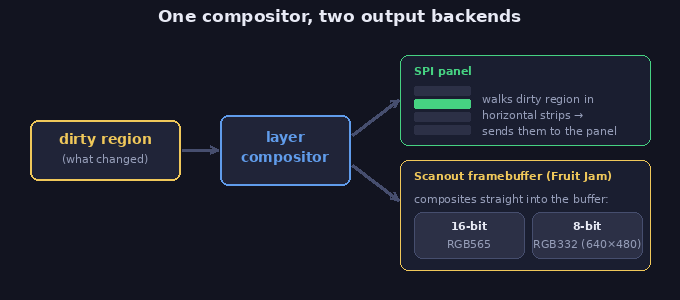
## One compositor, two output backends
[Section titled “One compositor, two output backends”](#one-compositor-two-output-backends)
Every draw uses the same layer compositor. On SPI targets, it walks each dirty region in horizontal **strips** and sends them to the panel. On scanout targets such as Fruit Jam, it composites dirty regions directly into the framebuffer. There the buffer’s colour depth decides the pixel format the compositor writes: a 16-bit framebuffer takes RGB565 as-is, while an 8-bit one (the only depth picodvi offers at 640×480) has each finished band quantized 565→332 as it’s published — you still author in `pg.rgb565(...)` either way.
The layer choice determines how much additional pixel memory your game retains. A full-screen `StripDraw` keeps no pixel buffer; a 320×240 RGB565 `Canvas` keeps about 150 KB. The scanout framebuffer, where present, belongs to the display backend and is separate from both.
## Two drivers (how drawing is triggered)
[Section titled “Two drivers (how drawing is triggered)”](#two-drivers-how-drawing-is-triggered)
| Driver | Use it for | Repaints |
| ------------------------------------------------------------------------------- | -------------------------------------------------------------------------------------------------------------------------------------------------------------------- | ---------------------- |
| **`scene.refresh()`** — retained, dirty-rect | the persistent game world: add layers, mutate them, refresh. Camera (`set_view`), `fixed` (camera-independent) layers, reserved bands (`top=/bottom=/left=/right=`). | only the dirty regions |
| **`pg.render(display, items, buffer, x0,y0,x1,y1, *, background)`** — immediate | a one-shot push, on demand, *outside* a scene: a HUD in a reserved band, a title / level-done / game-over screen. | when you call it |
Both drivers accept the **same layer kinds**: a `pg.render` list can hold Sprites, a `StripDraw`, a `Canvas`, a `Tilemap`, or `Particles`, exactly like the scene.
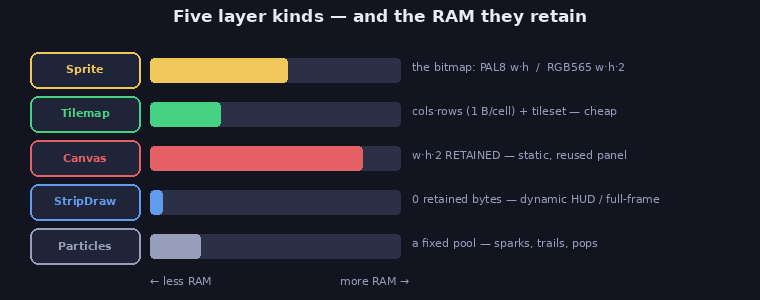
## Five layer kinds (what you draw) — and their RAM
[Section titled “Five layer kinds (what you draw) — and their RAM”](#five-layer-kinds-what-you-draw--and-their-ram)
| Kind | RAM | Use for |
| ----------------------------- | ------------------------------------------------------------------ | ---------------------------------------------------------------------------------------------------------------------------------------------------------------------------------------------------------------------------------------- |
| **Sprite** (wraps a `Bitmap`) | the bitmap: PAL8 = `w*h` (1 B/px), RGB565 = `w*h*2` | moving objects, characters, bullets |
| **Tilemap** | `cols*rows` (1 B/cell) + the tileset | big static / scrolling boards — very cheap per area |
| **Canvas** | `w*h*2` **retained** | a surface drawn **occasionally and reused** — a static panel, a dialog box |
| **StripDraw** | **0 retained pixel bytes** (a view onto the current render target) | **dynamic full-frame / strip content** — sky, road, gradients, **and dynamic HUD / screen text**. Repaints every frame by default, or **on demand** (`always_dirty=False` + `.invalidate()`) for a buffer-less panel inside a live scene |
| **Particles** | a fixed pool | sparks, trails, pops |
### Text rides on these
[Section titled “Text rides on these”](#text-rides-on-these)
* **`Canvas.text(x, y, s, fg, font, bg=None)`** composites glyphs in C straight into a surface: no glyph cache, no per-call Bitmap/Sprite. The surface can be a **retained Canvas** *or* a **`StripDraw` view** (which points at the live strip). The same one method covers both.
* **`picogame_font.render_text(...)`** rasterizes a string into a PAL8 `Bitmap` you show as a Sprite, good for **moving** text (floating damage numbers), where a sprite is what you want anyway.
Dynamic text drawn through a `StripDraw` view retains no glyph or panel bitmap. Its callback still uses CPU whenever the region repaints.
### Pseudo-3D rides on these too
[Section titled “Pseudo-3D rides on these too”](#pseudo-3d-rides-on-these-too)
* **`Canvas.mode7(...)`** fills the rows below a horizon with a **Mode-7 perspective floor** of a power-of-2 texture — draw it into a **`StripDraw` view** for a full-screen ground plane at **0 retained RAM** (the `picogame_mode7.Camera` helper computes its fixed-point args from a camera pose).
* **`picogame_ray.Raycaster`** builds first-person walls the same way — a DDA cast per column, each wall a `fill_rect` column into a `StripDraw` view.
Both are the pseudo-3D case of “dynamic full-frame content”, so they live on StripDraw (never a 150 KB full-screen Canvas). See [Pseudo-3D](/helpers/pseudo-3d/).
## The decision matrix (HUDs, panels, screens)
[Section titled “The decision matrix (HUDs, panels, screens)”](#the-decision-matrix-huds-panels-screens)
| What | Right path | RAM |
| --------------------------------------------------------------------- | ----------------------------------------------------------------------------------------------- | ----------------------------------------------------------- |
| **Dynamic, thin HUD** (score / lives bar) | `StripDraw` (+ `view.text`), via `scene` or `pg.render` | **0 retained pixels** |
| **Static, large panel** (side panel, title art, help text) | a **`Canvas` drawn once** (`canvas.text`), kept as a layer | `w*h*2` (justified — drawn once, reused, not re-rasterized) |
| **Static panel + a few live numbers** | static `Canvas` for the fixed part **+** a small `StripDraw` for the numbers | small |
| **A panel/dialog/menu inside a live scene** (repaints only on change) | **on-demand `StripDraw`** (`always_dirty=False`, `.invalidate()` on change), added to the scene | **0 retained pixels** |
| **One-off screen** (title / level-done / game-over) | `pg.render([stripdraw])` — procedural bg + `view.text`, no scene needed | **0 retained pixels** |
| **Moving text** (floating damage numbers) | `picogame_font.render_text` → Sprite | text-sized bitmap |
The trap to avoid: **a `Canvas` band for a *dynamic* HUD.** A `Canvas` is retained `w*h*2`; for a 320×16 bar that is 10 KB that lives forever, and for a full-height side panel far more. A dynamic HUD is dynamic strip content, so it belongs on a **`StripDraw`**, re-rasterized in C when it changes. Reach for a `Canvas` only when the content is **static** (drawn once and reused).
A second trap: **immediate `pg.render` over a live retained scene.** The scene doesn’t know `render()` changed the pixels, so its next `refresh()` repaints only its own dirty rects and leaves stale fragments of your overlay on screen. If the rendered region overlaps the scene’s play rect (pause screen, menu, cutscene, banner), call **`scene.invalidate()`** afterwards — or use **`picogame_game.overlay(...)`**, which is `pg.render` + `scene.invalidate()` in one call. HUD bands outside the play rect (the `top=`/`bottom=` reserves) don’t need this: the scene never touches them.
## A HUD without a retained panel buffer
[Section titled “A HUD without a retained panel buffer”](#a-hud-without-a-retained-panel-buffer)
`picogame_ui.HudBar` already does this: it is a buffer-less `StripDraw` pushed via `pg.render` on change. The same pattern by hand, for a reserved-band HUD:
```python
scene, bufA, bufB = picogame_game.setup(background=BG, strip_h=BAR, top=BAR)
hud = ui.HudBar(pg, board.DISPLAY, bufA, 0, 0, W, BAR, BG) # 0 retained RAM
score = hud.label(FONT, 4, 3, INK, "SCORE 0") # returns a text handle
# ... on a change:
score.set("SCORE %d" % pts)
hud.draw() # re-composites in C, no cache
```
**Format on change, not per frame.** `.set()` gates the *redraw* (it no-ops on an unchanged string), but the `"%"`-formatting itself allocates a fresh string every call — done every frame it is pure GC churn. Format at the place the value *changes* (as above), or if you poll in the loop, guard with shadow ints: `if pts != shown_pts: shown_pts = pts; score.set("SCORE %d" % pts)`. For continuously moving values, quantize to the displayed unit first (seconds, percent).
Or fully by hand (e.g. a title screen, no scene, no buffers of your own):
```python
def draw_title(view, vx, vy, vw, vh):
view.clear(SKY)
view.text(60 - vx, 90 - vy, "PRESS A", INK, FONT) # view-local = screen - (vx, vy)
title = pg.StripDraw(draw_title, 0, 0, W, H)
pg.render(board.DISPLAY, [title], bufA, 0, 0, W, H, background=SKY) # 0 retained pixels
```
`view`-local `(0,0)` is screen `(vx, vy)`, so to draw at a screen position subtract `(vx, vy)`.
## On-demand repaint: a buffer-less panel inside a live scene
[Section titled “On-demand repaint: a buffer-less panel inside a live scene”](#on-demand-repaint-a-buffer-less-panel-inside-a-live-scene)
A `StripDraw` defaults to repainting **every frame** (`always_dirty=True`), right for a sky/road that changes constantly. But construct it with **`always_dirty=False`** and it repaints only when you call **`.invalidate()`** (or another dirty layer overlaps it). That gives a panel that lives inside a scene\*\* (a dialog box, status panel, or menu) which sits idle (no re-rasterize, no re-push) until its content actually changes, then repaints once. It is the buffer-less alternative to a retained `Canvas` for content that is mostly static but must update occasionally.
```python
panel = pg.StripDraw(draw_panel, x, y, w, h, always_dirty=False) # idle until invalidated
scene.add(panel, fixed=True)
# ... when the text changes:
panel.invalidate() # repaints once on the next refresh
```
This is how `picogame_ui.SceneBox` and `SceneMenu` work: a buffer-less in-scene dialog or menu that repaints on `show`/`hide`/`set_line`, not every frame.
## Rules of thumb
[Section titled “Rules of thumb”](#rules-of-thumb)
* **Moving object → Sprite. Big board → Tilemap. Dynamic full-frame/strip or HUD → StripDraw. Occasional static panel → Canvas (drawn once).**
* A dynamic HUD never needs a `Canvas`. If you typed `pg.Canvas(W, BAR, ...)` for a HUD, switch to a `StripDraw`.
* A `Canvas` is justified only when the content is static and reused; then the buffer pays for itself by not re-rasterizing each frame.
* Both `scene.refresh()` and `pg.render()` take every layer kind, so choose the driver by *when* it should repaint (every dirty refresh vs. on demand), not by what you need to draw.
## See also
[Section titled “See also”](#see-also)
* Fighting a `MemoryError`? See [Memory & RAM](/memory/) for the budget, how to measure it, and the arena fix.
* Exact signatures for `Canvas`, `StripDraw`, `pg.render` and `Sprite`: the [Reference](/reference/).
* Ready-made HUD / dialog / menu widgets built on these paths: [Text & UI](/helpers/text-ui/).
* Backing a `Canvas` with reused memory instead of a fresh buffer: [Saving & memory](/helpers/data/) (`picogame_arena`).
# Glossary
> Plain-language definitions of the game-making words used across these docs — written for people who know CircuitPython but are new to games.
This glossary explains the game-development terms used throughout the docs. Where useful, it connects them to concepts from CircuitPython `displayio`.
## Sprite
[Section titled “Sprite”](#sprite)
A movable picture: the player, an enemy, a bullet, a coin. It wraps a `Bitmap` and has a position you change each frame. Closest `displayio` analogy: a single `TileGrid` you reposition, except a picogame sprite also flips, scales, rotates, and animates.
## Layer
[Section titled “Layer”](#layer)
One thing the scene draws, stacked back-to-front like sheets of glass. A sprite, a tilemap, a canvas and so on are all “layer kinds”; the order you add them is the order they’re painted.
## Tilemap
[Section titled “Tilemap”](#tilemap)
A big area built from a small set of repeating tile pictures (a background, a brick wall, a level grid), stored as **1 byte per cell** (the tile number), so it’s far cheaper than one sprite per cell. Like a grid of `displayio` `TileGrid` cells.
## Scene and retained mode
[Section titled “Scene and retained mode”](#scene-and-retained-mode)
picogame is **retained mode**: you build the objects once with `scene.add(...)`, and the engine *remembers* them. Each frame you change what moved and call `scene.refresh()`; you don’t redraw everything yourself. (The opposite, **immediate mode**, means you clear and redraw the whole screen every frame by hand.) A `Scene` is the container holding all your layers.
## Dirty rectangle
[Section titled “Dirty rectangle”](#dirty-rectangle)
The region that changed since the last frame. Because the scene remembers everything (above), it can work out which regions moved and **repaint only those**. “Dirty” means “changed and needs repainting.”
## Blit
[Section titled “Blit”](#blit)
To copy a picture’s pixels onto the screen (or into another drawing surface). `displayio` hides this behind Groups and TileGrids, so you may never have typed it; in picogame it’s the basic “stamp this bitmap here” operation.
## Game loop
[Section titled “Game loop”](#game-loop)
The heartbeat of every game: each frame, **read input → update the world → draw → wait a bit**, then repeat. picogame games are all this same shape.
## Frame
[Section titled “Frame”](#frame)
This word means two different things, so watch the context:
* a **screen frame** — one turn of the game loop (one repaint), as in “each frame you move the player”;
* an **animation frame** — one picture in a bitmap’s strip of pictures, as in “advance `sprite.frame` to the next walk pose.”
## Anchor
[Section titled “Anchor”](#anchor)
The pivot point a sprite scales and rotates around, given as fractions of its size: `(0.5, 0.5)` is the centre, `(0.5, 1.0)` the bottom-centre. Its position and rotation are measured about this point.
## AABB
[Section titled “AABB”](#aabb)
A box overlap test, short for *axis-aligned bounding box*, a plain (non-rotated) rectangle drawn around a sprite. “Do these two AABBs overlap?” is the cheapest way to check if two things collide.
## Object pool
[Section titled “Object pool”](#object-pool)
A fixed set of sprites you create **once** and recycle (spawn / free) instead of making and deleting them mid-game. Creating and destroying objects each frame fragments the tiny RAM; a pool avoids that. Reach for `picogame_pool` for bullets, enemies, coins, anything that comes and goes.
## Wire-order colour
[Section titled “Wire-order colour”](#wire-order-colour)
The byte order the display panel expects over SPI, which is **not** the same as a plain `0xRRGGBB` literal. Always build colours with `pg.rgb565(r, g, b)`; passing a raw hex literal gives wrong colours. (This is the one colour footgun coming from `displayio`.)
## Juice
[Section titled “Juice”](#juice)
The small, cheap touches that make a game *feel* good: a hit-flash, a screen shake, a spark, a beep on the key action. Standard game-maker slang; `picogame_fx` provides most of it.
## Parallax
[Section titled “Parallax”](#parallax)
Background layers that scroll **slower** than the foreground, creating an illusion of depth (think of distant hills drifting by slower than the roadside).
## Coyote time and jump buffering
[Section titled “Coyote time and jump buffering”](#coyote-time-and-jump-buffering)
Two small fairness tricks: **coyote time** lets the player still jump for a few frames after walking off a ledge; **jump buffering** honours a jump pressed just before landing. Both make controls feel forgiving (`picogame_input.Timer`).
## Ghost lap
[Section titled “Ghost lap”](#ghost-lap)
In racing games, a translucent replay of your best lap shown on the track so you can race against your own record.
## State machine
[Section titled “State machine”](#state-machine)
The game switches between named modes (title → playing → game-over). One `state` variable decides what updates and draws each frame.
## Stride
[Section titled “Stride”](#stride)
How many **pixels** one row of a bitmap’s source data spans. Leave it `0` and the engine assumes the data is tightly packed (one row is `width × frames` pixels, the full horizontal atlas); set it only when you’re pointing at a **sub-window of a larger image**, where each row in memory is wider than the part you’re drawing. A constructor argument on `Bitmap(...)`.
## StripDraw and Canvas
[Section titled “StripDraw and Canvas”](#stripdraw-and-canvas)
Two ways to draw custom pixels, traded off by memory (see [Drawing paths](/concepts/drawing-paths/) for the full picture):
* **Canvas** — a retained pixel buffer (`width × height × 2` bytes) you draw onto and reuse; right for a panel that changes rarely.
* **StripDraw** — a buffer-less layer that draws into each live strip. It retains **0 pixel bytes**, but its callback still uses CPU each time the region repaints. Use it for full-frame effects and dynamic HUD or text.
# How picogame works
> Scenes, the game loop, and dirty-region rendering in picogame.
picogame keeps your scene objects between frames. You change their state, call `scene.refresh()`, and the engine redraws the affected regions. This page explains that model and the game loop around it.
New to game terms? Any unfamiliar word here is defined in the [Glossary](/concepts/glossary/).
## The big idea: describe the scene, then say what moved
[Section titled “The big idea: describe the scene, then say what moved”](#the-big-idea-describe-the-scene-then-say-what-moved)
Most of a game’s screen doesn’t change from frame to frame: the background stays put, only a few things move. picogame is built around that.
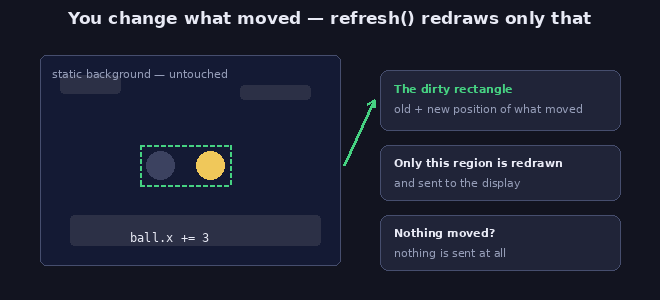
You **describe a scene once** (these sprites, this tilemap, this background), and then each frame you just **change what moved** (`ball.x += 3`) and call `scene.refresh()`. The engine works out which little rectangles actually changed (each a [dirty rectangle](/concepts/glossary/)) and **redraws only those**; it doesn’t repaint the whole screen. Nothing moved? Nothing is sent to the display.
For the levers that keep a game at a steady 30 FPS as it grows, see [Performance](/performance/).
The work usually follows how much *changed*, not the full screen size. Camera movement and always-dirty layers are the main exceptions because they repaint the play area. The engine tracks the regions for you.
## The pieces you build a scene from
[Section titled “The pieces you build a scene from”](#the-pieces-you-build-a-scene-from)
These are the main objects you can put in a scene:
* **Sprite** — a movable picture: the player, an enemy, a bullet, a coin. It has a position, can be flipped, animated through frames, scaled and rotated.
* **Tilemap** — a big grid built from a small set of tile pictures: a level, a tiled background, a brick wall. Cheap, because the grid stores one number per cell instead of every pixel.
* **Bitmap** — the actual picture a sprite or tile draws. You can generate one in code (a circle, a rectangle) or convert it from a PNG.
* **Scene** — the container that holds all of the above and draws them in order. Each thing it draws is a [layer](/concepts/glossary/) (one thing the scene draws, stacked back-to-front); you add things to it, then refresh it each frame.
* A **camera** — the scene has a viewpoint you can move (`set_view`), so the world can be bigger than the screen and scroll as the player walks.
There are a few more specialised pieces (a drawing **Canvas**, full-frame **StripDraw** effects, **Particles**); you’ll reach for those once you need them. See the [feature guide](/features/) for “which one when”.
## The game loop
[Section titled “The game loop”](#the-game-loop)
Every picogame game is the same shape:
1. **Read input** — which buttons are down.
2. **Update** — move things, run game rules, spawn and remove objects.
3. **Refresh** — `scene.refresh()` draws the changes.
4. **Wait** — a clock caps the framerate so the game runs at a steady speed.
```python
while True:
buttons.poll() # 1. input
ball.x += speed # 2. update
scene.refresh() # 3. draw what changed
clock.tick() # 4. hold the framerate
```
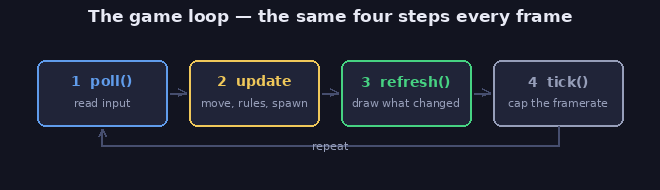
Collisions, sound, scoring, and other game rules belong in step 2.
This 4-step shape is universal. Once a game has more than one screen (title / play / game-over) and needs to restart, hold its state in one object and move this loop into a `main()` function — see [Game patterns](/concepts/patterns/) for that shape and why.
## You build before touching hardware
[Section titled “You build before touching hardware”](#you-build-before-touching-hardware)
The same game code runs off the device, so you design, debug and iterate there first. The browser-based option is the **Playground**; for hands-on local work there’s also a **[desktop simulator](/simulator/)** (headless screenshots for quick checks, or a live window). All three environments share the game-facing API - but not the runtime: RAM limits, timing, input feel, audio and panel-specific effects only exist for real on the device. Smoke-test on hardware regularly during development, not once at the end.
## Where to go next
[Section titled “Where to go next”](#where-to-go-next)
New here? Build [your first game](/start/first-game/), then continue with the tutorials. Use the feature guide and reference when you need to choose a tool or check a signature.
**Already know an engine (or `displayio`)?** Skip the tutorial and jump to the [concept map](/concepts/coming-from/) and [glossary](/concepts/glossary/), then the [reference](/reference/).
* **[Make your first game](/start/first-game/)** — put this into practice in five minutes.
* **[The tutorials](/tutorials/)** — three games, one idea per step.
* **[Feature guide](/features/)** — once you know the shape, this is “which tool for which job”.
* **[API reference](/reference/)** — the precise, complete list when you need exact signatures.
# Making it fun
> Tune a working game loop through clear actions, immediate feedback, paced difficulty, and a controlled scope.
Once the game loop works, tune four things: the player’s main action, feedback, difficulty, and scope. The bar is not “it runs” — it’s **fun in the first 10 seconds**. The [patterns](/concepts/patterns/) page provides code for the ideas below.
## Start with the main action
[Section titled “Start with the main action”](#start-with-the-main-action)
Before naming the verb, decide the fantasy — what the player gets to *be*. “Catch” is a different game as a frantic short-order cook, a goalie, or someone saving falling stars. Pick the fantasy, then name the verb in one word: jump, shoot, steer, match, dodge. Build the loop around it: **act → see the result → respond → act again under changed conditions**.
A loop this tight should be legible just by *watching* it for ten seconds, and fun with no art and no sound. Prototype with generated shapes from `picogame_shapes` before committing to final art — if the action isn’t fun as a rectangle chasing a circle, better art won’t save it. Fix the rules and feedback first.
## Give actions immediate feedback
[Section titled “Give actions immediate feedback”](#give-actions-immediate-feedback)
Feedback connects an input or collision to a result the player can see and hear, applied in the same update that handles the event — a delayed response reads as sluggish even at 30 fps. Not all feedback is equally cheap. Roughly in order of fun gained per byte spent:
1. **A sound on the main action** — the single best return for the least code; a beep confirms what the eye already saw. The simplest beep needs no `.wav` file:
```python
beep = picogame_audio.tone(880, 90) # a short high blip, built once
audio.sfx(beep) # fire it the frame the catch happens
```
What carries the meaning is the *contour* — high reads as good, low as bad. The ready-made [`picogame_sfx`](/helpers/audio/) kit gives you both:
Catch (a light blip): [](/audio/sfx_blip.mp3)\
Miss (a low, downward tone): [](/audio/sfx_hurt.mp3)
2. **A short hit-flash** — set a sprite’s opaque pixels to flat white for 1-3 frames, then clear it. Almost free:
```python
spr.flash = pg.rgb565(255, 255, 255) # on impact
spr.flash = 0 # 2 frames later: back to normal
```

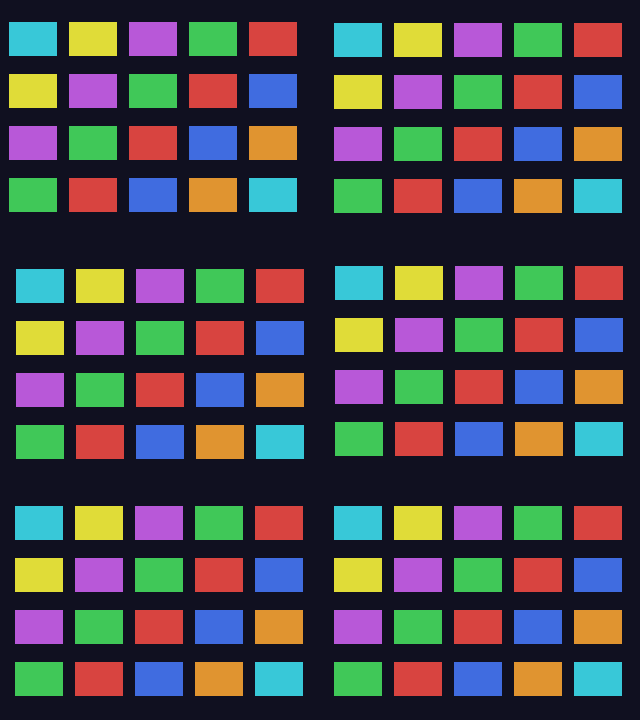
3. **A restrained screen shake** — `picogame_fx.Shake`, a few pixels, decaying fast. More reads as noise, not impact:
```python
shaker.add(0.6) # on a hit — trauma is squared, so small events barely shake
shaker.tick(0, 0) # every frame (feed a camera offset here if you have one)
```
4. **A brief hit-stop** — freeze the sim for 2-8 frames on a big hit; it makes the impact *connect*. No engine primitive — you skip your own ticks:
```python
freeze = 4 # on a big impact
if freeze > 0: # at the top of the loop, while frozen:
freeze -= 1; clock.tick(); continue
```
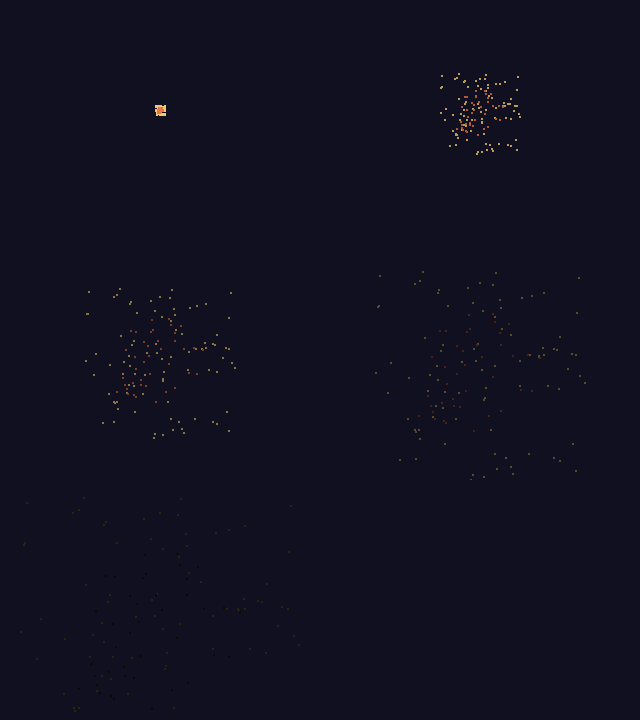
5. **A small particle burst** — a pop or ring on catch or score:
```python
ps.emit(x, y, 16, 4, 24, pg.rgb565(255, 210, 120)) # burst on the event
ps.tick() # every frame
```
Spend the first item before reaching for the fifth — one good sound beats five weak particle effects. Match strength to the event and keep the play area readable; `picogame_fx` and the native blit effects cover most of this, see [effects](/helpers/effects/) and the [patterns](/concepts/patterns/) page.
Flashing safety
Never flash the whole screen faster than about 3 Hz (≥10 frames apart at 30 fps), and watch for many hit-flashes clustering past that — it’s a seizure risk. Prefer a localized `sprite.flash` to a full-screen white frame, and offer a reduced-effects toggle.
## Difficulty that breathes
[Section titled “Difficulty that breathes”](#difficulty-that-breathes)
Difficulty should rise in a **sawtooth**, not a straight climb: build tension for 20-40 seconds, release it at a milestone (a cleared wave, a checkpoint), then re-engage about 10% harder. A flat ramp goes boring by minute two; a monotonic climb never lets the player exhale.
* **Ramp speed, density, or variety before adding health.** This changes the play pattern instead of padding the same encounter.
* **Telegraph every threat.** A readable wind-up, and enough time to react — the human floor is about 250 ms (roughly 8 frames at 30 fps). Below that, a hit stops feeling like the player’s fault.
* **Be generous** — this is what makes a game feel *fair*, not easy: coyote time and a jump buffer (`picogame_input.Timer`), i-frames after a hit so one mistake can’t chain-kill, a hitbox smaller than the player’s sprite.
* **Restart in under half a second.** Re-initialise the run in place; never send the player through a menu to try again.
## Scope is a feature
[Section titled “Scope is a feature”](#scope-is-a-feature)
Build the smallest complete version of the main loop, play it, and add from there. Cut a feature if it doesn’t change the player’s decisions or the strength of the feedback — a fourth enemy type that plays exactly like the first three is not depth. The device’s [RAM](/memory/) and [timing](/performance/) limits are a useful boundary, not just a constraint to fight.
## What players remember
[Section titled “What players remember”](#what-players-remember)
A run is remembered by its peak and its ending, not its average frame. Give each run a clear high point, and land the ending deliberately: on failure, show the result, add one last visual or audio beat, and offer a restart with no delay. A flourish on death costs little and is what makes the player reach for the button again.
## Before → after: a catch game
[Section titled “Before → after: a catch game”](#before--after-a-catch-game)
A one-button game — move left/right, catch falling shapes, three misses and you’re out. Bland version: silent, shapes fall at one constant speed forever, “GAME OVER” text, no restart hint. Applying the ideas above, cheapest first:
* **Sound** — a blip on every catch, a distinct low thud on every miss. One `picogame_sfx.Kit` call; changes how every catch *feels* immediately.
* **Hit-flash** — the caught shape flashes white for 2 frames before it leaves the pool.
* **Shake** — a 3-4 px `picogame_fx.Shake` on a miss only, decaying over half a second — not on every catch, or it drowns the good feedback in noise.
* **Fairness** — the catcher’s hitbox is a few pixels narrower than its sprite, and a shape that grazes the edge still counts. Without this, misses feel like the game’s fault, not a slow reaction.
* **Difficulty sawtooth** — fall speed and spawn rate step up every 5 catches, each step \~10% harder, with the two seconds after a step-up left untouched to let the new speed register.
* **Peak-end** — the run’s best streak is shown, large, at the top of the game-over screen, above the score; A instantly starts a new run.
None of this changed the rules of catch. It changed how catching *feels* — and that’s the whole page.
***
Next: the [patterns](/concepts/patterns/) turn each of these into code; the [tutorials](/tutorials/) build three games applying them.
# Game patterns
> Small recipes for state, levels, camera, scoring, collision, and feedback.
These recipes show the *shape* of code reused across genres — the structure and the why. For the paste-ready code of a specific task (HUD updates, pools, restart, shuffle, input timing), see [Snippets](/snippets/); the [API reference](/reference/) gives exact signatures and the [examples](/examples/) show complete games. Keep actors distinguishable by both shape and colour so they stay readable on a small screen and without colour cues.
## Game structure: state machine + restart
[Section titled “Game structure: state machine + restart”](#game-structure-state-machine--restart)
Hold all mutable game state in one **`State`** object, put the per-frame loop in a **function** (`main`), and branch on `st.mode`. The function keeps the loop’s name lookups fast (locals instead of module-global dict lookups — a measured win on device), and the single object makes restart a one-liner.
```python
class State:
def __init__(self): self.reset()
def reset(self):
self.mode = "title" # "title" -> "play" -> "over"
self.score = 0; self.lives = 3
st = State()
def new_game():
st.reset(); st.mode = "play" # re-init IN PLACE (clear pools, re-show sprites)
def main(): # the loop lives in a function -> its names are fast locals
poll, refresh, tick = btn.poll, scene.refresh, clock.tick # hoist hot calls to locals
while True:
poll()
if st.mode == "play":
... # move, collide, score; on death: st.mode = "over"
elif btn.just_pressed(btn.A):
new_game() # title / game-over -> instant restart, no reload
refresh(); tick()
main()
```
A tiny game (a few state vars) can stay module-level, but this `State` + `main()` shape scales cleanly and is the recommended default. Ready-to-run skeleton: [try it in the browser](/playground/?ex=game-skeleton).
## Object pool
[Section titled “Object pool”](#object-pool)
Reuse a fixed pool for short-lived things such as bullets, coins, blocks, and sparks.
```python
pool = picogame_pool.Pool(scene, BMP, 16, anchor=(0.5, 0.5))
s = pool.spawn() # None if full; .visible is the alive flag
if s: s.move(x, y); s.data = ... # pool.free(s) to recycle
```
## Tilemap level
[Section titled “Tilemap level”](#tilemap-level)
The board for mazes, bricks, platforms, RPG maps: 1 byte/cell, read and written at runtime.
```python
level = pg.Tilemap(tileset, cols, rows); scene.add(level)
level.tile(cx, cy, EMPTY) # write a cell: eat a pellet, break a brick
hit = level.tile(cx, cy) in WALLS # read a cell for collision
```
## Solid-tile collision (per-axis)
[Section titled “Solid-tile collision (per-axis)”](#solid-tile-collision-per-axis)
For platformer walls and floors, move and resolve **one axis at a time** (X, then Y) so the body never wedges in corners; probe the leading edge at two points, and step a fast fall one pixel at a time so a big `vy` can’t tunnel through a floor. It’s plain per-object Python: cheap, no special engine call.
```python
def move_x(x, y, dx, hw): # stop at the wall, don't enter it
e = x + (hw if dx > 0 else -hw)
return x if solid(e, y - 2) or solid(e, y - 14) else x + dx
def move_y(x, y, vy, hw): # step down so a big vy can't tunnel through the floor
if vy > 0:
for _ in range(vy):
if solid(x, y + 1) or solid(x - hw, y + 1) or solid(x + hw, y + 1):
return y, 0, True # landed: y held, vy zeroed, grounded
y += 1
return y + vy, vy, False
```
## Scrolling camera
[Section titled “Scrolling camera”](#scrolling-camera)
When the world is bigger than the screen: follow and clamp the view; keep the HUD on a `fixed` layer.
```python
scene.set_view(clamp(player.x - W // 2, 0, world_w - W), 0)
```
## Turn-based loop
[Section titled “Turn-based loop”](#turn-based-loop)
Puzzle, tactics, RPG: wait for input, resolve one move, redraw. Most frames draw nothing, so it’s cheap.
```python
if btn.just_pressed(btn.A):
resolve_move() # advance exactly one turn
scene.refresh() # only the changed cells repaint
```
## Impact feedback
[Section titled “Impact feedback”](#impact-feedback)
Combine a sound, short flash, restrained shake, [hit-stop](/helpers/effects/), or particles according to the size of the event.
```python
spr.flash = WHITE # flat, 1-3 frames
shake.add(0.4) # picogame_fx.Shake; shake.tick() each frame
if audio: audio.sfx(picogame_audio.tone(150, 70))
```
## Damage forgiveness: hitbox & i-frames
[Section titled “Damage forgiveness: hitbox & i-frames”](#damage-forgiveness-hitbox--i-frames)
Make a timing game feel fair: a hitbox smaller than the sprite, plus a mercy window after a hit.
```python
if inv == 0 and threat.near(player, 12): # hitbox < sprite art
inv = 45 # i-frames; blink the player while inv > 0
```
## Score chain
[Section titled “Score chain”](#score-chain)
Reward greed: consecutive hits ramp a multiplier; a miss resets it.
```python
# on a hit: chain += 1; mult = 1 + chain // 5; score += pts * mult
# on a miss: chain = 0; mult = 1
```
To *display* the score on screen, see [Text & UI](/helpers/text-ui/).
## Difficulty ramp
[Section titled “Difficulty ramp”](#difficulty-ramp)
Ramp speed/density (not HP), in a sawtooth: build, ease at a milestone, re-engage harder.
```python
interval = max(11, 30 - t // 160) # spawns speed up over time
if (t % 600) >= 54 and t % interval == 0: # with a ~1.8s lull every ~20s
spawn()
```
## Scrolling background
[Section titled “Scrolling background”](#scrolling-background)
A few wrapping sprites create an endless parallax background without a full-screen background bitmap.
```python
for s in stars:
s.fy += s.speed
if s.fy > H: s.fy = -2; s.fx = rng.below(W) # wrap to the top
```
***
For the design *why* (the one verb, juice, difficulty, scope) see [Making it fun](/concepts/making-it-fun/); for the mental model, [How picogame works](/concepts/how-it-works/); the [tutorials](/tutorials/) build Breakout, a shooter, and an RPG step by step.
# Build your own board
> picogame can run on a board you wire yourself, as long as it has an SPI display, a few buttons - and a firmware build with the picogame module (prebuilt for…
picogame can run on a board you wire yourself, as long as it has an **SPI display, a few buttons - and a firmware build with the picogame module** (prebuilt for the boards on [Supported hardware](/supported-hardware/), or your own build). This page takes a bare **Raspberry Pi Pico** (or Pico W / Pico 2) plus a display and gets a game running on it.
## Wire it
[Section titled “Wire it”](#wire-it)
This is the PicoPad’s pin map. Matching it requires the least configuration, but you can choose other suitable GPIO pins and name them in `settings.toml`. Schematics: [Pajenicko PicoPad hardware](https://github.com/Pajenicko/Picopad/tree/main/hardware/schematics).
| Function | Pico GPIO | Notes |
| --------------------- | --------- | ---------------------------------------------------- |
| Display **SCK** | GP18 | SPI clock |
| Display **MOSI** | GP19 | SPI data (to display SDA/DIN) |
| Display **DC** | GP17 | data/command |
| Display **CS** | GP21 | chip select |
| Display **RST** | GP20 | reset |
| Display **BL** | GP16 | backlight (tie high, or PWM to dim) |
| **↑ Up** | GP4 | button to **GND** (active-low, internal pull-up) |
| **↓ Down** | GP5 | |
| **← Left** | GP3 | |
| **→ Right** | GP2 | |
| **A** | GP7 | |
| **B** | GP6 | |
| X / Y *(optional)* | GP9 / GP8 | |
| **Speaker** | GP15 | PWM audio, through a small transistor/amp or a piezo |
| Display **VCC / GND** | 3V3 / GND | also the common for buttons & speaker |
Buttons wire **to GND** (read active-low with an internal pull-up). The ST7789 bus runs up to **62.5 MHz**. On a breadboard keep the display wires short, or drop `PICOGAME_BAUD` (below).
## Three ways to get `board.DISPLAY`
[Section titled “Three ways to get board.DISPLAY”](#three-ways-to-get-boarddisplay)
A game asks the engine for the screen via `board.DISPLAY`. How you provide it depends on your board. **Pick one path:**
1. **Your board already has `board.DISPLAY`** (PicoPad, PicoSystem, µGame, Thumby, VIDI X). Nothing to do: copy your game as `code.py` plus the `lib/` it imports. Done.
2. **A picogame *custom-board* firmware**: the **Pico / Pico W / Pico 2 / Pico 2 W** [downloads](/supported-hardware/) expose a `board.DISPLAY` slot. A small **`boot.py`** builds the display from `settings.toml`, and your game remains **unchanged as `code.py`**. This also works for existing games and `stage`-based games.
3. **A stock / other firmware** (no slot). A **launcher `code.py`** builds the display, makes it `board.DISPLAY`, then runs your game (as `game.py`). A little more setup.
Grab the ready `boot.py` / launcher from [`custom_board/` in the repo](https://github.com/MakerClassCZ/picogame/tree/main/custom_board). Each path has its own folder; use one. The display **driver is Python** (an init table inside the file), so adding a new controller needs no firmware rebuild.
## Configure it — one `settings.toml`
[Section titled “Configure it — one settings.toml”](#configure-it--one-settingstoml)
Both non-native paths (and the game itself) read the **same `settings.toml`**. One file describes the whole board:
```toml
# Display
PICOGAME_DISPLAY = "st7789" # or "ili9341"
PICOGAME_PINS = "SCK=GP18 MOSI=GP19 DC=GP17 CS=GP21 RST=GP20 BL=GP16"
PICOGAME_SIZE = "320x240" # WIDTH x HEIGHT; WIDTH > HEIGHT = landscape
PICOGAME_FLIP = "" # "", "h", "v", "hv" — orientation (see below)
PICOGAME_INVERT = 0 # colours negative? -> 1
PICOGAME_BGR = 0 # red/blue swapped? -> 1
PICOGAME_BAUD = 24000000 # lower on long breadboard wires
# Buttons (active-low, to GND) — token is LOGICAL=GPpin
PICOGAME_BUTTONS = "UP=GP4 DOWN=GP5 LEFT=GP3 RIGHT=GP2 A=GP7 B=GP6 X=GP9 Y=GP8"
# Audio (optional)
PICOGAME_AUDIO = "GP15" # PWM speaker pin; omit if none
```
Re-wiring a button is then a one-character edit, no code. (The launcher path also reads `PICOGAME_GAME = "game"` to know which module to run.)
Changed a display setting? Do a full restart
On the **boot.py path**, `boot.py` builds the display only at power-on, so after editing a display key (`PICOGAME_DISPLAY`, `PICOGAME_PINS`, `PICOGAME_SIZE`, `PICOGAME_FLIP`, `PICOGAME_INVERT`, `PICOGAME_BGR`, `PICOGAME_BAUD`) press **RESET** or re-plug USB. A soft reload (saving a file) re-runs `code.py` but not `boot.py`, so it keeps the old display. Button and audio keys are read by the game, so those *do* update on a normal reload. (On the **launcher path** everything updates on reload: the launcher rebuilds the display each run.)
## Full `settings.toml` reference
[Section titled “Full settings.toml reference”](#full-settingstoml-reference)
The keys above cover the common case. Below is every **runtime** key picogame reads. All are read at runtime, so a board is adapted with **no reflash** — a key takes effect on the next reload (display keys need a full restart, see the note above). Values are **integers or strings only**: CircuitPython’s `settings.toml` has no floats or booleans, so on/off is `1`/`0` and volumes are **integer dB**.
| Key | Format / values | Example | Note |
| ------------------------- | -------------------------------------- | -------------------------- | ---------------------------------------------------------------------------------------------------------------------------------------------------------------------- |
| `PICOGAME_PULL` | `"up"` or `"down"` | `PICOGAME_PULL = "up"` | Internal resistor + active level for **all** buttons. `up` = wired to GND, pressed reads low (default); `down` = wired to 3V3, pressed reads high. |
| `PICOGAME_MATRIX_ROWS` | space/comma GP pins | `"GP0 GP1 GP2 GP3"` | Row pins of a scanned key matrix (see intro below). |
| `PICOGAME_MATRIX_COLS` | space/comma GP pins | `"GP4 GP5 GP6 GP7"` | Column pins of the matrix. |
| `PICOGAME_MATRIX_MAP` | `NAME=row,col` tokens | `"UP=1,2 A=3,5 START=0,0"` | Maps matrix cells to game buttons. Also accepts `NAME=key_number` (`key = row*ncols+col`). Map only the keys you want; the rest are ignored. |
| `PICOGAME_MATRIX_ANODES` | `"cols"` or `"rows"` | `"cols"` | Optional; which axis is driven. Default `cols`; flip to `rows` if the diode direction is reversed. |
| `PICOGAME_AUDIO_OUT` | `"headphone"` / `"speaker"` / `"both"` | `"headphone"` | Output select for an I2S DAC (Fruit Jam TLV320). Default `headphone`. |
| `PICOGAME_HP_VOLUME` | integer dB, `<= 0` | `-10` | Headphone analog trim. `0` = line level (too loud for earbuds — stay `<= -3`); `-78` = silent. Driver default is a quiet `-30`, so raise toward 0. |
| `PICOGAME_DAC_VOLUME` | integer dB, `<= 0` | `-3` | Main digital fader. Keep `<= 0` to avoid DSP clipping. |
| `PICOGAME_SPK_VOLUME` | integer dB, `<= 0` | `-10` | Speaker analog trim (same scale as headphone). |
| `PICOGAME_USB` | `1` / `0` | `PICOGAME_USB = 0` | On a USB-host build, `0` **disables** auto-attach of USB HID input (gamepad + keyboard). Default on. |
| `PICOGAME_KBD` | `1` / `0` | `PICOGAME_KBD = 0` | `0` disables the USB **keyboard** only (the gamepad still auto-attaches). Default on. |
| `PICOGAME_USBPAD` | `NAME=byte:bitmask` tokens | `"A=5:0x40 B=5:0x20"` | Remap gamepad buttons (HID report byte index : bitmask). A partial list merges over the DragonRise defaults. |
| `PICOGAME_USBPAD_ID` | `"VID:PID"` (hex) | `"081f:e401"` | Pin the USB gamepad to a specific device (skip auto-pick) when several HID devices are attached. |
| `PICOGAME_USBPAD_TIMEOUT` | ms | `10` | HID read timeout for the gamepad poll. Raise only if a pad drops inputs. |
| `PICOGAME_USBKBD` | `NAME=keycode` tokens | `"A=0x2C START=0x28"` | Remap USB-keyboard keys to game buttons (HID keycode, hex or decimal). Merges over the default arrows/WASD layout. |
| `PICOGAME_USBKBD_EP` | `"iface:endpoint"` | `"2:0x83"` | Point the keyboard driver at the live interface/IN-endpoint of a combo dongle whose boot interface is silent (find it with `tools/usbkbd_probe.py`). |
| `PICOGAME_USBKBD_TIMEOUT` | ms | `10` | HID read timeout for the keyboard poll. |
| `PICOGAME_DEBUG` | `1` / `0` | `PICOGAME_DEBUG = 1` | **When something doesn’t work, set this.** Prints `[picogame] ...` failure reasons (audio DAC/driver, USB pad/keyboard, …) to the serial console. Remove once working. |
**Buttons on a key matrix.** If your buttons are wired as a scanned **row × column** grid (a small keypad or a QWERTY block) instead of one pin per button, use the `PICOGAME_MATRIX_*` keys above instead of `PICOGAME_BUTTONS`. Map only the cells you care about onto game buttons. Discover each cell’s `(row, col)` (or key number) by running **`matrix_probe.py`** first — it prints them as you press.
**USB gamepad.** On a USB-host firmware (Fruit Jam) a pad plugged into the USB-HOST port auto-attaches with **no game change**; the default layout is the DragonRise `081f:e401` generic pad. Set `PICOGAME_USB = 0` to turn that off, or remap another pad’s buttons with `PICOGAME_USBPAD` (discover its report bytes with the USB probe tool).
These are build flags, not settings
DVI/framebuffer output, 12-bit RGB444 colour, and the fast (DMA) display backend are **compile-time firmware options** (`CIRCUITPY_PICOGAME_FRAMEBUFFER`, `CIRCUITPY_PICOGAME_RGB444`, `CIRCUITPY_PICOGAME_FAST_DISPLAY`), **not** `settings.toml` keys — don’t look for a runtime key. See [Firmware](/firmware/) to rebuild with them.
## If the picture is wrong
[Section titled “If the picture is wrong”](#if-the-picture-is-wrong)
picogame draws straight to the panel, so orientation lives in the panel’s own settings, not in a software rotation. Toggle these in `settings.toml` until it looks right, **no code:**
| Symptom | Fix |
| ---------------------------------------------------------------- | ------------------------------------------------------------------------------------------------------------------------------------------------------------------------------------------------ |
| Sideways / wrong aspect | swap `PICOGAME_SIZE` (`320x240` ↔ `240x320`) |
| Upside down | `PICOGAME_FLIP = "hv"` |
| Mirror image (text backwards) | `PICOGAME_FLIP = "h"` (or `"v"` if flipped vertically) |
| Photo-negative colours | flip `PICOGAME_INVERT` (0 ↔ 1) — ST7789 panels come in both polarities; the key sets the panel’s correct resting state and works on the stock PicoPad firmware too |
| Red/blue swapped or image mirrored **on stock PicoPad firmware** | `PICOGAME_MADCTL` = the absolute panel-orientation byte: `0x60` stock · `0x68` BGR panel · `0xA0` mounted 180° · `0xA8` both. (On a DIY board use `PICOGAME_BGR`/`PICOGAME_FLIP` above instead.) |
| Backlight too bright / dim by default | `PICOGAME_BRIGHTNESS` = integer percent 0–100 (applied at game setup) |
| Red and blue swapped | `PICOGAME_BGR = 1` |
Panel modules vary. Change one setting at a time and check the result. An ST7789 often uses `INVERT = 1`, and an ILI9341 often uses `BGR = 1`, but the correct value depends on the module.
## Check the wiring first: `input_example`
[Section titled “Check the wiring first: input\_example”](#check-the-wiring-first-input_example)
Before your game, drop **`input_example.py`** (in the repo’s `examples/`) on the board. It prints what the engine detected — board id, display size, mapped buttons, audio — to the serial console, and draws the D-pad + A/B/X/Y as squares that **light up and beep** as you press them. An unmapped button stays dark, so a wiring or `settings.toml` mistake shows at a glance.
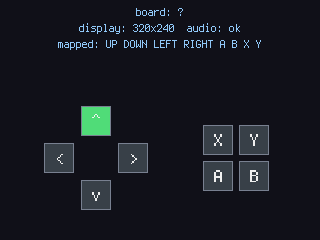
## Then deploy as usual
[Section titled “Then deploy as usual”](#then-deploy-as-usual)
Once the display and buttons respond, everything else — shipping `.mpy`, the RAM budget, flashing — is the same as on the other supported boards: see [Run on hardware](/hardware/).
# picogame — 2D game engine for PicoPad (CircuitPython)
> picogame is a retained-mode 2D game engine built as a CircuitPython C module. It targets the Pajenicko PicoPad (RP2040, 320×240 ST7789) and similar boards.
Complete API guide
If you are new to picogame, first read [How picogame works](/concepts/how-it-works/) and build [your first game](/start/first-game/). This page documents exact engine behaviour and includes a quick start for readers coming from `displayio`.
`picogame` is a retained-mode 2D game engine built as a CircuitPython C module. It targets the Pajenicko PicoPad (RP2040, 320×240 ST7789) and similar boards. It is a more complete successor to `_stage`: arbitrary-size sprites, a retained `Scene` with dirty-region rendering, tilemaps, particles, drawing surfaces, and an optional asynchronous DMA display backend.
* **Reference target:** the PicoPad firmware and SPI path are tested on hardware. Other targets have individual status notes in [Supported hardware](/supported-hardware/).
* **Performance:** on an SPI display, `Scene` transfers up to six changed regions separately. Localized motion can therefore cost less than a full repaint; scattered changes and camera movement can still approach a full-screen update.
***
## Contents
[Section titled “Contents”](#contents)
1. [Where this page fits](#where-this-page-fits)
2. [Quick start](#quick-start)
3. [API reference](#api-reference)
4. [Asset pipeline](#asset-pipeline)
5. [Engine costs & constraints](#engine-costs--constraints)
6. [Under the hood](#under-the-hood)
7. [Building the firmware](#building-the-firmware)
8. [Examples](#examples)
***
## Where this page fits
[Section titled “Where this page fits”](#where-this-page-fits)
This is the **deep guide to the native `picogame` C module**: exact behaviour, contracts and costs of the engine types. It assumes you know what you’re looking for.
* New here? [Your first game](/start/first-game/), then [How picogame works](/concepts/how-it-works/).
* “Which layer/surface do I use?” → [Drawing paths](/concepts/drawing-paths/); task index in [FEATURES.md](/features/).
* Bare signatures of everything → [REFERENCE.md](/reference/).
* The pure-Python `picogame_*` helpers (input, timing, audio, UI, pools, save…) have their own guides under *Helpers* — this page covers the C module only. (Helpers keep the `picogame_*` file prefix, **not** a `picogame/` package: that name is the C module and can’t be shadowed.)
**Two contracts everything relies on:** colours are always the display’s **wire byte order** — build them with `pg.rgb565(r, g, b)`; a naïve `0xRRGGBB` or host-endian RGB565 renders wrong colours. Coordinates are top-left origin; render-call rectangles are **half-open** (`x0,y0` inclusive to `x1,y1` exclusive), while `collide()` hitboxes are **inclusive** (different domains: pixels vs hitboxes).
***
## Quick start
[Section titled “Quick start”](#quick-start)
```python
import time, array
import board
import picogame as pg
import picogame_game
BG = pg.rgb565(20, 24, 40)
scene, _, _ = picogame_game.setup(background=BG)
W, H = board.DISPLAY.width, board.DISPLAY.height # read the screen size from the board
# Simple 16×16 paletted sprite (index 0 is transparent)
pal = array.array("H", [pg.rgb565(0, 0, 0), pg.rgb565(230, 80, 80)])
data = bytearray(16 * 16)
for y in range(16):
for x in range(16):
if 3 <= x < 13 and 3 <= y < 13:
data[y * 16 + x] = 1
hero_bmp = pg.Bitmap(data, 16, 16, format=pg.PAL8, palette=pal, transparent=0)
hero = pg.Sprite(hero_bmp, 150, 110)
scene.add(hero)
while True:
hero.x = (hero.x + 1) % (W - 16)
scene.refresh()
time.sleep(1 / 60)
```
***
## API reference
[Section titled “API reference”](#api-reference)
### Module `picogame`
[Section titled “Module picogame”](#module-picogame)
| Name | Description |
| ---------------------------------------------------------------------- | -------------------------------------------------------------------------------------------------------------------------------------------------------------------------------------------------------------------------------------------- |
| `RGB565` | format constant (16-bit color, wire order) |
| `PAL8` | format constant (8-bit palette index) |
| `rgb565(r, g, b) -> int` | build a wire-order RGB565 color from 8-bit components |
| `collide(x1, y1, x2, y2, ax1, ay1, ax2, ay2) -> bool` | AABB box↔box overlap; inclusive bounds, so boxes collide when they touch (pass sprite boxes as `(x, y, x+w, y+h)`; fires on contact). `collide` is inclusive, unlike render’s half-open pixel ranges (different domains: hitboxes vs pixels) |
| `collide(x1, y1, x2, y2, px, py) -> bool` | box↔point (6 args) |
| `render(display, sprites, buffer, x0, y0, x1, y1, *, background=0)` | immediate draw of a sprite list to a compatible display target |
| `value2d(x, y, *, seed=0) -> float` | smooth 2-D value noise, 0..1 (fast C) |
| `value1d(x, *, seed=0) -> float` | smooth 1-D value noise, 0..1 |
| `fbm2d(x, y, *, octaves=4, seed=0, lacunarity=2.0, gain=0.5) -> float` | fractal (fBm) 2-D noise, 0..1 — terrain/clouds/caves |
| `fbm1d(x, *, octaves=4, seed=0, lacunarity=2.0, gain=0.5) -> float` | fractal (fBm) 1-D noise, 0..1 |
Noise is **fixed-point** (Q16.16) under the hood, fast on the RP2040 (no FPU) and meant for one-shot terrain/cloud gen, not per-frame. There are no separate `_fx` exports; `value2d`/`value1d`/`fbm2d`/`fbm1d` are the canonical functions, called directly on the `picogame` module (`pg.value2d`, `pg.fbm2d`, …); the simulator provides a matching Python implementation.
### Conditional / build-flag API
[Section titled “Conditional / build-flag API”](#conditional--build-flag-api)
Presence depends on the firmware build - feature-test with `hasattr` / `getattr`:
| Name | Present when | Purpose |
| ------------------ | ------------------------------------------------------------------------------------- | ------------------------------------------------------------------------------------------------- |
| `Display` | `CIRCUITPY_PICOGAME_FAST_DISPLAY` (RP2/ESP ports) | async-DMA render backend; absent on portable ports (pass the plain busdisplay to `Scene` instead) |
| `Framebuffer` | `CIRCUITPY_PICOGAME_FRAMEBUFFER` (scanout-buffer platforms, e.g. the WASM playground) | RAM render target instead of a panel |
| `RGB444_SUPPORTED` | always (bool) | whether this board’s panel can drive 12-bit RGB444 |
| `STRIP_H` | always (int) | the board’s default render-strip height (`picogame_game.setup` uses it) |
| `API_LEVEL` | newer firmware (use `getattr(pg, "API_LEVEL", 0)`) | engine API generation, for up-front version checks |
### `Bitmap(data, width, height, *, format=RGB565, palette=None, frames=1, stride=0, transparent=None)`
[Section titled “Bitmap(data, width, height, \*, format=RGB565, palette=None, frames=1, stride=0, transparent=None)”](#bitmapdata-width-height--formatrgb565-palettenone-frames1-stride0-transparentnone)
An image atlas of one or more equal-size frames, **any** width/height.
* `data` — readable buffer: `PAL8` = 1 byte/pixel index; `RGB565` = 2 bytes/pixel (LE wire).
* `palette` — for `PAL8`, a buffer of wire-order RGB565 entries (e.g. `array("H", [...])`).
* `frames` — animation frames laid out **horizontally**; frame `f` is at column `f*width`.
* `stride` — atlas width in pixels (default `width*frames`).
* `transparent` — palette index (`PAL8`) or wire color (`RGB565`) to skip; `None` = opaque.
* Read-only properties: `width`, `height`, `frames`, `format`, `stride`, `palette` (the PAL8 palette buffer or `None`), `transparent` (the transparent value or `None`).
### `Sprite(bitmap, x=0, y=0, *, frame=0, visible=True, flip_x=False, flip_y=False)`
[Section titled “Sprite(bitmap, x=0, y=0, \*, frame=0, visible=True, flip\_x=False, flip\_y=False)”](#spritebitmap-x0-y0--frame0-visibletrue-flip_xfalse-flip_yfalse)
A positioned, animatable instance of a `Bitmap`.
* Properties: `x`, `y` (integer pixel; setter also accepts a float), `fx`, `fy` (sub-pixel float position), `frame`, `visible`, `flip_x`, `flip_y`, `transpose`, `data`, `bitmap`, `scale`, `angle`, `shadow`, `flash`, `tint`, `dither`.
* `move(x, y)` — set position (accepts int or float).
* `overlaps(other, inset=0) -> bool` / `near(other, r) -> bool` — native collision tests (anchor/scale/rotation aware, zero-allocation). `overlaps` is an inclusive AABB box test (`other` = a `Sprite`, an `(x, y)` point, or an `(x1, y1, x2, y2)` rect); `inset` shrinks **this** sprite’s box by N px for a fairer hitbox. `near` is a circular test (centres within `r`, no sqrt; `other` = `Sprite` or point).
* `scale` — uniform draw scale (float, nearest-neighbour). `1.0` = native (fast 1:1 path); `2.0` = double size; fractional allowed (e.g. a coin pulsing `1.0..1.3`, a powerup growing). Scales about the `anchor`.
* `angle` — rotation in **degrees** about the anchor (float). `0` = none (fast path); any other value uses the affine (inverse-mapped) blit. Integer scales stay crisp; rotation shimmers slightly (pixel-art trade-off). `scale` + `angle` compose.
* `shadow` — when `True`, the sprite’s opaque pixels **darken** the destination instead of drawing their color (drop shadows: an offset silhouette below the sprite; or a dim/vignette overlay). Combine with `scale`/`angle` freely.
* Blit effects `flash`, `tint`, `dither` — cheap per-pixel recolour/translucency, one at a time (setting one clears the others; `0` = off), no extra art or RAM. `flash = WHITE` paints opaque pixels a flat colour (a 1–3-frame hit blink); `tint = RED` multiplies the colour, **keeping** shading (lighting/damage/freeze; it can only darken); `dither = 0..16` is a Bayer stipple (ghost/fog/fade, no alpha; animate the level to fade in/out).
* `transpose` — when `True`, swaps the X/Y axes (a diagonal mirror); combined with `flip_x`/`flip_y` it gives all **8** orientations as a crisp fast-path blit (scale 1, angle 0). The footprint swaps width/height.
* `bitmap` — read/write the source `Bitmap`. Assigning a new one swaps graphics at runtime and may change size (powerups, resizable HUD bars, text labels); the scene repaints both the old and new bounds on the next `refresh`.
* `touch()` — mark the sprite dirty after an **in-place** `bitmap`/palette edit (e.g. a `picogame_palette` recolour), so the change repaints on the next `refresh`.
* `anchor` — pivot as `(fx, fy)` fractions of the bitmap size: `(0, 0)` top-left (default), `(0.5, 0.5)` center, `(0.5, 1.0)` bottom-center. `x`/`y` then refer to this point, so growing/shrinking via a `bitmap` swap stays aligned around the pivot. The dirty-rect tracks the resulting top-left.
* Use `fx`/`fy` for smooth physics (`ball.fx += 2.4`) instead of a parallel Python float + `int(round())`; `x`/`y` return the floored pixel for tile/collision math. Dirty-rect triggers only when the pixel changes (sub-pixel jitter under 1 px is free).
* `data` — an arbitrary user payload (any object) for per-sprite game state, so you don’t need a parallel wrapper class: `hero.data = {"vy": 0, "dead": False}`.
### `Display(busdisplay, *, rgb444=False)`
[Section titled “Display(busdisplay, \*, rgb444=False)”](#displaybusdisplay--rgb444false)
Fast async-DMA backend wrapping an existing `busdisplay.BusDisplay` (e.g. `board.DISPLAY`). Reuses its SPI bus, pins, window commands and dimensions.
* `rgb444=True` drives the panel in 12-bit RGB444 instead of 16-bit RGB565: \~25 % less SPI traffic (3 bytes per 2 pixels) at the cost of colour depth.
* `render(sprites, buffer_a, buffer_b, x0, y0, x1, y1, *, background=0)` — draw a sprite list into the region with double-buffered DMA.
* `picogame.invert(display, on)` — toggle the panel’s hardware colour inversion. Changes the panel’s inversion state without sending pixel data, so a brief invert makes a full-screen negative flash (a 1-bit “hit” look) with no buffer and no redraw. Wrapped by `picogame_fx.InvertFlash`.
### `Scene(display, buffer_a, buffer_b, *, background=0, top=0, bottom=0, left=0, right=0)`
[Section titled “Scene(display, buffer\_a, buffer\_b, \*, background=0, top=0, bottom=0, left=0, right=0)”](#scenedisplay-buffer_a-buffer_b--background0-top0-bottom0-left0-right0)
Retained-mode scene with dirty-rectangle rendering. `display` is a `picogame.Display` (the fast backend) **or** a plain `busdisplay.BusDisplay` (the portable path).
* `add(item, *, fixed=False) -> item` — add a `Sprite`/`Tilemap`/`Particles`/`Canvas`/`StripDraw` and return it (so `spr = scene.add(Sprite(...))` works). Insertion order is **bottom-to-top**. `fixed=True` (keyword-only) pins the item to the screen (ignores the view offset); use it for HUD / score / dialog that must stay put while the world scrolls via `set_view`. (add tilemap backgrounds first, sprites after, foreground tilemaps last).
* `add_all(items)` — add several items at once (same bottom-to-top order).
* `refresh() -> [x1, y1, x2, y2] | None` — diff vs. the previous frame and repaint only the changed region; returns the bounding dirty rect as a REUSED list (read it immediately - the next call overwrites it), or `None` if nothing changed. The first refresh repaints the whole screen (covers leftover console pixels).
* `invalidate()` — force a full-screen repaint on the next refresh (e.g. on level change).
* `set_view(ox, oy)` — view offset = screen position of the scene origin. Set a constant offset to centre a small game (e.g. a 128×128 game on 320×240); update it each frame to scroll a larger world (scrolling repaints the whole screen). Sprites/tilemaps then live in plain scene coordinates regardless of placement.
* `view` — read-only `(ox, oy)` current view offset.
* `display` — read-only: the render backend this scene draws through (the `pg.Display` wrapper where enabled, else the plain busdisplay). `pg.render()`/`pg.invert()` accept either form, so `pg.render(scene.display, ...)` always works.
### `Tilemap(tileset, cols, rows)`
[Section titled “Tilemap(tileset, cols, rows)”](#tilemaptileset-cols-rows)
A grid of tile indices into `tileset` (a `Bitmap` whose frames are the tiles).
* `tile(tx, ty) -> int` / `tile(tx, ty, value, *, flip_x=False, flip_y=False, transpose=False)` — get / set a tile (set marks dirty); the orientation flags are keyword-only.
* `move(x, y)` — move the whole map (pixel position of tile 0,0).
* `fill(value)` — set every tile.
* Out-of-range `tile()` reads as `0` and ignores writes (no exception).
* Read-only properties: `x`, `y`, `cols`, `rows`.
### `Canvas(width, height, *, transparent=None, buffer=None)`
[Section titled “Canvas(width, height, \*, transparent=None, buffer=None)”](#canvaswidth-height--transparentnone-buffernone)
A RAM drawing surface composited as a Scene layer — the general home for shapes. Add it to a `Scene`; draw into it; only redrawn areas repaint. Colors are wire-order. Pass an existing `buffer` (a `width*height*2`-byte writable buffer) to back the surface with your own RAM instead of letting the Canvas allocate one.
* Primitives (all take wire colors): `clear(color)`, `pixel(x, y, color)`, `fill_rect(x,y,w,h,color)`, `rect(x,y,w,h,color)`, `line(x0,y0,x1,y1,color)`, `circle(cx,cy,r,color)`, `fill_circle(cx,cy,r,color)`, `ring(cx,cy,r,thickness,color)`, `triangle(x0,y0,x1,y1,x2,y2,color)`, `fill_triangle(...)`, `ellipse(cx,cy,rx,ry,color)`, `fill_ellipse(...)`, `fill_round_rect(x,y,w,h,r,color)`, `frame3d(x,y,w,h,light,dark)` (bevelled box: light top/left, dark bottom/right), `text(x, y, s, fg, font, bg=None)` (composite font glyphs in C; `bg=None` = transparent, and also works in a `StripDraw` view without a retained text bitmap), `move(x, y)`.
* `blit(bitmap, x, y, frame=0, flip_x=False, flip_y=False)` — stamp a bitmap frame into the surface (honours its transparent key): the retained way to bake an icon/portrait/rendered text into a panel.
* Read-only properties: `x`, `y`, `width`, `height`.
* `transparent` (a wire color) lets the surface be a shaped overlay (HUD bar, gauge, vector art) over other layers. Costs `width*height*2` bytes of RAM, so size it to what you need (e.g. a 320×16 status bar = \~10 KB).
* **RAM warning:** a full-screen `Canvas(320, 240)` is **150 KB**, too big for the RP2040 (\~190 KB heap, \~130 KB contiguous). Keep Canvases small, or use a `Tilemap` for large scrolling fields. See [the hardware notes](/hardware/). For a *full-frame animated* surface, consider `StripDraw` below; it does not retain a pixel surface.
### `StripDraw(callback, x=0, y=0, width=0, height=0, *, always_dirty=True)`
[Section titled “StripDraw(callback, x=0, y=0, width=0, height=0, \*, always\_dirty=True)”](#stripdrawcallback-x0-y0-width0-height0--always_dirtytrue)
An **immediate-mode** draw layer with **no pixel buffer at all**. Added to a `Scene` like any layer, but instead of retaining pixels it calls your `callback` once per render strip that overlaps its rect:
```python
def draw(view, vx, vy, vw, vh):
# `view` is a Canvas pointing straight at the live strip, clipped to the part that
# overlaps the layer's rect; its local (0,0) is screen pixel (vx, vy); (vw, vh) is
# that view's size. Draw with normal Canvas primitives -- a full-view fill stays
# inside the layer's rect (the callback only fires for strips the rect touches).
for ly in range(vh):
Y = vy + ly # screen row
view.fill_rect(0, ly, vw, 1, sky_or_road(Y))
scene.add(pg.StripDraw(draw, 0, 0, 320, 240))
```
* **RAM:** the layer retains no `width*height*2` pixel surface. A full-screen pseudo-3D road therefore avoids the **150 KB** pixel buffer required by a full-screen `Canvas`; the `StripDraw` object, callback, and game state still use memory.
* With the default `always_dirty=True` its rect is **repainted every frame** (no dirty-rect skip), so use it for *animated* content: pseudo-3D roads, gradient skies, raycasters, plasma, procedural backgrounds, or shapes that change each frame. For *static* art that mostly sits still, a `Canvas` is cheaper CPU (it repaints only when changed); pick by motion, not by size.
* `always_dirty=False` makes it an **on-demand** layer: it repaints only when you call `.invalidate()` (otherwise the dirty-rect skips it, like a Canvas), a buffer-less in-scene panel with no retained pixel surface that repaints only on change. This is how `picogame_ui.SceneBox`/`SceneMenu` draw their panels.
* **Keep the inner loop light:** the callback issues C primitives, so a handful of `fill_rect`/`hline`-style calls per strip is cheap; avoid heavy per-pixel Python.
* Read/write properties `x`, `y`, `width`, `height` move or resize the layer at runtime; after shrinking it, call `scene.invalidate()` so the vacated area repaints.
* Drawn in **screen space** (it ignores the camera/view offset). In a **scrolling** scene (one that calls `set_view`) add it **fixed** (`scene.add(sd, fixed=True)`) so its dirty rect matches where it draws; in a static-camera scene it doesn’t matter. Inside the callback, map a screen point to the strip via `(screen_x - vx, screen_y - vy)`. Composites over lower layers and under higher ones, like any layer. See `examples/picogame_stripdraw_example.py`, and `examples/journey_hw/journey_mono.py` (racer road, intro shapes, RPG dialog box).
### `Particles(capacity, *, size=1, gravity=0.0, fade=False)`
[Section titled “Particles(capacity, \*, size=1, gravity=0.0, fade=False)”](#particlescapacity--size1-gravity00-fadefalse)
A pooled particle layer (many small moving dots) drawn as a single Scene layer, far cheaper than one `Sprite` per particle. Add it to a `Scene`. With `fade=True` each particle dims toward black over its life (sparks/embers/smoke look).
* `emit(x, y, count, speed=1, life=30, color=0xFFFF)` — spawn `count` particles at (x, y) with random velocity up to `speed` px/tick, living `life` ticks, in a wire-order color (use `picogame.rgb565`).
* `tick()` — advance one step (move, gravity, ageing); call once per frame.
* `clear()` — remove all particles.
* Positions are sub-pixel (fixed-point); the layer repaints only where particles are (and were), so they leave no trails. v1 draws solid `size`×`size` dots.
***
## Asset pipeline
[Section titled “Asset pipeline”](#asset-pipeline)
`tools/png2picogame.py` (host-side, needs Pillow) converts PNG/BMP into importable asset modules whose colors are already in wire order.
```bash
# A sprite / horizontal animation atlas (auto picks PAL8 or RGB565):
python3 tools/png2picogame.py hero.png -o hero.py --frames 6
# A vertical / grid tile sheet -> horizontal atlas Bitmap (16x16 tiles):
python3 tools/png2picogame.py tiles.bmp -o tiles.py --tile 16x16 --transparent-index 15
# A tilemap (image palette indices ARE tile indices) -> Tilemap data module:
python3 tools/png2picogame.py level.bmp -o level.py --map
```
On the device:
```python
import hero, tiles, level
spr = pg.Sprite(hero.bitmap(pg), 40, 120)
tileset = tiles.bitmap(pg)
tm = pg.Tilemap(tileset, level.WIDTH, level.HEIGHT)
level.fill(tm) # load the map data
```
Options: `--format auto|pal8|rgb565`, `--frames N`, `--tile WxH`, `--map`, `--transparent-index N` (treat a P-mode palette index as transparent), `--rle` (RLE-compress a single-frame PAL8 background).
Size-saving options (PAL8):
* `--dither` (+ `--colors N`, default 255): Floyd–Steinberg dither when reducing to PAL8; hides gradient banding (skies, lighting). A low `--colors` (e.g. 16–32) + `--dither` = a retro look.
* `--dedup` (with `--tile WxH`) — fold tiles that are identical **up to orientation** (all 8: 4 rotations × mirror) into a smaller tileset → less tileset RAM. Emits a `REMAP` table; rebuild your map with `v, fx, fy, tp = REMAP[old_index]; tm.tile(x, y, v, flip_x=fx, flip_y=fy, transpose=tp)` (it carries the per-tile flip/transpose; the orientation flags are keyword-only). Typical hand-drawn levels are 40–70 % duplicate. Pairs with the Tilemap per-cell orientation.
***
## Engine costs & constraints
[Section titled “Engine costs & constraints”](#engine-costs--constraints)
> For deployment, read [Run on hardware](/hardware/) (`.mpy`, firmware, and device testing) and [Fit it in RAM](/memory/) (costs and measurement).
* **Plan retained surfaces against the measured heap.** A full-screen `Canvas(320,240)` is 150 KB and exceeds the largest contiguous block in the current RP2040 PicoPad build. Keep Canvases small, use a `Tilemap` for big fields and a `StripDraw` for animated full-frame content. Costs and the decision matrix: [Drawing paths](/concepts/drawing-paths/) + [MEMORY.md](/memory/).
* **Dirty-region rendering reduces SPI traffic for localized motion.** A full-screen repaint still pays both composition and transfer costs; which dominates depends on the scene, firmware, and SPI clock.
* **Up to six dirty regions:** overlapping changes are combined first. If more than six regions remain, `Scene` merges the pair that adds the least extra area until six are left. Localized motion stays cheap; changes scattered across the screen can still approach a full redraw. `refresh()` returns their bounding union for diagnostics, although the renderer processes the regions separately.
* **Native types (`Sprite`, `Bitmap`, …) can’t hold custom attributes** - use `sprite.data` for per-entity state.
* **PAL8 uses half the pixel storage of RGB565** (1 B/px vs 2). For larger assets, also consider frozen data, ROMFS, or streaming; see [Where assets live](/memory/).
***
## Under the hood
[Section titled “Under the hood”](#under-the-hood)
How a `refresh()` or `render()` reaches the output:
* **SPI targets render in horizontal strips.** The engine reuses one or two small buffers; for each strip it clears the background, composites overlapping layers, and sends the result.
* **Framebuffer targets composite into the scanout buffer.** They do not allocate the SPI strip buffers. A large dirty region still means more pixels to composite, but there is no SPI transfer step.
* **Fast SPI path (`pg.Display`)**: two strip buffers + asynchronous DMA - the CPU composites the next strip while the previous one is still on the SPI bus. **Portable path** (plain busdisplay): one buffer and blocking `bus.send`.
* **Strip height** comes from the buffer size you allocate (`buffer_len / (width*2)`). Smaller strips give finer CPU/transfer overlap on the DMA path; larger strips mean fewer blocking sends on the portable path - which is why the board default `STRIP_H` differs (8 with DMA, 24 without).
* **Dirty tracking** diffs each layer against a per-item snapshot (position, frame, scale, angle, effects, a `seq` bumped by `touch()`); Canvas/Tilemap/Particles accumulate their own dirty rects internally and hand them over on refresh.
* **Rotation/scaling** is a fixed-point inverse-mapped blit (no floats in the hot path); the per-sprite transform (bbox + inverse-map steps) is cached and recomputed only when angle/scale/bitmap/anchor change.
***
## Building the firmware
[Section titled “Building the firmware”](#building-the-firmware)
The engine is a native module inside a CircuitPython fork; building it is its own guide - see **[The firmware build](/firmware/)** (toolchain, board configs, flags). Prebuilt firmware for supported boards: [Supported hardware](/supported-hardware/).
***
## Examples
[Section titled “Examples”](#examples)
In the project root (copy to `CIRCUITPY/code.py`):
| File | Shows |
| ------------------------------------- | ----------------------------------------------------------------------------------------------------------------------- |
| `examples/picogame_demo_code.py` | arbitrary-size sprites, fast Display, FPS/timing breakdown |
| `examples/picogame_scene_demo.py` | retained Scene + dirty-rect (static field + movers) |
| `examples/picogame_play_demo.py` | D-pad input → Scene (frame-capped movement) |
| `examples/picogame_hud_demo.py` | HUD text via the bundled font (`picogame_font.py`) |
| `examples/picogame_tilemap_demo.py` | tilemap background + sprite over it |
| `examples/picogame_audio_demo.py` | PWM audio: overlapping beeps via the mixer (`picogame_audio.py`) |
| `examples/picogame_scroll_demo.py` | camera/scrolling: a 640×480 world with the view following the player (`scene.set_view`) |
| `examples/picogame_particles_demo.py` | particle layer: burst (A) + fountain (B) with gravity (`pg.Particles`) |
| `demos/picogame_arkanoid.py` | a full Breakout/Arkanoid game: Tilemap bricks + sprites + collide + particles + HUD |
| `games/squest/code.py` | a Seaquest-style shooter: pooled sprites via `sprite.data`, projectiles + collide + particles, O2 HUD gauge, tone audio |
### Project layout
[Section titled “Project layout”](#project-layout)
```text
lib/ engine Python helpers (picogame_*) -> copy needed ones to CIRCUITPY/lib/
examples/ games, demos, per-game assets -> a game becomes code.py at the root
tools/ asset converters (png2picogame, ...)
```
Deploying a game to the device (helpers, `.mpy`, assets) is covered by [Run on hardware](/hardware/).
# picogame example games
> Click a game to play it in your browser — or copy it to a PicoPad. These are the games that ship with picogame.
Click a game to play it in your browser — or copy it to a PicoPad. These are the games that ship with picogame.
## Try a game
[Section titled “Try a game”](#try-a-game)
**▶ In your browser — easiest, nothing to install.** Click any game below. It opens in the [Playground](/playground/) and starts right away. Keys: **arrows** (or WASD) move, **F** (or Ctrl) = button A, **G** = button B.
**💻 On your computer.** Download the code once, then run a single line — the desktop simulator opens a window:
```bash
git clone https://github.com/MakerClassCZ/picogame
cd picogame
python3 sim/run.py games/snake/code.py # any game
```
You need Python 3 (add `pip install pygame` for a live window; without it the run just saves a screenshot).
**🎮 On real hardware.** Any Raspberry Pi Pico with a small screen, a few buttons and a buzzer plays these — a ready-made **PicoPad**, or one you [build yourself](/hardware/). Flash the firmware, copy the game’s files, done.
## The games
[Section titled “The games”](#the-games)
[**Platformer**`picogame_cavern`▶ play in browser](/playground/?game=cavern) [**Pseudo-3D racer**`picogame_picobike`▶ play in browser](/playground/?game=picobike) [**Vertical shooter**`picogame_squest_full`▶ play in browser](/playground/?game=squest_full) [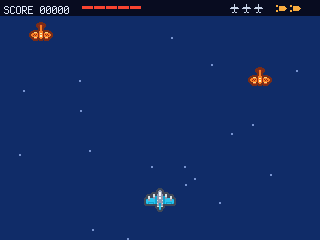**Plane shmup**`picogame_picowing`▶ play in browser](/playground/?game=picowing) [**Top-down RPG**`picogame_quest`▶ play in browser](/playground/?game=quest) [**Card roguelite**`picogame_picatro`▶ play in browser](/playground/?game=picatro) [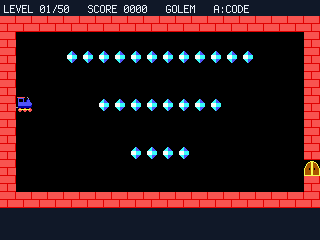**Logic puzzle**`picogame_train`▶ play in browser](/playground/?game=train) [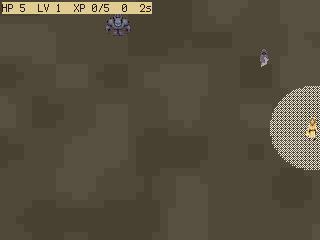**Survivor arena**`picogame_corona`▶ play in browser](/playground/?game=corona) [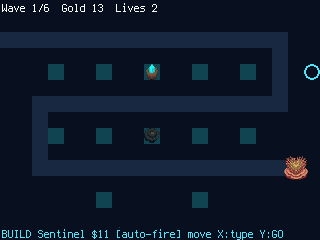**Tower defense**`picogame_salvo`▶ play in browser](/playground/?game=salvo) [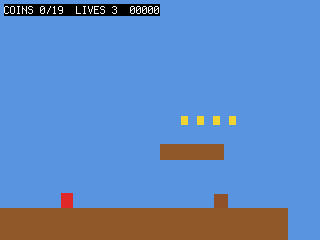**Side-scroller**`picogame_platformer`▶ play in browser](/playground/?game=platformer) [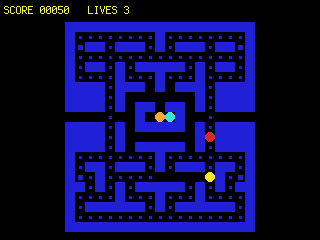**Maze chase**`picogame_pacman`▶ play in browser](/playground/?game=pacman) [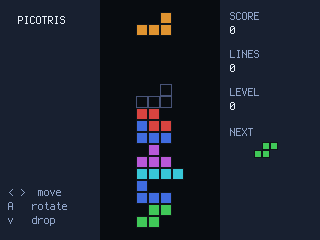**Falling-block puzzle**`picogame_picotris`▶ play in browser](/playground/?game=picotris) [**Breakout**`picogame_arkanoid`▶ play in browser](/playground/?game=arkanoid) [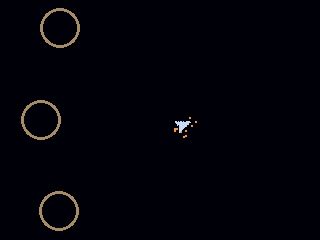**Asteroids**`picogame_asteroids`▶ play in browser](/playground/?game=asteroids) [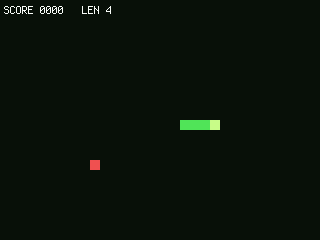**Snake**`picogame_snake`▶ play in browser](/playground/?game=snake) [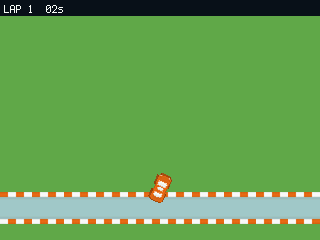**Top-down racer**`picogame_picoracer`▶ play in browser](/playground/?game=picoracer) [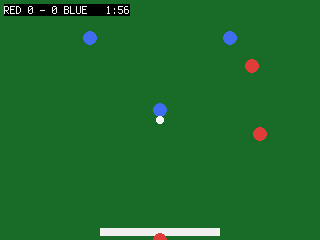**Sports**`picogame_soccer`▶ play in browser](/playground/?game=soccer) [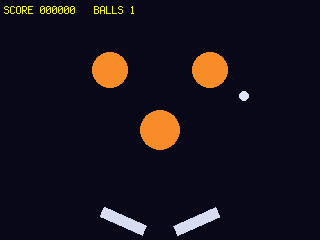**Pinball**`picogame_pinball`▶ play in browser](/playground/?game=pinball) [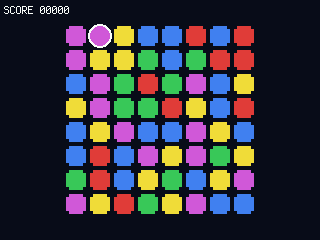**Match-3**`picogame_match3`▶ play in browser](/playground/?game=match3) [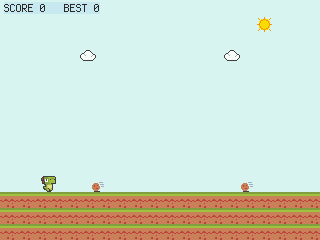**Endless runner**`picogame_dinorun`▶ play in browser](/playground/?game=dinorun) [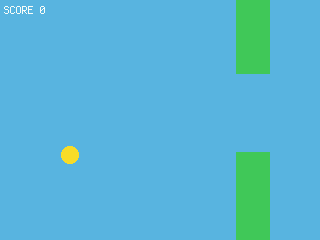**Flappy**`picogame_flappy`▶ play in browser](/playground/?game=flappy) [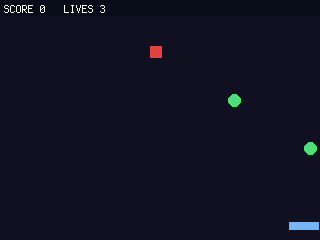**Catch arcade**`picogame_starfall`▶ play in browser](/playground/?game=starfall) [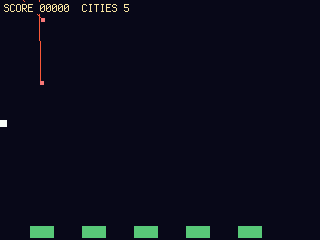**Missile defense**`picogame_missile`▶ play in browser](/playground/?game=missile) [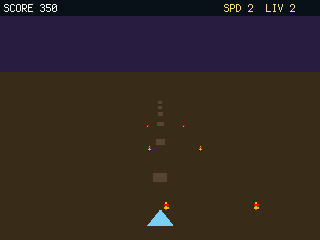**Pseudo-3D gates**`picogame_zoom`▶ play in browser](/playground/?game=zoom)
Every game is one self-contained program, and its opening comment lists exactly what it uses — so it also works as a template: start from the closest one and reshape it. They all live in the [picogame repo](https://github.com/MakerClassCZ/picogame).
## Put a game on a device
[Section titled “Put a game on a device”](#put-a-game-on-a-device)
1. Flash `firmware.uf2` — steps on [Run on hardware](/hardware/).
2. Copy the game’s `code.py` onto the CIRCUITPY drive, plus the helper modules and any asset files it imports (each game’s header comment lists them).
Power-cycle and it runs.
# picogame — what to use for what
> One page, one job: you know what you want to build — this index says which piece to use and links the page that explains it. (New to the engine?
Choosing a tool
This page assumes you know the basic scene model. For an introduction, build [your first game](/start/first-game/) and read [How picogame works](/concepts/how-it-works/).
One page, one job: you know what you want to build — this index says **which piece to use** and links the page that explains it. (New to the engine? Read [How picogame works](/concepts/how-it-works/) first.)
## Drawing & the screen
[Section titled “Drawing & the screen”](#drawing--the-screen)
RAM at a glance: a retained full-screen `Canvas` ≈ 150 KB; `StripDraw` / `Tilemap` ≈ 0 — full costs in [Drawing paths](/concepts/drawing-paths/).
| I want to… | Use | Details |
| ----------------------------------------------------------------- | ----------------------------------------------------------------------------------------------- | -------------------------------------------------------------------------- |
| show a moving object (player, enemy, bullet) | `Sprite` | [Reference](/reference/) |
| draw a map / big scrolling world | `Tilemap` (1 B per cell) | [Drawing paths](/concepts/drawing-paths/) |
| draw an animated full-screen effect cheaply (sky, road, gradient) | `StripDraw` (no retained buffer) | [Drawing paths](/concepts/drawing-paths/) |
| a panel that changes rarely (framed box, gauge) | `Canvas` (retained `w*h*2` B) | [Drawing paths](/concepts/drawing-paths/) |
| a status bar / HUD / dialog / menu | `picogame_ui` widgets — pick by the decision matrix | [Drawing paths](/concepts/drawing-paths/) · [Text & UI](/helpers/text-ui/) |
| rotate / scale a sprite at runtime | `Sprite.scale` / `Sprite.angle`; bake frames for many always-rotating objects | [Building scenes](/helpers/building-scenes/) |
| recolour / flash / ghost a sprite without extra bitmaps | blit effects `flash` / `tint` / `dither` / `shadow` (one at a time) | [Reference](/reference/) |
| a crisp 90° turn without shimmer | `transpose` + flips (all 8 orientations) | [Reference](/reference/) |
| follow the player with a camera | `scene.set_view(ox, oy)` + `fixed=True` HUD layers | [Game patterns](/concepts/patterns/) |
| screen shake / fade / smooth camera | `picogame_fx` | [Effects & juice](/helpers/effects/) |
| animated water/lava, palette cycling | `picogame_palette` | [Effects & juice](/helpers/effects/) |
| lots of small sparks / debris | `Particles` | [Reference](/reference/) |
| terrain / sky that varies naturally | C noise: `value2d` / `fbm2d` | [Reference](/reference/) |
| a pseudo-3D floor or first-person walls | `Canvas.mode7` (floor, via `picogame_mode7`) / `picogame_ray` (walls) — both into a `StripDraw` | [Pseudo-3D](/helpers/pseudo-3d/) |
## Gameplay
[Section titled “Gameplay”](#gameplay)
| I want to… | Use | Details |
| -------------------------------------------------------------------------------------- | ----------------------------------------------------------------------------- | ----------------------------------------------------------------------------- |
| detect hits | `a.overlaps(b)` (box), `a.near(b, r)` (circle), `picogame_tiles` (grid probe) | [Math & collision](/helpers/math/) |
| fire lots of bullets / spawn enemies | `picogame_pool.Pool` — reuse frequently created sprites | [Snippets](/snippets/) |
| animate a sprite (walk/idle/explode) | `sprite.frame` by hand, or `picogame_anim` time-based | [Animation](/helpers/animation/) |
| cutscene / title image with no frame buffer | `picogame_cutscene` (streams from flash) | [Animation](/helpers/animation/) |
| read the buttons through one API | `picogame_input.Buttons` | [Input & controls](/helpers/input/) |
| play with a USB gamepad or keyboard (USB-host boards, e.g. Fruit Jam) | `picogame_usbpad` / `picogame_usbkbd` (auto-attached via `Buttons`) | [Input & controls](/helpers/input/) |
| give each player their own controller (local multiplayer) | one `Buttons(sources=[pad])` per player + `find_pads()` | [Input & controls](/helpers/input/#local-multiplayer) |
| coyote time / jump buffering | `picogame_input.Timer` | [Boot & game loop](/helpers/boot-loop/) · [Snippets](/snippets/) |
| frame-rate-independent motion | `picogame_clock.Clock` (dt) / `FixedStep` (deterministic) | [Boot & game loop](/helpers/boot-loop/) |
| seeded / deterministic random, fair spawns | `picogame_rand` | [Math & collision](/helpers/math/) |
| play sounds (samples vs synth vs MIDI) | `picogame_audio` (WAV) / `picogame_synth` (synthio) | [Audio & music](/helpers/audio/) |
| a ready-made signature SFX set (no note-tuning) | `picogame_sfx` (`Kit` over `picogame_synth`) | [Audio & music](/helpers/audio/#picogame_sfx) |
| save a high score (to *display* a score on screen, see [Text & UI](/helpers/text-ui/)) | `picogame_save` (NVM) | [Saving & memory](/helpers/data/) |
| author many levels | the declarative scene format + editor; hand-code small ones | [Scene format](/scene-format/) · [Building scenes](/helpers/building-scenes/) |
| pause / menu over a live scene | `picogame_game.overlay()` | [Snippets](/snippets/) |
## Fitting the device
[Section titled “Fitting the device”](#fitting-the-device)
| I want to… | Use | Details |
| ----------------------------------------- | ------------------------------------------------------------------------------------------- | ------------------------------ |
| make it fit in RAM | budget → measure → optimize | [Fit it in RAM](/memory/) |
| keep a steady frame rate | game loop in a function, dirty-rect-friendly motion, 0-RAM layers | [Performance](/performance/) |
| store big art / many frames | frozen vs file→RAM vs streaming (`picogame_stream`) | [Fit it in RAM](/memory/) |
| shrink a tileset | `png2picogame.py --dedup` (merges rotated/mirrored tiles) | [Engine guide](/engine/) |
| understand fast DMA vs portable rendering | `pg.Display` backend vs plain busdisplay | [Engine guide](/engine/) |
| run at 640×480 over HDMI (Fruit Jam) | `CIRCUITPY_DISPLAY_COLOR_DEPTH = 8` (RGB332, auto-handled by `setup()`) | [Run on hardware](/hardware/) |
| run on a board I wired myself | prebuilt generic firmware + `settings.toml` (`PICOGAME_BUTTONS`, display, matrix, USB keys) | [Custom board](/custom-board/) |
| deploy to the device / troubleshoot | `.mpy`, lib bundle, serial console | [Run on hardware](/hardware/) |
Every row’s *Details* page carries the behaviour, the costs and the gotchas — this page deliberately repeats none of it.
# The firmware build
> The PicoPad firmware is a CircuitPython build with the native picogame module enabled.
The PicoPad firmware is a CircuitPython build with the native `picogame` module enabled.
## Building & flashing
[Section titled “Building & flashing”](#building--flashing)
Prerequisites: **ARM GCC ≥ 14** and initialized submodules.
```bash
# from the CircuitPython fork root
make -C ports/raspberrypi BOARD=pajenicko_picopad -j"$(nproc)"
```
Output: `ports/raspberrypi/build-pajenicko_picopad/firmware.uf2`. Flash it over **BOOTSEL** (hold BOOTSEL while plugging in, then drag the `.uf2` onto the `RPI-RP2` drive) like any CircuitPython firmware.
See [Run on hardware](/hardware/) for the device side and [Fit it in RAM](/memory/) for the RAM budget.
## Where picogame lives in the tree
[Section titled “Where picogame lives in the tree”](#where-picogame-lives-in-the-tree)
The engine lives in the `picogame` branch of the CircuitPython fork. Two module directories contain the implementation, and build flags select the module and optional backends.
| Path | What |
| --------------------------------------- | --------------------------------------------------------------------------------------------------------------------------------------- |
| `shared-bindings/picogame/` | the Python-facing API + docstrings: `__init__`, `Scene`, `Sprite`, `Bitmap`, `Tilemap`, `Canvas`, `Particles`, `Display`, `Framebuffer` |
| `shared-module/picogame/` | the **portable** C core — the blit / scene / tilemap / particles / canvas implementation, no port dependencies |
| `ports/*/common-hal/picogame/Display.c` | the optional per-port fast display backend (raspberrypi + espressif provide one) |
Build-system hooks:
| File | Change |
| --------------------------------------------- | --------------------------------------------------------------------------------------------------------------------------- |
| `py/circuitpy_mpconfig.mk` | registers the five `CIRCUITPY_PICOGAME*` flags — all default `0` |
| `py/circuitpy_defns.mk` | compiles `picogame/%` only when `CIRCUITPY_PICOGAME = 1`; adds `common-hal/picogame/Display.c` only when `FAST_DISPLAY = 1` |
| `ports/raspberrypi/boards/pajenicko_picopad/` | the board that opts in (config below) |
### The port intervention: the fast display path
[Section titled “The port intervention: the fast display path”](#the-port-intervention-the-fast-display-path)
The portable core in `shared-module/` never touches hardware — it blits pixels into a strip buffer and hands that buffer to a `busdisplay` through `bus.send`. This is the portable path for ports that compile picogame and expose a compatible SPI display. Each `bus.send` **blocks** the CPU until the strip has finished transferring over SPI, so rendering and transfer happen strictly one after the other.
`ports/raspberrypi/common-hal/picogame/Display.c` is the one place the engine reaches into the port, to remove that stall. It drives the RP2040’s SPI and DMA directly:
* **Overlap.** It double-buffers strips and DMAs one strip out over SPI *while the CPU blits the next* — render and transfer run concurrently instead of serially. It waits on the previous DMA only just before reusing that buffer.
* **Raw streaming.** It opens the panel’s GRAM window once (via `busdisplay`, which drives DC high for the first data strip), then streams the remaining strips as raw DMA with no per-strip reconfiguration or DC toggling.
* **One DMA channel, reused.** The channel is claimed once and kept across soft resets and game launches; the pico-SDK doesn’t free it on soft reset, so claiming per-construct would leak channels until DMA is exhausted.
This is what `CIRCUITPY_PICOGAME_FAST_DISPLAY` gates — both the `pg.Display` type and the common-hal file. **The flag is optional.** With it off, picogame still runs everywhere via the portable `bus.send` renderer; it’s just slower because each strip transfer blocks. The overlap only helps when a repaint spans multiple strips, so the win grows with per-strip blit cost: near zero for a small dirty-region update and larger for a full-frame, transform-heavy scene. Treat the 25–30% measured on the PicoPad benchmark as configuration-specific; see [Clocks, SPI & display limits](/hardware-limits/) for the test setup.
## Board configuration
[Section titled “Board configuration”](#board-configuration)
A board turns the engine on in its `mpconfigboard.mk`:
```make
CIRCUITPY_PICOGAME = 1 # compile the engine in
CIRCUITPY_PICOGAME_FAST_DISPLAY = 1 # async-DMA display backend (raspberrypi port)
CIRCUITPY_PICOGAME_RGB444 = 0 # panel COLMOD capability (see Build flags)
OPTIMIZATION_FLAGS = -O2 … # tuned for the Cortex-M0+ (see appendix)
CFLAGS += -DCIRCUITPY_FIRMWARE_SIZE='(1536 * 1024)' # + a matching linker-script change
```
**Display SPI clock (in `board.c`).** Request **62.5 MHz** (125/2) for the ST7789, not 60 — the PL022’s even-only divider rounds 60 down to half speed. See [Clocks, SPI & display limits](/hardware-limits/).
**Keep the image general-purpose.** Leave the full module set on; only disable what this device physically can’t use.
| Module | State | Why |
| ------------------------------------------------------------------------------------ | ------ | ------------------------------------------------------------------------------------------------------------------------------------------ |
| `picogame` (+ fast DMA display) | **on** | the engine |
| native `_stage` (`CIRCUITPY_STAGE`) | on | runs the original ugame/stage games head-to-head with the **picogame-stage** shim |
| `ulab`, `synthio`, audio, `displayio`, `bitmaptools`, `vectorio`, Wi-Fi, `keypad`, … | on | general-purpose, they fit |
| `picodvi`, `_eve` | off | no DVI / FT8xx hardware on this device |
| `qrio` | off | QR *decode* needs a camera the PicoPad lacks; also drops its \~32 KB `quirc` backend (QR *generation* via `adafruit_miniqr` is unaffected) |
The measured build used about **88%** of its 1.5 MB firmware region; this changes with the CircuitPython version and enabled modules.
## Build flags
[Section titled “Build flags”](#build-flags)
| Flag | Default | What it does |
| --------------------------------- | ------- | ------------------------------------------------------------------------------------------------------------------------------------------------------------------------------------------------------------------------------------------------------- |
| `CIRCUITPY_PICOGAME` | `0` | compile the engine in |
| `CIRCUITPY_PICOGAME_FAST_DISPLAY` | `0` | use the port’s async-DMA `Display` (raspberrypi + espressif); other boards fall back to the portable `bus.send` renderer |
| `CIRCUITPY_PICOGAME_RGB444` | `0` | board declares its panel supports 12-bit RGB444 (COLMOD), exposed as `picogame.RGB444_SUPPORTED` so a game can enable `Display(rgb444=True)` only where it helps. Off on PicoPad — on this CPU-balanced panel the per-strip pack cost ≥ the SPI saving. |
| `CIRCUITPY_PICOGAME_FRAMEBUFFER` | `0` | full-frame RAM-framebuffer backend for scanout platforms (RP2350 DVI/HSTX, the desktop sim, the WASM playground) instead of an SPI strip bus |
| `CIRCUITPY_PICOGAME_ROMFS_KB` | `0` | carves a flash asset region (in KB) for 0-copy ROMFS-XIP bitmaps; only the `-romfs` firmware variants set it (e.g. `64`) |
**Render-strip height.** On an SPI display, the screen is painted in horizontal strips of `STRIP_H` rows. `picogame_game.setup()` allocates two `width × STRIP_H × 2`-byte buffers; the framebuffer path returns `None` for both and does not allocate them. The SPI default is keyed to `FAST_DISPLAY`: **8** rows with DMA and **24** without. These are performance defaults for the measured paths; a smaller value always uses less buffer RAM. Override per board with `-DPICOGAME_STRIP_H=N`, or per game via `picogame_game.setup(strip_h=N)`; read it at runtime as `picogame.STRIP_H`. More in [Fit it in RAM](/memory/).
***
## Appendix: compiler optimization (tuned −O2)
[Section titled “Appendix: compiler optimization (tuned −O2)”](#appendix-compiler-optimization-tuned-o2)
CircuitPython’s rp2 port defaults to `-O3`. On the PicoPad’s Cortex-M0+ (no SIMD, no FPU, 16 KB XIP cache) most of what `-O3` adds is dead weight — the auto-vectorizers have no SIMD to target, and function cloning / heavy loop unrolling only grow flash. So the board ships **`-O2` plus the five cheap loop passes that do help the pixel loops**, matching `-O3` engine speed within \~1 % for \~150 KB less flash:
```make
OPTIMIZATION_FLAGS = -O2 -funswitch-loops -fpredictive-commoning -fgcse-after-reload \
-ftree-partial-pre -fsplit-paths
```
The MicroPython interpreter core (`gc.o`, `vm.o`) stays at `-O3` via CircuitPython’s `SUPEROPT_*` settings, so Python execution speed is unaffected. The single hottest loop (the plain sprite blit) additionally carries a `#pragma GCC unroll 4` — \~8 % faster on the M0+ for +0.3 KB; `-funroll-loops` firmware-wide would overflow the flash region.
Measured on-device, all builds on CircuitPython 10.3.0; **lower is faster**, best in each column **bold**. **Engine** = `picogame_bench_hotpath.py` (108 sprites of 32×32 over 120 frames at 320×240, ms/frame min); **Python** = `bench_optlevel.py` (ms/op); **flash** = full image, KB. The `O2+` row is the shipped build (baseline); each `🟢/🟡/🔴` marks how far a cell sits from it (better / ≤5 % worse / >5 % worse).
| | bg-fill ms | plain ms | plain+bg ms | tint ms | transpose ms | bignum ms | int ms | float ms | fib ms | ulab-py ms | ulab-np ms | flash KB |
| ----------------------------------------- | ---------------- | ------------ | ------------ | ---------------- | ------------- | ------------ | ----------------- | ------------- | ----------------- | ---------------- | ------------ | --------------- |
| `-O3` *(rp2 default)* | **24.9** 🟢−1.2% | 36.3 🟡+0.8% | 37.0 🟡+0.1% | **80.2** 🟢−0.5% | 46.1 🟡+0.3% | 98.8 🔴+8.8% | 20.84 🟡+2.1% | 40.80 🟡+1.3% | **657.8** 🟢−0.0% | **2.63** 🟢−2.2% | 0.76 🔴+17% | 1499 🔴+11% |
| `-O2` | 25.3 🟡+0.4% | 38.2 🔴+5.9% | 39.1 🔴+5.7% | 81.2 🟡+0.8% | 53.9 🔴+17% | 92.0 🟡+1.3% | **20.29** 🟢−0.6% | 40.34 🟡+0.1% | 660.2 🟡+0.3% | 3.77 🔴+40% | 0.66 🟡+1.5% | 1326 🟢−1.4% |
| `-Os` | 27.0 🔴+7.4% | 43.6 🔴+21% | 46.4 🔴+25% | 121.9 🔴+51% | 103.0 🔴+124% | 113.3 🔴+25% | 21.18 🟡+3.7% | 44.07 🔴+9.4% | 667.3 🟡+1.4% | 3.00 🔴+11% | 0.73 🔴+12% | **1167** 🟢−13% |
| `O3−` *(−O3 minus vectorizers + cloning)* | 25.2 🟡+0.1% | 36.2 🟡+0.5% | 37.2 🟡+0.6% | 81.5 🟡+1.1% | 46.1 🟡+0.2% | 96.1 🔴+5.8% | 20.32 🟢−0.5% | 40.95 🟡+1.7% | 662.8 🟡+0.7% | 2.75 🟡+2.2% | 0.68 🟡+4.6% | 1480 🔴+10% |
| **`O2+`** *(shipped — baseline)* | 25.2 | **36.0** | **37.0** | 80.6 | **46.0** | **90.8** | 20.42 | **40.28** | 658.0 | 2.69 | **0.65** | 1345 |
`-Os` shrinks flash most but wrecks the affine/blend loops (`tint` +51 %, `transpose` +124 %); `O3−` matches engine speed yet stays +134 KB because `-O3`’s firmware-wide inlining survives; the Python columns barely move since the interpreter core is `-O3` in every build. (`bench_displayio.py` was flat across opt levels, so it’s omitted.)
# Running picogame on hardware (PicoPad / RP2040)
> You can build and test in the browser or the desktop simulator before copying the game to a device.
Running on hardware
You can develop the game in the simulator first. This page covers copying a game to a board, flashing firmware, and device limits.
You can build and test in the browser or the [desktop simulator](/simulator/) before copying the game to a device. The simulator does not reproduce the device’s RAM limits, timing, controls, or audio, so verify those on the board. On a PicoPad, deployment takes three steps.
## Quick start: deploy to a PicoPad
[Section titled “Quick start: deploy to a PicoPad”](#quick-start-deploy-to-a-picopad)
The PicoPad has a prebuilt firmware with `board.DISPLAY` and a button profile. You do not need to build firmware for normal deployment.
1. **Flash the firmware once.** Hold **BOOTSEL** while plugging in USB (or double-tap **RESET**) → an `RPI-RP2` drive appears → drag [`picopad.uf2`](/supported-hardware/) onto it → it reboots as a `CIRCUITPY` drive. You only do this once, and it’s reversible: your files on `CIRCUITPY` survive a same-layout reflash (a firmware that moves the flash layout - e.g. adds or resizes the ROMFS asset region - reformats the drive; back up first).
2. **Copy your game.** Drag your `code.py` onto the `CIRCUITPY` drive, plus the `lib/` helper modules it imports (the `picogame_*` files) and any assets. It’s the same game code you ran in the sim.
3. **Start the game.** Save `code.py` or reset the board. No additional display or button setup is needed.
On another board (a bare Pico, PicoSystem, …) the wiring and button map differ. See [Supported hardware](/supported-hardware/). Everything else on this page is the same.
> The rest of this page covers RAM limits, `.mpy`, splitting large programs, and porting to a board without prebuilt firmware. You can skip it for a first PicoPad deployment.
> Clock / SPI / display-speed limits (how the core clock drives the display SPI, the ST7789 ceiling, overclocking the RP2350, how to test) live in **[Clocks, SPI & display limits](/hardware-limits/)**.
***
## 1. The RAM budget
[Section titled “1. The RAM budget”](#1-the-ram-budget)
RP2040 has **264 KB** SRAM. In the measured PicoPad firmware build, static allocations use about 72 KB, leaving roughly **190 KB** of Python heap and an initial largest contiguous block of about **130 KB**. These figures change with the firmware version and configuration.
| Thing | Cost |
| ----------------------------------------------------------- | ------------------------------------------------------------------ |
| `picogame_game.setup()` strip buffers (2 × 320×`strip_h`×2) | `strip_h=8` (DMA default) → **10 KB**, `strip_h=24` → **30 KB** |
| full-screen `Canvas(320, 240)` | **150 KB** ⚠️ larger than the measured contiguous block |
| `Canvas(320, 130)` (e.g. a pseudo-3D road) | **83 KB**, OK alone (see `microrace`), but not on top of much else |
| `Canvas(320, 20)` status bar | 12.8 KB |
| a tile/sprite Bitmap | width×height×frames × (1 B PAL8 / 2 B RGB565) |
Consequences:
* **Avoid a full-screen Canvas on the measured RP2040 build.** If you need a custom raster (road, shape field), keep it as small as the content (band it), or use a `Tilemap` for large scrolling areas (1 byte/cell instead of 2 bytes/pixel: a 320×960 noise sky is **600 KB as a Canvas but \~5 KB as a shade Tilemap**).
* For a HUD, use `SceneLabel`, `HudBar`, or another helper that does not retain a full-width pixel surface unless the design needs one.
* **`strip_h` defaults to 8 on current DMA builds** (about 10 KB for two 320-pixel-wide RGB565 buffers, compared with 30 KB at 24). The measured PicoPad build was also faster at the smaller value. Non-DMA ports default to 24 to reduce the number of blocking transfers.
* **`gc.collect()` between scenes/levels** so the previous scene’s buffers are freed before the next allocates.
* If a game is too big as one program, **split it** (see §4).
`MemoryError: memory allocation failed, allocating N bytes` = you’re over budget; note which scene/line and shrink the biggest buffer there (usually a Canvas).
**Fragmentation, not just total free.** A long session that allocates and frees big buffers fragments the heap: `gc.mem_free()` can read \~90 KB while a 51 KB allocation still fails (no contiguous run). If a monolith dies on a big Canvas even though “there’s plenty free”, that’s this. The fix is a pre-allocated **arena** (`lib/picogame_arena.py`
* the firmware `Canvas(..., buffer=)` arg): grab one big buffer up front and slice it. The general writeup (with the largest-contiguous-block probe and a networking example) is **[Fit it in RAM](/memory/)**.
***
## 2. Device and simulator
[Section titled “2. Device and simulator”](#2-device-and-simulator)
The simulator and firmware expose the same game-facing API, but the simulator cannot model the device’s heap, transfer timing, speaker, or panel-specific effects exactly. Use `picogame_game.setup()` so the same code selects an SPI display or framebuffer correctly. It returns `(scene, buffer_a, buffer_b)`; the buffers exist on the SPI path and are `None` on the framebuffer path.
`Scene.display` is available in both environments. `Scene.add(..., fixed=True)` uses a keyword-only `fixed` argument, and low-level `pg.render()` accepts `scene.display`. Test on the target board before release, especially after changing assets or firmware.
### Framebuffer boards (Fruit Jam DVI) and colour depth
[Section titled “Framebuffer boards (Fruit Jam DVI) and colour depth”](#framebuffer-boards-fruit-jam-dvi-and-colour-depth)
On a board whose display is a RAM framebuffer rather than an SPI panel — an RP2350 picodvi/HSTX board like the **Adafruit Fruit Jam** — `picogame_game.setup()` composites into the scanout buffer directly (its returned buffers are `None`). It picks the pixel format from the framebuffer’s colour depth automatically, so **your game code is unchanged**; you only set the depth once, in `settings.toml`:
* **`CIRCUITPY_DISPLAY_COLOR_DEPTH = 16`** — 16-bit RGB565 (full colour). The usual choice; on picodvi it caps the resolution (e.g. 320×240 doubled).
* **`CIRCUITPY_DISPLAY_COLOR_DEPTH = 8`** — 8-bit **RGB332**, the only depth the picodvi hardware offers at **640×480** (Fruit Jam full resolution). The engine quantizes each finished band 565→332 as it publishes it, so you still author in `pg.rgb565(...)`; colours are just reduced to 3-3-2 bits.
Under the hood this is `pg.Framebuffer(buffer, width, height, rgb332=True)` for the 8-bit path vs `native_rgb565=True` for 16-bit (`setup()` chooses for you). The 8-bit/RGB332 path needs a picogame build whose `Framebuffer` supports `rgb332=` — a recent engine; older builds raise a clear “lacks rgb332” error telling you to reflash.
***
## 3. Import-time / compile-time traps
[Section titled “3. Import-time / compile-time traps”](#3-import-time--compile-time-traps)
* **Big `.py` as `code.py` → MemoryError on import.** CircuitPython compiles `code.py` source at boot, so a large parse tree causes a temporary RAM spike. Deploy larger modules as `.mpy`, compiled with an `mpy-cross` version compatible with the target firmware, and use a small `code.py` launcher (`import my_scene`).
* **Huge list literals → `RuntimeError: pystack exhausted`.** A `array.array('H', [7168, ...])` literal pushes thousands of elements onto the VM stack (and builds a \~28 KB transient list). For big RGB565 tilesets, **bake them as PAL8 with `DATA = b'...'`** (a single `bytes` constant: half the size, no list, and byte-data is alignment-safe on Cortex-M0+). Reserve palette index 0 = transparent.
Compile a module:
```bash
circuitpython/mpy-cross/build/mpy-cross mymodule.py -o mymodule.mpy
```
***
## 4. Option for a large game: one program per scene
[Section titled “4. Option for a large game: one program per scene”](#4-option-for-a-large-game-one-program-per-scene)
If a game cannot hold all assets and scene code at once, split it so only one scene’s data is live. The `journey_hw` example uses this layout:
* **`dj_common.mpy`** — shared scaffolding + helpers (display setup, `new_scene`, `status_bar` as a Label, `play()` with **no** wipe-cover Canvas, bitmap helpers). `import *` from it.
* **`scene_.mpy`** — one program per scene; imports only the assets it needs, so only one scene’s RAM is live at a time. Runs its own `while True: seg(); gc.collect()`.
* **`code.py`** — a one-line launcher (`import scene_intro`); edit/rename to switch scenes, or build a small button menu.
The simulator or video build may use a separate combined entry point. Concrete example: **`examples/journey_hw/`** (`dj_common.py` + `scene_*.py`, plus `journey_mono.py`, a StripDraw single-file variant, zero pixel buffer / no arena) vs. the sim/video monolith `examples/picogame_demo_journey.py` (with sound + wipe). See `examples/journey_hw/README.md`.
On-device layout:
```text
CIRCUITPY/
code.py # import scene_
scene_*.mpy # one per scene
dj_common.mpy # shared helpers
.mpy # dj_hero, dj_town, ... (only what the scenes import)
lib/picogame_*.mpy # engine Python helpers
```
(No sound on device unless you wire up `picogame_audio`; the demo’s chiptune is offline-only, baked into the recorded video.)
***
## 5. The firmware must contain the feature you call
[Section titled “5. The firmware must contain the feature you call”](#5-the-firmware-must-contain-the-feature-you-call)
Symptoms like `AttributeError: ... has no attribute 'X'` or `can't set attribute 'X'` usually mean the **flashed firmware is older than the code that uses X**. E.g. an old build had `Sprite.scale` as read-only → `can't set attribute 'scale'`.
> **On a PicoPad you don’t build firmware**: just reflash the latest prebuilt [`picopad.uf2`](/supported-hardware/) and the feature is there. The build steps below are only for porting to another board or working on the engine itself.
* Reflash (PicoPad): drop the latest [`picopad.uf2`](/supported-hardware/) over BOOTSEL; your files survive it as long as the firmware keeps the same flash layout (see the backup note above).
* Build (porting / engine dev): see [the engine guide](/engine/) §“Building the firmware” (ARM GCC ≥ 14 toolchain + venv; `make BOARD=pajenicko_picopad -j$(nproc)`). Output: `circuitpython/ports/raspberrypi/build-pajenicko_picopad/firmware.uf2`.
* Verify a symbol is present without flashing: `arm-none-eabi-nm build-.../firmware.elf | grep sprite_set_scale`.
* Flash: enter the RP2040 bootloader (RPI-RP2 drive), copy `firmware.uf2`. The CIRCUITPY filesystem (your `.mpy` files) is preserved across a same-layout firmware flash.
Current firmware has: `Sprite.scale/angle/shadow` setters, the full `Canvas` primitive set (`triangle`/`ellipse`/`ring`/`fill_round_rect`/`frame3d`), and C `noise` (`value2d`/`value1d`/`fbm2d`/`fbm1d` - fixed-point implementations under the plain names).
***
## 6. Performance notes
[Section titled “6. Performance notes”](#6-performance-notes)
For the game-side speed levers — the loop in a function, dirty-rect-friendly motion, avoiding per-frame allocation — see **[Performance](/performance/)**. The notes here are the engine/hardware side.
* **Noise is C, and fixed-point** (Q16.16): fast on the FPU-less RP2040; the names are `value2d`/`value1d`/`fbm2d`/`fbm1d`.
* **Canvas drawing is C** (`fill_rect`, `frame3d`, …): Python only issues the calls. What costs is the Canvas *buffer* (RAM), not the drawing.
* **`StripDraw` = immediate mode without a retained pixel surface.** For full-frame *animated* surfaces (pseudo-3D road, gradient sky, procedural background) use `pg.StripDraw(callback, …)` instead of a Canvas. It draws into each render strip and avoids the **150 KB pixel buffer** of a full-screen Canvas. It repaints every frame, so use it for animated content rather than static art. See [the engine guide](/engine/) → `StripDraw` and `examples/picogame_stripdraw_example.py`. The `StripDraw` object, callback, and game state still use RAM, but there is no full-screen surface to fragment the heap.
* Dirty-region rendering reduces work in a mostly static scene; full-screen scrolling still repaints the whole view. Measure the frame rate with your artwork, firmware, and SPI clock.
See also: [engine API](/engine/), [scene format](/scene-format/), `tutorials/` (step-by-step), `examples/` (genre examples include `microrace`, which uses an 83 KB Canvas in its measured configuration).
# Hardware limits: clocks, SPI & the display
> How the core clock, the peripheral clock and the display SPI relate on RP2 boards, where their limits are, and how to measure them.
Deep hardware detail
Clocks, SPI and the display ceiling — optional unless you’re tuning the firmware itself.
How the core clock, the peripheral clock and the display SPI relate on RP2 boards, where their limits are, and how to measure them. The results on this page come from a PicoPad (RP2040) and a PicoPad with its chip replaced by an RP2350 (Pico 2).
For the RAM budget and deployment, see **[HARDWARE.md](/hardware/)**. For the fast and portable rendering paths, see the **[engine guide](/engine/#under-the-hood)**.
Looking for what the engine can and can’t do in a *game* — RAM, frame rate, features? See **[Coming from another engine](/concepts/coming-from/)** and **[Fit it in RAM](/memory/)**. This page is firmware clock / SPI / display tuning.
***
## 1. The clock chain (what drives what)
[Section titled “1. The clock chain (what drives what)”](#1-the-clock-chain-what-drives-what)
```text
PLL_SYS ──> clk_sys ──> the CPU cores
└─────> clk_peri ──> SPI, UART, … (CircuitPython: clk_peri = clk_sys, undivided)
XIP/QMI flash clock is derived from clk_sys too (a separate divider)
PLL_USB ──> 48 MHz USB (independent — the USB-CDC REPL is unaffected by overclocking)
```
Two consequences that drive everything below:
1. **`clk_peri` follows `clk_sys`.** On CircuitPython the peripheral clock is the system clock, undivided. So **changing the core clock changes the SPI input clock**, and therefore the display clock. You cannot tune one without thinking about the other.
2. **Default `clk_sys` differs by chip:** RP2040 = **125 MHz**, RP2350 = **150 MHz**. A constant tuned for one chip lands differently on the other (see §3).
***
## 2. How the display SPI clock is derived
[Section titled “2. How the display SPI clock is derived”](#2-how-the-display-spi-clock-is-derived)
The display is an ST7789 on a 4-wire SPI bus. Its clock comes from the PL022 SPI peripheral, which divides `clk_peri` by an **even integer** (`CPSDVSR × (1+SCR)`), and the SDK picks the divider so the actual clock is the **highest achievable that does NOT exceed your request**:
```text
actual_spi_hz = clk_peri / even_divider # largest result <= requested baudrate
```
You request a baudrate in `board.c` (`common_hal_fourwire_fourwire_construct(... baudrate ...)`). The request is a **ceiling**, not an exact value: if the exact value isn’t an even division of `clk_peri`, you get the next one *down*.
Worked examples (request 62.5 MHz in every case):
| clk\_peri (= clk\_sys) | even divisors near 62.5 | picked | actual SPI |
| ---------------------- | ------------------------------------- | ------ | -------------------- |
| 125 MHz (RP2040 stock) | /2 = 62.5 | /2 | **62.5 MHz** (exact) |
| 150 MHz (RP2350 stock) | /2 = 75 (> 62.5, rejected), /4 = 37.5 | /4 | **37.5 MHz** |
| 200 MHz | /2 = 100 (rej.), /4 = 50 | /4 | **50 MHz** |
| 225 MHz | /2 = 112.5 (rej.), /4 = 56.25 | /4 | **56.25 MHz** |
| 250 MHz | /2 = 125 (rej.), /4 = 62.5 | /4 | **62.5 MHz** (exact) |
**Key trap:** the same 62.5 MHz request gives 62.5 on RP2040 (125/2) but only **37.5** on a stock-150 MHz RP2350 (because 150/2 = 75 overshoots and rounds down to 150/4). To get a good display clock on RP2350 you must pick a `clk_sys` whose even divisions land where you want, e.g. **250 MHz → /4 = exactly 62.5 MHz**, the in-spec maximum (see §3, §4).
To get the SPI clock you must request `request = actual` *or higher but below 2×actual*; the safe rule is **request exactly the clock you want** and verify which divider it picked.
***
## 3. The datasheet limit (and running past it)
[Section titled “3. The datasheet limit (and running past it)”](#3-the-datasheet-limit-and-running-past-it)
The **ST7789 datasheet** rates the **serial write clock** at **tSCYCW = 16 ns min → 62.5 MHz max** (reads are far slower, \~6.6 MHz, but the display is write-only here). So **62.5 MHz is the in-spec ceiling** for pushing pixels.
In practice the panel often runs **above** spec on a given board:
* On this PicoPad, **75 MHz** SPI (RP2350 at 150 MHz, /2) produced a **clean image**, \~20% over spec, works on this unit at room temperature.
* “Works here” is **not** “guaranteed everywhere”: over-spec clocking can fail on another panel, at temperature extremes, at a different voltage, or on longer/worse wiring. Treat it as a per-unit experiment, not a shippable default.
Because the PL022 only divides by even integers, from a given `clk_sys` you usually have just two choices bracketing the spec, e.g. from 150 MHz: **75** (over) or **37.5** (well under), nothing at 62.5. Picking `clk_sys` is how you hit a good in-spec clock (250 → 62.5).
The SPI clock is the *one* transfer knob the divider gives you. A second, orthogonal lever for a **transfer-bound** platform is **`Display(rgb444=True)`** (12-bit packed pixels, \~25% less SPI per frame, gated by `picogame.RGB444_SUPPORTED`). It trades a per-strip pack cost for fewer bytes on the wire, so it only wins where the panel is the bottleneck. It’s compiled out on the CPU-balanced PicoPad. See [The firmware build](/firmware/).
***
## 4. Overclocking the core
[Section titled “4. Overclocking the core”](#4-overclocking-the-core)
> **On the measured RP2350 PicoPad, overclocking reduced performance.** Although 250 MHz would set SPI to an exact, in-spec 62.5 MHz, every measured rendering mode was about **2× slower** at 225 MHz than at the default 150 MHz:
>
> | mode | stock 150 MHz | overclocked 225 MHz |
> | ------------------------------ | ------------- | ------------------- |
> | HEAVY (CPU/blit-bound) | \~31 fps | **\~15 fps** |
> | STRESS (full-frame, SPI-bound) | \~44 fps | **\~16 fps** |
> | default (dirty-rect) | \~95 fps | **\~42 fps** |
>
> **Why it backfires:** raising `clk_sys` without re-tuning the QMI/XIP **flash timing** makes code execute from flash with wait-states. The core ticks faster but instruction throughput *drops*; that loss outweighs the clock gain. CircuitPython’s `set_sys_clock_khz` (whether via `microcontroller.cpu.frequency` or a `board_init` call) does **not** re-tune the flash; designs that overclock successfully (e.g. PicoDVI at 252 MHz) run their hot loop from RAM, not XIP. Re-tuning the QMI timing for the new clock is flash-chip-specific and fiddly, and on top of that 250 MHz independently scrambled the display (§4b), so the practical answer is **stay at the stock clock and get your display speed from the SPI divider (§2/§3) instead.**
The notes below are kept because they’re still true *if* you ever do overclock (and the two rules are how you avoid bricking the display while finding that out).
### Two rules for test builds
[Section titled “Two rules for test builds”](#two-rules-for-test-builds)
**(a) Set the clock at BOOT, in `board.c board_init()`, BEFORE the display SPI is constructed, NOT at runtime.** Changing `microcontroller.cpu.frequency` at runtime **corrupts a live ST7789**: the VREG voltage bump (CircuitPython raises core voltage for >133 MHz) and the PLL reconfigure glitch `clk_peri` while the panel is mid-transaction, scrambling it. Measured: a runtime change to *any* value ≥133 MHz scrambled the display; ≤120 MHz (no VREG change) was fine. Doing it in `board_init` before the display exists avoids the glitch entirely:
```c
#include "hardware/clocks.h"
#include "hardware/vreg.h"
#include "hardware/timer.h"
void board_init(void) {
vreg_set_voltage(VREG_VOLTAGE_1_20); // required for >133 MHz
busy_wait_us(10000); // let the voltage settle
set_sys_clock_khz(225000, true); // THEN raise the clock
// ... only now construct the display SPI (it inits at the final clk_peri) ...
}
```
VREG voltage tiers CircuitPython uses: ≤133 MHz → 1.10 V, >133 MHz → 1.20 V, ≥300 MHz → 1.20 V, ≥400 MHz → 1.30 V.
**(b) Display command timing set the limit before the chip did.** The RP2350 booted and ran at 250 MHz (a simple game like Train was clean), but heavy rendering showed **artefacts around the dirty regions**: at 250 MHz the CPU issues the per-rect window-setup commands (CASET / RASET / RAMWR plus the DC/CS GPIO toggles) faster than the ST7789 reliably latches them, so an occasional window lands wrong and the strip is written slightly off. This is a **core-clock** effect, not an SPI-data-rate one: it appeared at 250 MHz/62.5 MHz SPI while 150 MHz/75 MHz SPI was clean (slower SPI, faster core → still broke). It shows up wherever there are many window setups per frame (lots of dirty rects, full-frame redraws), and barely on light dirty-rect games.
Binary search on this board found the *display* ceiling: **150 · 200 · 225 MHz clean · 250 MHz dirty** (panel-command limit between 225 and 250). But see the box above, even at the clean 200/225 the board ran \~2× slower overall (flash/XIP), so the board ships **stock 150 MHz**, not an overclock. The clock is not the lever here; the SPI divider is.
### The trade-off
[Section titled “The trade-off”](#the-trade-off)
Overclocking raises the CPU but (via the even-divider rule) often *lowers* the in-spec SPI clock:
| Build | core | display SPI | result |
| ----------------------------- | ------- | ------------------------------ | ------------------------------------------ |
| **stock + “spi75” (shipped)** | 150 MHz | 75 MHz (over spec, clean here) | **fastest overall on this board** |
| boot-225 (rejected) | 225 MHz | 56.25 MHz (in spec) | \~2× slower (flash/XIP, see the box in §4) |
The overclock’s lower SPI *and* its flash penalty both pushed the wrong way, so the recommended RP2350 PicoPad config is **stock 150 MHz with a 75 MHz SPI request** (`/2`).
The clock/SPI-divider coupling above is the general trade-off (you can’t max both from one even divider) - but note it never made overclocking win on the measured board: the XIP wait-state penalty (§4) dominated for every workload. On this hardware, stay at stock and choose the SPI divider; treat “overclock a CPU-bound game” as a hypothesis to re-measure on other boards, not advice.
***
## 5. How to test it
[Section titled “5. How to test it”](#5-how-to-test-it)
Run a benchmark whose toggles isolate each regime:
| Toggle | Isolates | Read |
| ------------------- | --------------------------------------- | --------------------------------------------------------------------------------------------------------- |
| `FAST = True/False` | fast DMA vs portable renderer | are they different? (only multi-strip transfers differ) |
| `STRESS = True` | forces a full-frame repaint every frame | the **SPI-bound** ceiling (∝ SPI clock) |
| `HEAVY = True` | a few big scale+rotate sprites | the **CPU/blit-bound** case (∝ core clock) |
| `OVERCLOCK = …` | runtime core clock | **leave None on the PicoPad**: runtime change corrupts the display; overclock at boot in firmware instead |
Reading the results:
* **Default mode (small sprites) is a poor metric:** 25 scattered sprites exceed the limit of six dirty regions. The least expensive pairs are then merged until six remain, and their total area varies as the sprites move. FPS therefore changes with the sprite layout. Use `STRESS` for a repeatable full-frame workload or `HEAVY` for a repeatable CPU workload.
* **`STRESS` is designed to expose the transfer-bound case.** If its FPS changes roughly in proportion to the SPI clock, SPI transfer is the bottleneck in that configuration.
* **`HEAVY` is designed to expose the CPU/blit-bound case.** Compare it across builds to see whether a core-clock change improves instruction throughput on that board.
Spotting an over-clock that’s too high for the display:
* **Artefacts around / at the edges of dirty regions**, smearing, or shifted strips in heavy rendering, while a light scene (or a simple game) still looks fine. That’s the window-command timing ceiling (§4b), not a crash.
* A clock too high for the **chip/flash** instead fails harder: it won’t boot or hard-faults.
* **Recover with BOOTSEL:** if the firmware no longer boots after a clock change, hold BOOTSEL and re-flash a known-good `.uf2`.
Finding the ceiling: build firmwares at descending core clocks (250 → 225 → 200 → …), flash each, run `STRESS` + `HEAVY`, and keep the **highest clock with no dirty-region artefacts**. Change the clock only in `board.c board_init` (not at runtime), and re-check which SPI divider the new `clk_peri` selected (§2).
# Animation & sequencing
> Guide to picogame_anim, picogame_seq and picogame_cutscene: time-based sprite frames, coroutine timelines, and low-RAM cutscene images.
These three Python helpers cover sprite animation, timed sequences, and full-screen still images. `picogame_anim` advances animation from elapsed time, `picogame_seq` expresses timelines as generators, and `picogame_cutscene` streams an image without keeping the full frame in the Python heap. See [/reference/](/reference/) for their signatures.
## picogame\_anim
[Section titled “picogame\_anim”](#picogame_anim)
Give `FrameAnim` a sequence and an `fps`, then call `tick(dt)` once per game frame with the elapsed time in seconds. Sequence entries can be frame indices for a sprite sheet or separate `Bitmap` objects. The animation follows elapsed time instead of loop count.
There are two classes:
* **`FrameAnim(sprite, frames, *, fps=8, loop=True)`** - plays one sequence. `frames` is a list or tuple of frame indices, or of `Bitmap` objects. The sequence is referenced rather than copied, so treat it as read-only. `fps` sets the animation speed and `loop` is keyword-only. Construction displays `frames[0]` when the sequence is not empty.
* **`.tick(dt)`** - advance by `dt` real seconds. Accumulates time, steps the frame when enough has passed. No-op once a non-looping anim is finished or if `frames` is empty. No return value.
* **`.configure(frames, fps=8, loop=True)`** - re-point this same instance at a new sequence and reset it. Returns `self`. Lets you reuse one `FrameAnim` instead of allocating a new one on every switch.
* **`.reset()`** - back to frame 0, clears the `done` flag and time accumulator.
* Attributes you can read: **`.done`** (True when a non-looping anim has reached its last frame), `.i` (current index into `frames`), `.frames`, `.fps`, `.loop`.
* **`AnimatedSprite(sprite, anims)`** - a sprite with named states. `anims` is a dictionary `{name: (frames, fps, loop)}`. It keeps one reusable `FrameAnim`, so switching an animation does not allocate another driver.
* **`.play(name)`** - switch to that named animation. Looks up `anims[name]` and reconfigures. Calling `play` with the name already playing is a no-op, so it is safe to call every frame.
* **`.tick(dt)`** - advance the current animation.
```python
import picogame_anim
hero = picogame_anim.AnimatedSprite(self.spr, {
"run": (DINO_RUN, 12, True),
"jump": ((DINO_JUMP,), 1, False),
})
hero.play("run")
# each frame, with dt = real seconds since last frame:
hero.play("jump" if self.jumping else "run") # cheap to call every frame
hero.tick(dt)
```
For one sequence, such as a spinning coin, use `FrameAnim` directly: `spin = picogame_anim.FrameAnim(sprite, list(range(COIN_FRAMES)), fps=15)`.
Gotchas
you must pass real `dt` (seconds per frame, e.g. from `picogame_clock`), not a frame count - passing `1` makes it run at `fps` frames per *call*. The `frames` list is held by reference, so do not mutate it while it is in use. `.done` only ever becomes True for `loop=False`.
## picogame\_seq
[Section titled “picogame\_seq”](#picogame_seq)
`picogame_seq` expresses timed logic as generators. Each `yield` pauses until the next game frame, and each `tick()` advances one generator to its next `yield`. Use it for intros, staged AI, and other ordered actions. Compose smaller sequences with `yield from`.
Generator helpers (call them with `yield from`):
* **`wait(frames)`** - pause for `frames` frames (yields that many times, doing nothing).
* **`over(frames, fn)`** - generic tween: calls `fn(t)` each frame with `t` ramping `0..1` (specifically `i/frames` for `i` in `1..frames`) over `frames` frames.
* **`move_over(sprite, x, y, frames)`** - glide a sprite from its current position to `(x, y)` over `frames` frames, linearly, via `sprite.move(...)`.
The driver:
* **`Seq(gen=None)`** - wraps one generator. If `gen` is `None` it starts already `.done`.
* **`.start(gen)`** - point it at a (new) generator and clear `done`. Returns `self`, so it is reusable.
* **`.tick()`** - advance to the next `yield`. Catches `StopIteration` and sets `.done`. **Returns** the `done` flag (True once finished), so you can branch on it.
* **`.done`** - True when the sequence has finished.
```python
import picogame_seq as seq
def intro(hero, label):
yield from seq.wait(30)
label.set("GO!")
yield from seq.move_over(hero, 120, hero.y, 20) # glide over 20 frames
s = seq.Seq(intro(player, hud))
# each frame:
if not s.tick(): # advances one step; True once the intro is over
... # still running
```
Gotchas
`tick()` advances exactly one step (to the next `yield`) per call, so drive it once per game frame. Anything between `yield`s runs in a single frame - keep heavy work behind a `yield`. A `Seq` runs *one* generator; to run several timelines at once, give each its own `Seq`, or merge them with `yield from` inside one generator.
## picogame\_cutscene
[Section titled “picogame\_cutscene”](#picogame_cutscene)
`picogame_cutscene` displays a full-screen still without loading the complete image into the Python heap. A 320x240 source occupies 153,600 bytes in RGB565 or 76,800 bytes in PAL8. The module instead reads a raw, row-major file from flash one **band** at a time and renders each band to the display backend.
The temporary source band costs `w * band` bytes for PAL8 or `w * band * 2` bytes for RGB565. With the default `w=320` and `band=24`, that is 7,680 or 15,360 bytes in addition to the render buffer passed to `show()`. Reduce `band` if the allocation does not fit. Once rendered, the still image needs no additional Python object containing the full frame. See [/memory/](/memory/) for the other memory costs.
Bake the raw file first with `tools/bake_cutscene.py` (PNG to PAL8 + a palette module, or wire-order RGB565 rows). See [/scene-format/](/scene-format/) for engine bitmap formats and [/hardware/](/hardware/) for the display and buttons.
* **`palette(pg, rgb)`** - build the device palette (`array('H')` of wire colours) from a `bake_cutscene.py` palette module, a list of `(r, g, b)` triplets, or wire ints. Build it ONCE at setup and reuse it - `show()` would otherwise rebuild it per call.
* **`show(pg, display, buffer, path, pal=None, w=320, h=240, scale=None, band=24, bg=0)`** - stream the image at `path` one band at a time and render each band with the supplied engine strip `buffer`. `pal` selects PAL8 input (1 B/px); `None` selects RGB565 (2 B/px). `scale=None` derives an integer scale from the display (`width // w`) and rejects a source size that does not fill both axes. A short final band is cleared with `bg`. Returns the scale used.
* **`play(pg, display, buffer, btn, path, pal=None, w=320, h=240, scale=None, band=24, caption=None, caption_lines=None, auto_hold=0, clock=None, bg=0)`** - show the image, add optional caption lines in a dark bar, then block until **A** or **B** is pressed. With `auto_hold > 0`, it advances after that many loop ticks and `btn` may be `None`. Pass a `picogame_clock` instance as `clock` to pace the wait loop.
```python
import picogame_cutscene as cut
import board
PAL = cut.palette(pg, intro_pal) # once, at setup
cut.play(pg, board.DISPLAY, bufA, btn, "intro.raw", pal=PAL,
caption="Chapter 1", clock=clock)
scene.invalidate() # the image clobbered the LCD
```
Gotchas
this uses the immediate drawing path, outside the scene. Pause or fade the scene first, then call `scene.invalidate()` after `play()` returns so the next `refresh()` repaints it. The input must be a raw, row-major file produced by `bake_cutscene.py`; a PNG cannot be passed directly. `play()` blocks the game loop while it waits.
# Audio & music
> Play WAV samples, synthesize SFX and MIDI with synthio, or use the ready-made picogame_sfx kit.
Where audio plays: playground, simulator, device
* **Device** — everything (real synthio + PWM/I2S).
* **Browser playground** — `tone()` beeps and the `picogame_sfx` kit play via WebAudio (press a key first to unlock sound); custom `picogame_synth` voices don’t (no synthio backend in the browser).
* **Desktop simulator, live window** (`--backend pygame`, the default) — `picogame_synth` SFX and music **do** play through `pygame.mixer`: an approximation for tuning by ear, not bit-exact. Headless runs (`--shot` / CI) and `picogame_audio` sample playback stay silent.
* Audition synth SFX offline with `tools/synth_preview.py`, and confirm the real mix on hardware.
picogame offers four audio layers. `picogame_audioout` picks the board’s output device (PWM or I2S DAC). `picogame_audio` mixes `.wav` files and generated PCM tones. `picogame_synth` creates notes in real time with synthio and avoids a PCM buffer for every effect. `picogame_sfx` adds a ready-made set of named game sounds over the synthesizer. See [/hardware/](/hardware/) for board audio setup and [/reference/](/reference/) for signatures.
## picogame\_audioout — one output for every board
[Section titled “picogame\_audioout — one output for every board”](#picogame_audioout--one-output-for-every-board)
`picogame_audio` and `picogame_synth` both get their output device from `picogame_audioout.make_output()`, so a game needs **no board-specific audio code**. It auto-selects:
* an **I2S DAC** (e.g. the Fruit Jam’s TLV320) when the board exposes `board.I2S_BCLK`,
* otherwise a **PWM** output on the board’s speaker pin (or a pin you pass).
You normally never call it directly — construct `Audio()` / `Synth()` and it happens for you. `make_output(sample_rate=22050, pin=None)` is there if you want the raw device; passing an explicit `pin` **forces PWM**.
**Volume (I2S DAC boards):** the TLV320 driver’s defaults are deliberately very quiet, so on a Fruit Jam sound can seem absent until you raise them in `settings.toml` — `PICOGAME_AUDIO_OUT` (`headphone`/`speaker`/`both`), `PICOGAME_DAC_VOLUME`, `PICOGAME_HP_VOLUME`, `PICOGAME_SPK_VOLUME` (integer dB, keep `<= 0`). See the [settings.toml reference](/custom-board/).
Fruit Jam: install the DAC driver or it’s silent
I2S audio needs `adafruit_tlv320` **and** `adafruit_bus_device` in `CIRCUITPY/lib` (from the Adafruit bundle / `circup`) — they are **not** bundled with picogame. If they’re missing, audio silently falls back to a PWM pin the DVI board doesn’t have, so there’s no sound. Set `PICOGAME_DEBUG = 1` to print the reason (`[picogame] audioout: I2S DAC driver missing …`) to the serial console.
## picogame\_audio
[Section titled “picogame\_audio”](#picogame_audio)
A convenience layer over CircuitPython’s audio stack (`audiocore` + `audiomixer`) on top of the `picogame_audioout` output. Reach for it when you have `.wav` assets to play, or want simple beeps without bundling files. It sets up a mixer with several voices so a shot, an explosion, and looping music can all sound at once. The defaults (22050 Hz, mono, 16-bit signed) match typical ugame `.wav` assets - any sample you play must match that format.
### `Audio(pin=None, voices=4, sample_rate=22050, channels=1, bits=16, signed=True)`
[Section titled “Audio(pin=None, voices=4, sample\_rate=22050, channels=1, bits=16, signed=True)”](#audiopinnone-voices4-sample_rate22050-channels1-bits16-signedtrue)
Constructs the audio output and starts the mixer playing immediately. `pin=None` lets `picogame_audioout` pick the device (I2S DAC or the board’s PWM speaker pin); an explicit `pin` forces PWM on that pin. `voices` is the number of simultaneous channels; voice 0 is reserved for music and voices 1..N-1 are used round-robin for sound effects. The other args define the sample format every clip must match.
* `load(path)` - opens a `.wav` file as a reusable `WaveFile` sample. Build it once and keep the returned object alive (it holds the open file); replaying it is cheap.
* `play(sample, *, voice=None, loop=False, volume=1.0)` - plays a sample. `voice` is keyword-only; `None` picks the next round-robin sfx voice. `volume` sets that voice’s level (0.0-1.0). Returns the voice index it used.
* `sfx(sample, volume=1.0)` - fire-and-forget effect on a free sfx voice (calls `play` with `loop=False`). Returns the voice index.
* `music(sample, loop=True, volume=1.0)` - plays on the reserved music voice (voice 0), looping by default.
* `stop(voice=None)` - stops one voice, or every voice if `voice` is `None`.
* `stop_music()` - stops just the music voice.
* `is_playing` (property) - `True` if any voice is currently playing.
* `deinit()` - releases the audio output. The output device is a singleton, so call this before constructing a second `Audio()` (or a `Synth()` sharing the pin) - otherwise the next one raises *pin in use*.
### `tone(frequency=440, ms=120, sample_rate=22050, volume=0.6)`
[Section titled “tone(frequency=440, ms=120, sample\_rate=22050, volume=0.6)”](#tonefrequency440-ms120-sample_rate22050-volume06)
Builds a short square-wave `RawSample` in RAM - a beep with no `.wav` file needed. Good for prototyping and simple blips. Pass it straight to `sfx`/`play`.
```python
import picogame_audio
import picogame_input
audio = picogame_audio.Audio() # PWM audio, 4 voices
pew = picogame_audio.tone(880, 90) # high blip, built once
boom = picogame_audio.tone(140, 200) # low thud
btns = picogame_input.Buttons()
while True:
btns.poll()
if btns.just_pressed(btns.A):
audio.sfx(pew) # overlaps on a free voice
if btns.just_pressed(btns.B):
audio.sfx(boom, volume=0.8)
```
Gotchas
* Every sample must match the mixer’s format. A 44100 Hz or stereo `.wav` will play wrong (or error); resample assets to 22050 Hz mono 16-bit first.
* Keep `load()` results alive - if the `WaveFile` is garbage-collected the open file goes with it. Load clips once at startup, not per frame.
* `tone()` builds a `RawSample` in RAM (about `sample_rate * ms / 1000 * 2` bytes each). Many long tones can exhaust the heap. Keep them short and few, lower both the mixer and tone `sample_rate` (for example to `8000`), or use `picogame_synth` to avoid a separate PCM buffer for every effect.
* You only have `voices-1` sfx channels; rapid-fire effects round-robin and will cut each other off once they wrap.
## picogame\_synth
[Section titled “picogame\_synth”](#picogame_synth)
`picogame_synth` wraps synthio oscillators, ADSR envelopes, pitch-bend LFOs, and low-pass filters. It avoids storing a PCM buffer for every effect, but still allocates the audio output buffer, mixer, waveforms, and note objects. Use it for a larger SFX set or MIDI music when WAV assets would consume too much RAM or flash.
The module is safe to import on firmware without audio. If audio initialisation fails, its API becomes a silent no-op; check `AVAILABLE` or `synth.available` only when the UI needs to expose audio settings. The desktop simulator’s live pygame window plays these `picogame_synth` voices through `pygame.mixer` (an approximation for tuning by ear); headless runs stay silent. Either way the same game path runs unchanged.
Built-in waveform constants (one-cycle, signed 16-bit arrays you share across notes): `SINE`, `SAW`, `TRIANGLE`, `SQUARE`, `NOISE`. The functions `sine()`, `saw()`, `triangle()`, `square()`, `noise()` build fresh copies if you need them. For a crisp arcade blip reach for a short `SQUARE` note (`SINE` and `TRIANGLE` read softer and rounder).
### `note(midi, waveform=None, attack=0.005, decay=0.06, sustain=0.0, release=0.08, amplitude=0.6, bend=None, cutoff=None)`
[Section titled “note(midi, waveform=None, attack=0.005, decay=0.06, sustain=0.0, release=0.08, amplitude=0.6, bend=None, cutoff=None)”](#notemidi-waveformnone-attack0005-decay006-sustain00-release008-amplitude06-bendnone-cutoffnone)
Builds a reusable note/SFX/instrument - the core building block. `midi` is a MIDI note number (60 = middle C, 72 = C5). `waveform` is one of the constants above. `attack`/`decay`/`sustain`/`release` shape the ADSR envelope in seconds (a short decay with `sustain=0.0` gives a percussive blip). `amplitude` is loudness (0.0-1.0). `bend` takes a `pitch_bend` LFO for a pitch sweep (a quick wobble; see `pitch_bend`); `cutoff` adds a low-pass filter at that many Hz to round off harsh tones. Build each note once and replay it.
### `pitch_bend(semitones, ms, waveform=None, once=True)`
[Section titled “pitch\_bend(semitones, ms, waveform=None, once=True)”](#pitch_bendsemitones-ms-waveformnone-oncetrue)
Returns a `synthio.LFO` for a note’s `bend`. With `once=True` it is a **one-shot sine sweep**: over `ms` the pitch swings toward `semitones` and back - a *wobble/swoop*, not a clean monotonic glide. Keep `ms` short (about the note’s `attack+decay`) so mostly the rise (positive = zap up) or fall (negative = drop) is heard; a long `ms` lets the return swing show and sounds wobbly.
### `Synth(pin=None, sample_rate=22050, buffer_size=2048, music_level=0.4, sfx_level=0.7)`
[Section titled “Synth(pin=None, sample\_rate=22050, buffer\_size=2048, music\_level=0.4, sfx\_level=0.7)”](#synthpinnone-sample_rate22050-buffer_size2048-music_level04-sfx_level07)
Sets up the output (via `picogame_audioout` — I2S DAC or PWM, same as `Audio`) and a 2-voice mixer: voice 0 for music (a `MidiTrack`), voice 1 for the live synth used by SFX. `pin=None` auto-selects the device; an explicit `pin` forces PWM. `music_level`/`sfx_level` are the starting mix levels for those two voices.
* `sfx(n)` - plays note `n` as a one-shot effect. It retriggers the note’s LFOs first (so a repeated zap sounds identical every time), then calls `release_all_then_press`, so back-to-back SFX cut cleanly.
* `press(n)` / `release(n)` - hold and release a note manually, for sounds that last as long as a button is held rather than firing once.
* `music(midi_track)` - plays a `MidiTrack` (from `load_midi`) on voice 0, looping.
* `stop_music()` - stops the music voice.
### `Drone(synth, waveform=None, amplitude=0.35, attack=0.03, release=0.12)`
[Section titled “Drone(synth, waveform=None, amplitude=0.35, attack=0.03, release=0.12)”](#dronesynth-waveformnone-amplitude035-attack003-release012)
A continuously **held** note for engine, siren, or drone-style sounds - press it once, then steer its pitch/volume live each frame. Where `note()`/`sfx` fire a one-shot, a `Drone` keeps a single note sounding on the SFX voice; synthio reads the note’s live `.frequency`/`.amplitude` per audio buffer, so the tone tracks whatever you feed it (e.g. an engine note driven by car speed). `synth` is a live `Synth`; `waveform` defaults to `SAW`.
* `.start()` - press the held note (idempotent - safe to call again while playing).
* `.set(frequency, amplitude=None)` - update the live pitch (Hz) every frame, and optionally the volume.
* `.stop()` - release the note (e.g. on the title or results screen).
```python
eng = snd.Drone(s, waveform=snd.SAW)
eng.start() # at race start
# each frame, rev = speed / max_speed in 0..1:
eng.set(70 + 270 * rev, amplitude=0.2 + 0.5 * rev)
eng.stop() # on the title / results screen
```
### `load_midi(path, sample_rate=22050, waveform=None, envelope=None, tempo=120, ppqn=240)`
[Section titled “load\_midi(path, sample\_rate=22050, waveform=None, envelope=None, tempo=120, ppqn=240)”](#load_midipath-sample_rate22050-waveformnone-envelopenone-tempo120-ppqn240)
Loads a `.mid` file as a `synthio.MidiTrack` for `Synth.music`. `waveform` and `envelope` select the instrument voice for the track; `tempo` (BPM) and `ppqn` set playback speed. The loader accepts a standard format-0 SMF header.
```python
import picogame_synth as snd
import picogame_input
s = snd.Synth()
# Each SFX is a Note built ONCE (envelope + optional bend + filter).
blip = snd.note(72, snd.SQUARE, decay=0.10)
zap = snd.note(60, snd.SAW, decay=0.18, cutoff=4000, bend=snd.pitch_bend(12, 180))
boom = snd.note(45, snd.NOISE, attack=0.0, decay=0.30, amplitude=0.55, cutoff=2800)
btn = picogame_input.Buttons()
while True:
btn.poll()
if btn.just_pressed(btn.A):
s.sfx(zap)
```
Gotchas
* No import guard needed: the module runs as silent no-ops on audio-less firmware, and a `Synth()` that fails mid-init (tight heap, claimed pin) degrades the same way instead of raising.
* Build each `note()` once at startup and replay it; `sfx` handles retriggering. Rebuilding notes per frame wastes time and breaks LFO retrigger.
* The simulator’s live window approximates these voices through `pygame.mixer`; for an exact preview render SFX to WAV with `tools/synth_preview.py`, then confirm the final balance on the target speaker. Pitch contours can carry meaning: rising for a gain, falling for a loss, and alternating tones for a warning.
* It is the synthesizer that makes sound, not the note object - effects only play through a live `Synth`, and there are just two mixer voices (one music, one SFX), so overlapping synth SFX share a single voice.
## picogame\_sfx
[Section titled “picogame\_sfx”](#picogame_sfx)
`picogame_sfx` provides one cohesive set of named effects over `picogame_synth`. Use it when the built-in arcade-style sounds fit the game. Build custom `picogame_synth.note()` objects when the kit does not cover an event or the game needs a different audio identity. With no audio, every call is a silent no-op.
### `Kit(synth)`
[Section titled “Kit(synth)”](#kitsynth)
Build the theme’s voices **once** from a live `picogame_synth.Synth()`, then fire effects by name (and call `tick()` once per frame). Each call maps to a game *event*; the kit arbitrates them by priority through the single SFX voice, so a big scene sound briefly holds off the small feedback blips instead of being cut by them.
| Call | Fires on | Preview |
| ------------- | ------------------------------------ | ---------------------------- |
| `blip()` | UI tick — menu move, select, confirm | [](/audio/sfx_blip.mp3) |
| `coin()` | a pickup / gained value | [](/audio/sfx_coin.mp3) |
| `powerup()` | level / wave clear, upgrade | [](/audio/sfx_powerup.mp3) |
| `zap()` | **your** shot or dash | [](/audio/sfx_zap.mp3) |
| `pew()` | an **enemy** fired | [](/audio/sfx_pew.mp3) |
| `jump()` | a jump / launch | [](/audio/sfx_jump.mp3) |
| `hit()` | a hit landed on an enemy | [](/audio/sfx_hit.mp3) |
| `hurt()` | **you** took damage | [](/audio/sfx_hurt.mp3) |
| `boom()` | something destroyed / ended | [](/audio/sfx_boom.mp3) |
| `explosion()` | a big scene blast | [](/audio/sfx_explosion.mp3) |
`hit()` varies its brightness across a rapid burst so repeats don’t grate; pass `rotate=False` for identical hits. Call `tick()` **once per frame** — it plays out the coin/powerup arpeggios and counts down the protected windows.
Volume/mute live on the `Synth`: `synth.set_levels(music=None, sfx=None)` sets either mixer level (0.0-1.0), and `synth.mute(on)` silences everything while remembering the levels. Wire these to a `picogame_options` menu + `picogame_save` for a persisted volume control.
```python
import picogame_synth as snd
import picogame_sfx as sfx
import picogame_input
s = snd.Synth()
kit = sfx.Kit(s) # builds the signature voices once (silent no-op if no audio)
btn = picogame_input.Buttons()
while True:
btn.poll()
if btn.just_pressed(btn.A):
kit.zap() # your shot
if btn.just_pressed(btn.B):
kit.jump()
# ... on a kill: kit.boom(); on taking damage: kit.hurt(); on a pickup: kit.coin()
kit.tick() # once per frame - drives sequences + priority windows
```
Gotchas
* Build the `Kit` **once** at startup and reuse it; it pre-builds every voice. Rebuilding per frame wastes time and heap.
* Call `kit.tick()` **every frame**, next to `clock.tick()`. Miss it and the arpeggio effects (coin, powerup) and the protected windows stop working.
* It shares `picogame_synth`’s single SFX voice, so effects are monophonic - the priority arbitration decides which one wins when two fire close together (that’s the point of the windows).
* The simulator’s live window plays the kit (approximate); for an exact audition render it to WAV before flashing (see `picogame_synth`’s note above), then lock the feel on hardware.
# Boot & game loop
> Guide to picogame_game, picogame_clock and picogame_input: take over the display, pace the frame, and read the buttons.
These three modules set up the display, pace the game loop, and read buttons. A typical `code.py` calls `picogame_game.setup()` once, creates `Buttons()` and `Clock()`, then repeats four steps: poll input, update state, refresh the scene, and tick the clock. See [/reference/](/reference/) for the signatures.
## picogame\_game
[Section titled “picogame\_game”](#picogame_game)
Call `setup()` once before creating the game objects. It resolves the display backend, stops `displayio` from refreshing independently where applicable, and returns a new `Scene` with the memory it needs.
* `setup(display=None, strip_h=None, background=0, fast=True, top=0, bottom=0, left=0, right=0, rgb444=False)` - returns `(scene, buffer_a, buffer_b)`. On an SPI display it disables automatic refresh, clears `root_group`, and allocates two full-width render strips. On a framebuffer target such as Fruit Jam DVI or the browser playground, the scene composites into the framebuffer and both returned buffers are `None`. The `Scene` keeps any allocated strip buffers alive. A game that only calls `scene.refresh()` can ignore the returned buffers: `scene, _, _ = picogame_game.setup(...)`.
* `display` - explicit display object. If omitted, setup tries `board.DISPLAY` and then `supervisor.runtime.display`.
* `strip_h` - height of each render strip on the SPI path. It defaults to the board’s compiled `picogame.STRIP_H` value. The two buffers occupy `2 * width * strip_h * 2` bytes: about 10 KiB at 320×8 or 30 KiB at 320×24. On the measured RP2040 DMA path, a smaller strip also improved overlap between rendering and transfer; without DMA, larger strips reduce the number of blocking transfers. Override the value per call or at firmware build time with `-DPICOGAME_STRIP_H=N`. Framebuffer targets ignore it. See [/memory/](/memory/) for the trade-off.
* `background` - fill colour behind the scene, an RGB565 int. Build one with `pg.rgb565(r, g, b)`.
* `top` / `bottom` / `left` / `right` - reserve a border (px) the scene won’t render into, so it paints only the inner play rect. You draw that border yourself (a HUD bar, side panels) once, and it is never recomputed per frame.
* `fast` - on an SPI display, `True` selects `pg.Display` when available; `False` uses the portable busdisplay renderer. Setup falls back automatically when the fast backend is absent.
* `rgb444` - `True` requests 12-bit colour on a compatible fast SPI backend. Use `"auto"` to enable it only when the board reports support. Framebuffer targets ignore this setting. See [/hardware/](/hardware/).
```python
import picogame as pg
import picogame_game
BG = pg.rgb565(20, 24, 30)
scene, buffer_a, buffer_b = picogame_game.setup(background=BG, strip_h=16, top=12)
# scene is a pg.Scene; add sprites and refresh it each frame
# a simple game that never draws in immediate mode can skip the buffers: scene, _, _ = ...
scene.add(sprite)
scene.refresh()
```
Gotchas
keep `scene` alive for the life of the game. On the SPI path it owns the two render buffers; the framebuffer path does not create them. A border reserved with `top`/`bottom`/`left`/`right` is not painted by the scene, so draw it separately. See [/scene-format/](/scene-format/) for scene data and [/hardware/](/hardware/) for display notes.
## picogame\_clock
[Section titled “picogame\_clock”](#picogame_clock)
`Clock` caps the loop to a target FPS and returns elapsed time as `dt`, so movement can be independent of frame rate. `FixedStep` runs game logic in equal time steps when physics or collision must be reproducible.
`Clock`:
* `Clock(fps=30, max_dt=0.1)` - cap the loop to `fps` (use `0` for uncapped) and clamp the returned `dt` to at most `max_dt` seconds, so a pause or stall can’t produce a giant `dt` that teleports everything.
* `tick()` - sleeps until the frame boundary, then returns the real `dt` in seconds since the last `tick()`. Anchors to the ideal schedule so a small oversleep can’t accumulate into drift; if you ran over budget it anchors to real time instead, keeping `dt` accurate. Call once per frame.
* `tick_async()` - awaitable variant that yields to other `asyncio` tasks during the idle wait instead of blocking. Needs the `asyncio` library available (raises `RuntimeError` otherwise). Note rendering itself is blocking, so async only helps in the cap-sleep gap.
* `set_fps(fps)` - change the target FPS on the fly (e.g. menus at 30, action at 60). `0` uncaps.
`FixedStep`:
* `FixedStep(step_fps=60, max_steps=5)` - fixed timestep of `1/step_fps` seconds, running at most `max_steps` logic steps per frame (the cap avoids a “spiral of death” when rendering can’t keep up - backlog is dropped).
* `step_count()` - returns how many fixed steps to run this frame (`0..max_steps`). Loop `for _ in range(step_count())` and use the constant `self.dt`; this form allocates nothing, good for hot loops.
* `dt` - the constant step duration in seconds. Pass it to your update.
* `steps()` - generator form yielding `self.dt` per step. Convenient, but allocates a generator each call; prefer `step_count()` in the main loop.
```python
import picogame_clock
clock = picogame_clock.Clock(30) # cap to 30 FPS
while True:
dt = clock.tick() # sleeps to the frame boundary, returns real dt
player.x += player.vx * dt # frame-rate independent movement
scene.refresh()
```
Gotchas
call `tick()` exactly once per frame, at the bottom of the loop. If you ignore the return value you still get the FPS cap, but lose frame-rate independence - fine for a fixed-feel grid game, not for smooth motion. `tick_async()` only buys you anything if rendering can overlap other tasks; the render call still blocks.
## picogame\_input
[Section titled “picogame\_input”](#picogame_input)
`Buttons` maps physical buttons to a logical bitmask with pressed and released edges plus auto-repeat. It uses CircuitPython’s background-scanned `keypad` event queue when available and falls back to `digitalio` polling. The `Timer` class provides frame-based windows for coyote time and jump buffering.
Logical buttons are exposed both as module constants and as attributes on the instance: `UP`, `DOWN`, `LEFT`, `RIGHT`, `A`, `B`, `X`, `Y`, `L1`, `L2`, `R1`, `R2`, `START`, `SELECT`, plus `ALL`. The PicoPad maps the eight face buttons; absent buttons (no shoulders) simply never fire. They are bit flags, so you can OR them: `btn.A | btn.B`.
`Buttons`:
* `Buttons(profile=None, pull=None, prefer_keypad=True, debounce_s=0.02, matrix=None, usb=None, sources=None)` - build the reader. With `profile=None` the pin map is resolved highest-wins: an explicit `profile`, then `settings.toml` `PICOGAME_BUTTONS = "UP=GP2 A=GP12 ..."` (remap a custom Pico with no reflash), then a built-in profile by `board.board_id`, then the `PICOPAD` fallback. `pull` defaults to `Pull.UP` (or `PICOGAME_PULL` in `settings.toml`). `debounce_s` is the keypad scan window; `prefer_keypad=False` forces polling. `matrix=` adds a scanned key matrix and `usb=` adds USB HID sources — see below.
* **More than one input source:** `Buttons` ORs several sources into one mask — on-board GPIO buttons, a scanned key matrix (`matrix=`, or the `PICOGAME_MATRIX_*` keys), and USB gamepads/keyboards on USB-host boards (`usb=`, auto-attached). A game reads them all with no code change. Full guide: [Input & controls](/helpers/input/).
* `poll()` - sample all buttons once and return the current pressed bitmask. Call once per frame, before any query. Drains the keypad event queue (catching sub-frame taps) or reads the pins directly, and updates held-frame counts for `repeat()`.
* `is_pressed(mask=ALL)` - `True` if any button in `mask` is currently down (level).
* `just_pressed(mask=ALL)` - `True` on the rising edge (the frame a button went down). On the keypad backend this comes from the event queue, so a tap shorter than a frame still registers.
* `just_released(mask=ALL)` - `True` on the falling edge (the frame a button came up).
* `has(mask=ALL)` - `True` if this board physically wires the given button(s). Use it to adapt controls/UI to boards without shoulders or START/SELECT.
* `repeat(button, delay=15, interval=4)` - auto-repeat for a SINGLE button: `True` the frame it’s pressed, then every `interval` frames once held `delay` frames. Ideal for menu and grid movement.
* `clear()` - reset state and flush pending input. Call on scene or menu transitions so a held button doesn’t leak across.
`Timer`:
* `Timer(frames)` - a counter that decays one frame at a time over `frames` frames.
* `feed(condition)` - recharge to full when `condition` is true, else count down one frame; returns whether still active. Use for coyote time (`feed(on_ground)`).
* `charge()` - force the timer to full.
* `is_active` (property) - `True` while the counter is above zero.
* `consume()` - `True` once if active, then clears it, so a buffered press fires exactly once (jump buffering).
```python
import picogame_input
btn = picogame_input.Buttons() # auto profile by board
while True:
btn.poll()
dx = btn.is_pressed(btn.RIGHT) - btn.is_pressed(btn.LEFT) # -1, 0 or +1
if btn.just_pressed(btn.A): # rising edge: fire once per tap
jump()
scene.refresh()
```
Coyote time and jump buffering, straight from the platformer example:
```python
coyote = picogame_input.Timer(5) # still jump a few frames after a ledge
jbuf = picogame_input.Timer(6) # honour a jump pressed just before landing
# each frame:
coyote.feed(on_ground)
jbuf.feed(btn.just_pressed(btn.A))
if coyote.is_active and jbuf.consume():
jump()
```
Gotchas
always `poll()` once per frame before querying, or `is_pressed` / `just_pressed` read stale state. `repeat()` takes a single button, not an OR-mask. The `digitalio` polling backend is undebounced (per-frame sampling already filters sub-frame bounce); for a noisy switch on a keypad-less build, debounce upstream. See [Input & controls](/helpers/input/) for USB pad/keyboard and matrix input, and [the settings.toml reference](/custom-board/) for the `PICOGAME_BUTTONS`/`PICOGAME_MATRIX_*`/USB remap keys.
# Building scenes
> Guide to the picogame scene-building helpers: load baked scenes, flag tiles, bake placeholder art, and pool sprites.
These four modules load baked scenes, attach properties to tiles, create simple bitmap art in code, and reuse a fixed set of sprites. See [/reference/](/reference/) for the signatures.
## picogame\_scene
[Section titled “picogame\_scene”](#picogame_scene)
The loader turns a baked `SCENE` dictionary into a `pg.Scene` and a set of named handles. Use it for a level produced by the editor or `scene_build.py`. The same data and loader run on hardware and in the simulator. See [/scene-format/](/scene-format/) for the input format.
`load(pg, scene, display=None, strip_h=None, font=None, bank=None)` returns a `View`. It resolves the display in the same way as `picogame_game.setup()`, constructs the scene, and adds each tilemap, sprite, group, particle system, and HUD label. On an SPI display it allocates two `width * strip_h * 2` render buffers, available as `view.bufA` and `view.bufB`. On a framebuffer target both are `None`. Pass a font such as `terminalio.FONT` if the data contains a HUD label. See [/hardware/](/hardware/) for display backends and [/memory/](/memory/) for buffer costs.
`load_bank(pg, bank)` builds shared bitmaps/sounds/anims ONCE; pass the result as `load(..., bank=...)` for each level so unchanged art is not rebuilt per level.
The returned `View` is your handle to everything:
* `view.scene` - the live `pg.Scene`. Call `view.scene.refresh()` each frame and `view.scene.set_view(ox, oy)` to scroll.
* `view.named[name]` - dict of name -> sprite / particles / HUD label for any layer given a `name`.
* `view.group(tag)` - list of sprites for a group layer (returns `[]` if the tag is unknown, so it is safe to iterate).
* `view.tick(dt)` - advance all auto-animated sprites; call once per frame with `dt` in seconds.
* `view.tile_xy(px, py)` - world pixel -> `(tx, ty)` cell of the primary (first) tilemap.
* `view.is_solid(tx, ty)` - shorthand for `tile_has(tx, ty, "solid")`.
* `view.tile_has(tx, ty, prop)` - True if the primary tilemap’s tile at that cell has the named property (from the baked `tileprops`).
* `view.point(name)` - `(x, y)` for a named point, or None.
* `view.in_zone(x, y, tag=None)` - first zone `(tag, x, y, w, h)` containing the point (optionally filtered by tag), else None.
* `view.play(sound_id)` - play a baked sfx by id (no-op if audio/sample is missing).
* `view.tilemap` / `view.camera` / `view.zones` / `view.points` / `view.anims` - the primary tilemap object, the camera tuple, and the raw collections.
```python
import board, terminalio
import picogame as pg
import picogame_scene as pgs
import world1_scene
view = pgs.load(pg, world1_scene.SCENE, font=terminalio.FONT)
player = view.named["player"]
enemies = view.group("enemies")
while True:
view.tick(1 / 30) # advance auto-animations
tx, ty = view.tile_xy(player.x, player.y)
if not view.is_solid(tx, ty):
player.move(player.x + 2, player.y)
view.scene.refresh()
```
Gotchas
the first tilemap layer is the primary one; `tile_xy`, `is_solid`, and `tile_has` query only that map. `view.named` contains only layers with a name. Sound loading is best-effort: a missing audio module or sample produces a `None` entry, and `play()` then does nothing.
## picogame\_tiles
[Section titled “picogame\_tiles”](#picogame_tiles)
`TileFlags` stores one metadata bitfield for each tile index, so every cell using that tile shares the same properties. Use it with a hand-built `pg.Tilemap`. A scene loaded through `picogame_scene` already exposes the higher-level `view.is_solid()` and `view.tile_has()` methods.
Eight named bits and their masks: `B_SOLID, B_HAZARD, B_LADDER, B_PLATFORM, B_WATER, B_COIN, B_EXIT, B_CUSTOM` are bit indices 0..7; `SOLID, HAZARD, LADDER, PLATFORM, WATER, COIN, EXIT, CUSTOM` are the matching `1 << bit` masks. Use the masks when building the table, the `B_*` indices when querying.
`TileFlags(flags=None, tile_px=8)` builds the table. `flags` is either a `{tile_index: bitfield}` dict or a list/bytes indexed by tile index; `tile_px` is the tile size used by the pixel helper.
* `tf.get(tile, bit=None)` - the full bitfield of a tile, or one bool flag if `bit` (a `B_*` index) is given.
* `tf.set(tile, bit, value=True)` - flag (or clear) a bit on a tile at runtime.
* `tf.at(tilemap, tx, ty, bit)` - flag `bit` of the tile at cell `(tx, ty)`.
* `tf.at_px(tilemap, px, py, bit)` - flag `bit` of the tile under MAP-LOCAL pixel `(px, py)`; the common collision probe.
```python
import picogame as pg
import picogame_tiles as tiles
TILE = 8
tf = tiles.TileFlags({1: tiles.SOLID, 2: tiles.COIN, 3: tiles.EXIT}, tile_px=TILE)
def blocked(level, tx, ty): # level is a pg.Tilemap
return tf.at(level, tx, ty, tiles.B_SOLID)
if tf.at_px(level, px, py, tiles.B_SOLID): # is the tile under pixel (px, py) solid?
stop()
```
Gotchas
`at_px` assumes the map is at screen `(0, 0)` - if it is moved, subtract the map origin from `px`/`py` yourself before calling. Tiles missing from the table read as `0` (no flags). Build with the MASK constants (`tiles.SOLID`) but query with the BIT indices (`tiles.B_SOLID`); mixing them up silently checks the wrong bit.
## picogame\_shapes
[Section titled “picogame\_shapes”](#picogame_shapes)
These functions build single-colour PAL8 `Bitmap` objects in code. They suit prototypes and geometric art such as balls, bricks, or ships. Unlike `Canvas`, they return a reusable bitmap for a `Sprite` or `Tilemap`. Palette index 0 is transparent and index 1 contains the requested colour.
* `rect(w, h, color)` - a filled `w x h` rectangle.
* `circle(d, color)` - a filled disc of diameter `d`.
* `ring(d, color, thickness=2)` - a circle outline of diameter `d`.
* `from_mask(mask, color)` - a bitmap from a list of strings; `#`, `X`, or `1` sets a pixel. Sized to the mask.
* `atlas(frames_data, w, h, color)` - pack a list of `w*h` 0/1 buffers into one horizontal multi-frame bitmap (one colour). The general “frame sheet” builder.
* `color_frames(w, h, colors)` - a multi-frame bitmap where frame `i` is a solid fill of `colors[i]`; frame 0 is already a colour. Index 0 transparent.
* `tileset_colors(w, h, colors)` - a tileset where frame 0 is EMPTY (transparent) and frame `i` is a solid fill of `colors[i-1]`. So a Tilemap reads tile value 0 as empty and 1..N as coloured tiles.
* `poly_frames(size, points, nframes, color, fill=True)` - bake `nframes` rotations of a polygon (points around centre, +y down) into a `size x size` atlas. The engine also rotates at runtime (`Sprite.angle`); baked frames trade a little RAM for a cheaper per-frame blit and pixel-stable art, so pick them for many always-rotating objects (asteroids), and `angle` for one-off or continuous rotation. Set `fill=False` for an outline.
```python
import picogame as pg
import picogame_shapes as shp
ball = shp.circle(4, pg.rgb565(255, 255, 120))
bricks = shp.tileset_colors(16, 8, [pg.rgb565(220, 70, 70),
pg.rgb565(80, 140, 240)]) # value 0 empty, 1..2 coloured
ship = shp.poly_frames(16, [(0, -8), (6, 7), (0, 4), (-6, 7)], 16,
pg.rgb565(200, 220, 255)) # 16 pre-rotated frames
sprite = pg.Sprite(ball, 100, 60)
```
Gotchas
`color_frames` frame 0 is a visible colour, but `tileset_colors` frame 0 is transparent (empty) - pick the one matching how your Tilemap treats value 0. `circle` fills its bitmap edge-to-edge, so it looks flat-topped when scaled up. `poly_frames` with `nframes=1` bakes a single un-rotated frame (use it for a fixed-direction shape).
## picogame\_pool
[Section titled “picogame\_pool”](#picogame_pool)
`Pool` pre-allocates a fixed number of sprites for short-lived objects such as bullets, enemies, or pickups. `sprite.visible` marks an occupied slot and `sprite.data` can hold entity state. Spawning and freeing slots allocate no new sprites. See [/memory/](/memory/) for why stable allocation matters on the device.
`Pool(scene, bitmap, capacity, anchor=None, fixed=False)` pre-allocates `capacity` hidden sprites sharing `bitmap`, sets each `anchor` (if given) and `data = None`, and adds them all to `scene` (`fixed=` passes through to `scene.add`).
* `pool.items` - the underlying list of sprites; iterate it directly for zero-alloc updates.
* `pool.spawn()` - make the first free (hidden) sprite visible and return it, or None if the pool is full.
* `pool.free(s)` - hide sprite `s` (return it to the pool).
* `pool.free_all()` - hide every sprite (use on level reset).
* `pool.count()` - count of live (visible) sprites; cheap, but iterate `items` for the sprites themselves.
```python
import picogame as pg
import picogame_pool
bullets = picogame_pool.Pool(scene, bullet_bm, 6, anchor=(0.5, 0.5))
b = bullets.spawn() # a now-visible sprite, or None if full
if b:
b.data = {"vx": 6}
b.move(x, y)
for s in bullets.items: # zero-alloc iteration
if not s.visible:
continue
s.move(s.x + s.data["vx"], s.y)
if off_screen(s):
bullets.free(s)
```
Gotchas
always skip hidden slots when iterating (`if not s.visible: continue`) - `items` holds every slot, alive or not. `spawn()` returns the first free slot it finds (don’t rely on any particular order), so if you `free(s)` and `spawn()` in the same step, read any state off `s.data` BEFORE freeing - the new spawn may overwrite it. A full pool returns None from `spawn()`; check for it. All sprites share one bitmap, so per-entity frame/animation must be set on each sprite after `spawn()`.
# Saving & memory
> Persist scores and settings to NVM, dodge heap fragmentation with a pre-allocated arena, and stream big sprite sheets from flash.
These helpers persist small values, reserve reusable memory, and stream animation frames from flash. See [/reference/](/reference/) for the signatures and [/memory/](/memory/) for the memory model behind the last two modules.
## picogame\_save
[Section titled “picogame\_save”](#picogame_save)
This structured key-value store uses `microcontroller.nvm`, a reserved flash region writable from `code.py`. Use it for a high score, unlocked level, or settings that must survive power loss. The region is 4 KiB on the supported RP2040 builds; the class checks the actual available length when it is constructed.
NVM is a single region shared by every program on the device, so each game passes its own `key`. The key is hashed into the header and checked on load - if another game or stale data wrote the slot, `load()` returns your defaults instead of misreading foreign bytes.
You describe your data as a schema: an ordered dict of `name -> (struct format char, default)`. Common chars: `"B"` 0-255, `"H"` 0-65535, `"I"` 0 to 2^32-1; lowercase `b`/`h`/`i` are signed.
* `Save(key, schema, *, offset=0)` - create a store. `key` is your game’s name (str or bytes). `offset` is keyword-only; bump it only if two coexisting games must use different NVM regions. Raises `RuntimeError` if NVM is unavailable, or `ValueError` if the schema does not fit NVM.
* `load()` - return a dict of the stored values, or a fresh copy of the defaults if the slot is blank, corrupt, or written by a different game (key mismatch). Never raises on bad data.
* `save(values)` - persist a dict. Missing keys fall back to their schema default. Writes a checksum so a later `load()` can detect corruption.
* `reset()` - write the defaults back under this game’s key.
* `defaults()` - a fresh dict of just the default values, no NVM read.
```python
import picogame_save
# persist the best lap time (seconds) across reboots
store = picogame_save.Save("ghostrace", {"best_t": ("H", 0)})
best_t = store.load()["best_t"] # 0 = no record yet
# ...later, on a new best run:
if best_t == 0 or secs < best_t:
best_t = secs
store.save({"best_t": best_t}) # survives power-off
```
Gotchas
every `save()` erases and rewrites a flash sector, so flash wears out if you call it every frame - save only on meaningful events (game over, new high score, settings change). Keep the schema small; the whole blob (header + fields + checksum) must fit in NVM.
## picogame\_arena
[Section titled “picogame\_arena”](#picogame_arena)
A buffer arena reserves one contiguous block early and hands out slices of it later. Use it when several scenes or modes need large `Canvas` buffers at different times. MicroPython’s garbage collector does not compact the heap, so repeatedly creating and discarding large buffers can leave enough free memory in total but no sufficiently large contiguous block.
* `Arena(pixels)` - allocate the arena. Size is in pixels; it reserves `pixels * 2` bytes (RGB565). Do this early, before the heap fragments.
* `canvas(w, h, transparent=None)` - a `pg.Canvas` backed by the next slice (no per-canvas heap alloc); 16-bit aligned automatically. Returns the `Canvas`.
* `alloc(nbytes, align=1)` - a generic `memoryview` slice of `nbytes`: reuse it as a file/network read buffer, parse scratch, audio block, etc. `align` rounds the slice start up (use `align=2` for 16-bit data, `align=4` for word access). Raises `MemoryError` if the arena is full. Valid until the next `reset()`.
* `mark()` - return the current allocation offset. Keep it when entering a temporary mode or scene.
* `release(mark)` - rewind the arena to a previous mark and make every later slice available again. Marks should be released in reverse order. Objects backed by released slices must no longer be used.
* `reset()` - free all slices handed out so far. Call at the start of each scene that reuses the arena. Any `Canvas` from before the reset must no longer be drawn.
* `free()` - bytes still available in the arena.
```python
import picogame_arena
# one arena for the big canvases, grabbed once while the heap is contiguous;
# scenes that never run at the same time share the bytes (reset each).
ARENA = picogame_arena.Arena(320 * 80) # 320x80 px = 51 200 bytes
def big_canvas(w, h, transparent=None, first=False):
if first:
ARENA.reset() # reuse the arena for this scene
return ARENA.canvas(w, h, transparent=transparent)
```
Gotchas
this needs a firmware `Canvas` with the `buffer=` argument. The simulator currently allocates its own canvas storage, so the anti-fragmentation benefit applies on [hardware](/hardware/). After `reset()` or `release()`, do not use objects backed by the reclaimed slices; new allocations may overwrite their data.
## picogame\_stream
[Section titled “picogame\_stream”](#picogame_stream)
`StreamSheet` keeps one PAL8 animation frame in RAM and reads the requested frame from a file on flash. A 64x100 sheet with 11 frames therefore needs a 6,400-byte pixel buffer instead of 70,400 bytes for all frame pixels. The file must be frame-major, with each frame’s `w*h` bytes contiguous. Create it with `tools/pack_sheet.py`.
* `StreamSheet(pg, path, w, h, frames, palette, transparent=None)` - open `path`, allocate one frame buffer, build a `pg.Bitmap` (PAL8) over it, and load frame 0. `palette` is the color table for the PAL8 data.
* `.bitmap` - the single `pg.Bitmap` whose pixels get overwritten in place. Build your `pg.Sprite` from this.
* `use(i)` - load frame `i` (wrapped modulo `frames`) into the shared buffer and return the bitmap. Cached: re-reads from flash only when `i` actually changes.
* `close()` - close the underlying file.
```python
import picogame_stream
sheet = picogame_stream.StreamSheet(pg, "jill.bin", 64, 100, 11, PAL, transparent=0)
player = pg.Sprite(sheet.bitmap, x, y)
# ...each frame the animation advances:
sheet.use(frame_index) # stream that frame into the shared buffer
player.touch() # tell the scene to repaint it (pixels changed in place)
```
Gotchas
always call `sprite.touch()` after `use()`. The method overwrites bitmap pixels in place, which does not change a property tracked by the dirty-region renderer. Without `touch()`, a stationary sprite may keep showing its previous frame. The simulator repaints the full scene, so this mistake can appear only on hardware. See [/scene-format/](/scene-format/) for dirty-region repainting.
# Effects & feedback
> Screen shake, fades, tweens, cameras, raster effects, particles, and PAL8 palette changes.
These effects add visual feedback and movement without full-screen surfaces. Their memory costs differ: `Fade` draws through a `StripDraw` callback, `Sky` keeps a colour lookup table, `Scanlines` keeps one bitmap row, and palette helpers modify existing PAL8 palettes. See [/reference/](/reference/) for the signatures.
Reaching for feedback on a game event? This table routes you to the right effect; the sections below have the details.
| Event | Reach for |
| ------------------------- | --------------------------------------------------------------------------------------- |
| Small hit / took damage | sprite `flash` (1-3 frames) + a small `Shake` (`add(~0.15)`) |
| Enemy killed / big impact | `Particles` burst + a bigger `Shake` (`add(~0.6)`) + [hit-stop](#hit-stop-frame-freeze) |
| Pickup / score pop | a `Tween` pop (the blip is on the [audio page](/helpers/audio/)) |
| Screen / scene change | `Fade` |
| Menu / UI motion | `Tween` |
## picogame\_fx
[Section titled “picogame\_fx”](#picogame_fx)
Create these helpers for a `Scene` and update the time-based ones once per game frame. `Shake` and `InvertFlash` emphasize an impact, `Fade` handles transitions, `Tween` smooths a changing value, `Camera` follows the world, and `Sky` or `Scanlines` draw raster-style backgrounds and overlays.
`import picogame_fx as fx`
### `fx.Shake` - decaying screen shake
[Section titled “fx.Shake - decaying screen shake”](#fxshake---decaying-screen-shake)

`Shake` stores an intensity called trauma. Calling `add()` raises it; each `tick()` applies a random offset and reduces the stored value. Pass the normal camera offset to `tick()` so both effects use one `scene.set_view()` call.
* `Shake(scene, max_offset=6, decay=0.03, seed=0x9E37)` - `max_offset` is the peak pixel offset (about 6 suits 320x240; over 10 hides the action). `decay` is trauma lost per frame (about 0.03 reads as a “kick”, not a “rumble”).
* `.add(amount)` - add trauma in the 0..1 range, clamped to 1.0. About 0.6 for a hit or explosion, 0.15 for a small bump. Trauma is squared before use, so small events barely shake and big ones slam.
* `.tick(cam_x=0, cam_y=0)` - adds a decaying random offset on top of `(cam_x, cam_y)` and calls `scene.set_view` with the sum. Returns `True` while still shaking. Pass your camera offset here so shake and a moving camera don’t both call `set_view` and stomp each other.
```python
import picogame_fx as fx
shaker = fx.Shake(scene, max_offset=6)
# ...on impact:
shaker.add(0.8)
# ...every frame (no camera, so feed 0,0):
shaker.tick(0, 0)
```
Gotchas
`Shake` owns `scene.set_view` while it runs - if you also move a camera by hand, feed that offset into `tick(cam_x, cam_y)` rather than calling `set_view` separately. See [/hardware/](/hardware/) for the screen size you are tuning `max_offset` against.
### Hit-stop (frame freeze)
[Section titled “Hit-stop (frame freeze)”](#hit-stop-frame-freeze)
Freeze-framing on a big impact is a common juice technique, but there is **no engine primitive** for it - you skip N logic / `scene.refresh()` ticks yourself. Hold a `freeze` counter and, while it is positive, decrement and `continue` the loop (still calling `clock.tick()` so timing stays steady).
```python
freeze = 0
# ...on a big impact:
freeze = 4
# ...at the top of the game loop:
if freeze > 0:
freeze -= 1
clock.tick()
continue
```
### `fx.Fade` - dither screen fade / dim / flash
[Section titled “fx.Fade - dither screen fade / dim / flash”](#fxfade---dither-screen-fade--dim--flash)
A `StripDraw` overlay stipples a colour over a rectangle with ordered Bayer dithering. It keeps no pixel surface. At level 0 its drawing rectangle collapses to 0×0, so it adds no region to repaint.
* `Fade(scene, width, height, x=0, y=0, color=0, cell=8)` - covers the rect `(x, y, width, height)`; defaults cover the whole screen. A sub-rect dims just that area (a panel behind a dialog, a sidebar). `color=0` is black; `cell` is the dither block size. Added to the scene `fixed=True` so it ignores the camera.
* `.set(level)` - jump instantly to `level` (0 = clear .. 16 = solid). Use 16 to start opaque before a fade-in.
* `.to(target, speed=2.0)` - head toward `target` at `speed` levels per frame. Returns `self`.
* `.out(speed=2.0)` / `.into(speed=2.0)` - shortcuts for `to(16)` (to opaque) and `to(0)` (to clear).
* `.dim(level=8)` - jump to a partial hold, e.g. a 50% dim behind a menu. `.clear()` jumps to 0.
* `.pulse(level=12, speed=2.0)` - ramp up to `level` then automatically back to 0; the smooth full-screen flash. Keep `level` under 16 so it stays a see-through dither, never a solid wall.
* `.tick()` - step `level` toward `target` by `speed`. Returns `True` when the target is reached.
* `.is_done` (property) - `True` when `level == target`.
```python
import picogame_fx as fx
fader = fx.Fade(scene, W, H)
# ...trigger a fade to black:
fader.out(speed=2)
# ...each frame, fade back in once we hit black:
if fading and fader.tick():
fader.into(speed=2)
```
Gotchas
`level` runs from 0 to 16, not 0 to 255 or 0.0 to 1.0. A white `Fade` pulse works on every render backend. `InvertFlash` below avoids repainting but only works with a supported panel controller.
### `fx.Tween` - ease a scalar toward a target
[Section titled “fx.Tween - ease a scalar toward a target”](#fxtween---ease-a-scalar-toward-a-target)
A per-frame exponential ease-out for a single value: UI slides, pop-up scales, a number that should “catch up” smoothly. No keyframes or schedule.
* `Tween(value=0.0, speed=0.2)` - `speed` is the fraction of the remaining gap closed each frame (0..1).
* `.to(target, speed=None)` - set a new target (and optionally a new speed). Returns `self`.
* `.set(value)` - snap value and target to `value` immediately.
* `.tick()` - move value a `speed` fraction toward target and return the new value. Snaps exactly when within 0.01.
* `.is_done` (property) - `True` once value equals target.
```python
import picogame_fx as fx
y = fx.Tween(0)
y.to(100) # slide a panel down to y=100
# ...each frame:
panel.y = int(y.tick())
```
Gotchas
ease-out only, so it never overshoots or bounces. `tick()` returns the value - read its return rather than `.value` if you want the freshly-stepped number.
### `fx.Camera` - smoothed follow camera
[Section titled “fx.Camera - smoothed follow camera”](#fxcamera---smoothed-follow-camera)
Tracks a world point and produces the scene view offset, centred and optionally clamped to a world size. Use it when the level is bigger than the screen.
* `Camera(scene, w, h, lerp=0.18, world_w=0, world_h=0)` - `w`/`h` are the screen size; `lerp` is the follow smoothing per frame; `world_w`/`world_h` (if non-zero) clamp so the view never shows past the world edge.
* `.follow(tx, ty, snap=False)` - move the camera centre toward `(tx, ty)` by `lerp`, or jump there with `snap=True`. Returns `self`, so you can chain.
* `.apply()` - compute the offset and call `scene.set_view` directly. Allocation-free; returns `None`. Use when there is no shake.
* `.offset()` - compute and return the offset as an `(ox, oy)` tuple (allocates). Feed this into `Shake.tick(ox, oy)` to compose the two.
```python
import picogame_fx as fx
cam = fx.Camera(scene, W, 240, world_w=bounds_w)
# ...each frame:
cam.follow(player.x, 120).apply()
```
Gotchas
`apply()` and `Shake` both call `scene.set_view`, so don’t run both blind. To combine, take `ox, oy = cam.follow(...).offset()` and pass those into `shaker.tick(ox, oy)` so shake stacks on the camera. See [/scene-format/](/scene-format/) for what `set_view` does to the view.
### `fx.Sky` - vertical gradient background
[Section titled “fx.Sky - vertical gradient background”](#fxsky---vertical-gradient-background)
A per-scanline gradient drawn through `StripDraw`. It retains a lookup table of `h` wire-order colours, or `2 * h` bytes, and redraws the requested rows when its region is repainted. Add it before the gameplay layers.
* `Sky(scene, x, y, w, h, top, bottom)` - fills the rect, lerping each scanline from the `top` wire-RGB565 colour to `bottom`. Added `fixed=True`. Change `.top`/`.bottom` over time for a day-night cycle.
```python
import picogame as pg
import picogame_fx as fx
sky = fx.Sky(scene, 0, 0, W, HORIZON,
pg.rgb565(60, 120, 240), pg.rgb565(200, 230, 255))
```
Gotchas
it issues one `fill_rect` per visible scanline. Its CPU cost grows with the height of the repainted region.
### `fx.Scanlines` - CRT scanline overlay
[Section titled “fx.Scanlines - CRT scanline overlay”](#fxscanlines---crt-scanline-overlay)
Darkens every Nth row for a CRT or LCD-grid look. It retains one PAL8 row of `w` bytes plus a two-entry palette, then blits that row through `StripDraw`. Add it after gameplay layers so it remains visible.
* `Scanlines(scene, x, y, w, h, step=2, dark=pg.rgb565(0, 0, 0))` - `step=2` darkens every other line; `dark` is the overlay colour. Precomputes a 1px dither row and blits it once per darkened line (one blit instead of a per-pixel loop).
```python
import picogame_fx as fx
scanlines = fx.Scanlines(scene, 0, 0, W, H) # add LAST, on top of everything
```
Gotchas
order matters - add it after every gameplay layer or it gets painted over.
### `fx.InvertFlash` - controller inversion flash
[Section titled “fx.InvertFlash - controller inversion flash”](#fxinvertflash---controller-inversion-flash)
Flips a compatible SPI panel to its negative for a few frames using controller colour inversion (`pg.invert`). It does not repaint the scene or allocate a pixel buffer. Use it with ST7789/ST7735-class controllers; it is not available on framebuffer outputs such as Fruit Jam DVI. The simulator emulates the effect.
* `InvertFlash(display, frames=3, normal=None)` - `display` is e.g. `board.DISPLAY`; `frames` is the flash length. `normal` is the panel’s resting invert state. The PicoPad sends INVON in its init, so its resting state is `normal=None` (the default); pass `normal=False` only for a panel whose init does not invert.
* `.pulse(frames=None)` - flip away from the resting state now (optionally for a custom frame count).
* `.tick()` - count down and restore the resting state when the flash ends. Returns `True` while flashing. Call it after `scene.refresh()` so the INVON/INVOFF is the frame’s last bus op.
```python
import board
import picogame_fx as fx
flash = fx.InvertFlash(board.DISPLAY, frames=6)
# ...on hit:
flash.pulse()
# ...after scene.refresh():
flash.tick()
```
Gotchas
the resting inversion state must match the panel initialization. On PicoPad, leave `normal=None` so the helper uses the configured default. Do not construct this effect for a framebuffer display. See [/hardware/](/hardware/) for controllers that support INVON/INVOFF.
**Seizure safety:** for any full-screen flasher (`InvertFlash`, `Fade.pulse`, rapid sprite flash), avoid sustained flashing above \~3 Hz (at least 10 frames apart at 30 fps); keep full-screen inverts to 1-3 frames, one-shot.
## picogame.Particles
[Section titled “picogame.Particles”](#picogameparticles)

`pg.Particles` is a core engine layer for sparks, explosions, pickup bursts, and dust. It pre-allocates a fixed-capacity pool and does not create new particle objects during `emit()` or `tick()`.
* `pg.Particles(capacity, *, size=1, gravity=0.0, fade=False)` - a pool of up to `capacity` dots, each `size` px. `gravity` pulls them down per tick (0 = free drift); `fade=True` dims a dot as it ages. `size`/`gravity`/`fade` are keyword-only (pass them by name).
* `.emit(x, y, count, speed=1, life=30, color=0xFFFF)` - burst `count` dots from `(x, y)` with random velocity up to `speed` px/tick, each living `life` ticks.
* `.tick()` - age and move the live dots; call once per frame.
```python
import picogame as pg
ps = pg.Particles(180, size=2, gravity=0.0, fade=True)
scene.add(ps) # add once, like any layer
# ...on a hit / kill / pickup:
ps.emit(x, y, 16, 4, 24, pg.rgb565(255, 210, 120)) # 16 sparks, speed 4, 24-tick life
# ...every frame:
ps.tick()
```
Gotchas
emits past `capacity` are dropped, so size the pool for your busiest moment (a big burst plus lingering sparks). `fade=True` + a short `life` reads as a spark; `gravity > 0` + a longer `life` reads as debris falling. Keep the live-dot count modest on RP2040.
## picogame\_palette
[Section titled “picogame\_palette”](#picogame_palette)
PAL8 art can change colour without duplicating its pixel indices. `cycle` rotates a range of palette entries, `swap` copies another palette, and `fade` interpolates entries toward a target. Palette entries are wire-order RGB565 integers returned by `pg.rgb565()`.
`import picogame_palette as palette`
* `snapshot(palette)` - return an `array('H')` copy of a palette. Save the original once, before any fading or cycling, so you can fade relative to it or `restore` it.
* `restore(palette, base)` - copy `base` back into `palette` in place.
* `cycle(palette, lo, hi, step=1)` - rotate entries `[lo..hi]` inclusive by `step` (wraps), in place with no allocation, so it is safe to call every frame. Reserve a run of indices for flowing colours, paint your art with them, and they animate.
* `swap(dst_palette, src_palette)` - copy one palette over another (up to the shorter length). GBC-style recolour: keep one PAL8 bitmap and hand it a different palette per variant. Cheaper than a second bitmap.
* `fade(palette, base, t, target=0, skip=None)` - lerp every entry of `palette` from the saved `base` toward the `target` wire colour by `t` (0.0 = base .. 1.0 = target). `target=0` (black) fades out; a white target fades to white. `skip` leaves one index untouched (e.g. a transparent index).
```python
import picogame_palette as palette
# ...each frame, flow a reserved band of water colours:
palette.cycle(water_bmp.palette, 1, 6)
water.touch() # tell the renderer the palette changed
```
One blit slot on device
A sprite’s `flash`, `tint`, `dither`, and `shadow` effects share **one** blit slot on hardware — setting one clears the others (last-set-wins). The desktop simulator does **not** reproduce this; it shows them as independent. Combine them by sequencing frame-by-frame or using a separate effect layer; always confirm on hardware.
Recolour a sprite **brighter / to a new hue** — what `sprite.tint` can’t do (multiply only darkens). Keep one PAL8 bitmap and give it a warm palette (e.g. a green enemy → a hot amber “elite”):
```python
import array, picogame_palette as palette
WARM = array.array("H", [0, pg.rgb565(150, 40, 30), pg.rgb565(255, 130, 45),
pg.rgb565(120, 45, 25), pg.rgb565(255, 215, 130),
pg.rgb565(235, 90, 45), pg.rgb565(255, 245, 190)]) # one entry per index
palette.swap(enemy.bitmap.palette, WARM) # copy WARM into the bitmap's palette, in place
enemy.touch() # the renderer won't notice a palette change on its own
# Per-variant instead of in-place? Build a 2nd `pg.Bitmap(DATA, ..., palette=WARM)` and assign it to
# the sprite's `.bitmap` — see examples/picogame_picowing.py, which recolours the Kenney enemy this way.
```
Gotchas
the dirty-rect renderer reads the palette at blit time but does not notice a palette change on its own. After any `cycle`/`swap`/`fade`/`restore`, call `sprite.touch()` on the sprites using that bitmap (or `scene.invalidate()` / repaint the tilemap region) or nothing visibly changes. The cost is a repaint of the affected sprites that frame, so cycle a small band (a strip of water), not the whole screen. See [/memory/](/memory/) for why this beats holding a second recoloured bitmap.
# Input & controls
> Read the D-pad and buttons with picogame_input, and add USB gamepad or keyboard control on USB-host boards — with zero game-code changes.
`picogame_input.Buttons` is the one input object every game uses. It reads the board’s physical buttons into a **bitmask** with edge detection, so game code never re-does the wiring:
```python
import picogame_input as pi
btn = pi.Buttons()
# each frame:
btn.poll()
if btn.is_pressed(pi.LEFT): px -= 2
if btn.just_pressed(pi.A): jump()
if btn.repeat(pi.DOWN): menu_move(+1) # PICO-8 btnp auto-repeat, good for menus
```
## One virtual controller, mapped to real hardware
[Section titled “One virtual controller, mapped to real hardware”](#one-virtual-controller-mapped-to-real-hardware)
The engine gives every game the **same virtual controller** — a fixed set of logical buttons — and you **map your board’s real hardware onto it**. Games always code against the logical names (`pi.A`, `pi.LEFT`), never against pins, so the *same `code.py`* runs on a PicoPad, a breadboard Pico, a keypad matrix, or a USB gamepad; only the mapping changes.
The logical set:
* **Baseline (every game can rely on these):** the 4-way D-pad — `UP` `DOWN` `LEFT` `RIGHT` — plus `A` and `B`.
* **Optional extras (map them if your hardware has them):** `X` `Y`, shoulders `L1` `L2` `R1` `R2`, and `START` `SELECT`.
A board maps whatever subset it physically has; absent buttons simply never fire. Query availability with `btn.has(pi.L1)` so a game can hide a control the board lacks. The physical→logical mapping lives in `settings.toml` (below) — one file, no reflash — resolved per source: `PICOGAME_BUTTONS` for GPIO, `PICOGAME_MATRIX_*` for a key matrix, `PICOGAME_USBPAD` / `PICOGAME_USBKBD` for USB.
`Buttons` methods: `poll() -> mask`, `is_pressed(mask)`, `just_pressed(mask)`, `just_released(mask)`, `has(mask)`, `repeat(button, delay=15, interval=4)`, `clear()`. For input-leniency windows (coyote time, jump buffering) use `pi.Timer(frames)` with `.feed(cond)` / `.is_active` / `.consume()`.
## Input sources are OR’d together
[Section titled “Input sources are OR’d together”](#input-sources-are-ord-together)
```python
Buttons(profile=None, pull=None, prefer_keypad=True, debounce_s=0.02, matrix=None, usb=None, sources=None)
```
A `Buttons` object can read from **several sources at once** and ORs them into one mask, so a game reads them all identically:
* **On-board GPIO buttons** — the default; the pin map is a *profile* resolved from `settings.toml` (`PICOGAME_BUTTONS`) or a board default.
* **A scanned key matrix** (`matrix=`, or the `PICOGAME_MATRIX_*` settings keys) — for keypad-style boards.
* **USB HID gamepad / keyboard** (`usb=`, auto-attached on USB-host builds) — see below.
Because everything ORs, **you don’t branch on the source**: the same `btn.just_pressed(pi.A)` fires whether A came from a GPIO button, a matrix cell, a USB pad, or a keyboard key.
## Map your hardware in `settings.toml`
[Section titled “Map your hardware in settings.toml”](#map-your-hardware-in-settingstoml)
Each source has its own mapping key. Edit `settings.toml` on the `CIRCUITPY` drive and reset — no firmware rebuild. The [settings.toml reference](/custom-board/) lists every key and its exact format; the common cases:
**Direct GPIO buttons** — `NAME=GPpin` tokens. Map only what you have:
```toml
# a Pico wired D-pad + A/B, plus optional X/Y
PICOGAME_BUTTONS = "UP=GP2 DOWN=GP3 LEFT=GP4 RIGHT=GP5 A=GP6 B=GP7 X=GP8 Y=GP9"
PICOGAME_PULL = "up" # buttons to GND, pressed reads low (the default)
```
**A scanned key matrix** — give the row/column pins, then map matrix cells to logical buttons by `NAME=row,col`. picogame scans the grid and de-bounces it via the `keypad` module:
```toml
PICOGAME_MATRIX_ROWS = "GP0 GP1 GP2 GP3"
PICOGAME_MATRIX_COLS = "GP4 GP5 GP6 GP7"
PICOGAME_MATRIX_MAP = "UP=0,1 DOWN=2,1 LEFT=1,0 RIGHT=1,2 A=3,3 B=3,2 START=0,0 SELECT=0,3"
# PICOGAME_MATRIX_ANODES = "cols" # flip to "rows" if the diode direction is reversed
```
**USB gamepad / keyboard** — `PICOGAME_USBPAD` / `PICOGAME_USBKBD` (see the USB sections below).
A partial map merges over the source’s defaults, so you only name the buttons you’re changing. Unmapped logical buttons stay inactive (`btn.has(...)` reports them absent).
## USB gamepad (USB-host boards, e.g. Fruit Jam)
[Section titled “USB gamepad (USB-host boards, e.g. Fruit Jam)”](#usb-gamepad-usb-host-boards-eg-fruit-jam)
On a USB-host CircuitPython build, `Buttons()` **auto-attaches** a plugged-in USB HID gamepad — so a pad works with **zero game changes**. On boards without USB host (PicoPad, …) the driver is simply never loaded (no RAM cost).
* Default layout = the ubiquitous DragonRise `081f:e401` SNES-style pad.
* Remap any pad from `settings.toml` (no reflash): `PICOGAME_USBPAD = "A=5:0x20 B=5:0x40 X=5:0x10 Y=5:0x80 START=6:0x20 SELECT=6:0x10"` (`NAME=report-byte:bitmask`; a partial list merges over the defaults). Discover a new pad’s report bytes with `tools/usbpad_probe.py`, or run the interactive `tools/usbpad_calibrate.py` — it prompts you to press each button and prints the ready-to-paste `PICOGAME_USBPAD` / `PICOGAME_USBPAD_ID` line.
* Turn it off with `PICOGAME_USB = 0`; pin a specific device with `PICOGAME_USBPAD_ID = "vid:pid"`.
The driver is `picogame_usbpad.UsbPad`; you rarely touch it directly — `Buttons` attaches it for you.
## USB keyboard (USB-host boards)
[Section titled “USB keyboard (USB-host boards)”](#usb-keyboard-usb-host-boards)
The keyboard twin of the gamepad — also auto-attached, also OR’d in. Works with wired keyboards and 2.4 GHz-dongle wireless ones (not Bluetooth — CircuitPython has no BT host stack).
* Default layout: **arrows + WASD** → D-pad, **Z / Space** → A, **X** → B, **C** → X, **V** → Y, **Q** → L1, **E** → R1, **Enter** → START, **Esc** → SELECT.
* Remap from `settings.toml`: `PICOGAME_USBKBD = "A=0x2C B=0x1B START=0x28"` (`NAME=HID-keycode`, hex or decimal; merges over the defaults).
* Disable the keyboard only (keep the pad) with `PICOGAME_KBD = 0`.
* Some combo dongles present a boot-keyboard interface that stays silent while keystrokes flow on a sibling interface. Point the driver at the live channel: `PICOGAME_USBKBD_EP = "2:0x83"` (`interface:IN-endpoint`). Find the value by running `tools/usbkbd_probe.py` as `code.py` — it prints the exact line.
The driver is `picogame_usbkbd.UsbKbd`.
Set `PICOGAME_DEBUG = 1` when input doesn’t attach
It prints `[picogame] ...` reasons to the serial console (driver missing, device not found, wrong endpoint) instead of failing silently. Remove it once things work.
## Local multiplayer
[Section titled “Local multiplayer”](#local-multiplayer)
By default a `Buttons` merges every source (above). To give each player their own controller, build **one `Buttons` per player** and bind each to its own device with `sources=`:
```python
import picogame_input as pi
pads = pi.find_pads() # every connected USB gamepad, in bus order
p1 = pi.Buttons(sources=pads[0:1]) # player 1 = first pad
p2 = pi.Buttons(sources=pads[1:2]) # player 2 = second pad
# or mix devices — pi.Buttons(usb=False) is a player on the on-board buttons.
```
Each player is independent: poll and read them separately (`p1.just_pressed(pi.A)` / `p2.just_pressed(pi.A)`). `find_pads()` returns `[]` on a board with no USB host. Two identical pads come back in enumeration order — if players want them the other way round, they swap controllers (the engine tracks no per-pad identity). See the two-player pattern above.
See the [full `settings.toml` reference](/custom-board/) for every input key and its format.
# Math, random & collision
> Numeric helpers, reproducible random sequences, and the collision tests built into Sprite.
This page covers numeric helpers, a seedable random generator, and the collision methods on `Sprite`. Neither helper module requires engine setup. See [/reference/](/reference/) for the signatures.
## picogame\_math
[Section titled “picogame\_math”](#picogame_math)
`picogame_math` provides `clamp`, `lerp`, `approach`, `wrap`, 2D vector functions, and trigonometry expressed in turns. Functions ending in `_t` use the interval `[0,1)` for one full rotation, which is convenient for stored headings and aiming. The module also keeps the vector helpers formerly provided by `picogame_vec`.
API:
* `clamp(v, lo, hi)` - returns `v` pinned into `[lo, hi]`. The everyday helper for keeping a position on screen or HP in range.
* `mid(a, b, c)` - median of three; behaves like a clamp when the middle arg is the value.
* `lerp(a, b, t)` - linear blend `a + (b-a)*t`. With a small `t` each frame it gives a smooth follow/ease.
* `inv_lerp(a, b, v)` - inverse of `lerp`: where `v` sits in `[a,b]` as `0..1`. Returns `0.0` if `a == b`.
* `remap(v, a, b, c, d)` - map `v` from range `[a,b]` onto `[c,d]`. Safe when `a == b` (maps to `c`).
* `sgn(x)` - sign as `-1`, `0`, or `1`.
* `approach(v, target, step)` - move `v` toward `target` by at most `step`, never overshooting. Great for friction/acceleration toward a value.
* `wrap(v, lo, hi)` - wrap `v` into the half-open range `[lo, hi)`. Degenerate or inverted ranges return `lo` (no division by zero, never out of range).
* `sin_t(turns)` / `cos_t(turns)` - sine/cosine of an angle in TURNS (`1.0` = full circle). Positive is clockwise on a y-down screen.
* `atan2_t(dy, dx)` - angle of vector `(dx, dy)` in turns, normalized to `0..1`. Use for aiming.
* `length(dx, dy)` - magnitude of a vector.
* `distance(x1, y1, x2, y2)` - distance between two points.
* `normalize(dx, dy)` - unit vector; returns `(0.0, 0.0)` for a zero-length input.
* `angle_rad(dx, dy)` - angle in RADIANS (raw `atan2`); `from_angle_rad(a, mag=1.0)` - vector of length `mag` at radian angle `a`.
* `TAU` - the constant `2*pi`, used internally by the `_t` trig.
Example (rotate a ship and thrust along its nose, as in asteroids):
```python
import picogame_math as m
ang = 0.0 # heading, in turns 0..1
TURN = 0.01
ang = (ang + TURN) % 1.0 # rotate right
dx, dy = m.sin_t(ang), -m.cos_t(ang) # nose-up direction
vx += dx * 0.25
vy += dy * 0.25
sp = m.length(vx, vy) # current speed
x = m.clamp(x, 8, W - 8) # keep on screen
```
Gotchas
* The `_t` trig is clockwise on the y-down screen, and “up” is `-cos_t` - flip the sign of the y component, like the asteroids ship above, or your sprite turns the wrong way.
* `wrap` is half-open: `wrap(hi, lo, hi)` returns `lo`, not `hi`. For an inverted or zero-width range it just returns `lo` rather than raising.
* Use turns (`sin_t`/`cos_t`/`atan2_t`) and radians (`angle_rad`/`from_angle_rad`) consistently; do not mix the two for the same angle.
## picogame\_rand
[Section titled “picogame\_rand”](#picogame_rand)
This seedable xorshift32 generator supports weighted choices, in-place shuffling, and a shuffle bag. Use a fixed seed for reproducible replays, ghost data, tests, or level layouts. `Rand()` without an argument seeds itself from the clock. `Bag` emits each item once per shuffled cycle, which prevents long streaks caused by independent choices.
`Rand(seed=None)`:
* `Rand(1234)` seeds from an int (reproducible); `Rand()` seeds from the clock. `seed=0` is remapped internally (xorshift cannot start at zero).
* `seed(s)` - reseed an existing generator.
* `below(n)` - integer in `0 .. n-1`. Returns `0` if `n <= 0`.
* `randint(a, b)` - integer in `a .. b` inclusive. Raises `ValueError` if `b < a`.
* `random()` - float in `[0.0, 1.0)`.
* `chance(p)` - `True` with probability `p` (where `p` is `0..1`).
* `choice(seq)` - one element of `seq`. Raises `ValueError` on an empty sequence.
* `shuffle(lst)` - Fisher-Yates shuffle of `lst`, in place (returns `None`).
* `weighted(weights)` - return an index `0..len-1` picked proportionally to `weights`. Raises `ValueError` if the total is `<= 0`. No streak control (independent draws).
`Bag(items, rng)`:
* A shuffle-bag / “7-bag”: yields every item once per cycle in shuffled order, so no long streaks or droughts. Fairer than independent picks for spawns and pieces.
* `next()` - return the next item, reshuffling automatically at the start of each cycle. Raises `ValueError` at construction if `items` is empty.
Example (one seeded RNG for the whole game, plus an anti-streak spawn bag):
```python
import picogame_rand
rng = picogame_rand.Rand(0x1234) # seeded -> reproducible
x = rng.randint(40, W - 40) # 40 .. W-40 inclusive
if rng.chance(0.25):
spawn_powerup(x)
kind = rng.weighted([5, 3, 1]) # index 0 most likely
bag = picogame_rand.Bag([0, 1, 2, 3, 4, 5, 6], rng)
piece = bag.next() # every value once per cycle
```
Gotchas
* Reach for `picogame_rand` (or plain `random.randint`) instead of `random.shuffle`, `random.sample`, or `random.choices`: those exist only in desktop CPython, so a game using them runs in the [simulator](/simulator/) but crashes with `AttributeError: module 'random' has no attribute 'shuffle'` on the board and in the browser playground (both are MicroPython). `Rand.shuffle` is a drop-in replacement.
* `shuffle` mutates the list in place and returns `None` - do not write `lst = rng.shuffle(lst)`.
* `Bag` takes ownership of a copy of `items`; `next()` reshuffles that internal list, so the order you passed in is not preserved.
* `weighted` returns an index, not the value - index into your own list with it.
* Same seed plus same call sequence equals same results: that is the point, but it also means an accidentally shared `rng` couples two systems’ randomness.
## Sprite collision
[Section titled “Sprite collision”](#sprite-collision)
Every `Sprite` has box and radius collision methods. They use the drawn bounds after anchor, scale, and rotation without allocating a result object. Use `overlaps()` for sprite or rectangular intersections and `near()` for a circular distance check.
API (methods on any `Sprite`):
* `a.overlaps(b, inset=0)` - inclusive AABB box overlap (they collide the moment they touch). `b` may be another `Sprite`, a point `(x, y)`, or a rect `(x1, y1, x2, y2)` - e.g. a trigger zone, or `(0, 0, W, H)` to test whether the sprite is still on screen. `inset` shrinks THIS sprite’s box by N px on each side, for a hitbox smaller than the art. Returns a bool.
* `a.near(b, r)` - circular test: is this sprite’s centre within `r` px of `b`’s centre? Uses squared distance, so no `sqrt`. `b` may be a `Sprite` or a point `(x, y)`.
Boxes and centres come from the sprite’s drawn rectangle, so both methods are anchor/scale/rotation aware - correct for any anchor (unlike a hand-rolled `x`-based test). See [/scene-format/](/scene-format/) for anchors.
For arbitrary boxes with no sprite (two computed regions), drop to the raw primitive `pg.collide(x1, y1, x2, y2, ax1, ay1[, ax2, ay2])`. For tile-grid walls/terrain, probe `picogame_tiles` flags rather than overlapping every tile.
Example (bullets vs rocks circular, player vs enemy boxed - from asteroids and a platformer):
```python
for b in bullets:
for r in rocks:
if b.visible and b.near(r, 18): # circular, no sqrt
kill(b, r)
if player.overlaps(enemy): # box overlap, anchor-correct
take_damage()
if not ship.overlaps((0, 0, W, H)): # off-screen? despawn it
pool.free(ship)
```
Gotchas
* These read live sprite positions. If you track motion in floats (`data["x"]`), call `sprite.move(int(x), int(y))` before testing, or the collision lags a frame behind the visible sprite.
* `overlaps` is a box test, not pixel-perfect - use `inset` (often a few px) so art corners do not register false hits.
* Guard with `if sprite.visible` (and any “alive” flag) yourself - the methods test geometry only, not whether an entity is active. See [/memory/](/memory/) on pooling freed entities.
# Pseudo-3D (Mode-7 & raycasting)
> Fake-3D ground planes and wall corridors drawn into a buffer-less StripDraw view - a perspective floor via the C Canvas.mode7 primitive, and a Python DDA raycaster.
Two ways to get a 3D-looking world out of a 2D engine, both rendered into a **buffer-less `StripDraw` view** so they cost **zero retained RAM**. `picogame_mode7` gives you a receding **ground plane** (a racer track, a flying-carpet floor); `picogame_ray` gives you **walls and corridors** (a dungeon, a maze). See [/reference/](/reference/) for the signatures.
| You want | Reach for | How it draws |
| -------------------------------------------- | ----------------------------------------------------- | ------------------------------------ |
| A ground / floor that recedes to the horizon | `picogame_mode7.Camera` (drives the C `Canvas.mode7`) | C primitive, per-scanline - fast |
| Walls / a first-person corridor | `picogame_ray.Raycaster` | native DDA caster + temporal repaint |
Both draw into the below-horizon rows and leave the sky to you; you fill the rows above the horizon yourself (a flat colour, a gradient, or [`fx.Sky`](/helpers/effects/)).
## picogame\_mode7
[Section titled “picogame\_mode7”](#picogame_mode7)
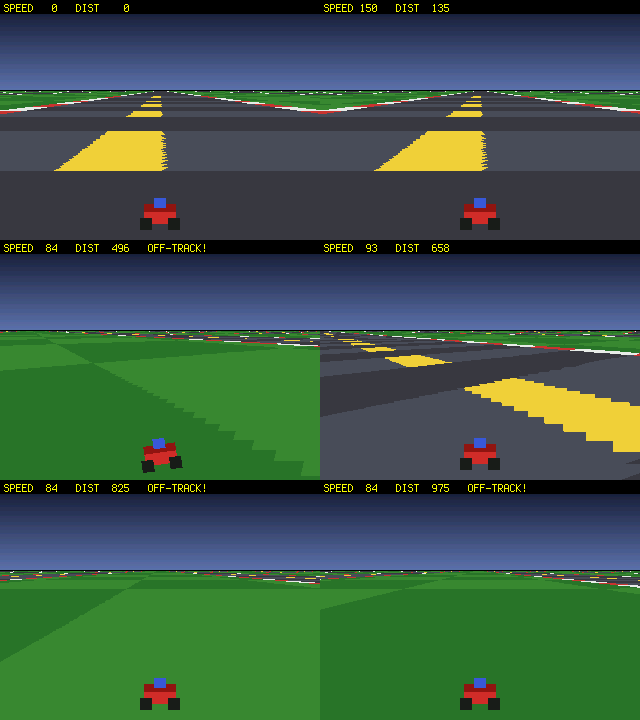
A **Mode-7 perspective floor**: each screen row below the horizon samples one distance into a texture, so a flat top-down image reads as a ground plane stretching to the horizon. All the maths lives in this Python helper; the per-scanline fill is the C engine primitive `Canvas.mode7`, so it is cheap.
`import picogame_mode7 as m7`
### `m7.Camera` - perspective ground plane
[Section titled “m7.Camera - perspective ground plane”](#m7camera---perspective-ground-plane)
* `Camera(fov=0.66)` - holds the field of view (higher = wider, more fish-eye). Reuse one camera; pass the pose to `draw()` each frame.
* `.draw(canvas, texture, x, y, angle, horizon, height, y_off=0)` - fill `canvas` (a `Canvas` **or** a `StripDraw` view) below `horizon` with a receding view of `texture`. `x`/`y` are the camera position in **world (tile) units**, `angle` is the heading in radians, `horizon` is the screen row of the horizon line, and `height` is how high the camera sits (bigger = the ground recedes slower, so you see further). In a `StripDraw` callback pass `y_off=vy` so the perspective divide uses the absolute screen row.
`texture` must have **power-of-2 width and height**, and **one world unit = one full texture tile**. A texture that tiles seamlessly (grass, a road with rumble stripes) can use a large `height` and wrap forever; a single non-tiling image (one closed circuit) needs a small `height` or the far distance repeats it.
```python
import picogame as pg
import picogame_mode7 as m7
cam = m7.Camera(fov=0.9)
def ground(view, vx, vy, vw, vh):
for r in range(vh): # sky: fill rows above the horizon yourself
if vy + r < HORIZON:
view.fill_rect(0, r, vw, 1, SKY)
cam.draw(view, TRACK, car.x, car.y, car.heading, HORIZON, 5.0, y_off=vy)
scene.add(pg.StripDraw(ground, 0, 0, W, H)) # 0 retained bytes
# ...each frame: move car.x/y/heading, then scene.refresh()
```
Gotchas
Draw into a **`StripDraw` view**, not a full-screen `Canvas` - a 320×240 `Canvas` is \~150 KB and won’t fit on RP2040, while a `StripDraw` view is 0 retained RAM. Always pass `y_off=vy` in the callback or the horizon lands in the wrong place per strip. The texture dims must be powers of two. For the lowest-level control you can call `Canvas.mode7(...)` directly (10 fixed-point args); the `Camera` helper just computes them from a friendly pose.
## picogame\_ray
[Section titled “picogame\_ray”](#picogame_ray)
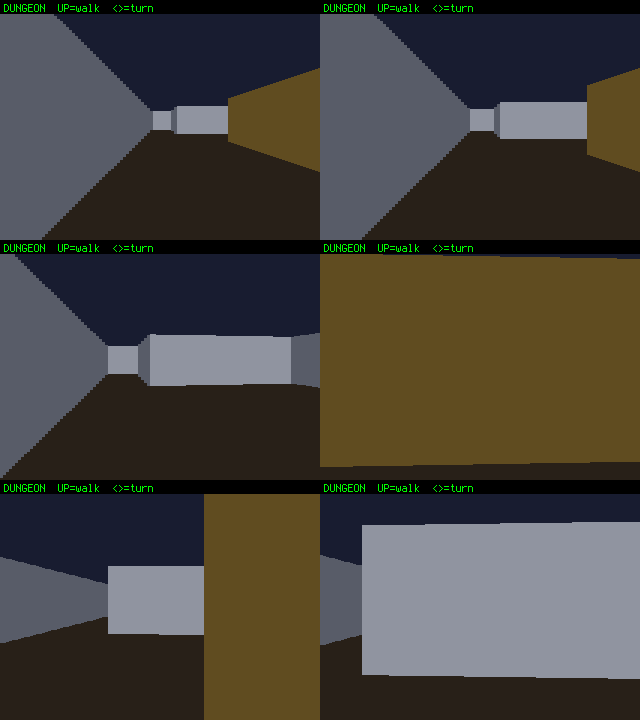
A **Wolfenstein-style raycaster**: one DDA ray per screen column finds the nearest wall, and each column is drawn as a distance-shaded vertical bar. The per-column DDA is the native engine caster `pg.raycast` (integer 16.16 C on device, a Python version in the sim); the lib does the trig, paint and dirty-band bookkeeping, and the walls are solid `fill_rect` columns into a `StripDraw` view.
`import picogame_ray`
### `picogame_ray.Raycaster` - first-person wall caster
[Section titled “picogame\_ray.Raycaster - first-person wall caster”](#picogame_rayraycaster---first-person-wall-caster)
* `Raycaster(world, wall_colors, sky, floor, fov=0.66, stride=2)` - `world` is a list of equal-length strings (`'0'` = empty, `'1'`..`'9'` = wall types); `wall_colors` maps each wall type to a `(face_colour, side_colour)` pair (the side colour a touch darker = a free depth cue); `sky`/`floor` are wire-RGB565 backgrounds. `stride` casts one ray per N columns - the **perf/quality knob** (see below).
* `.cast(px, py, ang, sw, sh)` - cast the rays for camera position `(px, py)` and heading `ang`, caching each column’s wall span. Call once per frame **before** `scene.refresh()`.
* `.draw(view, vx, vy, vw, vh)` - the `StripDraw` callback: paints the sky/floor bands and the wall columns. Adjacent identical columns are merged into one `fill_rect`.
* `.solid(x, y)` - is the map cell at integer `(x, y)` a wall? Use it for movement collision (out of bounds counts as a wall).
* `.attach(stripdraw)` - opt into **temporal rendering**: pass the `StripDraw` (created `always_dirty=False`) that draws this raycaster, and `cast()` invalidates only the column band that changed since the previous frame (a still camera repaints nothing). Big win when standing / moving slowly.
* `.zbuf` - after `cast()`, each column’s wall distance (16.16 fixed-point; the depth buffer `project_sprite` tests against).
* `.project_sprite(sx, sy, margin=0.2)` - project a world-space point `(sx, sy)` onto the screen for the last `cast()`. Returns `(screen_x, size, depth)`, or `None` if the point is behind the camera or hidden by a nearer wall. `size` is the on-screen height in px at the wall scale - set `sprite.scale = size / bitmap_height`; sort your sprites by `depth` far-to-near so nearer ones draw on top. `margin` is z-test slack so a sprite flush against a wall is not culled.
```python
import picogame as pg
import picogame_ray
MAP = ["1111111111", "1000000001", "1011100201", "1000000001", "1111111111"]
WALLS = {1: (pg.rgb565(150, 150, 160), pg.rgb565(95, 95, 110)),
2: (pg.rgb565(170, 90, 60), pg.rgb565(110, 55, 35))}
rc = picogame_ray.Raycaster(MAP, WALLS, pg.rgb565(30, 30, 48), pg.rgb565(40, 34, 30), stride=2)
scene.add(pg.StripDraw(rc.draw, 0, 0, W, H))
# ...each frame:
rc.cast(px, py, ang, W, H) # cast, then paint
scene.refresh()
# ...to move without walking through walls:
if not rc.solid(int(nx), int(py)):
px = nx
```
### Enemies & pickups - billboard sprites
[Section titled “Enemies & pickups - billboard sprites”](#enemies--pickups---billboard-sprites)
The raycaster draws only walls; enemies and pickups are ordinary `Sprite`s scaled and placed each frame from `project_sprite`, depth-tested against the walls so they hide behind corners. Add the sprites to the Scene **after** the `StripDraw` so they layer on top, and reuse a [`picogame_pool.Pool`](/helpers/math/) rather than creating them per frame.
```python
GUYS = [Enemy(3.5, 2.5), Enemy(6.5, 3.5)] # world (tile) positions
for g in GUYS:
g.spr = pg.Sprite(DEMON_BMP, -40, -40) # DEMON_BMP is 8 px tall
g.spr.anchor = (0.5, 0.5)
scene.add(g.spr) # AFTER the StripDraw -> on top of walls
def frame():
rc.cast(px, py, ang, W, H) # cast walls (fills rc.zbuf)
GUYS.sort(key=lambda g: -((g.x - px) ** 2 + (g.y - py) ** 2)) # far-to-near
for g in GUYS:
p = rc.project_sprite(g.x, g.y)
if p:
sx, size, _ = p
g.spr.move(sx, HORIZON) # centre on the horizon row
g.spr.scale = size / 8.0 # bitmap is 8 px tall
g.spr.visible = True
else:
g.spr.visible = False # off-screen or behind a wall
scene.refresh()
```
Gotchas
The per-column DDA is the **native `pg.raycast` caster** (C on device, integer 16.16 - no FPU; a Python version in the desktop sim), so a full-screen raycaster runs about **22-30 fps** on RP2040. Two Python-side levers help further: **temporal rendering** - create the `StripDraw` with `always_dirty=False` and call `rc.attach(sd)`; `cast()` then repaints only the column band that changed since the last frame, and a still camera re-casts nothing (pose-cache), so standing / moving slowly is \~30 fps (great for grid-step dungeon crawlers). And **`stride`** (1 = sharpest walls; 3 a good RP2040 balance; 6 fastest) trades crispness for speed; a larger `picogame_game.setup(strip_h=…)` also cuts the repaint. Occasional single-column “teeth” show at grazing angles (inherent to DDA). `project_sprite` depth-tests at the sprite’s **centre column**, so a billboard is shown or hidden as a whole - fine for one sprite, but it is not clipped half-behind a wall edge.
# Text & UI
> Bitmap text, HUD labels, dialog boxes, cursor menus, and editable options.
These modules render bitmap text and provide HUD, dialog, menu, grid-cursor, and options controls. See the [reference](/reference/) for signatures and the tutorials for complete examples.
## picogame\_font
[Section titled “picogame\_font”](#picogame_font)
This module renders a `fontio` font, commonly `terminalio.FONT`, into a PAL8 `picogame.Bitmap`. Use it for text that needs to become a sprite or an immediate label.
If you just want a score in a corner, `Label` is the simplest choice; the fuller widget picture (scene layers vs. immediate widgets) is explained below under [picogame\_ui](#picogame_ui).
* `render_text(pg, font, text, fg, bg=None)` - composes `text` into a `PAL8` bitmap and returns the tuple `(bmp, w, h)` (bitmap plus pixel size). `fg`/`bg` are wire colours from `pg.rgb565(...)`. `bg=None` leaves the background transparent (palette index 0); an opaque `bg` means a redraw fully overwrites the old text, so HUD updates need no separate clear.
* `render_text_pal(pg, font, text, fg, bg=None)` - same as above but returns `(bmp, w, h, palette)`. Keep the `palette` (an `array('H')`) and mutate `palette[1]` (the fg colour) for a live colour shimmer without rebuilding the bitmap - the C `Bitmap` reads the same buffer.
* `Label(pg, font, x, y, fg, bg)` - a positioned label drawn immediately (good for a HUD over a screen you render yourself).
* `.set(text)` - re-renders only if the text changed; returns `True` if it did, `False` if skipped. Coerces non-strings via `str()`.
* `.move(x, y)` - repositions and forces a re-render at the new spot on the next `set`/`draw`.
* `.draw(display, buffer)` - repaints just the label’s rectangle via `pg.render` (a single present).
* `.w`, `.h` - pixel size of the last rendered text.
```python
import picogame_font, terminalio
hud = picogame_font.Label(pg, terminalio.FONT, 4, 4,
pg.rgb565(255, 255, 255), BG)
shown_score = -1 # shadow int: last value the label shows
# each frame, after you draw the screen:
if score != shown_score: # only format when the number changes
shown_score = score
hud.set("SCORE %06d" % score)
hud.draw(board.DISPLAY, bufA) # repaints just its rect
```
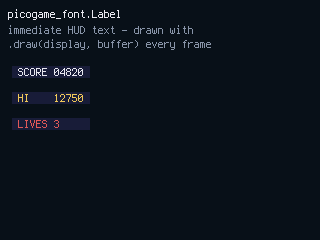
Gotchas
after changing `bmp.palette` or the array returned by `render_text_pal()`, the new colour appears on the next repaint. Use `picogame_ui.SceneLabel` over a live scene; an immediate `Label` is not tracked by `scene.refresh()`.
### Extra glyphs: `ExtraFont`
[Section titled “Extra glyphs: ExtraFont”](#extra-glyphs-extrafont)
`terminalio.FONT` is ASCII only. `picogame_font.ExtraFont` extends it with glyphs from one or more small BDF files, looked up as **fallbacks** — the built-in font first, then each BDF in order, so extra files only ever *add* glyphs and blend seamlessly with normal text. Two subsets ship in `lib/fonts/` (cut from CircuitPython’s own Terminus build, the same one `terminalio.FONT` comes from):
* **`picogame_cz.bdf`** — Czech diacritics (á č ď é ě í ň ó ř š ť ú ů ý ž and capitals).
* **`picogame_symbols.bdf`** — game symbols: arrows, hearts, block/shade fills, triangles, ✓/✗, ♥ ♫ ☼, ° ½ × ÷ and more:
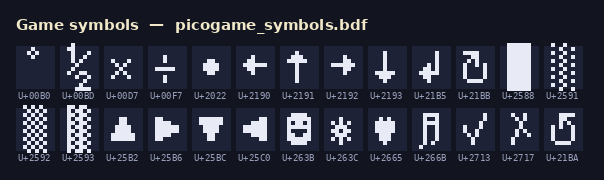
```python
import picogame_font
font = picogame_font.ExtraFont("/lib/fonts/picogame_cz.bdf", "/lib/fonts/picogame_symbols.bdf")
bmp, w, h = picogame_font.render_text(pg, font, "Život 3 ♥♥♥ →", fg)
```
Pass the `ExtraFont` anywhere this module takes a font (`render_text`, `render_text_pal`, `Label`, and the `picogame_ui` widgets built on them). Glyphs load eagerly (\~20 B each; a 30-glyph set is under 1 KB).
**Limitation:** `ExtraFont` is a *Python-side* font for this module’s render paths only. The **native C text path** (`picogame.Canvas.text`, and therefore `picogame_ui.SceneLabel` / `HudBar` and a `StripDraw` `view.text`) validates a `fontio.BuiltinFont` in firmware and will **not** accept an `ExtraFont` — use the `render_text`/`Label` path when you need the extra glyphs. To make your own subset, `tools/make_bdf_subset.py`.
## picogame\_bitfont
[Section titled “picogame\_bitfont”](#picogame_bitfont)
This 8×8 bitmap font uses four shades and includes arrows, hearts, a star, a note, and box-drawing symbols in codes 0–31; codes 32 and above cover ASCII. Its outline can keep transparent text legible over the game world.
* `render_text(pg, text, fg=None, outline=None, mid=None, bg=None)` - renders `text` to a `PAL8` bitmap and returns `(bitmap, w, h)`. The four shades map to: `0 -> bg`/transparent, `1 -> outline`, `2 -> mid`, `3 -> fg`. Colour defaults: `fg` white, `outline` black, `mid` mid-grey; all are `rgb565` wire colours. Supports `\n` for multi-line. Pass `bg` for an opaque background (else index 0 is transparent).
* Symbol constants (1-char strings you concatenate into text): `ARROW_U`, `ARROW_D`, `ARROW_R`, `ARROW_L`, `BOXX`, `STAR`, `HEART`, `BALL`, `NOTE`.
* `GLYPH_W`, `GLYPH_H` - both `8`, the per-glyph cell size.
```python
import picogame_bitfont as bf
bmp, w, h = bf.render_text(pg, "LIVES " + bf.HEART * 3) # white, outlined, transparent
spr = pg.Sprite(bmp, x, y) # place anywhere
spr.scale = 2 # scale up for big text
```
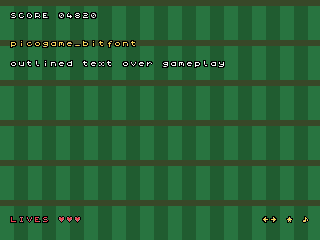
Gotchas
the module returns a bitmap but does not provide a label class. Create and update its `Sprite` yourself. Each rendered string occupies its own PAL8 pixel buffer; see [memory](/memory/) when choosing between persistent text sprites and immediate text.
## picogame\_ui
[Section titled “picogame\_ui”](#picogame_ui)
Choose widgets by who owns the affected pixels:
* `SceneLabel`, `SceneBox`, and `SceneMenu` are fixed scene layers. `scene.refresh()` repaints them when needed, so use them inside a live or scrolling scene.
* `picogame_font.Label`, `TextBox`, and `Menu` draw immediately through `pg.render()`. Use them on a screen whose redraw you control. `HudBar` is also immediate, but belongs in a border reserved outside the scene.
Pick by what owns the pixels:
| Situation | Class |
| ----------------------------------------------------------------------- | ------------ |
| Static screen you redraw yourself (title, game-over, a HUD you repaint) | `Label` |
| A live, scrolling scene where the HUD must **not** scroll | `SceneLabel` |
| A reserved edge bar / status strip | `HudBar` |
| A transient dialog / message box over the live world | `SceneBox` |
| A dialog / battle / menu box on a static screen | `TextBox` |
`tick()`-based widgets return: a chosen index/cell on **A** (confirm), `ui.CANCEL` (`-2`) on **B** (back), or `None` while navigating. See [scene-format](/scene-format/) for the `fixed` layer and [hardware](/hardware/) for the buttons.
**`SceneLabel(scene, pg, font, x, y, fg, bg)`** - one line of text pinned over a scrolling world.
* `.set(text)` - re-renders only on change (swaps the sprite’s bitmap; dirty-rect handles old/new bounds). A blank/empty string hides the sprite, leaving no leftover bg patch.
* `.reserve(chars)` - reserve the label’s text buffer **now**, on the fresh startup heap, for up to `chars` characters, so a long line first shown *later* (e.g. a game-over banner) isn’t allocated on a fragmented heap (a `MemoryError`). Renders nothing visible. See [memory](/memory/).
**`SceneBox(scene, pg, font, x, y, w, h, fg, bg, nlines=3, key=None, border=None)`** - a multi-line dialog or status panel over a live scene. Its `StripDraw` callback composites the panel, border, and text without retaining a pixel surface. Pass `border` for a raised frame.
* `.show(lines)` - fill the panel and set text, then reveal. **Call once**, not per frame.
* `.hide()` - make the panel fully transparent and blank the rows.
* `.set_line(i, text)` - update one row in place (no Canvas/border redraw).
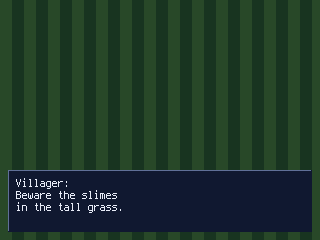
**`HudBar(pg, display, buffer, x, y, w, h, bg)`** - an immediate HUD drawn in a border reserved with `Scene(..., top=/bottom=)`. Call `draw()` only after its contents change. It stores label strings and icon references but no panel-sized pixel surface. `buffer` is the render buffer from setup on SPI targets and may be `None` on framebuffer targets.
* `.add(sprite)` - store an icon sprite (hearts, gauges) in the bar; returns it. It’s blitted at its own x/y on `draw()`.
* `.label(font, x, y, fg, text=" ")` - add a text field; returns a `_HudLabel` **handle** (not a sprite) which you update with `handle.set(text)` (the same `.set` verb as `SceneLabel`). The text is composited directly, no per-label sprite.
* `.draw()` - repaint the bar (flat bg + icons + text) and push it in one `pg.render`. Takes no arguments - the bar stores the display/buffer/geometry at construction. Call only on HUD changes.
```python
hud = ui.HudBar(pg, board.DISPLAY, bufA, 0, 0, W, BAR, pg.rgb565(10, 12, 24))
hud_l = hud.label(terminalio.FONT, 4, 3, INK, "SCORE 0 LIVES 3")
hud.draw()
# later, only when it changes:
hud_l.set("SCORE %d LIVES %d" % (score, lives))
hud.draw()
```
**`TextBox(pg, font, x, y, w, h, fg, bg, maxlines=6)`** - a screen-space multi-line box (filled rect + text rows) for static dialog/battle/menu screens.
* `.draw(display, buffer, lines, force=False)` - skips the repaint when `lines` are unchanged; when it does draw, the bg and every row go out in **one** `pg.render` (no blank-fill flash). Pass `force=True` after the screen under it was wiped (e.g. a full-screen `pg.render`).
* `.draw_line(display, buffer, i, text)` - repaint a single row in place, atomically.
**`Menu(pg, font, x, y, items, fg, bg, *, title=None, rows=None, width=None, paged=True)`** - an immediate cursor menu built on `TextBox`. UP and DOWN use auto-repeat. `rows=None` shows all items; a smaller value creates a scrolling window. With `paged=True`, crossing an edge moves by a page instead of one row. Arguments after `*` are keyword-only.
* `.tick(btn)` - returns the chosen index on A, `ui.CANCEL` on B, else `None`.
* `.draw(display, buffer, force=False)` - repaints only what changed (nothing / the 2 affected rows on a cursor move / the whole box on scroll). `force=True` repaints unconditionally after a wipe.
```python
bmenu = ui.Menu(pg, terminalio.FONT, 8, H - 72,
["ATTACK", "MAGIC", "HEAL", "FLEE"], WHITE, NAVY)
# each frame:
act = bmenu.tick(btn) # index on A, ui.CANCEL on B, else None
bmenu.draw(board.DISPLAY, bufA)
```
**`SceneMenu(scene, pg, font, x, y, items, fg, bg, title=None, rows=None, width=None, border=None, paged=True)`** - the same menu but built on `SceneBox`, for use **over a live scene** (battle actions, an in-game popup). Same navigation/paging as `Menu`.
* `.show(sel=0)` - reveal it (resets the cursor). The scene paints it from then on - no `draw()` call.
* `.hide()` - hide it.
* `.tick(btn)` - same return contract as `Menu`; repaints only the rows that changed.
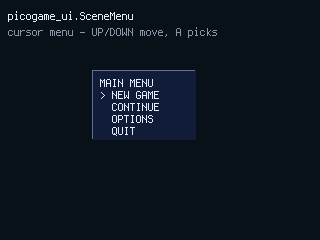
**`GridCursor(cols, rows, tx=0, ty=0, wrap=False)`** - logic-only 2D cursor for a battlefield, tile inventory, or match-3. It owns movement (D-pad auto-repeat) and confirm/cancel; *you* draw the grid and a highlight at `(cursor.tx, cursor.ty)`. `wrap=True` wraps at edges, else it clamps.
* `.tick(btn)` - returns the `(tx, ty)` tuple on A, `ui.CANCEL` on B, else `None`.
* `.tx`, `.ty` - current cell.
* `.index` (property) - `ty * cols + tx`, handy for indexing a flat list.
```python
cur = ui.GridCursor(N, N) # N x N board
# each frame:
pick = cur.tick(btn) # (tx, ty) on A, ui.CANCEL on B, else None
# you draw the highlight yourself at (cur.tx, cur.ty)
```
Gotchas
an immediate `Menu` or `TextBox` is not part of the scene and can be overwritten by a later `scene.refresh()`. Use the corresponding `Scene*` widget over a live scene. The default menu width estimates about 11 pixels per character; pass `width=` when using a narrow font or long labels. Call `SceneBox.show()` when its contents change, not every frame.
## picogame\_options
[Section titled “picogame\_options”](#picogame_options)
`OptionsMenu` adds editable rows to a `SceneBox`. Use it for settings, shops, or selection screens that combine choices, numeric steps, toggles, and actions. It is a scene-layer widget, so `scene.refresh()` displays value changes.
* `OptionsMenu(scene, pg, font, x, y, w, rows, fg, bg, title=None, border=None)` - `rows` is a list of dicts, each with a `kind`:
* `choice` - `{"key", "label", "kind": "choice", "choices": [...]}`; cycles through the list. (A non-empty `choices` is required - it raises `ValueError` up front otherwise.)
* `stepper` - `{"key", "label", "kind": "stepper", "value", "min", "max"}`; also honours an optional `"step"` (default 1). Clamps to `min`/`max`.
* `toggle` - `{"key", "label", "kind": "toggle", "value": True/False}`.
* `action` - `{"key", "label", "kind": "action"}`; no value, just returns its key on A.
* `.show(sel=0)` - reveal and render (call once); `scene.refresh()` paints it after.
* `.hide()` - hide the panel.
* `.tick(btn)` - UP/DOWN move the cursor; LEFT/RIGHT change the selected row’s value live (steppers/choices auto-repeat while held; a toggle flips only on a fresh press, so it can’t oscillate). Returns the selected row’s `key` on **A**, `ui.CANCEL` on **B**, else `None`.
* `.value(key)` - read a row’s current value any time: a `choice` returns the chosen string, a `stepper` an int, a `toggle` a bool; `None` if no such key.
```python
import picogame_options as opt
menu = opt.OptionsMenu(scene, pg, font, 40, 40, 240, [
{"key": "diff", "label": "Difficulty", "kind": "choice", "choices": ["Easy", "Normal", "Hard"]},
{"key": "vol", "label": "Volume", "kind": "stepper", "value": 7, "min": 0, "max": 10},
{"key": "snd", "label": "Sound", "kind": "toggle", "value": True},
{"key": "done", "label": "Start", "kind": "action"},
], WHITE, NAVY, title="OPTIONS")
menu.show()
while True:
btn.poll()
k = menu.tick(btn)
if k == "done":
diff = menu.value("diff") # read live values on the action row
elif k == opt.CANCEL:
menu.hide()
scene.refresh() # paints the menu - no draw() call
```
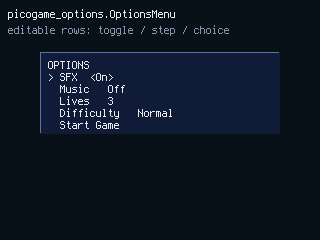
Gotchas
it imports `CANCEL` from `picogame_ui`, so `opt.CANCEL` and `ui.CANCEL` are the same `-2`. Being a `SceneBox` widget, it needs a live `scene.refresh()` under it - it won’t paint on a static screen drawn purely with `pg.render`.
# The games menu (launcher)
> The launcher is the menu picogame boots into — pick a game with the D-pad. How it finds games, its controls, and how to add your own.
The launcher is picogame’s **games menu** — the official, and optional, way to keep several games on one board and switch between them. Copy games onto the drive and the launcher lists them; pick one with the D-pad and play, reset to come back.
It’s optional: the [quick-start packs](/start/quickstart/) boot into the launcher (their root `code.py` runs it), but a board whose `code.py` is a single game just runs that game — no menu. Use the launcher when you want more than one game on the same board.
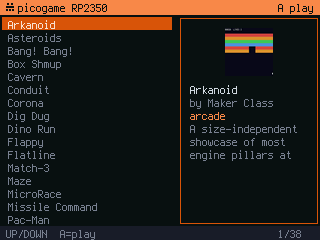
## Controls
[Section titled “Controls”](#controls)
* **UP / DOWN** — move through the list.
* **A** — start the highlighted game.
* **RESET** (the board’s reset button) — return to the launcher from a game.
## How it finds games
[Section titled “How it finds games”](#how-it-finds-games)
By default the launcher scans the `demos/`, `games/` and `apps/` folders on the drive — a missing one is simply skipped. Each game is a **folder** with a `code.py` entry and its compiled `.mpy`:
```plaintext
games/
picotris/
code.py # 2-line stub that imports the game
picotris.mpy # the compiled game
metadata.json # title, icon, ... (optional)
icon.bmp # menu icon (optional)
```
A folder with a `code.py` but no metadata still shows up — the launcher falls back to the folder name and a letter placeholder icon.
A custom boot `code.py` can scan a different set of folders — just pass them: `picogame_launcher.run(roots=("mygames", "demos"))`.
## Add your own game
[Section titled “Add your own game”](#add-your-own-game)
1. Compile your game to `.mpy` (`mpy-cross yourgame.py`), or drop the `.py` in to compile on-device.
2. Make a folder in `apps/` — that’s where your own games go, next to the bundled `games/` and `demos/` — say `apps/yourgame/`, with a `code.py` stub that imports it:
```python
import yourgame
```
3. Optional — add a `metadata.json` beside it so it reads nicely in the menu, plus a small `icon.bmp` (a 48-pixel BMP works well):
```json
{
"title": "Your Game",
"author": "You",
"category": "arcade",
"players": 1,
"desc": "One line about it.",
"icon": "icon.bmp"
}
```
4. Reset the board — it appears in the menu.
## Two ways to describe a game
[Section titled “Two ways to describe a game”](#two-ways-to-describe-a-game)
A folder can carry a small manifest so it reads nicely in the menu. Two formats work:
* **`metadata.json`** — simple and **FruitJamOS-compatible** (`title` + `icon`, plus optional `author`, `category`, `players`, `desc`, `entry`). One game per folder — this is what the example above uses, so the same folder shows up in both menus.
* **`picogame.json`** — the richer form. Either a flat object (`title`, `entry`, `icon`, …) for one game, or an **`"apps"` list** to offer **several games from one folder** — handy for a collection or a game with variants:
```json
{
"apps": [
{ "title": "Game A", "entry": "a.py", "icon": "a.bmp" },
{ "title": "Game B", "entry": "b.py", "icon": "b.bmp" }
]
}
```
Each entry names its own `entry`, `title` and `icon` (and optional `author`/`category`/`players`/ `desc`). `picogame.json` is read before `metadata.json`.
# Managing RAM & avoiding heap fragmentation on CircuitPython
> A general CircuitPython / MicroPython memory note: how to fit a long-running program in RAM — know the budget, know what the big items cost, measure instead…
Seeing a `MemoryError`? Start here.
This page is the way out: budget your RAM, measure what’s eating it, and clear the error step by step — most fits are a few changes, not a rewrite. Build and debug in the [simulator](/simulator/) first; optimise later.
A general CircuitPython / MicroPython memory note: how to fit a long-running program in RAM — know the budget, know what the big items cost, measure instead of guessing — and how to avoid heap fragmentation. The technique at the end (a pre-allocated **arena**) is broadly reusable.
Applied the fix but nothing changed?
A stale `.mpy` in the board’s `/lib` **shadows** the matching `.py` at import, so a Python edit never runs — delete or rebuild it after any lib change (see [Run on hardware](/hardware/)).
MemoryError triage — start here
A `MemoryError` mid-game almost always means **no contiguous block big enough**, not “out of RAM”. Work down this list and stop at the first fix that sticks:
1. **Measure the largest *contiguous* block, not total free** — `micropython.mem_info(1)` or the [`largest_block()` helper below](#measure-dont-guess). That’s the number a big allocation has to fit into.
2. **Move HUD / text / panels off retained buffers** onto `StripDraw` (composite `Canvas.text` into a strip view) — see [Drawing paths](/concepts/drawing-paths/).
3. **Allocate big buffers once at boot; arena the churny ones** — [pre-allocated arena](#the-fix-for-churn-a-pre-allocated-arena).
4. **Pool per-frame spawns** instead of create/destroy churn — [`picogame_pool`](/helpers/building-scenes/).
5. **Freeze or stream large assets** rather than copying them onto the heap — [frozen vs file vs streaming](#where-assets-live-frozen-vs-file-in-ram-vs-streaming).
6. **`gc.collect()` at scene / level boundaries** to merge freed blocks.
7. **Still failing after a fix?** A stale `.mpy` may be **shadowing your `.py`** — see the note above.
## The budget, and what eats it
[Section titled “The budget, and what eats it”](#the-budget-and-what-eats-it)
The Python heap on a small board is the scarce resource, and **assets dominate it**. The recurring costs (bytes):
| Item | Cost | Notes |
| ---------------------------------- | -------------------------- | ----------------------------------------------------- |
| Retained `Canvas` surface | `w * h * 2` | a 320×80 panel = 51 200 B — the classic budget killer |
| PAL8 bitmap (sprites, backgrounds) | `w * h` (+ palette) | RGB565 bitmap costs double |
| Strip buffers (from `setup()`) | `2 × width × strip_h × 2` | e.g. 320×8 ≈ 10 KB for the pair |
| Sprite pool | \~sprite object × capacity | bitmaps are shared; the pool caps the worst case |
| Text label bitmap | text area × 1–2 B/px | or 0 retained via `Canvas.text` into a StripDraw view |
Totals differ per board and firmware build — don’t budget from a headline number; measure your own build (next section). As a rule of thumb, plan your biggest surfaces first: whatever the free heap is, one full-screen retained surface (`320*240*2` = 150 KB) will not fit on an RP2040-class board, and a couple of large panels can eat half of it.
## Where assets live: frozen vs file-in-RAM vs streaming
[Section titled “Where assets live: frozen vs file-in-RAM vs streaming”](#where-assets-live-frozen-vs-file-in-ram-vs-streaming)
A bitmap’s pixels have to be *somewhere*, and on a small heap the choice decides whether the game fits. The trap first: **CIRCUITPY is a FAT filesystem in flash, but it is NOT memory-mapped**, so importing a big `.mpy` or reading a file **copies it to the heap**. Only **frozen** data is read in place from flash, so “it’s on flash” ≠ “it’s free”. Three tiers:
| Approach | Heap cost | Swap art w/o reflash? | Best for |
| --------------------------------------------- | ------------------------------ | --------------------- | -------------------------------------------- |
| **Frozen** (`FROZEN_MPY_DIRS`) | \~0 (read in place from flash) | no | the bulk of resident art on a tight build |
| **File → RAM** (`readinto` once) | whole sheet `w*h*frames` | yes | sheets that fit + quick art iteration |
| **Streaming** (`picogame_stream.StreamSheet`) | \~one frame | yes | a few BIG sprites/backgrounds that won’t fit |
* **Frozen:** the art is a module with a `bytes` literal (`DATA = b'...'`) frozen into the firmware; `pg.Bitmap(DATA, ...)` references it in place. Changing the art means a reflash.
* **File → RAM:** ship a `.bin` on CIRCUITPY, `f.readinto(blob)` into ONE pre-sized `bytearray` at load (not `read()` — that fragments), slice the `memoryview` into Bitmaps.
* **Streaming:** `StreamSheet` keeps **one frame** in RAM; `use(i)` seeks + `readinto`s it on demand. A flash read per frame change — fine for a few big sprites at animation rates, wasteful for hundreds of tiny ones. The `.bin` must be frame-major (`tools/pack_sheet.py`).
Rule: **freeze what you always need, stream the few big things that don’t fit, keep small often-used sheets in RAM.** Mix all three in one game.
## Measure, don’t guess
[Section titled “Measure, don’t guess”](#measure-dont-guess)
* `gc.mem_free()` — total free heap. Take readings after `gc.collect()`, at fixed points (after imports, after `setup()`, in the game loop) so runs are comparable.
* **Largest contiguous block** — what a big allocation actually needs; there’s no built-in, binary-search it:
```python
import gc
def largest_block():
gc.collect()
lo, hi = 0, gc.mem_free()
while hi - lo > 256:
m = (lo + hi) // 2
try:
b = bytearray(m); del b; lo = m
except MemoryError:
hi = m
gc.collect()
return lo
```
* `import micropython; micropython.mem_info(1)` dumps the full heap map (what’s live and where) on firmware built with the diagnostics enabled — the tool for *why* it’s fragmented.
## Common optimizations (in the order to try them)
[Section titled “Common optimizations (in the order to try them)”](#common-optimizations-in-the-order-to-try-them)
1. **Don’t allocate the surface at all.** Text and HUD/panel content can composite straight into the render strip (`Canvas.text` into a `StripDraw` view; the `picogame_ui` widgets already work this way) — no retained pixel buffer, nothing on the heap to fragment. Which drawing path costs what, and when a retained `Canvas` *is* justified, is covered by [Drawing paths](/concepts/drawing-paths/).
2. **Store a full-screen background as a tilemap, not a bitmap.** A 320×240 PAL8 background is \~75 KB (RGB565 doubles it) — often too much on an RP2040. Cut the image into 8×8 tiles, keep only the *unique* tiles (a small tileset) plus a grid of indices, and draw it with a [`Tilemap`](/engine/) layer. Backgrounds repeat a lot, so the tileset + index grid is a fraction of the full bitmap. `png2picogame.py --dedup` merges identical (and rotated/mirrored) tiles for you; this is how the Fruit Jam MoonMiner port fits its full-screen scenes on an RP2040.
3. **Allocate big/long-lived buffers first, at boot**, and keep them; don’t free and re-create them per level/screen.
4. **Pre-size on-demand buffers to their WIDEST content at boot.** A text label created short and later set to a longer string re-allocates a bigger buffer *mid-run*; on a fragmented heap that’s a `MemoryError`. (Create HUD labels at their widest string; `SceneLabel.reserve(chars)` pre-sizes a banner shown only at game-over.)
5. **Object pools** for many small same-size objects (sprites, requests): reuse instead of alloc/free churn ([`picogame_pool`](/helpers/building-scenes/)).
6. **`recv_into` / `readinto`** (and other `*_into` APIs) read into an existing buffer instead of allocating a new bytes object each call.
7. **`gc.collect()` at natural boundaries** (end of a request/level) to merge adjacent free blocks; necessary but not sufficient (it can’t move live objects). `gc.threshold(n)` triggers GC earlier and keeps the heap tidier.
8. **Import everything up front, not lazily mid-run** — CircuitPython relocates import-time “long-lived” objects to the end of the heap on the first GC, keeping the low heap contiguous for working allocations.
## Fragmentation: total free is not the largest block
[Section titled “Fragmentation: total free is not the largest block”](#fragmentation-total-free-is-not-the-largest-block)
MicroPython/CircuitPython use a **non-moving** mark-and-sweep GC: it frees unreachable objects but **never moves live ones** (objects are referenced by raw pointers, and the C stack is scanned conservatively, so relocating them safely isn’t possible). Adjacent free blocks are merged on `gc.collect()`, but free space split by **live** objects stays split.
Consequence: after a program has allocated and freed many differently-sized buffers, the heap fragments. You can have **lots of total free RAM but no single contiguous block** big enough for the next large allocation:
```text
gc.mem_free() -> 90000 # 90 KB free...
bytearray(51200) # ...but this raises MemoryError (no 51 KB contiguous run)
```
`gc.mem_free()` reports total free; what a big allocation needs is the **largest contiguous free block**, which can be far smaller and which shrinks as a session fragments.
### When it bites
[Section titled “When it bites”](#when-it-bites)
Any pattern that **repeatedly allocates and frees a large buffer** during one run:
* **Networking / web:** reading an HTTP response, a JSON/MQTT payload, a TLS record, an image download, each request grabbing (and freeing) a fresh kilobyte-scale buffer.
* **File / stream processing:** reading a file in chunks, decompressing, parsing.
* **Audio:** per-clip sample buffers.
* **Graphics:** full-/large-screen drawing surfaces (e.g. a `displayio`/`picogame` Canvas) created per screen/level.
A single big buffer allocated **once at boot** and kept forever is fine (it gets a contiguous block while the heap is fresh). The problem is the **churn**.
## The fix for churn: a pre-allocated arena
[Section titled “The fix for churn: a pre-allocated arena”](#the-fix-for-churn-a-pre-allocated-arena)
Grab **one** big buffer **once, early** (when the heap is fresh and contiguous), then hand out slices of it for the large transient buffers. Those buffers then never alloc/free at runtime, so they can’t fragment anything. Reuse the same arena bytes for work that doesn’t overlap in time.
[`lib/picogame_arena.py`](/helpers/data/) is a tiny, general implementation (it’s in the picogame lib but the `Arena` class is not game-specific):
```python
import picogame_arena
AR = picogame_arena.Arena(4096) # 4096 bytes, grabbed up front (size = your max)
# --- networking example: reuse ONE response buffer instead of churning ---
buf = AR.alloc(4096) # a memoryview slice, no per-request alloc
while True:
AR.reset() # reuse the same bytes each request
n = sock.recv_into(buf) # read straight into the arena slice
process(buf[:n]) # parse without allocating another big buffer
```
```python
# --- graphics example (picogame): back big Canvases with arena memory ---
AR = picogame_arena.Arena(320 * 80) # pixels (x2 bytes); the biggest surface you need
AR.reset(); road = AR.canvas(320, 80) # one screen's big surface
# later, a different screen (not alive at the same time) reuses the same arena:
AR.reset(); shapes = AR.canvas(320, 44); btn = AR.canvas(160, 48)
```
API: `Arena(pixels)` (allocates `pixels*2` bytes), `alloc(nbytes) -> memoryview`, `canvas(w, h, transparent=None) -> Canvas` (needs the firmware `Canvas(..., buffer=)` arg), `reset()` (rewind the cursor, call at the start of each non-overlapping use), `free()`.
Key point: the arena makes the big allocation happen **once at startup** and the **slices never touch the heap**, so a session can run indefinitely without the “90 KB free but can’t allocate 51 KB” failure.
## Why not just defragment?
[Section titled “Why not just defragment?”](#why-not-just-defragment)
A true compacting/defragmenting GC isn’t feasible as an add-on: MicroPython objects reference each other by **raw pointers** (in Python, in C modules, in bytecode), and the GC scans the C stack **conservatively**, so it cannot safely move an object and rewrite every reference to it. That would require a different (precise / handle-based) object model in the VM core. The arena pattern is the practical answer: don’t let the big buffers churn in the first place.
See also the engine’s `Canvas(..., buffer=)` argument (back a drawing surface with [arena memory](/helpers/data/)) and the helper [`picogame_pool`](/helpers/building-scenes/) (object pools). Build and measure in the desktop simulator first; optimise only once you’ve measured where the RAM actually goes.
# Performance — keep your game fast
> A practical checklist for a steady frame rate on picogame — the game loop in a function, dirty-rect-friendly motion, zero-RAM layers, and no per-frame allocation.
picogame games run at a steady **30 FPS** when each frame fits in about **33 ms**. Most small games get there without effort — the rendering runs in native C, and the engine repaints only what moved. When a game does start to stutter, the fixes below are the ones that actually move the needle, in rough order of payoff. Every number here is measured on an RP2040.
## 1. Put the game loop in a function
[Section titled “1. Put the game loop in a function”](#1-put-the-game-loop-in-a-function)
This is the single biggest lever. In MicroPython, reading a **module-level global is a dictionary lookup** every time — and on the device that lookup is literally the hottest thing the interpreter does. Names inside a **function are locals**, which are far cheaper. So wrap your loop in a function and call it:
```python
def main():
x = W // 2 # locals — fast
while True:
buttons.poll()
if buttons.is_pressed(pi.RIGHT):
x += 2
ball.x = x
scene.refresh()
clock.tick()
main()
```
Measured on one real game, moving the loop into a function cut its Python time from **\~12 ms to \~8 ms per frame (−33 %)** — enough to turn a game that missed the cap into a solid 30 FPS.
## 2. Hoist lookups out of the hot loop
[Section titled “2. Hoist lookups out of the hot loop”](#2-hoist-lookups-out-of-the-hot-loop)
Same idea, one level down. If you touch `self.player.x` or `sprite.move` many times a frame, read it into a local once:
```python
def main():
px = ball.x # cache the attribute
poll = buttons.poll # cache the bound method
while True:
poll()
px += vx
ball.x = px
...
```
Repeated `obj.attr` and `obj.method()` each cost a lookup; a local costs almost nothing.
## 3. Move few things
[Section titled “3. Move few things”](#3-move-few-things)
picogame is **retained, dirty-rect** rendering: it redraws only the rectangles that changed, and on an SPI panel it only sends those pixels. A **static background with a small moving foreground** is the sweet spot. A change that touches most of the screen costs a full frame no matter what — so keep the moving-object count modest and let the background sit still. See [Drawing paths](/concepts/drawing-paths/).
## 4. Prefer zero-RAM layers
[Section titled “4. Prefer zero-RAM layers”](#4-prefer-zero-ram-layers)
* **StripDraw** draws full-screen effects (a road, a gradient sky, a scanline HUD) with **no pixel buffer** — zero extra RAM and nothing to keep in sync.
* **Tilemap** is **one byte per cell**, so a big scrolling world is cheap.
* Reach for a retained **Canvas** only for a small panel that rarely changes — a full-screen Canvas is a large buffer you usually don’t need. See [Fit it in RAM](/memory/).
## 5. Don’t allocate every frame
[Section titled “5. Don’t allocate every frame”](#5-dont-allocate-every-frame)
Creating objects in the loop feeds the garbage collector, and a `gc.collect()` can cost tens of milliseconds — a visible hitch. So:
* Spawn bullets, enemies and pickups from a fixed [`picogame_pool.Pool`](/helpers/data/), never `Sprite(...)` per frame.
* Reuse objects and buffers instead of rebuilding them; update a label’s text, don’t recreate it.
* Avoid building throwaway lists, tuples or strings inside the loop.
## 6. Ship `.mpy`, not big `.py`
[Section titled “6. Ship .mpy, not big .py”](#6-ship-mpy-not-big-py)
Pre-compile your game with `mpy-cross` (or let the packs do it). Compiled bytecode starts faster and avoids the heap churn of compiling a large source file on the device — which can itself `MemoryError`. See [Run on hardware](/hardware/).
## Measure, don’t guess
[Section titled “Measure, don’t guess”](#measure-dont-guess)
Some “obvious” tweaks do nothing — bumping the dirty-rectangle limit, for instance, was measured to make no difference, because a well-built scene isn’t rect-bound. Before optimising, find out where the time actually goes:
* In the **[desktop simulator](/simulator/)**, `python3 sim/run.py yourgame.py --profile` prints per- function call counts and per-frame allocation.
* On hardware, watch the frame time with an FPS readout (`picogame_debug`) and change one thing at a time.
Optimise the loop that the profile says is hot — not the one you guessed.
# Playground
> Try picogame in your browser — write Python and run it live, no install.
Write Python and run it **live in the browser** — the same `picogame` API as on the device, no install.
Pick an example from the dropdown (start with **first-game**, the companion to [Your first game](/start/first-game/)), edit the code, and press **Run**.
Audio here
`tone()` beeps and the `picogame_sfx` kit **do** play here (via WebAudio — press a key first to unlock sound). Custom `picogame_synth` voices don’t — the browser has no synthio backend — so preview those with `tools/synth_preview.py` and confirm on hardware. (The desktop simulator, by contrast, *does* play `picogame_synth` through its pygame window — see [Audio](/helpers/audio/) for what plays where.)
Screen:
Arrows/WASD move · `F`/`Ctrl`=A · `G`/`Space`=B · `R`/`Q`=X · `T`/`E`=Y
booting… 0 fps
🎮 Load example: —
▶ Run🔗 Share⛶ Fullscreen
```
```
Type `pg.` or `Ctrl-Space` for hints. Run = save & restart.
| Keys | |
| --------------- | ------------ |
| Arrows / `WASD` | move (D-pad) |
| `F` / `Ctrl` | A |
| `G` / `Space` | B |
| `R` / `Q` | X |
| `T` / `E` | Y |
Type `pg.` (or `Ctrl-Space`) for API hints.
# picogame — quick reference
> A one-page cheat sheet of the engine's everyday API: the native picogame C module and the pure-Python picogame_* helper libraries in lib/.
Cheat sheet
Every signature in one place. For explanations see the [full engine API](/engine/); to learn the engine, start with the [tutorials](/tutorials/).
A one-page cheat sheet of the engine’s everyday API: the native `picogame` C module and the pure-Python `picogame_*` helper libraries in `lib/`. Signatures show parameter names and defaults; `*` marks keyword-only arguments. Colours are wire-order RGB565 ints (build them with `rgb565`). For longer explanations see the [engine guide](/engine/).
**See also:** [Fit it in RAM](/memory/) · [Drawing paths](/concepts/drawing-paths/) · [Performance](/performance/) · [Run on hardware](/hardware/) · [Coming from another engine](/concepts/coming-from/).
***
## Native module: `picogame` (`import picogame as pg`)
[Section titled “Native module: picogame (import picogame as pg)”](#native-module-picogame-import-picogame-as-pg)
### Constants & colour
[Section titled “Constants & colour”](#constants--colour)
* `RGB565`, `PAL8` — bitmap pixel formats.
* `API_LEVEL` — `int`; engine API generation, bumped when the Python-visible surface grows. Libraries check `getattr(pg, "API_LEVEL", 0) >= N` to diagnose a too-old firmware up front instead of failing later on a missing attribute.
* `RGB444_SUPPORTED` — `bool`; whether this board’s panel can drive 12-bit RGB444 (lets one game opt into `Display(rgb444=True)` only where it works).
* `rgb565(r, g, b) -> int` — wire-order colour from 8-bit channels.
* `collide(x1, y1, x2, y2, ax1, ay1, ax2, ay2) -> bool` — AABB overlap (8 args = box vs box) or point-in-box (6 args: `collide(x1, y1, x2, y2, px, py)`). Inclusive AABB, so boxes collide when they touch (pass sprite boxes as `(x, y, x+w, y+h)`; fires on contact).
### `Bitmap(data, width, height, *, format=RGB565, palette=None, frames=1, stride=0, transparent=None)`
[Section titled “Bitmap(data, width, height, \*, format=RGB565, palette=None, frames=1, stride=0, transparent=None)”](#bitmapdata-width-height--formatrgb565-palettenone-frames1-stride0-transparentnone)
An image atlas of equal-size frames (any size). `data` is a buffer; `palette` (array of wire colours) is required for `PAL8`. `transparent` = the index/colour skipped when blitting.
* Read-only props: `width`, `height`, `frames`, `format`, [`stride`](/concepts/glossary/) (pixels per source row; leave `0` for tightly-packed data, set it only for a sub-window of a larger image), `palette` (the PAL8 palette buffer or `None`), `transparent` (the transparent value or `None`).
### `Sprite(bitmap, x=0, y=0, *, frame=0, visible=True, flip_x=False, flip_y=False)`
[Section titled “Sprite(bitmap, x=0, y=0, \*, frame=0, visible=True, flip\_x=False, flip\_y=False)”](#spritebitmap-x0-y0--frame0-visibletrue-flip_xfalse-flip_yfalse)
A positioned, animatable instance of a Bitmap.
* Position/anim props: `x`, `y` (int px) · `fx`, `fy` (float sub-pixel) · `frame` · `visible` · `flip_x`, `flip_y` · `bitmap` (swap) · `data` (your payload).
* Transform props (nearest-neighbour, about the anchor):
* `scale` — float draw scale; `1.0` = native (fast path), `2.0` = double size, fractional allowed (e.g. a pulse).
* `angle` — rotation in degrees; `0` = none (fast path). Combines with `scale`.
* `transpose` — bool; swaps X/Y axes. On its own that is a **diagonal mirror**, not a rotation; combine with a flip for a crisp, shimmer-free quarter-turn. With `flip_x`/`flip_y` it reaches all 8 orientations. Fast path only (scale 1, angle 0); footprint swaps w/h. Recipes (screen y-down): **90° CW** = `transpose+flip_y` · **180°** = `flip_x+flip_y` · **270° CW** = `transpose+flip_x`.
* `anchor` = `(fx, fy)` — pivot as fractions of the bitmap (0..1): `(0.5, 0.5)` = centre, `(0.5, 1.0)` = bottom-centre. `x`/`y` and rotation are about this point.
* Blit-effect props (one at a time; setting one clears the others; cheap, no extra bitmaps):
* `shadow` — bool; opaque pixels darken the destination (drop-shadow / dim overlay).
* `flash` — wire-RGB565 colour (or `0`/`None` = off); opaque pixels drawn as that flat colour (hit-flash). Pulse 1–3 frames.
* `tint` — wire-RGB565 colour (or `0` = off); opaque pixels *multiplied* by it, colouring the sprite while **keeping its shading** (damage-red, freeze-blue, glow).
* `dither` — `0` (opaque) .. `16` (invisible); Bayer-stipple translucency, no alpha (ghosts, fog, fade-in/out).
* `move(x, y)` — set position. · `touch()` — mark dirty after an in-place bitmap/palette edit.
* `overlaps(other, inset=0) -> bool` · `near(other, r) -> bool` — native collision tests (see **Sprite collision** below).
### `Display(busdisplay, *, rgb444=False)`
[Section titled “Display(busdisplay, \*, rgb444=False)”](#displaybusdisplay--rgb444false)
Fast DMA backend wrapping a board’s `busdisplay` (FourWire SPI). Pass to `Scene`. `rgb444=True` drives the panel in 12-bit RGB444 (\~25% less SPI traffic) on panels that support it; gate with `RGB444_SUPPORTED`.
### `Scene(display, buffer_a, buffer_b, *, background=0, top=0, bottom=0, left=0, right=0)`
[Section titled “Scene(display, buffer\_a, buffer\_b, \*, background=0, top=0, bottom=0, left=0, right=0)”](#scenedisplay-buffer_a-buffer_b--background0-top0-bottom0-left0-right0)
Retained-mode scene with dirty-rectangle rendering; `buffer_a/b` are strip buffers.
* `add(item, *, fixed=False) -> item` — add a Sprite/Tilemap/Particles/Canvas/StripDraw (insertion order = bottom→top) and return it (so `spr = scene.add(Sprite(...))` works). `fixed=True` (keyword-only) pins it to the screen (ignores the camera) for HUD/dialog.
* `add_all(items)` — add several (bottom→top).
* `remove(item)` — unlink a previously added item (no ghost — next refresh repaints over it, like `invalidate()`); the item survives and can be `add()`ed again. `ValueError` if not in the scene.
* `set_view(ox, oy)` — camera offset (screen position of the scene origin); changing it repaints all.
* `view` — read-only `(ox, oy)` camera offset.
* `invalidate()` — force a full repaint next refresh.
* `refresh() -> list | None` — diff & repaint changed regions; returns the dirty rect `[x1,y1,x2,y2]` (reused) or None.
### `Tilemap(tileset, cols, rows)`
[Section titled “Tilemap(tileset, cols, rows)”](#tilemaptileset-cols-rows)
A grid of tile indices into a tileset Bitmap (each frame = one tile); a Scene layer.
* `tile(tx, ty, value=None, *, flip_x=False, flip_y=False, transpose=False) -> int` — get tile, or set it (with optional keyword-only per-cell orientation: `flip_x`/`flip_y`/`transpose` give all 8 orientations of a tile; pair with a deduplicated tileset, see `png2picogame.py --dedup`). Out-of-range ignored. The orientation plane is allocated lazily (RAM only if a map uses it).
* `fill(value)` — set every tile (clears orientation).
* `move(x, y)` — position the map.
* Read-only props: `x`, `y`, `cols`, `rows`.
### `Particles(capacity, *, size=1, gravity=0.0, fade=False)`
[Section titled “Particles(capacity, \*, size=1, gravity=0.0, fade=False)”](#particlescapacity--size1-gravity00-fadefalse)
A pooled particle layer (small moving dots) drawn as one Scene layer.
* `emit(x, y, count, speed=1, life=30, color=0xFFFF)` — burst `count` dots, random velocity ≤ `speed` px/tick, living `life` ticks.
* `tick()` — advance one step (move, gravity, ageing). Call each frame.
* `clear()` — remove all.
### `Canvas(width, height, *, transparent=None, buffer=None)`
[Section titled “Canvas(width, height, \*, transparent=None, buffer=None)”](#canvaswidth-height--transparentnone-buffernone)
A RAM RGB565 drawing surface composited as a Scene layer (`width*height*2` bytes). `transparent` makes it a shaped overlay; `buffer` backs it with external memory (e.g. an arena slice). For *animated full-frame* surfaces prefer `StripDraw` (no buffer).
* `clear(color)` · `pixel(x, y, color)` · `fill_rect(x, y, w, h, color)` · `rect(x, y, w, h, color)`
* `line(x0, y0, x1, y1, color)` · `circle(cx, cy, r, color)` · `fill_circle(cx, cy, r, color)` · `ring(cx, cy, r, thickness, color)`
* `triangle(x0,y0, x1,y1, x2,y2, color)` · `fill_triangle(...)` · `ellipse(cx, cy, rx, ry, color)` · `fill_ellipse(...)`
* `fill_round_rect(x, y, w, h, r, color)` · `frame3d(x, y, w, h, light, dark)` (beveled box) · `move(x, y)`
* `blit(bitmap, x, y, frame=0, flip_x=False, flip_y=False)` — stamp a bitmap frame into the surface (honours its transparent key; the retained way to bake an icon/portrait/rendered text into a panel).
* `text(x, y, s, fg, font, bg=None)` — composite a string in C, rasterizing each glyph of `font` (a `fontio.BuiltinFont`) on the fly: no Python glyph cache and no per-call Bitmap/Sprite. `bg=None` → transparent glyph background. ASCII/built-in font only. Works on a Canvas or a `StripDraw` view; the latter does not retain a separate text surface.
* `mode7(texture, horizon, y_off, z, rx0, ry0, rsx, rsy, cam_x, cam_y)` — fill the rows below `horizon` with a **Mode-7 perspective floor** of `texture` (power-of-2 dims; one world unit = one tile). 10 fixed-point (16.16) args — you normally let `picogame_mode7.Camera` compute them from a camera pose. Draws into a Canvas or a 0-RAM `StripDraw` view (pass `y_off` = the strip top).
* Read-only props: `x`, `y`, `width`, `height`.
### `StripDraw(callback, x=0, y=0, width=0, height=0, *, always_dirty=True)`
[Section titled “StripDraw(callback, x=0, y=0, width=0, height=0, \*, always\_dirty=True)”](#stripdrawcallback-x0-y0-width0-height0--always_dirtytrue)
Immediate-mode layer with **no pixel buffer**: each refresh it calls `callback(view, vx, vy, vw, vh)` once per render strip inside its rect. `view` is a Canvas pointing at the live strip (use Canvas primitives, incl. `view.text`); view-local `(0,0)` = screen `(vx, vy)`. In a scrolling scene add it `fixed`.
* `always_dirty=True` (default) repaints every frame → for animated/scanline content (pseudo-3D, gradients). `always_dirty=False` repaints only when invalidated or overlapped by another change → for static/on-change panels (it still renders once on first refresh).
* `invalidate()` — mark it dirty so the next refresh repaints it (the way to update an `always_dirty=False` panel when its content changes).
* Read/write props: `x`, `y`, `width`, `height` — move or resize the layer (after shrinking, call `scene.invalidate()`) · `always_dirty`.
### Low-level draw functions
[Section titled “Low-level draw functions”](#low-level-draw-functions)
Most games never call these (`picogame_game.setup` + `Scene` use them internally), but they are exposed for hand-built render loops.
* `render(display, sprites, buffer, x0, y0, x1, y1, *, background=0)` — render a sprite list into the region `[x0,x1) × [y0,y1)` and push it to `display`. `buffer` is a reusable strip buffer (≥ region-width × 2 bytes). **Mixing with a retained scene:** the scene doesn’t know `render()` changed the pixels — if the region overlaps the scene’s play rect, call `scene.invalidate()` after (or use `picogame_game.overlay`, which does both); HUD bands outside the play rect don’t need it.
* `invert(display, on)` — toggle the panel’s hardware colour inversion. Changes the panel’s inversion state without sending pixel data, so a brief invert makes a full-screen negative flash (a 1-bit “hit” look) with no redraw. See `picogame_fx.InvertFlash`.
### Procedural noise (coherent value noise, 0..1)
[Section titled “Procedural noise (coherent value noise, 0..1)”](#procedural-noise-coherent-value-noise-01)
* `value2d(x, y, *, seed=0) -> float` · `value1d(x, *, seed=0) -> float`
* `fbm2d(x, y, *, octaves=4, seed=0, lacunarity=2.0, gain=0.5) -> float` · `fbm1d(x, *, octaves=4, seed=0, lacunarity=2.0, gain=0.5) -> float` — fractal (summed octaves).
***
## Helper libraries (`lib/picogame_*.py`, pure Python)
[Section titled “Helper libraries (lib/picogame\_\*.py, pure Python)”](#helper-libraries-libpicogame_py-pure-python)
### `picogame_game` — one-call boot
[Section titled “picogame\_game — one-call boot”](#picogame_game--one-call-boot)
* `setup(display=None, strip_h=None, background=0, fast=True, top=0, bottom=0, left=0, right=0, rgb444=False) -> (scene, buffer_a, buffer_b)` — take over the display, build a Scene + two strip buffers. `top/bottom/left/right` reserve fixed HUD margins; `rgb444=True` opts into 12-bit colour on a supporting SPI panel, and `rgb444="auto"` enables it only where the board reports `picogame.RGB444_SUPPORTED`.
* `overlay(scene, display, items, buffer, x0, y0, x1, y1, *, background=0)` — immediate-draw `items` over a live scene (pause / menu / cutscene / banner) = `pg.render` + `scene.invalidate()`, so the next `refresh()` repaints the full frame instead of leaving overlay fragments.
* `open_framebuffer(width, height, color_depth=None) -> display` — set the resolution from inside a game on a framebuffer board (Fruit Jam DVI), e.g. `open_framebuffer(640, 480)`; a no-op that returns `board.DISPLAY` on a fixed SPI panel. Pass the result to `setup(display=…)`.
* `resolve_display(display=None) -> (display, is_framebuffer)` — normalise a display/framebuffer handle (used by the HUD / immediate-render helpers).
### `picogame_clock` — frame pacing
[Section titled “picogame\_clock — frame pacing”](#picogame_clock--frame-pacing)
* `Clock(fps=30, max_dt=0.1)` · `.set_fps(fps)` · `.tick() -> dt` (sleep to frame, return seconds) · `.tick_async()` (the same, for `asyncio` loops).
* `FixedStep(step_fps=60, max_steps=5)` · `.steps()` — generator yielding a constant dt per fixed step · `.step_count()`.
### `picogame_input` — buttons
[Section titled “picogame\_input — buttons”](#picogame_input--buttons)
* Masks: `UP DOWN LEFT RIGHT A B X Y L1 L2 R1 R2 START SELECT ALL` (a superset; each board maps the subset it has); profile `PICOPAD`.
* `Buttons(profile=None, pull=None, prefer_keypad=True, debounce_s=0.02, matrix=None, usb=None, sources=None)` · `.poll() -> mask` · `.is_pressed(mask=ALL)` · `.just_pressed(mask=ALL)` · `.just_released(mask=ALL)` · `.has(mask=ALL)` (is the mask present in the profile) · `.repeat(button, delay=15, interval=4)` — PICO-8 `btnp` auto-repeat (menus / grid move) · `.clear()` (drop held state).
* `matrix=` — a scanned key-matrix source (also configured board-wide via the `PICOGAME_MATRIX_*` settings keys); `usb=` — one or more extra button **sources** (USB pad/keyboard, below). `Buttons` ORs every source together, so a game reads them all with no code change.
* `Timer(frames)` — input-leniency window (coyote time / jump buffering): `.feed(condition)` (recharge while true, else decay) · `.charge()` · `.is_active` · `.consume()` (true once, then clears).
### `picogame_usbpad` — USB HID gamepad source (USB-host boards, e.g. Fruit Jam)
[Section titled “picogame\_usbpad — USB HID gamepad source (USB-host boards, e.g. Fruit Jam)”](#picogame_usbpad--usb-hid-gamepad-source-usb-host-boards-eg-fruit-jam)
* `UsbPad(buttons=None)` — a button **source** for `Buttons(usb=…)` (auto-attached by default on a USB-host build). Reads a USB HID gamepad and ORs it into the button mask, so a plugged-in pad works with **zero game code changes**. Needs a USB-host CircuitPython build (`usb.core`); a no-op on boards without it.
* Default map = the ubiquitous DragonRise `081f:e401` SNES-style pad; remap per pad from `settings.toml` (`PICOGAME_USBPAD`, no reflash — see [Custom board](/custom-board/)). Discover a new pad’s report bytes with `tools/usbpad_probe.py`.
* `.mapped` — mask of buttons this pad can report; `VERSION`, `MAPPED` module constants.
### `picogame_usbkbd` — USB HID keyboard source (USB-host boards)
[Section titled “picogame\_usbkbd — USB HID keyboard source (USB-host boards)”](#picogame_usbkbd--usb-hid-keyboard-source-usb-host-boards)
* `UsbKbd(keys=None)` — the keyboard twin of `UsbPad`, a `Buttons(usb=…)` source. Found by its boot-keyboard HID interface (no fixed VID/PID); works with wired and 2.4 GHz-dongle keyboards (not Bluetooth).
* Default map: arrows + WASD → D-pad, Z/Space → A, X → B, C → X, V → Y, Q → L1, E → R1, Enter → START, Esc → SELECT. Remap from `settings.toml` (`PICOGAME_USBKBD`, `NAME=HID-keycode`). For a combo dongle whose real keystrokes flow on a sibling interface, point it at the right channel with `PICOGAME_USBKBD_EP = "iface:endpoint"` (find it with `tools/usbkbd_probe.py`).
### `picogame_font` — text bitmaps (external font module)
[Section titled “picogame\_font — text bitmaps (external font module)”](#picogame_font--text-bitmaps-external-font-module)
Which text path to use (`Canvas.text` vs a rendered Bitmap vs a StripDraw view — and what each costs): see the decision matrix in [Drawing paths](/concepts/drawing-paths/).
* `render_text(pg, font, text, fg, bg=None) -> (bitmap, w, h)` — render a string to a PAL8 Bitmap (`bg=None` → transparent).
* `render_text_pal(pg, font, text, fg, bg=None) -> (bitmap, w, h, palette)` — same, plus the palette array; mutate `palette[1]` to recolour the text in place (no rebuild).
* `Label(pg, font, x, y, fg, bg)` · `.move(x, y)` · `.set(text) -> changed` · `.draw(display, buffer)`.
### `picogame_bitfont` — built-in font (no font module needed)
[Section titled “picogame\_bitfont — built-in font (no font module needed)”](#picogame_bitfont--built-in-font-no-font-module-needed)
* `render_text(pg, text, fg=None, outline=None, mid=None, bg=None) -> (bitmap, w, h)` — render with the bundled bitmap font; optional `outline`/`mid` give a cheap 2-tone outlined look.
### `picogame_ui` — HUD & menu widgets (`LINE_H = 12`)
[Section titled “picogame\_ui — HUD & menu widgets (LINE\_H = 12)”](#picogame_ui--hud--menu-widgets-line_h--12)
* `SceneLabel(scene, pg, font, x, y, fg, bg)` · `.set(text)` · `.destroy()` — camera-independent text label (a fixed Scene layer); destroy() detaches a ONE-SHOT label so GC reclaims it (recurring HUD: build once + set/hide instead).
* `SceneBox(scene, pg, font, x, y, w, h, fg, bg, nlines=3, key=None, border=None)` · `.show(lines)` · `.hide()` · `.set_line(i, text)` · `.destroy()` — a multi-line in-scene panel (dialog/log); destroy() = one-shot teardown (needs firmware with `Scene.remove`).
* `HudBar(pg, display, buffer, x, y, w, h, bg)` · `.add(sprite)` (an icon Sprite) · `.label(font, x, y, fg, text=" ")` → a text handle; update it with `handle.set(text)` · `.draw()` (repaint the bar, call on HUD changes) — a fixed bar that composites sprites + labels (0 retained RAM).
* `TextBox(pg, font, x, y, w, h, fg, bg, maxlines=6)` · `.draw(display, buffer, lines, force=False)`.
* `Menu(pg, font, x, y, items, fg, bg, *, title=None, rows=None, width=None, paged=True)` · `.tick(btn)` → index ≥0 on A, `CANCEL` (= -2) on B, `None` while navigating · `.draw(display, buffer, force=False)`.
* `SceneMenu(scene, pg, font, x, y, items, fg, bg, title=None, rows=None, width=None, border=None, paged=True)` · `.show(sel=0)` · `.hide()` · `.tick(btn)` → index ≥0 on A, `CANCEL` (= -2) on B, `None` while navigating — the same menu as an in-scene layer.
* `GridCursor(cols, rows, tx=0, ty=0, wrap=False)` · `.index` · `.tick(btn)` — D-pad cursor over a grid (inventory / board).
### `picogame_options` — settings menu
[Section titled “picogame\_options — settings menu”](#picogame_options--settings-menu)
* `OptionsMenu(scene, pg, font, x, y, w, rows, fg, bg, title=None, border=None)` · `.value(key)` · `.show(sel=0)` · `.hide()` · `.tick(btn)` — an in-scene options screen of toggles/choices.
### `picogame_shapes` — single-colour bitmap generators
[Section titled “picogame\_shapes — single-colour bitmap generators”](#picogame_shapes--single-colour-bitmap-generators)
* `rect(w, h, color)` · `circle(d, color)` · `ring(d, color, thickness=2)`
* `from_mask(mask, color)` — Bitmap from a string mask (`'#'` = set).
* `atlas(frames_data, w, h, color)` — pack w×h buffers into a multi-frame Bitmap.
* `color_frames(w, h, colors)` — frame i = solid `colors[i]`.
* `tileset_colors(w, h, colors)` — tileset: frame 0 empty, frames 1..N coloured.
* `poly_frames(size, points, nframes, color, fill=True)` — bake `nframes` rotations of a polygon.
### `picogame_pool` — reusable sprite pool
[Section titled “picogame\_pool — reusable sprite pool”](#picogame_pool--reusable-sprite-pool)
* `Pool(scene, bitmap, capacity, anchor=None, fixed=False)` · `.spawn() -> sprite | None` · `.free(s)` · `.free_all()` · `.count() -> int`. (`.items` = all sprites.)
### Sprite collision (native methods)
[Section titled “Sprite collision (native methods)”](#sprite-collision-native-methods)
Collision lives on the `Sprite` itself: zero-alloc, anchor/scale/rotation aware (no separate module).
* `Sprite.overlaps(other, inset=0) -> bool` — inclusive AABB box overlap (touch = hit). `other` = another `Sprite`, a point `(x, y)`, or a rect `(x1, y1, x2, y2)` (trigger zone / screen-cull). `inset` shrinks THIS sprite’s box by N px per side for a fair hitbox.
* `Sprite.near(other, r) -> bool` — circular: this sprite’s centre within `r` px of `other`’s centre (squared distance, no sqrt). `other` = a `Sprite` or a point `(x, y)`.
* Raw primitive (any coords, no sprite): `pg.collide(x1, y1, x2, y2, ax1, ay1[, ax2, ay2])` — 8 args box-vs-box, 6 args box-vs-point.
* Tile-grid collision (walls/terrain): probe `picogame_tiles` flags (`at_px(tm, x, y, SOLID)`), not AABB.
### `picogame_math` — numeric helpers, vectors & turn-based trig
[Section titled “picogame\_math — numeric helpers, vectors & turn-based trig”](#picogame_math--numeric-helpers-vectors--turn-based-trig)
* `clamp(v, lo, hi)` · `mid(a, b, c)` · `lerp(a, b, t)` · `inv_lerp(a, b, v)` · `remap(v, a, b, c, d)` · `sgn(x)` · `approach(v, target, step)` · `wrap(v, lo, hi)`.
* `sin_t(turns)` · `cos_t(turns)` · `atan2_t(dy, dx) -> turns` — angles as 0..1 turns (standard, not PICO-8’s inverted sin).
* `length(dx, dy)` · `distance(x1, y1, x2, y2)` · `normalize(dx, dy)` · `angle_rad(dx, dy)` (radians) · `from_angle_rad(a, mag=1.0)` — vector helpers.
### `picogame_tiles` — per-tile metadata flags (PICO-8 `fget`/`fset`)
[Section titled “picogame\_tiles — per-tile metadata flags (PICO-8 fget/fset)”](#picogame_tiles--per-tile-metadata-flags-pico-8-fgetfset)
* Bits/masks: `B_SOLID B_HAZARD B_LADDER …` (indices) and `SOLID HAZARD LADDER …` (masks).
* `TileFlags(flags=None, tile_px=8)` — `flags` = `{tile_index: bitfield}` or a list. `.get(tile, bit=None)` · `.set(tile, bit, value=True)` · `.at(tilemap, tx, ty, bit)` · `.at_px(tilemap, px, py, bit)` (collision one-liner). Keyed by tile index (shared by all cells using it).
### `picogame_seq` — generator-driven sequences (coroutine pattern)
[Section titled “picogame\_seq — generator-driven sequences (coroutine pattern)”](#picogame_seq--generator-driven-sequences-coroutine-pattern)
* `wait(frames)` · `over(frames, fn)` (fn(t), t 0..1) · `move_over(sprite, x, y, frames)` — all are generators; compose with `yield from`.
* `Seq(gen=None)` · `.start(gen)` · `.tick() -> done` — advance one step per frame (cutscenes, “do X over N frames”).
### `picogame_anim` — frame animation over time
[Section titled “picogame\_anim — frame animation over time”](#picogame_anim--frame-animation-over-time)
* `FrameAnim(sprite, frames, *, fps=8, loop=True)` · `.configure(frames, fps=8, loop=True)` · `.reset()` · `.tick(dt)`.
* `AnimatedSprite(sprite, anims)` · `.play(name)` · `.tick(dt)`.
### `picogame_fx` — juice & raster effects
[Section titled “picogame\_fx — juice & raster effects”](#picogame_fx--juice--raster-effects)
* `Shake(scene, max_offset=6, decay=0.03, seed=0x9E37)` · `.add(amount)` (0.6 hit, 0.15 bump) · `.tick(cam_x=0, cam_y=0)` — trauma screen shake composed on top of the camera.
* `Fade(scene, width, height, x=0, y=0, color=0, cell=8)` · `.to(target, speed=2.0)` · `.out()/.into()/.set(level)/.dim(level=8)/.clear()/.pulse(level=12, speed=2.0)` · `.is_done` · `.tick() -> done` — dither fade / dim / flash, full-screen or a region. Uses `StripDraw` without a retained pixel surface.
* `Tween(value=0.0, speed=0.2)` · `.to(target, speed=None)` · `.set(value)` · `.tick() -> value` · `.is_done` — ease a scalar (UI/pop-ups).
* `Camera(scene, w, h, lerp=0.18, world_w=0, world_h=0)` · `.follow(tx, ty, snap=False)` · `.offset() -> (ox,oy)` · `.apply()` — smoothed follow + world clamp (compose with `Shake` via `shake.tick(*cam.offset())`).
* `Sky(scene, x, y, w, h, top, bottom)` — vertical gradient with a `2*h`-byte colour table. · `Scanlines(scene, x, y, w, h, step=2, dark=0)` — CRT overlay retaining one `w`-byte PAL8 row and its palette.
* `InvertFlash(display, frames=3, normal=None)` · `.pulse(frames=None)` · `.tick()` — hardware-invert hit flash for a supported SPI panel. It does not redraw the scene and is not a framebuffer effect.
### `picogame_palette` — Game-Boy palette tricks on PAL8 art (call `sprite.touch()` after)
[Section titled “picogame\_palette — Game-Boy palette tricks on PAL8 art (call sprite.touch() after)”](#picogame_palette--game-boy-palette-tricks-on-pal8-art-call-spritetouch-after)
* `cycle(palette, lo, hi, step=1)` — rotate entries (animated water/lava/portals; \~0 extra art).
* `swap(dst_palette, src_palette)` — recolour a shared bitmap (GBC-style; cheaper than a 2nd bitmap).
* `fade(palette, base, t, target=0, skip=None)` — lerp toward a colour (smooth brightness fade; `base` = `snapshot()` of the original).
* `snapshot(palette)` / `restore(palette, base)`.
### `picogame_rand` — seedable RNG
[Section titled “picogame\_rand — seedable RNG”](#picogame_rand--seedable-rng)
* `Rand(seed=None)` (deterministic xorshift; `None` = time-seeded) · `.below(n)` · `.randint(a, b)` · `.random()` · `.chance(p)` · `.choice(seq)` · `.shuffle(lst)` · `.weighted(weights) -> index` · `.seed(s)`.
* `Bag(items, rng)` · `.next()` — shuffle-bag (7-bag) anti-streak randomizer.
### `picogame_save` — NVM persistence
[Section titled “picogame\_save — NVM persistence”](#picogame_save--nvm-persistence)
* `Save(key, schema, *, offset=0)` · `.defaults()` · `.load() -> dict` · `.save(values)` · `.reset()`. Survives reboot/filesystem wipe.
### `picogame_audioout` — one output device for any board
[Section titled “picogame\_audioout — one output device for any board”](#picogame_audioout--one-output-device-for-any-board)
* `make_output(sample_rate=22050, pin=None)` — returns this board’s audio output, chosen automatically: an I2S DAC (Fruit Jam TLV320) when the board has `I2S_BCLK`, else a PWM output on `pin` (or the board default). Used by both `picogame_audio` and `picogame_synth`, so a game needs no board-specific audio code. Raises `RuntimeError` if no output exists.
* The TLV320’s output select + the three volume trims are set from `settings.toml` (`PICOGAME_AUDIO_OUT`, `PICOGAME_DAC_VOLUME`, `PICOGAME_HP_VOLUME`, `PICOGAME_SPK_VOLUME` — see [Custom board](/custom-board/)); the driver’s defaults are deliberately quiet, so raise them toward 0 dB. `PICOGAME_DEBUG = 1` prints why a DAC failed to init.
### `picogame_audio` — sample playback (PWM or I2S DAC)
[Section titled “picogame\_audio — sample playback (PWM or I2S DAC)”](#picogame_audio--sample-playback-pwm-or-i2s-dac)
* `Audio(pin=None, voices=4, sample_rate=22050, channels=1, bits=16, signed=True)` · `.load(path)` · `.play(sample, *, voice=None, loop=False, volume=1.0)` · `.sfx(sample, volume=1.0)` · `.music(sample, loop=True, volume=1.0)` · `.stop(voice=None)` · `.stop_music()` · `.deinit()` · `.is_playing`.
* `tone(frequency=440, ms=120, sample_rate=22050, volume=0.6)` — square-wave beep sample.
### `picogame_synth` — synthio music & SFX
[Section titled “picogame\_synth — synthio music & SFX”](#picogame_synth--synthio-music--sfx)
* Waveforms: `sine()` · `saw()` · `triangle()` · `square()` · `noise()`.
* `note(midi, waveform=None, attack=0.005, decay=0.06, sustain=0.0, release=0.08, amplitude=0.6, bend=None, cutoff=None)` — build a reusable instrument note (`midi` 60 = middle C; `cutoff` = low-pass Hz).
* `pitch_bend(semitones, ms, waveform=None, once=True)` — an LFO for a note’s `bend` (slide / laser zap).
* `Synth(pin=None, sample_rate=22050, buffer_size=2048, music_level=0.4, sfx_level=0.7)` · `.sfx(n)` · `.press(n)` · `.release(n)` · `.music(midi_track)` · `.stop_music()` · `.set_levels(music=None, sfx=None)` · `.mute(on)` · `.available` — self-guarding init: on audio-less firmware **or** a failed init (tight heap, claimed pin) the instance runs as silent no-ops instead of raising; no try/except needed in games.
* `Drone(synth, waveform=None, amplitude=0.35, attack=0.03, release=0.12)` · `.start()` · `.set(frequency, amplitude=None)` · `.stop()` — a continuously-held note (engine/siren/drone): press once, then feed `set(freq, amp)` each frame so synthio tracks the live pitch/amplitude.
* `load_midi(path, sample_rate=22050, waveform=None, envelope=None, tempo=120, ppqn=240)` — load a MIDI file into a playable track.
### `picogame_sfx` — signature SFX kit (over `picogame_synth`)
[Section titled “picogame\_sfx — signature SFX kit (over picogame\_synth)”](#picogame_sfx--signature-sfx-kit-over-picogame_synth)
* `Kit(synth)` — build a ready-made, hardware-tuned SFX set once from a live `Synth` (silent no-op without audio). Fire by event: `.blip()` · `.coin()` · `.powerup()` · `.zap()` (your fire) · `.pew()` (enemy fire) · `.jump()` · `.hit(rotate=True)` (brightness rotates on rapid fire) · `.hurt()` · `.boom()` · `.explosion()`. Call `.tick()` once per frame — drives the coin/powerup arpeggios and the priority + protected-window arbitration through the single SFX voice. Volume via the `Synth`: `.set_levels()` / `.mute()`.
### `picogame_cutscene` — full-screen image / story-scene player
[Section titled “picogame\_cutscene — full-screen image / story-scene player”](#picogame_cutscene--full-screen-image--story-scene-player)
* `palette(pg, rgb)` — build the wire palette once (from a bake\_cutscene.py palette module, RGB triplets, or wire ints).
* `show(pg, display, buffer, path, pal=None, w=320, h=240, scale=None, band=24, bg=0)` — stream an image in row bands. The source band uses `w*band` bytes for PAL8 or `w*band*2` for RGB565, in addition to any render buffer passed in. `scale=None` derives an integer upscale from the display.
* `play(pg, display, buffer, btn, path, pal=None, ..., caption=None, caption_lines=None, auto_hold=0, clock=None)` — show it, overlay an optional caption bar, and wait for A/B (or auto-advance after `auto_hold` ticks).
### `picogame_stream` — stream sprite frames from flash
[Section titled “picogame\_stream — stream sprite frames from flash”](#picogame_stream--stream-sprite-frames-from-flash)
* `StreamSheet(pg, path, w, h, frames, palette, transparent=None)` · `.use(i)` (select a frame, loaded on demand) · `.close()` — keep big sheets on flash instead of RAM.
### `picogame_arena` — anti-fragmentation buffer
[Section titled “picogame\_arena — anti-fragmentation buffer”](#picogame_arena--anti-fragmentation-buffer)
* `Arena(pixels)` · `.alloc(nbytes, align=1) -> memoryview` · `.canvas(w, h, transparent=None) -> Canvas` · `.reset()` · `.mark() -> m` / `.release(m)` (nested LIFO lifetimes: mark on entering a mode, release on leaving — run-level buffers survive) · `.free() -> int`. Grab one big buffer up front, hand out slices.
### `picogame_debug` — RAM watermarks + FPS overlay (testing aid)
[Section titled “picogame\_debug — RAM watermarks + FPS overlay (testing aid)”](#picogame_debug--ram-watermarks--fps-overlay-testing-aid)
* `enabled` — module flag (default False: calls ship as no-ops; flip True while testing).
* `ram(tag)` — gc.collect() + print `[RAM] : free N alloc M` at a transition (boot/battle/menu) — the on-device leak/fit diagnostic.
* `Watch(scene, clock=None, every=30, x=2, y=2)` · `.step()` each frame · `.hide()/.show()` · `.remove()` — a corner `FPS 30 FREE 31k` overlay (one live text bitmap, re-rendered only on change). Pass your `Clock` as `clock=` for a true FPS reading; `every`/`x`/`y` are keyword args.
### `picogame_scene` — declarative level loader
[Section titled “picogame\_scene — declarative level loader”](#picogame_scene--declarative-level-loader)
* `load(pg, scene, display=None, strip_h=None, font=None, bank=None) -> View` — build a scene from a baked SCENE dict.
* `load_bank(pg, bank)` — build a shared asset bank once (reuse across levels).
* `View`: `.tile_xy(px, py)` · `.group(tag)` · `.point(name)` · `.in_zone(x, y, tag=None)` · `.is_solid(tx, ty)` · `.tile_has(tx, ty, prop)` · `.play(sound_id)` · `.tick(dt)`.
### `picogame_mode7` — Mode-7 perspective floor
[Section titled “picogame\_mode7 — Mode-7 perspective floor”](#picogame_mode7--mode-7-perspective-floor)
* `Camera(fov=0.66)` · `.draw(canvas, texture, x, y, angle, horizon, height, y_off=0)` — drive the C `Canvas.mode7` floor from a friendly camera pose (position in world/tile units, heading in radians, `height` = how high the camera sits). `texture` dims must be powers of two, one world unit = one tile. Draw into a 0-RAM `StripDraw` view. See [/helpers/pseudo-3d/](/helpers/pseudo-3d/).
### `picogame_ray` — first-person raycaster
[Section titled “picogame\_ray — first-person raycaster”](#picogame_ray--first-person-raycaster)
* `Raycaster(world, wall_colors, sky, floor, fov=0.66, stride=2)` · `.cast(px, py, ang, sw, sh)` (once/frame) · `.draw(view, vx, vy, vw, vh)` (StripDraw callback) · `.solid(x, y)` (wall test) · `.attach(sd)` (temporal repaint) · `.project_sprite(sx, sy)` (billboard) — DDA walls via the native `pg.raycast` caster (integer 16.16 C on device, Python in the sim) into a 0-RAM `StripDraw` view (\~22-30 fps). `stride` = perf/quality knob; `attach(sd)` + `always_dirty=False` repaints only the changed column band (still/slow \~30 fps). See [/helpers/pseudo-3d/](/helpers/pseudo-3d/).
# picogame scene format
> A scene describes a level or map as data shared by the device game, desktop simulator, and web editor.
For level authoring
The declarative scene format + loader. Use it once you’re hand-coding scenes and want to stop. See also the [web editor](/tools/editor/).
A scene describes a level or map as **data** shared by the device game, desktop simulator, and [web editor](/tools/editor/). It can contain assets, sprite placement, tilemaps, tile properties, layer order, HUD elements, and camera settings. Game logic such as movement, AI, and win conditions stays in Python.
## The pipeline
[Section titled “The pipeline”](#the-pipeline)
```text
*.scene.json ──tools/scene_build.py──▶ _scene.py ──mpy-cross──▶ _scene.mpy
(authoring: editor or hand) (baked runtime module) (ship to CIRCUITPY)
```
* **Authoring = JSON** (`*.scene.json`): diff-able, round-trippable by the editor or a human. Colours as `[r, g, b]`, maps as grids.
* **Runtime = a baked Python module** (`SCENE = {...}`): colours pre-converted to wire RGB565, the tilemap grid a `bytes` literal (1 byte/tile, one allocation), art pre-converted to PAL8 atlases. Import cost stays small; ship it as `.mpy`.
* **One loader for both targets:** `picogame_scene.load(pg, SCENE, ...)` builds the live `pg.Scene` using only public engine API, so the same file runs on hardware and in the simulator. Loader usage guide: [Building scenes](/helpers/building-scenes/).
Bake:
```bash
python3 tools/scene_build.py examples/levels/world1.scene.json
# -> examples/levels/world1_scene.py (module attribute SCENE)
tools/build_mpy.sh # or mpy-cross the module for the device
```
## Authoring schema (version 2 — the implemented set)
[Section titled “Authoring schema (version 2 — the implemented set)”](#authoring-schema-version-2--the-implemented-set)
```jsonc
{
"format": "picogame-scene", "version": 2,
"size": [320, 240],
"background": [8, 10, 24], // -> wire rgb565 at bake time
"assets": { // shared bank, referenced by id
"hero": { "type": "sprite", "src": "hero.png", "frames": 6, "transparent": 0,
"animations": { "walk": { "frames": [0,1,2,1], "fps": 8, "loop": true } } },
"tiles": { "type": "tileset", "src": "tiles.png", "tile": [16, 16], "frames": 5,
"props": { "1": {"solid": true}, "2": {"coin": true}, "3": {"goal": true} } },
"flag": { "type": "rect", "size": [8, 16], "color": [255, 220, 60] }
},
"sounds": { "jump": { "src": "jump.wav" } },
"layers": [ // ordered bottom -> top
{ "kind": "tilemap", "asset": "tiles", "cols": 80, "rows": 15, "pos": [0, 0],
"map": "rle:..." },
{ "kind": "sprite", "asset": "hero", "name": "player",
"pos": [40, 208], "anchor": [0.5, 1.0], "anim": "walk", "data": { "lives": 3 } },
{ "kind": "group", "asset": "goomba", "anchor": [0.5, 1.0],
"instances": [[224, 208], [480, 208], [704, 208]], "tag": "enemies" },
{ "kind": "tilemap", "asset": "tiles", "fg": true, "cols": 80, "rows": 15,
"map": "rle:..." }, // fg: true draws OVER the sprites
{ "kind": "particles", "capacity": 64, "size": 2, "gravity": 0.5, "fade": true,
"name": "fx" },
{ "kind": "hudlabel", "name": "score", "pos": [4, 4],
"fg": [255,255,255], "bg": [0,0,0] } // camera-independent (fixed implied)
],
"zones": [ { "tag": "door", "x": 300, "y": 180, "w": 20, "h": 40 } ],
"points": [ { "name": "spawn", "x": 40, "y": 208 } ],
"camera": { "mode": "follow", "target": "player", "axis": "x",
"bounds": [0, 0, 1280, 240] },
"music": "theme",
"meta": { "editor": { "grid": 16, "name": "World 1-1" } } // ignored by the runtime
}
```
Field notes:
* **assets** — kinds `sprite` / `tileset` / `bitmap` (`src` PNG + `frames`, `tile`, `transparent`), `rect`, `tileset_color`; a tileset may attach per-tile **props** (`solid`/`coin`/`goal`/`hazard`/your own) and a sprite may declare **animations** (`{name: {frames, fps, loop}}`).
* **layer kinds** — `tilemap` (several allowed; one may be `fg: true` to draw over sprites), `sprite` (`name`/`anchor`/`frame`/`anim`/`data`), `group` (many instances of one bitmap, addressable by `tag`), `particles`, `hudlabel` (camera-independent). Any layer may set `"fixed": true`.
* **zones / points** — named rectangles and positions the game queries at runtime (`view.in_zone`, `view.point`).
* **camera** is advisory data the game applies via `set_view`; games can drive the camera themselves.
* **meta** is free for the editor; the runtime loader ignores unknown keys (forward-compat).
### Two top-level shapes
[Section titled “Two top-level shapes”](#two-top-level-shapes)
* `"format": "picogame-scene"` — one self-contained scene (assets inline) → baked to one `_scene` module.
* `"format": "picogame-project"` — an assets **bank** + `levels[]` → baked to one `_bank` module plus one `_level` module per level; load with `bank = picogame_scene.load_bank(pg, BANK)` then `load(..., bank=bank)` so shared art isn’t rebuilt per level.
### Validation
[Section titled “Validation”](#validation)
The baker fails fast with a `ValueError` naming the offender on an unknown asset type or an unknown layer kind; asset conversion errors (missing file, bad PNG) surface as the underlying exception with the file in the message. The loader tolerates unknown *top-level* keys (so an older firmware can load a newer scene’s data it doesn’t use), but layer tuples are positional — a module baked by a newer `scene_build.py` needs the matching `picogame_scene` version.
## Baked runtime module (what the device imports)
[Section titled “Baked runtime module (what the device imports)”](#baked-runtime-module-what-the-device-imports)
```python
# world1_scene.py (then -> world1_scene.mpy)
SCENE = {
"bg": 0x2001, # pre-converted wire rgb565
"assets": {
"hero": ("pal8", "a1b2...", 12, 16, 6, 0, (0x0000, 0xF80F, ...)), # data(hex),w,h,frames,transp,palette
"tiles": ("pal8", "00ff...", 16, 16, 5, None, (...)),
},
"tileprops": { "tiles": { "solid": b"\x00\x01\x00\x00\x00",
"coin": b"\x00\x00\x01\x00\x00" } }, # indexed by tile value
"anims": { "hero": { "walk": ((0, 1, 2, 1), 8, True) } },
"layers": [
("tilemap", "tiles", 80, 15, 0, 0, b"\x01\x01..."), # cols,rows,ox,oy,grid bytes
("sprite", "hero", "player", 40, 208, 128, 256, 0, {"lives": 3}), # anchor in 1/256
("group", "goomba", "enemies", 128, 256, ((224,208), (480,208))),
("particles", "fx", 64, 2, 0.5, True),
("hudlabel", "score", 4, 4, 0xFFFF, 0x0000),
],
"camera": ("follow", "player", "x", 0, 0, 1280, 240),
}
```
Layers and assets are tuples (not dicts) to keep the `.mpy` small and parse-free; the loader unpacks positionally. The grid and tile-prop tables are `bytes` (one allocation each); asset pixel data is a hex string the loader decodes with `bytes.fromhex(...)`.
Why not JSON on the device? `json.load` of a tilemap builds a Python list of boxed ints (\~28 B each): a 28×18 map ≈ 14 KB for the list alone, plus the JSON text. The same grid as a `bytes` literal in a `.mpy` is \~500 B and one allocation.
## Runtime loader API
[Section titled “Runtime loader API”](#runtime-loader-api)
```python
import picogame_scene as pgs, terminalio
view = pgs.load(pg, world1_scene.SCENE, font=terminalio.FONT)
view.scene # the picogame.Scene (already populated + layered)
view.named["player"] # the Sprite
view.group("enemies") # list of Sprites
view.tick(dt) # advance auto-animated sprites (once per frame)
view.is_solid(tx, ty) # tile-property query (primary/first tilemap)
view.tile_has(tx, ty, "coin")
view.tile_xy(px, py) # world pixel -> (tx, ty) on the primary tilemap
view.in_zone(x, y, "door") # first zone containing (x, y), or None
view.point("spawn") # named point (x, y), or None
view.play("jump") # play a loaded sound by id
view.camera # (mode, target, axis, bounds) for the game to apply
```
See [Building scenes](/helpers/building-scenes/) for the complete loader behaviour and limits.
# Desktop simulator
> The web Playground lets you try picogame in a browser. The desktop simulator runs the same game-facing API on your PC and is better suited to local files…
The web [Playground](/playground/) lets you try picogame in a browser. The **desktop simulator** runs the same game-facing API on your PC and is better suited to local files, converted PNG assets, headless screenshots, and scripted command-line runs.
It ships inside the repo (`sim/`). Clone [picogame](https://github.com/MakerClassCZ/picogame) and you have everything: the simulator, the games, and the `picogame_*` helpers.
```sh
git clone https://github.com/MakerClassCZ/picogame
cd picogame
```
## Install
[Section titled “Install”](#install)
Headless mode (render frames, save a screenshot, no window) works out of the box. For a live, interactive window, install pygame:
```sh
pip install pygame
```
If it doesn’t work
* `pip` not found? Use `python3 -m pip install pygame` instead.
* Run every command from the cloned `picogame` folder, the one that holds `sim/` and `lib/`.
* Without pygame, use `--shot out.png` to run headlessly and save the final frame.
## Run a game
[Section titled “Run a game”](#run-a-game)
Play it in a window (the default when pygame is installed; it prints the controls on start):
```sh
python3 sim/run.py demos/picogame_flappy.py
```
Render a few frames headlessly and save a screenshot (handy for docs, tests, and CI):
```sh
python3 sim/run.py demos/picogame_flappy.py --frames 80 --shot shot.png
```
### Options
[Section titled “Options”](#options)
| Flag | What it does |
| -------------------------- | --------------------------------------------------------------------------------------------------------------------------------------- |
| `--backend pygame` / `pil` | force a live window / headless. Default: a window if pygame is installed, else headless (a `--shot` or `--profile` run stays headless). |
| `--frames N` | run N frames, then stop (default 150) |
| `--shot FILE` | save a PNG of the final frame |
| `--shot-at N` | save that PNG at frame N instead of at the end |
| `--hold RIGHT,A` | hold these buttons for the whole run, so you can drive it with no keyboard |
| `--profile` | print per-phase timing |
In the live window: arrows or **WASD** move; `F` (or `Ctrl`) = A, `G` (or `Space`) = B, `R`/`Q` = X, `T`/`E` = Y.
## Web or desktop?
[Section titled “Web or desktop?”](#web-or-desktop)
Both expose the same game-facing API, so the same game code runs in either. Under the hood they differ (the browser runs the native C engine compiled to WASM; the desktop simulator is a Python reference implementation), so timing, RAM behaviour, audio and panel effects are approximations - verify those on the device.
| | Web Playground | Desktop simulator |
| -------- | ------------------------------------------- | ------------------------------------------------------------------ |
| Setup | none, runs in the browser | clone the repo (plus pygame for a window) |
| Best for | trying an idea, sharing a link, first steps | asset files, headless screenshots, CLI automation, local iteration |
| Assets | code-generated shapes | your own PNGs and converted art |
Once a game runs well, copy it to the board and test its timing, controls, audio, and memory use. See [Run on hardware](/hardware/).
# Snippets — patterns ready to adapt
> A ready-to-run game skeleton plus short code fragments for common tasks — HUD updates, pools, restart, pause, shuffle, hit feedback, and input timing.
These are paste-ready fragments — the code for a specific task. For the *why* and the higher-level structure behind them, see [Game patterns](/concepts/patterns/). The skeleton below is a whole game in miniature; the fragments after it fill in the parts. Copy the relevant piece, adapt the names, and adjust the limits to your game. They use the same conventions as the bundled examples.
## The whole shape: a ready-to-run skeleton
[Section titled “The whole shape: a ready-to-run skeleton”](#the-whole-shape-a-ready-to-run-skeleton)
Start here. All mutable game state lives in one **`State`** object (`st`), and the per-frame loop lives in a **`main()`** function — inside a function its names resolve as fast locals instead of globals-dict lookups, a measured win on device. Every fragment further down slots into this shape. Copy it, rename the `State` fields, and fill in the `play` branch.
```python
# Ready-to-use picogame skeleton: a TITLE -> PLAY -> GAME-OVER state machine, with ALL game state
# in one State object and the per-frame loop in a function (main). Copy it, rename the State fields,
# and fill in the PLAY branch. Runs as-is here in the browser and on a device.
import board
import terminalio
import picogame as pg
import picogame_game
import picogame_input
import picogame_clock
import picogame_shapes as shapes
import picogame_ui as ui
W, H = board.DISPLAY.width, board.DISPLAY.height # size-independent: never hardcode 320x240
BAR = 16 # reserved top HUD strip
scene, bufA, _ = picogame_game.setup(background=pg.rgb565(16, 20, 34), top=BAR)
btn = picogame_input.Buttons()
clock = picogame_clock.Clock(30)
hud = ui.HudBar(pg, board.DISPLAY, bufA, 0, 0, W, BAR, pg.rgb565(10, 12, 22))
label = hud.label(terminalio.FONT, 4, 3, pg.rgb565(235, 240, 255), "")
# The player: a generated shape now; swap in a Bitmap (png2picogame) later.
player = pg.Sprite(shapes.circle(14, pg.rgb565(240, 90, 90)), W // 2, H // 2)
player.anchor = (0.5, 0.5)
scene.add(player)
class State:
"""ALL mutable game state in ONE object, created once and never reassigned. reset() re-inits it
in place, so main() can hold `st` and every helper sees the same state. Add your fields here;
keep engine objects (sprites, pools, clock) as module globals, not in State."""
def __init__(self):
self.reset()
def reset(self):
self.mode = "title" # "title" -> "play" -> "over"
self.score = 0
st = State()
def show(text): # set the HUD text and repaint the bar
label.set(text)
hud.draw()
def new_game():
st.reset()
st.mode = "play"
player.move(W // 2, H // 2)
show("SCORE 0")
def main():
# The per-frame loop lives in a FUNCTION, not at module scope: here its names resolve as fast
# array-indexed locals instead of globals-dict lookups -- a measured win on device.
show("PRESS A TO START")
while True:
btn.poll()
if st.mode == "play":
# --- your game goes here: move, collide, score ---
player.x += (btn.is_pressed(btn.RIGHT) - btn.is_pressed(btn.LEFT)) * 3
if btn.just_pressed(btn.A):
st.score += 1
show("SCORE %d" % st.score) # set text where it CHANGES, not every frame
if btn.just_pressed(btn.B):
st.mode = "over"
show("GAME OVER - press A")
elif btn.just_pressed(btn.A): # title or game-over -> (re)start, no reload
new_game()
scene.refresh()
clock.tick()
main()
```
[▶ Try it in the browser](/playground/?ex=game-skeleton)
The [Game patterns](/concepts/patterns/) page explains the shape; the fragments below are the individual moves.
## Read the screen size instead of hardcoding it
[Section titled “Read the screen size instead of hardcoding it”](#read-the-screen-size-instead-of-hardcoding-it)
Derive positions from `W` and `H` when the layout should adapt to different supported screen sizes (for example 320×240 and 240×240).
```python
W, H = board.DISPLAY.width, board.DISPLAY.height
player = pg.Sprite(bm, W // 2, H - 40)
```
## HUD text: format on change, not per frame
[Section titled “HUD text: format on change, not per frame”](#hud-text-format-on-change-not-per-frame)
`label.set()` skips the redraw on unchanged text, but the `"%"`-format itself allocates a new string on every call. Doing that each frame creates avoidable garbage. Compare the integers first and format only when the displayed value changes:
```python
hud = picogame_font.Label(...) # or a picogame_ui.HudBar; built ONCE at load
if score != shown_score: # shadow int of what the label shows
shown_score = score
hud.set("SCORE %d" % score)
```
Full HUD/label options: [Text & UI](/helpers/text-ui/).
When possible, set the label where its value changes (in the hit handler or at the level transition) and keep the frame loop free of HUD code. Quantize continuous values to the displayed unit first:
```python
secs = int(time.monotonic() - t0) # whole seconds = what the label shows
if secs != shown_secs:
shown_secs = secs
timer_lbl.set("TIME %d" % secs)
```
## Bullets & spawns come from a Pool
[Section titled “Bullets & spawns come from a Pool”](#bullets--spawns-come-from-a-pool)
For frequently created objects such as bullets, avoid constructing a new `pg.Sprite(...)` each time. A `Pool` pre-allocates them once; `spawn()` and `free()` toggle visibility:
```python
bullets = Pool(scene, bullet_bm, 8, anchor=(0.5, 0.5)) # ONE allocation, at load
b = bullets.spawn() # None when all 8 fly -> fire rate self-limits
if b:
b.move(ship.x + 14, ship.y)
for b in bullets.items: # fixed list -> the loop allocates nothing
if not b.visible:
continue
b.x += 6
if b.x > W + 8:
bullets.free(b) # back to the pool for reuse
```
Fixed-count HUD icons (lives, ammo pips) don’t need a Pool — a plain list of sprites with `visible` toggles is right there.
## Instant restart: one `reset()`, one never-rebound `st`
[Section titled “Instant restart: one reset(), one never-rebound st”](#instant-restart-one-reset-one-never-rebound-st)
Keep all run-scoped values in one `State` class and re-init them **in place** with `reset()`. `st` is created once and never reassigned — a never-rebound singleton — so `main()` (and any helper) can hold it as a fast local with no risk of pointing at a stale copy after a restart. Engine objects and cross-run values (best score) stay module globals.
```python
class State:
def __init__(self): self.reset() # __init__ just calls reset -> one place for defaults
def reset(self):
self.score = 0
self.lives = 3
self.px = 60.0
st = State() # created ONCE, at load
def new_game():
st.reset() # every field back to its documented default, IN PLACE
bullets.free_all()
player.move(60, GROUND)
```
## Pause / menu over a live scene
[Section titled “Pause / menu over a live scene”](#pause--menu-over-a-live-scene)
`pg.render` paints behind the scene’s back — without `invalidate()` the next `refresh()` leaves stale overlay fragments. `overlay()` does both; draw once, freeze, resume clean:
```python
if btn.just_pressed(btn.START):
paused = not paused
if paused:
picogame_game.overlay(scene, board.DISPLAY, [pause_sd], bufA, 0, 0, W, H)
if paused:
clock.tick() # no updates, no refresh -> overlay stays put
continue
scene.refresh() # first refresh after unpause repaints fully
```
## Shuffle: there is no `random.shuffle` on the device
[Section titled “Shuffle: there is no random.shuffle on the device”](#shuffle-there-is-no-randomshuffle-on-the-device)
CircuitPython’s `random` lacks `shuffle()`/`sample()` (the desktop simulator has them — it runs CPython). Fisher-Yates over `randint` is the same algorithm:
```python
for i in range(len(deck) - 1, 0, -1):
j = random.randint(0, i)
deck[i], deck[j] = deck[j], deck[i]
```
## Hit flash: 1–3 frames, then clear
[Section titled “Hit flash: 1–3 frames, then clear”](#hit-flash-13-frames-then-clear)
The cheapest visual punch. Set `flash` on the impact, count it down in the loop:
```python
enemy.flash = WHITE # at the hit
st.flash_t = 3
if st.flash_t > 0: # in the frame loop
st.flash_t -= 1
if st.flash_t == 0:
enemy.flash = None
```
(On the device the blit effects `flash`/`tint`/`dither`/`shadow` share **one** slot — last set wins; the sim treats them as independent, so it won’t reproduce this. Re-assert a permanent `dither` after a flash ends. Fuller toolkit: [Effects](/helpers/effects/).)
## Beep on an event
[Section titled “Beep on an event”](#beep-on-an-event)
Pair the flash with a sound. Build the tone **once** at load, then fire it on the event. Guard everything behind `if audio:` so an audio-less board (or a failed init) just runs silent:
```python
audio = None
try:
import picogame_audio
audio = picogame_audio.Audio() # PWM out + mixer; may fail on audio-less boards
boom = picogame_audio.tone(140, 200) # low thud, built ONCE (a RawSample in RAM)
except Exception: # tight heap, no audio pin, ...
audio = None # -> run silent
if audio: # at the hit / pickup:
audio.sfx(boom) # fire-and-forget on a free voice
```
`tone()` beeps like this play in the browser playground (WebAudio). For where each audio path makes sound (playground / simulator / device) and a ready-made named-effect kit (`hit()`, `coin()`, `boom()`), see [Audio](/helpers/audio/).
## Buttons: one virtual pad, mapped in `settings.toml`
[Section titled “Buttons: one virtual pad, mapped in settings.toml”](#buttons-one-virtual-pad-mapped-in-settingstoml)
Code against the engine’s logical buttons (`UP DOWN LEFT RIGHT A B`, optional `X Y L1 L2 R1 R2 START SELECT`) — never against pins. The same `code.py` then runs on any board; only the mapping in `settings.toml` changes (no reflash):
```python
btn = picogame_input.Buttons() # reads GPIO + key matrix + USB, all OR'd
btn.poll() # once per frame, before any query
if btn.is_pressed(btn.LEFT): px -= 2
if btn.just_pressed(btn.A): jump()
if btn.has(btn.X): show_x_hint() # only if this board mapped X
```
```toml
# direct GPIO buttons (a Pico you wired yourself)
PICOGAME_BUTTONS = "UP=GP2 DOWN=GP3 LEFT=GP4 RIGHT=GP5 A=GP6 B=GP7"
# …or a scanned key matrix — NAME=row,col
PICOGAME_MATRIX_ROWS = "GP0 GP1 GP2 GP3"
PICOGAME_MATRIX_COLS = "GP4 GP5 GP6 GP7"
PICOGAME_MATRIX_MAP = "UP=0,1 DOWN=2,1 LEFT=1,0 RIGHT=1,2 A=3,3 B=3,2"
```
USB gamepad/keyboard (USB-host boards) attach automatically. Full guide + USB remap keys: [Input & controls](/helpers/input/).
## Input forgiveness: coyote time + jump buffer
[Section titled “Input forgiveness: coyote time + jump buffer”](#input-forgiveness-coyote-time--jump-buffer)
Both are `picogame_input.Timer` one-liners; together they make platforming feel fair:
```python
coyote = picogame_input.Timer(6) # jump up to 6 frames after leaving a ledge
jbuf = picogame_input.Timer(5) # honour a jump pressed 5 frames before landing
coyote.feed(on_ground) # in the frame loop
jbuf.feed(btn.just_pressed(btn.A))
if jbuf.consume() and coyote.is_active:
jump()
```
## A panel that repaints only when it changes
[Section titled “A panel that repaints only when it changes”](#a-panel-that-repaints-only-when-it-changes)
A `StripDraw` with `always_dirty=False` does not retain a pixel surface for the panel. It stays idle until you call `invalidate()`:
```python
panel = pg.StripDraw(draw_panel, x, y, w, h, always_dirty=False)
scene.add(panel, fixed=True)
lines[1] = "HP %d" % hp # when the content changes:
panel.invalidate() # repaints once on the next refresh
```
## Sub-pixel movement without float drift
[Section titled “Sub-pixel movement without float drift”](#sub-pixel-movement-without-float-drift)
Sprite `x`/`y` are ints; for smooth slow motion use the engine’s fixed-point accessors `fx`/`fy` (24.8) instead of keeping your own float position:
```python
ball.fx = ball.fx + 0.4 # fractional-pixel movement without integer jitter
ball.fy = ball.fy + vy * dt
```
# Your first game
> Get something moving on screen in five minutes, right in your browser. No install, no hardware.
**Goal:** a red ball you drive around the screen with the arrow keys. About five minutes, right in your browser - nothing to install. If you can read a dozen lines of Python, you can do this.
Tip
New to words like *sprite* or *scene*? Keep the [Glossary](/concepts/glossary/) open as you go.
## 1. Write it, press Try it
[Section titled “1. Write it, press Try it”](#1-write-it-press-try-it)
Here is the whole game, about a dozen lines. Press **Try it** to run it live in your browser, then drive the ball with the arrow keys.
```python
import picogame as pg
import picogame_game # one-call setup
import picogame_input # buttons
import picogame_clock # frame timing
import picogame_shapes as shapes # make simple bitmaps in code
# Take over the screen and get a scene to draw into.
scene, _, _ = picogame_game.setup(background=pg.rgb565(20, 24, 40))
buttons = picogame_input.Buttons()
clock = picogame_clock.Clock(30) # aim for 30 frames per second
# A red ball — a 24px circle drawn in code, so we need no art yet.
ball = pg.Sprite(shapes.circle(24, pg.rgb565(230, 80, 80)), 150, 110)
scene.add(ball)
# The game loop: read input, move, redraw — forever.
while True:
buttons.poll()
ball.x += (buttons.is_pressed(buttons.RIGHT) - buttons.is_pressed(buttons.LEFT)) * 3
ball.y += (buttons.is_pressed(buttons.DOWN) - buttons.is_pressed(buttons.UP)) * 3
scene.refresh()
clock.tick()
```
[▶ Try it in the browser](/playground/?ex=first-game)
That is the picogame engine (the native C module, compiled to WASM) running in your browser. Edit the code, press Run, and your change shows instantly. When you want more room to tinker, open it in the [Playground](/playground/).
## 2. What the code does
[Section titled “2. What the code does”](#2-what-the-code-does)
Only four ideas carry the whole game; the rest is detail you’ll meet later:
| Line | Idea |
| ------------------------------------------------- | ------------------------------------------------------------------------------------------------------------------------------------------------------------------------------- |
| [`picogame_game.setup(...)`](/helpers/boot-loop/) | Returns the **scene** you draw into (plus two helper buffers you don’t need yet, the `_, _` in `scene, _, _`). This one call hides all the display setup and clears the screen. |
| `pg.Sprite(shapes.circle(...), x, y)` | A **sprite** is a movable picture. Here the picture is a circle we generated in code; later it’ll be your own art. |
| `scene.add(ball)` | Put the sprite **in the scene** so it gets drawn. |
| the `while` loop | The **game loop**: every frame, read input, change things, then `scene.refresh()`. The engine redraws only what moved. |
Why colors look like \`rgb565(r, g, b)\`
The screen stores colors in a packed format. Build every color with `pg.rgb565(red, green, blue)` (each component 0–255) and picogame handles the representation.
## 3. Take it further
[Section titled “3. Take it further”](#3-take-it-further)
* **Build on your PC.** Want a faster local loop, or to work with your own art files? Run the same game in the [desktop simulator](/simulator/): one `git clone`, then `python3 sim/run.py`.
* **Learn step by step.** The [tutorials](/tutorials/) build a Breakout, then a shooter, then an RPG, one new idea per step.
* **Get the mental model.** [How picogame works](/concepts/how-it-works/) explains the engine in five minutes, so the next things you build make sense.
* **Put it on a device.** When you’re ready for hardware, see [Run on hardware](/hardware/).
# Get it on your device
> Flash the picogame firmware, then download the ready-made games pack for your board — a launcher boots so you can pick a game and play.
Two steps put a menu of ready-to-play games on your handheld: flash the firmware once, then copy the pack for your board onto the drive. No coding needed — a [launcher](/launcher/) boots and lets you pick a game with the D-pad.
## 1. Flash the firmware
[Section titled “1. Flash the firmware”](#1-flash-the-firmware)
The firmware **is** the picogame engine — a CircuitPython build with the native-C module baked in. You flash it once per board.
Download the `.uf2` for your board from [Supported hardware](/supported-hardware/#download-firmware), hold **BOOTSEL** while you plug the board in, and drag the `.uf2` onto the drive that appears. The board reboots and shows up as a **`CIRCUITPY`** drive.
## 2. Download the pack for your board
[Section titled “2. Download the pack for your board”](#2-download-the-pack-for-your-board)
Each pack is a ready `CIRCUITPY` layout — the launcher, the games and demos (compiled `.mpy`), the helper libraries and fonts. Pick the one for your board and **extract it onto the `CIRCUITPY` drive**.
* **[RP2040 — PicoPad, plain Pico](/download/picogame-rp2040.zip)** — a tight-RAM set (8 games + 10 demos) tuned to fit the RP2040. Start here on a PicoPad or a bare Pico.
* **[RP2350 — PicoPad 2, Pico 2](/download/picogame-rp2350.zip)** — the full portfolio (every game and demo) with intro splashes, for RP2350-class boards with RAM to spare.
* **[Fruit Jam](/download/picogame-fruitjam.zip)** — the full portfolio plus a `settings.toml` that sets the Fruit Jam audio levels and DVI display.
Not sure which chip your board has? See [Supported hardware](/supported-hardware/).
## 3. Play
[Section titled “3. Play”](#3-play)
Eject the drive and reset the board. The launcher lists the games — **UP/DOWN** to move, **A** to play, the board’s **RESET** button to come back to the menu.
## Next
[Section titled “Next”](#next)
* Add your own game to the menu, or see how the launcher finds games → [The games menu](/launcher/).
* Want to build a game rather than play the packs? → [Your first game](/start/first-game/) and [Run on hardware](/hardware/).
# What you can build
> The genres picogame is genuinely good at - platformers, scrolling shooters, top-down RPGs, even a pseudo-3D racer - with playable examples.
picogame is a retained-mode 2D engine: it redraws only what moved, so it shines where a mostly-still screen carries a few busy things on top. In practice that makes it strong at:
* **Tile-based worlds** — top-down RPGs and maze games: big boards for almost no RAM.
* **Scrolling shoot-’em-ups** — pooled bullets and enemies streaming across the screen.
* **Single-screen arcade & platformers** — a hero, platforms, animated art, a framed HUD.
* **Pseudo-3D racing** — a perspective road that bends as you steer, drawn by **StripDraw** with no extra RAM.
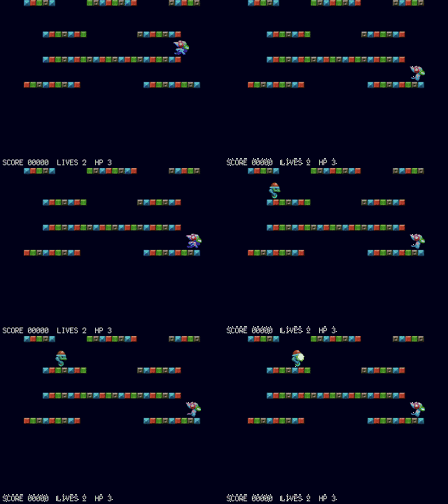
**Platformer** — hero on platforms, animated art.
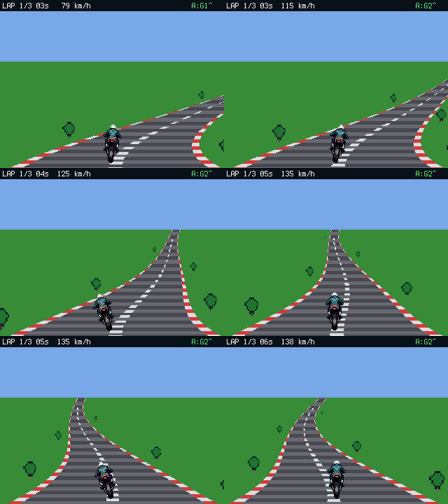
**Pseudo-3D racer** — a StripDraw road that bends, ghost lap.
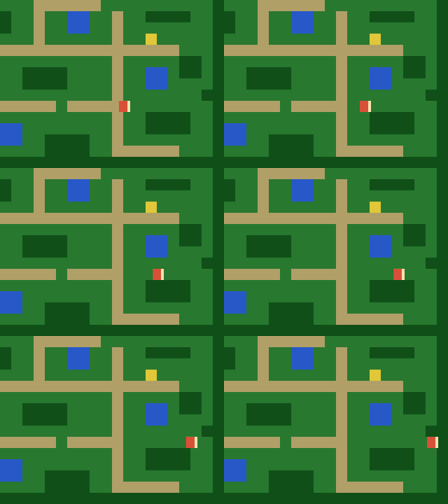
**Top-down RPG** — tilemap world, NPCs, encounters.
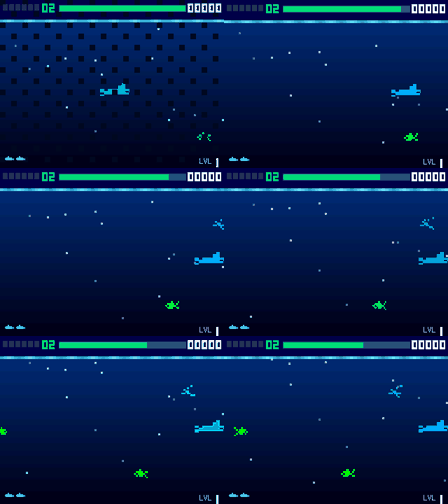
**Scrolling shooter** — pooled sprites, torpedoes to dodge.
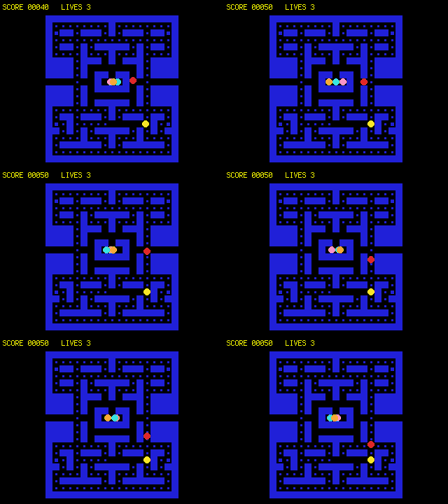
**Maze chase** — tilemap board, ghost AI.
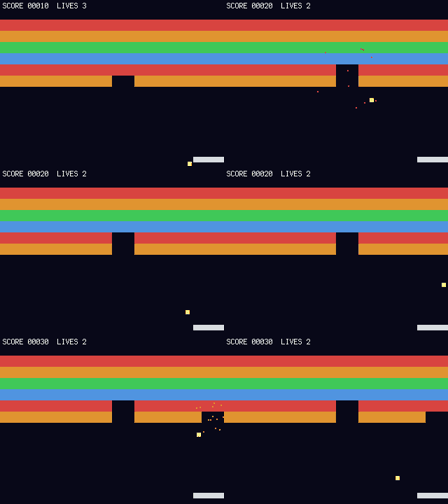
**Breakout** — paddle, brick wall, particles.
[▶ Open the full gallery & playany of them in your browser — Asteroids, Snake, Tetris, Flappy, soccer, pinball & more](/examples/)
Every title is downloadable from the [picogame repo](https://github.com/MakerClassCZ/picogame), and its header comment lists exactly what it uses — so the closest example doubles as your template.
## Small effects, clear feedback
[Section titled “Small effects, clear feedback”](#small-effects-clear-feedback)
The same engine gives you the juice that makes a game *feel* good — screen shake, particles, eased motion, palette tricks — each a couple of lines:

**Screenshake** — trauma-based, on every hit.

**Particles** — bursts and fountains.

**Tweens** — eased motion, no snapping.

**Palette tricks** — recolour with no extra art.
[Effects referencefor developers: the API and when to reach for each](/helpers/effects/)
**What it’s not:** picogame is 2D — not a 3D engine, no heavy physics, and on the RP2040 not full-screen 60 FPS. Design within those limits and lean into them.
## Ready to make one?
[Section titled “Ready to make one?”](#ready-to-make-one)
* **[Make your first game](/start/first-game/)** — five minutes to something moving.
* **[The tutorials](/tutorials/)** — build a Breakout, a shooter, and an RPG step by step.
# Supported hardware
> picogame is a native module inside a CircuitPython fork, so it runs on boards with a picogame firmware build - which needs an SPI display, a few buttons…
picogame is a native module inside a CircuitPython fork, so it runs on boards with **a picogame firmware build** - which needs an SPI display, a few buttons, and (optionally) a PWM speaker. Boards below have builds; other CircuitPython boards with an SPI display can be ported (see [Build your own board](/custom-board/)). The reference device everything is tuned and measured against is the PicoPad.
## Devices
[Section titled “Devices”](#devices)
| Device | MCU | Notes |
| ---------------------------------- | -------- | --------------------------------------------------------------------------------------------------------------------------------------- |
| **Pajenicko PicoPad** | RP2040 | **Primary / reference device.** 320×240 ST7789, D-pad + A/B/X/Y, speaker, SD, NVM. A prebuilt firmware and button profile are provided. |
| PicoPad 2 / RP2350 boards | RP2350 | Build-only (not yet verified on this hardware). Same layout and a larger heap than the RP2040 builds. |
| ESP32-S3 boards (e.g. Feather TFT) | ESP32-S3 | Build-only (not yet verified on this hardware). Wire the buttons for your board (see below). |
| Desktop simulator | your PC | A development tool rather than a hardware target. It runs the same game-facing API but does not reproduce device RAM limits or timing. |
The engine is a native C module in a CircuitPython fork. PicoPad has a **prebuilt firmware**; for other boards you build the fork for that board, see [The firmware build](/firmware/).
## Download firmware
[Section titled “Download firmware”](#download-firmware)
Each link below is a firmware build for one board. Flash it, then copy `code.py` and the required `lib/` modules from [picogame-libs](https://github.com/MakerClassCZ/picogame-libs).
Check the status of your board
The **PicoPad** firmware is the reference build and is tested on the device. Builds without a specific tested status in the table are experimental and may need board-specific work. For a reproducible release, build the CircuitPython fork for the exact board and commit you use (see [The firmware build](/firmware/)).
| Board | Firmware |
| ------------------------------------------------------------------------------------------------------------- | ------------------------------------------------ |
| **Pajenicko PicoPad** (RP2040) — *tested* | [`picopad.uf2`](/firmware/picopad.uf2) |
| PicoPad 2 (RP2350) — *DIY* | [`picopad2.uf2`](/firmware/picopad2.uf2) |
| PicoPad 2 W (RP2350) — *DIY* | [`picopad2w.uf2`](/firmware/picopad2w.uf2) |
| Pimoroni PicoSystem (RP2040) | [`picosystem.uf2`](/firmware/picosystem.uf2) |
| µGame22 (RP2040) | [`ugame22.uf2`](/firmware/ugame22.uf2) |
| Raspberry Pi Pico (RP2040) | [`pico.uf2`](/firmware/pico.uf2) |
| Raspberry Pi Pico W (RP2040) | [`pico_w.uf2`](/firmware/pico_w.uf2) |
| Raspberry Pi Pico 2 (RP2350) | [`pico2.uf2`](/firmware/pico2.uf2) |
| Raspberry Pi Pico 2 W (RP2350) | [`pico2_w.uf2`](/firmware/pico2_w.uf2) |
| TinyCircuits Thumby Color (RP2350) | [`thumby_color.uf2`](/firmware/thumby_color.uf2) |
| **Adafruit Fruit Jam** (RP2350B, **DVI/HDMI out**) — *tested: DVI display, TLV320 audio, USB input, launcher* | [`fruitjam.uf2`](/firmware/fruitjam.uf2) |
| ESP32-S3 — generic (Adafruit Feather TFT) | [`feather_s3.uf2`](/firmware/feather_s3.uf2) |
| µGame S3 (ESP32-S3) | [`ugame_s3.uf2`](/firmware/ugame_s3.uf2) |
| VIDI X (ESP32) | [`vidi_x.bin`](/firmware/vidi_x.bin) |
*The two **PicoPad 2** builds are **DIY / unofficial**, for a PicoPad whose Pico module has been swapped for a Pico 2 / Pico 2 W (RP2350). There is no official Pico 2 PicoPad product and no official CircuitPython for it: same PicoPad hardware, just more RAM (\~520 KB heap). Use at your own risk.*
*The **Fruit Jam** build renders through the DVI framebuffer instead of an SPI panel, and is a well-tested platform — DVI rendering, TLV320 audio, USB gamepad/keyboard input and the on-device launcher all run on hardware. Configure it in `settings.toml` (`CIRCUITPY_DISPLAY_WIDTH`/`_HEIGHT`/`_ROTATION`) with one of two colour depths — `setup()` handles either automatically: `CIRCUITPY_DISPLAY_COLOR_DEPTH=16` for full-colour RGB565 (e.g. 320×240), or `=8` for RGB332, the only depth picodvi offers at **640×480** (full resolution). See [Run on hardware](/hardware/) for the framebuffer/colour-depth details. **Audio** on the Fruit Jam is the I2S TLV320 DAC — install `adafruit_tlv320` + `adafruit_bus_device` in `CIRCUITPY/lib` (they aren’t bundled) and raise the volume keys, or it’s silent; `PICOGAME_DEBUG=1` prints why. **Input** is a USB gamepad or keyboard (the board has no game buttons) — see [Input & controls](/helpers/input/).*
### Experimental: ROMFS asset builds
[Section titled “Experimental: ROMFS asset builds”](#experimental-romfs-asset-builds)
Every RP2040/RP2350 board above also has a **`-romfs`** variant that reserves a **64 KB ROMFS asset region** in flash: `picogame.romfs_program("/assets.romfs")` writes game assets there once, and bitmaps can use their pixel data **from flash without copying it to the heap** (`romfs_mount` + `pg.Bitmap` over the file buffer). The ESP32 port doesn’t support the region yet.
| Board | Firmware |
| --------------------------------------------- | ------------------------------------------------------------ |
| **Pajenicko PicoPad** — *ROMFS device-tested* | [`picopad-romfs.uf2`](/firmware/picopad-romfs.uf2) |
| PicoPad 2 (DIY) | [`picopad2-romfs.uf2`](/firmware/picopad2-romfs.uf2) |
| PicoPad 2 W (DIY) | [`picopad2w-romfs.uf2`](/firmware/picopad2w-romfs.uf2) |
| Pimoroni PicoSystem | [`picosystem-romfs.uf2`](/firmware/picosystem-romfs.uf2) |
| µGame22 | [`ugame22-romfs.uf2`](/firmware/ugame22-romfs.uf2) |
| Raspberry Pi Pico | [`pico-romfs.uf2`](/firmware/pico-romfs.uf2) |
| Raspberry Pi Pico W | [`pico_w-romfs.uf2`](/firmware/pico_w-romfs.uf2) |
| Raspberry Pi Pico 2 | [`pico2-romfs.uf2`](/firmware/pico2-romfs.uf2) |
| Raspberry Pi Pico 2 W | [`pico2_w-romfs.uf2`](/firmware/pico2_w-romfs.uf2) |
| TinyCircuits Thumby Color | [`thumby_color-romfs.uf2`](/firmware/thumby_color-romfs.uf2) |
Switching between the two flavors reformats CIRCUITPY once
The `-romfs` variant moves the flash layout (the drive shifts to make room for the region), so the **first** flash across flavors — either direction — reformats the CIRCUITPY drive: copy your games, `lib/` and files off the device first, then copy them back. Staying within one flavor preserves files as usual, and NVM saves (`picogame_save`) are never affected. On the PicoPad the ROMFS feature is device-tested; treat the other boards’ variants as experimental.
**Flashing:** put the board in bootloader mode. Pico/PicoPad: hold **BOOTSEL** while connecting USB (or double-tap **RESET**) → an `RPI-RP2` USB drive appears → drag the `.uf2` onto it → it reboots as `CIRCUITPY`. Then copy your `code.py` + the `lib/` modules it imports. On a bare Pico, also wire a display + buttons and build the display in code (see *Build your own* below).
**About `.mpy` files:** a game folder may hold an **`mpy/`** subfolder. Those are **compiled MicroPython modules** (the game’s data/asset modules run through `mpy-cross`): they import faster, take less storage, and, most importantly on a tiny-RAM board, skip the parse-time RAM spike a large `.py` causes at import. **On hardware, copy the `mpy/` files next to `code.py`** (not the loose `.py` assets); the loose `.py` are the source the **simulator** runs directly. Same idea as the shipped `lib/*.mpy` engine helpers.
The **classic ESP32** (VIDI X) ships a `.bin` flashed with `esptool` (no UF2 bootloader); ESP32-**S3** boards still use drag-and-drop UF2.
Display, sound, and button setup
**Screen and sound auto-map** wherever the board firmware exposes them; picogame uses `board.DISPLAY` and the output picked by `picogame_audioout` (a PWM speaker pin, or an I2S DAC where the board has one), which the onboard-screen handhelds here (PicoSystem, µGame22, µGame S3, Thumby Color, VIDI X) define. So on those the screen lights up with no setup; sound works if the board names a speaker pin (otherwise pass one: `picogame_audio.Audio(pin)`). On an **I2S DAC board (Fruit Jam)** install `adafruit_tlv320` + `adafruit_bus_device` and set the volume keys, or it stays silent — see [Audio & music](/helpers/audio/).
**Buttons** map automatically on boards with a picogame profile: **PicoPad, PicoSystem, µGame22, µGame S3, and Thumby Color**. **VIDI X** needs separate handling because its D-pad uses an analog resistor ladder, and unlisted boards need an explicit map. On a **USB-host board (Fruit Jam)** a USB gamepad or keyboard is the input (auto-attached; see [Input & controls](/helpers/input/)). Set a GPIO map in `settings.toml` without rebuilding the firmware; `picogame_input.py` contains profiles you can use as examples:
```toml
PICOGAME_BUTTONS = "UP=GP4 DOWN=GP5 LEFT=GP3 RIGHT=GP2 A=GP7 B=GP6 X=GP9 Y=GP8"
```
On a board with **no onboard display** (a bare Pico), you also build the display in code. Both steps are shown in *Build your own → Bring-up* below.
## What a board needs
[Section titled “What a board needs”](#what-a-board-needs)
* **A CircuitPython-supported MCU** — RP2040, RP2350 or ESP32-S3 are the tested families.
* **RAM** usually sets the asset budget. The current measured builds provide about **190 KB** of heap on RP2040 and **520 KB** on RP2350; the largest contiguous block is smaller and varies with firmware configuration. Measure your build (see [Fit it in RAM](/memory/)).
* **An SPI display** driven by `displayio` (or a DVI/HSTX framebuffer on RP2350 boards like the Fruit Jam).
* **A few buttons** on GPIO — a D-pad + A/B is the baseline; X/Y are optional. Or a USB gamepad/keyboard on a USB-host board.
* **Optional: a PWM-capable pin** for a small speaker, **or an I2S DAC** (sound is opt-in).
## Displays
[Section titled “Displays”](#displays)
picogame uses the `displayio` SPI display stack. The controllers listed below are the current tested or supported targets; other `displayio` SPI displays may need verification.
* **Resolution is flexible, if the game reads it.** 320×240 is the reference size. The engine and `Scene` render to whatever size the display reports, but a game has to *lay itself out* from that size rather than hardcode 320×240: read `board.DISPLAY.width`/`height` and derive your layout from it. The `arkanoid` example does exactly that (brick width = display width ÷ columns), so the **same file runs on 240- and 320-px** screens. Less width/height just means a smaller play area.
* **Controllers:** **ST7789** is the reference (PicoPad). **ST7735** (smaller panels) and **ILI9341** also work, as do other `displayio`-supported SPI controllers.
* **12-bit colour (RGB444):** the firmware can send 12-bit instead of 16-bit to cut SPI traffic on transfer-bound scenes. It is an opt-in, compile-time capability: the default everywhere is RGB565, and a game enables 12-bit only where the board advertises it (`picogame.RGB444_SUPPORTED`, e.g. `rgb444="auto"` in `picogame_game.setup`). Requesting `rgb444=True` on a build without the support raises an error rather than mis-driving the panel (ST7789/ST7735 have COLMOD 12-bit, ILI9341 does not). Details in [Clocks, SPI & display limits](/hardware-limits/).
## Build your own on a breadboard
[Section titled “Build your own on a breadboard”](#build-your-own-on-a-breadboard)
No board from the list? A picogame console is cheap to build yourself. The minimum is:
* a **Raspberry Pi Pico** — Pico 1, Pico W or **Pico 2** all work;
* a **320×240 SPI display** with an **ST7789** or **ILI9341** controller;
* **at least 6 buttons** — a D-pad + A/B (add X/Y for two more);
* a small **piezo buzzer** for sound (optional).
That’s enough to play everything on this site. The full pin map, the three ways to get `board.DISPLAY`, the `settings.toml` button config, and orientation/colour troubleshooting are in **[Build your own board](/custom-board/)**.
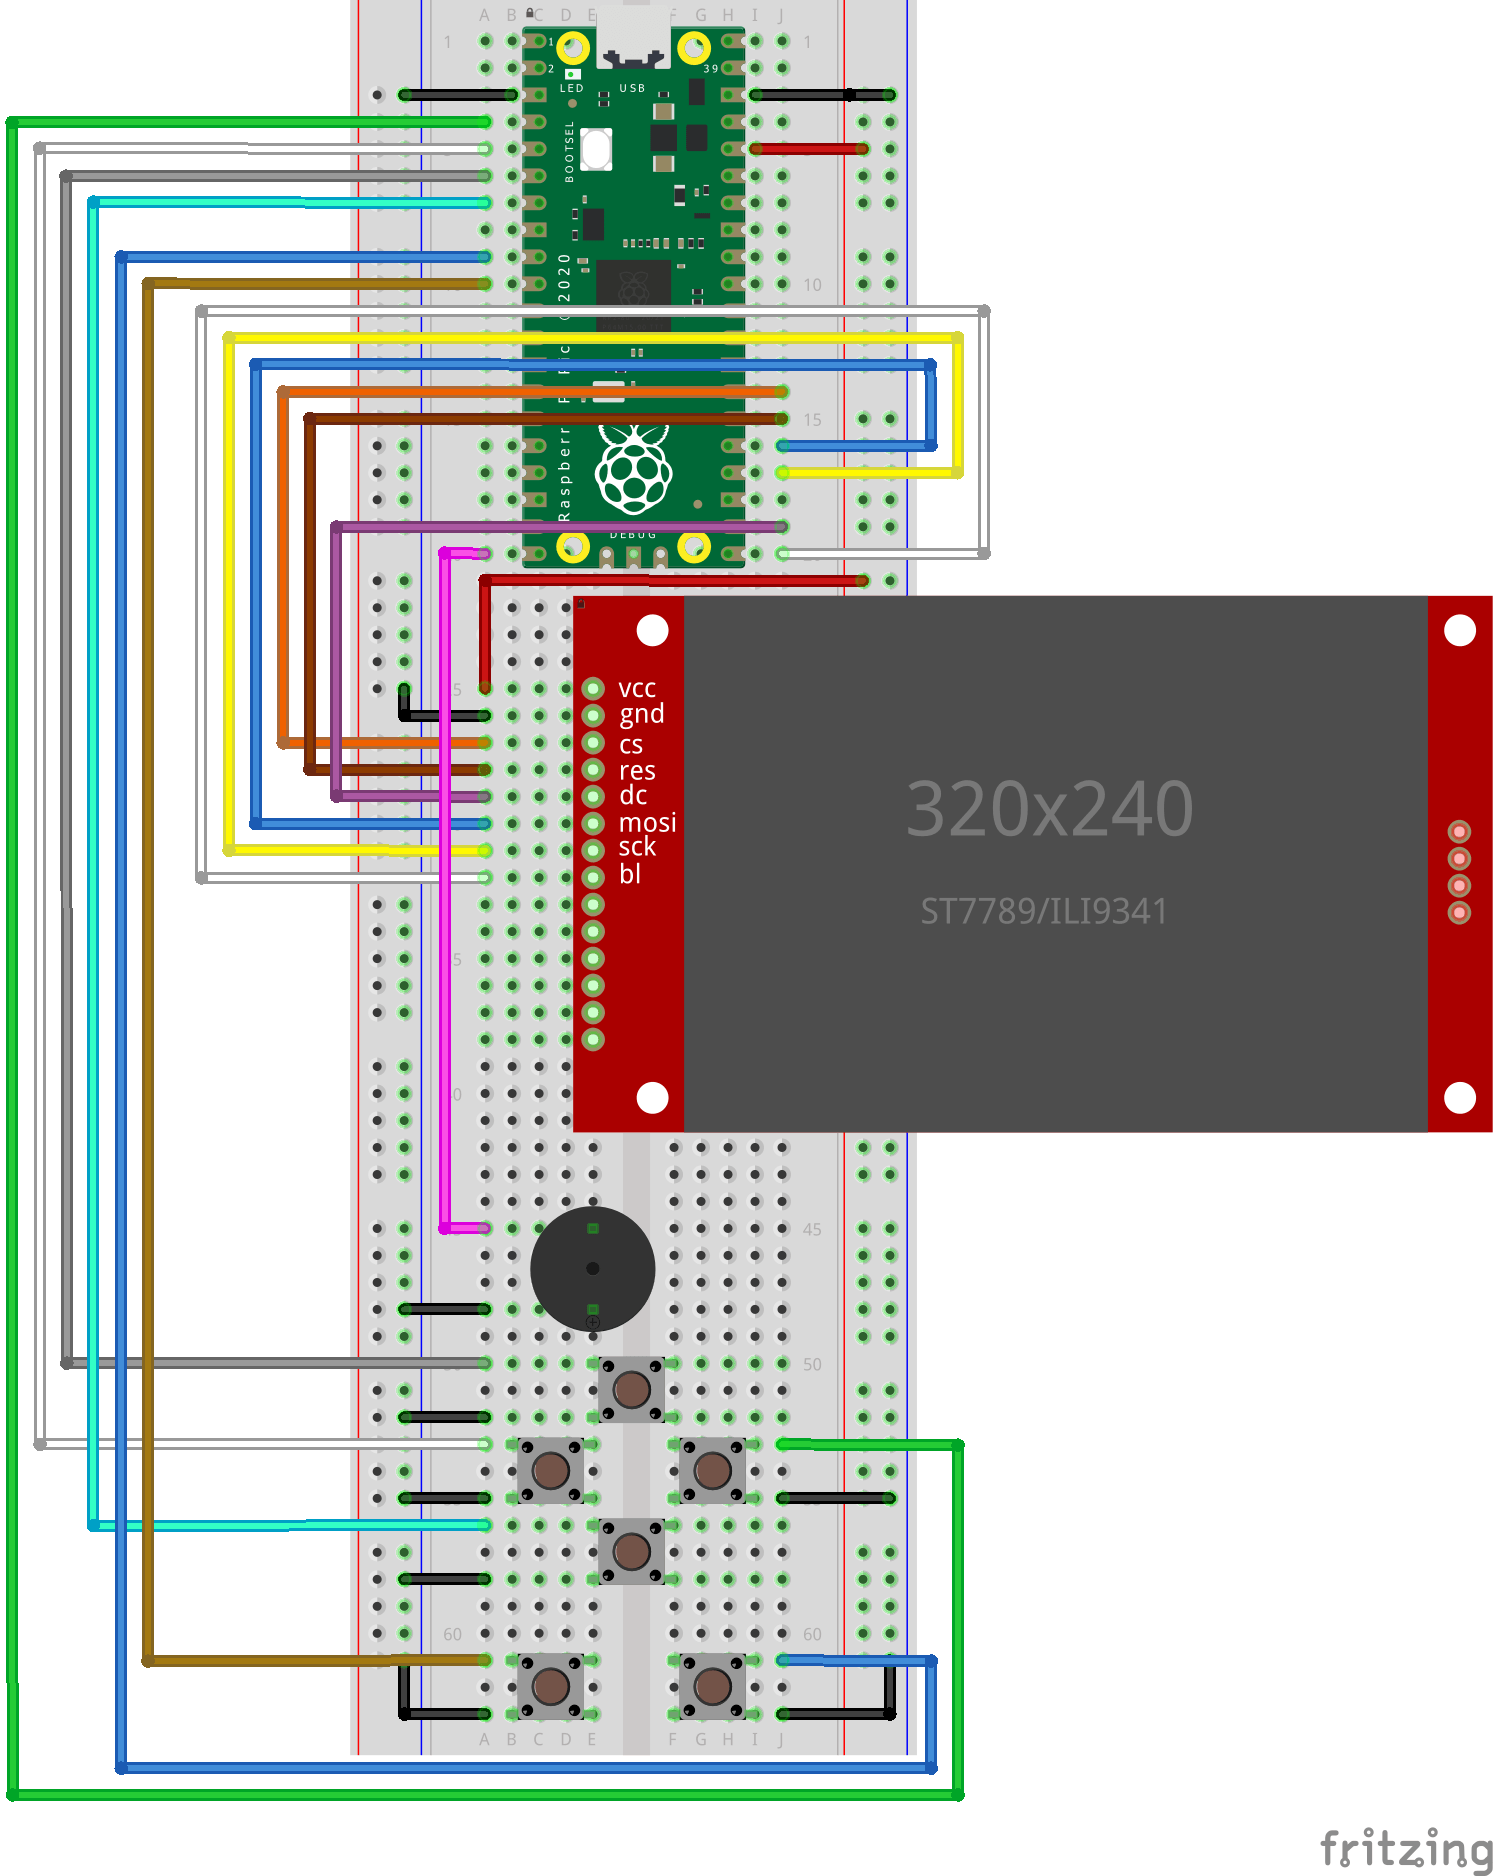
Wire the display’s `vcc / gnd / cs / res / dc / mosi / sck / bl`, the six buttons and the piezo as shown. The exact GPIO pins and the matching `settings.toml` button map are on [Build your own board](/custom-board/); a build video is on the way.
# Web level editor
> A browser editor for picogame scenes — paint tilemaps, place sprites, build scrolling maps bigger than one screen, and export scene.json.
This **browser editor for picogame scenes and levels** lets you import sprite and tileset PNGs, paint tilemaps (with per-tile solid/coin/goal/hazard flags), place sprites, HUD labels, zones, spawn points and particles, set up a follow-camera, and export the `scene.json` that `tools/scene_build.py` bakes for the device/simulator.
The canvas is a window onto a world that can be larger than the device screen, so you can use the editor for both fixed-screen and scrolling levels.
▦**Open the level editor**full-screen · paint tiles, place sprites, build scrolling maps, export scene.json
The button above opens the editor full-screen (Esc closes). It also lives standalone at [`/editor/`](/editor/). On first run a short getting-started card appears; press **?** any time for the full shortcut list.
## Learn by loading a demo
[Section titled “Learn by loading a demo”](#learn-by-loading-a-demo)
The **Demos** menu in the top bar loads ready-made levels. Open one to see how its **Map size** and **Camera** are configured:
* **Sample (one screen)** — a compact one-screen level showing every feature.
* **Scrolling platformer (bounded)** — a 960×240 world (\~3 screens wide). Follow-camera on **axis x** with bounds = the finite world, so the camera **clamps** at the left/right ends (a level with definite ends).
* **Open world (bigger both ways)** — a 640×480 quest map, bigger than the screen in *both* dimensions. Follow-camera on **axis xy**, so you free-roam in x *and* y.
The getting-started card links to the same two scrolling demos.
## World size vs. device screen
[Section titled “World size vs. device screen”](#world-size-vs-device-screen)
Two sizes matter, and the editor shows them as a pair in the **Level** panel (Select tool, nothing selected):
* **World size** — how big the **whole level** is, in **pixels**. This is *where you set the size of your level*: it defines the world extent and drives the camera bounds, **Fit**, the minimap, and the size of new tilemap layers. A live readout shows “≈ N × M screens”.
* **Device screen** — one handheld view (320×240), drawn as the dashed **white box** on the canvas.
To make a level that **scrolls**, set a World size bigger than one screen.
## Make a level that scrolls
[Section titled “Make a level that scrolls”](#make-a-level-that-scrolls)
1. In the **Level** panel (Select tool, nothing selected), set **World size** bigger than one screen: type `world w×h` and **Apply world size**, or use a preset: **1 screen**, **3× wide** (platformer), **2×2 screens** (open world). The editor offers to grow/crop your tilemap layers to fill it.
2. Pick the **Paint** tool and a tileset (import a PNG, or **+ Colour tileset** for placeholders); a new layer already fills the whole world. Paint your ground across it. **Pan** with Space-drag / middle-drag / the Pan tool, use the **minimap** (top-right) to jump around, **Fit** to frame the whole world, **100%** for 1:1.
3. **Place** a sprite and name one `player` (Select tool → *name* field).
4. In **Select** set **Camera → follow → player**. Bounds default to the whole World size (*auto*); uncheck it to drag an explicit orange **camera-bounds** frame.
5. **Export → scene.json**, keep the PNGs next to it, and bake.
Changing World size (or a layer’s own size in the Paint panel) pads with empty tiles on grow, and crops with a confirm if painted tiles would be lost. Everything is undoable (Ctrl+Z). The per-layer **Layer size** control is for cases where a layer should be smaller than the world or offset for parallax. For most levels, change **World size**.
## Tools & controls
[Section titled “Tools & controls”](#tools--controls)
| Tool | Key | Does |
| ------ | --------- | --------------------------------------------------------------------------------------------- |
| Select | 1 / V | Pick + move objects (drag). Click a stacked spot again to cycle. Edit tile flags/colour. |
| Paint | 2 / B | Paint the active layer. Drag = brush, **Shift-drag = rectangle**, **Alt-click = flood fill**. |
| Place | 3 / P | Drop the chosen sprite. |
| HUD | 4 | Camera-fixed text label; also manages **particle layers**. |
| Zone | 5 | Drag a trigger rectangle, then tag it. |
| Point | 6 | Drop a named point (e.g. `spawn`). |
| Pan | H / Space | Pan the view (middle-drag also pans). |
Wheel scrolls, **Ctrl/⌘+wheel** zooms to the cursor, `+`/`−` zoom, `F` fits. Arrows nudge the selection (Shift = ×10) or pan when nothing is selected. `Ctrl+Z`/`Y` undo/redo, `Ctrl+C`/`V`/`D` copy/paste/duplicate, `Delete` deletes, `Esc` deselects. The panel on the right changes with the active tool, so you only see the controls that tool needs. Status messages do not interrupt your work with `prompt()` or `alert()` dialogs.
## Tile flags
[Section titled “Tile flags”](#tile-flags)
A flag gives a tile a **meaning the game reads**; it does not change how it looks. The loader builds fast lookup tables so the game asks the meaning instead of hardcoding tile numbers:
| flag | the game reads it as | typical use |
| ------ | --------------------------------- | -------------------------------------- |
| solid | `view.is_solid(tx, ty)` | walls / floor that block movement |
| coin | `view.tile_has(tx, ty, "coin")` | collectible the game removes on pickup |
| goal | `view.tile_has(tx, ty, "goal")` | level exit / win tile |
| hazard | `view.tile_has(tx, ty, "hazard")` | lava / spikes that hurt the player |
Toggle **Show flag badges on map** (Paint panel) to see coloured corner badges on flagged tiles. **Colour tilesets** (Paint → **+ Colour tileset**) make a placeholder set with no art; edit each colour with a picker, **+ add colour** for more.
## Bake and run on a device or in the simulator
[Section titled “Bake and run on a device or in the simulator”](#bake-and-run-on-a-device-or-in-the-simulator)
Keep the imported/exported PNGs next to the downloaded `scene.json`, then:
```sh
python3 tools/scene_build.py my.scene.json # -> my_scene.py (SCENE = {...})
python3 sim/run.py # preview in the simulator
tools/build_mpy.sh # optional: my_scene.mpy for the device
```
Load it in a game with `picogame_scene.load(pg, my_scene.SCENE, font=...)`. See `examples/picogame_scene_example.py` for a data-driven game built on a baked scene.
# picogame tutorials — learn the engine by building games
> These tutorials introduce the picogame engine one group of mechanics at a time. Every step is a complete, runnable program, and the next step builds on it.
These tutorials introduce the picogame engine **one group of mechanics at a time**. Every step is a complete, runnable program, and the next step builds on it. Compare `stepN` and `stepN+1` side by side to see the code added for the new concept.
Each tutorial ends with a small completed game:
| Tutorial | Genre | What it teaches |
| ------------------------------------------------------------------------------------------------------------------------------- | ---------------------- | ------------------------------------------------------------------------------------------------------------------------------------------------------------------------------------------------------------------------------------------------------------------------------------------------------------ |
| **[01-bounce](/tutorials/01-bounce/)** ([source](https://github.com/MakerClassCZ/picogame/tree/main/tutorials/01-bounce)) | Breakout / Arkanoid | the render loop, input, sub-pixel movement, wall and paddle bounces, box collision, a `Tilemap` brick wall, a HUD, particles, and sound. Placeholder shapes and imported art both use a `Bitmap` on the same `Sprite`, so replacing the artwork does not change the game logic. |
| **[02-starship](/tutorials/02-starship/)** ([source](https://github.com/MakerClassCZ/picogame/tree/main/tutorials/02-starship)) | top-down space shooter | rotation via pre-baked frames, vector thrust + screen wrap, **object pools** (bullets, enemies), circular collision + splitting, escalating waves, explosions/exhaust particles, audio, and a **title → play → game-over state machine**. |
| **[03-quest](/tutorials/03-quest/)** ([source](https://github.com/MakerClassCZ/picogame/tree/main/tutorials/03-quest)) | top-down RPG | a **world bigger than the screen** + a following **camera** (`set_view` with clamping), **tile-based wall collision**, a directional **walk animation**, collectible items + a fixed HUD, an **NPC + dialog**, bump **combat** (HP, i-frames), and a **quest** (objective → unlock a door → reach the goal). |
Do them **in order**: each assumes the fundamentals of the ones before it.
## How to run a step
[Section titled “How to run a step”](#how-to-run-a-step)
You can run each step in the browser with the **Try it** button. To run a step file locally, use the desktop simulator (no hardware needed; it can render headless, saves a PNG):
```bash
python3 sim/run.py tutorials/01-bounce/step3_ball.py --shot /tmp/out.png
```
Useful flags: `--frames N` (how long to run), `--hold RIGHT,B` (hold buttons for the whole run, so you can test input headlessly), `--backend pygame` (a live, playable window if you have pygame installed).
On the **PicoPad** (or any supported board): copy the step file plus the `lib/` helpers it imports to `CIRCUITPY/` and name it `code.py` (or import it). Each file’s header comment lists what it needs.
## How each step is structured
[Section titled “How each step is structured”](#how-each-step-is-structured)
* The **header comment** states *what you learn*, *what’s new vs the previous step*, and the exact run command.
* Inline comments mark the **new lines** so you can see the change at a glance.
* The README in each tutorial folder explains why each addition is useful and ends each step with a small **Try it** change.
## The engine pieces you’ll meet
[Section titled “The engine pieces you’ll meet”](#the-engine-pieces-youll-meet)
All the helpers live in `lib/` (pure Python, work on device and in the simulator):
| Helper | Role |
| --------------------------------- | ---------------------------------------------------------------------------------- |
| `picogame_game.setup()` | resolve the display and create a Scene; on SPI targets, also create render strips |
| `picogame` (C module) | `Sprite`, `Bitmap`, `Tilemap`, `Particles`, `Canvas`, `Scene`, `collide`, `rgb565` |
| `picogame_input` | buttons → bitmask, `is_pressed` / `just_pressed` |
| `picogame_clock` | frame-rate cap + `dt`; a fixed-timestep accumulator |
| `picogame_shapes` | generate solid/round/polygon bitmaps (rectangles, balls, ships) |
| `picogame_pool` | a fixed-size sprite pool for spawners (bullets, enemies) |
| `sprite.overlaps` / `sprite.near` | zero-alloc box / circular collision, built into Sprite |
| `picogame_ui` | `SceneLabel` (in-scene HUD text), text box, menu |
| `picogame_font` | render strings to bitmaps with the bundled font |
| `picogame_audio` | beeps (`tone()`) and `.wav` playback |
## After the tutorials: move to the scene editor
[Section titled “After the tutorials: move to the scene editor”](#after-the-tutorials-move-to-the-scene-editor)
Once you understand the mechanics, the **editor** (`editor/`) can replace hand-placing every tile and sprite in Python. It lets you paint maps, place sprites, and assign tile properties, then export a **scene** that the `picogame_scene` loader builds. The same data runs on device and in the simulator. See `examples/picogame_platformer_scene.py` for a full game whose level (tiles, collisions, coins, enemies, camera) is loaded from editor data, with only the gameplay left in Python. The tutorials teach the mechanics; the editor moves level layout into data.
## Next steps after the tutorials
[Section titled “Next steps after the tutorials”](#next-steps-after-the-tutorials)
After the tutorials, continue with:
* **[Game patterns](/concepts/patterns/)** + **[Snippets](/snippets/)** — the reusable game-loop + `State` shape every bigger game grows into, plus a ready-to-run **game skeleton** to start your own project from (open it in the [Playground](/playground/?ex=game-skeleton)). This is the natural next step now that you’ve built three games by hand.
* **[Feature guide](/features/)** — the task-oriented tour of everything the engine can do (which drawing surface to pick, sprite transforms, collision, HUDs, audio, RAM budgeting), with alternatives for each. Use it when choosing a tool for a task.
* **The helpers** (`lib/`) — the pure-Python modules you met above (`picogame_pool`, `picogame_ui`, `picogame_clock`, `picogame_anim`, …); the feature guide links each to its use.
* **[Glossary](/concepts/glossary/)** — short, plain-language definitions of any unfamiliar term such as sprite, tilemap, dirty region, AABB, or parallax.
# Tutorial 1 — Bounce
> Build a Breakout/Arkanoid game one mechanic at a time, then replace generated rectangles with finished bitmap art.
We build a complete brick-breaker, one mechanic per step. Each `stepN_*.py` runs on its own: read the code below and press **Try it** to run that step right in the browser, or run it locally with:
Run these from the cloned `picogame` folder (the one from [Your first game](/start/first-game/)).
```bash
python3 sim/run.py tutorials/01-bounce/stepN_name.py --shot /tmp/out.png
```
(add `--hold RIGHT` etc. to hold a button, or `--backend pygame` to play it live.)
The first eight steps use generated rectangles. The final step replaces their bitmaps without changing the game loop. Keeping art separate from mechanics also lets the editor change a scene’s graphics without changing its gameplay code.
***
### step 1 — `step1_hello.py` · the render loop
[Section titled “step 1 — step1\_hello.py · the render loop”](#step-1--step1_hellopy--the-render-loop)
 picogame uses [**retained mode**](/concepts/glossary/) (you add objects once and then just change what moved, instead of redrawing the screen yourself): you `scene.add()` objects once to the [`Scene`](/reference/), then each frame you change their state and call `scene.refresh()` and the engine redraws. A “paddle” is a [`Sprite`](/reference/) whose bitmap is a solid rectangle from [`picogame_shapes`](/reference/)’s `shp.rect(w, h, colour)`. [`picogame_game.setup()`](/helpers/boot-loop/) does the display boilerplate and returns `(scene, buffer_a, buffer_b)`. On SPI targets the last two values are reusable render strips; on framebuffer targets they are `None`. This step needs only the scene, so it uses `scene, _, _`. [`picogame_clock`](/reference/)’s `Clock(40)` caps the loop to 40 FPS. **You see:** a grey bar near the bottom. **Try it:** change the rectangle’s size/colour.
```diff
16 collapsed lines
# Bounce -- step 1: get ONE thing on screen.
#
# What you learn: the picogame render loop. A game is (a) a Scene you add objects
# to ONCE, then (b) a loop that moves things and calls scene.refresh(). The engine
# is retained-mode: you don't redraw by hand, you change object state and refresh.
#
# New in this step: picogame_game.setup(), picogame_shapes.rect(), pg.Sprite,
# scene.add(), scene.refresh(), the frame clock.
#
# Run it: python3 sim/run.py tutorials/01-bounce/step1_hello.py --shot /tmp/s1.png
# On device: copy this file + the lib/ helpers to CIRCUITPY.
import picogame as pg
import picogame_game
import picogame_clock
import picogame_shapes as shp
W, H = 320, 240
PADDLE_W, PADDLE_H = 44, 8
# setup() takes over the display and gives us a Scene + its two strip buffers.
+scene, _, _ = picogame_game.setup(background=pg.rgb565(8, 10, 24))
+clock = picogame_clock.Clock(40) # cap the loop to 40 FPS
# A "paddle" is just a Sprite whose bitmap is a solid rectangle. shp.rect(w,h,color)
# makes that bitmap -- a rectangle and an image sprite are the SAME kind of object
# (we'll prove that in step 9 by swapping the bitmap for art, with no other change).
+paddle = pg.Sprite(shp.rect(PADDLE_W, PADDLE_H, pg.rgb565(220, 220, 230)),
(W - PADDLE_W) // 2, H - 16)
+scene.add(paddle) # add it to the scene ONCE
+while True:
+ scene.refresh() # the engine draws the scene
+ clock.tick() # sleep to the next frame
```
[▶ Try it in the browser](/playground/?ex=01-bounce-step1_hello)
### step 2 — `step2_move.py` · input
[Section titled “step 2 — step2\_move.py · input”](#step-2--step2_movepy--input)
 [`picogame_input`](/reference/)’s `Buttons()` samples the buttons each `poll()`. `is_pressed(RIGHT) - is_pressed(LEFT)` is a tidy −1/0/+1 axis; we move the paddle and clamp it inside the screen. **You see:** the paddle slides with LEFT/RIGHT. **Try it:** change `SPEED`.
```diff
16 collapsed lines
# Bounce -- step 2: move the paddle with the buttons.
#
# What you learn: input. picogame_input.Buttons reads the board's buttons into a
# bitmask each frame; btn.is_pressed(btn.LEFT) is the held state. We move the paddle
# and clamp it to the screen so it can't leave.
#
# New vs step 1: picogame_input.Buttons, btn.poll()/btn.is_pressed(), sprite.move(),
# clamping with max()/min().
#
# Run: python3 sim/run.py tutorials/01-bounce/step2_move.py --hold RIGHT --shot /tmp/s2.png
import picogame as pg
import picogame_game
import picogame_input
import picogame_clock
import picogame_shapes as shp
W, H = 320, 240
PADDLE_W, PADDLE_H = 44, 8
SPEED = 5
scene, _, _ = picogame_game.setup(background=pg.rgb565(8, 10, 24))
+btn = picogame_input.Buttons() # NEW: the buttons
clock = picogame_clock.Clock(40)
paddle = pg.Sprite(shp.rect(PADDLE_W, PADDLE_H, pg.rgb565(220, 220, 230)),
(W - PADDLE_W) // 2, H - 16)
scene.add(paddle)
while True:
+ btn.poll() # sample the buttons once per frame
+# RIGHT minus LEFT gives -1 / 0 / +1 -- a tidy way to read a 1-axis control.
+ delta_x = btn.is_pressed(btn.RIGHT) - btn.is_pressed(btn.LEFT)
+if delta_x:
+ x = paddle.x + delta_x * SPEED
+ x = max(0, min(W - PADDLE_W, x)) # clamp inside the screen
+ paddle.move(x, paddle.y)
scene.refresh()
clock.tick()
```
[▶ Try it in the browser](/playground/?ex=01-bounce-step2_move)
### step 3 — `step3_ball.py` · velocity (whole pixels)
[Section titled “step 3 — step3\_ball.py · velocity (whole pixels)”](#step-3--step3_ballpy--velocity-whole-pixels)
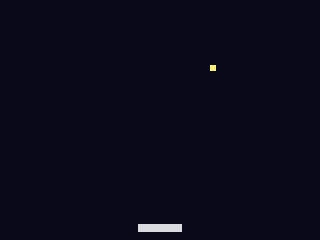 Velocity is just how many whole pixels a thing moves each frame: `velocity_x` across, `velocity_y` down. Add the velocity to the ball’s position every frame and it travels in a straight line. Here we keep it simple: integer velocity, integer position, whole-pixel steps. **You see:** the ball flies off-screen (we fix that next). **Try it:** change `velocity_x, velocity_y`.
```diff
17 collapsed lines
# Bounce -- step 3: a ball with velocity (whole-pixel movement).
#
# What you learn: velocity. Velocity is just how many pixels a thing moves each
# frame: velocity_x across, velocity_y down. Add the velocity to the ball's
# position every frame and it travels in a straight line. Here we move in WHOLE
# pixels -- integer velocity, integer position -- which is all this step needs.
#
# New vs step 2: a velocity (velocity_x, velocity_y) added to ball.x / ball.y each
# frame. The ball flies off-screen for now -- step 4 makes it bounce.
#
# Run: python3 sim/run.py tutorials/01-bounce/step3_ball.py --shot /tmp/s3.png
import picogame as pg
import picogame_game
import picogame_input
import picogame_clock
import picogame_shapes as shp
W, H = 320, 240
PADDLE_W, PADDLE_H = 44, 8
BALL = 6
scene, _, _ = picogame_game.setup(background=pg.rgb565(8, 10, 24))
btn = picogame_input.Buttons()
clock = picogame_clock.Clock(40)
paddle = pg.Sprite(shp.rect(PADDLE_W, PADDLE_H, pg.rgb565(220, 220, 230)),
(W - PADDLE_W) // 2, H - 16)
+ball = pg.Sprite(shp.rect(BALL, BALL, pg.rgb565(255, 240, 120)), W // 2, H // 2)
scene.add(paddle)
+scene.add(ball)
+velocity_x, velocity_y = 3, -3 # NEW: whole pixels moved per frame
while True:
btn.poll()
delta_x = btn.is_pressed(btn.RIGHT) - btn.is_pressed(btn.LEFT)
if delta_x:
paddle.move(max(0, min(W - PADDLE_W, paddle.x + delta_x * 5)), paddle.y)
+# move the ball by its velocity (whole pixels)
+ ball.move(ball.x + velocity_x, ball.y + velocity_y)
scene.refresh()
clock.tick()
```
[▶ Try it in the browser](/playground/?ex=01-bounce-step3_ball)
### step 4 — `step4_walls.py` · reflection
[Section titled “step 4 — step4\_walls.py · reflection”](#step-4--step4_wallspy--reflection)
 A bounce is just flipping the velocity component heading into a wall and pinning the ball to the edge so it can’t tunnel out. Left/right flip `velocity_x`, the top flips `velocity_y`. Still whole-pixel velocity here. The bottom stays open; falling past it is a “miss”. **You see:** the ball bounces around three walls forever. **Try it:** make the top open too and watch it escape.
```diff
17 collapsed lines
# Bounce -- step 4: bounce off the walls.
#
# What you learn: reflection. A bounce is just flipping the velocity component that
# points into the wall, and pinning the position back to the edge so the ball can't
# tunnel out. Left/right flip velocity_x; the top flips velocity_y. We're still
# moving in whole pixels (integer velocity). We leave the BOTTOM open -- a ball that
# falls past it is a missed ball (step 5 turns that into "lose a life").
#
# New vs step 3: edge tests against ball.x/.y, inverting velocity_x/velocity_y on contact.
#
# Run: python3 sim/run.py tutorials/01-bounce/step4_walls.py --shot /tmp/s4.png
import picogame as pg
import picogame_game
import picogame_input
import picogame_clock
import picogame_shapes as shp
W, H = 320, 240
PADDLE_W, PADDLE_H = 44, 8
BALL = 6
scene, _, _ = picogame_game.setup(background=pg.rgb565(8, 10, 24))
btn = picogame_input.Buttons()
clock = picogame_clock.Clock(40)
paddle = pg.Sprite(shp.rect(PADDLE_W, PADDLE_H, pg.rgb565(220, 220, 230)),
(W - PADDLE_W) // 2, H - 16)
ball = pg.Sprite(shp.rect(BALL, BALL, pg.rgb565(255, 240, 120)), W // 2, H // 2)
scene.add(paddle)
scene.add(ball)
velocity_x, velocity_y = 3, -3
while True:
btn.poll()
delta_x = btn.is_pressed(btn.RIGHT) - btn.is_pressed(btn.LEFT)
if delta_x:
paddle.move(max(0, min(W - PADDLE_W, paddle.x + delta_x * 5)), paddle.y)
ball.move(ball.x + velocity_x, ball.y + velocity_y)
+# walls: flip the component heading into the wall, and pin to the edge
+if ball.x < 0:
+ ball.move(0, ball.y)
+ velocity_x = -velocity_x
+elif ball.x > W - BALL:
+ ball.move(W - BALL, ball.y)
+ velocity_x = -velocity_x
+if ball.y < 0:
+ ball.move(ball.x, 0)
+ velocity_y = -velocity_y
scene.refresh()
clock.tick()
```
[▶ Try it in the browser](/playground/?ex=01-bounce-step4_walls)
### step 5 — `step5_paddle.py` · box collision + feel
[Section titled “step 5 — step5\_paddle.py · box collision + feel”](#step-5--step5_paddlepy--box-collision--feel)
 `pg.collide(ax1,ay1,ax2,ay2, bx1,by1,bx2,by2)` is a fast [box-overlap test](/concepts/glossary/) (AABB, axis-aligned bounding box): it just checks whether two upright rectangles overlap. On a paddle hit (only while moving down) we send the ball up and nudge `velocity_x` by *where* on the paddle it landed, so you can aim. That variable bounce angle is **why we now need sub-pixel movement**: a steered ball travels at speeds like 1.4 px/frame, *fractions* of a pixel that whole-pixel integers can’t express. So the ball now keeps a sub-pixel position in `ball.fx`/`ball.fy` (floats) with a float velocity; `ball.x`/`ball.y` are just those values rounded to whole pixels for drawing and collision. Falling past the bottom costs a life and re-serves. **You see:** a volley you can keep alive. **Try it:** change the `0.06` steering factor.
```diff
21 collapsed lines
# Bounce -- step 5: the paddle hits the ball, and you can miss.
#
# What you learn: box collision + a control-feel trick, and WHY we now need
# sub-pixel movement. pg.collide(ax1,ay1,ax2,ay2, bx1,by1,bx2,by2) is a fast
# axis-aligned overlap test. On a paddle hit we send the ball upward and steer it
# by WHERE on the paddle it landed -- so you can aim. That variable bounce angle
# means the ball must travel at speeds like 1.4 px/frame: FRACTIONS of a pixel,
# which whole-pixel integers can't express. So the ball now keeps a sub-pixel
# position in ball.fx / ball.fy (floats) and a float velocity; ball.x / ball.y are
# just those values rounded to whole pixels for drawing and collision.
#
# New vs step 4: ball.fx/.fy + float velocity, pg.collide, steering the bounce by
# hit offset, lives + reset.
#
# Run: python3 sim/run.py tutorials/01-bounce/step5_paddle.py --hold LEFT --shot /tmp/s5.png
import picogame as pg
import picogame_game
import picogame_input
import picogame_clock
import picogame_shapes as shp
W, H = 320, 240
PADDLE_W, PADDLE_H = 44, 8
BALL = 6
scene, _, _ = picogame_game.setup(background=pg.rgb565(8, 10, 24))
btn = picogame_input.Buttons()
clock = picogame_clock.Clock(40)
paddle = pg.Sprite(shp.rect(PADDLE_W, PADDLE_H, pg.rgb565(220, 220, 230)),
(W - PADDLE_W) // 2, H - 16)
ball = pg.Sprite(shp.rect(BALL, BALL, pg.rgb565(255, 240, 120)), W // 2, H // 2)
scene.add(paddle)
scene.add(ball)
velocity_x, velocity_y = 2.4, -2.6 # NEW: float velocity (fractions of a pixel)
lives = 3
+def serve():
+global velocity_x, velocity_y
+ ball.move(W // 2, H // 2)
+ velocity_x, velocity_y = 2.4, -2.6
while True:
btn.poll()
delta_x = btn.is_pressed(btn.RIGHT) - btn.is_pressed(btn.LEFT)
if delta_x:
paddle.move(max(0, min(W - PADDLE_W, paddle.x + delta_x * 5)), paddle.y)
+# integrate the float velocity into the ball's sub-pixel position
+ ball.fx += velocity_x
+ ball.fy += velocity_y
+if ball.fx < 0:
+ ball.fx = 0; velocity_x = -velocity_x
+elif ball.fx > W - BALL:
+ ball.fx = W - BALL; velocity_x = -velocity_x
+if ball.fy < 0:
+ ball.fy = 0; velocity_y = -velocity_y
+# paddle bounce: only when moving DOWN and the boxes overlap
+if velocity_y > 0 and pg.collide(ball.x, ball.y, ball.x + BALL, ball.y + BALL,
paddle.x, paddle.y, paddle.x + PADDLE_W, paddle.y + PADDLE_H):
+ velocity_y = -abs(velocity_y)
+# steer: distance of ball centre from paddle centre -> sideways speed
+ velocity_x += (ball.x + BALL / 2 - (paddle.x + PADDLE_W / 2)) * 0.06
+if ball.fy > H: # missed the ball
+ lives -= 1
+if lives <= 0:
+ lives = 3
+serve()
scene.refresh()
clock.tick()
```
[▶ Try it in the browser](/playground/?ex=01-bounce-step5_paddle)
### step 6 — `step6_bricks.py` · the Tilemap
[Section titled “step 6 — step6\_bricks.py · the Tilemap”](#step-6--step6_brickspy--the-tilemap)
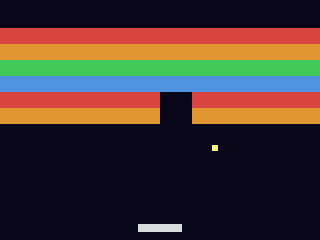 A [`Tilemap`](/reference/) is a grid of identical tiles that share one image, instead of one sprite per cell. It’s backed by one tileset bitmap, 1 byte per cell, far cheaper than a sprite per brick. `shp.tileset_colors(w, h, [colours])` builds a sheet where value 0 is empty and 1..N are colours. Map the ball’s pixel to a tile (`tile_x = pixel_x // BRICK_W`), read it, and set it to 0 to clear it. Clear the wall → rebuild. **You see:** a 10×6 wall you break. **Try it:** change `ROWS` or the brick colours.
```diff
17 collapsed lines
# Bounce -- step 6: a wall of bricks (a Tilemap).
#
# What you learn: the Tilemap. A grid of tiles backed by ONE bitmap (a tileset),
# stored as 1 byte per cell -- far cheaper than a Sprite per brick. We build the
# tileset with shp.tileset_colors (frame 0 = empty, 1..4 = colours), fill the grid,
# and on a ball hit we find the tile under the ball, read it, and set it to 0 to
# clear it. Map a pixel to a tile with tx = (px - origin_x) // tile_w.
#
# New vs step 5: pg.Tilemap, shp.tileset_colors, pixel->tile mapping, clearing a tile.
#
# Run: python3 sim/run.py tutorials/01-bounce/step6_bricks.py --shot /tmp/s6.png
import picogame as pg
import picogame_game
import picogame_input
import picogame_clock
import picogame_shapes as shp
W, H = 320, 240
PADDLE_W, PADDLE_H = 44, 8
BALL = 6
+BRICK_W, BRICK_H = 32, 16 # brick (tile) size
+COLS, ROWS = W // BRICK_W, 6 # 10 x 6 wall
+BRICK_Y = 28 # wall top (leaves a HUD strip)
scene, _, _ = picogame_game.setup(background=pg.rgb565(8, 10, 24))
btn = picogame_input.Buttons()
clock = picogame_clock.Clock(40)
# tileset: value 0 empty, 1..4 = four brick colours
+brick_colors = [pg.rgb565(220, 70, 70), pg.rgb565(230, 150, 50),
+ pg.rgb565(70, 200, 90), pg.rgb565(80, 150, 230)]
+bricks = pg.Tilemap(shp.tileset_colors(BRICK_W, BRICK_H, brick_colors), COLS, ROWS)
+bricks.move(0, BRICK_Y)
+def build_wall():
+global bricks_left
+for tile_y in range(ROWS):
+for tile_x in range(COLS):
+ bricks.tile(tile_x, tile_y, 1 + (tile_y % 4)) # row -> colour 1..4
+ bricks_left = COLS * ROWS
build_wall()
paddle = pg.Sprite(shp.rect(PADDLE_W, PADDLE_H, pg.rgb565(220, 220, 230)),
(W - PADDLE_W) // 2, H - 16)
ball = pg.Sprite(shp.rect(BALL, BALL, pg.rgb565(255, 240, 120)), W // 2, H // 2)
+scene.add(bricks) # add the wall first (drawn under the ball)
scene.add(paddle)
scene.add(ball)
velocity_x, velocity_y = 2.4, -2.6
lives = 3
def serve():
global velocity_x, velocity_y
ball.move(W // 2, H // 2)
velocity_x, velocity_y = 2.4, -2.6
20 collapsed lines
while True:
btn.poll()
delta_x = btn.is_pressed(btn.RIGHT) - btn.is_pressed(btn.LEFT)
if delta_x:
paddle.move(max(0, min(W - PADDLE_W, paddle.x + delta_x * 5)), paddle.y)
ball.fx += velocity_x
ball.fy += velocity_y
if ball.fx < 0:
ball.fx = 0; velocity_x = -velocity_x
elif ball.fx > W - BALL:
ball.fx = W - BALL; velocity_x = -velocity_x
if ball.fy < 0:
ball.fy = 0; velocity_y = -velocity_y
if velocity_y > 0 and pg.collide(ball.x, ball.y, ball.x + BALL, ball.y + BALL,
paddle.x, paddle.y, paddle.x + PADDLE_W, paddle.y + PADDLE_H):
velocity_y = -abs(velocity_y)
velocity_x += (ball.x + BALL / 2 - (paddle.x + PADDLE_W / 2)) * 0.06
+# brick hit: the tile under the ball's centre
+ center_x, center_y = ball.x + BALL // 2, ball.y + BALL // 2
+ tile_x = center_x // BRICK_W
+ tile_y = (center_y - BRICK_Y) // BRICK_H
+if 0 <= tile_x < COLS and 0 <= tile_y < ROWS and bricks.tile(tile_x, tile_y):
+ bricks.tile(tile_x, tile_y, 0) # clear the brick
+ bricks_left -= 1
+ velocity_y = -velocity_y
+if bricks_left == 0: # cleared the wall -> rebuild
+build_wall()
+serve()
if ball.fy > H:
lives -= 1
if lives <= 0:
lives = 3
build_wall()
serve()
scene.refresh()
clock.tick()
```
[▶ Try it in the browser](/playground/?ex=01-bounce-step6_bricks)
### step 7 — `step7_hud.py` · text / status bar
[Section titled “step 7 — step7\_hud.py · text / status bar”](#step-7--step7_hudpy--text--status-bar)
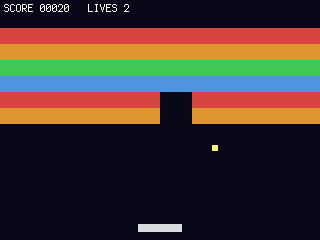 [`picogame_ui`](/reference/)’s `SceneLabel` renders text into the scene as a **fixed** layer (drawn by `refresh()`, and camera-independent, handy once the world scrolls). It uses the bundled `terminalio.FONT`, so no font asset. `label.set(...)` re-renders only when the text changes. **You see:** `SCORE / LIVES` across the top. **Try it:** add the brick count.
```diff
21 collapsed lines
# Bounce -- step 7: a score + lives status bar.
#
# What you learn: text / HUD. picogame_ui.SceneLabel renders text into the scene as a
# "fixed" layer -- it's drawn by scene.refresh() like everything else, and (because
# it's fixed) it would stay put even if the world scrolled (it doesn't here, but
# you'll want that in a platformer). It uses the bundled terminalio.FONT, so no font
# asset is needed. Call label.set(...) each frame; it only re-renders when the text
# actually changes.
#
# New vs step 6: terminalio.FONT, picogame_ui.SceneLabel, a running score.
#
# Run: python3 sim/run.py tutorials/01-bounce/step7_hud.py --shot /tmp/s7.png
import terminalio
import picogame as pg
import picogame_game
import picogame_input
import picogame_clock
import picogame_shapes as shp
import picogame_ui as ui
W, H = 320, 240
PADDLE_W, PADDLE_H = 44, 8
BALL = 6
BRICK_W, BRICK_H = 32, 16
COLS, ROWS = W // BRICK_W, 6
BRICK_Y = 28
BACKGROUND = pg.rgb565(8, 10, 24)
scene, _, _ = picogame_game.setup(background=BACKGROUND)
btn = picogame_input.Buttons()
clock = picogame_clock.Clock(40)
brick_colors = [pg.rgb565(220, 70, 70), pg.rgb565(230, 150, 50),
pg.rgb565(70, 200, 90), pg.rgb565(80, 150, 230)]
bricks = pg.Tilemap(shp.tileset_colors(BRICK_W, BRICK_H, brick_colors), COLS, ROWS)
bricks.move(0, BRICK_Y)
def build_wall():
global bricks_left
for tile_y in range(ROWS):
for tile_x in range(COLS):
bricks.tile(tile_x, tile_y, 1 + (tile_y % 4))
bricks_left = COLS * ROWS
build_wall()
paddle = pg.Sprite(shp.rect(PADDLE_W, PADDLE_H, pg.rgb565(220, 220, 230)),
(W - PADDLE_W) // 2, H - 16)
ball = pg.Sprite(shp.rect(BALL, BALL, pg.rgb565(255, 240, 120)), W // 2, H // 2)
scene.add(bricks)
scene.add(paddle)
scene.add(ball)
# NEW: a HUD label. Adding it to the scene happens inside SceneLabel (as a fixed layer).
+hud = ui.SceneLabel(scene, pg, terminalio.FONT, 4, 2, pg.rgb565(255, 255, 255), BACKGROUND)
velocity_x, velocity_y = 2.4, -2.6
+score = 0
lives = 3
def serve():
global velocity_x, velocity_y
ball.move(W // 2, H // 2)
velocity_x, velocity_y = 2.4, -2.6
while True:
btn.poll()
delta_x = btn.is_pressed(btn.RIGHT) - btn.is_pressed(btn.LEFT)
if delta_x:
paddle.move(max(0, min(W - PADDLE_W, paddle.x + delta_x * 5)), paddle.y)
17 collapsed lines
ball.fx += velocity_x
ball.fy += velocity_y
if ball.fx < 0:
ball.fx = 0; velocity_x = -velocity_x
elif ball.fx > W - BALL:
ball.fx = W - BALL; velocity_x = -velocity_x
if ball.fy < 0:
ball.fy = 0; velocity_y = -velocity_y
if velocity_y > 0 and pg.collide(ball.x, ball.y, ball.x + BALL, ball.y + BALL,
paddle.x, paddle.y, paddle.x + PADDLE_W, paddle.y + PADDLE_H):
velocity_y = -abs(velocity_y)
velocity_x += (ball.x + BALL / 2 - (paddle.x + PADDLE_W / 2)) * 0.06
center_x, center_y = ball.x + BALL // 2, ball.y + BALL // 2
tile_x, tile_y = center_x // BRICK_W, (center_y - BRICK_Y) // BRICK_H
if 0 <= tile_x < COLS and 0 <= tile_y < ROWS and bricks.tile(tile_x, tile_y):
bricks.tile(tile_x, tile_y, 0)
bricks_left -= 1
+ score += 10 # NEW: score on a hit
velocity_y = -velocity_y
if bricks_left == 0:
build_wall()
serve()
if ball.fy > H:
lives -= 1
if lives <= 0:
lives = 3
score = 0
build_wall()
serve()
+ hud.set("SCORE %05d LIVES %d" % (score, lives)) # update text, then draw it
scene.refresh() # draws the scene incl. the HUD
clock.tick()
```
[▶ Try it in the browser](/playground/?ex=01-bounce-step7_hud)
### step 8 — `step8_particles.py` · juice (particles + sound)
[Section titled “step 8 — step8\_particles.py · juice (particles + sound)”](#step-8--step8_particlespy--juice-particles--sound)
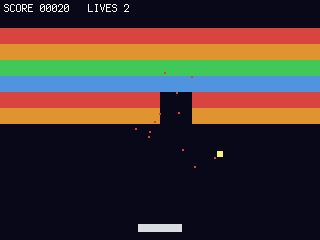 Now we add some [juice](/concepts/glossary/), the small touches that make a hit feel good. [`Particles`](/reference/) is a cheap burst system: `emit(x, y, count, speed, life, colour)` then `tick()` each frame. We burst in the brick’s colour on every break. `picogame_audio.tone()` makes a beep with no `.wav`, a blip per hit. (Audio is wrapped in `try/except`, so it’s silent but safe where there’s no audio output, like the simulator.) **You see:** coloured sparks + (on hardware) a blip. **Try it:** change the particle `count`/`gravity`.
```diff
22 collapsed lines
# Bounce -- step 8: juice (particles + sound).
#
# What you learn: feedback that makes a hit feel good. pg.Particles is a cheap
# burst system: emit(x, y, count, speed, life, colour) spawns particles, tick()
# advances them (with gravity), and the scene draws them. We burst on every brick
# break, in the brick's colour. And picogame_audio.tone() builds a short square-wave
# beep with no .wav file -- a tiny blip on each hit. (Audio is wrapped in try/except
# so it degrades gracefully where there's no audio output, e.g. the simulator.)
#
# New vs step 7: pg.Particles (emit/tick), picogame_audio.tone() + Audio().sfx()
# (a blip on each hit and a low tone when you miss the ball).
#
# Run: python3 sim/run.py tutorials/01-bounce/step8_particles.py --shot /tmp/s8.png
import terminalio
import picogame as pg
import picogame_game
import picogame_input
import picogame_clock
import picogame_shapes as shp
import picogame_ui as ui
W, H = 320, 240
PADDLE_W, PADDLE_H = 44, 8
BALL = 6
BRICK_W, BRICK_H = 32, 16
COLS, ROWS = W // BRICK_W, 6
BRICK_Y = 28
BACKGROUND = pg.rgb565(8, 10, 24)
scene, _, _ = picogame_game.setup(background=BACKGROUND)
btn = picogame_input.Buttons()
clock = picogame_clock.Clock(40)
+# optional audio: a beep on each hit (no asset needed). None if no audio backend.
+try:
+import picogame_audio
+ audio = picogame_audio.Audio()
+ blip = picogame_audio.tone(660, 35)
+ lose = picogame_audio.tone(150, 160) # low tone when a ball is missed
+except Exception:
+ audio = None
+ blip = lose = None
brick_colors = [pg.rgb565(220, 70, 70), pg.rgb565(230, 150, 50),
pg.rgb565(70, 200, 90), pg.rgb565(80, 150, 230)]
brick_ts = shp.tileset_colors(BRICK_W, BRICK_H, brick_colors)
bricks = pg.Tilemap(brick_ts, COLS, ROWS)
bricks.move(0, BRICK_Y)
def build_wall():
+global bricks_left
for tile_y in range(ROWS):
for tile_x in range(COLS):
bricks.tile(tile_x, tile_y, 1 + (tile_y % 4))
bricks_left = COLS * ROWS
build_wall()
paddle = pg.Sprite(shp.rect(PADDLE_W, PADDLE_H, pg.rgb565(220, 220, 230)),
(W - PADDLE_W) // 2, H - 16)
ball = pg.Sprite(shp.rect(BALL, BALL, pg.rgb565(255, 240, 120)), W // 2, H // 2)
particles = pg.Particles(96, size=2, gravity=0.12) # NEW
scene.add(bricks)
scene.add(particles) # behind paddle+ball
scene.add(paddle)
scene.add(ball)
35 collapsed lines
hud = ui.SceneLabel(scene, pg, terminalio.FONT, 4, 2, pg.rgb565(255, 255, 255), BACKGROUND)
velocity_x, velocity_y = 2.4, -2.6
score = 0
lives = 3
def serve():
global velocity_x, velocity_y
ball.move(W // 2, H // 2)
velocity_x, velocity_y = 2.4, -2.6
while True:
btn.poll()
delta_x = btn.is_pressed(btn.RIGHT) - btn.is_pressed(btn.LEFT)
if delta_x:
paddle.move(max(0, min(W - PADDLE_W, paddle.x + delta_x * 5)), paddle.y)
ball.fx += velocity_x
ball.fy += velocity_y
if ball.fx < 0:
ball.fx = 0; velocity_x = -velocity_x
elif ball.fx > W - BALL:
ball.fx = W - BALL; velocity_x = -velocity_x
if ball.fy < 0:
ball.fy = 0; velocity_y = -velocity_y
if velocity_y > 0 and pg.collide(ball.x, ball.y, ball.x + BALL, ball.y + BALL,
paddle.x, paddle.y, paddle.x + PADDLE_W, paddle.y + PADDLE_H):
velocity_y = -abs(velocity_y)
velocity_x += (ball.x + BALL / 2 - (paddle.x + PADDLE_W / 2)) * 0.06
center_x, center_y = ball.x + BALL // 2, ball.y + BALL // 2
tile_x, tile_y = center_x // BRICK_W, (center_y - BRICK_Y) // BRICK_H
if 0 <= tile_x < COLS and 0 <= tile_y < ROWS:
cell = bricks.tile(tile_x, tile_y)
if cell:
bricks.tile(tile_x, tile_y, 0)
bricks_left -= 1
score += 10
velocity_y = -velocity_y
+# burst in the brick's colour at the brick's centre
+ brick_x = tile_x * BRICK_W + BRICK_W // 2
+ brick_y = BRICK_Y + tile_y * BRICK_H + BRICK_H // 2
+ particles.emit(brick_x, brick_y, 14, 3, 22, brick_colors[cell - 1])
+if audio:
+ audio.sfx(blip)
if bricks_left == 0:
build_wall()
serve()
if ball.fy > H:
lives -= 1
if audio:
+ audio.sfx(lose) # low tone on a missed ball
if lives <= 0:
lives = 3
score = 0
build_wall()
serve()
+ particles.tick() # advance the burst each frame
hud.set("SCORE %05d LIVES %d" % (score, lives))
scene.refresh()
clock.tick()
```
[▶ Try it in the browser](/playground/?ex=01-bounce-step8_particles)
### step 9 — `step9_sprites.py` · rectangles → sprites
[Section titled “step 9 — step9\_sprites.py · rectangles → sprites”](#step-9--step9_spritespy--rectangles--sprites)
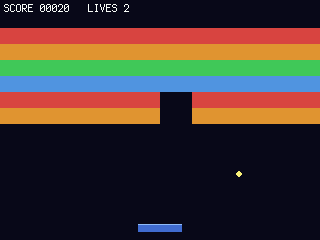 The payoff. We change **only the two bitmaps**: the ball becomes a round disc (`shp.circle`) and the paddle gets a multi-colour [`Bitmap`](/reference/) with a highlight. Diff this file against step 8: the entire game loop is byte-for-byte identical. A `Sprite` doesn’t care whether its bitmap is a rectangle, a generated shape, or a PNG you imported in the editor. **You see:** the same game, now with a round ball and a shaded paddle. **Try it:** load a a PNG through the editor → scene pipeline (open it in the [web editor](/tools/editor/)) and assign it as the bitmap.
```diff
24 collapsed lines
# Bounce -- step 9: from rectangles to sprites (the orthogonality lesson).
#
# What you learn: art is independent of mechanics. We built a COMPLETE game out of
# coloured rectangles. To make it look like a real game we change ONLY the bitmaps:
# the ball becomes a round disc (shp.circle) and the paddle gets a multi-colour
# bitmap with a highlight stripe. Compare this file to step 8: the entire game loop
# -- movement, bouncing, collision, scoring, particles -- is byte-for-byte the same.
# A Sprite doesn't care whether its bitmap is a rectangle, a generated shape, or a
# PNG you imported in the editor. (To use real PNG art: draw/import it in the editor,
# export a scene, and load it with picogame_scene -- see tutorials/README.md.)
#
# New vs step 8: only the two bitmap definitions changed (ball + paddle art).
#
# Run: python3 sim/run.py tutorials/01-bounce/step9_sprites.py --shot /tmp/s9.png
import array
import terminalio
import picogame as pg
import picogame_game
import picogame_input
import picogame_clock
import picogame_shapes as shp
import picogame_ui as ui
W, H = 320, 240
PADDLE_W, PADDLE_H = 44, 8
BALL = 6
BRICK_W, BRICK_H = 32, 16
COLS, ROWS = W // BRICK_W, 6
BRICK_Y = 28
BACKGROUND = pg.rgb565(8, 10, 24)
scene, _, _ = picogame_game.setup(background=BACKGROUND)
btn = picogame_input.Buttons()
clock = picogame_clock.Clock(40)
try:
import picogame_audio
audio = picogame_audio.Audio()
blip = picogame_audio.tone(660, 35)
lose = picogame_audio.tone(150, 160) # low tone when a ball is missed
except Exception:
audio = None
blip = lose = None
+def paddle_art(w, h):
+"""A 2-colour paddle bitmap: blue body + a lighter highlight on the top row.
This is what 'real sprite art' is -- a PAL8 bitmap with more than one colour."""
+ palette = array.array("H", [pg.rgb565(0, 0, 0), pg.rgb565(70, 110, 210), pg.rgb565(150, 190, 255)])
+ data = bytearray(b"\x01" * (w * h)) # index 1 = body
+for x in range(w):
+ data[x] = 2 # index 2 = highlight on the top row
+return pg.Bitmap(data, w, h, format=pg.PAL8, palette=palette, frames=1, stride=w, transparent=0)
+brick_colors = [pg.rgb565(220, 70, 70), pg.rgb565(230, 150, 50),
+ pg.rgb565(70, 200, 90), pg.rgb565(80, 150, 230)]
14 collapsed lines
bricks = pg.Tilemap(shp.tileset_colors(BRICK_W, BRICK_H, brick_colors), COLS, ROWS)
bricks.move(0, BRICK_Y)
def build_wall():
global bricks_left
for tile_y in range(ROWS):
for tile_x in range(COLS):
bricks.tile(tile_x, tile_y, 1 + (tile_y % 4))
bricks_left = COLS * ROWS
build_wall()
# >>> the ONLY change from step 8: art instead of plain rectangles <<<
paddle = pg.Sprite(paddle_art(PADDLE_W, PADDLE_H), (W - PADDLE_W) // 2, H - 16)
ball = pg.Sprite(shp.circle(BALL, pg.rgb565(255, 240, 120)), W // 2, H // 2)
70 collapsed lines
# >>> everything below is identical to step 8 <<<
particles = pg.Particles(96, size=2, gravity=0.12)
scene.add(bricks)
scene.add(particles)
scene.add(paddle)
scene.add(ball)
hud = ui.SceneLabel(scene, pg, terminalio.FONT, 4, 2, pg.rgb565(255, 255, 255), BACKGROUND)
velocity_x, velocity_y = 2.4, -2.6
score = 0
lives = 3
def serve():
global velocity_x, velocity_y
ball.move(W // 2, H // 2)
velocity_x, velocity_y = 2.4, -2.6
while True:
btn.poll()
delta_x = btn.is_pressed(btn.RIGHT) - btn.is_pressed(btn.LEFT)
if delta_x:
paddle.move(max(0, min(W - PADDLE_W, paddle.x + delta_x * 5)), paddle.y)
ball.fx += velocity_x
ball.fy += velocity_y
if ball.fx < 0:
ball.fx = 0; velocity_x = -velocity_x
elif ball.fx > W - BALL:
ball.fx = W - BALL; velocity_x = -velocity_x
if ball.fy < 0:
ball.fy = 0; velocity_y = -velocity_y
if velocity_y > 0 and pg.collide(ball.x, ball.y, ball.x + BALL, ball.y + BALL,
paddle.x, paddle.y, paddle.x + PADDLE_W, paddle.y + PADDLE_H):
velocity_y = -abs(velocity_y)
velocity_x += (ball.x + BALL / 2 - (paddle.x + PADDLE_W / 2)) * 0.06
center_x, center_y = ball.x + BALL // 2, ball.y + BALL // 2
tile_x, tile_y = center_x // BRICK_W, (center_y - BRICK_Y) // BRICK_H
if 0 <= tile_x < COLS and 0 <= tile_y < ROWS:
cell = bricks.tile(tile_x, tile_y)
if cell:
bricks.tile(tile_x, tile_y, 0)
bricks_left -= 1
score += 10
velocity_y = -velocity_y
particles.emit(tile_x * BRICK_W + BRICK_W // 2, BRICK_Y + tile_y * BRICK_H + BRICK_H // 2,
14, 3, 22, brick_colors[cell - 1])
if audio:
audio.sfx(blip)
if bricks_left == 0:
build_wall()
serve()
if ball.fy > H:
lives -= 1
if audio:
audio.sfx(lose) # low tone on a missed ball
if lives <= 0:
lives = 3
score = 0
build_wall()
serve()
particles.tick()
hud.set("SCORE %05d LIVES %d" % (score, lives))
scene.refresh()
clock.tick()
```
[▶ Try it in the browser](/playground/?ex=01-bounce-step9_sprites)
***
**Where to go next:** [02-starship](/tutorials/02-starship/) (pools, rotation, shooting, state machine), or jump to the [web editor](/tools/editor/) and the [scene format](/scene-format/) to build levels as data instead of by hand. There’s also [03-quest](/tutorials/03-quest/) if you want a longer game to pull apart.
# Tutorial 2 — Starship
> Build a top-down Asteroids-style shooter in 8 steps with rotation, thrust, object pools, splitting enemies, and a game-state machine.
In this tutorial, you’ll build a small Asteroids-style shooter. It assumes you’ve completed **01-bounce** (render loop, input, sub-pixel movement, collision, HUD, and particles). This time you’ll add rotation, vector thrust, object pools, splitting enemies, and a game-state machine.
The full source for this tutorial lives on GitHub: [tutorials/02-starship](https://github.com/MakerClassCZ/picogame/tree/main/tutorials/02-starship).
Run any step:
```bash
python3 sim/run.py tutorials/02-starship/stepN_name.py --hold UP,B --shot /tmp/out.png
```
***
### step 1 — `step1_ship.py` · a shaped sprite
[Section titled “step 1 — step1\_ship.py · a shaped sprite”](#step-1--step1_shippy--a-shaped-sprite)
 [`picogame_game.setup`](/helpers/boot-loop/) prepares the display and returns `(scene, buffer_a, buffer_b)`. On an SPI display, the last two values are reusable strip buffers; on a framebuffer display, they are `None`. This step only needs the [`Scene`](/reference/), so it ignores the other two values (`scene, _, _`). [`picogame_shapes`](/reference/) (imported as `shp`) builds bitmaps: `shp.from_mask` turns an ASCII picture into a one-colour [`Bitmap`](/reference/). We wrap it in a [`Sprite`](/reference/) and `anchor=(0.5, 0.5)` puts the sprite’s reference point at its centre, the right choice for something that rotates and wraps. **You see:** a little ship in the middle. **Try it:** redraw the mask.
```diff
18 collapsed lines
# Starship -- step 1: a ship on screen (recap, with a shaped sprite).
#
# This second tutorial assumes you've done Bounce (01-bounce). It builds a top-down
# space shooter and covers what Bounce couldn't: rotation, vector thrust, object
# pools (bullets/enemies), circular collision, explosions, and game states.
#
# What you learn here (recap): a Sprite can be any shape. shp.from_mask turns an
# ASCII picture into a one-colour bitmap. anchor=(0.5, 0.5) puts the sprite's
# reference point at its CENTRE -- the natural choice for something that rotates.
#
# New: shp.from_mask, centre anchor.
#
# Run: python3 sim/run.py tutorials/02-starship/step1_ship.py --shot /tmp/p1.png
import picogame as pg
import picogame_game
import picogame_clock
import picogame_shapes as shp
W, H = 320, 240
BACKGROUND = pg.rgb565(0, 0, 8)
scene, _, _ = picogame_game.setup(background=BACKGROUND)
clock = picogame_clock.Clock(30)
+SHIP_MASK = [
+" # ",
+" # ",
+" ### ",
+" ### ",
+"#####",
+"## ##",
+]
+ship = pg.Sprite(shp.from_mask(SHIP_MASK, pg.rgb565(200, 220, 255)), W // 2, H // 2)
+ship.anchor = (0.5, 0.5) # rotate/position about the centre
+scene.add(ship)
while True:
scene.refresh()
clock.tick()
```
[▶ Try it in the browser](/playground/?ex=02-starship-step1_ship)
### step 2 — `step2_fly.py` · rotation, thrust, wrap
[Section titled “step 2 — step2\_fly.py · rotation, thrust, wrap”](#step-2--step2_flypy--rotation-thrust-wrap)
 For a ship that spins constantly, we bake the rotation into frames. This is sharper and cheaper than changing `sprite.angle` at runtime: `shp.poly_frames(size, points, N, colour)` renders a polygon at N angles into one multi-frame bitmap, and `ship.frame = angle` selects one of them. A `DIRS` table holds each angle’s unit vector; UP accelerates along the facing vector into the velocity, with a top-speed cap and gentle drag. `wrap()` teleports across the edges. **You see:** a ship you fly Asteroids-style. **Try it:** change the thrust `0.25` or the drag `0.99`.
```diff
22 collapsed lines
# Starship -- step 2: rotate, thrust, and wrap around the screen.
#
# What you learn: pre-baked rotation. For a ship that spins constantly, baking the
# rotations into frames is crisper and cheaper than rotating at runtime (sprite.angle).
# shp.poly_frames(size, points, N, colour) renders a polygon at N angles into
# one multi-frame bitmap; setting ship.frame = angle_index shows that rotation. A
# DIRS table holds the unit vector for each angle. UP thrusts along the facing
# vector into the sub-pixel velocity (velocity_x, velocity_y); we cap top speed and apply a little
# drag so it drifts like a spaceship. wrap() teleports across screen edges.
#
# New vs step 1: shp.poly_frames (pre-rotated frames), ship.frame, vector thrust
# into fx/fy, speed cap + drag, screen wrap.
#
# Run: python3 sim/run.py tutorials/02-starship/step2_fly.py --hold UP --shot /tmp/p2.png
import math
import picogame as pg
import picogame_game
import picogame_input
import picogame_clock
import picogame_shapes as shp
W, H = 320, 240
BACKGROUND = pg.rgb565(0, 0, 8)
FRAMES = 16 # number of baked rotation frames
scene, _, _ = picogame_game.setup(background=BACKGROUND)
btn = picogame_input.Buttons()
clock = picogame_clock.Clock(30)
# a ship polygon (points around the centre, +y is down), baked at FRAMES angles
+ship_bitmap = shp.poly_frames(18, [(0, -8), (6, 7), (0, 4), (-6, 7)], FRAMES, pg.rgb565(200, 220, 255))
# facing unit vector for each frame: frame 0 points up (-y)
+DIRS = [(math.sin(frame * 2 * math.pi / FRAMES), -math.cos(frame * 2 * math.pi / FRAMES)) for frame in range(FRAMES)]
ship = pg.Sprite(ship_bitmap, W // 2, H // 2)
ship.anchor = (0.5, 0.5)
scene.add(ship)
angle = 0 # current rotation frame
velocity_x = velocity_y = 0.0 # velocity
+def wrap(x, y):
+return x % W, y % H
while True:
+ btn.poll()
+if btn.is_pressed(btn.LEFT):
+ angle = (angle - 1) % FRAMES
+if btn.is_pressed(btn.RIGHT):
+ angle = (angle + 1) % FRAMES
+ delta_x, delta_y = DIRS[angle]
+if btn.is_pressed(btn.UP):
+ velocity_x += delta_x * 0.25 # accelerate along the facing vector
+ velocity_y += delta_y * 0.25
+ speed = math.sqrt(velocity_x * velocity_x + velocity_y * velocity_y) # cap top speed
+if speed > 5:
+ velocity_x *= 5 / speed
+ velocity_y *= 5 / speed
+ velocity_x *= 0.99 # gentle drag
+ velocity_y *= 0.99
+ ship.fx, ship.fy = wrap(ship.fx + velocity_x, ship.fy + velocity_y) # sub-pixel position + wrap
+ ship.frame = angle # show the matching rotation
scene.refresh()
clock.tick()
```
[▶ Try it in the browser](/playground/?ex=02-starship-step2_fly)
### step 3 — `step3_shoot.py` · object pools
[Section titled “step 3 — step3\_shoot.py · object pools”](#step-3--step3_shootpy--object-pools)
 Repeatedly creating and discarding sprites can fragment the heap. Instead, [`picogame_pool`](/reference/)’s `Pool(scene, bitmap, N)` pre-allocates N hidden sprites once; `spawn()` reveals a free one, `free()` hides it, and `sprite.visible` *is* the alive flag. Each bullet keeps its velocity + remaining life in `sprite.data`, and its position in `fx`/`fy`. A cooldown caps the fire rate; [`picogame_input`](/reference/)’s `just_pressed(B)` fires once when B is pressed. **You see:** a stream of bullets that expire. **Try it:** change the pool size or `fire_cooldown`.
```diff
22 collapsed lines
# Starship -- step 3: fire bullets from an object pool.
#
# What you learn: pooling. Spawning objects (bullets, enemies, sparks) by creating
# Sprites at runtime causes memory churn. Instead, pre-allocate a fixed pool ONCE:
# picogame_pool.Pool makes N hidden sprites in the scene, spawn() reveals the first
# free one, free() hides it, and sprite.visible IS the alive flag. We keep each
# bullet's velocity + remaining life in sprite.data, and its position in fx/fy.
# A cooldown limits the fire rate.
#
# New vs step 2: picogame_pool.Pool, spawn/free, btn.just_pressed (a fresh press),
# per-bullet state in sprite.data, a fire cooldown + bullet lifetime.
#
# Run: python3 sim/run.py tutorials/02-starship/step3_shoot.py --hold B --shot /tmp/p3.png
import math
import picogame as pg
import picogame_game
import picogame_input
import picogame_clock
import picogame_shapes as shp
import picogame_pool
W, H = 320, 240
BACKGROUND = pg.rgb565(0, 0, 8)
FRAMES = 16
scene, _, _ = picogame_game.setup(background=BACKGROUND)
btn = picogame_input.Buttons()
clock = picogame_clock.Clock(30)
ship_bitmap = shp.poly_frames(18, [(0, -8), (6, 7), (0, 4), (-6, 7)], FRAMES, pg.rgb565(200, 220, 255))
DIRS = [(math.sin(frame * 2 * math.pi / FRAMES), -math.cos(frame * 2 * math.pi / FRAMES)) for frame in range(FRAMES)]
+bullet_bitmap = shp.circle(4, pg.rgb565(255, 255, 120))
ship = pg.Sprite(ship_bitmap, W // 2, H // 2)
ship.anchor = (0.5, 0.5)
+bullets = picogame_pool.Pool(scene, bullet_bitmap, 6, anchor=(0.5, 0.5)) # NEW: 6-bullet pool
scene.add(ship) # add ship AFTER the pool so it draws on top
angle = 0
velocity_x = velocity_y = 0.0
+fire_cooldown = 0
def wrap(x, y):
return x % W, y % H
while True:
btn.poll()
fire_cooldown -= 1
if btn.is_pressed(btn.LEFT):
angle = (angle - 1) % FRAMES
if btn.is_pressed(btn.RIGHT):
angle = (angle + 1) % FRAMES
delta_x, delta_y = DIRS[angle]
if btn.is_pressed(btn.UP):
velocity_x += delta_x * 0.25
velocity_y += delta_y * 0.25
speed = math.sqrt(velocity_x * velocity_x + velocity_y * velocity_y)
if speed > 5:
velocity_x *= 5 / speed; velocity_y *= 5 / speed
velocity_x *= 0.99; velocity_y *= 0.99
ship.fx, ship.fy = wrap(ship.fx + velocity_x, ship.fy + velocity_y)
ship.frame = angle
+# fire: a fresh B press, if the cooldown has elapsed and a slot is free
+if btn.just_pressed(btn.B) and fire_cooldown <= 0:
+ bullet = bullets.spawn()
+if bullet:
+ bullet.data = {"velocity_x": delta_x * 7, "velocity_y": delta_y * 7, "life": 30}
+ bullet.move(ship.x, ship.y)
+ fire_cooldown = 6
+# advance live bullets; retire them when their life runs out
+for bullet in bullets.items:
+if not bullet.visible:
+continue
+ bullet.data["life"] -= 1
+if bullet.data["life"] <= 0:
+ bullets.free(bullet)
+continue
+ bullet.fx, bullet.fy = wrap(bullet.fx + bullet.data["velocity_x"], bullet.fy + bullet.data["velocity_y"])
scene.refresh()
clock.tick()
```
[▶ Try it in the browser](/playground/?ex=02-starship-step3_shoot)
### step 4 — `step4_rocks.py` · a second pool + waves
[Section titled “step 4 — step4\_rocks.py · a second pool + waves”](#step-4--step4_rockspy--a-second-pool--waves)
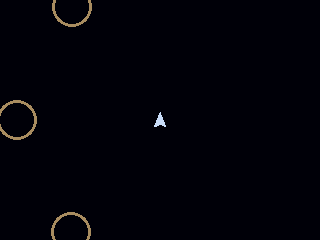 Reuse the pool pattern for enemies. Rocks come in 3 sizes; we keep the size in `sprite.data` and pick the matching ring bitmap with `sprite.bitmap`. `new_wave(n)` spreads n rocks around the screen, each drifting. **You see:** drifting rock rings. **Try it:** change the wave count or rock speed.
```diff
20 collapsed lines
# Starship -- step 4: asteroids to dodge (a second pool + waves).
#
# What you learn: reuse the pool pattern for enemies, and spawn a "wave". Rocks come
# in 3 sizes (we keep the size in sprite.data and pick a matching ring bitmap with
# sprite.bitmap). A wave spreads N rocks around the screen, each drifting with its
# own velocity. shp.ring draws a hollow circle.
#
# New vs step 3: a rocks Pool with per-rock size/velocity, choosing a bitmap per
# rock (sprite.bitmap), spawning a wave.
#
# Run: python3 sim/run.py tutorials/02-starship/step4_rocks.py --shot /tmp/p4.png
import math
import picogame as pg
import picogame_game
import picogame_input
import picogame_clock
import picogame_shapes as shp
import picogame_pool
W, H = 320, 240
BACKGROUND = pg.rgb565(0, 0, 8)
FRAMES = 16
scene, _, _ = picogame_game.setup(background=BACKGROUND)
btn = picogame_input.Buttons()
clock = picogame_clock.Clock(30)
ship_bitmap = shp.poly_frames(18, [(0, -8), (6, 7), (0, 4), (-6, 7)], FRAMES, pg.rgb565(200, 220, 255))
DIRS = [(math.sin(frame * 2 * math.pi / FRAMES), -math.cos(frame * 2 * math.pi / FRAMES)) for frame in range(FRAMES)]
bullet_bitmap = shp.circle(4, pg.rgb565(255, 255, 120))
+ROCK_BITMAP = [shp.ring(40, pg.rgb565(170, 140, 100), 3), # size 0 = big
+ shp.ring(24, pg.rgb565(170, 140, 100), 3), # size 1 = medium
+ shp.ring(13, pg.rgb565(170, 140, 100), 2)] # size 2 = small
ship = pg.Sprite(ship_bitmap, W // 2, H // 2)
ship.anchor = (0.5, 0.5)
+rocks = picogame_pool.Pool(scene, ROCK_BITMAP[0], 16, anchor=(0.5, 0.5)) # NEW
bullets = picogame_pool.Pool(scene, bullet_bitmap, 6, anchor=(0.5, 0.5))
scene.add(ship)
angle = 0
velocity_x = velocity_y = 0.0
fire_cooldown = 0
wave = 3
def wrap(x, y):
return x % W, y % H
+def spawn_rock(size, x, y, velocity_x, velocity_y):
+ rock = rocks.spawn()
+if rock is None:
+return
+ rock.data = {"size": size, "velocity_x": velocity_x, "velocity_y": velocity_y}
+ rock.bitmap = ROCK_BITMAP[size] # pick the bitmap for this size
+ rock.fx, rock.fy = float(x), float(y)
+def new_wave(count):
+for i in range(count):
+ angle_rad = i * 2 * math.pi / count
+spawn_rock(0, (W // 2 + int(140 * math.cos(angle_rad))) % W,
(H // 2 + int(110 * math.sin(angle_rad))) % H,
math.cos(angle_rad) * 1.2, math.sin(angle_rad) * 1.2)
+new_wave(wave)
32 collapsed lines
while True:
btn.poll()
fire_cooldown -= 1
if btn.is_pressed(btn.LEFT):
angle = (angle - 1) % FRAMES
if btn.is_pressed(btn.RIGHT):
angle = (angle + 1) % FRAMES
delta_x, delta_y = DIRS[angle]
if btn.is_pressed(btn.UP):
velocity_x += delta_x * 0.25; velocity_y += delta_y * 0.25
speed = math.sqrt(velocity_x * velocity_x + velocity_y * velocity_y)
if speed > 5:
velocity_x *= 5 / speed; velocity_y *= 5 / speed
velocity_x *= 0.99; velocity_y *= 0.99
ship.fx, ship.fy = wrap(ship.fx + velocity_x, ship.fy + velocity_y)
ship.frame = angle
if btn.just_pressed(btn.B) and fire_cooldown <= 0:
bullet = bullets.spawn()
if bullet:
bullet.data = {"velocity_x": delta_x * 7, "velocity_y": delta_y * 7, "life": 30}
bullet.move(ship.x, ship.y)
fire_cooldown = 6
for bullet in bullets.items:
if not bullet.visible:
continue
bullet.data["life"] -= 1
if bullet.data["life"] <= 0:
bullets.free(bullet)
continue
bullet.fx, bullet.fy = wrap(bullet.fx + bullet.data["velocity_x"], bullet.fy + bullet.data["velocity_y"])
+# drift the rocks
+for rock in rocks.items:
+if not rock.visible:
+continue
+ rock.fx, rock.fy = wrap(rock.fx + rock.data["velocity_x"], rock.fy + rock.data["velocity_y"])
scene.refresh()
clock.tick()
```
[▶ Try it in the browser](/playground/?ex=02-starship-step4_rocks)
### step 5 — `step5_collide.py` · circular hits + splitting
[Section titled “step 5 — step5\_collide.py · circular hits + splitting”](#step-5--step5_collidepy--circular-hits--splitting)
 `a.near(b, r)` is a fast, no-sqrt distance test on the sprites’ centres, ideal for round things. A bullet that hits a rock frees both; a big/medium rock **splits** into two smaller ones flying apart. A rock reaching the ship costs a life, grants brief invulnerability (i-frames, shown by blinking `ship.visible`), and respawns. **You see:** you can shoot rocks apart and get hit. **Try it:** change `ROCK_RADIUS` or the split velocities.
```diff
21 collapsed lines
# Starship -- step 5: shooting rocks (and getting hit).
#
# What you learn: circular collision + spawning on destruction. sprite.near(other, r)
# (a, b, r) is a fast no-sqrt distance test reading sprite positions -- ideal for
# round things. A bullet that hits a rock frees both; a big/medium rock SPLITS into
# two smaller rocks flying apart. A rock that reaches the ship costs a life and
# triggers a brief invulnerability (i-frames) + respawn so you don't die instantly.
#
# New vs step 4: sprite.near (circular hit), splitting rocks, lives + i-frames + respawn,
# blinking the ship while invulnerable (ship.visible toggled).
#
# Run: python3 sim/run.py tutorials/02-starship/step5_collide.py --hold B --shot /tmp/p5.png
import math
import picogame as pg
import picogame_game
import picogame_input
import picogame_clock
import picogame_shapes as shp
import picogame_pool
W, H = 320, 240
BACKGROUND = pg.rgb565(0, 0, 8)
FRAMES = 16
scene, _, _ = picogame_game.setup(background=BACKGROUND)
btn = picogame_input.Buttons()
clock = picogame_clock.Clock(30)
ship_bitmap = shp.poly_frames(18, [(0, -8), (6, 7), (0, 4), (-6, 7)], FRAMES, pg.rgb565(200, 220, 255))
DIRS = [(math.sin(frame * 2 * math.pi / FRAMES), -math.cos(frame * 2 * math.pi / FRAMES)) for frame in range(FRAMES)]
bullet_bitmap = shp.circle(4, pg.rgb565(255, 255, 120))
ROCK_BITMAP = [shp.ring(40, pg.rgb565(170, 140, 100), 3),
shp.ring(24, pg.rgb565(170, 140, 100), 3),
shp.ring(13, pg.rgb565(170, 140, 100), 2)]
ROCK_RADIUS = [20, 12, 6] # collision radius per size
ship = pg.Sprite(ship_bitmap, W // 2, H // 2)
ship.anchor = (0.5, 0.5)
rocks = picogame_pool.Pool(scene, ROCK_BITMAP[0], 16, anchor=(0.5, 0.5))
bullets = picogame_pool.Pool(scene, bullet_bitmap, 6, anchor=(0.5, 0.5))
scene.add(ship)
angle = 0
velocity_x = velocity_y = 0.0
fire_cooldown = 0
+lives = 3
invincible = 60 # invincibility frames
wave = 3
+frame = 0
def wrap(x, y):
return x % W, y % H
def spawn_rock(size, x, y, velocity_x, velocity_y):
rock = rocks.spawn()
if rock is None:
return
rock.data = {"size": size, "velocity_x": velocity_x, "velocity_y": velocity_y}
rock.bitmap = ROCK_BITMAP[size]
rock.fx, rock.fy = float(x), float(y)
def new_wave(count):
for i in range(count):
angle_rad = i * 2 * math.pi / count
spawn_rock(0, (W // 2 + int(140 * math.cos(angle_rad))) % W,
(H // 2 + int(110 * math.sin(angle_rad))) % H,
math.cos(angle_rad) * 1.2, math.sin(angle_rad) * 1.2)
+def respawn():
+global velocity_x, velocity_y, invincible
+ ship.fx, ship.fy = float(W // 2), float(H // 2)
+ velocity_x = velocity_y = 0.0
+ invincible = 90
new_wave(wave)
while True:
btn.poll()
frame += 1
fire_cooldown -= 1
+if invincible > 0:
+ invincible -= 1
if btn.is_pressed(btn.LEFT):
33 collapsed lines
angle = (angle - 1) % FRAMES
if btn.is_pressed(btn.RIGHT):
angle = (angle + 1) % FRAMES
delta_x, delta_y = DIRS[angle]
if btn.is_pressed(btn.UP):
velocity_x += delta_x * 0.25; velocity_y += delta_y * 0.25
speed = math.sqrt(velocity_x * velocity_x + velocity_y * velocity_y)
if speed > 5:
velocity_x *= 5 / speed; velocity_y *= 5 / speed
velocity_x *= 0.99; velocity_y *= 0.99
ship.fx, ship.fy = wrap(ship.fx + velocity_x, ship.fy + velocity_y)
ship.frame = angle
ship.visible = (invincible <= 0) or (frame & 1) # blink while invincible
if btn.just_pressed(btn.B) and fire_cooldown <= 0:
bullet = bullets.spawn()
if bullet:
bullet.data = {"velocity_x": delta_x * 7, "velocity_y": delta_y * 7, "life": 30}
bullet.move(ship.x, ship.y)
fire_cooldown = 6
for bullet in bullets.items:
if not bullet.visible:
continue
bullet.data["life"] -= 1
if bullet.data["life"] <= 0:
bullets.free(bullet)
continue
bullet.fx, bullet.fy = wrap(bullet.fx + bullet.data["velocity_x"], bullet.fy + bullet.data["velocity_y"])
for rock in rocks.items:
if not rock.visible:
continue
rock.fx, rock.fy = wrap(rock.fx + rock.data["velocity_x"], rock.fy + rock.data["velocity_y"])
+ size = rock.data["size"]
+ radius = ROCK_RADIUS[size]
+# bullet hits this rock?
+for bullet in bullets.items:
+if not bullet.visible:
+continue
+if bullet.near(rock, radius):
+ bullets.free(bullet)
+ rocks.free(rock)
+if size < 2: # split into two smaller, flying apart
+for sign in (-1, 1):
+spawn_rock(size + 1, rock.fx, rock.fy,
rock.data["velocity_x"] + sign * 0.8, rock.data["velocity_y"] - sign * 0.8)
+break
+# rock reaches the ship?
+if invincible <= 0 and rock.visible and ship.near(rock, radius + 6):
+ lives -= 1
+respawn()
+if lives < 0:
+ lives = 3
+ rocks.free_all()
+new_wave(wave)
+break
scene.refresh()
clock.tick()
```
[▶ Try it in the browser](/playground/?ex=02-starship-step5_collide)
### step 6 — `step6_waves.py` · score + progression
[Section titled “step 6 — step6\_waves.py · score + progression”](#step-6--step6_wavespy--score--progression)
 Smaller rocks score more. [`picogame_ui`](/reference/)’s [`SceneLabel`](/reference/) shows score + ships. When `rocks.count() == 0` the field is clear, so we launch the next, bigger wave, and the game ramps up. **You see:** a score that climbs and waves that grow. **Try it:** change the scoring or wave growth.
```diff
21 collapsed lines
# Starship -- step 6: score, lives, and escalating waves.
#
# What you learn: a scoring/progression loop. Smaller rocks are worth more. A HUD
# shows score + ships. When the field is clear (rocks.count() == 0) we start the
# next, bigger wave -- the game keeps going and ramps up.
#
# New vs step 5: picogame_ui.SceneLabel, scoring, rocks.count() to detect a cleared
# field, growing waves.
#
# Run: python3 sim/run.py tutorials/02-starship/step6_waves.py --hold B --shot /tmp/p6.png
import math
import terminalio
import picogame as pg
import picogame_game
import picogame_input
import picogame_clock
import picogame_shapes as shp
import picogame_pool
import picogame_ui as ui
W, H = 320, 240
BACKGROUND = pg.rgb565(0, 0, 8)
FRAMES = 16
scene, _, _ = picogame_game.setup(background=BACKGROUND)
btn = picogame_input.Buttons()
clock = picogame_clock.Clock(30)
ship_bitmap = shp.poly_frames(18, [(0, -8), (6, 7), (0, 4), (-6, 7)], FRAMES, pg.rgb565(200, 220, 255))
DIRS = [(math.sin(frame * 2 * math.pi / FRAMES), -math.cos(frame * 2 * math.pi / FRAMES)) for frame in range(FRAMES)]
bullet_bitmap = shp.circle(4, pg.rgb565(255, 255, 120))
ROCK_BITMAP = [shp.ring(40, pg.rgb565(170, 140, 100), 3),
shp.ring(24, pg.rgb565(170, 140, 100), 3),
shp.ring(13, pg.rgb565(170, 140, 100), 2)]
ROCK_RADIUS = [20, 12, 6]
ship = pg.Sprite(ship_bitmap, W // 2, H // 2)
ship.anchor = (0.5, 0.5)
rocks = picogame_pool.Pool(scene, ROCK_BITMAP[0], 16, anchor=(0.5, 0.5))
bullets = picogame_pool.Pool(scene, bullet_bitmap, 6, anchor=(0.5, 0.5))
scene.add(ship)
hud = ui.SceneLabel(scene, pg, terminalio.FONT, 4, 4, pg.rgb565(255, 255, 255), BACKGROUND)
angle = 0
velocity_x = velocity_y = 0.0
fire_cooldown = 0
lives = 3
invincible = 60
wave = 3
+score = 0
frame = 0
79 collapsed lines
def wrap(x, y):
return x % W, y % H
def spawn_rock(size, x, y, velocity_x, velocity_y):
rock = rocks.spawn()
if rock is None:
return
rock.data = {"size": size, "velocity_x": velocity_x, "velocity_y": velocity_y}
rock.bitmap = ROCK_BITMAP[size]
rock.fx, rock.fy = float(x), float(y)
def new_wave(count):
for i in range(count):
angle_rad = i * 2 * math.pi / count
spawn_rock(0, (W // 2 + int(140 * math.cos(angle_rad))) % W,
(H // 2 + int(110 * math.sin(angle_rad))) % H,
math.cos(angle_rad) * 1.2, math.sin(angle_rad) * 1.2)
def respawn():
global velocity_x, velocity_y, invincible
ship.fx, ship.fy = float(W // 2), float(H // 2)
velocity_x = velocity_y = 0.0
invincible = 90
new_wave(wave)
while True:
btn.poll()
frame += 1
fire_cooldown -= 1
if invincible > 0:
invincible -= 1
if btn.is_pressed(btn.LEFT):
angle = (angle - 1) % FRAMES
if btn.is_pressed(btn.RIGHT):
angle = (angle + 1) % FRAMES
delta_x, delta_y = DIRS[angle]
if btn.is_pressed(btn.UP):
velocity_x += delta_x * 0.25; velocity_y += delta_y * 0.25
speed = math.sqrt(velocity_x * velocity_x + velocity_y * velocity_y)
if speed > 5:
velocity_x *= 5 / speed; velocity_y *= 5 / speed
velocity_x *= 0.99; velocity_y *= 0.99
ship.fx, ship.fy = wrap(ship.fx + velocity_x, ship.fy + velocity_y)
ship.frame = angle
ship.visible = (invincible <= 0) or (frame & 1)
if btn.just_pressed(btn.B) and fire_cooldown <= 0:
bullet = bullets.spawn()
if bullet:
bullet.data = {"velocity_x": delta_x * 7, "velocity_y": delta_y * 7, "life": 30}
bullet.move(ship.x, ship.y)
fire_cooldown = 6
for bullet in bullets.items:
if not bullet.visible:
continue
bullet.data["life"] -= 1
if bullet.data["life"] <= 0:
bullets.free(bullet)
continue
bullet.fx, bullet.fy = wrap(bullet.fx + bullet.data["velocity_x"], bullet.fy + bullet.data["velocity_y"])
for rock in rocks.items:
if not rock.visible:
continue
rock.fx, rock.fy = wrap(rock.fx + rock.data["velocity_x"], rock.fy + rock.data["velocity_y"])
size = rock.data["size"]
radius = ROCK_RADIUS[size]
for bullet in bullets.items:
if not bullet.visible:
continue
if bullet.near(rock, radius):
bullets.free(bullet)
rocks.free(rock)
+ score += (3 - size) * 20 # smaller rock -> more points
if size < 2:
for sign in (-1, 1):
spawn_rock(size + 1, rock.fx, rock.fy,
rock.data["velocity_x"] + sign * 0.8, rock.data["velocity_y"] - sign * 0.8)
break
if invincible <= 0 and rock.visible and ship.near(rock, radius + 6):
lives -= 1
respawn()
if lives < 0:
lives = 3
score = 0
rocks.free_all()
new_wave(wave)
break
+if rocks.count() == 0: # field cleared -> next, bigger wave
+ wave += 1
+new_wave(wave)
+ hud.set("SCORE %05d SHIPS %d" % (score, max(0, lives)))
scene.refresh()
clock.tick()
```
[▶ Try it in the browser](/playground/?ex=02-starship-step6_waves)
### step 7 — `step7_particles.py` · explosions, exhaust, sound
[Section titled “step 7 — step7\_particles.py · explosions, exhaust, sound”](#step-7--step7_particlespy--explosions-exhaust-sound)
 One [`Particles`](/reference/)`(fade=True)` system serves two effects: a burst when a rock is destroyed (many fast, fading sparks) and a thrust flame (a couple of short sparks behind the ship each frame while thrusting). `fade=True` dims particles as they age. `tone()` gives a fire beep and a lower boom. **You see:** explosions and an engine trail. **Try it:** change the explosion `count`/`life` or the beep frequencies.
```diff
24 collapsed lines
# Starship -- step 7: explosions, thrust flame, and sound.
#
# What you learn: particles for two different effects, plus audio. One Particles
# system gives us BOTH a burst on a rock's destruction (many fast, fading sparks)
# and a thrust flame (a few short-lived sparks behind the ship each frame while
# thrusting). fade=True dims particles as they age. tone() beeps for firing and a
# lower boom for explosions. Audio is optional (try/except) so it's silent but safe
# where there's no audio output.
#
# New vs step 6: pg.Particles(fade=True), emit for explosions AND exhaust,
# picogame_audio for fire/boom beeps.
#
# Run: python3 sim/run.py tutorials/02-starship/step7_particles.py --hold UP,B --shot /tmp/p7.png
import math
import terminalio
import picogame as pg
import picogame_game
import picogame_input
import picogame_clock
import picogame_shapes as shp
import picogame_pool
import picogame_ui as ui
W, H = 320, 240
BACKGROUND = pg.rgb565(0, 0, 8)
FRAMES = 16
scene, _, _ = picogame_game.setup(background=BACKGROUND)
btn = picogame_input.Buttons()
clock = picogame_clock.Clock(30)
+try:
+import picogame_audio
+ audio = picogame_audio.Audio()
+ snd_fire = picogame_audio.tone(880, 25)
+ snd_boom = picogame_audio.tone(160, 90)
+except Exception:
+ audio = None
ship_bitmap = shp.poly_frames(18, [(0, -8), (6, 7), (0, 4), (-6, 7)], FRAMES, pg.rgb565(200, 220, 255))
DIRS = [(math.sin(frame * 2 * math.pi / FRAMES), -math.cos(frame * 2 * math.pi / FRAMES)) for frame in range(FRAMES)]
bullet_bitmap = shp.circle(4, pg.rgb565(255, 255, 120))
ROCK_BITMAP = [shp.ring(40, pg.rgb565(170, 140, 100), 3),
shp.ring(24, pg.rgb565(170, 140, 100), 3),
shp.ring(13, pg.rgb565(170, 140, 100), 2)]
ROCK_RADIUS = [20, 12, 6]
ship = pg.Sprite(ship_bitmap, W // 2, H // 2)
ship.anchor = (0.5, 0.5)
rocks = picogame_pool.Pool(scene, ROCK_BITMAP[0], 16, anchor=(0.5, 0.5))
bullets = picogame_pool.Pool(scene, bullet_bitmap, 6, anchor=(0.5, 0.5))
sparks = pg.Particles(160, size=2, fade=True) # NEW
+scene.add(sparks)
+scene.add(ship)
55 collapsed lines
hud = ui.SceneLabel(scene, pg, terminalio.FONT, 4, 4, pg.rgb565(255, 255, 255), BACKGROUND)
angle = 0
velocity_x = velocity_y = 0.0
fire_cooldown = 0
lives = 3
invincible = 60
wave = 3
score = 0
frame = 0
def wrap(x, y):
return x % W, y % H
def spawn_rock(size, x, y, velocity_x, velocity_y):
rock = rocks.spawn()
if rock is None:
return
rock.data = {"size": size, "velocity_x": velocity_x, "velocity_y": velocity_y}
rock.bitmap = ROCK_BITMAP[size]
rock.fx, rock.fy = float(x), float(y)
def new_wave(count):
for i in range(count):
angle_rad = i * 2 * math.pi / count
spawn_rock(0, (W // 2 + int(140 * math.cos(angle_rad))) % W,
(H // 2 + int(110 * math.sin(angle_rad))) % H,
math.cos(angle_rad) * 1.2, math.sin(angle_rad) * 1.2)
def respawn():
global velocity_x, velocity_y, invincible
ship.fx, ship.fy = float(W // 2), float(H // 2)
velocity_x = velocity_y = 0.0
invincible = 90
new_wave(wave)
while True:
btn.poll()
frame += 1
fire_cooldown -= 1
if invincible > 0:
invincible -= 1
if btn.is_pressed(btn.LEFT):
angle = (angle - 1) % FRAMES
if btn.is_pressed(btn.RIGHT):
angle = (angle + 1) % FRAMES
delta_x, delta_y = DIRS[angle]
if btn.is_pressed(btn.UP):
velocity_x += delta_x * 0.25; velocity_y += delta_y * 0.25
+# thrust flame: a couple of orange sparks shot out the back
+ sparks.emit(ship.x - int(delta_x * 8), ship.y - int(delta_y * 8), 2, 2, 10, pg.rgb565(255, 150, 40))
speed = math.sqrt(velocity_x * velocity_x + velocity_y * velocity_y)
if speed > 5:
velocity_x *= 5 / speed; velocity_y *= 5 / speed
velocity_x *= 0.99; velocity_y *= 0.99
ship.fx, ship.fy = wrap(ship.fx + velocity_x, ship.fy + velocity_y)
ship.frame = angle
ship.visible = (invincible <= 0) or (frame & 1)
if btn.just_pressed(btn.B) and fire_cooldown <= 0:
bullet = bullets.spawn()
if bullet:
bullet.data = {"velocity_x": delta_x * 7, "velocity_y": delta_y * 7, "life": 30}
bullet.move(ship.x, ship.y)
fire_cooldown = 6
+if audio:
+ audio.sfx(snd_fire)
for bullet in bullets.items:
if not bullet.visible:
continue
bullet.data["life"] -= 1
if bullet.data["life"] <= 0:
bullets.free(bullet)
continue
bullet.fx, bullet.fy = wrap(bullet.fx + bullet.data["velocity_x"], bullet.fy + bullet.data["velocity_y"])
for rock in rocks.items:
if not rock.visible:
continue
rock.fx, rock.fy = wrap(rock.fx + rock.data["velocity_x"], rock.fy + rock.data["velocity_y"])
size = rock.data["size"]
radius = ROCK_RADIUS[size]
for bullet in bullets.items:
if not bullet.visible:
continue
if bullet.near(rock, radius):
bullets.free(bullet)
rocks.free(rock)
score += (3 - size) * 20
+ sparks.emit(rock.x, rock.y, 18, 3, 26, pg.rgb565(255, 200, 120)) # explosion
+if audio:
+ audio.sfx(snd_boom)
if size < 2:
for sign in (-1, 1):
spawn_rock(size + 1, rock.fx, rock.fy,
rock.data["velocity_x"] + sign * 0.8, rock.data["velocity_y"] - sign * 0.8)
break
if invincible <= 0 and rock.visible and ship.near(rock, radius + 6):
lives -= 1
+ sparks.emit(ship.x, ship.y, 24, 4, 30, pg.rgb565(120, 200, 255))
respawn()
if lives < 0:
lives = 3
score = 0
rocks.free_all()
new_wave(wave)
break
if rocks.count() == 0:
wave += 1
new_wave(wave)
+ sparks.tick() # advance all particles
hud.set("SCORE %05d SHIPS %d" % (score, max(0, lives)))
scene.refresh()
clock.tick()
```
[▶ Try it in the browser](/playground/?ex=02-starship-step7_particles)
### step 8 — `step8_states.py` · the state machine (capstone)
[Section titled “step 8 — step8\_states.py · the state machine (capstone)”](#step-8--step8_statespy--the-state-machine-capstone)
 A finished game needs more than one mode — and it’s worth tidying the code as it grows. All the run’s mutable values move into one `State` object (`st`), re-initialised **in place** by `reset()`, and the whole loop moves into a `main()` function (inside a function its names resolve as fast locals — a small measured win on device). `st.mode` runs TITLE → PLAY → GAMEOVER; `new_game()` calls `st.reset()` to restart; one centred `SceneLabel` shows the message for the non-play states; death ends the run instead of silently restarting. This is the `State` + `main()` shape every bigger game grows into — see [Game patterns](/concepts/patterns/) and the ready-to-run [skeleton](/snippets/). **You see:** title → play → game over → title. **Try it:** add a high score that survives across games (keep it a module global, not in `State`; see [`picogame_save`](/reference/) for NVM persistence).
```diff
27 collapsed lines
# Starship -- step 8: game states (title / playing / game over) + restart, tidied into State + main().
#
# What you learn: a state machine -- the backbone of a finished game -- built the way picogame
# recommends. All the run's mutable values live in ONE `class State` (st), re-initialised IN PLACE by
# reset() (st is created once and never reassigned). The per-frame loop lives in a main() function --
# inside a function its names resolve as fast locals instead of globals-dict lookups, a measured win on
# device. st.mode runs TITLE -> PLAY -> GAMEOVER; new_game() calls st.reset() to restart. This is the
# difference between a mechanic and a game, in the shape every bigger game grows into
# (see /concepts/patterns/).
#
# New vs step 7: a State object + a mode machine (TITLE/PLAY/GAMEOVER), the loop moved into main(),
# new_game() reset, a centred message label, ending the run on death instead of silently restarting,
# plus a confirm blip on start/menu and a low boom on game over.
#
# Run: python3 sim/run.py tutorials/02-starship/step8_states.py --hold B --shot /tmp/p8.png
import math
import terminalio
import picogame as pg
import picogame_game
import picogame_input
import picogame_clock
import picogame_shapes as shp
import picogame_pool
import picogame_ui as ui
W, H = 320, 240
BACKGROUND = pg.rgb565(0, 0, 8)
FRAMES = 16
+TITLE, PLAY, GAMEOVER = 0, 1, 2
scene, _, _ = picogame_game.setup(background=BACKGROUND)
6 collapsed lines
btn = picogame_input.Buttons()
clock = picogame_clock.Clock(30)
try:
import picogame_audio
audio = picogame_audio.Audio()
snd_fire = picogame_audio.tone(880, 25)
snd_boom = picogame_audio.tone(160, 90)
+ snd_start = picogame_audio.tone(660, 40) # bright blip: start / menu confirm
+ snd_die = picogame_audio.tone(120, 260) # low boom: game over (descending = lose)
except Exception:
audio = None
11 collapsed lines
ship_bitmap = shp.poly_frames(18, [(0, -8), (6, 7), (0, 4), (-6, 7)], FRAMES, pg.rgb565(200, 220, 255))
DIRS = [(math.sin(frame * 2 * math.pi / FRAMES), -math.cos(frame * 2 * math.pi / FRAMES)) for frame in range(FRAMES)]
bullet_bitmap = shp.circle(4, pg.rgb565(255, 255, 120))
ROCK_BITMAP = [shp.ring(40, pg.rgb565(170, 140, 100), 3),
shp.ring(24, pg.rgb565(170, 140, 100), 3),
shp.ring(13, pg.rgb565(170, 140, 100), 2)]
ROCK_RADIUS = [20, 12, 6]
ship = pg.Sprite(ship_bitmap, W // 2, H // 2)
ship.anchor = (0.5, 0.5)
rocks = picogame_pool.Pool(scene, ROCK_BITMAP[0], 16, anchor=(0.5, 0.5))
bullets = picogame_pool.Pool(scene, bullet_bitmap, 6, anchor=(0.5, 0.5))
sparks = pg.Particles(160, size=2, fade=True)
scene.add(sparks)
scene.add(ship)
hud = ui.SceneLabel(scene, pg, terminalio.FONT, 4, 4, pg.rgb565(255, 255, 255), BACKGROUND)
+msg = ui.SceneLabel(scene, pg, terminalio.FONT, 96, 112, pg.rgb565(255, 255, 255), BACKGROUND)
+# ALL the run's mutable values in ONE object. reset() lists every field's default in one place, so a
+# restart is st.reset() -- and st is created ONCE below and never reassigned (a never-rebound singleton),
+# which is what lets main() and new_game() just mutate st.* with no `global`. Engine objects (ship, the
+# pools, sparks, clock, the labels) stay module-level names, NOT in State.
+class State:
+def __init__(self):
+self.reset()
+def reset(self):
+self.mode = TITLE # TITLE -> PLAY -> GAMEOVER
+self.angle = 0
+self.vx = self.vy = 0.0
+self.fire_cooldown = 0
+self.lives = 3
+self.invincible = 0
+self.wave = 3
+self.score = 0
+st = State()
def wrap(x, y):
return x % W, y % H
17 collapsed lines
def spawn_rock(size, x, y, velocity_x, velocity_y):
rock = rocks.spawn()
if rock is None:
return
rock.data = {"size": size, "velocity_x": velocity_x, "velocity_y": velocity_y}
rock.bitmap = ROCK_BITMAP[size]
rock.fx, rock.fy = float(x), float(y)
def new_wave(count):
for i in range(count):
angle_rad = i * 2 * math.pi / count
spawn_rock(0, (W // 2 + int(140 * math.cos(angle_rad))) % W,
(H // 2 + int(110 * math.sin(angle_rad))) % H,
math.cos(angle_rad) * 1.2, math.sin(angle_rad) * 1.2)
+def new_game():
+ st.reset() # every field back to its default, IN PLACE
+ st.mode = PLAY
+ st.invincible = 60 # a mercy window on the fresh run
ship.fx, ship.fy = float(W // 2), float(H // 2)
+ rocks.free_all()
+ bullets.free_all()
+ sparks.clear()
+new_wave(st.wave)
+def main():
# The per-frame loop lives in a FUNCTION: its names (st, the helpers, the loop's own frame counter)
+# resolve as fast array-indexed locals instead of globals-dict lookups.
+ frame = 0
+while True:
+ btn.poll()
+ frame += 1
+if st.mode == TITLE:
+ ship.visible = False
+ msg.set("STARSHIP PRESS A")
+if btn.just_pressed(btn.A):
if audio:
audio.sfx(snd_start) # confirm blip on start
+new_game()
+ scene.refresh()
+ clock.tick()
continue
+if st.mode == GAMEOVER:
+ msg.set("GAME OVER %05d A=MENU" % st.score)
+if btn.just_pressed(btn.A):
if audio:
audio.sfx(snd_start) # confirm blip back to menu
+ st.mode = TITLE
+ sparks.tick()
+ scene.refresh()
+ clock.tick()
+continue
+if st.mode == PLAY:
+ msg.set(" ")
+ st.fire_cooldown -= 1
+if st.invincible > 0:
+ st.invincible -= 1
+if btn.is_pressed(btn.LEFT):
+ st.angle = (st.angle - 1) % FRAMES
+if btn.is_pressed(btn.RIGHT):
+ st.angle = (st.angle + 1) % FRAMES
+ delta_x, delta_y = DIRS[st.angle]
+if btn.is_pressed(btn.UP):
+ st.vx += delta_x * 0.25; st.vy += delta_y * 0.25
+ sparks.emit(ship.x - int(delta_x * 8), ship.y - int(delta_y * 8), 2, 2, 10, pg.rgb565(255, 150, 40))
+ speed = math.sqrt(st.vx * st.vx + st.vy * st.vy)
+if speed > 5:
+ st.vx *= 5 / speed; st.vy *= 5 / speed
+ st.vx *= 0.99; st.vy *= 0.99
+ ship.fx, ship.fy = wrap(ship.fx + st.vx, ship.fy + st.vy)
+ ship.frame = st.angle
+ ship.visible = (st.invincible <= 0) or (frame & 1)
+if btn.just_pressed(btn.B) and st.fire_cooldown <= 0:
+ bullet = bullets.spawn()
+if bullet:
+ bullet.data = {"velocity_x": delta_x * 7, "velocity_y": delta_y * 7, "life": 30}
+ bullet.move(ship.x, ship.y)
+ st.fire_cooldown = 6
+if audio:
+ audio.sfx(snd_fire)
+for bullet in bullets.items:
+if not bullet.visible:
+continue
+ bullet.data["life"] -= 1
+if bullet.data["life"] <= 0:
+ bullets.free(bullet)
+continue
+ bullet.fx, bullet.fy = wrap(bullet.fx + bullet.data["velocity_x"], bullet.fy + bullet.data["velocity_y"])
+for rock in rocks.items:
+if not rock.visible:
+continue
+ rock.fx, rock.fy = wrap(rock.fx + rock.data["velocity_x"], rock.fy + rock.data["velocity_y"])
+ size = rock.data["size"]
+ radius = ROCK_RADIUS[size]
+for bullet in bullets.items:
+if not bullet.visible:
+continue
+if bullet.near(rock, radius):
+ bullets.free(bullet)
+ rocks.free(rock)
+ st.score += (3 - size) * 20
+ sparks.emit(rock.x, rock.y, 18, 3, 26, pg.rgb565(255, 200, 120))
+if audio:
+ audio.sfx(snd_boom)
+if size < 2:
+for sign in (-1, 1):
+spawn_rock(size + 1, rock.fx, rock.fy,
rock.data["velocity_x"] + sign * 0.8, rock.data["velocity_y"] - sign * 0.8)
+break
+if st.invincible <= 0 and rock.visible and ship.near(rock, radius + 6):
+ st.lives -= 1
+ sparks.emit(ship.x, ship.y, 24, 4, 30, pg.rgb565(120, 200, 255))
+ ship.fx, ship.fy = float(W // 2), float(H // 2)
+ st.vx = st.vy = 0.0
+ st.invincible = 90
+if st.lives < 0:
+if audio:
+ audio.sfx(snd_die) # low boom on game over
+ st.mode = GAMEOVER
+break
+if rocks.count() == 0:
+ st.wave += 1
+new_wave(st.wave)
sparks.tick()
hud.set("SCORE %05d SHIPS %d" % (st.score, max(0, st.lives)))
scene.refresh()
clock.tick()
+main()
```
[▶ Try it in the browser](/playground/?ex=02-starship-step8_states)
***
**Where to go next:** the [web editor](/tools/editor/) + `picogame_scene`, to design levels as data and load them, instead of hand-coding placement. See the [scene format](/scene-format/) for how that data is structured, and try the sibling tutorials: [01-bounce](/tutorials/01-bounce/) and [03-quest](/tutorials/03-quest/).
# Tutorial 3 — Quest
> Build a top-down RPG in 8 steps — a scrolling map, camera, items, an NPC, combat, and a complete quest.
In this tutorial, you’ll build a small top-down RPG: walk through a scrolling map, collect coins, talk to an NPC, fight slimes, and complete a quest. It assumes you’ve completed [01-bounce](/tutorials/01-bounce/) and [02-starship](/tutorials/02-starship/). The main new ideas are the **camera** and using a **tilemap as the world**.
The full source for this tutorial lives on GitHub: [tutorials/03-quest](https://github.com/MakerClassCZ/picogame/tree/main/tutorials/03-quest).
Run any step:
```bash
python3 sim/run.py tutorials/03-quest/stepN_name.py --hold DOWN --shot /tmp/out.png
```
**Tip:** use `--backend pygame` for steps 6–8 if you want to interact with the dialog and quest.
***
### step 1 — `step1_world.py` · a world bigger than the screen
[Section titled “step 1 — step1\_world.py · a world bigger than the screen”](#step-1--step1_worldpy--a-world-bigger-than-the-screen)
 [`picogame_game.setup(...)`](/helpers/boot-loop/) returns `(scene, buffer_a, buffer_b)`. On an SPI display, the last two values are reusable strip buffers; on a framebuffer display, they are `None`. Early steps only need the [`Scene`](/reference/) and ignore the other two values (`scene, _, _`). Later dialog steps pass `buffer_a` to an immediate-mode helper; the framebuffer renderer does not need it. An ASCII map becomes a [`Tilemap`](/reference/) (30×20 tiles = 480×320 px, larger than the 320×240 screen). `shp.tileset_colors` builds the tileset (grass/path/water/tree/wall/door/goal). The hero is a [`Sprite`](/reference/) whose look comes from a [`Bitmap`](/reference/) — for now a **placeholder**: a red square with a brighter *facing edge* so you can see which way it points. Step 4 replaces it with a character assembled from ASCII masks. [`scene.set_view(offset_x, offset_y)`](/reference/) chooses the visible window; that’s the camera. The hero lives in **world** coordinates; the view offset decides where it lands on screen. **You see:** a patch of world with the hero centred. **Try it:** edit the `MAP` strings.
```python
# Quest -- step 1: a world bigger than the screen.
#
# This third tutorial builds a top-down RPG. It teaches what Bounce and Starship
# couldn't: a scrolling world larger than the display, a camera that follows the
# hero, tile-based wall collision, a walk animation, items, an NPC you talk to, and
# light combat. Do 01-bounce and 02-starship first.
#
# What you learn here: a Tilemap can be a whole WORLD (30x20 tiles = 480x320 px,
# bigger than the 320x240 screen). scene.set_view(offset_x, offset_y) chooses which part of the
# world is on screen -- that's the camera. We centre it on the hero. The hero lives
# in WORLD coordinates; the view offset decides where that lands on screen.
#
# New: a large Tilemap from an ASCII map, shp.tileset_colors, scene.set_view, and a
# placeholder hero (a red square with a facing edge). Step 4 gives it real drawn art.
#
# Run: python3 sim/run.py tutorials/03-quest/step1_world.py --shot /tmp/q1.png
import array
import picogame as pg
import picogame_game
import picogame_clock
import picogame_shapes as shp
W, H = 320, 240
TILE = 16
38 collapsed lines
# . grass : path ~ water(solid) # tree(solid) W wall(solid) D door G goal
# P player N npc * coin E enemy
MAP = [
"##############################",
"#.....:......................#",
"#.....:........*.............#",
"#..##.:.............~~~~~~...#",
"#..##.:.............~~~~~~...#",
"#.....N.............~~~~~~...#",
"#.....:.......E.....~~~~~~...#",
"#.....:......................#",
"#.....:.....*.........*......#",
"#.....:......................#",
"#:::::::P:::::::::*::::::::::#",
"#.....:...................*..#",
"#.....:.............E........#",
"#.....:...WWWWWWW............#",
"#.....:...W.....W......##....#",
"#.....:.*.W..G..W......##....#",
"#.....:...W.....W........E...#",
"#.....:...WWWDWWW............#",
"#.....:......................#",
"##############################",
]
MAPCOLS, MAPROWS = 30, 20
# map char -> tile value (entities sit on grass; the tile under them is grass/path)
# tile values (frame index into the colour tileset; 0 = empty)
GRASS, PATH, WATER, TREE, WALL, DOOR, GOAL = 1, 2, 3, 4, 5, 6, 7
CHAR2TILE = {".": GRASS, "P": GRASS, "N": GRASS, "*": GRASS, "E": GRASS,
":": PATH, "~": WATER, "#": TREE, "W": WALL, "D": DOOR, "G": GOAL}
# tile colours for values 1..7 (value 0 is unused)
TILE_RGB = [(40, 120, 50), # GRASS
(180, 160, 110), # PATH
(40, 90, 200), # WATER
(20, 80, 30), # TREE
(120, 120, 130), # WALL
(150, 90, 40), # DOOR
(240, 210, 60)] # GOAL
scene, _, _ = picogame_game.setup(background=pg.rgb565(0, 0, 0))
clock = picogame_clock.Clock(30)
tileset = shp.tileset_colors(TILE, TILE, [pg.rgb565(*color) for color in TILE_RGB])
world = pg.Tilemap(tileset, MAPCOLS, MAPROWS)
hero_x, hero_y = TILE, TILE # world pixel position of the hero
# build the Tilemap cell by cell from the ASCII map above
for tile_y in range(MAPROWS):
row = MAP[tile_y]
for tile_x in range(MAPCOLS):
char = row[tile_x] if tile_x < len(row) else "." # rows are full width; "." is just a safety net
world.tile(tile_x, tile_y, CHAR2TILE.get(char, GRASS)) # unknown chars fall back to GRASS
if char == "P":
hero_x, hero_y = tile_x * TILE, tile_y * TILE
scene.add(world)
# a PLACEHOLDER hero: a plain red square with a brighter bar on the facing edge, so you
# can see which way it points. 4 frames = 4 directions (frame = facing). We prototype
# with a shape now and draw a real animated character in step 4.
RED = pg.rgb565(210, 80, 60)
EDGE = pg.rgb565(255, 225, 170)
def hero_bitmap():
palette = array.array("H", [pg.rgb565(0, 0, 0), RED, EDGE]) # index 0 = transparent
stride = TILE * 4 # 4 frames side by side, 1 byte/px
data = bytearray(stride * TILE)
for facing in range(4): # 0 down, 1 up, 2 left, 3 right
for y in range(TILE):
for x in range(TILE):
on_facing_edge = ((facing == 0 and y >= TILE - 3) or (facing == 1 and y < 3) or
(facing == 2 and x < 3) or (facing == 3 and x >= TILE - 3))
data[y * stride + facing * TILE + x] = 2 if on_facing_edge else 1
return pg.Bitmap(data, TILE, TILE, format=pg.PAL8, palette=palette, frames=4, stride=stride)
hero = pg.Sprite(hero_bitmap(), hero_x, hero_y, frame=0)
scene.add(hero)
def camera_follow():
# centre the camera on the hero, clamped so we never show past the world edges
# The view offset = how far the world is shifted left/up on screen: 0 (world edge
# at screen edge) down to negative as we scroll right/down.
offset_x = W // 2 - (hero.x + TILE // 2) # centre the hero...
offset_x = min(0, offset_x) # ...but never past the left edge
offset_x = max(W - MAPCOLS * TILE, offset_x) # ...nor past the right edge
offset_y = H // 2 - (hero.y + TILE // 2) # centre the hero...
offset_y = min(0, offset_y) # ...but never past the top edge
offset_y = max(H - MAPROWS * TILE, offset_y) # ...nor past the bottom edge
scene.set_view(int(offset_x), int(offset_y))
camera_follow()
while True:
scene.refresh()
clock.tick()
```
[▶ Try it in the browser](/playground/?ex=03-quest-step1_world)
### step 2 — `step2_walk.py` · walk, camera follows
[Section titled “step 2 — step2\_walk.py · walk, camera follows”](#step-2--step2_walkpy--walk-camera-follows)
 4-direction movement read with [`picogame_input`](/reference/); after each move `camera_follow()` re-centres the camera, **clamped** to the world so you never see past the edges (near an edge the hero walks toward the screen edge instead). The hero faces its movement direction — its `frame` picks down/up/left/right. No wall collision yet: you can walk over water. **You see:** the hero strides around with the camera following, clamped so the view never slips past the world’s edge. **Try it:** change `SPEED`.
```diff
14 collapsed lines
# Quest -- step 2: walk around, camera follows.
#
# What you learn: world vs screen coordinates. The hero moves in WORLD space; after
# each move we call camera_follow() to re-aim the camera. Near the world edges the clamp in
# camera_follow() stops the camera and the hero walks toward the screen edge instead -- the
# classic top-down feel. The hero also FACES the way it moves -- its `frame` picks the
# direction (0 down, 1 up, 2 left, 3 right). There's no wall collision yet, so you can
# walk over water and trees (step 3 fixes that).
#
# New vs step 1: 4-direction input, facing via sprite.frame, camera_follow() on move.
#
# Run: python3 sim/run.py tutorials/03-quest/step2_walk.py --hold DOWN --shot /tmp/q2.png
import array
import picogame as pg
import picogame_game
+import picogame_input
import picogame_clock
import picogame_shapes as shp
W, H = 320, 240
TILE = 16
+SPEED = 2
MAP = [
"##############################",
30 collapsed lines
"#.....:......................#",
"#.....:........*.............#",
"#..##.:.............~~~~~~...#",
"#..##.:.............~~~~~~...#",
"#.....N.............~~~~~~...#",
"#.....:.......E.....~~~~~~...#",
"#.....:......................#",
"#.....:.....*.........*......#",
"#.....:......................#",
"#:::::::P:::::::::*::::::::::#",
"#.....:...................*..#",
"#.....:.............E........#",
"#.....:...WWWWWWW............#",
"#.....:...W.....W......##....#",
"#.....:.*.W..G..W......##....#",
"#.....:...W.....W........E...#",
"#.....:...WWWDWWW............#",
"#.....:......................#",
"##############################",
]
MAPCOLS, MAPROWS = 30, 20
# tile values (frame index into the colour tileset; 0 = empty)
GRASS, PATH, WATER, TREE, WALL, DOOR, GOAL = 1, 2, 3, 4, 5, 6, 7
CHAR2TILE = {".": GRASS, "P": GRASS, "N": GRASS, "*": GRASS, "E": GRASS,
":": PATH, "~": WATER, "#": TREE, "W": WALL, "D": DOOR, "G": GOAL}
TILE_RGB = [(40, 120, 50), # GRASS
(180, 160, 110), # PATH
(40, 90, 200), # WATER
(20, 80, 30), # TREE
(120, 120, 130), # WALL
(150, 90, 40), # DOOR
(240, 210, 60)] # GOAL
+DOWN, UP, LEFT, RIGHT = 0, 1, 2, 3 # facing -> frame index
scene, _, _ = picogame_game.setup(background=pg.rgb565(0, 0, 0))
+btn = picogame_input.Buttons()
clock = picogame_clock.Clock(30)
tileset = shp.tileset_colors(TILE, TILE, [pg.rgb565(*color) for color in TILE_RGB])
world = pg.Tilemap(tileset, MAPCOLS, MAPROWS)
hero_x, hero_y = TILE, TILE
for tile_y in range(MAPROWS):
for tile_x in range(MAPCOLS):
char = MAP[tile_y][tile_x] if tile_x < len(MAP[tile_y]) else "."
world.tile(tile_x, tile_y, CHAR2TILE.get(char, GRASS))
if char == "P":
hero_x, hero_y = tile_x * TILE, tile_y * TILE
scene.add(world)
# a PLACEHOLDER hero: a plain red square with a brighter bar on the facing edge, so you
# can see which way it points. 4 frames = 4 directions (frame = facing). Step 4 replaces
# it with a real drawn character.
RED = pg.rgb565(210, 80, 60)
EDGE = pg.rgb565(255, 225, 170)
13 collapsed lines
def hero_bitmap():
palette = array.array("H", [pg.rgb565(0, 0, 0), RED, EDGE]) # index 0 = transparent
stride = TILE * 4 # 4 frames side by side, 1 byte/px
data = bytearray(stride * TILE)
for facing in range(4): # 0 down, 1 up, 2 left, 3 right
for y in range(TILE):
for x in range(TILE):
on_facing_edge = ((facing == 0 and y >= TILE - 3) or (facing == 1 and y < 3) or
(facing == 2 and x < 3) or (facing == 3 and x >= TILE - 3))
data[y * stride + facing * TILE + x] = 2 if on_facing_edge else 1
return pg.Bitmap(data, TILE, TILE, format=pg.PAL8, palette=palette, frames=4, stride=stride)
hero = pg.Sprite(hero_bitmap(), hero_x, hero_y, frame=DOWN)
scene.add(hero)
def camera_follow():
offset_x = max(W - MAPCOLS * TILE, min(0, W // 2 - (hero.x + TILE // 2)))
offset_y = max(H - MAPROWS * TILE, min(0, H // 2 - (hero.y + TILE // 2)))
scene.set_view(int(offset_x), int(offset_y))
camera_follow()
while True:
+ btn.poll()
+# True/False count as 1/0, so this is -1 (left), 0, or +1 (right)
+ delta_x = btn.is_pressed(btn.RIGHT) - btn.is_pressed(btn.LEFT)
+ delta_y = btn.is_pressed(btn.DOWN) - btn.is_pressed(btn.UP)
+if delta_x:
+ hero.frame = RIGHT if delta_x > 0 else LEFT # face horizontally
+elif delta_y:
+ hero.frame = DOWN if delta_y > 0 else UP # face vertically
+if delta_x or delta_y:
+ hero.move(hero.x + delta_x * SPEED, hero.y + delta_y * SPEED)
+camera_follow()
scene.refresh()
clock.tick()
```
[▶ Try it in the browser](/playground/?ex=03-quest-step2_walk)
### step 3 — `step3_walls.py` · tile collision
[Section titled “step 3 — step3\_walls.py · tile collision”](#step-3--step3_wallspy--tile-collision)
 `solid_at(pixel_x, pixel_y)` maps a world pixel to a tile and checks a `SOLID` set; `can_walk()` probes the hero’s four corners. We test the X and Y moves **separately**, so you slide along a wall instead of sticking when pushing diagonally into it. (The engine also ships [`picogame_tiles`](/reference/) with ready-made tile probing if you’d rather not hand-roll it.) **You see:** water, trees and walls now block you. **Try it:** add a tile value to `SOLID` (or remove one).
```diff
54 collapsed lines
# Quest -- step 3: walls (tile-based collision).
#
# What you learn: stop the hero walking through water/trees/walls. Convert a world
# pixel to a tile (tx = px // TILE), look the tile up, and treat some values as
# SOLID. can_walk() probes the hero's body (its four corners, inset a little) so it
# can't clip into a wall. We test the X and Y moves SEPARATELY, so the hero slides
# along a wall instead of sticking when you push diagonally into it.
#
# New vs step 2: solid_at()/can_walk() pixel->tile collision, per-axis movement.
#
# Run: python3 sim/run.py tutorials/03-quest/step3_walls.py --hold RIGHT --shot /tmp/q3.png
import array
import picogame as pg
import picogame_game
import picogame_input
import picogame_clock
import picogame_shapes as shp
W, H = 320, 240
TILE = 16
SPEED = 2
MAP = [
"##############################",
"#.....:......................#",
"#.....:........*.............#",
"#..##.:.............~~~~~~...#",
"#..##.:.............~~~~~~...#",
"#.....N.............~~~~~~...#",
"#.....:.......E.....~~~~~~...#",
"#.....:......................#",
"#.....:.....*.........*......#",
"#.....:......................#",
"#:::::::P:::::::::*::::::::::#",
"#.....:...................*..#",
"#.....:.............E........#",
"#.....:...WWWWWWW............#",
"#.....:...W.....W......##....#",
"#.....:.*.W..G..W......##....#",
"#.....:...W.....W........E...#",
"#.....:...WWWDWWW............#",
"#.....:......................#",
"##############################",
]
MAPCOLS, MAPROWS = 30, 20
# tile values (frame index into the colour tileset; 0 = empty)
GRASS, PATH, WATER, TREE, WALL, DOOR, GOAL = 1, 2, 3, 4, 5, 6, 7
CHAR2TILE = {".": GRASS, "P": GRASS, "N": GRASS, "*": GRASS, "E": GRASS,
":": PATH, "~": WATER, "#": TREE, "W": WALL, "D": DOOR, "G": GOAL}
TILE_RGB = [(40, 120, 50), # GRASS
(180, 160, 110), # PATH
(40, 90, 200), # WATER
(20, 80, 30), # TREE
(120, 120, 130), # WALL
(150, 90, 40), # DOOR
(240, 210, 60)] # GOAL
+SOLID = (WATER, TREE, WALL, DOOR) # these tiles block movement
DOWN, UP, LEFT, RIGHT = 0, 1, 2, 3 # facing -> frame index
scene, _, _ = picogame_game.setup(background=pg.rgb565(0, 0, 0))
37 collapsed lines
btn = picogame_input.Buttons()
clock = picogame_clock.Clock(30)
tileset = shp.tileset_colors(TILE, TILE, [pg.rgb565(*color) for color in TILE_RGB])
world = pg.Tilemap(tileset, MAPCOLS, MAPROWS)
hero_x, hero_y = TILE, TILE
for tile_y in range(MAPROWS):
for tile_x in range(MAPCOLS):
char = MAP[tile_y][tile_x] if tile_x < len(MAP[tile_y]) else "."
world.tile(tile_x, tile_y, CHAR2TILE.get(char, GRASS))
if char == "P":
hero_x, hero_y = tile_x * TILE, tile_y * TILE
scene.add(world)
# a PLACEHOLDER hero: a plain red square with a brighter bar on the facing edge, so you
# can see which way it points. 4 frames = 4 directions (frame = facing). Step 4 replaces
# it with a real drawn character.
RED = pg.rgb565(210, 80, 60)
EDGE = pg.rgb565(255, 225, 170)
def hero_bitmap():
palette = array.array("H", [pg.rgb565(0, 0, 0), RED, EDGE]) # index 0 = transparent
stride = TILE * 4 # 4 frames side by side, 1 byte/px
data = bytearray(stride * TILE)
for facing in range(4): # 0 down, 1 up, 2 left, 3 right
for y in range(TILE):
for x in range(TILE):
on_facing_edge = ((facing == 0 and y >= TILE - 3) or (facing == 1 and y < 3) or
(facing == 2 and x < 3) or (facing == 3 and x >= TILE - 3))
data[y * stride + facing * TILE + x] = 2 if on_facing_edge else 1
return pg.Bitmap(data, TILE, TILE, format=pg.PAL8, palette=palette, frames=4, stride=stride)
hero = pg.Sprite(hero_bitmap(), hero_x, hero_y, frame=DOWN)
scene.add(hero)
+def solid_at(pixel_x, pixel_y):
+ tile_x, tile_y = pixel_x // TILE, pixel_y // TILE
+if tile_x < 0 or tile_x >= MAPCOLS or tile_y < 0 or tile_y >= MAPROWS:
+return True
+return world.tile(tile_x, tile_y) in SOLID
+def can_walk(pixel_x, pixel_y):
+# probe the hero's body corners (inset 2px) -- all must be free
+return not (solid_at(pixel_x + 2, pixel_y + 2) or solid_at(pixel_x + TILE - 3, pixel_y + 2) or
+solid_at(pixel_x + 2, pixel_y + TILE - 3) or solid_at(pixel_x + TILE - 3, pixel_y + TILE - 3))
def camera_follow():
offset_x = max(W - MAPCOLS * TILE, min(0, W // 2 - (hero.x + TILE // 2)))
8 collapsed lines
offset_y = max(H - MAPROWS * TILE, min(0, H // 2 - (hero.y + TILE // 2)))
scene.set_view(int(offset_x), int(offset_y))
camera_follow()
while True:
btn.poll()
delta_x = btn.is_pressed(btn.RIGHT) - btn.is_pressed(btn.LEFT)
delta_y = btn.is_pressed(btn.DOWN) - btn.is_pressed(btn.UP)
if delta_x:
hero.frame = RIGHT if delta_x > 0 else LEFT
elif delta_y:
hero.frame = DOWN if delta_y > 0 else UP
+ moved = False
if delta_x and can_walk(hero.x + delta_x * SPEED, hero.y): # test X alone
+ hero.move(hero.x + delta_x * SPEED, hero.y); moved = True
+if delta_y and can_walk(hero.x, hero.y + delta_y * SPEED): # then Y alone -> slide
+ hero.move(hero.x, hero.y + delta_y * SPEED); moved = True
+if moved:
camera_follow()
scene.refresh()
clock.tick()
```
[▶ Try it in the browser](/playground/?ex=03-quest-step3_walls)
### step 4 — `step4_anim.py` · walk animation
[Section titled “step 4 — step4\_anim.py · walk animation”](#step-4--step4_animpy--walk-animation)
 Now we replace the placeholder square with a character drawn from ASCII masks (down/up/side, with LEFT the side view mirrored by `flip_x`), with two **poses** per facing, driven by [`picogame_anim`](/reference/)`.AnimatedSprite`: `play(name)` picks the facing’s animation, `tick(dt)` advances it using the real `dt` from `clock.tick()` (so the walk speed is frame-rate independent). **You see:** a walk cycle in your direction of travel, and the rest pose when you stand still. **Try it:** change the animation `fps`.
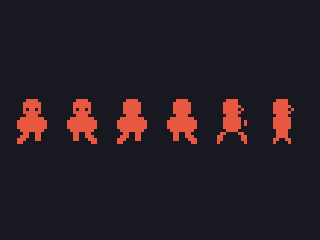
The frames here are hand-drawn ASCII **masks**, so you can focus on the animation code. For custom artwork, draw an image sprite sheet and bake it to a Bitmap with `tools/png2picogame.py`, then animate by frame index — the *same* `AnimatedSprite` drives that too. See the [assets guide](/tutorials/assets/) and each tutorial’s `bonus_art.py`.
```diff
22 collapsed lines
# Quest -- step 4: a walking animation.
#
# What you learn: time-based animation -- and giving the hero real art. We retire the
# placeholder square and draw a proper character from ASCII masks (down / up / side, with
# LEFT the side view mirrored by flip_x), with TWO poses per facing, then drive the walk
# with picogame_anim.AnimatedSprite: play(name) picks the facing's animation, tick(dt)
# advances it with the real dt from clock.tick() (so the walk speed is frame-rate
# independent); standing still we show the still pose.
#
# Here the frames are hand-drawn masks (no asset), so we animate by SWAPPING whole
# bitmaps. A REAL game usually loads a proper image sprite-sheet (a PNG baked with
# tools/png2picogame.py -> one multi-frame Bitmap) and animates by frame INDEX -- the
# same AnimatedSprite drives that too. See the bonus_art step / the assets guide.
#
# New vs step 3: the drawn masked hero (replacing the placeholder square) + sprite.flip_x
# for LEFT, two walk poses per facing, picogame_anim.AnimatedSprite over a bitmap list,
# play()/tick(dt), the dt from clock.tick().
#
# Run: python3 sim/run.py tutorials/03-quest/step4_anim.py --hold RIGHT --shot /tmp/q4.png
import picogame as pg
import picogame_game
import picogame_input
import picogame_clock
+import picogame_anim
import picogame_shapes as shp
36 collapsed lines
W, H = 320, 240
TILE = 16
SPEED = 2
MAP = [
"##############################",
"#.....:......................#",
"#.....:........*.............#",
"#..##.:.............~~~~~~...#",
"#..##.:.............~~~~~~...#",
"#.....N.............~~~~~~...#",
"#.....:.......E.....~~~~~~...#",
"#.....:......................#",
"#.....:.....*.........*......#",
"#.....:......................#",
"#:::::::P:::::::::*::::::::::#",
"#.....:...................*..#",
"#.....:.............E........#",
"#.....:...WWWWWWW............#",
"#.....:...W.....W......##....#",
"#.....:.*.W..G..W......##....#",
"#.....:...W.....W........E...#",
"#.....:...WWWDWWW............#",
"#.....:......................#",
"##############################",
]
MAPCOLS, MAPROWS = 30, 20
# tile values (frame index into the colour tileset; 0 = empty)
GRASS, PATH, WATER, TREE, WALL, DOOR, GOAL = 1, 2, 3, 4, 5, 6, 7
CHAR2TILE = {".": GRASS, "P": GRASS, "N": GRASS, "*": GRASS, "E": GRASS,
":": PATH, "~": WATER, "#": TREE, "W": WALL, "D": DOOR, "G": GOAL}
TILE_RGB = [(40, 120, 50), # GRASS
(180, 160, 110), # PATH
(40, 90, 200), # WATER
(20, 80, 30), # TREE
(120, 120, 130), # WALL
(150, 90, 40), # DOOR
(240, 210, 60)] # GOAL
SOLID = (WATER, TREE, WALL, DOOR) # these tiles block movement
DOWN, UP, LEFT, RIGHT = 0, 1, 2, 3
+FACING_ANIM = ("down", "up", "side", "side") # animation per facing (left/right share the side art)
+WALK_FPS = 8
scene, _, _ = picogame_game.setup(background=pg.rgb565(0, 0, 0))
13 collapsed lines
btn = picogame_input.Buttons()
clock = picogame_clock.Clock(30)
tileset = shp.tileset_colors(TILE, TILE, [pg.rgb565(*color) for color in TILE_RGB])
world = pg.Tilemap(tileset, MAPCOLS, MAPROWS)
hero_x, hero_y = TILE, TILE
for tile_y in range(MAPROWS):
for tile_x in range(MAPCOLS):
char = MAP[tile_y][tile_x] if tile_x < len(MAP[tile_y]) else "."
world.tile(tile_x, tile_y, CHAR2TILE.get(char, GRASS))
if char == "P":
hero_x, hero_y = tile_x * TILE, tile_y * TILE
scene.add(world)
# --- the hero: ASCII pixel art you can edit. '#' = a pixel, '.' = transparent. One
# colour = a 1-bit silhouette; the FACING reads from the shape: DOWN has eyes, UP is
# the back of the head, SIDE is a profile with a nose (LEFT = SIDE mirrored at runtime
# with flip_x). Two poses per facing make the walk -- the legs scissor between A and B.
+HERO_COLOR = pg.rgb565(235, 90, 70)
+DOWN_A = [
"................",
".....####.......",
+"....######......",
+"....######......",
+"....#.##.#......", # eye gaps -> the face
+"....######......",
+".....####.......",
+"...########.....",
+"..##########....",
+"..##########....",
+"..##########....",
+"...########.....",
+"....##..##......",
+"...###..##......",
+"..###...##......", # left foot forward
+"..##............",
+]
+DOWN_B = [
+"................",
+".....####.......",
+"....######......",
+"....######......",
+"....#.##.#......",
+"....######......",
+".....####.......",
+"...########.....",
+"..##########....",
+"..##########....",
+"..##########....",
+"...########.....",
+"....##..##......",
+"....##..###.....",
+"....##...###....", # right foot forward
+"..........##....",
+]
+UP_A = [
+"................",
+".....####.......",
+"....######......",
+"....######......",
+"....######......", # solid head = the hero's back
+"....######......",
+".....####.......",
+"...########.....",
+"..##########....",
+"..##########....",
+"..##########....",
+"...########.....",
+"....##..##......",
+"...###..##......",
+"..###...##......",
+"..##............",
+]
+UP_B = [
+"................",
+".....####.......",
+"....######......",
+"....######......",
+"....######......",
+"....######......",
+".....####.......",
+"...########.....",
+"..##########....",
+"..##########....",
+"..##########....",
+"...########.....",
+"....##..##......",
+"....##..###.....",
+"....##...###....",
+"..........##....",
+]
+SIDE_A = [
+"................",
+".....####.......",
+"....#####.......",
+"....######......",
+"....#####.#.....", # nose nub -> faces right (flip_x -> left)
+"....######......",
+".....####.......",
+"....######......",
+"....######.#....", # arm swung forward
+"....######.#....",
+"....######......",
+".....####.......",
+"...##....##.....", # legs split
+"..##......##....",
+"..##......##....",
+"..#........#....",
+]
+SIDE_B = [
+"................",
+".....####.......",
+"....#####.......",
+"....######......",
+"....#####.#.....",
+"....######......",
+".....####.......",
+"....######......",
+"....######......", # arm tucked in
+"....######......",
+"....######......",
+".....####.......",
+".....####.......", # legs pass under the body
+".....####.......",
+"....##..##......",
+"....#....#......",
+]
+BM = {"down": [shp.from_mask(DOWN_A, HERO_COLOR), shp.from_mask(DOWN_B, HERO_COLOR)],
+"up": [shp.from_mask(UP_A, HERO_COLOR), shp.from_mask(UP_B, HERO_COLOR)],
+"side": [shp.from_mask(SIDE_A, HERO_COLOR), shp.from_mask(SIDE_B, HERO_COLOR)]}
hero = pg.Sprite(BM["down"][0], hero_x, hero_y)
+# each entry: name: (bitmap list, frames-per-second, loop?) -- AnimatedSprite accepts
+# a list of Bitmaps to swap in, not only frame indices into one sheet
+walk = picogame_anim.AnimatedSprite(hero, {
+"down": (BM["down"], WALK_FPS, True),
+"up": (BM["up"], WALK_FPS, True),
+"side": (BM["side"], WALK_FPS, True)})
scene.add(hero)
+facing = DOWN
def solid_at(pixel_x, pixel_y):
tile_x, tile_y = pixel_x // TILE, pixel_y // TILE
15 collapsed lines
if tile_x < 0 or tile_x >= MAPCOLS or tile_y < 0 or tile_y >= MAPROWS:
return True
return world.tile(tile_x, tile_y) in SOLID
def can_walk(pixel_x, pixel_y):
return not (solid_at(pixel_x + 2, pixel_y + 2) or solid_at(pixel_x + TILE - 3, pixel_y + 2) or
solid_at(pixel_x + 2, pixel_y + TILE - 3) or solid_at(pixel_x + TILE - 3, pixel_y + TILE - 3))
def camera_follow():
offset_x = max(W - MAPCOLS * TILE, min(0, W // 2 - (hero.x + TILE // 2)))
offset_y = max(H - MAPROWS * TILE, min(0, H // 2 - (hero.y + TILE // 2)))
scene.set_view(int(offset_x), int(offset_y))
camera_follow()
+dt = 1 / 30 # assume one 30fps frame for the first tick; clock.tick() returns real dt after that
while True:
btn.poll()
+# True/False count as 1/0, so this is -1 (left), 0, or +1 (right)
delta_x = btn.is_pressed(btn.RIGHT) - btn.is_pressed(btn.LEFT)
delta_y = btn.is_pressed(btn.DOWN) - btn.is_pressed(btn.UP)
if delta_x:
facing = RIGHT if delta_x > 0 else LEFT
elif delta_y:
facing = DOWN if delta_y > 0 else UP
+ hero.flip_x = (facing == LEFT) # mirror the side art for LEFT
moved = False
if delta_x and can_walk(hero.x + delta_x * SPEED, hero.y):
hero.move(hero.x + delta_x * SPEED, hero.y); moved = True
if delta_y and can_walk(hero.x, hero.y + delta_y * SPEED):
hero.move(hero.x, hero.y + delta_y * SPEED); moved = True
if moved:
camera_follow()
+ walk.play(FACING_ANIM[facing]) # animate the walk while moving
+ walk.tick(dt)
+else:
+ hero.bitmap = BM[FACING_ANIM[facing]][0] # still: pose A of the current facing
scene.refresh()
dt = clock.tick()
```
[▶ Try it in the browser](/playground/?ex=03-quest-step4_anim)
### step 5 — `step5_items.py` · items + a fixed HUD
[Section titled “step 5 — step5\_items.py · items + a fixed HUD”](#step-5--step5_itemspy--items--a-fixed-hud)
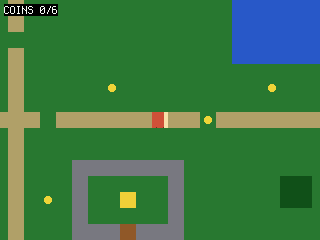 Coins are sprites placed from the map; being normal scene items, they **scroll with the world**. We collect one when the hero is close, hide it, and count it. [`picogame_ui`](/reference/)`.SceneLabel` is a **fixed** layer: it does NOT scroll, so the counter stays pinned to the corner. **You see:** coins dotted through the world that you scoop up close, and a counter pinned in the corner that doesn’t scroll. **Try it:** add more `*` coins to the map.
```diff
12 collapsed lines
# Quest -- step 5: collectible items + a HUD over the scrolling world.
#
# What you learn: world-space pickups and a camera-fixed HUD. Coins are sprites
# placed at map positions; because they're normal scene items they scroll with the
# world. We collect one when the hero is close enough (a simple distance test), hide
# it, and bump a counter. picogame_ui.SceneLabel is a FIXED scene layer -- it does NOT
# scroll, so the coin counter stays pinned to the corner while the world moves under
# it.
#
# New vs step 4: item sprites placed from the map, distance-based pickup, a fixed
# SceneLabel counter.
#
# Run: python3 sim/run.py tutorials/03-quest/step5_items.py --hold RIGHT --shot /tmp/q5.png
+import terminalio
import picogame as pg
import picogame_game
import picogame_input
import picogame_clock
import picogame_anim
import picogame_shapes as shp
+import picogame_ui as ui
W, H = 320, 240
38 collapsed lines
TILE = 16
SPEED = 2
MAP = [
"##############################",
"#.....:......................#",
"#.....:........*.............#",
"#..##.:.............~~~~~~...#",
"#..##.:.............~~~~~~...#",
"#.....N.............~~~~~~...#",
"#.....:.......E.....~~~~~~...#",
"#.....:......................#",
"#.....:.....*.........*......#",
"#.....:......................#",
"#:::::::P:::::::::*::::::::::#",
"#.....:...................*..#",
"#.....:.............E........#",
"#.....:...WWWWWWW............#",
"#.....:...W.....W......##....#",
"#.....:.*.W..G..W......##....#",
"#.....:...W.....W........E...#",
"#.....:...WWWDWWW............#",
"#.....:......................#",
"##############################",
]
MAPCOLS, MAPROWS = 30, 20
# tile values (frame index into the colour tileset; 0 = empty)
GRASS, PATH, WATER, TREE, WALL, DOOR, GOAL = 1, 2, 3, 4, 5, 6, 7
CHAR2TILE = {".": GRASS, "P": GRASS, "N": GRASS, "*": GRASS, "E": GRASS,
":": PATH, "~": WATER, "#": TREE, "W": WALL, "D": DOOR, "G": GOAL}
TILE_RGB = [(40, 120, 50), # GRASS
(180, 160, 110), # PATH
(40, 90, 200), # WATER
(20, 80, 30), # TREE
(120, 120, 130), # WALL
(150, 90, 40), # DOOR
(240, 210, 60)] # GOAL
SOLID = (WATER, TREE, WALL, DOOR) # these tiles block movement
DOWN, UP, LEFT, RIGHT = 0, 1, 2, 3
FACING_ANIM = ("down", "up", "side", "side") # animation per facing (left/right share the side art)
WALK_FPS = 8
+BACKGROUND = pg.rgb565(0, 0, 0)
scene, _, _ = picogame_game.setup(background=BACKGROUND)
btn = picogame_input.Buttons()
clock = picogame_clock.Clock(30)
tileset = shp.tileset_colors(TILE, TILE, [pg.rgb565(*color) for color in TILE_RGB])
world = pg.Tilemap(tileset, MAPCOLS, MAPROWS)
hero_x, hero_y = TILE, TILE
+coin_spots = []
for tile_y in range(MAPROWS):
for tile_x in range(MAPCOLS):
char = MAP[tile_y][tile_x] if tile_x < len(MAP[tile_y]) else "."
world.tile(tile_x, tile_y, CHAR2TILE.get(char, GRASS))
if char == "P":
hero_x, hero_y = tile_x * TILE, tile_y * TILE
+elif char == "*":
+ coin_spots.append((tile_x * TILE, tile_y * TILE))
scene.add(world)
+coin_bitmap = shp.circle(8, pg.rgb565(245, 215, 60))
+coins = [pg.Sprite(coin_bitmap, x + 4, y + 4) for (x, y) in coin_spots] # +4 to centre in tile
+for coin in coins:
+ scene.add(coin)
# --- the hero: ASCII pixel art you can edit. '#' = a pixel, '.' = transparent. One
# colour = a 1-bit silhouette; the FACING reads from the shape: DOWN has eyes, UP is
118 collapsed lines
# the back of the head, SIDE is a profile with a nose (LEFT = SIDE mirrored at runtime
# with flip_x). Two poses per facing make the walk -- the legs scissor between A and B.
HERO_COLOR = pg.rgb565(235, 90, 70)
DOWN_A = [
"................",
".....####.......",
"....######......",
"....######......",
"....#.##.#......", # eye gaps -> the face
"....######......",
".....####.......",
"...########.....",
"..##########....",
"..##########....",
"..##########....",
"...########.....",
"....##..##......",
"...###..##......",
"..###...##......", # left foot forward
"..##............",
]
DOWN_B = [
"................",
".....####.......",
"....######......",
"....######......",
"....#.##.#......",
"....######......",
".....####.......",
"...########.....",
"..##########....",
"..##########....",
"..##########....",
"...########.....",
"....##..##......",
"....##..###.....",
"....##...###....", # right foot forward
"..........##....",
]
UP_A = [
"................",
".....####.......",
"....######......",
"....######......",
"....######......", # solid head = the hero's back
"....######......",
".....####.......",
"...########.....",
"..##########....",
"..##########....",
"..##########....",
"...########.....",
"....##..##......",
"...###..##......",
"..###...##......",
"..##............",
]
UP_B = [
"................",
".....####.......",
"....######......",
"....######......",
"....######......",
"....######......",
".....####.......",
"...########.....",
"..##########....",
"..##########....",
"..##########....",
"...########.....",
"....##..##......",
"....##..###.....",
"....##...###....",
"..........##....",
]
SIDE_A = [
"................",
".....####.......",
"....#####.......",
"....######......",
"....#####.#.....", # nose nub -> faces right (flip_x -> left)
"....######......",
".....####.......",
"....######......",
"....######.#....", # arm swung forward
"....######.#....",
"....######......",
".....####.......",
"...##....##.....", # legs split
"..##......##....",
"..##......##....",
"..#........#....",
]
SIDE_B = [
"................",
".....####.......",
"....#####.......",
"....######......",
"....#####.#.....",
"....######......",
".....####.......",
"....######......",
"....######......", # arm tucked in
"....######......",
"....######......",
".....####.......",
".....####.......", # legs pass under the body
".....####.......",
"....##..##......",
"....#....#......",
]
BM = {"down": [shp.from_mask(DOWN_A, HERO_COLOR), shp.from_mask(DOWN_B, HERO_COLOR)],
"up": [shp.from_mask(UP_A, HERO_COLOR), shp.from_mask(UP_B, HERO_COLOR)],
"side": [shp.from_mask(SIDE_A, HERO_COLOR), shp.from_mask(SIDE_B, HERO_COLOR)]}
hero = pg.Sprite(BM["down"][0], hero_x, hero_y)
walk = picogame_anim.AnimatedSprite(hero, {
"down": (BM["down"], WALK_FPS, True),
"up": (BM["up"], WALK_FPS, True),
"side": (BM["side"], WALK_FPS, True)})
scene.add(hero)
+hud = ui.SceneLabel(scene, pg, terminalio.FONT, 4, 4, pg.rgb565(255, 255, 255), BACKGROUND)
facing = DOWN
+coins_collected = 0
17 collapsed lines
def solid_at(pixel_x, pixel_y):
tile_x, tile_y = pixel_x // TILE, pixel_y // TILE
if tile_x < 0 or tile_x >= MAPCOLS or tile_y < 0 or tile_y >= MAPROWS:
return True
return world.tile(tile_x, tile_y) in SOLID
def can_walk(pixel_x, pixel_y):
return not (solid_at(pixel_x + 2, pixel_y + 2) or solid_at(pixel_x + TILE - 3, pixel_y + 2) or
solid_at(pixel_x + 2, pixel_y + TILE - 3) or solid_at(pixel_x + TILE - 3, pixel_y + TILE - 3))
def camera_follow():
offset_x = max(W - MAPCOLS * TILE, min(0, W // 2 - (hero.x + TILE // 2)))
offset_y = max(H - MAPROWS * TILE, min(0, H // 2 - (hero.y + TILE // 2)))
scene.set_view(int(offset_x), int(offset_y))
camera_follow()
dt = 1 / 30
while True:
btn.poll()
14 collapsed lines
# True/False count as 1/0, so this is -1 (left), 0, or +1 (right)
delta_x = btn.is_pressed(btn.RIGHT) - btn.is_pressed(btn.LEFT)
delta_y = btn.is_pressed(btn.DOWN) - btn.is_pressed(btn.UP)
if delta_x:
facing = RIGHT if delta_x > 0 else LEFT
elif delta_y:
facing = DOWN if delta_y > 0 else UP
hero.flip_x = (facing == LEFT) # mirror the side art for LEFT
moved = False
if delta_x and can_walk(hero.x + delta_x * SPEED, hero.y):
hero.move(hero.x + delta_x * SPEED, hero.y); moved = True
if delta_y and can_walk(hero.x, hero.y + delta_y * SPEED):
hero.move(hero.x, hero.y + delta_y * SPEED); moved = True
if moved:
camera_follow()
walk.play(FACING_ANIM[facing]); walk.tick(dt)
else:
hero.bitmap = BM[FACING_ANIM[facing]][0] # still: pose A of the current facing
+# pick up any coin we're standing on (within ~12px on both axes = close enough)
+for coin in coins:
+if coin.visible and abs(hero.x - coin.x) < 12 and abs(hero.y - coin.y) < 12:
+ coin.visible = False
+ coins_collected += 1
+ hud.set("COINS %d/%d" % (coins_collected, len(coins)))
scene.refresh()
dt = clock.tick()
```
[▶ Try it in the browser](/playground/?ex=03-quest-step5_items)
### step 6 — `step6_npc.py` · talk to an NPC
[Section titled “step 6 — step6\_npc.py · talk to an NPC”](#step-6--step6_npcpy--talk-to-an-npc)
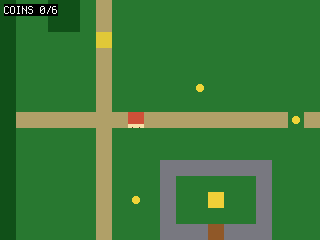 Stand next to the NPC and press **A** to switch into a **dialog mode**: the world keeps drawing underneath while `picogame_ui.TextBox` overlays a message; movement is frozen until you press a button. **You see:** a “PRESS A” prompt near the NPC, then a dialog box. **Try it:** change the dialog `LINES`.
**A tidy-up: the `State` object.** The mutable variables are piling up, and as globals each needs a `global` line in every function that changes it. So we group them into one `class State` (`st.coins`, `st.mode`); objects that never change reference (the hero, the tilemap) stay module-level.
```diff
23 collapsed lines
# Quest -- step 6: an NPC you can talk to (and a State object + a main() loop to tidy up).
#
# What you learn: interaction + a simple state machine for dialog, AND how to keep
# the growing pile of game variables under control. An NPC is a sprite; when the hero
# stands next to it and presses A we switch to a DIALOG mode: the world keeps drawing
# underneath, and picogame_ui.TextBox draws a multi-line message box on top (a
# screen-space overlay, drawn after scene.refresh). While in dialog we DON'T process
# movement -- the game is paused on the box until you press a button to dismiss it.
#
# State object: the loose module variables have been piling up (facing, coins, a
# mode, a "dialog shown" flag...) and the next steps add HP, a cooldown, a quest
# stage. Instead of a scatter of globals (and a `global` in every function that
# touches them), we group them in ONE `class State` and make `st = State()`. Now it's
# `st.coins`, `st.mode`, with no `global` needed. Objects that never get REASSIGNED
# (the hero Sprite, the world Tilemap, the labels) stay plain module-level names;
# State holds only the mutable scalars. The game mode is a named INT constant
# (EXPLORE / DIALOG) rather than a magic string, so a branch reads `st.mode ==
# DIALOG`.
#
# New vs step 5: an NPC sprite, a State object, the loop moved into a main() function,
# a mode machine (EXPLORE/DIALOG), picogame_ui.TextBox, freezing the world during
# dialog, an adjacency "PRESS A" prompt.
#
# Run: python3 sim/run.py tutorials/03-quest/step6_npc.py --shot /tmp/q6.png
+import board
import terminalio
import picogame as pg
44 collapsed lines
import picogame_game
import picogame_input
import picogame_clock
import picogame_anim
import picogame_shapes as shp
import picogame_ui as ui
W, H = 320, 240
TILE = 16
SPEED = 2
MAP = [
"##############################",
"#.....:......................#",
"#.....:........*.............#",
"#..##.:.............~~~~~~...#",
"#..##.:.............~~~~~~...#",
"#.....N.............~~~~~~...#",
"#.....:.......E.....~~~~~~...#",
"#.....:......................#",
"#.....:.....*.........*......#",
"#.....:......................#",
"#:::::::P:::::::::*::::::::::#",
"#.....:...................*..#",
"#.....:.............E........#",
"#.....:...WWWWWWW............#",
"#.....:...W.....W......##....#",
"#.....:.*.W..G..W......##....#",
"#.....:...W.....W........E...#",
"#.....:...WWWDWWW............#",
"#.....:......................#",
"##############################",
]
MAPCOLS, MAPROWS = 30, 20
# tile values (frame index into the colour tileset; 0 = empty)
GRASS, PATH, WATER, TREE, WALL, DOOR, GOAL = 1, 2, 3, 4, 5, 6, 7
CHAR2TILE = {".": GRASS, "P": GRASS, "N": GRASS, "*": GRASS, "E": GRASS,
":": PATH, "~": WATER, "#": TREE, "W": WALL, "D": DOOR, "G": GOAL}
TILE_RGB = [(40, 120, 50), # GRASS
(180, 160, 110), # PATH
(40, 90, 200), # WATER
(20, 80, 30), # TREE
(120, 120, 130), # WALL
(150, 90, 40), # DOOR
(240, 210, 60)] # GOAL
SOLID = (WATER, TREE, WALL, DOOR) # these tiles block movement
DOWN, UP, LEFT, RIGHT = 0, 1, 2, 3
FACING_ANIM = ("down", "up", "side", "side") # animation per facing (left/right share the side art)
+EXPLORE, DIALOG = 0, 1 # game modes (int constants, not strings)
WALK_FPS = 8 # walk-animation speed (frames per second)
BACKGROUND = pg.rgb565(0, 0, 0)
+WHITE = pg.rgb565(255, 255, 255)
+NAVY = pg.rgb565(10, 10, 40)
+# buffer_a/buffer_b = the engine's two shared render strips; immediate-mode draws
+# (the dialog box below) paint straight into buffer_a
scene, buffer_a, buffer_b = picogame_game.setup(background=BACKGROUND)
btn = picogame_input.Buttons()
clock = picogame_clock.Clock(30)
tileset = shp.tileset_colors(TILE, TILE, [pg.rgb565(*color) for color in TILE_RGB])
world = pg.Tilemap(tileset, MAPCOLS, MAPROWS)
hero_x, hero_y = TILE, TILE
+npc_x, npc_y = TILE, TILE
coin_spots = []
for tile_y in range(MAPROWS):
for tile_x in range(MAPCOLS):
char = MAP[tile_y][tile_x] if tile_x < len(MAP[tile_y]) else "."
world.tile(tile_x, tile_y, CHAR2TILE.get(char, GRASS))
if char == "P":
hero_x, hero_y = tile_x * TILE, tile_y * TILE
+elif char == "N":
+ npc_x, npc_y = tile_x * TILE, tile_y * TILE
elif char == "*":
coin_spots.append((tile_x * TILE, tile_y * TILE))
scene.add(world)
coin_bitmap = shp.circle(8, pg.rgb565(245, 215, 60))
coins = [pg.Sprite(coin_bitmap, x + 4, y + 4) for (x, y) in coin_spots]
for coin in coins:
scene.add(coin)
+npc = pg.Sprite(shp.rect(TILE, TILE, pg.rgb565(230, 200, 60)), npc_x, npc_y)
+scene.add(npc)
120 collapsed lines
# --- the hero: ASCII pixel art you can edit. '#' = a pixel, '.' = transparent. One
# colour = a 1-bit silhouette; the FACING reads from the shape: DOWN has eyes, UP is
# the back of the head, SIDE is a profile with a nose (LEFT = SIDE mirrored at runtime
# with flip_x). Two poses per facing make the walk -- the legs scissor between A and B.
HERO_COLOR = pg.rgb565(235, 90, 70)
DOWN_A = [
"................",
".....####.......",
"....######......",
"....######......",
"....#.##.#......", # eye gaps -> the face
"....######......",
".....####.......",
"...########.....",
"..##########....",
"..##########....",
"..##########....",
"...########.....",
"....##..##......",
"...###..##......",
"..###...##......", # left foot forward
"..##............",
]
DOWN_B = [
"................",
".....####.......",
"....######......",
"....######......",
"....#.##.#......",
"....######......",
".....####.......",
"...########.....",
"..##########....",
"..##########....",
"..##########....",
"...########.....",
"....##..##......",
"....##..###.....",
"....##...###....", # right foot forward
"..........##....",
]
UP_A = [
"................",
".....####.......",
"....######......",
"....######......",
"....######......", # solid head = the hero's back
"....######......",
".....####.......",
"...########.....",
"..##########....",
"..##########....",
"..##########....",
"...########.....",
"....##..##......",
"...###..##......",
"..###...##......",
"..##............",
]
UP_B = [
"................",
".....####.......",
"....######......",
"....######......",
"....######......",
"....######......",
".....####.......",
"...########.....",
"..##########....",
"..##########....",
"..##########....",
"...########.....",
"....##..##......",
"....##..###.....",
"....##...###....",
"..........##....",
]
SIDE_A = [
"................",
".....####.......",
"....#####.......",
"....######......",
"....#####.#.....", # nose nub -> faces right (flip_x -> left)
"....######......",
".....####.......",
"....######......",
"....######.#....", # arm swung forward
"....######.#....",
"....######......",
".....####.......",
"...##....##.....", # legs split
"..##......##....",
"..##......##....",
"..#........#....",
]
SIDE_B = [
"................",
".....####.......",
"....#####.......",
"....######......",
"....#####.#.....",
"....######......",
".....####.......",
"....######......",
"....######......", # arm tucked in
"....######......",
"....######......",
".....####.......",
".....####.......", # legs pass under the body
".....####.......",
"....##..##......",
"....#....#......",
]
BM = {"down": [shp.from_mask(DOWN_A, HERO_COLOR), shp.from_mask(DOWN_B, HERO_COLOR)],
"up": [shp.from_mask(UP_A, HERO_COLOR), shp.from_mask(UP_B, HERO_COLOR)],
"side": [shp.from_mask(SIDE_A, HERO_COLOR), shp.from_mask(SIDE_B, HERO_COLOR)]}
hero = pg.Sprite(BM["down"][0], hero_x, hero_y)
walk = picogame_anim.AnimatedSprite(hero, {
"down": (BM["down"], WALK_FPS, True),
"up": (BM["up"], WALK_FPS, True),
"side": (BM["side"], WALK_FPS, True)})
scene.add(hero)
hud = ui.SceneLabel(scene, pg, terminalio.FONT, 4, 4, WHITE, BACKGROUND)
+dialog = ui.TextBox(pg, terminalio.FONT, 8, H - 64, W - 16, 58, WHITE, NAVY, maxlines=4)
+LINES = ["Villager:", "Beware the slimes in the", "tall grass, traveller.", "(press A)"]
+class State:
+"""All the mutable game variables in one place (was a pile of module globals). __init__ just calls
reset(), so every default lives in ONE spot and a restart would be a single call -- st.reset()."""
+def __init__(self):
+self.reset()
+def reset(self):
+self.facing = DOWN
+self.coins = 0
+self.mode = EXPLORE # EXPLORE = walking around, DIALOG = talking
+self.dlg_shown = False # draw the modal once, not every frame
+st = State()
def solid_at(pixel_x, pixel_y):
tile_x, tile_y = pixel_x // TILE, pixel_y // TILE
8 collapsed lines
if tile_x < 0 or tile_x >= MAPCOLS or tile_y < 0 or tile_y >= MAPROWS:
return True
return world.tile(tile_x, tile_y) in SOLID
def can_walk(pixel_x, pixel_y):
return not (solid_at(pixel_x + 2, pixel_y + 2) or solid_at(pixel_x + TILE - 3, pixel_y + 2) or
solid_at(pixel_x + 2, pixel_y + TILE - 3) or solid_at(pixel_x + TILE - 3, pixel_y + TILE - 3))
+def near_npc():
+return abs(hero.x - npc.x) <= TILE and abs(hero.y - npc.y) <= TILE
def camera_follow():
offset_x = max(W - MAPCOLS * TILE, min(0, W // 2 - (hero.x + TILE // 2)))
offset_y = max(H - MAPROWS * TILE, min(0, H // 2 - (hero.y + TILE // 2)))
scene.set_view(int(offset_x), int(offset_y))
camera_follow()
# The per-frame loop now lives in a FUNCTION (main), not at module scope. Inside a
+# function its names -- st, the loop's own delta_x/dt, the helpers -- resolve as fast
+# array-indexed locals instead of globals-dict lookups; on the device that's a
+# measured speed-up for the hot loop. It pairs naturally with the State tidy-up: one
+# st object + one main() is the shape every bigger game grows into.
+def main():
dt = 1 / 30 # seed the first frame; re-set from clock.tick() each loop
while True:
btn.poll()
+if st.mode == DIALOG:
+if not st.dlg_shown: # draw ONCE -> no per-frame flicker
+ scene.refresh() # world frozen under the box
+ dialog.draw(scene.display, buffer_a, LINES)
+ st.dlg_shown = True
+if btn.just_pressed(btn.A) or btn.just_pressed(btn.B):
+ st.mode = EXPLORE
+ scene.invalidate() # repaint over the box next frame
+ clock.tick()
+continue
+ delta_x = btn.is_pressed(btn.RIGHT) - btn.is_pressed(btn.LEFT)
+ delta_y = btn.is_pressed(btn.DOWN) - btn.is_pressed(btn.UP)
+if delta_x:
+ st.facing = RIGHT if delta_x > 0 else LEFT
+elif delta_y:
+ st.facing = DOWN if delta_y > 0 else UP
+ hero.flip_x = (st.facing == LEFT) # mirror the side art for LEFT
+ moved = False
+if delta_x and can_walk(hero.x + delta_x * SPEED, hero.y):
+ hero.move(hero.x + delta_x * SPEED, hero.y); moved = True
+if delta_y and can_walk(hero.x, hero.y + delta_y * SPEED):
+ hero.move(hero.x, hero.y + delta_y * SPEED); moved = True
+if moved:
+camera_follow()
+ walk.play(FACING_ANIM[st.facing]) # animate the walk while moving
walk.tick(dt)
+else:
+ hero.bitmap = BM[FACING_ANIM[st.facing]][0] # still: pose A of the current facing
+# pick up any coin we're standing on (within ~12px on both axes = close enough)
+for coin in coins:
+if coin.visible and abs(hero.x - coin.x) < 12 and abs(hero.y - coin.y) < 12:
+ coin.visible = False
+ st.coins += 1
+if near_npc():
hud.set("COINS %d/%d A: TALK" % (st.coins, len(coins)))
+if btn.just_pressed(btn.A):
+ st.mode = DIALOG
+ st.dlg_shown = False
+else:
+ hud.set("COINS %d/%d" % (st.coins, len(coins)))
scene.refresh()
+ dt = clock.tick()
+main()
```
[▶ Try it in the browser](/playground/?ex=03-quest-step6_npc)
### step 7 — `step7_combat.py` · enemies + bump combat
[Section titled “step 7 — step7\_combat.py · enemies + bump combat”](#step-7--step7_combatpy--enemies--bump-combat)
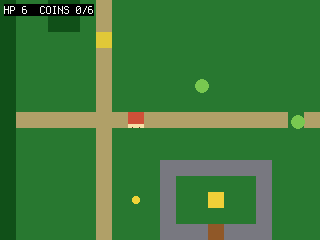 Slimes chase the hero (slower than you, respecting walls). Touching one costs **HP** and briefly can’t be hurt again (a short cooldown); press **B** to swing at the tile you’re facing and defeat a slime. HP shows in the HUD; reaching 0 sends you back to start. **You see:** slimes converging on you, HP ticking down in the HUD on each hit, and a **B** swing that clears the tile you face. (A still talks.) **Try it:** change the slime speed or your starting HP.
```diff
64 collapsed lines
# Quest -- step 7: enemies and bump combat.
#
# What you learn: simple chasing AI, taking damage, and attacking. Slimes step
# toward the hero (slower than you, and they respect walls via can_walk). Touching
# one costs HP and starts a brief "can't be hurt again" cooldown (hurt_cooldown) so one touch doesn't
# drain you instantly. Press B to swing: we defeat any slime in the tile just ahead
# of the way you're facing. HP shows in the HUD; reaching 0 sends you back to start.
#
# The State object from step 6 keeps paying off: HP, the hurt cooldown and a frame
# counter just become more `st.` fields -- no new globals, no `global` soup.
#
# New vs step 6: enemy sprites with chase AI, player HP + a brief hurt cooldown + knock-back,
# a white hit-flash (sprite.flash) on damage, a B attack in the facing direction. (A still
# talks to the NPC.)
#
# Run: python3 sim/run.py tutorials/03-quest/step7_combat.py --hold B --shot /tmp/q7.png
import board
import terminalio
import picogame as pg
import picogame_game
import picogame_input
import picogame_clock
import picogame_anim
import picogame_shapes as shp
import picogame_ui as ui
W, H = 320, 240
TILE = 16
SPEED = 2
MAP = [
"##############################",
"#.....:......................#",
"#.....:........*.............#",
"#..##.:.............~~~~~~...#",
"#..##.:.............~~~~~~...#",
"#.....N.............~~~~~~...#",
"#.....:.......E.....~~~~~~...#",
"#.....:......................#",
"#.....:.....*.........*......#",
"#.....:......................#",
"#:::::::P:::::::::*::::::::::#",
"#.....:...................*..#",
"#.....:.............E........#",
"#.....:...WWWWWWW............#",
"#.....:...W.....W......##....#",
"#.....:.*.W..G..W......##....#",
"#.....:...W.....W........E...#",
"#.....:...WWWDWWW............#",
"#.....:......................#",
"##############################",
]
MAPCOLS, MAPROWS = 30, 20
# tile values (frame index into the colour tileset; 0 = empty)
GRASS, PATH, WATER, TREE, WALL, DOOR, GOAL = 1, 2, 3, 4, 5, 6, 7
CHAR2TILE = {".": GRASS, "P": GRASS, "N": GRASS, "*": GRASS, "E": GRASS,
":": PATH, "~": WATER, "#": TREE, "W": WALL, "D": DOOR, "G": GOAL}
TILE_RGB = [(40, 120, 50), # GRASS
(180, 160, 110), # PATH
(40, 90, 200), # WATER
(20, 80, 30), # TREE
(120, 120, 130), # WALL
(150, 90, 40), # DOOR
(240, 210, 60)] # GOAL
SOLID = (WATER, TREE, WALL, DOOR) # these tiles block movement
DOWN, UP, LEFT, RIGHT = 0, 1, 2, 3
+DIR = {DOWN: (0, 1), UP: (0, -1), LEFT: (-1, 0), RIGHT: (1, 0)} # facing -> (dx, dy) step
FACING_ANIM = ("down", "up", "side", "side") # animation per facing (left/right share the side art)
EXPLORE, DIALOG = 0, 1 # game modes (int constants, not strings)
WALK_FPS = 8 # walk-animation speed (frames per second)
+MAX_HP = 6
+HURT_FRAMES = 40 # ~1.3s of mercy after a hit (at 30 fps)
+FLASH_FRAMES = 3 # how long the white hit-flash shows
BACKGROUND = pg.rgb565(0, 0, 0)
WHITE = pg.rgb565(255, 255, 255)
8 collapsed lines
NAVY = pg.rgb565(10, 10, 40)
# buffer_a/buffer_b = the engine's two shared render strips; immediate-mode draws
# (the dialog box below) paint straight into buffer_a
scene, buffer_a, buffer_b = picogame_game.setup(background=BACKGROUND)
btn = picogame_input.Buttons()
clock = picogame_clock.Clock(30)
tileset = shp.tileset_colors(TILE, TILE, [pg.rgb565(*color) for color in TILE_RGB])
world = pg.Tilemap(tileset, MAPCOLS, MAPROWS)
+START = (TILE, TILE)
npc_x, npc_y = TILE, TILE
coin_spots, enemy_spots = [], []
for tile_y in range(MAPROWS):
for tile_x in range(MAPCOLS):
char = MAP[tile_y][tile_x] if tile_x < len(MAP[tile_y]) else "."
world.tile(tile_x, tile_y, CHAR2TILE.get(char, GRASS))
if char == "P":
START = (tile_x * TILE, tile_y * TILE)
elif char == "N":
npc_x, npc_y = tile_x * TILE, tile_y * TILE
elif char == "*":
coin_spots.append((tile_x * TILE, tile_y * TILE))
+elif char == "E":
+ enemy_spots.append((tile_x * TILE, tile_y * TILE))
scene.add(world)
coin_bitmap = shp.circle(8, pg.rgb565(245, 215, 60))
coins = [pg.Sprite(coin_bitmap, x + 4, y + 4) for (x, y) in coin_spots]
for coin in coins:
scene.add(coin)
+slime_bitmap = shp.circle(14, pg.rgb565(120, 200, 80))
+enemies = [pg.Sprite(slime_bitmap, x + 1, y + 1) for (x, y) in enemy_spots]
+for enemy in enemies:
+ scene.add(enemy)
npc = pg.Sprite(shp.rect(TILE, TILE, pg.rgb565(230, 200, 60)), npc_x, npc_y)
scene.add(npc)
116 collapsed lines
# --- the hero: ASCII pixel art you can edit. '#' = a pixel, '.' = transparent. One
# colour = a 1-bit silhouette; the FACING reads from the shape: DOWN has eyes, UP is
# the back of the head, SIDE is a profile with a nose (LEFT = SIDE mirrored at runtime
# with flip_x). Two poses per facing make the walk -- the legs scissor between A and B.
HERO_COLOR = pg.rgb565(235, 90, 70)
DOWN_A = [
"................",
".....####.......",
"....######......",
"....######......",
"....#.##.#......", # eye gaps -> the face
"....######......",
".....####.......",
"...########.....",
"..##########....",
"..##########....",
"..##########....",
"...########.....",
"....##..##......",
"...###..##......",
"..###...##......", # left foot forward
"..##............",
]
DOWN_B = [
"................",
".....####.......",
"....######......",
"....######......",
"....#.##.#......",
"....######......",
".....####.......",
"...########.....",
"..##########....",
"..##########....",
"..##########....",
"...########.....",
"....##..##......",
"....##..###.....",
"....##...###....", # right foot forward
"..........##....",
]
UP_A = [
"................",
".....####.......",
"....######......",
"....######......",
"....######......", # solid head = the hero's back
"....######......",
".....####.......",
"...########.....",
"..##########....",
"..##########....",
"..##########....",
"...########.....",
"....##..##......",
"...###..##......",
"..###...##......",
"..##............",
]
UP_B = [
"................",
".....####.......",
"....######......",
"....######......",
"....######......",
"....######......",
".....####.......",
"...########.....",
"..##########....",
"..##########....",
"..##########....",
"...########.....",
"....##..##......",
"....##..###.....",
"....##...###....",
"..........##....",
]
SIDE_A = [
"................",
".....####.......",
"....#####.......",
"....######......",
"....#####.#.....", # nose nub -> faces right (flip_x -> left)
"....######......",
".....####.......",
"....######......",
"....######.#....", # arm swung forward
"....######.#....",
"....######......",
".....####.......",
"...##....##.....", # legs split
"..##......##....",
"..##......##....",
"..#........#....",
]
SIDE_B = [
"................",
".....####.......",
"....#####.......",
"....######......",
"....#####.#.....",
"....######......",
".....####.......",
"....######......",
"....######......", # arm tucked in
"....######......",
"....######......",
".....####.......",
".....####.......", # legs pass under the body
".....####.......",
"....##..##......",
"....#....#......",
]
BM = {"down": [shp.from_mask(DOWN_A, HERO_COLOR), shp.from_mask(DOWN_B, HERO_COLOR)],
"up": [shp.from_mask(UP_A, HERO_COLOR), shp.from_mask(UP_B, HERO_COLOR)],
"side": [shp.from_mask(SIDE_A, HERO_COLOR), shp.from_mask(SIDE_B, HERO_COLOR)]}
hero = pg.Sprite(BM["down"][0], START[0], START[1])
walk = picogame_anim.AnimatedSprite(hero, {
"down": (BM["down"], WALK_FPS, True),
"up": (BM["up"], WALK_FPS, True),
"side": (BM["side"], WALK_FPS, True)})
scene.add(hero)
hud = ui.SceneLabel(scene, pg, terminalio.FONT, 4, 4, WHITE, BACKGROUND)
dialog = ui.TextBox(pg, terminalio.FONT, 8, H - 64, W - 16, 58, WHITE, NAVY, maxlines=4)
+LINES = ["Villager:", "Slimes ahead! Press B to", "swing at them.", "(press A)"]
class State:
+"""All the mutable game variables in one place (grows as the game does). __init__ calls reset()."""
def __init__(self):
self.reset()
def reset(self):
self.facing = DOWN
self.coins = 0
+self.hp = MAX_HP
+self.hurt_cooldown = 0 # frames of mercy after a hit (i-frames)
self.mode = EXPLORE # EXPLORE = walking around, DIALOG = talking
+self.frame_count = 0 # frames elapsed (slimes chase every other frame)
self.dlg_shown = False # draw the modal once, not every frame
13 collapsed lines
st = State()
def solid_at(pixel_x, pixel_y):
tile_x, tile_y = pixel_x // TILE, pixel_y // TILE
if tile_x < 0 or tile_x >= MAPCOLS or tile_y < 0 or tile_y >= MAPROWS:
return True
return world.tile(tile_x, tile_y) in SOLID
def can_walk(pixel_x, pixel_y):
return not (solid_at(pixel_x + 2, pixel_y + 2) or solid_at(pixel_x + TILE - 3, pixel_y + 2) or
solid_at(pixel_x + 2, pixel_y + TILE - 3) or solid_at(pixel_x + TILE - 3, pixel_y + TILE - 3))
+def near(a, bx, by, d=TILE):
+# True if sprite a is within d px of the point (bx, by) on both axes (a box test)
+return abs(a.x - bx) < d and abs(a.y - by) < d
5 collapsed lines
def camera_follow():
offset_x = max(W - MAPCOLS * TILE, min(0, W // 2 - (hero.x + TILE // 2)))
offset_y = max(H - MAPROWS * TILE, min(0, H // 2 - (hero.y + TILE // 2)))
scene.set_view(int(offset_x), int(offset_y))
camera_follow()
def main(): # loop in a function -> its names are fast locals (see step 6)
dt = 1 / 30 # seed the first frame; re-set from clock.tick() each loop
while True:
btn.poll()
+ st.frame_count += 1
if st.mode == DIALOG:
if not st.dlg_shown: # draw ONCE -> no per-frame flicker
scene.refresh()
dialog.draw(scene.display, buffer_a, LINES)
st.dlg_shown = True
if btn.just_pressed(btn.A) or btn.just_pressed(btn.B):
st.mode = EXPLORE
scene.invalidate()
clock.tick()
continue
13 collapsed lines
delta_x = btn.is_pressed(btn.RIGHT) - btn.is_pressed(btn.LEFT)
delta_y = btn.is_pressed(btn.DOWN) - btn.is_pressed(btn.UP)
if delta_x:
st.facing = RIGHT if delta_x > 0 else LEFT
elif delta_y:
st.facing = DOWN if delta_y > 0 else UP
hero.flip_x = (st.facing == LEFT) # mirror the side art for LEFT
moved = False
if delta_x and can_walk(hero.x + delta_x * SPEED, hero.y):
hero.move(hero.x + delta_x * SPEED, hero.y); moved = True
if delta_y and can_walk(hero.x, hero.y + delta_y * SPEED):
hero.move(hero.x, hero.y + delta_y * SPEED); moved = True
if moved:
camera_follow()
walk.play(FACING_ANIM[st.facing])
walk.tick(dt)
else:
hero.bitmap = BM[FACING_ANIM[st.facing]][0] # still: pose A of the current facing
+# attack: defeat a slime in the tile ahead of the facing
+if btn.just_pressed(btn.B):
+ ddx, ddy = DIR[st.facing]
+ ax, ay = hero.x + ddx * TILE, hero.y + ddy * TILE
+for enemy in enemies:
+if enemy.visible and abs(enemy.x - ax) < TILE and abs(enemy.y - ay) < TILE:
+ enemy.visible = False
+# slimes chase (slower: move every other frame) and respect walls
+if st.frame_count % 2 == 0:
+for enemy in enemies:
+if not enemy.visible:
+continue
+# which way to the hero: -1, 0 or +1 per axis (a compact sign())
+ chase_dx = (hero.x > enemy.x) - (hero.x < enemy.x)
+ chase_dy = (hero.y > enemy.y) - (hero.y < enemy.y)
+if chase_dx and can_walk(enemy.x + chase_dx, enemy.y):
+ enemy.move(enemy.x + chase_dx, enemy.y)
+if chase_dy and can_walk(enemy.x, enemy.y + chase_dy):
+ enemy.move(enemy.x, enemy.y + chase_dy)
+# take damage on contact (unless the cooldown from the last hit is still running)
+if st.hurt_cooldown > 0:
+ st.hurt_cooldown -= 1 # count the "safe" frames down
+if st.hurt_cooldown == HURT_FRAMES - FLASH_FRAMES: # ...and end the hit-flash after 3 frames
+ hero.flash = None
+else:
+for enemy in enemies:
+# 13px: slime radius (~7) + hero half-width (~8), i.e. they're touching
+if enemy.visible and near(enemy, hero.x, hero.y, 13):
+ st.hp -= 1
+ st.hurt_cooldown = HURT_FRAMES # frames where another touch can't hurt you
+ hero.flash = WHITE # white blit-flash for 3 frames: "I got hit"
+if st.hp <= 0: # down -> back to start, full HP
+ st.hp = MAX_HP
+ hero.move(START[0], START[1])
+camera_follow()
+break
# pick up any coin we're standing on (within ~12px on both axes = close enough)
for coin in coins:
if coin.visible and abs(hero.x - coin.x) < 12 and abs(hero.y - coin.y) < 12:
coin.visible = False
st.coins += 1
+if near(hero, npc.x, npc.y):
hud.set("HP %d COINS %d/%d A:TALK B:SWING" % (st.hp, st.coins, len(coins)))
if btn.just_pressed(btn.A):
st.mode = DIALOG
st.dlg_shown = False
else:
hud.set("HP %d COINS %d/%d" % (st.hp, st.coins, len(coins)))
scene.refresh()
dt = clock.tick()
main()
```
[▶ Try it in the browser](/playground/?ex=03-quest-step7_combat)
### step 8 — `step8_quest.py` · complete the quest
[Section titled “step 8 — step8\_quest.py · complete the quest”](#step-8--step8_questpy--complete-the-quest)
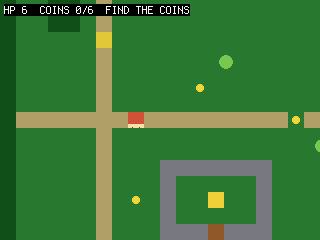 Everything becomes a goal: the NPC asks for all the coins; once you have them, talking again **opens the door** (we rewrite those tiles from “door” to “path” so collision lets you through); stepping on the shrine tile **wins**. A `st.stage` field drives the dialog and the door, and the mode gains a third value (`WON`). Note `dialog_lines(st)` now *takes* the state object instead of reaching for globals — the payoff of keeping state in one place. **You see:** talk → collect → unlock → reach the shrine → “QUEST COMPLETE”. **Try it:** require defeating all slimes too before the door opens.
```diff
73 collapsed lines
# Quest -- step 8: a quest, a goal, and a win state (capstone).
#
# What you learn: tying the systems into an actual game. The NPC gives an objective
# (collect every coin); once you have them all, talking again OPENS the door (we
# rewrite those tiles from "door" to "path", so collision lets you through); stepping
# on the shrine tile wins. A small quest-stage variable drives the dialog text and
# the door. This is the whole loop: talk -> collect -> unlock -> reach the goal.
#
# The State object now carries the whole game: hp, coins, the quest stage, and the
# mode (EXPLORE/DIALOG/WON). dialog_lines() TAKES the state (dialog_lines(st)) instead
# of reaching for globals -- the tidy payoff of grouping state in one object.
#
# New vs step 7: a quest stage, objective-driven dialog, opening the door by editing
# tiles, a goal tile + WON state, and sound (a talk blip + a win chime).
#
# BIG PICTURE: you've now hand-built an RPG -- map, camera, collision, animation,
# items, NPC, combat, quest. You DON'T have to keep hand-coding maps like this: the
# editor (editor/) lets you paint the map, place the hero/NPC/coins, and FLAG tiles
# (solid/coin/goal) visually, then the picogame_scene loader builds the scene for
# you -- the exact things this file does by hand become data. See tutorials/README.md
# and examples/picogame_platformer_scene.py for a game whose level is loaded that way.
#
# Run: python3 sim/run.py tutorials/03-quest/step8_quest.py --shot /tmp/q8.png
import board
import terminalio
import picogame as pg
import picogame_game
import picogame_input
import picogame_clock
import picogame_anim
import picogame_shapes as shp
import picogame_ui as ui
W, H = 320, 240
TILE = 16
SPEED = 2
MAP = [
"##############################",
"#.....:......................#",
"#.....:........*.............#",
"#..##.:.............~~~~~~...#",
"#..##.:.............~~~~~~...#",
"#.....N.............~~~~~~...#",
"#.....:.......E.....~~~~~~...#",
"#.....:......................#",
"#.....:.....*.........*......#",
"#.....:......................#",
"#:::::::P:::::::::*::::::::::#",
"#.....:...................*..#",
"#.....:.............E........#",
"#.....:...WWWWWWW............#",
"#.....:...W.....W......##....#",
"#.....:.*.W..G..W......##....#",
"#.....:...W.....W........E...#",
"#.....:...WWWDWWW............#",
"#.....:......................#",
"##############################",
]
MAPCOLS, MAPROWS = 30, 20
# tile values (frame index into the colour tileset; 0 = empty)
GRASS, PATH, WATER, TREE, WALL, DOOR, GOAL = 1, 2, 3, 4, 5, 6, 7
CHAR2TILE = {".": GRASS, "P": GRASS, "N": GRASS, "*": GRASS, "E": GRASS,
":": PATH, "~": WATER, "#": TREE, "W": WALL, "D": DOOR, "G": GOAL}
TILE_RGB = [(40, 120, 50), # GRASS
(180, 160, 110), # PATH
(40, 90, 200), # WATER
(20, 80, 30), # TREE
(120, 120, 130), # WALL
(150, 90, 40), # DOOR
(240, 210, 60)] # GOAL
SOLID = (WATER, TREE, WALL, DOOR) # these tiles block movement
DOWN, UP, LEFT, RIGHT = 0, 1, 2, 3
DIR = {DOWN: (0, 1), UP: (0, -1), LEFT: (-1, 0), RIGHT: (1, 0)} # facing -> (dx, dy) step
FACING_ANIM = ("down", "up", "side", "side") # animation per facing (left/right share the side art)
EXPLORE, DIALOG, WON = 0, 1, 2 # game modes (int constants, not strings)
WALK_FPS = 8 # walk-animation speed (frames per second)
MAX_HP = 6
5 collapsed lines
HURT_FRAMES = 40 # ~1.3s of mercy after a hit (at 30 fps)
FLASH_FRAMES = 3 # how long the white hit-flash shows
BACKGROUND = pg.rgb565(0, 0, 0)
WHITE = pg.rgb565(255, 255, 255)
NAVY = pg.rgb565(10, 10, 40)
# buffer_a/buffer_b = the engine's two shared render strips; immediate-mode draws
# (the dialog/win box below) paint straight into buffer_a
scene, buffer_a, buffer_b = picogame_game.setup(background=BACKGROUND)
btn = picogame_input.Buttons()
clock = picogame_clock.Clock(30)
+# optional audio: a talk blip + a bright win chime (no asset needed). None if no backend.
+try:
+import picogame_audio
+ audio = picogame_audio.Audio()
+ snd_talk = picogame_audio.tone(520, 30) # short blip on dialog advance
+ snd_win = picogame_audio.tone(880, 220) # bright chime on QUEST COMPLETE
+except Exception:
+ audio = None
+ snd_talk = snd_win = None
tileset = shp.tileset_colors(TILE, TILE, [pg.rgb565(*color) for color in TILE_RGB])
world = pg.Tilemap(tileset, MAPCOLS, MAPROWS)
START = (TILE, TILE)
npc_x, npc_y = TILE, TILE
coin_spots, enemy_spots, door_tiles = [], [], []
for tile_y in range(MAPROWS):
for tile_x in range(MAPCOLS):
8 collapsed lines
char = MAP[tile_y][tile_x] if tile_x < len(MAP[tile_y]) else "."
world.tile(tile_x, tile_y, CHAR2TILE.get(char, GRASS))
if char == "P":
START = (tile_x * TILE, tile_y * TILE)
elif char == "N":
npc_x, npc_y = tile_x * TILE, tile_y * TILE
elif char == "*":
coin_spots.append((tile_x * TILE, tile_y * TILE))
elif char == "E":
enemy_spots.append((tile_x * TILE, tile_y * TILE))
+elif char == "D":
+ door_tiles.append((tile_x, tile_y))
scene.add(world)
134 collapsed lines
coin_bitmap = shp.circle(8, pg.rgb565(245, 215, 60))
coins = [pg.Sprite(coin_bitmap, x + 4, y + 4) for (x, y) in coin_spots]
for coin in coins:
scene.add(coin)
slime_bitmap = shp.circle(14, pg.rgb565(120, 200, 80))
enemies = [pg.Sprite(slime_bitmap, x + 1, y + 1) for (x, y) in enemy_spots]
for enemy in enemies:
scene.add(enemy)
npc = pg.Sprite(shp.rect(TILE, TILE, pg.rgb565(230, 200, 60)), npc_x, npc_y)
scene.add(npc)
# --- the hero: ASCII pixel art you can edit. '#' = a pixel, '.' = transparent. One
# colour = a 1-bit silhouette; the FACING reads from the shape: DOWN has eyes, UP is
# the back of the head, SIDE is a profile with a nose (LEFT = SIDE mirrored at runtime
# with flip_x). Two poses per facing make the walk -- the legs scissor between A and B.
HERO_COLOR = pg.rgb565(235, 90, 70)
DOWN_A = [
"................",
".....####.......",
"....######......",
"....######......",
"....#.##.#......", # eye gaps -> the face
"....######......",
".....####.......",
"...########.....",
"..##########....",
"..##########....",
"..##########....",
"...########.....",
"....##..##......",
"...###..##......",
"..###...##......", # left foot forward
"..##............",
]
DOWN_B = [
"................",
".....####.......",
"....######......",
"....######......",
"....#.##.#......",
"....######......",
".....####.......",
"...########.....",
"..##########....",
"..##########....",
"..##########....",
"...########.....",
"....##..##......",
"....##..###.....",
"....##...###....", # right foot forward
"..........##....",
]
UP_A = [
"................",
".....####.......",
"....######......",
"....######......",
"....######......", # solid head = the hero's back
"....######......",
".....####.......",
"...########.....",
"..##########....",
"..##########....",
"..##########....",
"...########.....",
"....##..##......",
"...###..##......",
"..###...##......",
"..##............",
]
UP_B = [
"................",
".....####.......",
"....######......",
"....######......",
"....######......",
"....######......",
".....####.......",
"...########.....",
"..##########....",
"..##########....",
"..##########....",
"...########.....",
"....##..##......",
"....##..###.....",
"....##...###....",
"..........##....",
]
SIDE_A = [
"................",
".....####.......",
"....#####.......",
"....######......",
"....#####.#.....", # nose nub -> faces right (flip_x -> left)
"....######......",
".....####.......",
"....######......",
"....######.#....", # arm swung forward
"....######.#....",
"....######......",
".....####.......",
"...##....##.....", # legs split
"..##......##....",
"..##......##....",
"..#........#....",
]
SIDE_B = [
"................",
".....####.......",
"....#####.......",
"....######......",
"....#####.#.....",
"....######......",
".....####.......",
"....######......",
"....######......", # arm tucked in
"....######......",
"....######......",
".....####.......",
".....####.......", # legs pass under the body
".....####.......",
"....##..##......",
"....#....#......",
]
BM = {"down": [shp.from_mask(DOWN_A, HERO_COLOR), shp.from_mask(DOWN_B, HERO_COLOR)],
"up": [shp.from_mask(UP_A, HERO_COLOR), shp.from_mask(UP_B, HERO_COLOR)],
"side": [shp.from_mask(SIDE_A, HERO_COLOR), shp.from_mask(SIDE_B, HERO_COLOR)]}
hero = pg.Sprite(BM["down"][0], START[0], START[1])
walk = picogame_anim.AnimatedSprite(hero, {
"down": (BM["down"], WALK_FPS, True),
"up": (BM["up"], WALK_FPS, True),
"side": (BM["side"], WALK_FPS, True)})
scene.add(hero)
hud = ui.SceneLabel(scene, pg, terminalio.FONT, 4, 4, WHITE, BACKGROUND)
dialog = ui.TextBox(pg, terminalio.FONT, 8, H - 64, W - 16, 58, WHITE, NAVY, maxlines=4)
+NUMCOINS = len(coins)
class State:
+"""The whole game's mutable state -- one object, passed where a function needs it. __init__ calls
reset()."""
def __init__(self):
self.reset()
def reset(self):
self.facing = DOWN
self.coins = 0
self.hp = MAX_HP
self.hurt_cooldown = 0
+self.stage = 0 # 0 not started, 1 collecting, 2 door open
self.mode = EXPLORE # EXPLORE / DIALOG / WON
self.frame_count = 0 # frames elapsed (slimes chase every other frame)
self.overlay_shown = False # draw dialog/win modal once, not every frame
24 collapsed lines
st = State()
def solid_at(pixel_x, pixel_y):
tile_x, tile_y = pixel_x // TILE, pixel_y // TILE
if tile_x < 0 or tile_x >= MAPCOLS or tile_y < 0 or tile_y >= MAPROWS:
return True
return world.tile(tile_x, tile_y) in SOLID
def can_walk(pixel_x, pixel_y):
return not (solid_at(pixel_x + 2, pixel_y + 2) or solid_at(pixel_x + TILE - 3, pixel_y + 2) or
solid_at(pixel_x + 2, pixel_y + TILE - 3) or solid_at(pixel_x + TILE - 3, pixel_y + TILE - 3))
def near(a, bx, by, d=TILE):
# True if sprite a is within d px of the point (bx, by) on both axes (a box test)
return abs(a.x - bx) < d and abs(a.y - by) < d
def camera_follow():
offset_x = max(W - MAPCOLS * TILE, min(0, W // 2 - (hero.x + TILE // 2)))
offset_y = max(H - MAPROWS * TILE, min(0, H // 2 - (hero.y + TILE // 2)))
scene.set_view(int(offset_x), int(offset_y))
+def dialog_lines(st):
+if st.stage == 0:
+return ["Villager:", "Bring me all %d coins and" % NUMCOINS,
+"I'll open the shrine door.", "(press A)"]
+if st.stage == 1 and st.coins < NUMCOINS:
+return ["Villager:", "You have %d of %d coins." % (st.coins, NUMCOINS),
+"Keep looking!", "(press A)"]
+return ["Villager:", "The door is open.",
+"Seek the shrine within.", "(press A)"]
+def open_door():
+for (tile_x, tile_y) in door_tiles:
+ world.tile(tile_x, tile_y, PATH) # door -> path (no longer SOLID)
+ scene.invalidate()
camera_follow()
def main(): # loop in a function -> its names are fast locals (see step 6)
dt = 1 / 30 # seed the first frame; re-set from clock.tick() each loop
while True:
btn.poll()
st.frame_count += 1
+if st.mode == WON:
+if not st.overlay_shown: # draw ONCE -> no per-frame flicker
+ scene.refresh()
+ dialog.draw(scene.display, buffer_a, ["You reached the shrine!", "", "QUEST COMPLETE", "(press A)"])
+if audio:
+ audio.sfx(snd_win) # bright chime on the win
+ st.overlay_shown = True
+if btn.just_pressed(btn.A):
+ st.mode = EXPLORE
+ scene.invalidate()
+ clock.tick()
+continue
if st.mode == DIALOG:
if not st.overlay_shown: # draw ONCE -> no per-frame flicker
scene.refresh()
dialog.draw(scene.display, buffer_a, dialog_lines(st))
st.overlay_shown = True
if btn.just_pressed(btn.A) or btn.just_pressed(btn.B):
+if audio:
+ audio.sfx(snd_talk) # blip on dialog advance
+if st.stage == 0:
+ st.stage = 1
+elif st.stage == 1 and st.coins >= NUMCOINS:
+ st.stage = 2
+open_door()
st.mode = EXPLORE
scene.invalidate()
40 collapsed lines
clock.tick()
continue
delta_x = btn.is_pressed(btn.RIGHT) - btn.is_pressed(btn.LEFT)
delta_y = btn.is_pressed(btn.DOWN) - btn.is_pressed(btn.UP)
if delta_x:
st.facing = RIGHT if delta_x > 0 else LEFT
elif delta_y:
st.facing = DOWN if delta_y > 0 else UP
hero.flip_x = (st.facing == LEFT) # mirror the side art for LEFT
moved = False
if delta_x and can_walk(hero.x + delta_x * SPEED, hero.y):
hero.move(hero.x + delta_x * SPEED, hero.y); moved = True
if delta_y and can_walk(hero.x, hero.y + delta_y * SPEED):
hero.move(hero.x, hero.y + delta_y * SPEED); moved = True
if moved:
camera_follow()
walk.play(FACING_ANIM[st.facing])
walk.tick(dt)
else:
hero.bitmap = BM[FACING_ANIM[st.facing]][0] # still: pose A of the current facing
if btn.just_pressed(btn.B):
ddx, ddy = DIR[st.facing]
ax, ay = hero.x + ddx * TILE, hero.y + ddy * TILE
for enemy in enemies:
if enemy.visible and abs(enemy.x - ax) < TILE and abs(enemy.y - ay) < TILE:
enemy.visible = False
if st.frame_count % 2 == 0:
for enemy in enemies:
if not enemy.visible:
continue
# which way to the hero: -1, 0 or +1 per axis (a compact sign())
chase_dx = (hero.x > enemy.x) - (hero.x < enemy.x)
chase_dy = (hero.y > enemy.y) - (hero.y < enemy.y)
if chase_dx and can_walk(enemy.x + chase_dx, enemy.y):
enemy.move(enemy.x + chase_dx, enemy.y)
if chase_dy and can_walk(enemy.x, enemy.y + chase_dy):
enemy.move(enemy.x, enemy.y + chase_dy)
if st.hurt_cooldown > 0:
st.hurt_cooldown -= 1
if st.hurt_cooldown == HURT_FRAMES - FLASH_FRAMES: # end the hit-flash after 3 frames
hero.flash = None
else:
for enemy in enemies:
# 13px: slime radius (~7) + hero half-width (~8), i.e. they're touching
if enemy.visible and near(enemy, hero.x, hero.y, 13):
st.hp -= 1
st.hurt_cooldown = HURT_FRAMES
hero.flash = WHITE # white hit-flash on damage
if st.hp <= 0:
st.hp = MAX_HP
hero.move(START[0], START[1])
7 collapsed lines
camera_follow()
break
# pick up any coin we're standing on (within ~12px on both axes = close enough)
for coin in coins:
if coin.visible and abs(hero.x - coin.x) < 12 and abs(hero.y - coin.y) < 12:
coin.visible = False
st.coins += 1
+# reach the shrine (goal tile) once the door is open
+if st.stage >= 2:
+# the tile under the hero's centre
+ center_tile_x = (hero.x + TILE // 2) // TILE
+ center_tile_y = (hero.y + TILE // 2) // TILE
+if world.tile(center_tile_x, center_tile_y) == GOAL:
+ st.mode = WON
+ st.overlay_shown = False
if near(hero, npc.x, npc.y):
hud.set("HP %d COINS %d/%d A:TALK" % (st.hp, st.coins, NUMCOINS))
if btn.just_pressed(btn.A):
st.mode = DIALOG
st.overlay_shown = False
else:
+if st.stage < 1 or st.coins < NUMCOINS:
+ objective = "FIND THE COINS"
+elif st.stage >= 2:
+ objective = "DOOR OPEN!"
+else:
+ objective = "RETURN TO NPC"
hud.set("HP %d COINS %d/%d %s" % (st.hp, st.coins, NUMCOINS, objective))
scene.refresh()
dt = clock.tick()
main()
```
[▶ Try it in the browser](/playground/?ex=03-quest-step8_quest)
***
You now have a small playable RPG. You don’t have to keep hand-coding maps: the [web editor](/tools/editor/) lets you paint this map, place the hero/NPC/coins, and flag tiles (solid/coin/goal) visually, and `picogame_scene` loads it. Everything `step8` does by hand becomes data. See the [scene format](/scene-format/) reference, and the bundled `examples/picogame_platformer_scene.py` example for a complete scene loaded from data.
***
**Start your own game from here.** You’ve built three games by hand — here’s the reusable shape to start every new one from: the **State + `main()` pattern** ([Game patterns](/concepts/patterns/)) and a ready-to-run **game skeleton** ([Snippets](/snippets/), or open it in the [Playground](/playground/?ex=game-skeleton)). Drop your own art, tiles, and rules into that frame and you’re off.
# Art & assets
> picogame keeps art separate from code: you can prototype with shapes generated in code, then swap in pixel art without changing the game logic.
picogame keeps **art separate from code**: you can prototype with shapes generated in code, then swap in pixel art without changing the game logic. This page shows how to bring your own art in, where to get it free, and how the tutorials do it.
Each tutorial ends with a **`bonus_art.py`**: the finished game re-skinned with free [CC0](https://creativecommons.org/publicdomain/zero/1.0/) pixel art. Compare it with `step8` or `step9`; the gameplay stays the same while the bitmap construction changes.
| Tutorial | bonus uses | from (CC0) |
| ----------- | --------------------------------------------------------------------------------------------------- | ----------------------- |
| 01-bounce | brick wall = a CC0 brick texture **recoloured** into the 4 row colours (ball/paddle stay generated) | Kenney **Tiny Dungeon** |
| 02-starship | ship (pre-rotated 16 frames) + laser bullet | Kenney **Pixel Shmup** |
| 03-quest | tileset (floor/lava/barrel/brick/door/chest) + hero + slime + coin | Kenney **Tiny Dungeon** |
Run one:
```bash
python3 sim/run.py tutorials/03-quest/bonus_art.py --shot /tmp/out.png
```
## The pipeline: any PNG → a picogame sprite
[Section titled “The pipeline: any PNG → a picogame sprite”](#the-pipeline-any-png--a-picogame-sprite)
`tools/png2picogame.py` turns a PNG into a Python module exposing `bitmap(pg)`:
```bash
python3 tools/png2picogame.py hero.png -o hero_art.py --frames 8
```
then in a game:
```python
import hero_art
hero = pg.Sprite(hero_art.bitmap(pg), x, y) # drop-in replacement for any shp.*()
```
Options:
* `--frames N` — the PNG is a **horizontal strip** of N equal-width frames (left→right).
* `--tile WxH` — the PNG is a **grid** of W×H tiles; repacks them into a horizontal atlas (use for grid sheets; output frame count = number of tiles).
* format is auto (PAL8 if ≤256 colours, else RGB565); transparency comes from the PNG’s **alpha** (alpha ≥128 = opaque); colours are emitted in ST7789 wire order.
### Check it before you ship
[Section titled “Check it before you ship”](#check-it-before-you-ship)
Before you flash anything, drop the new sprite into a throwaway test file and run it in the desktop simulator with a screenshot — that’s the fastest way to confirm the palette, scale, and transparency came out right:
```bash
python3 sim/run.py .py --frames 1 --shot /tmp/art.png
```
If it looks wrong or is too big, here’s why: soft/anti-aliased edges quantise badly (you’ll see fringe or speckle around the sprite — redraw with hard alpha), and a source with >256 colours silently falls back to RGB565, which doubles the RAM the bitmap costs (cut the palette to keep it PAL8).
## Layout rules
[Section titled “Layout rules”](#layout-rules)
* **Horizontal strip**, equal-width frames. (Grids: use `--tile WxH`, or in Aseprite export `Sheet Type: Horizontal`, Trim OFF.)
* **Transparency = the alpha channel** (one on/off key, no blending). Hard pixel edges; avoid soft/anti-aliased alpha — it quantises badly.
* **Tilesets:** the engine draws tile value `v` as frame `v`, so make **frame 0 empty/ transparent** and put your tiles at 1, 2, 3… (that’s how `bonus_art` maps map values to tile graphics).
* **Rotation:** for a constant stepped spin, you can bake rotations into frames; use `sprite.angle` for continuous or occasional runtime rotation. The Starship ship is the Kenney sprite rotated into 16 frames offline (see how `tools/`-side scripts build the strip), then `ship.frame = angle`.
## Using your own Aseprite art
[Section titled “Using your own Aseprite art”](#using-your-own-aseprite-art)
`File → Export Sprite Sheet → Sheet Type: Horizontal`, **Trim OFF**, Padding 0 → that’s exactly the strip `png2picogame` wants. Design in **Indexed** mode with a small palette (or RGBA with a transparent background). Animation **Frame Tags** can drive frame ranges.
## Where to get more (free)
[Section titled “Where to get more (free)”](#where-to-get-more-free)
* **[kenney.nl](https://kenney.nl)** — everything CC0, no attribution. (We used Pixel Shmup and Tiny Dungeon.)
* **[Pixellab.ai](https://www.pixellab.ai/)** — generate pixel-art sprites and tilesets from a text prompt, handy for quick placeholders or a custom look. Check its export terms before you ship.
* Recolouring CC0 art is allowed: the Bounce bricks use one grey Tiny Dungeon tile multiplied into four colours to match the game’s palette.
* **[itch.io](https://itch.io)** (CC0 filter) and **[OpenGameArt](https://opengameart.org)** (filter CC0). Avoid CC-BY-SA / GPL art.
## Ship assets as .mpy (faster load, less RAM)
[Section titled “Ship assets as .mpy (faster load, less RAM)”](#ship-assets-as-mpy-faster-load-less-ram)
A baked-asset module is just Python, so you can precompile it to `.mpy` bytecode exactly like the helper libs — the device skips parsing the source, so it loads faster and uses less RAM (the same win `tools/build_mpy.sh` gives the libs). How:
```bash
mpy-cross your_assets.py -o your_assets.mpy
```
then copy the `.mpy` to `CIRCUITPY/lib/`. The mpy-cross build **must match the board’s CircuitPython version** (see `tools/build_mpy.sh` for the version it uses). Gotcha: a stale `.mpy` **shadows the `.py`** at import, so re-generate it after any edit — otherwise the device keeps loading the old art.
## One file with all your assets
[Section titled “One file with all your assets”](#one-file-with-all-your-assets)
For a game with several shared assets, keep related baked bitmaps and palettes in a **single module** such as `assets.py` that the game imports once, rather than scattering them across many tiny files — fewer imports, one place to manage, and one `.mpy` to ship.
* `tools/pack_assets.py` does exactly this in one command: point it at a PNG glob (or a folder) and it packs them all into a single module with **one shared palette** reused by every bitmap (the RAM win), each exposed as a ready-to-use named `Bitmap`. Add `--mpy` to also ship the bytecode.
```bash
python3 tools/pack_assets.py art/*.png -o assets.py --mpy # then: import assets; pg.Sprite(assets.ship)
```
(If the combined colours overflow 255 it falls back to per-asset palettes, and any image with >255 of its own colours is emitted as RGB565 — same auto behaviour as `png2picogame`.)
* `tools/png2picogame.py` converts a single PNG into a bitmap module — use it when you want just one image (it also has `--frames`, `--tile`, `--rle`, dithering, dedup).
* For a whole tile/scene-based level, `tools/scene_build.py` bakes the assets **and** the layout into one `SCENE` file that `picogame_scene.load()` reads — one file for the entire level.
## Licensing / credits
[Section titled “Licensing / credits”](#licensing--credits)
All bundled art is **CC0** (public domain, no attribution required). The source PNGs we used live in `assets/kenney/` with `assets/kenney/CREDITS.txt`. Even for CC0 it’s good manners to keep a credits note when you publish a game.
board.
## What is picogame?
[Section titled “What is picogame?”](#what-is-picogame)
**picogame is a small 2D game engine for microcontrollers like the RP2040**, the chip inside the [PicoPad](https://picopad.eu) pocket console. You write your game **in Python** and try it in your browser or the desktop simulator. When it is ready, copy it to a [supported board](/supported-hardware/). You do not need C, a firmware build, or hardware to start.
## See it in action
[Section titled “See it in action”](#see-it-in-action)
A whole game, designed and built with picogame:
[A game built with picogame](https://player.mediadelivery.net/embed/689358/321ad936-1df9-4397-b552-2fabf4892da1?autoplay=false\&loop=false\&muted=false\&preload=false\&responsive=true)
## What picogame gives you
[Section titled “What picogame gives you”](#what-picogame-gives-you)
Start in your browser in five minutes, then run the same code on the device — picogame handles the rest:
A complete engine
Sprites, tilemaps, collisions, a camera, sound, and text are built in — the parts every game needs, ready to use.
Smooth motion at 30+ FPS
The engine repaints only what changed each frame, so games stay fluid — even on the modest RP2040.
The low-level work is done
The hard parts — display driver, blitter, text, collisions — run in native C. You write your game in plain Python.
Built for small RAM
Built to use as little memory as it can — full-screen effects need no extra buffer, so even big scenes fit the RP2040’s small RAM.
## What can you build?
[Section titled “What can you build?”](#what-can-you-build)
Games across several genres, runnable in your browser and on supported devices:

**Breakout**

**Platformer**

**Pseudo-3D racer**

**Vertical shooter**

**Top-down RPG**

**Card roguelite**
Sprites, scrolling tilemaps, a moving camera, particles, sound, and saved high scores. **[See all the games — and play them in your browser →](/examples/)**
## Try it now, right in your browser
[Section titled “Try it now, right in your browser”](#try-it-now-right-in-your-browser)
No install, nothing to set up
* **[▶ Playground](/playground/)** — write Python against the picogame API and run it in the browser. Load an example or start from scratch.
* **[🎨 Level editor](/tools/editor/)** — paint a scrolling level with the mouse, place sprites and a camera, then export a scene your game loads.
## Get it on your device
[Section titled “Get it on your device”](#get-it-on-your-device)
Two steps and you’re playing: flash the firmware, then copy a ready-made pack of games onto the drive. A [launcher](/launcher/) boots so you can pick a game and play — no coding needed.
[⬇ 1. Download firmware](/supported-hardware/#download-firmware)Pick the .uf2 for your board (PicoPad, Fruit Jam, PicoSystem, plain Pico, ...) and drag it onto the BOOTSEL drive.
[⬇ 2. Get the games pack](/start/quickstart/)Choose the pack for your board — RP2040, RP2350, or Fruit Jam — extract onto CIRCUITPY, and a game menu boots.
## Pick your path
[Section titled “Pick your path”](#pick-your-path)
[🌱 New to making games](/start/first-game/)Start from zero. Get something moving in five minutes, no hardware needed, then build up step by step.
[🔁 Made games before](/concepts/coming-from/)Coming from Pygame or PICO-8? The concept map translates what you already know into picogame's names, then points you to the reference.
[🧰 Know CircuitPython](/concepts/coming-from/#coming-from-displayio)Fluent in displayio, or have a screen-based project to bring over? The displayio bridge takes you from screens to games.
[🛠️ Already building with picogame](/reference/)Straight to the API cheat sheet, the feature guide, and how to do things efficiently (RAM, framerate, deploy).
[🤖 Building with an AI agent](/ai-agents/)Give your coding agent the game-design skill or point it at /llms.txt — it'll design and build picogame games with the right patterns.
New to game words like *sprite* or *tilemap*? Start with the **[Glossary](/concepts/glossary/)**.
Two parts: engine + helpers
picogame comes in two parts: the **engine** (a CircuitPython module on the device) and the Python **helpers** you import in your game. You only need to think about the split when you deploy — see [Run on hardware](/hardware/).
## Where the code lives
[Section titled “Where the code lives”](#where-the-code-lives)
**Clone the main repository for the simulator, games, tutorials, and helper libraries.**
[👾 picogame →](https://github.com/MakerClassCZ/picogame)The main repo: the desktop simulator, ready-to-play games, step-by-step tutorials, and the picogame\_\* helper libraries.
The other repositories serve specific deployment and compatibility needs:
[📚 picogame-libs](https://github.com/MakerClassCZ/picogame-libs)The helper libraries on their own, when you want them à la carte or to follow their releases.
[🐍 circuitpython (fork)](https://github.com/MakerClassCZ/circuitpython)The firmware source, only to build a .uf2 for your own board (the PicoPad's is prebuilt).
[🕹️ picogame-stage](https://github.com/MakerClassCZ/picogame-stage)A Stage compat layer for running existing stage / ugame games on picogame.
# Credits & licenses
> picogame — the native engine, the Python helpers, the simulator, the tools, the editor, and these docs — is original work under the MIT License.
picogame — the native engine, the Python helpers, the simulator, the tools, the editor, and these docs — is original work under the **MIT License**.
With thanks to the projects it builds on and borrows from:
* **[PicoLibSDK](https://github.com/Panda381/PicoLibSDK)** — Miroslav Němeček. The engine borrows rendering techniques from it, and a few example games and their assets are ports of PicoLibSDK originals.
* **[circuitpython-stage](https://github.com/python-ugame/circuitpython-stage)** — Radomir Dopieralski. The `stage`/`ugame` compatibility layer and the bundled bitmap font build on it.
* **TinyJoypad** — Daniel C. Inspiration for a genre example.
* **[Kenney](https://kenney.nl)** — the free pixel art used in the tutorials.
* **[CircuitPython](https://circuitpython.org)** — the runtime picogame runs on.
Where picogame ships anything derived from these, the upstream author’s copyright and license travel inside the source file itself. That’s the authoritative record, so we don’t repeat the per-file details here.
# Build with an AI agent
> A ready-made Claude skill and LLM-readable docs so coding agents design and build picogame games correctly.
picogame ships two things that make AI coding agents (like Claude Code) genuinely good at building games for it: a **ready-made skill** that teaches the agent how to design and implement a picogame game, and **LLM-readable documentation** it can pull in wholesale.
## The picogame game-design skill
[Section titled “The picogame game-design skill”](#the-picogame-game-design-skill)
`picogame-game-design` is an **Agent Skill** — a packaged set of instructions and references an agent loads when you ask it to make a game. It carries:
* **Game-design fundamentals** — core loop, game feel & juice, difficulty & fairness, scope discipline, so the result is actually *fun*, not just running.
* **The engine, mapped** — every building block and what it costs in RAM, plus the full API reference (exact signatures for the native C engine **and** every helper library).
* **Genre playbooks** — Breakout, shmup, platformer, racing, first-person raycaster dungeon, and more — each with the core loop, controls, real tuning numbers, pitfalls and an MVP.
* **Technique recipes** — state machines, enemy AI, collision, procedural generation, pseudo-3D (Mode-7 & raycasting), each mapped to picogame.
* A runnable **starter game** and a **desktop-simulator** workflow, so the agent builds and checks with screenshots without any hardware.
### Install it
[Section titled “Install it”](#install-it)
Download and unzip it into your agent’s skills folder:
* **[Download the skill (.zip)](/download/picogame-game-design-skill.zip)**
For [Claude Code](https://claude.com/claude-code) that folder is `~/.claude/skills/`:
```sh
cd ~/.claude/skills
unzip ~/Downloads/picogame-game-design-skill.zip
```
Then just ask — *“make a tiny shooter for picogame”* — and the skill loads automatically.
The skill’s source lives in the [public repo](https://github.com/MakerClassCZ/picogame) under `skills/`.
## LLM-readable docs (llms.txt)
[Section titled “LLM-readable docs (llms.txt)”](#llm-readable-docs-llmstxt)
For agents that read documentation directly, the whole site is available as clean markdown following the [llms.txt](https://llmstxt.org/) convention — point your agent at these instead of scraping HTML:
* **[/llms.txt](/llms.txt)** — the index
* **[/llms-full.txt](/llms-full.txt)** — the entire documentation as one markdown file
* **[/\_llms-txt/api.txt](/_llms-txt/api.txt)** — just the API (reference + engine + helpers), for writing code
* **[/\_llms-txt/getting-started.txt](/_llms-txt/getting-started.txt)** — the intro, tutorials and concepts
# Coming from another engine
> Map what you already know from Pygame, displayio, PICO-8 or Arcade onto picogame — and see what the engine does and doesn't do.
Use the table below to map concepts from Pygame, `displayio`, PICO-8, or Arcade onto picogame. If you know `displayio`, continue with the [term-by-term bridge](#coming-from-displayio). See [How picogame works](/concepts/how-it-works/) for the underlying model and the [API reference](/reference/) for signatures.
## Concept map
[Section titled “Concept map”](#concept-map)
| You want… | Pygame | displayio (CircuitPython) | PICO-8 | **picogame** |
| -------------------- | ------------------ | ------------------------- | --------------------- | --------------------------------------------------------------------------------------- |
| An image | `Surface` | `Bitmap` + `Palette` | sprite sheet | `pg.Bitmap(data, w, h, …)` (PAL8 or RGB565, multi-frame atlas) |
| A movable object | `sprite.Sprite` | `TileGrid` | `spr()` | `pg.Sprite(bitmap, x, y)` (anchor, flip, frame, **scale**, **angle**) |
| The scene/world | `Group`/manual | `Group` | the screen | `pg.Scene(...)` — retained, dirty-rect |
| Draw it | `screen.blit()` | add to `Group` | `spr()`/`map()` | `scene.add(obj)` once; then `scene.refresh()` per frame |
| A tiled level | your own | `TileGrid`+`Bitmap` | `map()` | `pg.Tilemap(tiles, cols, rows)` — `tile(x, y, value)` |
| A scrolling camera | manual offset | `Group.x/y` | `camera()` | `scene.set_view(ox, oy)` (world bigger than screen) |
| The main loop | `while`, `flip()` | `while`, `refresh()` | `_update()`/`_draw()` | `while: buttons.poll(); …; scene.refresh(); clock.tick()` |
| Input | `pygame.event` | `keypad`/pins | `btn()` | `picogame_input.Buttons` → `is_pressed()` / `just_pressed()` (`poll()` for the bitmask) |
| Sound | `mixer` | `audiocore`/`audiopwmio` | `sfx()`/`music()` | `picogame_audio` (`tone()`, `.wav`) |
| Collision | `Rect.colliderect` | manual | manual | `pg.collide(...)` / `a.overlaps(b)` / `a.near(b, r)` (zero-alloc, off sprites) |
| Text | `font.render` | `label` | `print()` | `picogame_ui` HUD / `picogame_font` → Bitmap |
| Many bullets/enemies | sprite groups | manual | manual | `picogame_pool.Pool` (fixed pool, no per-frame alloc) |
| Transforms | `transform.rotate` | limited | `spr` flips | `sprite.scale` (float) + `sprite.angle` (deg), nearest-neighbour |
## Coming from displayio
[Section titled “Coming from displayio”](#coming-from-displayio)
If you’ve used CircuitPython’s `displayio`, you already know most of picogame; it’s the same world with games-shaped names and the redraw bookkeeping done for you:
| In `displayio` you used… | In picogame it’s… |
| ------------------------------------------ | ------------------------------------------------------------------------------------------------------------------ |
| `displayio.TileGrid` — a positioned bitmap | a **[Sprite](/concepts/glossary/)** — but it also flips, scales, rotates and animates |
| `displayio.Group` — a stack of things | a **[Scene](/concepts/glossary/)** — holds [layers](/concepts/glossary/), painted in order |
| `while True: display.refresh()` | the **[game loop](/concepts/glossary/)**: read input → update → `scene.refresh()` → wait |
| `bitmap` + `palette` + RGB565 | the same — but build colours with `pg.rgb565(r, g, b)` ([wire-order](/concepts/glossary/)), never a raw `0xRRGGBB` |
| managing redraws by hand | nothing — picogame is **[retained mode](/concepts/glossary/)**: you change objects, it repaints only what moved |
The main shift is that you describe the scene instead of driving each display update yourself.
## The main difference: retained mode and dirty regions
[Section titled “The main difference: retained mode and dirty regions”](#the-main-difference-retained-mode-and-dirty-regions)
Many 2D engines are **immediate mode**: every frame you clear the screen and redraw everything. picogame is **retained mode**: you build a `Scene` of objects once, then each frame you *mutate* them and call `scene.refresh()`. The engine figures out which rectangles changed and **redraws only those**. On SPI displays, only those pixels are sent to the panel. Framebuffer targets such as Fruit Jam repaint the same regions in scanout memory. In both cases, the scene tracks the changes.
One consequence: moving or swapping a sprite is tracked automatically, but an **in-place** pixel edit needs a `sprite.touch()` to register (see [effects](/helpers/effects/)).
## What picogame can do
[Section titled “What picogame can do”](#what-picogame-can-do)
* **Arbitrary-size sprites** with anchors, flips, multi-frame animation atlases.
* **Runtime scale and rotation** per sprite (nearest-neighbour affine, no FPU needed), about an anchor.
* **Tilemaps** you read and write at runtime (use them as game boards, not just backgrounds).
* A **moving camera** (`set_view`) over a world larger than the screen, with fixed (HUD) layers.
* **Particles**, a drawing **Canvas** (retained shapes), and **StripDraw** (full-frame effects without a retained pixel buffer).
* **Audio** (PWM tones + `.wav`), **NVM save** for high scores/settings, a bundled **font** + HUD helpers.
* A **desktop simulator**: the same game code runs on your PC (headless screenshots or a live window), so you build and debug without hardware.
## Design within the limits
[Section titled “Design within the limits”](#design-within-the-limits)
* **RAM depends on the board and firmware.** Large pixel buffers and sprite sheets dominate the budget. Tile large worlds, stream large sheets, and use StripDraw when you do not need retained pixels. See [Fit it in RAM](/memory/) for measured budgets and alternatives.
* **One display, no GPU.** No shaders, no alpha blending. Transparency is a single transparent index/colour; for a darken effect there’s a `shadow` mode. Transforms are nearest-neighbour (crisp at integer scales, shimmery at fractional).
* **Paletted art.** PAL8 is 1 byte/pixel (cheap); RGB565 is 2 bytes/pixel. Build colours with `rgb565(r, g, b)`, never raw `0xRRGGBB`.
* **Few buttons.** D-pad + A/B (and sometimes X/Y). Design controls accordingly.
* **Ship `.mpy`, not big `.py`.** Compiling a large source file on-device can `MemoryError`; pre-compile to `.mpy`. See [Run on hardware](/hardware/).
## Start here
[Section titled “Start here”](#start-here)
1. Read [How picogame works](/concepts/how-it-works/) for the loop and dirty-region model.
2. Copy the [first game](/start/first-game/) and run it in your browser or the [desktop simulator](/simulator/) to feel the API.
3. Keep the [API cheat sheet](/reference/) and [feature guide](/features/) open while you build.
4. Adapt patterns from the [examples](/examples/) to your genre.
# Drawing paths — which to use
> Choose a retained or immediate drawing path for worlds, HUDs, panels, and one-off screens.
Choose the path by when the content changes and whether it needs stored pixels:
* Use a retained `Scene` for a world that persists between frames.
* Use `pg.render()` for a one-off screen or a reserved HUD band.
* Use `StripDraw` when pixels can be regenerated instead of stored in a Canvas.
## One compositor, two output backends
[Section titled “One compositor, two output backends”](#one-compositor-two-output-backends)
Every draw uses the same layer compositor. On SPI targets, it walks each dirty region in horizontal **strips** and sends them to the panel. On scanout targets such as Fruit Jam, it composites dirty regions directly into the framebuffer. There the buffer’s colour depth decides the pixel format the compositor writes: a 16-bit framebuffer takes RGB565 as-is, while an 8-bit one (the only depth picodvi offers at 640×480) has each finished band quantized 565→332 as it’s published — you still author in `pg.rgb565(...)` either way.
The layer choice determines how much additional pixel memory your game retains. A full-screen `StripDraw` keeps no pixel buffer; a 320×240 RGB565 `Canvas` keeps about 150 KB. The scanout framebuffer, where present, belongs to the display backend and is separate from both.

## Two drivers (how drawing is triggered)
[Section titled “Two drivers (how drawing is triggered)”](#two-drivers-how-drawing-is-triggered)
| Driver | Use it for | Repaints |
| ------------------------------------------------------------------------------- | -------------------------------------------------------------------------------------------------------------------------------------------------------------------- | ---------------------- |
| **`scene.refresh()`** — retained, dirty-rect | the persistent game world: add layers, mutate them, refresh. Camera (`set_view`), `fixed` (camera-independent) layers, reserved bands (`top=/bottom=/left=/right=`). | only the dirty regions |
| **`pg.render(display, items, buffer, x0,y0,x1,y1, *, background)`** — immediate | a one-shot push, on demand, *outside* a scene: a HUD in a reserved band, a title / level-done / game-over screen. | when you call it |
Both drivers accept the **same layer kinds**: a `pg.render` list can hold Sprites, a `StripDraw`, a `Canvas`, a `Tilemap`, or `Particles`, exactly like the scene.
## Five layer kinds (what you draw) — and their RAM
[Section titled “Five layer kinds (what you draw) — and their RAM”](#five-layer-kinds-what-you-draw--and-their-ram)
| Kind | RAM | Use for |
| ----------------------------- | ------------------------------------------------------------------ | ---------------------------------------------------------------------------------------------------------------------------------------------------------------------------------------------------------------------------------------- |
| **Sprite** (wraps a `Bitmap`) | the bitmap: PAL8 = `w*h` (1 B/px), RGB565 = `w*h*2` | moving objects, characters, bullets |
| **Tilemap** | `cols*rows` (1 B/cell) + the tileset | big static / scrolling boards — very cheap per area |
| **Canvas** | `w*h*2` **retained** | a surface drawn **occasionally and reused** — a static panel, a dialog box |
| **StripDraw** | **0 retained pixel bytes** (a view onto the current render target) | **dynamic full-frame / strip content** — sky, road, gradients, **and dynamic HUD / screen text**. Repaints every frame by default, or **on demand** (`always_dirty=False` + `.invalidate()`) for a buffer-less panel inside a live scene |
| **Particles** | a fixed pool | sparks, trails, pops |

### Text rides on these
[Section titled “Text rides on these”](#text-rides-on-these)
* **`Canvas.text(x, y, s, fg, font, bg=None)`** composites glyphs in C straight into a surface: no glyph cache, no per-call Bitmap/Sprite. The surface can be a **retained Canvas** *or* a **`StripDraw` view** (which points at the live strip). The same one method covers both.
* **`picogame_font.render_text(...)`** rasterizes a string into a PAL8 `Bitmap` you show as a Sprite, good for **moving** text (floating damage numbers), where a sprite is what you want anyway.
Dynamic text drawn through a `StripDraw` view retains no glyph or panel bitmap. Its callback still uses CPU whenever the region repaints.
### Pseudo-3D rides on these too
[Section titled “Pseudo-3D rides on these too”](#pseudo-3d-rides-on-these-too)
* **`Canvas.mode7(...)`** fills the rows below a horizon with a **Mode-7 perspective floor** of a power-of-2 texture — draw it into a **`StripDraw` view** for a full-screen ground plane at **0 retained RAM** (the `picogame_mode7.Camera` helper computes its fixed-point args from a camera pose).
* **`picogame_ray.Raycaster`** builds first-person walls the same way — a DDA cast per column, each wall a `fill_rect` column into a `StripDraw` view.
Both are the pseudo-3D case of “dynamic full-frame content”, so they live on StripDraw (never a 150 KB full-screen Canvas). See [Pseudo-3D](/helpers/pseudo-3d/).
## The decision matrix (HUDs, panels, screens)
[Section titled “The decision matrix (HUDs, panels, screens)”](#the-decision-matrix-huds-panels-screens)
| What | Right path | RAM |
| --------------------------------------------------------------------- | ----------------------------------------------------------------------------------------------- | ----------------------------------------------------------- |
| **Dynamic, thin HUD** (score / lives bar) | `StripDraw` (+ `view.text`), via `scene` or `pg.render` | **0 retained pixels** |
| **Static, large panel** (side panel, title art, help text) | a **`Canvas` drawn once** (`canvas.text`), kept as a layer | `w*h*2` (justified — drawn once, reused, not re-rasterized) |
| **Static panel + a few live numbers** | static `Canvas` for the fixed part **+** a small `StripDraw` for the numbers | small |
| **A panel/dialog/menu inside a live scene** (repaints only on change) | **on-demand `StripDraw`** (`always_dirty=False`, `.invalidate()` on change), added to the scene | **0 retained pixels** |
| **One-off screen** (title / level-done / game-over) | `pg.render([stripdraw])` — procedural bg + `view.text`, no scene needed | **0 retained pixels** |
| **Moving text** (floating damage numbers) | `picogame_font.render_text` → Sprite | text-sized bitmap |
The trap to avoid: **a `Canvas` band for a *dynamic* HUD.** A `Canvas` is retained `w*h*2`; for a 320×16 bar that is 10 KB that lives forever, and for a full-height side panel far more. A dynamic HUD is dynamic strip content, so it belongs on a **`StripDraw`**, re-rasterized in C when it changes. Reach for a `Canvas` only when the content is **static** (drawn once and reused).
A second trap: **immediate `pg.render` over a live retained scene.** The scene doesn’t know `render()` changed the pixels, so its next `refresh()` repaints only its own dirty rects and leaves stale fragments of your overlay on screen. If the rendered region overlaps the scene’s play rect (pause screen, menu, cutscene, banner), call **`scene.invalidate()`** afterwards — or use **`picogame_game.overlay(...)`**, which is `pg.render` + `scene.invalidate()` in one call. HUD bands outside the play rect (the `top=`/`bottom=` reserves) don’t need this: the scene never touches them.
## A HUD without a retained panel buffer
[Section titled “A HUD without a retained panel buffer”](#a-hud-without-a-retained-panel-buffer)
`picogame_ui.HudBar` already does this: it is a buffer-less `StripDraw` pushed via `pg.render` on change. The same pattern by hand, for a reserved-band HUD:
```python
scene, bufA, bufB = picogame_game.setup(background=BG, strip_h=BAR, top=BAR)
hud = ui.HudBar(pg, board.DISPLAY, bufA, 0, 0, W, BAR, BG) # 0 retained RAM
score = hud.label(FONT, 4, 3, INK, "SCORE 0") # returns a text handle
# ... on a change:
score.set("SCORE %d" % pts)
hud.draw() # re-composites in C, no cache
```
**Format on change, not per frame.** `.set()` gates the *redraw* (it no-ops on an unchanged string), but the `"%"`-formatting itself allocates a fresh string every call — done every frame it is pure GC churn. Format at the place the value *changes* (as above), or if you poll in the loop, guard with shadow ints: `if pts != shown_pts: shown_pts = pts; score.set("SCORE %d" % pts)`. For continuously moving values, quantize to the displayed unit first (seconds, percent).
Or fully by hand (e.g. a title screen, no scene, no buffers of your own):
```python
def draw_title(view, vx, vy, vw, vh):
view.clear(SKY)
view.text(60 - vx, 90 - vy, "PRESS A", INK, FONT) # view-local = screen - (vx, vy)
title = pg.StripDraw(draw_title, 0, 0, W, H)
pg.render(board.DISPLAY, [title], bufA, 0, 0, W, H, background=SKY) # 0 retained pixels
```
`view`-local `(0,0)` is screen `(vx, vy)`, so to draw at a screen position subtract `(vx, vy)`.
## On-demand repaint: a buffer-less panel inside a live scene
[Section titled “On-demand repaint: a buffer-less panel inside a live scene”](#on-demand-repaint-a-buffer-less-panel-inside-a-live-scene)
A `StripDraw` defaults to repainting **every frame** (`always_dirty=True`), right for a sky/road that changes constantly. But construct it with **`always_dirty=False`** and it repaints only when you call **`.invalidate()`** (or another dirty layer overlaps it). That gives a panel that lives inside a scene\*\* (a dialog box, status panel, or menu) which sits idle (no re-rasterize, no re-push) until its content actually changes, then repaints once. It is the buffer-less alternative to a retained `Canvas` for content that is mostly static but must update occasionally.
```python
panel = pg.StripDraw(draw_panel, x, y, w, h, always_dirty=False) # idle until invalidated
scene.add(panel, fixed=True)
# ... when the text changes:
panel.invalidate() # repaints once on the next refresh
```
This is how `picogame_ui.SceneBox` and `SceneMenu` work: a buffer-less in-scene dialog or menu that repaints on `show`/`hide`/`set_line`, not every frame.
## Rules of thumb
[Section titled “Rules of thumb”](#rules-of-thumb)
* **Moving object → Sprite. Big board → Tilemap. Dynamic full-frame/strip or HUD → StripDraw. Occasional static panel → Canvas (drawn once).**
* A dynamic HUD never needs a `Canvas`. If you typed `pg.Canvas(W, BAR, ...)` for a HUD, switch to a `StripDraw`.
* A `Canvas` is justified only when the content is static and reused; then the buffer pays for itself by not re-rasterizing each frame.
* Both `scene.refresh()` and `pg.render()` take every layer kind, so choose the driver by *when* it should repaint (every dirty refresh vs. on demand), not by what you need to draw.
## See also
[Section titled “See also”](#see-also)
* Fighting a `MemoryError`? See [Memory & RAM](/memory/) for the budget, how to measure it, and the arena fix.
* Exact signatures for `Canvas`, `StripDraw`, `pg.render` and `Sprite`: the [Reference](/reference/).
* Ready-made HUD / dialog / menu widgets built on these paths: [Text & UI](/helpers/text-ui/).
* Backing a `Canvas` with reused memory instead of a fresh buffer: [Saving & memory](/helpers/data/) (`picogame_arena`).
# Glossary
> Plain-language definitions of the game-making words used across these docs — written for people who know CircuitPython but are new to games.
This glossary explains the game-development terms used throughout the docs. Where useful, it connects them to concepts from CircuitPython `displayio`.
## Sprite
[Section titled “Sprite”](#sprite)
A movable picture: the player, an enemy, a bullet, a coin. It wraps a `Bitmap` and has a position you change each frame. Closest `displayio` analogy: a single `TileGrid` you reposition, except a picogame sprite also flips, scales, rotates, and animates.
## Layer
[Section titled “Layer”](#layer)
One thing the scene draws, stacked back-to-front like sheets of glass. A sprite, a tilemap, a canvas and so on are all “layer kinds”; the order you add them is the order they’re painted.
## Tilemap
[Section titled “Tilemap”](#tilemap)
A big area built from a small set of repeating tile pictures (a background, a brick wall, a level grid), stored as **1 byte per cell** (the tile number), so it’s far cheaper than one sprite per cell. Like a grid of `displayio` `TileGrid` cells.
## Scene and retained mode
[Section titled “Scene and retained mode”](#scene-and-retained-mode)
picogame is **retained mode**: you build the objects once with `scene.add(...)`, and the engine *remembers* them. Each frame you change what moved and call `scene.refresh()`; you don’t redraw everything yourself. (The opposite, **immediate mode**, means you clear and redraw the whole screen every frame by hand.) A `Scene` is the container holding all your layers.
## Dirty rectangle
[Section titled “Dirty rectangle”](#dirty-rectangle)
The region that changed since the last frame. Because the scene remembers everything (above), it can work out which regions moved and **repaint only those**. “Dirty” means “changed and needs repainting.”
## Blit
[Section titled “Blit”](#blit)
To copy a picture’s pixels onto the screen (or into another drawing surface). `displayio` hides this behind Groups and TileGrids, so you may never have typed it; in picogame it’s the basic “stamp this bitmap here” operation.
## Game loop
[Section titled “Game loop”](#game-loop)
The heartbeat of every game: each frame, **read input → update the world → draw → wait a bit**, then repeat. picogame games are all this same shape.
## Frame
[Section titled “Frame”](#frame)
This word means two different things, so watch the context:
* a **screen frame** — one turn of the game loop (one repaint), as in “each frame you move the player”;
* an **animation frame** — one picture in a bitmap’s strip of pictures, as in “advance `sprite.frame` to the next walk pose.”
## Anchor
[Section titled “Anchor”](#anchor)
The pivot point a sprite scales and rotates around, given as fractions of its size: `(0.5, 0.5)` is the centre, `(0.5, 1.0)` the bottom-centre. Its position and rotation are measured about this point.
## AABB
[Section titled “AABB”](#aabb)
A box overlap test, short for *axis-aligned bounding box*, a plain (non-rotated) rectangle drawn around a sprite. “Do these two AABBs overlap?” is the cheapest way to check if two things collide.
## Object pool
[Section titled “Object pool”](#object-pool)
A fixed set of sprites you create **once** and recycle (spawn / free) instead of making and deleting them mid-game. Creating and destroying objects each frame fragments the tiny RAM; a pool avoids that. Reach for `picogame_pool` for bullets, enemies, coins, anything that comes and goes.
## Wire-order colour
[Section titled “Wire-order colour”](#wire-order-colour)
The byte order the display panel expects over SPI, which is **not** the same as a plain `0xRRGGBB` literal. Always build colours with `pg.rgb565(r, g, b)`; passing a raw hex literal gives wrong colours. (This is the one colour footgun coming from `displayio`.)
## Juice
[Section titled “Juice”](#juice)
The small, cheap touches that make a game *feel* good: a hit-flash, a screen shake, a spark, a beep on the key action. Standard game-maker slang; `picogame_fx` provides most of it.
## Parallax
[Section titled “Parallax”](#parallax)
Background layers that scroll **slower** than the foreground, creating an illusion of depth (think of distant hills drifting by slower than the roadside).
## Coyote time and jump buffering
[Section titled “Coyote time and jump buffering”](#coyote-time-and-jump-buffering)
Two small fairness tricks: **coyote time** lets the player still jump for a few frames after walking off a ledge; **jump buffering** honours a jump pressed just before landing. Both make controls feel forgiving (`picogame_input.Timer`).
## Ghost lap
[Section titled “Ghost lap”](#ghost-lap)
In racing games, a translucent replay of your best lap shown on the track so you can race against your own record.
## State machine
[Section titled “State machine”](#state-machine)
The game switches between named modes (title → playing → game-over). One `state` variable decides what updates and draws each frame.
## Stride
[Section titled “Stride”](#stride)
How many **pixels** one row of a bitmap’s source data spans. Leave it `0` and the engine assumes the data is tightly packed (one row is `width × frames` pixels, the full horizontal atlas); set it only when you’re pointing at a **sub-window of a larger image**, where each row in memory is wider than the part you’re drawing. A constructor argument on `Bitmap(...)`.
## StripDraw and Canvas
[Section titled “StripDraw and Canvas”](#stripdraw-and-canvas)
Two ways to draw custom pixels, traded off by memory (see [Drawing paths](/concepts/drawing-paths/) for the full picture):
* **Canvas** — a retained pixel buffer (`width × height × 2` bytes) you draw onto and reuse; right for a panel that changes rarely.
* **StripDraw** — a buffer-less layer that draws into each live strip. It retains **0 pixel bytes**, but its callback still uses CPU each time the region repaints. Use it for full-frame effects and dynamic HUD or text.
# How picogame works
> Scenes, the game loop, and dirty-region rendering in picogame.
picogame keeps your scene objects between frames. You change their state, call `scene.refresh()`, and the engine redraws the affected regions. This page explains that model and the game loop around it.
New to game terms? Any unfamiliar word here is defined in the [Glossary](/concepts/glossary/).
## The big idea: describe the scene, then say what moved
[Section titled “The big idea: describe the scene, then say what moved”](#the-big-idea-describe-the-scene-then-say-what-moved)
Most of a game’s screen doesn’t change from frame to frame: the background stays put, only a few things move. picogame is built around that.
You **describe a scene once** (these sprites, this tilemap, this background), and then each frame you just **change what moved** (`ball.x += 3`) and call `scene.refresh()`. The engine works out which little rectangles actually changed (each a [dirty rectangle](/concepts/glossary/)) and **redraws only those**; it doesn’t repaint the whole screen. Nothing moved? Nothing is sent to the display.
For the levers that keep a game at a steady 30 FPS as it grows, see [Performance](/performance/).
The work usually follows how much *changed*, not the full screen size. Camera movement and always-dirty layers are the main exceptions because they repaint the play area. The engine tracks the regions for you.

## The pieces you build a scene from
[Section titled “The pieces you build a scene from”](#the-pieces-you-build-a-scene-from)
These are the main objects you can put in a scene:
* **Sprite** — a movable picture: the player, an enemy, a bullet, a coin. It has a position, can be flipped, animated through frames, scaled and rotated.
* **Tilemap** — a big grid built from a small set of tile pictures: a level, a tiled background, a brick wall. Cheap, because the grid stores one number per cell instead of every pixel.
* **Bitmap** — the actual picture a sprite or tile draws. You can generate one in code (a circle, a rectangle) or convert it from a PNG.
* **Scene** — the container that holds all of the above and draws them in order. Each thing it draws is a [layer](/concepts/glossary/) (one thing the scene draws, stacked back-to-front); you add things to it, then refresh it each frame.
* A **camera** — the scene has a viewpoint you can move (`set_view`), so the world can be bigger than the screen and scroll as the player walks.
There are a few more specialised pieces (a drawing **Canvas**, full-frame **StripDraw** effects, **Particles**); you’ll reach for those once you need them. See the [feature guide](/features/) for “which one when”.
## The game loop
[Section titled “The game loop”](#the-game-loop)
Every picogame game is the same shape:
1. **Read input** — which buttons are down.
2. **Update** — move things, run game rules, spawn and remove objects.
3. **Refresh** — `scene.refresh()` draws the changes.
4. **Wait** — a clock caps the framerate so the game runs at a steady speed.
```python
while True:
buttons.poll() # 1. input
ball.x += speed # 2. update
scene.refresh() # 3. draw what changed
clock.tick() # 4. hold the framerate
```

Collisions, sound, scoring, and other game rules belong in step 2.
This 4-step shape is universal. Once a game has more than one screen (title / play / game-over) and needs to restart, hold its state in one object and move this loop into a `main()` function — see [Game patterns](/concepts/patterns/) for that shape and why.
## You build before touching hardware
[Section titled “You build before touching hardware”](#you-build-before-touching-hardware)
The same game code runs off the device, so you design, debug and iterate there first. The browser-based option is the **Playground**; for hands-on local work there’s also a **[desktop simulator](/simulator/)** (headless screenshots for quick checks, or a live window). All three environments share the game-facing API - but not the runtime: RAM limits, timing, input feel, audio and panel-specific effects only exist for real on the device. Smoke-test on hardware regularly during development, not once at the end.
## Where to go next
[Section titled “Where to go next”](#where-to-go-next)
New here? Build [your first game](/start/first-game/), then continue with the tutorials. Use the feature guide and reference when you need to choose a tool or check a signature.
**Already know an engine (or `displayio`)?** Skip the tutorial and jump to the [concept map](/concepts/coming-from/) and [glossary](/concepts/glossary/), then the [reference](/reference/).
* **[Make your first game](/start/first-game/)** — put this into practice in five minutes.
* **[The tutorials](/tutorials/)** — three games, one idea per step.
* **[Feature guide](/features/)** — once you know the shape, this is “which tool for which job”.
* **[API reference](/reference/)** — the precise, complete list when you need exact signatures.
# Making it fun
> Tune a working game loop through clear actions, immediate feedback, paced difficulty, and a controlled scope.
Once the game loop works, tune four things: the player’s main action, feedback, difficulty, and scope. The bar is not “it runs” — it’s **fun in the first 10 seconds**. The [patterns](/concepts/patterns/) page provides code for the ideas below.
## Start with the main action
[Section titled “Start with the main action”](#start-with-the-main-action)
Before naming the verb, decide the fantasy — what the player gets to *be*. “Catch” is a different game as a frantic short-order cook, a goalie, or someone saving falling stars. Pick the fantasy, then name the verb in one word: jump, shoot, steer, match, dodge. Build the loop around it: **act → see the result → respond → act again under changed conditions**.
A loop this tight should be legible just by *watching* it for ten seconds, and fun with no art and no sound. Prototype with generated shapes from `picogame_shapes` before committing to final art — if the action isn’t fun as a rectangle chasing a circle, better art won’t save it. Fix the rules and feedback first.
## Give actions immediate feedback
[Section titled “Give actions immediate feedback”](#give-actions-immediate-feedback)
Feedback connects an input or collision to a result the player can see and hear, applied in the same update that handles the event — a delayed response reads as sluggish even at 30 fps. Not all feedback is equally cheap. Roughly in order of fun gained per byte spent:
1. **A sound on the main action** — the single best return for the least code; a beep confirms what the eye already saw. The simplest beep needs no `.wav` file:
```python
beep = picogame_audio.tone(880, 90) # a short high blip, built once
audio.sfx(beep) # fire it the frame the catch happens
```
What carries the meaning is the *contour* — high reads as good, low as bad. The ready-made [`picogame_sfx`](/helpers/audio/) kit gives you both:
Catch (a light blip): [](/audio/sfx_blip.mp3)\
Miss (a low, downward tone): [](/audio/sfx_hurt.mp3)
2. **A short hit-flash** — set a sprite’s opaque pixels to flat white for 1-3 frames, then clear it. Almost free:
```python
spr.flash = pg.rgb565(255, 255, 255) # on impact
spr.flash = 0 # 2 frames later: back to normal
```

3. **A restrained screen shake** — `picogame_fx.Shake`, a few pixels, decaying fast. More reads as noise, not impact:
```python
shaker.add(0.6) # on a hit — trauma is squared, so small events barely shake
shaker.tick(0, 0) # every frame (feed a camera offset here if you have one)
```

4. **A brief hit-stop** — freeze the sim for 2-8 frames on a big hit; it makes the impact *connect*. No engine primitive — you skip your own ticks:
```python
freeze = 4 # on a big impact
if freeze > 0: # at the top of the loop, while frozen:
freeze -= 1; clock.tick(); continue
```
5. **A small particle burst** — a pop or ring on catch or score:
```python
ps.emit(x, y, 16, 4, 24, pg.rgb565(255, 210, 120)) # burst on the event
ps.tick() # every frame
```

Spend the first item before reaching for the fifth — one good sound beats five weak particle effects. Match strength to the event and keep the play area readable; `picogame_fx` and the native blit effects cover most of this, see [effects](/helpers/effects/) and the [patterns](/concepts/patterns/) page.
Flashing safety
Never flash the whole screen faster than about 3 Hz (≥10 frames apart at 30 fps), and watch for many hit-flashes clustering past that — it’s a seizure risk. Prefer a localized `sprite.flash` to a full-screen white frame, and offer a reduced-effects toggle.
## Difficulty that breathes
[Section titled “Difficulty that breathes”](#difficulty-that-breathes)
Difficulty should rise in a **sawtooth**, not a straight climb: build tension for 20-40 seconds, release it at a milestone (a cleared wave, a checkpoint), then re-engage about 10% harder. A flat ramp goes boring by minute two; a monotonic climb never lets the player exhale.
* **Ramp speed, density, or variety before adding health.** This changes the play pattern instead of padding the same encounter.
* **Telegraph every threat.** A readable wind-up, and enough time to react — the human floor is about 250 ms (roughly 8 frames at 30 fps). Below that, a hit stops feeling like the player’s fault.
* **Be generous** — this is what makes a game feel *fair*, not easy: coyote time and a jump buffer (`picogame_input.Timer`), i-frames after a hit so one mistake can’t chain-kill, a hitbox smaller than the player’s sprite.
* **Restart in under half a second.** Re-initialise the run in place; never send the player through a menu to try again.
## Scope is a feature
[Section titled “Scope is a feature”](#scope-is-a-feature)
Build the smallest complete version of the main loop, play it, and add from there. Cut a feature if it doesn’t change the player’s decisions or the strength of the feedback — a fourth enemy type that plays exactly like the first three is not depth. The device’s [RAM](/memory/) and [timing](/performance/) limits are a useful boundary, not just a constraint to fight.
## What players remember
[Section titled “What players remember”](#what-players-remember)
A run is remembered by its peak and its ending, not its average frame. Give each run a clear high point, and land the ending deliberately: on failure, show the result, add one last visual or audio beat, and offer a restart with no delay. A flourish on death costs little and is what makes the player reach for the button again.
## Before → after: a catch game
[Section titled “Before → after: a catch game”](#before--after-a-catch-game)
A one-button game — move left/right, catch falling shapes, three misses and you’re out. Bland version: silent, shapes fall at one constant speed forever, “GAME OVER” text, no restart hint. Applying the ideas above, cheapest first:
* **Sound** — a blip on every catch, a distinct low thud on every miss. One `picogame_sfx.Kit` call; changes how every catch *feels* immediately.
* **Hit-flash** — the caught shape flashes white for 2 frames before it leaves the pool.
* **Shake** — a 3-4 px `picogame_fx.Shake` on a miss only, decaying over half a second — not on every catch, or it drowns the good feedback in noise.
* **Fairness** — the catcher’s hitbox is a few pixels narrower than its sprite, and a shape that grazes the edge still counts. Without this, misses feel like the game’s fault, not a slow reaction.
* **Difficulty sawtooth** — fall speed and spawn rate step up every 5 catches, each step \~10% harder, with the two seconds after a step-up left untouched to let the new speed register.
* **Peak-end** — the run’s best streak is shown, large, at the top of the game-over screen, above the score; A instantly starts a new run.
None of this changed the rules of catch. It changed how catching *feels* — and that’s the whole page.
***
Next: the [patterns](/concepts/patterns/) turn each of these into code; the [tutorials](/tutorials/) build three games applying them.
# Game patterns
> Small recipes for state, levels, camera, scoring, collision, and feedback.
These recipes show the *shape* of code reused across genres — the structure and the why. For the paste-ready code of a specific task (HUD updates, pools, restart, shuffle, input timing), see [Snippets](/snippets/); the [API reference](/reference/) gives exact signatures and the [examples](/examples/) show complete games. Keep actors distinguishable by both shape and colour so they stay readable on a small screen and without colour cues.
## Game structure: state machine + restart
[Section titled “Game structure: state machine + restart”](#game-structure-state-machine--restart)
Hold all mutable game state in one **`State`** object, put the per-frame loop in a **function** (`main`), and branch on `st.mode`. The function keeps the loop’s name lookups fast (locals instead of module-global dict lookups — a measured win on device), and the single object makes restart a one-liner.
```python
class State:
def __init__(self): self.reset()
def reset(self):
self.mode = "title" # "title" -> "play" -> "over"
self.score = 0; self.lives = 3
st = State()
def new_game():
st.reset(); st.mode = "play" # re-init IN PLACE (clear pools, re-show sprites)
def main(): # the loop lives in a function -> its names are fast locals
poll, refresh, tick = btn.poll, scene.refresh, clock.tick # hoist hot calls to locals
while True:
poll()
if st.mode == "play":
... # move, collide, score; on death: st.mode = "over"
elif btn.just_pressed(btn.A):
new_game() # title / game-over -> instant restart, no reload
refresh(); tick()
main()
```
A tiny game (a few state vars) can stay module-level, but this `State` + `main()` shape scales cleanly and is the recommended default. Ready-to-run skeleton: [try it in the browser](/playground/?ex=game-skeleton).
## Object pool
[Section titled “Object pool”](#object-pool)
Reuse a fixed pool for short-lived things such as bullets, coins, blocks, and sparks.
```python
pool = picogame_pool.Pool(scene, BMP, 16, anchor=(0.5, 0.5))
s = pool.spawn() # None if full; .visible is the alive flag
if s: s.move(x, y); s.data = ... # pool.free(s) to recycle
```
## Tilemap level
[Section titled “Tilemap level”](#tilemap-level)
The board for mazes, bricks, platforms, RPG maps: 1 byte/cell, read and written at runtime.
```python
level = pg.Tilemap(tileset, cols, rows); scene.add(level)
level.tile(cx, cy, EMPTY) # write a cell: eat a pellet, break a brick
hit = level.tile(cx, cy) in WALLS # read a cell for collision
```
## Solid-tile collision (per-axis)
[Section titled “Solid-tile collision (per-axis)”](#solid-tile-collision-per-axis)
For platformer walls and floors, move and resolve **one axis at a time** (X, then Y) so the body never wedges in corners; probe the leading edge at two points, and step a fast fall one pixel at a time so a big `vy` can’t tunnel through a floor. It’s plain per-object Python: cheap, no special engine call.
```python
def move_x(x, y, dx, hw): # stop at the wall, don't enter it
e = x + (hw if dx > 0 else -hw)
return x if solid(e, y - 2) or solid(e, y - 14) else x + dx
def move_y(x, y, vy, hw): # step down so a big vy can't tunnel through the floor
if vy > 0:
for _ in range(vy):
if solid(x, y + 1) or solid(x - hw, y + 1) or solid(x + hw, y + 1):
return y, 0, True # landed: y held, vy zeroed, grounded
y += 1
return y + vy, vy, False
```
## Scrolling camera
[Section titled “Scrolling camera”](#scrolling-camera)
When the world is bigger than the screen: follow and clamp the view; keep the HUD on a `fixed` layer.
```python
scene.set_view(clamp(player.x - W // 2, 0, world_w - W), 0)
```
## Turn-based loop
[Section titled “Turn-based loop”](#turn-based-loop)
Puzzle, tactics, RPG: wait for input, resolve one move, redraw. Most frames draw nothing, so it’s cheap.
```python
if btn.just_pressed(btn.A):
resolve_move() # advance exactly one turn
scene.refresh() # only the changed cells repaint
```
## Impact feedback
[Section titled “Impact feedback”](#impact-feedback)
Combine a sound, short flash, restrained shake, [hit-stop](/helpers/effects/), or particles according to the size of the event.
```python
spr.flash = WHITE # flat, 1-3 frames
shake.add(0.4) # picogame_fx.Shake; shake.tick() each frame
if audio: audio.sfx(picogame_audio.tone(150, 70))
```
## Damage forgiveness: hitbox & i-frames
[Section titled “Damage forgiveness: hitbox & i-frames”](#damage-forgiveness-hitbox--i-frames)
Make a timing game feel fair: a hitbox smaller than the sprite, plus a mercy window after a hit.
```python
if inv == 0 and threat.near(player, 12): # hitbox < sprite art
inv = 45 # i-frames; blink the player while inv > 0
```
## Score chain
[Section titled “Score chain”](#score-chain)
Reward greed: consecutive hits ramp a multiplier; a miss resets it.
```python
# on a hit: chain += 1; mult = 1 + chain // 5; score += pts * mult
# on a miss: chain = 0; mult = 1
```
To *display* the score on screen, see [Text & UI](/helpers/text-ui/).
## Difficulty ramp
[Section titled “Difficulty ramp”](#difficulty-ramp)
Ramp speed/density (not HP), in a sawtooth: build, ease at a milestone, re-engage harder.
```python
interval = max(11, 30 - t // 160) # spawns speed up over time
if (t % 600) >= 54 and t % interval == 0: # with a ~1.8s lull every ~20s
spawn()
```
## Scrolling background
[Section titled “Scrolling background”](#scrolling-background)
A few wrapping sprites create an endless parallax background without a full-screen background bitmap.
```python
for s in stars:
s.fy += s.speed
if s.fy > H: s.fy = -2; s.fx = rng.below(W) # wrap to the top
```
***
For the design *why* (the one verb, juice, difficulty, scope) see [Making it fun](/concepts/making-it-fun/); for the mental model, [How picogame works](/concepts/how-it-works/); the [tutorials](/tutorials/) build Breakout, a shooter, and an RPG step by step.
# Build your own board
> picogame can run on a board you wire yourself, as long as it has an SPI display, a few buttons - and a firmware build with the picogame module (prebuilt for…
picogame can run on a board you wire yourself, as long as it has an **SPI display, a few buttons - and a firmware build with the picogame module** (prebuilt for the boards on [Supported hardware](/supported-hardware/), or your own build). This page takes a bare **Raspberry Pi Pico** (or Pico W / Pico 2) plus a display and gets a game running on it.
## Wire it
[Section titled “Wire it”](#wire-it)
This is the PicoPad’s pin map. Matching it requires the least configuration, but you can choose other suitable GPIO pins and name them in `settings.toml`. Schematics: [Pajenicko PicoPad hardware](https://github.com/Pajenicko/Picopad/tree/main/hardware/schematics).
| Function | Pico GPIO | Notes |
| --------------------- | --------- | ---------------------------------------------------- |
| Display **SCK** | GP18 | SPI clock |
| Display **MOSI** | GP19 | SPI data (to display SDA/DIN) |
| Display **DC** | GP17 | data/command |
| Display **CS** | GP21 | chip select |
| Display **RST** | GP20 | reset |
| Display **BL** | GP16 | backlight (tie high, or PWM to dim) |
| **↑ Up** | GP4 | button to **GND** (active-low, internal pull-up) |
| **↓ Down** | GP5 | |
| **← Left** | GP3 | |
| **→ Right** | GP2 | |
| **A** | GP7 | |
| **B** | GP6 | |
| X / Y *(optional)* | GP9 / GP8 | |
| **Speaker** | GP15 | PWM audio, through a small transistor/amp or a piezo |
| Display **VCC / GND** | 3V3 / GND | also the common for buttons & speaker |
Buttons wire **to GND** (read active-low with an internal pull-up). The ST7789 bus runs up to **62.5 MHz**. On a breadboard keep the display wires short, or drop `PICOGAME_BAUD` (below).
## Three ways to get `board.DISPLAY`
[Section titled “Three ways to get board.DISPLAY”](#three-ways-to-get-boarddisplay)
A game asks the engine for the screen via `board.DISPLAY`. How you provide it depends on your board. **Pick one path:**
1. **Your board already has `board.DISPLAY`** (PicoPad, PicoSystem, µGame, Thumby, VIDI X). Nothing to do: copy your game as `code.py` plus the `lib/` it imports. Done.
2. **A picogame *custom-board* firmware**: the **Pico / Pico W / Pico 2 / Pico 2 W** [downloads](/supported-hardware/) expose a `board.DISPLAY` slot. A small **`boot.py`** builds the display from `settings.toml`, and your game remains **unchanged as `code.py`**. This also works for existing games and `stage`-based games.
3. **A stock / other firmware** (no slot). A **launcher `code.py`** builds the display, makes it `board.DISPLAY`, then runs your game (as `game.py`). A little more setup.
Grab the ready `boot.py` / launcher from [`custom_board/` in the repo](https://github.com/MakerClassCZ/picogame/tree/main/custom_board). Each path has its own folder; use one. The display **driver is Python** (an init table inside the file), so adding a new controller needs no firmware rebuild.
## Configure it — one `settings.toml`
[Section titled “Configure it — one settings.toml”](#configure-it--one-settingstoml)
Both non-native paths (and the game itself) read the **same `settings.toml`**. One file describes the whole board:
```toml
# Display
PICOGAME_DISPLAY = "st7789" # or "ili9341"
PICOGAME_PINS = "SCK=GP18 MOSI=GP19 DC=GP17 CS=GP21 RST=GP20 BL=GP16"
PICOGAME_SIZE = "320x240" # WIDTH x HEIGHT; WIDTH > HEIGHT = landscape
PICOGAME_FLIP = "" # "", "h", "v", "hv" — orientation (see below)
PICOGAME_INVERT = 0 # colours negative? -> 1
PICOGAME_BGR = 0 # red/blue swapped? -> 1
PICOGAME_BAUD = 24000000 # lower on long breadboard wires
# Buttons (active-low, to GND) — token is LOGICAL=GPpin
PICOGAME_BUTTONS = "UP=GP4 DOWN=GP5 LEFT=GP3 RIGHT=GP2 A=GP7 B=GP6 X=GP9 Y=GP8"
# Audio (optional)
PICOGAME_AUDIO = "GP15" # PWM speaker pin; omit if none
```
Re-wiring a button is then a one-character edit, no code. (The launcher path also reads `PICOGAME_GAME = "game"` to know which module to run.)
Changed a display setting? Do a full restart
On the **boot.py path**, `boot.py` builds the display only at power-on, so after editing a display key (`PICOGAME_DISPLAY`, `PICOGAME_PINS`, `PICOGAME_SIZE`, `PICOGAME_FLIP`, `PICOGAME_INVERT`, `PICOGAME_BGR`, `PICOGAME_BAUD`) press **RESET** or re-plug USB. A soft reload (saving a file) re-runs `code.py` but not `boot.py`, so it keeps the old display. Button and audio keys are read by the game, so those *do* update on a normal reload. (On the **launcher path** everything updates on reload: the launcher rebuilds the display each run.)
## Full `settings.toml` reference
[Section titled “Full settings.toml reference”](#full-settingstoml-reference)
The keys above cover the common case. Below is every **runtime** key picogame reads. All are read at runtime, so a board is adapted with **no reflash** — a key takes effect on the next reload (display keys need a full restart, see the note above). Values are **integers or strings only**: CircuitPython’s `settings.toml` has no floats or booleans, so on/off is `1`/`0` and volumes are **integer dB**.
| Key | Format / values | Example | Note |
| ------------------------- | -------------------------------------- | -------------------------- | ---------------------------------------------------------------------------------------------------------------------------------------------------------------------- |
| `PICOGAME_PULL` | `"up"` or `"down"` | `PICOGAME_PULL = "up"` | Internal resistor + active level for **all** buttons. `up` = wired to GND, pressed reads low (default); `down` = wired to 3V3, pressed reads high. |
| `PICOGAME_MATRIX_ROWS` | space/comma GP pins | `"GP0 GP1 GP2 GP3"` | Row pins of a scanned key matrix (see intro below). |
| `PICOGAME_MATRIX_COLS` | space/comma GP pins | `"GP4 GP5 GP6 GP7"` | Column pins of the matrix. |
| `PICOGAME_MATRIX_MAP` | `NAME=row,col` tokens | `"UP=1,2 A=3,5 START=0,0"` | Maps matrix cells to game buttons. Also accepts `NAME=key_number` (`key = row*ncols+col`). Map only the keys you want; the rest are ignored. |
| `PICOGAME_MATRIX_ANODES` | `"cols"` or `"rows"` | `"cols"` | Optional; which axis is driven. Default `cols`; flip to `rows` if the diode direction is reversed. |
| `PICOGAME_AUDIO_OUT` | `"headphone"` / `"speaker"` / `"both"` | `"headphone"` | Output select for an I2S DAC (Fruit Jam TLV320). Default `headphone`. |
| `PICOGAME_HP_VOLUME` | integer dB, `<= 0` | `-10` | Headphone analog trim. `0` = line level (too loud for earbuds — stay `<= -3`); `-78` = silent. Driver default is a quiet `-30`, so raise toward 0. |
| `PICOGAME_DAC_VOLUME` | integer dB, `<= 0` | `-3` | Main digital fader. Keep `<= 0` to avoid DSP clipping. |
| `PICOGAME_SPK_VOLUME` | integer dB, `<= 0` | `-10` | Speaker analog trim (same scale as headphone). |
| `PICOGAME_USB` | `1` / `0` | `PICOGAME_USB = 0` | On a USB-host build, `0` **disables** auto-attach of USB HID input (gamepad + keyboard). Default on. |
| `PICOGAME_KBD` | `1` / `0` | `PICOGAME_KBD = 0` | `0` disables the USB **keyboard** only (the gamepad still auto-attaches). Default on. |
| `PICOGAME_USBPAD` | `NAME=byte:bitmask` tokens | `"A=5:0x40 B=5:0x20"` | Remap gamepad buttons (HID report byte index : bitmask). A partial list merges over the DragonRise defaults. |
| `PICOGAME_USBPAD_ID` | `"VID:PID"` (hex) | `"081f:e401"` | Pin the USB gamepad to a specific device (skip auto-pick) when several HID devices are attached. |
| `PICOGAME_USBPAD_TIMEOUT` | ms | `10` | HID read timeout for the gamepad poll. Raise only if a pad drops inputs. |
| `PICOGAME_USBKBD` | `NAME=keycode` tokens | `"A=0x2C START=0x28"` | Remap USB-keyboard keys to game buttons (HID keycode, hex or decimal). Merges over the default arrows/WASD layout. |
| `PICOGAME_USBKBD_EP` | `"iface:endpoint"` | `"2:0x83"` | Point the keyboard driver at the live interface/IN-endpoint of a combo dongle whose boot interface is silent (find it with `tools/usbkbd_probe.py`). |
| `PICOGAME_USBKBD_TIMEOUT` | ms | `10` | HID read timeout for the keyboard poll. |
| `PICOGAME_DEBUG` | `1` / `0` | `PICOGAME_DEBUG = 1` | **When something doesn’t work, set this.** Prints `[picogame] ...` failure reasons (audio DAC/driver, USB pad/keyboard, …) to the serial console. Remove once working. |
**Buttons on a key matrix.** If your buttons are wired as a scanned **row × column** grid (a small keypad or a QWERTY block) instead of one pin per button, use the `PICOGAME_MATRIX_*` keys above instead of `PICOGAME_BUTTONS`. Map only the cells you care about onto game buttons. Discover each cell’s `(row, col)` (or key number) by running **`matrix_probe.py`** first — it prints them as you press.
**USB gamepad.** On a USB-host firmware (Fruit Jam) a pad plugged into the USB-HOST port auto-attaches with **no game change**; the default layout is the DragonRise `081f:e401` generic pad. Set `PICOGAME_USB = 0` to turn that off, or remap another pad’s buttons with `PICOGAME_USBPAD` (discover its report bytes with the USB probe tool).
These are build flags, not settings
DVI/framebuffer output, 12-bit RGB444 colour, and the fast (DMA) display backend are **compile-time firmware options** (`CIRCUITPY_PICOGAME_FRAMEBUFFER`, `CIRCUITPY_PICOGAME_RGB444`, `CIRCUITPY_PICOGAME_FAST_DISPLAY`), **not** `settings.toml` keys — don’t look for a runtime key. See [Firmware](/firmware/) to rebuild with them.
## If the picture is wrong
[Section titled “If the picture is wrong”](#if-the-picture-is-wrong)
picogame draws straight to the panel, so orientation lives in the panel’s own settings, not in a software rotation. Toggle these in `settings.toml` until it looks right, **no code:**
| Symptom | Fix |
| ---------------------------------------------------------------- | ------------------------------------------------------------------------------------------------------------------------------------------------------------------------------------------------ |
| Sideways / wrong aspect | swap `PICOGAME_SIZE` (`320x240` ↔ `240x320`) |
| Upside down | `PICOGAME_FLIP = "hv"` |
| Mirror image (text backwards) | `PICOGAME_FLIP = "h"` (or `"v"` if flipped vertically) |
| Photo-negative colours | flip `PICOGAME_INVERT` (0 ↔ 1) — ST7789 panels come in both polarities; the key sets the panel’s correct resting state and works on the stock PicoPad firmware too |
| Red/blue swapped or image mirrored **on stock PicoPad firmware** | `PICOGAME_MADCTL` = the absolute panel-orientation byte: `0x60` stock · `0x68` BGR panel · `0xA0` mounted 180° · `0xA8` both. (On a DIY board use `PICOGAME_BGR`/`PICOGAME_FLIP` above instead.) |
| Backlight too bright / dim by default | `PICOGAME_BRIGHTNESS` = integer percent 0–100 (applied at game setup) |
| Red and blue swapped | `PICOGAME_BGR = 1` |
Panel modules vary. Change one setting at a time and check the result. An ST7789 often uses `INVERT = 1`, and an ILI9341 often uses `BGR = 1`, but the correct value depends on the module.
## Check the wiring first: `input_example`
[Section titled “Check the wiring first: input\_example”](#check-the-wiring-first-input_example)
Before your game, drop **`input_example.py`** (in the repo’s `examples/`) on the board. It prints what the engine detected — board id, display size, mapped buttons, audio — to the serial console, and draws the D-pad + A/B/X/Y as squares that **light up and beep** as you press them. An unmapped button stays dark, so a wiring or `settings.toml` mistake shows at a glance.

## Then deploy as usual
[Section titled “Then deploy as usual”](#then-deploy-as-usual)
Once the display and buttons respond, everything else — shipping `.mpy`, the RAM budget, flashing — is the same as on the other supported boards: see [Run on hardware](/hardware/).
# picogame — 2D game engine for PicoPad (CircuitPython)
> picogame is a retained-mode 2D game engine built as a CircuitPython C module. It targets the Pajenicko PicoPad (RP2040, 320×240 ST7789) and similar boards.
Complete API guide
If you are new to picogame, first read [How picogame works](/concepts/how-it-works/) and build [your first game](/start/first-game/). This page documents exact engine behaviour and includes a quick start for readers coming from `displayio`.
`picogame` is a retained-mode 2D game engine built as a CircuitPython C module. It targets the Pajenicko PicoPad (RP2040, 320×240 ST7789) and similar boards. It is a more complete successor to `_stage`: arbitrary-size sprites, a retained `Scene` with dirty-region rendering, tilemaps, particles, drawing surfaces, and an optional asynchronous DMA display backend.
* **Reference target:** the PicoPad firmware and SPI path are tested on hardware. Other targets have individual status notes in [Supported hardware](/supported-hardware/).
* **Performance:** on an SPI display, `Scene` transfers up to six changed regions separately. Localized motion can therefore cost less than a full repaint; scattered changes and camera movement can still approach a full-screen update.
***
## Contents
[Section titled “Contents”](#contents)
1. [Where this page fits](#where-this-page-fits)
2. [Quick start](#quick-start)
3. [API reference](#api-reference)
4. [Asset pipeline](#asset-pipeline)
5. [Engine costs & constraints](#engine-costs--constraints)
6. [Under the hood](#under-the-hood)
7. [Building the firmware](#building-the-firmware)
8. [Examples](#examples)
***
## Where this page fits
[Section titled “Where this page fits”](#where-this-page-fits)
This is the **deep guide to the native `picogame` C module**: exact behaviour, contracts and costs of the engine types. It assumes you know what you’re looking for.
* New here? [Your first game](/start/first-game/), then [How picogame works](/concepts/how-it-works/).
* “Which layer/surface do I use?” → [Drawing paths](/concepts/drawing-paths/); task index in [FEATURES.md](/features/).
* Bare signatures of everything → [REFERENCE.md](/reference/).
* The pure-Python `picogame_*` helpers (input, timing, audio, UI, pools, save…) have their own guides under *Helpers* — this page covers the C module only. (Helpers keep the `picogame_*` file prefix, **not** a `picogame/` package: that name is the C module and can’t be shadowed.)
**Two contracts everything relies on:** colours are always the display’s **wire byte order** — build them with `pg.rgb565(r, g, b)`; a naïve `0xRRGGBB` or host-endian RGB565 renders wrong colours. Coordinates are top-left origin; render-call rectangles are **half-open** (`x0,y0` inclusive to `x1,y1` exclusive), while `collide()` hitboxes are **inclusive** (different domains: pixels vs hitboxes).
***
## Quick start
[Section titled “Quick start”](#quick-start)
```python
import time, array
import board
import picogame as pg
import picogame_game
BG = pg.rgb565(20, 24, 40)
scene, _, _ = picogame_game.setup(background=BG)
W, H = board.DISPLAY.width, board.DISPLAY.height # read the screen size from the board
# Simple 16×16 paletted sprite (index 0 is transparent)
pal = array.array("H", [pg.rgb565(0, 0, 0), pg.rgb565(230, 80, 80)])
data = bytearray(16 * 16)
for y in range(16):
for x in range(16):
if 3 <= x < 13 and 3 <= y < 13:
data[y * 16 + x] = 1
hero_bmp = pg.Bitmap(data, 16, 16, format=pg.PAL8, palette=pal, transparent=0)
hero = pg.Sprite(hero_bmp, 150, 110)
scene.add(hero)
while True:
hero.x = (hero.x + 1) % (W - 16)
scene.refresh()
time.sleep(1 / 60)
```
***
## API reference
[Section titled “API reference”](#api-reference)
### Module `picogame`
[Section titled “Module picogame”](#module-picogame)
| Name | Description |
| ---------------------------------------------------------------------- | -------------------------------------------------------------------------------------------------------------------------------------------------------------------------------------------------------------------------------------------- |
| `RGB565` | format constant (16-bit color, wire order) |
| `PAL8` | format constant (8-bit palette index) |
| `rgb565(r, g, b) -> int` | build a wire-order RGB565 color from 8-bit components |
| `collide(x1, y1, x2, y2, ax1, ay1, ax2, ay2) -> bool` | AABB box↔box overlap; inclusive bounds, so boxes collide when they touch (pass sprite boxes as `(x, y, x+w, y+h)`; fires on contact). `collide` is inclusive, unlike render’s half-open pixel ranges (different domains: hitboxes vs pixels) |
| `collide(x1, y1, x2, y2, px, py) -> bool` | box↔point (6 args) |
| `render(display, sprites, buffer, x0, y0, x1, y1, *, background=0)` | immediate draw of a sprite list to a compatible display target |
| `value2d(x, y, *, seed=0) -> float` | smooth 2-D value noise, 0..1 (fast C) |
| `value1d(x, *, seed=0) -> float` | smooth 1-D value noise, 0..1 |
| `fbm2d(x, y, *, octaves=4, seed=0, lacunarity=2.0, gain=0.5) -> float` | fractal (fBm) 2-D noise, 0..1 — terrain/clouds/caves |
| `fbm1d(x, *, octaves=4, seed=0, lacunarity=2.0, gain=0.5) -> float` | fractal (fBm) 1-D noise, 0..1 |
Noise is **fixed-point** (Q16.16) under the hood, fast on the RP2040 (no FPU) and meant for one-shot terrain/cloud gen, not per-frame. There are no separate `_fx` exports; `value2d`/`value1d`/`fbm2d`/`fbm1d` are the canonical functions, called directly on the `picogame` module (`pg.value2d`, `pg.fbm2d`, …); the simulator provides a matching Python implementation.
### Conditional / build-flag API
[Section titled “Conditional / build-flag API”](#conditional--build-flag-api)
Presence depends on the firmware build - feature-test with `hasattr` / `getattr`:
| Name | Present when | Purpose |
| ------------------ | ------------------------------------------------------------------------------------- | ------------------------------------------------------------------------------------------------- |
| `Display` | `CIRCUITPY_PICOGAME_FAST_DISPLAY` (RP2/ESP ports) | async-DMA render backend; absent on portable ports (pass the plain busdisplay to `Scene` instead) |
| `Framebuffer` | `CIRCUITPY_PICOGAME_FRAMEBUFFER` (scanout-buffer platforms, e.g. the WASM playground) | RAM render target instead of a panel |
| `RGB444_SUPPORTED` | always (bool) | whether this board’s panel can drive 12-bit RGB444 |
| `STRIP_H` | always (int) | the board’s default render-strip height (`picogame_game.setup` uses it) |
| `API_LEVEL` | newer firmware (use `getattr(pg, "API_LEVEL", 0)`) | engine API generation, for up-front version checks |
### `Bitmap(data, width, height, *, format=RGB565, palette=None, frames=1, stride=0, transparent=None)`
[Section titled “Bitmap(data, width, height, \*, format=RGB565, palette=None, frames=1, stride=0, transparent=None)”](#bitmapdata-width-height--formatrgb565-palettenone-frames1-stride0-transparentnone)
An image atlas of one or more equal-size frames, **any** width/height.
* `data` — readable buffer: `PAL8` = 1 byte/pixel index; `RGB565` = 2 bytes/pixel (LE wire).
* `palette` — for `PAL8`, a buffer of wire-order RGB565 entries (e.g. `array("H", [...])`).
* `frames` — animation frames laid out **horizontally**; frame `f` is at column `f*width`.
* `stride` — atlas width in pixels (default `width*frames`).
* `transparent` — palette index (`PAL8`) or wire color (`RGB565`) to skip; `None` = opaque.
* Read-only properties: `width`, `height`, `frames`, `format`, `stride`, `palette` (the PAL8 palette buffer or `None`), `transparent` (the transparent value or `None`).
### `Sprite(bitmap, x=0, y=0, *, frame=0, visible=True, flip_x=False, flip_y=False)`
[Section titled “Sprite(bitmap, x=0, y=0, \*, frame=0, visible=True, flip\_x=False, flip\_y=False)”](#spritebitmap-x0-y0--frame0-visibletrue-flip_xfalse-flip_yfalse)
A positioned, animatable instance of a `Bitmap`.
* Properties: `x`, `y` (integer pixel; setter also accepts a float), `fx`, `fy` (sub-pixel float position), `frame`, `visible`, `flip_x`, `flip_y`, `transpose`, `data`, `bitmap`, `scale`, `angle`, `shadow`, `flash`, `tint`, `dither`.
* `move(x, y)` — set position (accepts int or float).
* `overlaps(other, inset=0) -> bool` / `near(other, r) -> bool` — native collision tests (anchor/scale/rotation aware, zero-allocation). `overlaps` is an inclusive AABB box test (`other` = a `Sprite`, an `(x, y)` point, or an `(x1, y1, x2, y2)` rect); `inset` shrinks **this** sprite’s box by N px for a fairer hitbox. `near` is a circular test (centres within `r`, no sqrt; `other` = `Sprite` or point).
* `scale` — uniform draw scale (float, nearest-neighbour). `1.0` = native (fast 1:1 path); `2.0` = double size; fractional allowed (e.g. a coin pulsing `1.0..1.3`, a powerup growing). Scales about the `anchor`.
* `angle` — rotation in **degrees** about the anchor (float). `0` = none (fast path); any other value uses the affine (inverse-mapped) blit. Integer scales stay crisp; rotation shimmers slightly (pixel-art trade-off). `scale` + `angle` compose.
* `shadow` — when `True`, the sprite’s opaque pixels **darken** the destination instead of drawing their color (drop shadows: an offset silhouette below the sprite; or a dim/vignette overlay). Combine with `scale`/`angle` freely.
* Blit effects `flash`, `tint`, `dither` — cheap per-pixel recolour/translucency, one at a time (setting one clears the others; `0` = off), no extra art or RAM. `flash = WHITE` paints opaque pixels a flat colour (a 1–3-frame hit blink); `tint = RED` multiplies the colour, **keeping** shading (lighting/damage/freeze; it can only darken); `dither = 0..16` is a Bayer stipple (ghost/fog/fade, no alpha; animate the level to fade in/out).
* `transpose` — when `True`, swaps the X/Y axes (a diagonal mirror); combined with `flip_x`/`flip_y` it gives all **8** orientations as a crisp fast-path blit (scale 1, angle 0). The footprint swaps width/height.
* `bitmap` — read/write the source `Bitmap`. Assigning a new one swaps graphics at runtime and may change size (powerups, resizable HUD bars, text labels); the scene repaints both the old and new bounds on the next `refresh`.
* `touch()` — mark the sprite dirty after an **in-place** `bitmap`/palette edit (e.g. a `picogame_palette` recolour), so the change repaints on the next `refresh`.
* `anchor` — pivot as `(fx, fy)` fractions of the bitmap size: `(0, 0)` top-left (default), `(0.5, 0.5)` center, `(0.5, 1.0)` bottom-center. `x`/`y` then refer to this point, so growing/shrinking via a `bitmap` swap stays aligned around the pivot. The dirty-rect tracks the resulting top-left.
* Use `fx`/`fy` for smooth physics (`ball.fx += 2.4`) instead of a parallel Python float + `int(round())`; `x`/`y` return the floored pixel for tile/collision math. Dirty-rect triggers only when the pixel changes (sub-pixel jitter under 1 px is free).
* `data` — an arbitrary user payload (any object) for per-sprite game state, so you don’t need a parallel wrapper class: `hero.data = {"vy": 0, "dead": False}`.
### `Display(busdisplay, *, rgb444=False)`
[Section titled “Display(busdisplay, \*, rgb444=False)”](#displaybusdisplay--rgb444false)
Fast async-DMA backend wrapping an existing `busdisplay.BusDisplay` (e.g. `board.DISPLAY`). Reuses its SPI bus, pins, window commands and dimensions.
* `rgb444=True` drives the panel in 12-bit RGB444 instead of 16-bit RGB565: \~25 % less SPI traffic (3 bytes per 2 pixels) at the cost of colour depth.
* `render(sprites, buffer_a, buffer_b, x0, y0, x1, y1, *, background=0)` — draw a sprite list into the region with double-buffered DMA.
* `picogame.invert(display, on)` — toggle the panel’s hardware colour inversion. Changes the panel’s inversion state without sending pixel data, so a brief invert makes a full-screen negative flash (a 1-bit “hit” look) with no buffer and no redraw. Wrapped by `picogame_fx.InvertFlash`.
### `Scene(display, buffer_a, buffer_b, *, background=0, top=0, bottom=0, left=0, right=0)`
[Section titled “Scene(display, buffer\_a, buffer\_b, \*, background=0, top=0, bottom=0, left=0, right=0)”](#scenedisplay-buffer_a-buffer_b--background0-top0-bottom0-left0-right0)
Retained-mode scene with dirty-rectangle rendering. `display` is a `picogame.Display` (the fast backend) **or** a plain `busdisplay.BusDisplay` (the portable path).
* `add(item, *, fixed=False) -> item` — add a `Sprite`/`Tilemap`/`Particles`/`Canvas`/`StripDraw` and return it (so `spr = scene.add(Sprite(...))` works). Insertion order is **bottom-to-top**. `fixed=True` (keyword-only) pins the item to the screen (ignores the view offset); use it for HUD / score / dialog that must stay put while the world scrolls via `set_view`. (add tilemap backgrounds first, sprites after, foreground tilemaps last).
* `add_all(items)` — add several items at once (same bottom-to-top order).
* `refresh() -> [x1, y1, x2, y2] | None` — diff vs. the previous frame and repaint only the changed region; returns the bounding dirty rect as a REUSED list (read it immediately - the next call overwrites it), or `None` if nothing changed. The first refresh repaints the whole screen (covers leftover console pixels).
* `invalidate()` — force a full-screen repaint on the next refresh (e.g. on level change).
* `set_view(ox, oy)` — view offset = screen position of the scene origin. Set a constant offset to centre a small game (e.g. a 128×128 game on 320×240); update it each frame to scroll a larger world (scrolling repaints the whole screen). Sprites/tilemaps then live in plain scene coordinates regardless of placement.
* `view` — read-only `(ox, oy)` current view offset.
* `display` — read-only: the render backend this scene draws through (the `pg.Display` wrapper where enabled, else the plain busdisplay). `pg.render()`/`pg.invert()` accept either form, so `pg.render(scene.display, ...)` always works.
### `Tilemap(tileset, cols, rows)`
[Section titled “Tilemap(tileset, cols, rows)”](#tilemaptileset-cols-rows)
A grid of tile indices into `tileset` (a `Bitmap` whose frames are the tiles).
* `tile(tx, ty) -> int` / `tile(tx, ty, value, *, flip_x=False, flip_y=False, transpose=False)` — get / set a tile (set marks dirty); the orientation flags are keyword-only.
* `move(x, y)` — move the whole map (pixel position of tile 0,0).
* `fill(value)` — set every tile.
* Out-of-range `tile()` reads as `0` and ignores writes (no exception).
* Read-only properties: `x`, `y`, `cols`, `rows`.
### `Canvas(width, height, *, transparent=None, buffer=None)`
[Section titled “Canvas(width, height, \*, transparent=None, buffer=None)”](#canvaswidth-height--transparentnone-buffernone)
A RAM drawing surface composited as a Scene layer — the general home for shapes. Add it to a `Scene`; draw into it; only redrawn areas repaint. Colors are wire-order. Pass an existing `buffer` (a `width*height*2`-byte writable buffer) to back the surface with your own RAM instead of letting the Canvas allocate one.
* Primitives (all take wire colors): `clear(color)`, `pixel(x, y, color)`, `fill_rect(x,y,w,h,color)`, `rect(x,y,w,h,color)`, `line(x0,y0,x1,y1,color)`, `circle(cx,cy,r,color)`, `fill_circle(cx,cy,r,color)`, `ring(cx,cy,r,thickness,color)`, `triangle(x0,y0,x1,y1,x2,y2,color)`, `fill_triangle(...)`, `ellipse(cx,cy,rx,ry,color)`, `fill_ellipse(...)`, `fill_round_rect(x,y,w,h,r,color)`, `frame3d(x,y,w,h,light,dark)` (bevelled box: light top/left, dark bottom/right), `text(x, y, s, fg, font, bg=None)` (composite font glyphs in C; `bg=None` = transparent, and also works in a `StripDraw` view without a retained text bitmap), `move(x, y)`.
* `blit(bitmap, x, y, frame=0, flip_x=False, flip_y=False)` — stamp a bitmap frame into the surface (honours its transparent key): the retained way to bake an icon/portrait/rendered text into a panel.
* Read-only properties: `x`, `y`, `width`, `height`.
* `transparent` (a wire color) lets the surface be a shaped overlay (HUD bar, gauge, vector art) over other layers. Costs `width*height*2` bytes of RAM, so size it to what you need (e.g. a 320×16 status bar = \~10 KB).
* **RAM warning:** a full-screen `Canvas(320, 240)` is **150 KB**, too big for the RP2040 (\~190 KB heap, \~130 KB contiguous). Keep Canvases small, or use a `Tilemap` for large scrolling fields. See [the hardware notes](/hardware/). For a *full-frame animated* surface, consider `StripDraw` below; it does not retain a pixel surface.
### `StripDraw(callback, x=0, y=0, width=0, height=0, *, always_dirty=True)`
[Section titled “StripDraw(callback, x=0, y=0, width=0, height=0, \*, always\_dirty=True)”](#stripdrawcallback-x0-y0-width0-height0--always_dirtytrue)
An **immediate-mode** draw layer with **no pixel buffer at all**. Added to a `Scene` like any layer, but instead of retaining pixels it calls your `callback` once per render strip that overlaps its rect:
```python
def draw(view, vx, vy, vw, vh):
# `view` is a Canvas pointing straight at the live strip, clipped to the part that
# overlaps the layer's rect; its local (0,0) is screen pixel (vx, vy); (vw, vh) is
# that view's size. Draw with normal Canvas primitives -- a full-view fill stays
# inside the layer's rect (the callback only fires for strips the rect touches).
for ly in range(vh):
Y = vy + ly # screen row
view.fill_rect(0, ly, vw, 1, sky_or_road(Y))
scene.add(pg.StripDraw(draw, 0, 0, 320, 240))
```
* **RAM:** the layer retains no `width*height*2` pixel surface. A full-screen pseudo-3D road therefore avoids the **150 KB** pixel buffer required by a full-screen `Canvas`; the `StripDraw` object, callback, and game state still use memory.
* With the default `always_dirty=True` its rect is **repainted every frame** (no dirty-rect skip), so use it for *animated* content: pseudo-3D roads, gradient skies, raycasters, plasma, procedural backgrounds, or shapes that change each frame. For *static* art that mostly sits still, a `Canvas` is cheaper CPU (it repaints only when changed); pick by motion, not by size.
* `always_dirty=False` makes it an **on-demand** layer: it repaints only when you call `.invalidate()` (otherwise the dirty-rect skips it, like a Canvas), a buffer-less in-scene panel with no retained pixel surface that repaints only on change. This is how `picogame_ui.SceneBox`/`SceneMenu` draw their panels.
* **Keep the inner loop light:** the callback issues C primitives, so a handful of `fill_rect`/`hline`-style calls per strip is cheap; avoid heavy per-pixel Python.
* Read/write properties `x`, `y`, `width`, `height` move or resize the layer at runtime; after shrinking it, call `scene.invalidate()` so the vacated area repaints.
* Drawn in **screen space** (it ignores the camera/view offset). In a **scrolling** scene (one that calls `set_view`) add it **fixed** (`scene.add(sd, fixed=True)`) so its dirty rect matches where it draws; in a static-camera scene it doesn’t matter. Inside the callback, map a screen point to the strip via `(screen_x - vx, screen_y - vy)`. Composites over lower layers and under higher ones, like any layer. See `examples/picogame_stripdraw_example.py`, and `examples/journey_hw/journey_mono.py` (racer road, intro shapes, RPG dialog box).
### `Particles(capacity, *, size=1, gravity=0.0, fade=False)`
[Section titled “Particles(capacity, \*, size=1, gravity=0.0, fade=False)”](#particlescapacity--size1-gravity00-fadefalse)
A pooled particle layer (many small moving dots) drawn as a single Scene layer, far cheaper than one `Sprite` per particle. Add it to a `Scene`. With `fade=True` each particle dims toward black over its life (sparks/embers/smoke look).
* `emit(x, y, count, speed=1, life=30, color=0xFFFF)` — spawn `count` particles at (x, y) with random velocity up to `speed` px/tick, living `life` ticks, in a wire-order color (use `picogame.rgb565`).
* `tick()` — advance one step (move, gravity, ageing); call once per frame.
* `clear()` — remove all particles.
* Positions are sub-pixel (fixed-point); the layer repaints only where particles are (and were), so they leave no trails. v1 draws solid `size`×`size` dots.
***
## Asset pipeline
[Section titled “Asset pipeline”](#asset-pipeline)
`tools/png2picogame.py` (host-side, needs Pillow) converts PNG/BMP into importable asset modules whose colors are already in wire order.
```bash
# A sprite / horizontal animation atlas (auto picks PAL8 or RGB565):
python3 tools/png2picogame.py hero.png -o hero.py --frames 6
# A vertical / grid tile sheet -> horizontal atlas Bitmap (16x16 tiles):
python3 tools/png2picogame.py tiles.bmp -o tiles.py --tile 16x16 --transparent-index 15
# A tilemap (image palette indices ARE tile indices) -> Tilemap data module:
python3 tools/png2picogame.py level.bmp -o level.py --map
```
On the device:
```python
import hero, tiles, level
spr = pg.Sprite(hero.bitmap(pg), 40, 120)
tileset = tiles.bitmap(pg)
tm = pg.Tilemap(tileset, level.WIDTH, level.HEIGHT)
level.fill(tm) # load the map data
```
Options: `--format auto|pal8|rgb565`, `--frames N`, `--tile WxH`, `--map`, `--transparent-index N` (treat a P-mode palette index as transparent), `--rle` (RLE-compress a single-frame PAL8 background).
Size-saving options (PAL8):
* `--dither` (+ `--colors N`, default 255): Floyd–Steinberg dither when reducing to PAL8; hides gradient banding (skies, lighting). A low `--colors` (e.g. 16–32) + `--dither` = a retro look.
* `--dedup` (with `--tile WxH`) — fold tiles that are identical **up to orientation** (all 8: 4 rotations × mirror) into a smaller tileset → less tileset RAM. Emits a `REMAP` table; rebuild your map with `v, fx, fy, tp = REMAP[old_index]; tm.tile(x, y, v, flip_x=fx, flip_y=fy, transpose=tp)` (it carries the per-tile flip/transpose; the orientation flags are keyword-only). Typical hand-drawn levels are 40–70 % duplicate. Pairs with the Tilemap per-cell orientation.
***
## Engine costs & constraints
[Section titled “Engine costs & constraints”](#engine-costs--constraints)
> For deployment, read [Run on hardware](/hardware/) (`.mpy`, firmware, and device testing) and [Fit it in RAM](/memory/) (costs and measurement).
* **Plan retained surfaces against the measured heap.** A full-screen `Canvas(320,240)` is 150 KB and exceeds the largest contiguous block in the current RP2040 PicoPad build. Keep Canvases small, use a `Tilemap` for big fields and a `StripDraw` for animated full-frame content. Costs and the decision matrix: [Drawing paths](/concepts/drawing-paths/) + [MEMORY.md](/memory/).
* **Dirty-region rendering reduces SPI traffic for localized motion.** A full-screen repaint still pays both composition and transfer costs; which dominates depends on the scene, firmware, and SPI clock.
* **Up to six dirty regions:** overlapping changes are combined first. If more than six regions remain, `Scene` merges the pair that adds the least extra area until six are left. Localized motion stays cheap; changes scattered across the screen can still approach a full redraw. `refresh()` returns their bounding union for diagnostics, although the renderer processes the regions separately.
* **Native types (`Sprite`, `Bitmap`, …) can’t hold custom attributes** - use `sprite.data` for per-entity state.
* **PAL8 uses half the pixel storage of RGB565** (1 B/px vs 2). For larger assets, also consider frozen data, ROMFS, or streaming; see [Where assets live](/memory/).
***
## Under the hood
[Section titled “Under the hood”](#under-the-hood)
How a `refresh()` or `render()` reaches the output:
* **SPI targets render in horizontal strips.** The engine reuses one or two small buffers; for each strip it clears the background, composites overlapping layers, and sends the result.
* **Framebuffer targets composite into the scanout buffer.** They do not allocate the SPI strip buffers. A large dirty region still means more pixels to composite, but there is no SPI transfer step.
* **Fast SPI path (`pg.Display`)**: two strip buffers + asynchronous DMA - the CPU composites the next strip while the previous one is still on the SPI bus. **Portable path** (plain busdisplay): one buffer and blocking `bus.send`.
* **Strip height** comes from the buffer size you allocate (`buffer_len / (width*2)`). Smaller strips give finer CPU/transfer overlap on the DMA path; larger strips mean fewer blocking sends on the portable path - which is why the board default `STRIP_H` differs (8 with DMA, 24 without).
* **Dirty tracking** diffs each layer against a per-item snapshot (position, frame, scale, angle, effects, a `seq` bumped by `touch()`); Canvas/Tilemap/Particles accumulate their own dirty rects internally and hand them over on refresh.
* **Rotation/scaling** is a fixed-point inverse-mapped blit (no floats in the hot path); the per-sprite transform (bbox + inverse-map steps) is cached and recomputed only when angle/scale/bitmap/anchor change.
***
## Building the firmware
[Section titled “Building the firmware”](#building-the-firmware)
The engine is a native module inside a CircuitPython fork; building it is its own guide - see **[The firmware build](/firmware/)** (toolchain, board configs, flags). Prebuilt firmware for supported boards: [Supported hardware](/supported-hardware/).
***
## Examples
[Section titled “Examples”](#examples)
In the project root (copy to `CIRCUITPY/code.py`):
| File | Shows |
| ------------------------------------- | ----------------------------------------------------------------------------------------------------------------------- |
| `examples/picogame_demo_code.py` | arbitrary-size sprites, fast Display, FPS/timing breakdown |
| `examples/picogame_scene_demo.py` | retained Scene + dirty-rect (static field + movers) |
| `examples/picogame_play_demo.py` | D-pad input → Scene (frame-capped movement) |
| `examples/picogame_hud_demo.py` | HUD text via the bundled font (`picogame_font.py`) |
| `examples/picogame_tilemap_demo.py` | tilemap background + sprite over it |
| `examples/picogame_audio_demo.py` | PWM audio: overlapping beeps via the mixer (`picogame_audio.py`) |
| `examples/picogame_scroll_demo.py` | camera/scrolling: a 640×480 world with the view following the player (`scene.set_view`) |
| `examples/picogame_particles_demo.py` | particle layer: burst (A) + fountain (B) with gravity (`pg.Particles`) |
| `demos/picogame_arkanoid.py` | a full Breakout/Arkanoid game: Tilemap bricks + sprites + collide + particles + HUD |
| `games/squest/code.py` | a Seaquest-style shooter: pooled sprites via `sprite.data`, projectiles + collide + particles, O2 HUD gauge, tone audio |
### Project layout
[Section titled “Project layout”](#project-layout)
```text
lib/ engine Python helpers (picogame_*) -> copy needed ones to CIRCUITPY/lib/
examples/ games, demos, per-game assets -> a game becomes code.py at the root
tools/ asset converters (png2picogame, ...)
```
Deploying a game to the device (helpers, `.mpy`, assets) is covered by [Run on hardware](/hardware/).
# picogame example games
> Click a game to play it in your browser — or copy it to a PicoPad. These are the games that ship with picogame.
Click a game to play it in your browser — or copy it to a PicoPad. These are the games that ship with picogame.
## Try a game
[Section titled “Try a game”](#try-a-game)
**▶ In your browser — easiest, nothing to install.** Click any game below. It opens in the [Playground](/playground/) and starts right away. Keys: **arrows** (or WASD) move, **F** (or Ctrl) = button A, **G** = button B.
**💻 On your computer.** Download the code once, then run a single line — the desktop simulator opens a window:
```bash
git clone https://github.com/MakerClassCZ/picogame
cd picogame
python3 sim/run.py games/snake/code.py # any game
```
You need Python 3 (add `pip install pygame` for a live window; without it the run just saves a screenshot).
**🎮 On real hardware.** Any Raspberry Pi Pico with a small screen, a few buttons and a buzzer plays these — a ready-made **PicoPad**, or one you [build yourself](/hardware/). Flash the firmware, copy the game’s files, done.
## The games
[Section titled “The games”](#the-games)
[**Platformer**`picogame_cavern`▶ play in browser](/playground/?game=cavern) [**Pseudo-3D racer**`picogame_picobike`▶ play in browser](/playground/?game=picobike) [**Vertical shooter**`picogame_squest_full`▶ play in browser](/playground/?game=squest_full) [**Plane shmup**`picogame_picowing`▶ play in browser](/playground/?game=picowing) [**Top-down RPG**`picogame_quest`▶ play in browser](/playground/?game=quest) [**Card roguelite**`picogame_picatro`▶ play in browser](/playground/?game=picatro) [**Logic puzzle**`picogame_train`▶ play in browser](/playground/?game=train) [**Survivor arena**`picogame_corona`▶ play in browser](/playground/?game=corona) [**Tower defense**`picogame_salvo`▶ play in browser](/playground/?game=salvo) [**Side-scroller**`picogame_platformer`▶ play in browser](/playground/?game=platformer) [**Maze chase**`picogame_pacman`▶ play in browser](/playground/?game=pacman) [**Falling-block puzzle**`picogame_picotris`▶ play in browser](/playground/?game=picotris) [**Breakout**`picogame_arkanoid`▶ play in browser](/playground/?game=arkanoid) [**Asteroids**`picogame_asteroids`▶ play in browser](/playground/?game=asteroids) [**Snake**`picogame_snake`▶ play in browser](/playground/?game=snake) [**Top-down racer**`picogame_picoracer`▶ play in browser](/playground/?game=picoracer) [**Sports**`picogame_soccer`▶ play in browser](/playground/?game=soccer) [**Pinball**`picogame_pinball`▶ play in browser](/playground/?game=pinball) [**Match-3**`picogame_match3`▶ play in browser](/playground/?game=match3) [**Endless runner**`picogame_dinorun`▶ play in browser](/playground/?game=dinorun) [**Flappy**`picogame_flappy`▶ play in browser](/playground/?game=flappy) [**Catch arcade**`picogame_starfall`▶ play in browser](/playground/?game=starfall) [**Missile defense**`picogame_missile`▶ play in browser](/playground/?game=missile) [**Pseudo-3D gates**`picogame_zoom`▶ play in browser](/playground/?game=zoom)
Every game is one self-contained program, and its opening comment lists exactly what it uses — so it also works as a template: start from the closest one and reshape it. They all live in the [picogame repo](https://github.com/MakerClassCZ/picogame).
## Put a game on a device
[Section titled “Put a game on a device”](#put-a-game-on-a-device)
1. Flash `firmware.uf2` — steps on [Run on hardware](/hardware/).
2. Copy the game’s `code.py` onto the CIRCUITPY drive, plus the helper modules and any asset files it imports (each game’s header comment lists them).
Power-cycle and it runs.
# picogame — what to use for what
> One page, one job: you know what you want to build — this index says which piece to use and links the page that explains it. (New to the engine?
Choosing a tool
This page assumes you know the basic scene model. For an introduction, build [your first game](/start/first-game/) and read [How picogame works](/concepts/how-it-works/).
One page, one job: you know what you want to build — this index says **which piece to use** and links the page that explains it. (New to the engine? Read [How picogame works](/concepts/how-it-works/) first.)
## Drawing & the screen
[Section titled “Drawing & the screen”](#drawing--the-screen)
RAM at a glance: a retained full-screen `Canvas` ≈ 150 KB; `StripDraw` / `Tilemap` ≈ 0 — full costs in [Drawing paths](/concepts/drawing-paths/).
| I want to… | Use | Details |
| ----------------------------------------------------------------- | ----------------------------------------------------------------------------------------------- | -------------------------------------------------------------------------- |
| show a moving object (player, enemy, bullet) | `Sprite` | [Reference](/reference/) |
| draw a map / big scrolling world | `Tilemap` (1 B per cell) | [Drawing paths](/concepts/drawing-paths/) |
| draw an animated full-screen effect cheaply (sky, road, gradient) | `StripDraw` (no retained buffer) | [Drawing paths](/concepts/drawing-paths/) |
| a panel that changes rarely (framed box, gauge) | `Canvas` (retained `w*h*2` B) | [Drawing paths](/concepts/drawing-paths/) |
| a status bar / HUD / dialog / menu | `picogame_ui` widgets — pick by the decision matrix | [Drawing paths](/concepts/drawing-paths/) · [Text & UI](/helpers/text-ui/) |
| rotate / scale a sprite at runtime | `Sprite.scale` / `Sprite.angle`; bake frames for many always-rotating objects | [Building scenes](/helpers/building-scenes/) |
| recolour / flash / ghost a sprite without extra bitmaps | blit effects `flash` / `tint` / `dither` / `shadow` (one at a time) | [Reference](/reference/) |
| a crisp 90° turn without shimmer | `transpose` + flips (all 8 orientations) | [Reference](/reference/) |
| follow the player with a camera | `scene.set_view(ox, oy)` + `fixed=True` HUD layers | [Game patterns](/concepts/patterns/) |
| screen shake / fade / smooth camera | `picogame_fx` | [Effects & juice](/helpers/effects/) |
| animated water/lava, palette cycling | `picogame_palette` | [Effects & juice](/helpers/effects/) |
| lots of small sparks / debris | `Particles` | [Reference](/reference/) |
| terrain / sky that varies naturally | C noise: `value2d` / `fbm2d` | [Reference](/reference/) |
| a pseudo-3D floor or first-person walls | `Canvas.mode7` (floor, via `picogame_mode7`) / `picogame_ray` (walls) — both into a `StripDraw` | [Pseudo-3D](/helpers/pseudo-3d/) |
## Gameplay
[Section titled “Gameplay”](#gameplay)
| I want to… | Use | Details |
| -------------------------------------------------------------------------------------- | ----------------------------------------------------------------------------- | ----------------------------------------------------------------------------- |
| detect hits | `a.overlaps(b)` (box), `a.near(b, r)` (circle), `picogame_tiles` (grid probe) | [Math & collision](/helpers/math/) |
| fire lots of bullets / spawn enemies | `picogame_pool.Pool` — reuse frequently created sprites | [Snippets](/snippets/) |
| animate a sprite (walk/idle/explode) | `sprite.frame` by hand, or `picogame_anim` time-based | [Animation](/helpers/animation/) |
| cutscene / title image with no frame buffer | `picogame_cutscene` (streams from flash) | [Animation](/helpers/animation/) |
| read the buttons through one API | `picogame_input.Buttons` | [Input & controls](/helpers/input/) |
| play with a USB gamepad or keyboard (USB-host boards, e.g. Fruit Jam) | `picogame_usbpad` / `picogame_usbkbd` (auto-attached via `Buttons`) | [Input & controls](/helpers/input/) |
| give each player their own controller (local multiplayer) | one `Buttons(sources=[pad])` per player + `find_pads()` | [Input & controls](/helpers/input/#local-multiplayer) |
| coyote time / jump buffering | `picogame_input.Timer` | [Boot & game loop](/helpers/boot-loop/) · [Snippets](/snippets/) |
| frame-rate-independent motion | `picogame_clock.Clock` (dt) / `FixedStep` (deterministic) | [Boot & game loop](/helpers/boot-loop/) |
| seeded / deterministic random, fair spawns | `picogame_rand` | [Math & collision](/helpers/math/) |
| play sounds (samples vs synth vs MIDI) | `picogame_audio` (WAV) / `picogame_synth` (synthio) | [Audio & music](/helpers/audio/) |
| a ready-made signature SFX set (no note-tuning) | `picogame_sfx` (`Kit` over `picogame_synth`) | [Audio & music](/helpers/audio/#picogame_sfx) |
| save a high score (to *display* a score on screen, see [Text & UI](/helpers/text-ui/)) | `picogame_save` (NVM) | [Saving & memory](/helpers/data/) |
| author many levels | the declarative scene format + editor; hand-code small ones | [Scene format](/scene-format/) · [Building scenes](/helpers/building-scenes/) |
| pause / menu over a live scene | `picogame_game.overlay()` | [Snippets](/snippets/) |
## Fitting the device
[Section titled “Fitting the device”](#fitting-the-device)
| I want to… | Use | Details |
| ----------------------------------------- | ------------------------------------------------------------------------------------------- | ------------------------------ |
| make it fit in RAM | budget → measure → optimize | [Fit it in RAM](/memory/) |
| keep a steady frame rate | game loop in a function, dirty-rect-friendly motion, 0-RAM layers | [Performance](/performance/) |
| store big art / many frames | frozen vs file→RAM vs streaming (`picogame_stream`) | [Fit it in RAM](/memory/) |
| shrink a tileset | `png2picogame.py --dedup` (merges rotated/mirrored tiles) | [Engine guide](/engine/) |
| understand fast DMA vs portable rendering | `pg.Display` backend vs plain busdisplay | [Engine guide](/engine/) |
| run at 640×480 over HDMI (Fruit Jam) | `CIRCUITPY_DISPLAY_COLOR_DEPTH = 8` (RGB332, auto-handled by `setup()`) | [Run on hardware](/hardware/) |
| run on a board I wired myself | prebuilt generic firmware + `settings.toml` (`PICOGAME_BUTTONS`, display, matrix, USB keys) | [Custom board](/custom-board/) |
| deploy to the device / troubleshoot | `.mpy`, lib bundle, serial console | [Run on hardware](/hardware/) |
Every row’s *Details* page carries the behaviour, the costs and the gotchas — this page deliberately repeats none of it.
# The firmware build
> The PicoPad firmware is a CircuitPython build with the native picogame module enabled.
The PicoPad firmware is a CircuitPython build with the native `picogame` module enabled.
## Building & flashing
[Section titled “Building & flashing”](#building--flashing)
Prerequisites: **ARM GCC ≥ 14** and initialized submodules.
```bash
# from the CircuitPython fork root
make -C ports/raspberrypi BOARD=pajenicko_picopad -j"$(nproc)"
```
Output: `ports/raspberrypi/build-pajenicko_picopad/firmware.uf2`. Flash it over **BOOTSEL** (hold BOOTSEL while plugging in, then drag the `.uf2` onto the `RPI-RP2` drive) like any CircuitPython firmware.
See [Run on hardware](/hardware/) for the device side and [Fit it in RAM](/memory/) for the RAM budget.
## Where picogame lives in the tree
[Section titled “Where picogame lives in the tree”](#where-picogame-lives-in-the-tree)
The engine lives in the `picogame` branch of the CircuitPython fork. Two module directories contain the implementation, and build flags select the module and optional backends.
| Path | What |
| --------------------------------------- | --------------------------------------------------------------------------------------------------------------------------------------- |
| `shared-bindings/picogame/` | the Python-facing API + docstrings: `__init__`, `Scene`, `Sprite`, `Bitmap`, `Tilemap`, `Canvas`, `Particles`, `Display`, `Framebuffer` |
| `shared-module/picogame/` | the **portable** C core — the blit / scene / tilemap / particles / canvas implementation, no port dependencies |
| `ports/*/common-hal/picogame/Display.c` | the optional per-port fast display backend (raspberrypi + espressif provide one) |
Build-system hooks:
| File | Change |
| --------------------------------------------- | --------------------------------------------------------------------------------------------------------------------------- |
| `py/circuitpy_mpconfig.mk` | registers the five `CIRCUITPY_PICOGAME*` flags — all default `0` |
| `py/circuitpy_defns.mk` | compiles `picogame/%` only when `CIRCUITPY_PICOGAME = 1`; adds `common-hal/picogame/Display.c` only when `FAST_DISPLAY = 1` |
| `ports/raspberrypi/boards/pajenicko_picopad/` | the board that opts in (config below) |
### The port intervention: the fast display path
[Section titled “The port intervention: the fast display path”](#the-port-intervention-the-fast-display-path)
The portable core in `shared-module/` never touches hardware — it blits pixels into a strip buffer and hands that buffer to a `busdisplay` through `bus.send`. This is the portable path for ports that compile picogame and expose a compatible SPI display. Each `bus.send` **blocks** the CPU until the strip has finished transferring over SPI, so rendering and transfer happen strictly one after the other.
`ports/raspberrypi/common-hal/picogame/Display.c` is the one place the engine reaches into the port, to remove that stall. It drives the RP2040’s SPI and DMA directly:
* **Overlap.** It double-buffers strips and DMAs one strip out over SPI *while the CPU blits the next* — render and transfer run concurrently instead of serially. It waits on the previous DMA only just before reusing that buffer.
* **Raw streaming.** It opens the panel’s GRAM window once (via `busdisplay`, which drives DC high for the first data strip), then streams the remaining strips as raw DMA with no per-strip reconfiguration or DC toggling.
* **One DMA channel, reused.** The channel is claimed once and kept across soft resets and game launches; the pico-SDK doesn’t free it on soft reset, so claiming per-construct would leak channels until DMA is exhausted.
This is what `CIRCUITPY_PICOGAME_FAST_DISPLAY` gates — both the `pg.Display` type and the common-hal file. **The flag is optional.** With it off, picogame still runs everywhere via the portable `bus.send` renderer; it’s just slower because each strip transfer blocks. The overlap only helps when a repaint spans multiple strips, so the win grows with per-strip blit cost: near zero for a small dirty-region update and larger for a full-frame, transform-heavy scene. Treat the 25–30% measured on the PicoPad benchmark as configuration-specific; see [Clocks, SPI & display limits](/hardware-limits/) for the test setup.
## Board configuration
[Section titled “Board configuration”](#board-configuration)
A board turns the engine on in its `mpconfigboard.mk`:
```make
CIRCUITPY_PICOGAME = 1 # compile the engine in
CIRCUITPY_PICOGAME_FAST_DISPLAY = 1 # async-DMA display backend (raspberrypi port)
CIRCUITPY_PICOGAME_RGB444 = 0 # panel COLMOD capability (see Build flags)
OPTIMIZATION_FLAGS = -O2 … # tuned for the Cortex-M0+ (see appendix)
CFLAGS += -DCIRCUITPY_FIRMWARE_SIZE='(1536 * 1024)' # + a matching linker-script change
```
**Display SPI clock (in `board.c`).** Request **62.5 MHz** (125/2) for the ST7789, not 60 — the PL022’s even-only divider rounds 60 down to half speed. See [Clocks, SPI & display limits](/hardware-limits/).
**Keep the image general-purpose.** Leave the full module set on; only disable what this device physically can’t use.
| Module | State | Why |
| ------------------------------------------------------------------------------------ | ------ | ------------------------------------------------------------------------------------------------------------------------------------------ |
| `picogame` (+ fast DMA display) | **on** | the engine |
| native `_stage` (`CIRCUITPY_STAGE`) | on | runs the original ugame/stage games head-to-head with the **picogame-stage** shim |
| `ulab`, `synthio`, audio, `displayio`, `bitmaptools`, `vectorio`, Wi-Fi, `keypad`, … | on | general-purpose, they fit |
| `picodvi`, `_eve` | off | no DVI / FT8xx hardware on this device |
| `qrio` | off | QR *decode* needs a camera the PicoPad lacks; also drops its \~32 KB `quirc` backend (QR *generation* via `adafruit_miniqr` is unaffected) |
The measured build used about **88%** of its 1.5 MB firmware region; this changes with the CircuitPython version and enabled modules.
## Build flags
[Section titled “Build flags”](#build-flags)
| Flag | Default | What it does |
| --------------------------------- | ------- | ------------------------------------------------------------------------------------------------------------------------------------------------------------------------------------------------------------------------------------------------------- |
| `CIRCUITPY_PICOGAME` | `0` | compile the engine in |
| `CIRCUITPY_PICOGAME_FAST_DISPLAY` | `0` | use the port’s async-DMA `Display` (raspberrypi + espressif); other boards fall back to the portable `bus.send` renderer |
| `CIRCUITPY_PICOGAME_RGB444` | `0` | board declares its panel supports 12-bit RGB444 (COLMOD), exposed as `picogame.RGB444_SUPPORTED` so a game can enable `Display(rgb444=True)` only where it helps. Off on PicoPad — on this CPU-balanced panel the per-strip pack cost ≥ the SPI saving. |
| `CIRCUITPY_PICOGAME_FRAMEBUFFER` | `0` | full-frame RAM-framebuffer backend for scanout platforms (RP2350 DVI/HSTX, the desktop sim, the WASM playground) instead of an SPI strip bus |
| `CIRCUITPY_PICOGAME_ROMFS_KB` | `0` | carves a flash asset region (in KB) for 0-copy ROMFS-XIP bitmaps; only the `-romfs` firmware variants set it (e.g. `64`) |
**Render-strip height.** On an SPI display, the screen is painted in horizontal strips of `STRIP_H` rows. `picogame_game.setup()` allocates two `width × STRIP_H × 2`-byte buffers; the framebuffer path returns `None` for both and does not allocate them. The SPI default is keyed to `FAST_DISPLAY`: **8** rows with DMA and **24** without. These are performance defaults for the measured paths; a smaller value always uses less buffer RAM. Override per board with `-DPICOGAME_STRIP_H=N`, or per game via `picogame_game.setup(strip_h=N)`; read it at runtime as `picogame.STRIP_H`. More in [Fit it in RAM](/memory/).
***
## Appendix: compiler optimization (tuned −O2)
[Section titled “Appendix: compiler optimization (tuned −O2)”](#appendix-compiler-optimization-tuned-o2)
CircuitPython’s rp2 port defaults to `-O3`. On the PicoPad’s Cortex-M0+ (no SIMD, no FPU, 16 KB XIP cache) most of what `-O3` adds is dead weight — the auto-vectorizers have no SIMD to target, and function cloning / heavy loop unrolling only grow flash. So the board ships **`-O2` plus the five cheap loop passes that do help the pixel loops**, matching `-O3` engine speed within \~1 % for \~150 KB less flash:
```make
OPTIMIZATION_FLAGS = -O2 -funswitch-loops -fpredictive-commoning -fgcse-after-reload \
-ftree-partial-pre -fsplit-paths
```
The MicroPython interpreter core (`gc.o`, `vm.o`) stays at `-O3` via CircuitPython’s `SUPEROPT_*` settings, so Python execution speed is unaffected. The single hottest loop (the plain sprite blit) additionally carries a `#pragma GCC unroll 4` — \~8 % faster on the M0+ for +0.3 KB; `-funroll-loops` firmware-wide would overflow the flash region.
Measured on-device, all builds on CircuitPython 10.3.0; **lower is faster**, best in each column **bold**. **Engine** = `picogame_bench_hotpath.py` (108 sprites of 32×32 over 120 frames at 320×240, ms/frame min); **Python** = `bench_optlevel.py` (ms/op); **flash** = full image, KB. The `O2+` row is the shipped build (baseline); each `🟢/🟡/🔴` marks how far a cell sits from it (better / ≤5 % worse / >5 % worse).
| | bg-fill ms | plain ms | plain+bg ms | tint ms | transpose ms | bignum ms | int ms | float ms | fib ms | ulab-py ms | ulab-np ms | flash KB |
| ----------------------------------------- | ---------------- | ------------ | ------------ | ---------------- | ------------- | ------------ | ----------------- | ------------- | ----------------- | ---------------- | ------------ | --------------- |
| `-O3` *(rp2 default)* | **24.9** 🟢−1.2% | 36.3 🟡+0.8% | 37.0 🟡+0.1% | **80.2** 🟢−0.5% | 46.1 🟡+0.3% | 98.8 🔴+8.8% | 20.84 🟡+2.1% | 40.80 🟡+1.3% | **657.8** 🟢−0.0% | **2.63** 🟢−2.2% | 0.76 🔴+17% | 1499 🔴+11% |
| `-O2` | 25.3 🟡+0.4% | 38.2 🔴+5.9% | 39.1 🔴+5.7% | 81.2 🟡+0.8% | 53.9 🔴+17% | 92.0 🟡+1.3% | **20.29** 🟢−0.6% | 40.34 🟡+0.1% | 660.2 🟡+0.3% | 3.77 🔴+40% | 0.66 🟡+1.5% | 1326 🟢−1.4% |
| `-Os` | 27.0 🔴+7.4% | 43.6 🔴+21% | 46.4 🔴+25% | 121.9 🔴+51% | 103.0 🔴+124% | 113.3 🔴+25% | 21.18 🟡+3.7% | 44.07 🔴+9.4% | 667.3 🟡+1.4% | 3.00 🔴+11% | 0.73 🔴+12% | **1167** 🟢−13% |
| `O3−` *(−O3 minus vectorizers + cloning)* | 25.2 🟡+0.1% | 36.2 🟡+0.5% | 37.2 🟡+0.6% | 81.5 🟡+1.1% | 46.1 🟡+0.2% | 96.1 🔴+5.8% | 20.32 🟢−0.5% | 40.95 🟡+1.7% | 662.8 🟡+0.7% | 2.75 🟡+2.2% | 0.68 🟡+4.6% | 1480 🔴+10% |
| **`O2+`** *(shipped — baseline)* | 25.2 | **36.0** | **37.0** | 80.6 | **46.0** | **90.8** | 20.42 | **40.28** | 658.0 | 2.69 | **0.65** | 1345 |
`-Os` shrinks flash most but wrecks the affine/blend loops (`tint` +51 %, `transpose` +124 %); `O3−` matches engine speed yet stays +134 KB because `-O3`’s firmware-wide inlining survives; the Python columns barely move since the interpreter core is `-O3` in every build. (`bench_displayio.py` was flat across opt levels, so it’s omitted.)
# Running picogame on hardware (PicoPad / RP2040)
> You can build and test in the browser or the desktop simulator before copying the game to a device.
Running on hardware
You can develop the game in the simulator first. This page covers copying a game to a board, flashing firmware, and device limits.
You can build and test in the browser or the [desktop simulator](/simulator/) before copying the game to a device. The simulator does not reproduce the device’s RAM limits, timing, controls, or audio, so verify those on the board. On a PicoPad, deployment takes three steps.
## Quick start: deploy to a PicoPad
[Section titled “Quick start: deploy to a PicoPad”](#quick-start-deploy-to-a-picopad)
The PicoPad has a prebuilt firmware with `board.DISPLAY` and a button profile. You do not need to build firmware for normal deployment.
1. **Flash the firmware once.** Hold **BOOTSEL** while plugging in USB (or double-tap **RESET**) → an `RPI-RP2` drive appears → drag [`picopad.uf2`](/supported-hardware/) onto it → it reboots as a `CIRCUITPY` drive. You only do this once, and it’s reversible: your files on `CIRCUITPY` survive a same-layout reflash (a firmware that moves the flash layout - e.g. adds or resizes the ROMFS asset region - reformats the drive; back up first).
2. **Copy your game.** Drag your `code.py` onto the `CIRCUITPY` drive, plus the `lib/` helper modules it imports (the `picogame_*` files) and any assets. It’s the same game code you ran in the sim.
3. **Start the game.** Save `code.py` or reset the board. No additional display or button setup is needed.
On another board (a bare Pico, PicoSystem, …) the wiring and button map differ. See [Supported hardware](/supported-hardware/). Everything else on this page is the same.
> The rest of this page covers RAM limits, `.mpy`, splitting large programs, and porting to a board without prebuilt firmware. You can skip it for a first PicoPad deployment.
> Clock / SPI / display-speed limits (how the core clock drives the display SPI, the ST7789 ceiling, overclocking the RP2350, how to test) live in **[Clocks, SPI & display limits](/hardware-limits/)**.
***
## 1. The RAM budget
[Section titled “1. The RAM budget”](#1-the-ram-budget)
RP2040 has **264 KB** SRAM. In the measured PicoPad firmware build, static allocations use about 72 KB, leaving roughly **190 KB** of Python heap and an initial largest contiguous block of about **130 KB**. These figures change with the firmware version and configuration.
| Thing | Cost |
| ----------------------------------------------------------- | ------------------------------------------------------------------ |
| `picogame_game.setup()` strip buffers (2 × 320×`strip_h`×2) | `strip_h=8` (DMA default) → **10 KB**, `strip_h=24` → **30 KB** |
| full-screen `Canvas(320, 240)` | **150 KB** ⚠️ larger than the measured contiguous block |
| `Canvas(320, 130)` (e.g. a pseudo-3D road) | **83 KB**, OK alone (see `microrace`), but not on top of much else |
| `Canvas(320, 20)` status bar | 12.8 KB |
| a tile/sprite Bitmap | width×height×frames × (1 B PAL8 / 2 B RGB565) |
Consequences:
* **Avoid a full-screen Canvas on the measured RP2040 build.** If you need a custom raster (road, shape field), keep it as small as the content (band it), or use a `Tilemap` for large scrolling areas (1 byte/cell instead of 2 bytes/pixel: a 320×960 noise sky is **600 KB as a Canvas but \~5 KB as a shade Tilemap**).
* For a HUD, use `SceneLabel`, `HudBar`, or another helper that does not retain a full-width pixel surface unless the design needs one.
* **`strip_h` defaults to 8 on current DMA builds** (about 10 KB for two 320-pixel-wide RGB565 buffers, compared with 30 KB at 24). The measured PicoPad build was also faster at the smaller value. Non-DMA ports default to 24 to reduce the number of blocking transfers.
* **`gc.collect()` between scenes/levels** so the previous scene’s buffers are freed before the next allocates.
* If a game is too big as one program, **split it** (see §4).
`MemoryError: memory allocation failed, allocating N bytes` = you’re over budget; note which scene/line and shrink the biggest buffer there (usually a Canvas).
**Fragmentation, not just total free.** A long session that allocates and frees big buffers fragments the heap: `gc.mem_free()` can read \~90 KB while a 51 KB allocation still fails (no contiguous run). If a monolith dies on a big Canvas even though “there’s plenty free”, that’s this. The fix is a pre-allocated **arena** (`lib/picogame_arena.py`
* the firmware `Canvas(..., buffer=)` arg): grab one big buffer up front and slice it. The general writeup (with the largest-contiguous-block probe and a networking example) is **[Fit it in RAM](/memory/)**.
***
## 2. Device and simulator
[Section titled “2. Device and simulator”](#2-device-and-simulator)
The simulator and firmware expose the same game-facing API, but the simulator cannot model the device’s heap, transfer timing, speaker, or panel-specific effects exactly. Use `picogame_game.setup()` so the same code selects an SPI display or framebuffer correctly. It returns `(scene, buffer_a, buffer_b)`; the buffers exist on the SPI path and are `None` on the framebuffer path.
`Scene.display` is available in both environments. `Scene.add(..., fixed=True)` uses a keyword-only `fixed` argument, and low-level `pg.render()` accepts `scene.display`. Test on the target board before release, especially after changing assets or firmware.
### Framebuffer boards (Fruit Jam DVI) and colour depth
[Section titled “Framebuffer boards (Fruit Jam DVI) and colour depth”](#framebuffer-boards-fruit-jam-dvi-and-colour-depth)
On a board whose display is a RAM framebuffer rather than an SPI panel — an RP2350 picodvi/HSTX board like the **Adafruit Fruit Jam** — `picogame_game.setup()` composites into the scanout buffer directly (its returned buffers are `None`). It picks the pixel format from the framebuffer’s colour depth automatically, so **your game code is unchanged**; you only set the depth once, in `settings.toml`:
* **`CIRCUITPY_DISPLAY_COLOR_DEPTH = 16`** — 16-bit RGB565 (full colour). The usual choice; on picodvi it caps the resolution (e.g. 320×240 doubled).
* **`CIRCUITPY_DISPLAY_COLOR_DEPTH = 8`** — 8-bit **RGB332**, the only depth the picodvi hardware offers at **640×480** (Fruit Jam full resolution). The engine quantizes each finished band 565→332 as it publishes it, so you still author in `pg.rgb565(...)`; colours are just reduced to 3-3-2 bits.
Under the hood this is `pg.Framebuffer(buffer, width, height, rgb332=True)` for the 8-bit path vs `native_rgb565=True` for 16-bit (`setup()` chooses for you). The 8-bit/RGB332 path needs a picogame build whose `Framebuffer` supports `rgb332=` — a recent engine; older builds raise a clear “lacks rgb332” error telling you to reflash.
***
## 3. Import-time / compile-time traps
[Section titled “3. Import-time / compile-time traps”](#3-import-time--compile-time-traps)
* **Big `.py` as `code.py` → MemoryError on import.** CircuitPython compiles `code.py` source at boot, so a large parse tree causes a temporary RAM spike. Deploy larger modules as `.mpy`, compiled with an `mpy-cross` version compatible with the target firmware, and use a small `code.py` launcher (`import my_scene`).
* **Huge list literals → `RuntimeError: pystack exhausted`.** A `array.array('H', [7168, ...])` literal pushes thousands of elements onto the VM stack (and builds a \~28 KB transient list). For big RGB565 tilesets, **bake them as PAL8 with `DATA = b'...'`** (a single `bytes` constant: half the size, no list, and byte-data is alignment-safe on Cortex-M0+). Reserve palette index 0 = transparent.
Compile a module:
```bash
circuitpython/mpy-cross/build/mpy-cross mymodule.py -o mymodule.mpy
```
***
## 4. Option for a large game: one program per scene
[Section titled “4. Option for a large game: one program per scene”](#4-option-for-a-large-game-one-program-per-scene)
If a game cannot hold all assets and scene code at once, split it so only one scene’s data is live. The `journey_hw` example uses this layout:
* **`dj_common.mpy`** — shared scaffolding + helpers (display setup, `new_scene`, `status_bar` as a Label, `play()` with **no** wipe-cover Canvas, bitmap helpers). `import *` from it.
* **`scene_.mpy`** — one program per scene; imports only the assets it needs, so only one scene’s RAM is live at a time. Runs its own `while True: seg(); gc.collect()`.
* **`code.py`** — a one-line launcher (`import scene_intro`); edit/rename to switch scenes, or build a small button menu.
The simulator or video build may use a separate combined entry point. Concrete example: **`examples/journey_hw/`** (`dj_common.py` + `scene_*.py`, plus `journey_mono.py`, a StripDraw single-file variant, zero pixel buffer / no arena) vs. the sim/video monolith `examples/picogame_demo_journey.py` (with sound + wipe). See `examples/journey_hw/README.md`.
On-device layout:
```text
CIRCUITPY/
code.py # import scene_
scene_*.mpy # one per scene
dj_common.mpy # shared helpers
.mpy # dj_hero, dj_town, ... (only what the scenes import)
lib/picogame_*.mpy # engine Python helpers
```
(No sound on device unless you wire up `picogame_audio`; the demo’s chiptune is offline-only, baked into the recorded video.)
***
## 5. The firmware must contain the feature you call
[Section titled “5. The firmware must contain the feature you call”](#5-the-firmware-must-contain-the-feature-you-call)
Symptoms like `AttributeError: ... has no attribute 'X'` or `can't set attribute 'X'` usually mean the **flashed firmware is older than the code that uses X**. E.g. an old build had `Sprite.scale` as read-only → `can't set attribute 'scale'`.
> **On a PicoPad you don’t build firmware**: just reflash the latest prebuilt [`picopad.uf2`](/supported-hardware/) and the feature is there. The build steps below are only for porting to another board or working on the engine itself.
* Reflash (PicoPad): drop the latest [`picopad.uf2`](/supported-hardware/) over BOOTSEL; your files survive it as long as the firmware keeps the same flash layout (see the backup note above).
* Build (porting / engine dev): see [the engine guide](/engine/) §“Building the firmware” (ARM GCC ≥ 14 toolchain + venv; `make BOARD=pajenicko_picopad -j$(nproc)`). Output: `circuitpython/ports/raspberrypi/build-pajenicko_picopad/firmware.uf2`.
* Verify a symbol is present without flashing: `arm-none-eabi-nm build-.../firmware.elf | grep sprite_set_scale`.
* Flash: enter the RP2040 bootloader (RPI-RP2 drive), copy `firmware.uf2`. The CIRCUITPY filesystem (your `.mpy` files) is preserved across a same-layout firmware flash.
Current firmware has: `Sprite.scale/angle/shadow` setters, the full `Canvas` primitive set (`triangle`/`ellipse`/`ring`/`fill_round_rect`/`frame3d`), and C `noise` (`value2d`/`value1d`/`fbm2d`/`fbm1d` - fixed-point implementations under the plain names).
***
## 6. Performance notes
[Section titled “6. Performance notes”](#6-performance-notes)
For the game-side speed levers — the loop in a function, dirty-rect-friendly motion, avoiding per-frame allocation — see **[Performance](/performance/)**. The notes here are the engine/hardware side.
* **Noise is C, and fixed-point** (Q16.16): fast on the FPU-less RP2040; the names are `value2d`/`value1d`/`fbm2d`/`fbm1d`.
* **Canvas drawing is C** (`fill_rect`, `frame3d`, …): Python only issues the calls. What costs is the Canvas *buffer* (RAM), not the drawing.
* **`StripDraw` = immediate mode without a retained pixel surface.** For full-frame *animated* surfaces (pseudo-3D road, gradient sky, procedural background) use `pg.StripDraw(callback, …)` instead of a Canvas. It draws into each render strip and avoids the **150 KB pixel buffer** of a full-screen Canvas. It repaints every frame, so use it for animated content rather than static art. See [the engine guide](/engine/) → `StripDraw` and `examples/picogame_stripdraw_example.py`. The `StripDraw` object, callback, and game state still use RAM, but there is no full-screen surface to fragment the heap.
* Dirty-region rendering reduces work in a mostly static scene; full-screen scrolling still repaints the whole view. Measure the frame rate with your artwork, firmware, and SPI clock.
See also: [engine API](/engine/), [scene format](/scene-format/), `tutorials/` (step-by-step), `examples/` (genre examples include `microrace`, which uses an 83 KB Canvas in its measured configuration).
# Hardware limits: clocks, SPI & the display
> How the core clock, the peripheral clock and the display SPI relate on RP2 boards, where their limits are, and how to measure them.
Deep hardware detail
Clocks, SPI and the display ceiling — optional unless you’re tuning the firmware itself.
How the core clock, the peripheral clock and the display SPI relate on RP2 boards, where their limits are, and how to measure them. The results on this page come from a PicoPad (RP2040) and a PicoPad with its chip replaced by an RP2350 (Pico 2).
For the RAM budget and deployment, see **[HARDWARE.md](/hardware/)**. For the fast and portable rendering paths, see the **[engine guide](/engine/#under-the-hood)**.
Looking for what the engine can and can’t do in a *game* — RAM, frame rate, features? See **[Coming from another engine](/concepts/coming-from/)** and **[Fit it in RAM](/memory/)**. This page is firmware clock / SPI / display tuning.
***
## 1. The clock chain (what drives what)
[Section titled “1. The clock chain (what drives what)”](#1-the-clock-chain-what-drives-what)
```text
PLL_SYS ──> clk_sys ──> the CPU cores
└─────> clk_peri ──> SPI, UART, … (CircuitPython: clk_peri = clk_sys, undivided)
XIP/QMI flash clock is derived from clk_sys too (a separate divider)
PLL_USB ──> 48 MHz USB (independent — the USB-CDC REPL is unaffected by overclocking)
```
Two consequences that drive everything below:
1. **`clk_peri` follows `clk_sys`.** On CircuitPython the peripheral clock is the system clock, undivided. So **changing the core clock changes the SPI input clock**, and therefore the display clock. You cannot tune one without thinking about the other.
2. **Default `clk_sys` differs by chip:** RP2040 = **125 MHz**, RP2350 = **150 MHz**. A constant tuned for one chip lands differently on the other (see §3).
***
## 2. How the display SPI clock is derived
[Section titled “2. How the display SPI clock is derived”](#2-how-the-display-spi-clock-is-derived)
The display is an ST7789 on a 4-wire SPI bus. Its clock comes from the PL022 SPI peripheral, which divides `clk_peri` by an **even integer** (`CPSDVSR × (1+SCR)`), and the SDK picks the divider so the actual clock is the **highest achievable that does NOT exceed your request**:
```text
actual_spi_hz = clk_peri / even_divider # largest result <= requested baudrate
```
You request a baudrate in `board.c` (`common_hal_fourwire_fourwire_construct(... baudrate ...)`). The request is a **ceiling**, not an exact value: if the exact value isn’t an even division of `clk_peri`, you get the next one *down*.
Worked examples (request 62.5 MHz in every case):
| clk\_peri (= clk\_sys) | even divisors near 62.5 | picked | actual SPI |
| ---------------------- | ------------------------------------- | ------ | -------------------- |
| 125 MHz (RP2040 stock) | /2 = 62.5 | /2 | **62.5 MHz** (exact) |
| 150 MHz (RP2350 stock) | /2 = 75 (> 62.5, rejected), /4 = 37.5 | /4 | **37.5 MHz** |
| 200 MHz | /2 = 100 (rej.), /4 = 50 | /4 | **50 MHz** |
| 225 MHz | /2 = 112.5 (rej.), /4 = 56.25 | /4 | **56.25 MHz** |
| 250 MHz | /2 = 125 (rej.), /4 = 62.5 | /4 | **62.5 MHz** (exact) |
**Key trap:** the same 62.5 MHz request gives 62.5 on RP2040 (125/2) but only **37.5** on a stock-150 MHz RP2350 (because 150/2 = 75 overshoots and rounds down to 150/4). To get a good display clock on RP2350 you must pick a `clk_sys` whose even divisions land where you want, e.g. **250 MHz → /4 = exactly 62.5 MHz**, the in-spec maximum (see §3, §4).
To get the SPI clock you must request `request = actual` *or higher but below 2×actual*; the safe rule is **request exactly the clock you want** and verify which divider it picked.
***
## 3. The datasheet limit (and running past it)
[Section titled “3. The datasheet limit (and running past it)”](#3-the-datasheet-limit-and-running-past-it)
The **ST7789 datasheet** rates the **serial write clock** at **tSCYCW = 16 ns min → 62.5 MHz max** (reads are far slower, \~6.6 MHz, but the display is write-only here). So **62.5 MHz is the in-spec ceiling** for pushing pixels.
In practice the panel often runs **above** spec on a given board:
* On this PicoPad, **75 MHz** SPI (RP2350 at 150 MHz, /2) produced a **clean image**, \~20% over spec, works on this unit at room temperature.
* “Works here” is **not** “guaranteed everywhere”: over-spec clocking can fail on another panel, at temperature extremes, at a different voltage, or on longer/worse wiring. Treat it as a per-unit experiment, not a shippable default.
Because the PL022 only divides by even integers, from a given `clk_sys` you usually have just two choices bracketing the spec, e.g. from 150 MHz: **75** (over) or **37.5** (well under), nothing at 62.5. Picking `clk_sys` is how you hit a good in-spec clock (250 → 62.5).
The SPI clock is the *one* transfer knob the divider gives you. A second, orthogonal lever for a **transfer-bound** platform is **`Display(rgb444=True)`** (12-bit packed pixels, \~25% less SPI per frame, gated by `picogame.RGB444_SUPPORTED`). It trades a per-strip pack cost for fewer bytes on the wire, so it only wins where the panel is the bottleneck. It’s compiled out on the CPU-balanced PicoPad. See [The firmware build](/firmware/).
***
## 4. Overclocking the core
[Section titled “4. Overclocking the core”](#4-overclocking-the-core)
> **On the measured RP2350 PicoPad, overclocking reduced performance.** Although 250 MHz would set SPI to an exact, in-spec 62.5 MHz, every measured rendering mode was about **2× slower** at 225 MHz than at the default 150 MHz:
>
> | mode | stock 150 MHz | overclocked 225 MHz |
> | ------------------------------ | ------------- | ------------------- |
> | HEAVY (CPU/blit-bound) | \~31 fps | **\~15 fps** |
> | STRESS (full-frame, SPI-bound) | \~44 fps | **\~16 fps** |
> | default (dirty-rect) | \~95 fps | **\~42 fps** |
>
> **Why it backfires:** raising `clk_sys` without re-tuning the QMI/XIP **flash timing** makes code execute from flash with wait-states. The core ticks faster but instruction throughput *drops*; that loss outweighs the clock gain. CircuitPython’s `set_sys_clock_khz` (whether via `microcontroller.cpu.frequency` or a `board_init` call) does **not** re-tune the flash; designs that overclock successfully (e.g. PicoDVI at 252 MHz) run their hot loop from RAM, not XIP. Re-tuning the QMI timing for the new clock is flash-chip-specific and fiddly, and on top of that 250 MHz independently scrambled the display (§4b), so the practical answer is **stay at the stock clock and get your display speed from the SPI divider (§2/§3) instead.**
The notes below are kept because they’re still true *if* you ever do overclock (and the two rules are how you avoid bricking the display while finding that out).
### Two rules for test builds
[Section titled “Two rules for test builds”](#two-rules-for-test-builds)
**(a) Set the clock at BOOT, in `board.c board_init()`, BEFORE the display SPI is constructed, NOT at runtime.** Changing `microcontroller.cpu.frequency` at runtime **corrupts a live ST7789**: the VREG voltage bump (CircuitPython raises core voltage for >133 MHz) and the PLL reconfigure glitch `clk_peri` while the panel is mid-transaction, scrambling it. Measured: a runtime change to *any* value ≥133 MHz scrambled the display; ≤120 MHz (no VREG change) was fine. Doing it in `board_init` before the display exists avoids the glitch entirely:
```c
#include "hardware/clocks.h"
#include "hardware/vreg.h"
#include "hardware/timer.h"
void board_init(void) {
vreg_set_voltage(VREG_VOLTAGE_1_20); // required for >133 MHz
busy_wait_us(10000); // let the voltage settle
set_sys_clock_khz(225000, true); // THEN raise the clock
// ... only now construct the display SPI (it inits at the final clk_peri) ...
}
```
VREG voltage tiers CircuitPython uses: ≤133 MHz → 1.10 V, >133 MHz → 1.20 V, ≥300 MHz → 1.20 V, ≥400 MHz → 1.30 V.
**(b) Display command timing set the limit before the chip did.** The RP2350 booted and ran at 250 MHz (a simple game like Train was clean), but heavy rendering showed **artefacts around the dirty regions**: at 250 MHz the CPU issues the per-rect window-setup commands (CASET / RASET / RAMWR plus the DC/CS GPIO toggles) faster than the ST7789 reliably latches them, so an occasional window lands wrong and the strip is written slightly off. This is a **core-clock** effect, not an SPI-data-rate one: it appeared at 250 MHz/62.5 MHz SPI while 150 MHz/75 MHz SPI was clean (slower SPI, faster core → still broke). It shows up wherever there are many window setups per frame (lots of dirty rects, full-frame redraws), and barely on light dirty-rect games.
Binary search on this board found the *display* ceiling: **150 · 200 · 225 MHz clean · 250 MHz dirty** (panel-command limit between 225 and 250). But see the box above, even at the clean 200/225 the board ran \~2× slower overall (flash/XIP), so the board ships **stock 150 MHz**, not an overclock. The clock is not the lever here; the SPI divider is.
### The trade-off
[Section titled “The trade-off”](#the-trade-off)
Overclocking raises the CPU but (via the even-divider rule) often *lowers* the in-spec SPI clock:
| Build | core | display SPI | result |
| ----------------------------- | ------- | ------------------------------ | ------------------------------------------ |
| **stock + “spi75” (shipped)** | 150 MHz | 75 MHz (over spec, clean here) | **fastest overall on this board** |
| boot-225 (rejected) | 225 MHz | 56.25 MHz (in spec) | \~2× slower (flash/XIP, see the box in §4) |
The overclock’s lower SPI *and* its flash penalty both pushed the wrong way, so the recommended RP2350 PicoPad config is **stock 150 MHz with a 75 MHz SPI request** (`/2`).
The clock/SPI-divider coupling above is the general trade-off (you can’t max both from one even divider) - but note it never made overclocking win on the measured board: the XIP wait-state penalty (§4) dominated for every workload. On this hardware, stay at stock and choose the SPI divider; treat “overclock a CPU-bound game” as a hypothesis to re-measure on other boards, not advice.
***
## 5. How to test it
[Section titled “5. How to test it”](#5-how-to-test-it)
Run a benchmark whose toggles isolate each regime:
| Toggle | Isolates | Read |
| ------------------- | --------------------------------------- | --------------------------------------------------------------------------------------------------------- |
| `FAST = True/False` | fast DMA vs portable renderer | are they different? (only multi-strip transfers differ) |
| `STRESS = True` | forces a full-frame repaint every frame | the **SPI-bound** ceiling (∝ SPI clock) |
| `HEAVY = True` | a few big scale+rotate sprites | the **CPU/blit-bound** case (∝ core clock) |
| `OVERCLOCK = …` | runtime core clock | **leave None on the PicoPad**: runtime change corrupts the display; overclock at boot in firmware instead |
Reading the results:
* **Default mode (small sprites) is a poor metric:** 25 scattered sprites exceed the limit of six dirty regions. The least expensive pairs are then merged until six remain, and their total area varies as the sprites move. FPS therefore changes with the sprite layout. Use `STRESS` for a repeatable full-frame workload or `HEAVY` for a repeatable CPU workload.
* **`STRESS` is designed to expose the transfer-bound case.** If its FPS changes roughly in proportion to the SPI clock, SPI transfer is the bottleneck in that configuration.
* **`HEAVY` is designed to expose the CPU/blit-bound case.** Compare it across builds to see whether a core-clock change improves instruction throughput on that board.
Spotting an over-clock that’s too high for the display:
* **Artefacts around / at the edges of dirty regions**, smearing, or shifted strips in heavy rendering, while a light scene (or a simple game) still looks fine. That’s the window-command timing ceiling (§4b), not a crash.
* A clock too high for the **chip/flash** instead fails harder: it won’t boot or hard-faults.
* **Recover with BOOTSEL:** if the firmware no longer boots after a clock change, hold BOOTSEL and re-flash a known-good `.uf2`.
Finding the ceiling: build firmwares at descending core clocks (250 → 225 → 200 → …), flash each, run `STRESS` + `HEAVY`, and keep the **highest clock with no dirty-region artefacts**. Change the clock only in `board.c board_init` (not at runtime), and re-check which SPI divider the new `clk_peri` selected (§2).
# Animation & sequencing
> Guide to picogame_anim, picogame_seq and picogame_cutscene: time-based sprite frames, coroutine timelines, and low-RAM cutscene images.
These three Python helpers cover sprite animation, timed sequences, and full-screen still images. `picogame_anim` advances animation from elapsed time, `picogame_seq` expresses timelines as generators, and `picogame_cutscene` streams an image without keeping the full frame in the Python heap. See [/reference/](/reference/) for their signatures.
## picogame\_anim
[Section titled “picogame\_anim”](#picogame_anim)
Give `FrameAnim` a sequence and an `fps`, then call `tick(dt)` once per game frame with the elapsed time in seconds. Sequence entries can be frame indices for a sprite sheet or separate `Bitmap` objects. The animation follows elapsed time instead of loop count.
There are two classes:
* **`FrameAnim(sprite, frames, *, fps=8, loop=True)`** - plays one sequence. `frames` is a list or tuple of frame indices, or of `Bitmap` objects. The sequence is referenced rather than copied, so treat it as read-only. `fps` sets the animation speed and `loop` is keyword-only. Construction displays `frames[0]` when the sequence is not empty.
* **`.tick(dt)`** - advance by `dt` real seconds. Accumulates time, steps the frame when enough has passed. No-op once a non-looping anim is finished or if `frames` is empty. No return value.
* **`.configure(frames, fps=8, loop=True)`** - re-point this same instance at a new sequence and reset it. Returns `self`. Lets you reuse one `FrameAnim` instead of allocating a new one on every switch.
* **`.reset()`** - back to frame 0, clears the `done` flag and time accumulator.
* Attributes you can read: **`.done`** (True when a non-looping anim has reached its last frame), `.i` (current index into `frames`), `.frames`, `.fps`, `.loop`.
* **`AnimatedSprite(sprite, anims)`** - a sprite with named states. `anims` is a dictionary `{name: (frames, fps, loop)}`. It keeps one reusable `FrameAnim`, so switching an animation does not allocate another driver.
* **`.play(name)`** - switch to that named animation. Looks up `anims[name]` and reconfigures. Calling `play` with the name already playing is a no-op, so it is safe to call every frame.
* **`.tick(dt)`** - advance the current animation.
```python
import picogame_anim
hero = picogame_anim.AnimatedSprite(self.spr, {
"run": (DINO_RUN, 12, True),
"jump": ((DINO_JUMP,), 1, False),
})
hero.play("run")
# each frame, with dt = real seconds since last frame:
hero.play("jump" if self.jumping else "run") # cheap to call every frame
hero.tick(dt)
```
For one sequence, such as a spinning coin, use `FrameAnim` directly: `spin = picogame_anim.FrameAnim(sprite, list(range(COIN_FRAMES)), fps=15)`.
Gotchas
you must pass real `dt` (seconds per frame, e.g. from `picogame_clock`), not a frame count - passing `1` makes it run at `fps` frames per *call*. The `frames` list is held by reference, so do not mutate it while it is in use. `.done` only ever becomes True for `loop=False`.
## picogame\_seq
[Section titled “picogame\_seq”](#picogame_seq)
`picogame_seq` expresses timed logic as generators. Each `yield` pauses until the next game frame, and each `tick()` advances one generator to its next `yield`. Use it for intros, staged AI, and other ordered actions. Compose smaller sequences with `yield from`.
Generator helpers (call them with `yield from`):
* **`wait(frames)`** - pause for `frames` frames (yields that many times, doing nothing).
* **`over(frames, fn)`** - generic tween: calls `fn(t)` each frame with `t` ramping `0..1` (specifically `i/frames` for `i` in `1..frames`) over `frames` frames.
* **`move_over(sprite, x, y, frames)`** - glide a sprite from its current position to `(x, y)` over `frames` frames, linearly, via `sprite.move(...)`.
The driver:
* **`Seq(gen=None)`** - wraps one generator. If `gen` is `None` it starts already `.done`.
* **`.start(gen)`** - point it at a (new) generator and clear `done`. Returns `self`, so it is reusable.
* **`.tick()`** - advance to the next `yield`. Catches `StopIteration` and sets `.done`. **Returns** the `done` flag (True once finished), so you can branch on it.
* **`.done`** - True when the sequence has finished.
```python
import picogame_seq as seq
def intro(hero, label):
yield from seq.wait(30)
label.set("GO!")
yield from seq.move_over(hero, 120, hero.y, 20) # glide over 20 frames
s = seq.Seq(intro(player, hud))
# each frame:
if not s.tick(): # advances one step; True once the intro is over
... # still running
```
Gotchas
`tick()` advances exactly one step (to the next `yield`) per call, so drive it once per game frame. Anything between `yield`s runs in a single frame - keep heavy work behind a `yield`. A `Seq` runs *one* generator; to run several timelines at once, give each its own `Seq`, or merge them with `yield from` inside one generator.
## picogame\_cutscene
[Section titled “picogame\_cutscene”](#picogame_cutscene)
`picogame_cutscene` displays a full-screen still without loading the complete image into the Python heap. A 320x240 source occupies 153,600 bytes in RGB565 or 76,800 bytes in PAL8. The module instead reads a raw, row-major file from flash one **band** at a time and renders each band to the display backend.
The temporary source band costs `w * band` bytes for PAL8 or `w * band * 2` bytes for RGB565. With the default `w=320` and `band=24`, that is 7,680 or 15,360 bytes in addition to the render buffer passed to `show()`. Reduce `band` if the allocation does not fit. Once rendered, the still image needs no additional Python object containing the full frame. See [/memory/](/memory/) for the other memory costs.
Bake the raw file first with `tools/bake_cutscene.py` (PNG to PAL8 + a palette module, or wire-order RGB565 rows). See [/scene-format/](/scene-format/) for engine bitmap formats and [/hardware/](/hardware/) for the display and buttons.
* **`palette(pg, rgb)`** - build the device palette (`array('H')` of wire colours) from a `bake_cutscene.py` palette module, a list of `(r, g, b)` triplets, or wire ints. Build it ONCE at setup and reuse it - `show()` would otherwise rebuild it per call.
* **`show(pg, display, buffer, path, pal=None, w=320, h=240, scale=None, band=24, bg=0)`** - stream the image at `path` one band at a time and render each band with the supplied engine strip `buffer`. `pal` selects PAL8 input (1 B/px); `None` selects RGB565 (2 B/px). `scale=None` derives an integer scale from the display (`width // w`) and rejects a source size that does not fill both axes. A short final band is cleared with `bg`. Returns the scale used.
* **`play(pg, display, buffer, btn, path, pal=None, w=320, h=240, scale=None, band=24, caption=None, caption_lines=None, auto_hold=0, clock=None, bg=0)`** - show the image, add optional caption lines in a dark bar, then block until **A** or **B** is pressed. With `auto_hold > 0`, it advances after that many loop ticks and `btn` may be `None`. Pass a `picogame_clock` instance as `clock` to pace the wait loop.
```python
import picogame_cutscene as cut
import board
PAL = cut.palette(pg, intro_pal) # once, at setup
cut.play(pg, board.DISPLAY, bufA, btn, "intro.raw", pal=PAL,
caption="Chapter 1", clock=clock)
scene.invalidate() # the image clobbered the LCD
```
Gotchas
this uses the immediate drawing path, outside the scene. Pause or fade the scene first, then call `scene.invalidate()` after `play()` returns so the next `refresh()` repaints it. The input must be a raw, row-major file produced by `bake_cutscene.py`; a PNG cannot be passed directly. `play()` blocks the game loop while it waits.
# Audio & music
> Play WAV samples, synthesize SFX and MIDI with synthio, or use the ready-made picogame_sfx kit.
Where audio plays: playground, simulator, device
* **Device** — everything (real synthio + PWM/I2S).
* **Browser playground** — `tone()` beeps and the `picogame_sfx` kit play via WebAudio (press a key first to unlock sound); custom `picogame_synth` voices don’t (no synthio backend in the browser).
* **Desktop simulator, live window** (`--backend pygame`, the default) — `picogame_synth` SFX and music **do** play through `pygame.mixer`: an approximation for tuning by ear, not bit-exact. Headless runs (`--shot` / CI) and `picogame_audio` sample playback stay silent.
* Audition synth SFX offline with `tools/synth_preview.py`, and confirm the real mix on hardware.
picogame offers four audio layers. `picogame_audioout` picks the board’s output device (PWM or I2S DAC). `picogame_audio` mixes `.wav` files and generated PCM tones. `picogame_synth` creates notes in real time with synthio and avoids a PCM buffer for every effect. `picogame_sfx` adds a ready-made set of named game sounds over the synthesizer. See [/hardware/](/hardware/) for board audio setup and [/reference/](/reference/) for signatures.
## picogame\_audioout — one output for every board
[Section titled “picogame\_audioout — one output for every board”](#picogame_audioout--one-output-for-every-board)
`picogame_audio` and `picogame_synth` both get their output device from `picogame_audioout.make_output()`, so a game needs **no board-specific audio code**. It auto-selects:
* an **I2S DAC** (e.g. the Fruit Jam’s TLV320) when the board exposes `board.I2S_BCLK`,
* otherwise a **PWM** output on the board’s speaker pin (or a pin you pass).
You normally never call it directly — construct `Audio()` / `Synth()` and it happens for you. `make_output(sample_rate=22050, pin=None)` is there if you want the raw device; passing an explicit `pin` **forces PWM**.
**Volume (I2S DAC boards):** the TLV320 driver’s defaults are deliberately very quiet, so on a Fruit Jam sound can seem absent until you raise them in `settings.toml` — `PICOGAME_AUDIO_OUT` (`headphone`/`speaker`/`both`), `PICOGAME_DAC_VOLUME`, `PICOGAME_HP_VOLUME`, `PICOGAME_SPK_VOLUME` (integer dB, keep `<= 0`). See the [settings.toml reference](/custom-board/).
Fruit Jam: install the DAC driver or it’s silent
I2S audio needs `adafruit_tlv320` **and** `adafruit_bus_device` in `CIRCUITPY/lib` (from the Adafruit bundle / `circup`) — they are **not** bundled with picogame. If they’re missing, audio silently falls back to a PWM pin the DVI board doesn’t have, so there’s no sound. Set `PICOGAME_DEBUG = 1` to print the reason (`[picogame] audioout: I2S DAC driver missing …`) to the serial console.
## picogame\_audio
[Section titled “picogame\_audio”](#picogame_audio)
A convenience layer over CircuitPython’s audio stack (`audiocore` + `audiomixer`) on top of the `picogame_audioout` output. Reach for it when you have `.wav` assets to play, or want simple beeps without bundling files. It sets up a mixer with several voices so a shot, an explosion, and looping music can all sound at once. The defaults (22050 Hz, mono, 16-bit signed) match typical ugame `.wav` assets - any sample you play must match that format.
### `Audio(pin=None, voices=4, sample_rate=22050, channels=1, bits=16, signed=True)`
[Section titled “Audio(pin=None, voices=4, sample\_rate=22050, channels=1, bits=16, signed=True)”](#audiopinnone-voices4-sample_rate22050-channels1-bits16-signedtrue)
Constructs the audio output and starts the mixer playing immediately. `pin=None` lets `picogame_audioout` pick the device (I2S DAC or the board’s PWM speaker pin); an explicit `pin` forces PWM on that pin. `voices` is the number of simultaneous channels; voice 0 is reserved for music and voices 1..N-1 are used round-robin for sound effects. The other args define the sample format every clip must match.
* `load(path)` - opens a `.wav` file as a reusable `WaveFile` sample. Build it once and keep the returned object alive (it holds the open file); replaying it is cheap.
* `play(sample, *, voice=None, loop=False, volume=1.0)` - plays a sample. `voice` is keyword-only; `None` picks the next round-robin sfx voice. `volume` sets that voice’s level (0.0-1.0). Returns the voice index it used.
* `sfx(sample, volume=1.0)` - fire-and-forget effect on a free sfx voice (calls `play` with `loop=False`). Returns the voice index.
* `music(sample, loop=True, volume=1.0)` - plays on the reserved music voice (voice 0), looping by default.
* `stop(voice=None)` - stops one voice, or every voice if `voice` is `None`.
* `stop_music()` - stops just the music voice.
* `is_playing` (property) - `True` if any voice is currently playing.
* `deinit()` - releases the audio output. The output device is a singleton, so call this before constructing a second `Audio()` (or a `Synth()` sharing the pin) - otherwise the next one raises *pin in use*.
### `tone(frequency=440, ms=120, sample_rate=22050, volume=0.6)`
[Section titled “tone(frequency=440, ms=120, sample\_rate=22050, volume=0.6)”](#tonefrequency440-ms120-sample_rate22050-volume06)
Builds a short square-wave `RawSample` in RAM - a beep with no `.wav` file needed. Good for prototyping and simple blips. Pass it straight to `sfx`/`play`.
```python
import picogame_audio
import picogame_input
audio = picogame_audio.Audio() # PWM audio, 4 voices
pew = picogame_audio.tone(880, 90) # high blip, built once
boom = picogame_audio.tone(140, 200) # low thud
btns = picogame_input.Buttons()
while True:
btns.poll()
if btns.just_pressed(btns.A):
audio.sfx(pew) # overlaps on a free voice
if btns.just_pressed(btns.B):
audio.sfx(boom, volume=0.8)
```
Gotchas
* Every sample must match the mixer’s format. A 44100 Hz or stereo `.wav` will play wrong (or error); resample assets to 22050 Hz mono 16-bit first.
* Keep `load()` results alive - if the `WaveFile` is garbage-collected the open file goes with it. Load clips once at startup, not per frame.
* `tone()` builds a `RawSample` in RAM (about `sample_rate * ms / 1000 * 2` bytes each). Many long tones can exhaust the heap. Keep them short and few, lower both the mixer and tone `sample_rate` (for example to `8000`), or use `picogame_synth` to avoid a separate PCM buffer for every effect.
* You only have `voices-1` sfx channels; rapid-fire effects round-robin and will cut each other off once they wrap.
## picogame\_synth
[Section titled “picogame\_synth”](#picogame_synth)
`picogame_synth` wraps synthio oscillators, ADSR envelopes, pitch-bend LFOs, and low-pass filters. It avoids storing a PCM buffer for every effect, but still allocates the audio output buffer, mixer, waveforms, and note objects. Use it for a larger SFX set or MIDI music when WAV assets would consume too much RAM or flash.
The module is safe to import on firmware without audio. If audio initialisation fails, its API becomes a silent no-op; check `AVAILABLE` or `synth.available` only when the UI needs to expose audio settings. The desktop simulator’s live pygame window plays these `picogame_synth` voices through `pygame.mixer` (an approximation for tuning by ear); headless runs stay silent. Either way the same game path runs unchanged.
Built-in waveform constants (one-cycle, signed 16-bit arrays you share across notes): `SINE`, `SAW`, `TRIANGLE`, `SQUARE`, `NOISE`. The functions `sine()`, `saw()`, `triangle()`, `square()`, `noise()` build fresh copies if you need them. For a crisp arcade blip reach for a short `SQUARE` note (`SINE` and `TRIANGLE` read softer and rounder).
### `note(midi, waveform=None, attack=0.005, decay=0.06, sustain=0.0, release=0.08, amplitude=0.6, bend=None, cutoff=None)`
[Section titled “note(midi, waveform=None, attack=0.005, decay=0.06, sustain=0.0, release=0.08, amplitude=0.6, bend=None, cutoff=None)”](#notemidi-waveformnone-attack0005-decay006-sustain00-release008-amplitude06-bendnone-cutoffnone)
Builds a reusable note/SFX/instrument - the core building block. `midi` is a MIDI note number (60 = middle C, 72 = C5). `waveform` is one of the constants above. `attack`/`decay`/`sustain`/`release` shape the ADSR envelope in seconds (a short decay with `sustain=0.0` gives a percussive blip). `amplitude` is loudness (0.0-1.0). `bend` takes a `pitch_bend` LFO for a pitch sweep (a quick wobble; see `pitch_bend`); `cutoff` adds a low-pass filter at that many Hz to round off harsh tones. Build each note once and replay it.
### `pitch_bend(semitones, ms, waveform=None, once=True)`
[Section titled “pitch\_bend(semitones, ms, waveform=None, once=True)”](#pitch_bendsemitones-ms-waveformnone-oncetrue)
Returns a `synthio.LFO` for a note’s `bend`. With `once=True` it is a **one-shot sine sweep**: over `ms` the pitch swings toward `semitones` and back - a *wobble/swoop*, not a clean monotonic glide. Keep `ms` short (about the note’s `attack+decay`) so mostly the rise (positive = zap up) or fall (negative = drop) is heard; a long `ms` lets the return swing show and sounds wobbly.
### `Synth(pin=None, sample_rate=22050, buffer_size=2048, music_level=0.4, sfx_level=0.7)`
[Section titled “Synth(pin=None, sample\_rate=22050, buffer\_size=2048, music\_level=0.4, sfx\_level=0.7)”](#synthpinnone-sample_rate22050-buffer_size2048-music_level04-sfx_level07)
Sets up the output (via `picogame_audioout` — I2S DAC or PWM, same as `Audio`) and a 2-voice mixer: voice 0 for music (a `MidiTrack`), voice 1 for the live synth used by SFX. `pin=None` auto-selects the device; an explicit `pin` forces PWM. `music_level`/`sfx_level` are the starting mix levels for those two voices.
* `sfx(n)` - plays note `n` as a one-shot effect. It retriggers the note’s LFOs first (so a repeated zap sounds identical every time), then calls `release_all_then_press`, so back-to-back SFX cut cleanly.
* `press(n)` / `release(n)` - hold and release a note manually, for sounds that last as long as a button is held rather than firing once.
* `music(midi_track)` - plays a `MidiTrack` (from `load_midi`) on voice 0, looping.
* `stop_music()` - stops the music voice.
### `Drone(synth, waveform=None, amplitude=0.35, attack=0.03, release=0.12)`
[Section titled “Drone(synth, waveform=None, amplitude=0.35, attack=0.03, release=0.12)”](#dronesynth-waveformnone-amplitude035-attack003-release012)
A continuously **held** note for engine, siren, or drone-style sounds - press it once, then steer its pitch/volume live each frame. Where `note()`/`sfx` fire a one-shot, a `Drone` keeps a single note sounding on the SFX voice; synthio reads the note’s live `.frequency`/`.amplitude` per audio buffer, so the tone tracks whatever you feed it (e.g. an engine note driven by car speed). `synth` is a live `Synth`; `waveform` defaults to `SAW`.
* `.start()` - press the held note (idempotent - safe to call again while playing).
* `.set(frequency, amplitude=None)` - update the live pitch (Hz) every frame, and optionally the volume.
* `.stop()` - release the note (e.g. on the title or results screen).
```python
eng = snd.Drone(s, waveform=snd.SAW)
eng.start() # at race start
# each frame, rev = speed / max_speed in 0..1:
eng.set(70 + 270 * rev, amplitude=0.2 + 0.5 * rev)
eng.stop() # on the title / results screen
```
### `load_midi(path, sample_rate=22050, waveform=None, envelope=None, tempo=120, ppqn=240)`
[Section titled “load\_midi(path, sample\_rate=22050, waveform=None, envelope=None, tempo=120, ppqn=240)”](#load_midipath-sample_rate22050-waveformnone-envelopenone-tempo120-ppqn240)
Loads a `.mid` file as a `synthio.MidiTrack` for `Synth.music`. `waveform` and `envelope` select the instrument voice for the track; `tempo` (BPM) and `ppqn` set playback speed. The loader accepts a standard format-0 SMF header.
```python
import picogame_synth as snd
import picogame_input
s = snd.Synth()
# Each SFX is a Note built ONCE (envelope + optional bend + filter).
blip = snd.note(72, snd.SQUARE, decay=0.10)
zap = snd.note(60, snd.SAW, decay=0.18, cutoff=4000, bend=snd.pitch_bend(12, 180))
boom = snd.note(45, snd.NOISE, attack=0.0, decay=0.30, amplitude=0.55, cutoff=2800)
btn = picogame_input.Buttons()
while True:
btn.poll()
if btn.just_pressed(btn.A):
s.sfx(zap)
```
Gotchas
* No import guard needed: the module runs as silent no-ops on audio-less firmware, and a `Synth()` that fails mid-init (tight heap, claimed pin) degrades the same way instead of raising.
* Build each `note()` once at startup and replay it; `sfx` handles retriggering. Rebuilding notes per frame wastes time and breaks LFO retrigger.
* The simulator’s live window approximates these voices through `pygame.mixer`; for an exact preview render SFX to WAV with `tools/synth_preview.py`, then confirm the final balance on the target speaker. Pitch contours can carry meaning: rising for a gain, falling for a loss, and alternating tones for a warning.
* It is the synthesizer that makes sound, not the note object - effects only play through a live `Synth`, and there are just two mixer voices (one music, one SFX), so overlapping synth SFX share a single voice.
## picogame\_sfx
[Section titled “picogame\_sfx”](#picogame_sfx)
`picogame_sfx` provides one cohesive set of named effects over `picogame_synth`. Use it when the built-in arcade-style sounds fit the game. Build custom `picogame_synth.note()` objects when the kit does not cover an event or the game needs a different audio identity. With no audio, every call is a silent no-op.
### `Kit(synth)`
[Section titled “Kit(synth)”](#kitsynth)
Build the theme’s voices **once** from a live `picogame_synth.Synth()`, then fire effects by name (and call `tick()` once per frame). Each call maps to a game *event*; the kit arbitrates them by priority through the single SFX voice, so a big scene sound briefly holds off the small feedback blips instead of being cut by them.
| Call | Fires on | Preview |
| ------------- | ------------------------------------ | ---------------------------- |
| `blip()` | UI tick — menu move, select, confirm | [](/audio/sfx_blip.mp3) |
| `coin()` | a pickup / gained value | [](/audio/sfx_coin.mp3) |
| `powerup()` | level / wave clear, upgrade | [](/audio/sfx_powerup.mp3) |
| `zap()` | **your** shot or dash | [](/audio/sfx_zap.mp3) |
| `pew()` | an **enemy** fired | [](/audio/sfx_pew.mp3) |
| `jump()` | a jump / launch | [](/audio/sfx_jump.mp3) |
| `hit()` | a hit landed on an enemy | [](/audio/sfx_hit.mp3) |
| `hurt()` | **you** took damage | [](/audio/sfx_hurt.mp3) |
| `boom()` | something destroyed / ended | [](/audio/sfx_boom.mp3) |
| `explosion()` | a big scene blast | [](/audio/sfx_explosion.mp3) |
`hit()` varies its brightness across a rapid burst so repeats don’t grate; pass `rotate=False` for identical hits. Call `tick()` **once per frame** — it plays out the coin/powerup arpeggios and counts down the protected windows.
Volume/mute live on the `Synth`: `synth.set_levels(music=None, sfx=None)` sets either mixer level (0.0-1.0), and `synth.mute(on)` silences everything while remembering the levels. Wire these to a `picogame_options` menu + `picogame_save` for a persisted volume control.
```python
import picogame_synth as snd
import picogame_sfx as sfx
import picogame_input
s = snd.Synth()
kit = sfx.Kit(s) # builds the signature voices once (silent no-op if no audio)
btn = picogame_input.Buttons()
while True:
btn.poll()
if btn.just_pressed(btn.A):
kit.zap() # your shot
if btn.just_pressed(btn.B):
kit.jump()
# ... on a kill: kit.boom(); on taking damage: kit.hurt(); on a pickup: kit.coin()
kit.tick() # once per frame - drives sequences + priority windows
```
Gotchas
* Build the `Kit` **once** at startup and reuse it; it pre-builds every voice. Rebuilding per frame wastes time and heap.
* Call `kit.tick()` **every frame**, next to `clock.tick()`. Miss it and the arpeggio effects (coin, powerup) and the protected windows stop working.
* It shares `picogame_synth`’s single SFX voice, so effects are monophonic - the priority arbitration decides which one wins when two fire close together (that’s the point of the windows).
* The simulator’s live window plays the kit (approximate); for an exact audition render it to WAV before flashing (see `picogame_synth`’s note above), then lock the feel on hardware.
# Boot & game loop
> Guide to picogame_game, picogame_clock and picogame_input: take over the display, pace the frame, and read the buttons.
These three modules set up the display, pace the game loop, and read buttons. A typical `code.py` calls `picogame_game.setup()` once, creates `Buttons()` and `Clock()`, then repeats four steps: poll input, update state, refresh the scene, and tick the clock. See [/reference/](/reference/) for the signatures.
## picogame\_game
[Section titled “picogame\_game”](#picogame_game)
Call `setup()` once before creating the game objects. It resolves the display backend, stops `displayio` from refreshing independently where applicable, and returns a new `Scene` with the memory it needs.
* `setup(display=None, strip_h=None, background=0, fast=True, top=0, bottom=0, left=0, right=0, rgb444=False)` - returns `(scene, buffer_a, buffer_b)`. On an SPI display it disables automatic refresh, clears `root_group`, and allocates two full-width render strips. On a framebuffer target such as Fruit Jam DVI or the browser playground, the scene composites into the framebuffer and both returned buffers are `None`. The `Scene` keeps any allocated strip buffers alive. A game that only calls `scene.refresh()` can ignore the returned buffers: `scene, _, _ = picogame_game.setup(...)`.
* `display` - explicit display object. If omitted, setup tries `board.DISPLAY` and then `supervisor.runtime.display`.
* `strip_h` - height of each render strip on the SPI path. It defaults to the board’s compiled `picogame.STRIP_H` value. The two buffers occupy `2 * width * strip_h * 2` bytes: about 10 KiB at 320×8 or 30 KiB at 320×24. On the measured RP2040 DMA path, a smaller strip also improved overlap between rendering and transfer; without DMA, larger strips reduce the number of blocking transfers. Override the value per call or at firmware build time with `-DPICOGAME_STRIP_H=N`. Framebuffer targets ignore it. See [/memory/](/memory/) for the trade-off.
* `background` - fill colour behind the scene, an RGB565 int. Build one with `pg.rgb565(r, g, b)`.
* `top` / `bottom` / `left` / `right` - reserve a border (px) the scene won’t render into, so it paints only the inner play rect. You draw that border yourself (a HUD bar, side panels) once, and it is never recomputed per frame.
* `fast` - on an SPI display, `True` selects `pg.Display` when available; `False` uses the portable busdisplay renderer. Setup falls back automatically when the fast backend is absent.
* `rgb444` - `True` requests 12-bit colour on a compatible fast SPI backend. Use `"auto"` to enable it only when the board reports support. Framebuffer targets ignore this setting. See [/hardware/](/hardware/).
```python
import picogame as pg
import picogame_game
BG = pg.rgb565(20, 24, 30)
scene, buffer_a, buffer_b = picogame_game.setup(background=BG, strip_h=16, top=12)
# scene is a pg.Scene; add sprites and refresh it each frame
# a simple game that never draws in immediate mode can skip the buffers: scene, _, _ = ...
scene.add(sprite)
scene.refresh()
```
Gotchas
keep `scene` alive for the life of the game. On the SPI path it owns the two render buffers; the framebuffer path does not create them. A border reserved with `top`/`bottom`/`left`/`right` is not painted by the scene, so draw it separately. See [/scene-format/](/scene-format/) for scene data and [/hardware/](/hardware/) for display notes.
## picogame\_clock
[Section titled “picogame\_clock”](#picogame_clock)
`Clock` caps the loop to a target FPS and returns elapsed time as `dt`, so movement can be independent of frame rate. `FixedStep` runs game logic in equal time steps when physics or collision must be reproducible.
`Clock`:
* `Clock(fps=30, max_dt=0.1)` - cap the loop to `fps` (use `0` for uncapped) and clamp the returned `dt` to at most `max_dt` seconds, so a pause or stall can’t produce a giant `dt` that teleports everything.
* `tick()` - sleeps until the frame boundary, then returns the real `dt` in seconds since the last `tick()`. Anchors to the ideal schedule so a small oversleep can’t accumulate into drift; if you ran over budget it anchors to real time instead, keeping `dt` accurate. Call once per frame.
* `tick_async()` - awaitable variant that yields to other `asyncio` tasks during the idle wait instead of blocking. Needs the `asyncio` library available (raises `RuntimeError` otherwise). Note rendering itself is blocking, so async only helps in the cap-sleep gap.
* `set_fps(fps)` - change the target FPS on the fly (e.g. menus at 30, action at 60). `0` uncaps.
`FixedStep`:
* `FixedStep(step_fps=60, max_steps=5)` - fixed timestep of `1/step_fps` seconds, running at most `max_steps` logic steps per frame (the cap avoids a “spiral of death” when rendering can’t keep up - backlog is dropped).
* `step_count()` - returns how many fixed steps to run this frame (`0..max_steps`). Loop `for _ in range(step_count())` and use the constant `self.dt`; this form allocates nothing, good for hot loops.
* `dt` - the constant step duration in seconds. Pass it to your update.
* `steps()` - generator form yielding `self.dt` per step. Convenient, but allocates a generator each call; prefer `step_count()` in the main loop.
```python
import picogame_clock
clock = picogame_clock.Clock(30) # cap to 30 FPS
while True:
dt = clock.tick() # sleeps to the frame boundary, returns real dt
player.x += player.vx * dt # frame-rate independent movement
scene.refresh()
```
Gotchas
call `tick()` exactly once per frame, at the bottom of the loop. If you ignore the return value you still get the FPS cap, but lose frame-rate independence - fine for a fixed-feel grid game, not for smooth motion. `tick_async()` only buys you anything if rendering can overlap other tasks; the render call still blocks.
## picogame\_input
[Section titled “picogame\_input”](#picogame_input)
`Buttons` maps physical buttons to a logical bitmask with pressed and released edges plus auto-repeat. It uses CircuitPython’s background-scanned `keypad` event queue when available and falls back to `digitalio` polling. The `Timer` class provides frame-based windows for coyote time and jump buffering.
Logical buttons are exposed both as module constants and as attributes on the instance: `UP`, `DOWN`, `LEFT`, `RIGHT`, `A`, `B`, `X`, `Y`, `L1`, `L2`, `R1`, `R2`, `START`, `SELECT`, plus `ALL`. The PicoPad maps the eight face buttons; absent buttons (no shoulders) simply never fire. They are bit flags, so you can OR them: `btn.A | btn.B`.
`Buttons`:
* `Buttons(profile=None, pull=None, prefer_keypad=True, debounce_s=0.02, matrix=None, usb=None, sources=None)` - build the reader. With `profile=None` the pin map is resolved highest-wins: an explicit `profile`, then `settings.toml` `PICOGAME_BUTTONS = "UP=GP2 A=GP12 ..."` (remap a custom Pico with no reflash), then a built-in profile by `board.board_id`, then the `PICOPAD` fallback. `pull` defaults to `Pull.UP` (or `PICOGAME_PULL` in `settings.toml`). `debounce_s` is the keypad scan window; `prefer_keypad=False` forces polling. `matrix=` adds a scanned key matrix and `usb=` adds USB HID sources — see below.
* **More than one input source:** `Buttons` ORs several sources into one mask — on-board GPIO buttons, a scanned key matrix (`matrix=`, or the `PICOGAME_MATRIX_*` keys), and USB gamepads/keyboards on USB-host boards (`usb=`, auto-attached). A game reads them all with no code change. Full guide: [Input & controls](/helpers/input/).
* `poll()` - sample all buttons once and return the current pressed bitmask. Call once per frame, before any query. Drains the keypad event queue (catching sub-frame taps) or reads the pins directly, and updates held-frame counts for `repeat()`.
* `is_pressed(mask=ALL)` - `True` if any button in `mask` is currently down (level).
* `just_pressed(mask=ALL)` - `True` on the rising edge (the frame a button went down). On the keypad backend this comes from the event queue, so a tap shorter than a frame still registers.
* `just_released(mask=ALL)` - `True` on the falling edge (the frame a button came up).
* `has(mask=ALL)` - `True` if this board physically wires the given button(s). Use it to adapt controls/UI to boards without shoulders or START/SELECT.
* `repeat(button, delay=15, interval=4)` - auto-repeat for a SINGLE button: `True` the frame it’s pressed, then every `interval` frames once held `delay` frames. Ideal for menu and grid movement.
* `clear()` - reset state and flush pending input. Call on scene or menu transitions so a held button doesn’t leak across.
`Timer`:
* `Timer(frames)` - a counter that decays one frame at a time over `frames` frames.
* `feed(condition)` - recharge to full when `condition` is true, else count down one frame; returns whether still active. Use for coyote time (`feed(on_ground)`).
* `charge()` - force the timer to full.
* `is_active` (property) - `True` while the counter is above zero.
* `consume()` - `True` once if active, then clears it, so a buffered press fires exactly once (jump buffering).
```python
import picogame_input
btn = picogame_input.Buttons() # auto profile by board
while True:
btn.poll()
dx = btn.is_pressed(btn.RIGHT) - btn.is_pressed(btn.LEFT) # -1, 0 or +1
if btn.just_pressed(btn.A): # rising edge: fire once per tap
jump()
scene.refresh()
```
Coyote time and jump buffering, straight from the platformer example:
```python
coyote = picogame_input.Timer(5) # still jump a few frames after a ledge
jbuf = picogame_input.Timer(6) # honour a jump pressed just before landing
# each frame:
coyote.feed(on_ground)
jbuf.feed(btn.just_pressed(btn.A))
if coyote.is_active and jbuf.consume():
jump()
```
Gotchas
always `poll()` once per frame before querying, or `is_pressed` / `just_pressed` read stale state. `repeat()` takes a single button, not an OR-mask. The `digitalio` polling backend is undebounced (per-frame sampling already filters sub-frame bounce); for a noisy switch on a keypad-less build, debounce upstream. See [Input & controls](/helpers/input/) for USB pad/keyboard and matrix input, and [the settings.toml reference](/custom-board/) for the `PICOGAME_BUTTONS`/`PICOGAME_MATRIX_*`/USB remap keys.
# Building scenes
> Guide to the picogame scene-building helpers: load baked scenes, flag tiles, bake placeholder art, and pool sprites.
These four modules load baked scenes, attach properties to tiles, create simple bitmap art in code, and reuse a fixed set of sprites. See [/reference/](/reference/) for the signatures.
## picogame\_scene
[Section titled “picogame\_scene”](#picogame_scene)
The loader turns a baked `SCENE` dictionary into a `pg.Scene` and a set of named handles. Use it for a level produced by the editor or `scene_build.py`. The same data and loader run on hardware and in the simulator. See [/scene-format/](/scene-format/) for the input format.
`load(pg, scene, display=None, strip_h=None, font=None, bank=None)` returns a `View`. It resolves the display in the same way as `picogame_game.setup()`, constructs the scene, and adds each tilemap, sprite, group, particle system, and HUD label. On an SPI display it allocates two `width * strip_h * 2` render buffers, available as `view.bufA` and `view.bufB`. On a framebuffer target both are `None`. Pass a font such as `terminalio.FONT` if the data contains a HUD label. See [/hardware/](/hardware/) for display backends and [/memory/](/memory/) for buffer costs.
`load_bank(pg, bank)` builds shared bitmaps/sounds/anims ONCE; pass the result as `load(..., bank=...)` for each level so unchanged art is not rebuilt per level.
The returned `View` is your handle to everything:
* `view.scene` - the live `pg.Scene`. Call `view.scene.refresh()` each frame and `view.scene.set_view(ox, oy)` to scroll.
* `view.named[name]` - dict of name -> sprite / particles / HUD label for any layer given a `name`.
* `view.group(tag)` - list of sprites for a group layer (returns `[]` if the tag is unknown, so it is safe to iterate).
* `view.tick(dt)` - advance all auto-animated sprites; call once per frame with `dt` in seconds.
* `view.tile_xy(px, py)` - world pixel -> `(tx, ty)` cell of the primary (first) tilemap.
* `view.is_solid(tx, ty)` - shorthand for `tile_has(tx, ty, "solid")`.
* `view.tile_has(tx, ty, prop)` - True if the primary tilemap’s tile at that cell has the named property (from the baked `tileprops`).
* `view.point(name)` - `(x, y)` for a named point, or None.
* `view.in_zone(x, y, tag=None)` - first zone `(tag, x, y, w, h)` containing the point (optionally filtered by tag), else None.
* `view.play(sound_id)` - play a baked sfx by id (no-op if audio/sample is missing).
* `view.tilemap` / `view.camera` / `view.zones` / `view.points` / `view.anims` - the primary tilemap object, the camera tuple, and the raw collections.
```python
import board, terminalio
import picogame as pg
import picogame_scene as pgs
import world1_scene
view = pgs.load(pg, world1_scene.SCENE, font=terminalio.FONT)
player = view.named["player"]
enemies = view.group("enemies")
while True:
view.tick(1 / 30) # advance auto-animations
tx, ty = view.tile_xy(player.x, player.y)
if not view.is_solid(tx, ty):
player.move(player.x + 2, player.y)
view.scene.refresh()
```
Gotchas
the first tilemap layer is the primary one; `tile_xy`, `is_solid`, and `tile_has` query only that map. `view.named` contains only layers with a name. Sound loading is best-effort: a missing audio module or sample produces a `None` entry, and `play()` then does nothing.
## picogame\_tiles
[Section titled “picogame\_tiles”](#picogame_tiles)
`TileFlags` stores one metadata bitfield for each tile index, so every cell using that tile shares the same properties. Use it with a hand-built `pg.Tilemap`. A scene loaded through `picogame_scene` already exposes the higher-level `view.is_solid()` and `view.tile_has()` methods.
Eight named bits and their masks: `B_SOLID, B_HAZARD, B_LADDER, B_PLATFORM, B_WATER, B_COIN, B_EXIT, B_CUSTOM` are bit indices 0..7; `SOLID, HAZARD, LADDER, PLATFORM, WATER, COIN, EXIT, CUSTOM` are the matching `1 << bit` masks. Use the masks when building the table, the `B_*` indices when querying.
`TileFlags(flags=None, tile_px=8)` builds the table. `flags` is either a `{tile_index: bitfield}` dict or a list/bytes indexed by tile index; `tile_px` is the tile size used by the pixel helper.
* `tf.get(tile, bit=None)` - the full bitfield of a tile, or one bool flag if `bit` (a `B_*` index) is given.
* `tf.set(tile, bit, value=True)` - flag (or clear) a bit on a tile at runtime.
* `tf.at(tilemap, tx, ty, bit)` - flag `bit` of the tile at cell `(tx, ty)`.
* `tf.at_px(tilemap, px, py, bit)` - flag `bit` of the tile under MAP-LOCAL pixel `(px, py)`; the common collision probe.
```python
import picogame as pg
import picogame_tiles as tiles
TILE = 8
tf = tiles.TileFlags({1: tiles.SOLID, 2: tiles.COIN, 3: tiles.EXIT}, tile_px=TILE)
def blocked(level, tx, ty): # level is a pg.Tilemap
return tf.at(level, tx, ty, tiles.B_SOLID)
if tf.at_px(level, px, py, tiles.B_SOLID): # is the tile under pixel (px, py) solid?
stop()
```
Gotchas
`at_px` assumes the map is at screen `(0, 0)` - if it is moved, subtract the map origin from `px`/`py` yourself before calling. Tiles missing from the table read as `0` (no flags). Build with the MASK constants (`tiles.SOLID`) but query with the BIT indices (`tiles.B_SOLID`); mixing them up silently checks the wrong bit.
## picogame\_shapes
[Section titled “picogame\_shapes”](#picogame_shapes)
These functions build single-colour PAL8 `Bitmap` objects in code. They suit prototypes and geometric art such as balls, bricks, or ships. Unlike `Canvas`, they return a reusable bitmap for a `Sprite` or `Tilemap`. Palette index 0 is transparent and index 1 contains the requested colour.
* `rect(w, h, color)` - a filled `w x h` rectangle.
* `circle(d, color)` - a filled disc of diameter `d`.
* `ring(d, color, thickness=2)` - a circle outline of diameter `d`.
* `from_mask(mask, color)` - a bitmap from a list of strings; `#`, `X`, or `1` sets a pixel. Sized to the mask.
* `atlas(frames_data, w, h, color)` - pack a list of `w*h` 0/1 buffers into one horizontal multi-frame bitmap (one colour). The general “frame sheet” builder.
* `color_frames(w, h, colors)` - a multi-frame bitmap where frame `i` is a solid fill of `colors[i]`; frame 0 is already a colour. Index 0 transparent.
* `tileset_colors(w, h, colors)` - a tileset where frame 0 is EMPTY (transparent) and frame `i` is a solid fill of `colors[i-1]`. So a Tilemap reads tile value 0 as empty and 1..N as coloured tiles.
* `poly_frames(size, points, nframes, color, fill=True)` - bake `nframes` rotations of a polygon (points around centre, +y down) into a `size x size` atlas. The engine also rotates at runtime (`Sprite.angle`); baked frames trade a little RAM for a cheaper per-frame blit and pixel-stable art, so pick them for many always-rotating objects (asteroids), and `angle` for one-off or continuous rotation. Set `fill=False` for an outline.
```python
import picogame as pg
import picogame_shapes as shp
ball = shp.circle(4, pg.rgb565(255, 255, 120))
bricks = shp.tileset_colors(16, 8, [pg.rgb565(220, 70, 70),
pg.rgb565(80, 140, 240)]) # value 0 empty, 1..2 coloured
ship = shp.poly_frames(16, [(0, -8), (6, 7), (0, 4), (-6, 7)], 16,
pg.rgb565(200, 220, 255)) # 16 pre-rotated frames
sprite = pg.Sprite(ball, 100, 60)
```
Gotchas
`color_frames` frame 0 is a visible colour, but `tileset_colors` frame 0 is transparent (empty) - pick the one matching how your Tilemap treats value 0. `circle` fills its bitmap edge-to-edge, so it looks flat-topped when scaled up. `poly_frames` with `nframes=1` bakes a single un-rotated frame (use it for a fixed-direction shape).
## picogame\_pool
[Section titled “picogame\_pool”](#picogame_pool)
`Pool` pre-allocates a fixed number of sprites for short-lived objects such as bullets, enemies, or pickups. `sprite.visible` marks an occupied slot and `sprite.data` can hold entity state. Spawning and freeing slots allocate no new sprites. See [/memory/](/memory/) for why stable allocation matters on the device.
`Pool(scene, bitmap, capacity, anchor=None, fixed=False)` pre-allocates `capacity` hidden sprites sharing `bitmap`, sets each `anchor` (if given) and `data = None`, and adds them all to `scene` (`fixed=` passes through to `scene.add`).
* `pool.items` - the underlying list of sprites; iterate it directly for zero-alloc updates.
* `pool.spawn()` - make the first free (hidden) sprite visible and return it, or None if the pool is full.
* `pool.free(s)` - hide sprite `s` (return it to the pool).
* `pool.free_all()` - hide every sprite (use on level reset).
* `pool.count()` - count of live (visible) sprites; cheap, but iterate `items` for the sprites themselves.
```python
import picogame as pg
import picogame_pool
bullets = picogame_pool.Pool(scene, bullet_bm, 6, anchor=(0.5, 0.5))
b = bullets.spawn() # a now-visible sprite, or None if full
if b:
b.data = {"vx": 6}
b.move(x, y)
for s in bullets.items: # zero-alloc iteration
if not s.visible:
continue
s.move(s.x + s.data["vx"], s.y)
if off_screen(s):
bullets.free(s)
```
Gotchas
always skip hidden slots when iterating (`if not s.visible: continue`) - `items` holds every slot, alive or not. `spawn()` returns the first free slot it finds (don’t rely on any particular order), so if you `free(s)` and `spawn()` in the same step, read any state off `s.data` BEFORE freeing - the new spawn may overwrite it. A full pool returns None from `spawn()`; check for it. All sprites share one bitmap, so per-entity frame/animation must be set on each sprite after `spawn()`.
# Saving & memory
> Persist scores and settings to NVM, dodge heap fragmentation with a pre-allocated arena, and stream big sprite sheets from flash.
These helpers persist small values, reserve reusable memory, and stream animation frames from flash. See [/reference/](/reference/) for the signatures and [/memory/](/memory/) for the memory model behind the last two modules.
## picogame\_save
[Section titled “picogame\_save”](#picogame_save)
This structured key-value store uses `microcontroller.nvm`, a reserved flash region writable from `code.py`. Use it for a high score, unlocked level, or settings that must survive power loss. The region is 4 KiB on the supported RP2040 builds; the class checks the actual available length when it is constructed.
NVM is a single region shared by every program on the device, so each game passes its own `key`. The key is hashed into the header and checked on load - if another game or stale data wrote the slot, `load()` returns your defaults instead of misreading foreign bytes.
You describe your data as a schema: an ordered dict of `name -> (struct format char, default)`. Common chars: `"B"` 0-255, `"H"` 0-65535, `"I"` 0 to 2^32-1; lowercase `b`/`h`/`i` are signed.
* `Save(key, schema, *, offset=0)` - create a store. `key` is your game’s name (str or bytes). `offset` is keyword-only; bump it only if two coexisting games must use different NVM regions. Raises `RuntimeError` if NVM is unavailable, or `ValueError` if the schema does not fit NVM.
* `load()` - return a dict of the stored values, or a fresh copy of the defaults if the slot is blank, corrupt, or written by a different game (key mismatch). Never raises on bad data.
* `save(values)` - persist a dict. Missing keys fall back to their schema default. Writes a checksum so a later `load()` can detect corruption.
* `reset()` - write the defaults back under this game’s key.
* `defaults()` - a fresh dict of just the default values, no NVM read.
```python
import picogame_save
# persist the best lap time (seconds) across reboots
store = picogame_save.Save("ghostrace", {"best_t": ("H", 0)})
best_t = store.load()["best_t"] # 0 = no record yet
# ...later, on a new best run:
if best_t == 0 or secs < best_t:
best_t = secs
store.save({"best_t": best_t}) # survives power-off
```
Gotchas
every `save()` erases and rewrites a flash sector, so flash wears out if you call it every frame - save only on meaningful events (game over, new high score, settings change). Keep the schema small; the whole blob (header + fields + checksum) must fit in NVM.
## picogame\_arena
[Section titled “picogame\_arena”](#picogame_arena)
A buffer arena reserves one contiguous block early and hands out slices of it later. Use it when several scenes or modes need large `Canvas` buffers at different times. MicroPython’s garbage collector does not compact the heap, so repeatedly creating and discarding large buffers can leave enough free memory in total but no sufficiently large contiguous block.
* `Arena(pixels)` - allocate the arena. Size is in pixels; it reserves `pixels * 2` bytes (RGB565). Do this early, before the heap fragments.
* `canvas(w, h, transparent=None)` - a `pg.Canvas` backed by the next slice (no per-canvas heap alloc); 16-bit aligned automatically. Returns the `Canvas`.
* `alloc(nbytes, align=1)` - a generic `memoryview` slice of `nbytes`: reuse it as a file/network read buffer, parse scratch, audio block, etc. `align` rounds the slice start up (use `align=2` for 16-bit data, `align=4` for word access). Raises `MemoryError` if the arena is full. Valid until the next `reset()`.
* `mark()` - return the current allocation offset. Keep it when entering a temporary mode or scene.
* `release(mark)` - rewind the arena to a previous mark and make every later slice available again. Marks should be released in reverse order. Objects backed by released slices must no longer be used.
* `reset()` - free all slices handed out so far. Call at the start of each scene that reuses the arena. Any `Canvas` from before the reset must no longer be drawn.
* `free()` - bytes still available in the arena.
```python
import picogame_arena
# one arena for the big canvases, grabbed once while the heap is contiguous;
# scenes that never run at the same time share the bytes (reset each).
ARENA = picogame_arena.Arena(320 * 80) # 320x80 px = 51 200 bytes
def big_canvas(w, h, transparent=None, first=False):
if first:
ARENA.reset() # reuse the arena for this scene
return ARENA.canvas(w, h, transparent=transparent)
```
Gotchas
this needs a firmware `Canvas` with the `buffer=` argument. The simulator currently allocates its own canvas storage, so the anti-fragmentation benefit applies on [hardware](/hardware/). After `reset()` or `release()`, do not use objects backed by the reclaimed slices; new allocations may overwrite their data.
## picogame\_stream
[Section titled “picogame\_stream”](#picogame_stream)
`StreamSheet` keeps one PAL8 animation frame in RAM and reads the requested frame from a file on flash. A 64x100 sheet with 11 frames therefore needs a 6,400-byte pixel buffer instead of 70,400 bytes for all frame pixels. The file must be frame-major, with each frame’s `w*h` bytes contiguous. Create it with `tools/pack_sheet.py`.
* `StreamSheet(pg, path, w, h, frames, palette, transparent=None)` - open `path`, allocate one frame buffer, build a `pg.Bitmap` (PAL8) over it, and load frame 0. `palette` is the color table for the PAL8 data.
* `.bitmap` - the single `pg.Bitmap` whose pixels get overwritten in place. Build your `pg.Sprite` from this.
* `use(i)` - load frame `i` (wrapped modulo `frames`) into the shared buffer and return the bitmap. Cached: re-reads from flash only when `i` actually changes.
* `close()` - close the underlying file.
```python
import picogame_stream
sheet = picogame_stream.StreamSheet(pg, "jill.bin", 64, 100, 11, PAL, transparent=0)
player = pg.Sprite(sheet.bitmap, x, y)
# ...each frame the animation advances:
sheet.use(frame_index) # stream that frame into the shared buffer
player.touch() # tell the scene to repaint it (pixels changed in place)
```
Gotchas
always call `sprite.touch()` after `use()`. The method overwrites bitmap pixels in place, which does not change a property tracked by the dirty-region renderer. Without `touch()`, a stationary sprite may keep showing its previous frame. The simulator repaints the full scene, so this mistake can appear only on hardware. See [/scene-format/](/scene-format/) for dirty-region repainting.
# Effects & feedback
> Screen shake, fades, tweens, cameras, raster effects, particles, and PAL8 palette changes.
These effects add visual feedback and movement without full-screen surfaces. Their memory costs differ: `Fade` draws through a `StripDraw` callback, `Sky` keeps a colour lookup table, `Scanlines` keeps one bitmap row, and palette helpers modify existing PAL8 palettes. See [/reference/](/reference/) for the signatures.
Reaching for feedback on a game event? This table routes you to the right effect; the sections below have the details.
| Event | Reach for |
| ------------------------- | --------------------------------------------------------------------------------------- |
| Small hit / took damage | sprite `flash` (1-3 frames) + a small `Shake` (`add(~0.15)`) |
| Enemy killed / big impact | `Particles` burst + a bigger `Shake` (`add(~0.6)`) + [hit-stop](#hit-stop-frame-freeze) |
| Pickup / score pop | a `Tween` pop (the blip is on the [audio page](/helpers/audio/)) |
| Screen / scene change | `Fade` |
| Menu / UI motion | `Tween` |
## picogame\_fx
[Section titled “picogame\_fx”](#picogame_fx)
Create these helpers for a `Scene` and update the time-based ones once per game frame. `Shake` and `InvertFlash` emphasize an impact, `Fade` handles transitions, `Tween` smooths a changing value, `Camera` follows the world, and `Sky` or `Scanlines` draw raster-style backgrounds and overlays.
`import picogame_fx as fx`
### `fx.Shake` - decaying screen shake
[Section titled “fx.Shake - decaying screen shake”](#fxshake---decaying-screen-shake)

`Shake` stores an intensity called trauma. Calling `add()` raises it; each `tick()` applies a random offset and reduces the stored value. Pass the normal camera offset to `tick()` so both effects use one `scene.set_view()` call.
* `Shake(scene, max_offset=6, decay=0.03, seed=0x9E37)` - `max_offset` is the peak pixel offset (about 6 suits 320x240; over 10 hides the action). `decay` is trauma lost per frame (about 0.03 reads as a “kick”, not a “rumble”).
* `.add(amount)` - add trauma in the 0..1 range, clamped to 1.0. About 0.6 for a hit or explosion, 0.15 for a small bump. Trauma is squared before use, so small events barely shake and big ones slam.
* `.tick(cam_x=0, cam_y=0)` - adds a decaying random offset on top of `(cam_x, cam_y)` and calls `scene.set_view` with the sum. Returns `True` while still shaking. Pass your camera offset here so shake and a moving camera don’t both call `set_view` and stomp each other.
```python
import picogame_fx as fx
shaker = fx.Shake(scene, max_offset=6)
# ...on impact:
shaker.add(0.8)
# ...every frame (no camera, so feed 0,0):
shaker.tick(0, 0)
```
Gotchas
`Shake` owns `scene.set_view` while it runs - if you also move a camera by hand, feed that offset into `tick(cam_x, cam_y)` rather than calling `set_view` separately. See [/hardware/](/hardware/) for the screen size you are tuning `max_offset` against.
### Hit-stop (frame freeze)
[Section titled “Hit-stop (frame freeze)”](#hit-stop-frame-freeze)
Freeze-framing on a big impact is a common juice technique, but there is **no engine primitive** for it - you skip N logic / `scene.refresh()` ticks yourself. Hold a `freeze` counter and, while it is positive, decrement and `continue` the loop (still calling `clock.tick()` so timing stays steady).
```python
freeze = 0
# ...on a big impact:
freeze = 4
# ...at the top of the game loop:
if freeze > 0:
freeze -= 1
clock.tick()
continue
```
### `fx.Fade` - dither screen fade / dim / flash
[Section titled “fx.Fade - dither screen fade / dim / flash”](#fxfade---dither-screen-fade--dim--flash)

A `StripDraw` overlay stipples a colour over a rectangle with ordered Bayer dithering. It keeps no pixel surface. At level 0 its drawing rectangle collapses to 0×0, so it adds no region to repaint.
* `Fade(scene, width, height, x=0, y=0, color=0, cell=8)` - covers the rect `(x, y, width, height)`; defaults cover the whole screen. A sub-rect dims just that area (a panel behind a dialog, a sidebar). `color=0` is black; `cell` is the dither block size. Added to the scene `fixed=True` so it ignores the camera.
* `.set(level)` - jump instantly to `level` (0 = clear .. 16 = solid). Use 16 to start opaque before a fade-in.
* `.to(target, speed=2.0)` - head toward `target` at `speed` levels per frame. Returns `self`.
* `.out(speed=2.0)` / `.into(speed=2.0)` - shortcuts for `to(16)` (to opaque) and `to(0)` (to clear).
* `.dim(level=8)` - jump to a partial hold, e.g. a 50% dim behind a menu. `.clear()` jumps to 0.
* `.pulse(level=12, speed=2.0)` - ramp up to `level` then automatically back to 0; the smooth full-screen flash. Keep `level` under 16 so it stays a see-through dither, never a solid wall.
* `.tick()` - step `level` toward `target` by `speed`. Returns `True` when the target is reached.
* `.is_done` (property) - `True` when `level == target`.
```python
import picogame_fx as fx
fader = fx.Fade(scene, W, H)
# ...trigger a fade to black:
fader.out(speed=2)
# ...each frame, fade back in once we hit black:
if fading and fader.tick():
fader.into(speed=2)
```
Gotchas
`level` runs from 0 to 16, not 0 to 255 or 0.0 to 1.0. A white `Fade` pulse works on every render backend. `InvertFlash` below avoids repainting but only works with a supported panel controller.
### `fx.Tween` - ease a scalar toward a target
[Section titled “fx.Tween - ease a scalar toward a target”](#fxtween---ease-a-scalar-toward-a-target)

A per-frame exponential ease-out for a single value: UI slides, pop-up scales, a number that should “catch up” smoothly. No keyframes or schedule.
* `Tween(value=0.0, speed=0.2)` - `speed` is the fraction of the remaining gap closed each frame (0..1).
* `.to(target, speed=None)` - set a new target (and optionally a new speed). Returns `self`.
* `.set(value)` - snap value and target to `value` immediately.
* `.tick()` - move value a `speed` fraction toward target and return the new value. Snaps exactly when within 0.01.
* `.is_done` (property) - `True` once value equals target.
```python
import picogame_fx as fx
y = fx.Tween(0)
y.to(100) # slide a panel down to y=100
# ...each frame:
panel.y = int(y.tick())
```
Gotchas
ease-out only, so it never overshoots or bounces. `tick()` returns the value - read its return rather than `.value` if you want the freshly-stepped number.
### `fx.Camera` - smoothed follow camera
[Section titled “fx.Camera - smoothed follow camera”](#fxcamera---smoothed-follow-camera)

Tracks a world point and produces the scene view offset, centred and optionally clamped to a world size. Use it when the level is bigger than the screen.
* `Camera(scene, w, h, lerp=0.18, world_w=0, world_h=0)` - `w`/`h` are the screen size; `lerp` is the follow smoothing per frame; `world_w`/`world_h` (if non-zero) clamp so the view never shows past the world edge.
* `.follow(tx, ty, snap=False)` - move the camera centre toward `(tx, ty)` by `lerp`, or jump there with `snap=True`. Returns `self`, so you can chain.
* `.apply()` - compute the offset and call `scene.set_view` directly. Allocation-free; returns `None`. Use when there is no shake.
* `.offset()` - compute and return the offset as an `(ox, oy)` tuple (allocates). Feed this into `Shake.tick(ox, oy)` to compose the two.
```python
import picogame_fx as fx
cam = fx.Camera(scene, W, 240, world_w=bounds_w)
# ...each frame:
cam.follow(player.x, 120).apply()
```
Gotchas
`apply()` and `Shake` both call `scene.set_view`, so don’t run both blind. To combine, take `ox, oy = cam.follow(...).offset()` and pass those into `shaker.tick(ox, oy)` so shake stacks on the camera. See [/scene-format/](/scene-format/) for what `set_view` does to the view.
### `fx.Sky` - vertical gradient background
[Section titled “fx.Sky - vertical gradient background”](#fxsky---vertical-gradient-background)
A per-scanline gradient drawn through `StripDraw`. It retains a lookup table of `h` wire-order colours, or `2 * h` bytes, and redraws the requested rows when its region is repainted. Add it before the gameplay layers.
* `Sky(scene, x, y, w, h, top, bottom)` - fills the rect, lerping each scanline from the `top` wire-RGB565 colour to `bottom`. Added `fixed=True`. Change `.top`/`.bottom` over time for a day-night cycle.
```python
import picogame as pg
import picogame_fx as fx
sky = fx.Sky(scene, 0, 0, W, HORIZON,
pg.rgb565(60, 120, 240), pg.rgb565(200, 230, 255))
```
Gotchas
it issues one `fill_rect` per visible scanline. Its CPU cost grows with the height of the repainted region.
### `fx.Scanlines` - CRT scanline overlay
[Section titled “fx.Scanlines - CRT scanline overlay”](#fxscanlines---crt-scanline-overlay)
Darkens every Nth row for a CRT or LCD-grid look. It retains one PAL8 row of `w` bytes plus a two-entry palette, then blits that row through `StripDraw`. Add it after gameplay layers so it remains visible.
* `Scanlines(scene, x, y, w, h, step=2, dark=pg.rgb565(0, 0, 0))` - `step=2` darkens every other line; `dark` is the overlay colour. Precomputes a 1px dither row and blits it once per darkened line (one blit instead of a per-pixel loop).
```python
import picogame_fx as fx
scanlines = fx.Scanlines(scene, 0, 0, W, H) # add LAST, on top of everything
```
Gotchas
order matters - add it after every gameplay layer or it gets painted over.
### `fx.InvertFlash` - controller inversion flash
[Section titled “fx.InvertFlash - controller inversion flash”](#fxinvertflash---controller-inversion-flash)

Flips a compatible SPI panel to its negative for a few frames using controller colour inversion (`pg.invert`). It does not repaint the scene or allocate a pixel buffer. Use it with ST7789/ST7735-class controllers; it is not available on framebuffer outputs such as Fruit Jam DVI. The simulator emulates the effect.
* `InvertFlash(display, frames=3, normal=None)` - `display` is e.g. `board.DISPLAY`; `frames` is the flash length. `normal` is the panel’s resting invert state. The PicoPad sends INVON in its init, so its resting state is `normal=None` (the default); pass `normal=False` only for a panel whose init does not invert.
* `.pulse(frames=None)` - flip away from the resting state now (optionally for a custom frame count).
* `.tick()` - count down and restore the resting state when the flash ends. Returns `True` while flashing. Call it after `scene.refresh()` so the INVON/INVOFF is the frame’s last bus op.
```python
import board
import picogame_fx as fx
flash = fx.InvertFlash(board.DISPLAY, frames=6)
# ...on hit:
flash.pulse()
# ...after scene.refresh():
flash.tick()
```
Gotchas
the resting inversion state must match the panel initialization. On PicoPad, leave `normal=None` so the helper uses the configured default. Do not construct this effect for a framebuffer display. See [/hardware/](/hardware/) for controllers that support INVON/INVOFF.
**Seizure safety:** for any full-screen flasher (`InvertFlash`, `Fade.pulse`, rapid sprite flash), avoid sustained flashing above \~3 Hz (at least 10 frames apart at 30 fps); keep full-screen inverts to 1-3 frames, one-shot.
## picogame.Particles
[Section titled “picogame.Particles”](#picogameparticles)

`pg.Particles` is a core engine layer for sparks, explosions, pickup bursts, and dust. It pre-allocates a fixed-capacity pool and does not create new particle objects during `emit()` or `tick()`.
* `pg.Particles(capacity, *, size=1, gravity=0.0, fade=False)` - a pool of up to `capacity` dots, each `size` px. `gravity` pulls them down per tick (0 = free drift); `fade=True` dims a dot as it ages. `size`/`gravity`/`fade` are keyword-only (pass them by name).
* `.emit(x, y, count, speed=1, life=30, color=0xFFFF)` - burst `count` dots from `(x, y)` with random velocity up to `speed` px/tick, each living `life` ticks.
* `.tick()` - age and move the live dots; call once per frame.
```python
import picogame as pg
ps = pg.Particles(180, size=2, gravity=0.0, fade=True)
scene.add(ps) # add once, like any layer
# ...on a hit / kill / pickup:
ps.emit(x, y, 16, 4, 24, pg.rgb565(255, 210, 120)) # 16 sparks, speed 4, 24-tick life
# ...every frame:
ps.tick()
```
Gotchas
emits past `capacity` are dropped, so size the pool for your busiest moment (a big burst plus lingering sparks). `fade=True` + a short `life` reads as a spark; `gravity > 0` + a longer `life` reads as debris falling. Keep the live-dot count modest on RP2040.
## picogame\_palette
[Section titled “picogame\_palette”](#picogame_palette)

PAL8 art can change colour without duplicating its pixel indices. `cycle` rotates a range of palette entries, `swap` copies another palette, and `fade` interpolates entries toward a target. Palette entries are wire-order RGB565 integers returned by `pg.rgb565()`.
`import picogame_palette as palette`
* `snapshot(palette)` - return an `array('H')` copy of a palette. Save the original once, before any fading or cycling, so you can fade relative to it or `restore` it.
* `restore(palette, base)` - copy `base` back into `palette` in place.
* `cycle(palette, lo, hi, step=1)` - rotate entries `[lo..hi]` inclusive by `step` (wraps), in place with no allocation, so it is safe to call every frame. Reserve a run of indices for flowing colours, paint your art with them, and they animate.
* `swap(dst_palette, src_palette)` - copy one palette over another (up to the shorter length). GBC-style recolour: keep one PAL8 bitmap and hand it a different palette per variant. Cheaper than a second bitmap.
* `fade(palette, base, t, target=0, skip=None)` - lerp every entry of `palette` from the saved `base` toward the `target` wire colour by `t` (0.0 = base .. 1.0 = target). `target=0` (black) fades out; a white target fades to white. `skip` leaves one index untouched (e.g. a transparent index).
```python
import picogame_palette as palette
# ...each frame, flow a reserved band of water colours:
palette.cycle(water_bmp.palette, 1, 6)
water.touch() # tell the renderer the palette changed
```
One blit slot on device
A sprite’s `flash`, `tint`, `dither`, and `shadow` effects share **one** blit slot on hardware — setting one clears the others (last-set-wins). The desktop simulator does **not** reproduce this; it shows them as independent. Combine them by sequencing frame-by-frame or using a separate effect layer; always confirm on hardware.
Recolour a sprite **brighter / to a new hue** — what `sprite.tint` can’t do (multiply only darkens). Keep one PAL8 bitmap and give it a warm palette (e.g. a green enemy → a hot amber “elite”):
```python
import array, picogame_palette as palette
WARM = array.array("H", [0, pg.rgb565(150, 40, 30), pg.rgb565(255, 130, 45),
pg.rgb565(120, 45, 25), pg.rgb565(255, 215, 130),
pg.rgb565(235, 90, 45), pg.rgb565(255, 245, 190)]) # one entry per index
palette.swap(enemy.bitmap.palette, WARM) # copy WARM into the bitmap's palette, in place
enemy.touch() # the renderer won't notice a palette change on its own
# Per-variant instead of in-place? Build a 2nd `pg.Bitmap(DATA, ..., palette=WARM)` and assign it to
# the sprite's `.bitmap` — see examples/picogame_picowing.py, which recolours the Kenney enemy this way.
```
Gotchas
the dirty-rect renderer reads the palette at blit time but does not notice a palette change on its own. After any `cycle`/`swap`/`fade`/`restore`, call `sprite.touch()` on the sprites using that bitmap (or `scene.invalidate()` / repaint the tilemap region) or nothing visibly changes. The cost is a repaint of the affected sprites that frame, so cycle a small band (a strip of water), not the whole screen. See [/memory/](/memory/) for why this beats holding a second recoloured bitmap.
# Input & controls
> Read the D-pad and buttons with picogame_input, and add USB gamepad or keyboard control on USB-host boards — with zero game-code changes.
`picogame_input.Buttons` is the one input object every game uses. It reads the board’s physical buttons into a **bitmask** with edge detection, so game code never re-does the wiring:
```python
import picogame_input as pi
btn = pi.Buttons()
# each frame:
btn.poll()
if btn.is_pressed(pi.LEFT): px -= 2
if btn.just_pressed(pi.A): jump()
if btn.repeat(pi.DOWN): menu_move(+1) # PICO-8 btnp auto-repeat, good for menus
```
## One virtual controller, mapped to real hardware
[Section titled “One virtual controller, mapped to real hardware”](#one-virtual-controller-mapped-to-real-hardware)
The engine gives every game the **same virtual controller** — a fixed set of logical buttons — and you **map your board’s real hardware onto it**. Games always code against the logical names (`pi.A`, `pi.LEFT`), never against pins, so the *same `code.py`* runs on a PicoPad, a breadboard Pico, a keypad matrix, or a USB gamepad; only the mapping changes.
The logical set:
* **Baseline (every game can rely on these):** the 4-way D-pad — `UP` `DOWN` `LEFT` `RIGHT` — plus `A` and `B`.
* **Optional extras (map them if your hardware has them):** `X` `Y`, shoulders `L1` `L2` `R1` `R2`, and `START` `SELECT`.
A board maps whatever subset it physically has; absent buttons simply never fire. Query availability with `btn.has(pi.L1)` so a game can hide a control the board lacks. The physical→logical mapping lives in `settings.toml` (below) — one file, no reflash — resolved per source: `PICOGAME_BUTTONS` for GPIO, `PICOGAME_MATRIX_*` for a key matrix, `PICOGAME_USBPAD` / `PICOGAME_USBKBD` for USB.
`Buttons` methods: `poll() -> mask`, `is_pressed(mask)`, `just_pressed(mask)`, `just_released(mask)`, `has(mask)`, `repeat(button, delay=15, interval=4)`, `clear()`. For input-leniency windows (coyote time, jump buffering) use `pi.Timer(frames)` with `.feed(cond)` / `.is_active` / `.consume()`.
## Input sources are OR’d together
[Section titled “Input sources are OR’d together”](#input-sources-are-ord-together)
```python
Buttons(profile=None, pull=None, prefer_keypad=True, debounce_s=0.02, matrix=None, usb=None, sources=None)
```
A `Buttons` object can read from **several sources at once** and ORs them into one mask, so a game reads them all identically:
* **On-board GPIO buttons** — the default; the pin map is a *profile* resolved from `settings.toml` (`PICOGAME_BUTTONS`) or a board default.
* **A scanned key matrix** (`matrix=`, or the `PICOGAME_MATRIX_*` settings keys) — for keypad-style boards.
* **USB HID gamepad / keyboard** (`usb=`, auto-attached on USB-host builds) — see below.
Because everything ORs, **you don’t branch on the source**: the same `btn.just_pressed(pi.A)` fires whether A came from a GPIO button, a matrix cell, a USB pad, or a keyboard key.
## Map your hardware in `settings.toml`
[Section titled “Map your hardware in settings.toml”](#map-your-hardware-in-settingstoml)
Each source has its own mapping key. Edit `settings.toml` on the `CIRCUITPY` drive and reset — no firmware rebuild. The [settings.toml reference](/custom-board/) lists every key and its exact format; the common cases:
**Direct GPIO buttons** — `NAME=GPpin` tokens. Map only what you have:
```toml
# a Pico wired D-pad + A/B, plus optional X/Y
PICOGAME_BUTTONS = "UP=GP2 DOWN=GP3 LEFT=GP4 RIGHT=GP5 A=GP6 B=GP7 X=GP8 Y=GP9"
PICOGAME_PULL = "up" # buttons to GND, pressed reads low (the default)
```
**A scanned key matrix** — give the row/column pins, then map matrix cells to logical buttons by `NAME=row,col`. picogame scans the grid and de-bounces it via the `keypad` module:
```toml
PICOGAME_MATRIX_ROWS = "GP0 GP1 GP2 GP3"
PICOGAME_MATRIX_COLS = "GP4 GP5 GP6 GP7"
PICOGAME_MATRIX_MAP = "UP=0,1 DOWN=2,1 LEFT=1,0 RIGHT=1,2 A=3,3 B=3,2 START=0,0 SELECT=0,3"
# PICOGAME_MATRIX_ANODES = "cols" # flip to "rows" if the diode direction is reversed
```
**USB gamepad / keyboard** — `PICOGAME_USBPAD` / `PICOGAME_USBKBD` (see the USB sections below).
A partial map merges over the source’s defaults, so you only name the buttons you’re changing. Unmapped logical buttons stay inactive (`btn.has(...)` reports them absent).
## USB gamepad (USB-host boards, e.g. Fruit Jam)
[Section titled “USB gamepad (USB-host boards, e.g. Fruit Jam)”](#usb-gamepad-usb-host-boards-eg-fruit-jam)
On a USB-host CircuitPython build, `Buttons()` **auto-attaches** a plugged-in USB HID gamepad — so a pad works with **zero game changes**. On boards without USB host (PicoPad, …) the driver is simply never loaded (no RAM cost).
* Default layout = the ubiquitous DragonRise `081f:e401` SNES-style pad.
* Remap any pad from `settings.toml` (no reflash): `PICOGAME_USBPAD = "A=5:0x20 B=5:0x40 X=5:0x10 Y=5:0x80 START=6:0x20 SELECT=6:0x10"` (`NAME=report-byte:bitmask`; a partial list merges over the defaults). Discover a new pad’s report bytes with `tools/usbpad_probe.py`, or run the interactive `tools/usbpad_calibrate.py` — it prompts you to press each button and prints the ready-to-paste `PICOGAME_USBPAD` / `PICOGAME_USBPAD_ID` line.
* Turn it off with `PICOGAME_USB = 0`; pin a specific device with `PICOGAME_USBPAD_ID = "vid:pid"`.
The driver is `picogame_usbpad.UsbPad`; you rarely touch it directly — `Buttons` attaches it for you.
## USB keyboard (USB-host boards)
[Section titled “USB keyboard (USB-host boards)”](#usb-keyboard-usb-host-boards)
The keyboard twin of the gamepad — also auto-attached, also OR’d in. Works with wired keyboards and 2.4 GHz-dongle wireless ones (not Bluetooth — CircuitPython has no BT host stack).
* Default layout: **arrows + WASD** → D-pad, **Z / Space** → A, **X** → B, **C** → X, **V** → Y, **Q** → L1, **E** → R1, **Enter** → START, **Esc** → SELECT.
* Remap from `settings.toml`: `PICOGAME_USBKBD = "A=0x2C B=0x1B START=0x28"` (`NAME=HID-keycode`, hex or decimal; merges over the defaults).
* Disable the keyboard only (keep the pad) with `PICOGAME_KBD = 0`.
* Some combo dongles present a boot-keyboard interface that stays silent while keystrokes flow on a sibling interface. Point the driver at the live channel: `PICOGAME_USBKBD_EP = "2:0x83"` (`interface:IN-endpoint`). Find the value by running `tools/usbkbd_probe.py` as `code.py` — it prints the exact line.
The driver is `picogame_usbkbd.UsbKbd`.
Set `PICOGAME_DEBUG = 1` when input doesn’t attach
It prints `[picogame] ...` reasons to the serial console (driver missing, device not found, wrong endpoint) instead of failing silently. Remove it once things work.
## Local multiplayer
[Section titled “Local multiplayer”](#local-multiplayer)
By default a `Buttons` merges every source (above). To give each player their own controller, build **one `Buttons` per player** and bind each to its own device with `sources=`:
```python
import picogame_input as pi
pads = pi.find_pads() # every connected USB gamepad, in bus order
p1 = pi.Buttons(sources=pads[0:1]) # player 1 = first pad
p2 = pi.Buttons(sources=pads[1:2]) # player 2 = second pad
# or mix devices — pi.Buttons(usb=False) is a player on the on-board buttons.
```
Each player is independent: poll and read them separately (`p1.just_pressed(pi.A)` / `p2.just_pressed(pi.A)`). `find_pads()` returns `[]` on a board with no USB host. Two identical pads come back in enumeration order — if players want them the other way round, they swap controllers (the engine tracks no per-pad identity). See the two-player pattern above.
See the [full `settings.toml` reference](/custom-board/) for every input key and its format.
# Math, random & collision
> Numeric helpers, reproducible random sequences, and the collision tests built into Sprite.
This page covers numeric helpers, a seedable random generator, and the collision methods on `Sprite`. Neither helper module requires engine setup. See [/reference/](/reference/) for the signatures.
## picogame\_math
[Section titled “picogame\_math”](#picogame_math)
`picogame_math` provides `clamp`, `lerp`, `approach`, `wrap`, 2D vector functions, and trigonometry expressed in turns. Functions ending in `_t` use the interval `[0,1)` for one full rotation, which is convenient for stored headings and aiming. The module also keeps the vector helpers formerly provided by `picogame_vec`.
API:
* `clamp(v, lo, hi)` - returns `v` pinned into `[lo, hi]`. The everyday helper for keeping a position on screen or HP in range.
* `mid(a, b, c)` - median of three; behaves like a clamp when the middle arg is the value.
* `lerp(a, b, t)` - linear blend `a + (b-a)*t`. With a small `t` each frame it gives a smooth follow/ease.
* `inv_lerp(a, b, v)` - inverse of `lerp`: where `v` sits in `[a,b]` as `0..1`. Returns `0.0` if `a == b`.
* `remap(v, a, b, c, d)` - map `v` from range `[a,b]` onto `[c,d]`. Safe when `a == b` (maps to `c`).
* `sgn(x)` - sign as `-1`, `0`, or `1`.
* `approach(v, target, step)` - move `v` toward `target` by at most `step`, never overshooting. Great for friction/acceleration toward a value.
* `wrap(v, lo, hi)` - wrap `v` into the half-open range `[lo, hi)`. Degenerate or inverted ranges return `lo` (no division by zero, never out of range).
* `sin_t(turns)` / `cos_t(turns)` - sine/cosine of an angle in TURNS (`1.0` = full circle). Positive is clockwise on a y-down screen.
* `atan2_t(dy, dx)` - angle of vector `(dx, dy)` in turns, normalized to `0..1`. Use for aiming.
* `length(dx, dy)` - magnitude of a vector.
* `distance(x1, y1, x2, y2)` - distance between two points.
* `normalize(dx, dy)` - unit vector; returns `(0.0, 0.0)` for a zero-length input.
* `angle_rad(dx, dy)` - angle in RADIANS (raw `atan2`); `from_angle_rad(a, mag=1.0)` - vector of length `mag` at radian angle `a`.
* `TAU` - the constant `2*pi`, used internally by the `_t` trig.
Example (rotate a ship and thrust along its nose, as in asteroids):
```python
import picogame_math as m
ang = 0.0 # heading, in turns 0..1
TURN = 0.01
ang = (ang + TURN) % 1.0 # rotate right
dx, dy = m.sin_t(ang), -m.cos_t(ang) # nose-up direction
vx += dx * 0.25
vy += dy * 0.25
sp = m.length(vx, vy) # current speed
x = m.clamp(x, 8, W - 8) # keep on screen
```
Gotchas
* The `_t` trig is clockwise on the y-down screen, and “up” is `-cos_t` - flip the sign of the y component, like the asteroids ship above, or your sprite turns the wrong way.
* `wrap` is half-open: `wrap(hi, lo, hi)` returns `lo`, not `hi`. For an inverted or zero-width range it just returns `lo` rather than raising.
* Use turns (`sin_t`/`cos_t`/`atan2_t`) and radians (`angle_rad`/`from_angle_rad`) consistently; do not mix the two for the same angle.
## picogame\_rand
[Section titled “picogame\_rand”](#picogame_rand)
This seedable xorshift32 generator supports weighted choices, in-place shuffling, and a shuffle bag. Use a fixed seed for reproducible replays, ghost data, tests, or level layouts. `Rand()` without an argument seeds itself from the clock. `Bag` emits each item once per shuffled cycle, which prevents long streaks caused by independent choices.
`Rand(seed=None)`:
* `Rand(1234)` seeds from an int (reproducible); `Rand()` seeds from the clock. `seed=0` is remapped internally (xorshift cannot start at zero).
* `seed(s)` - reseed an existing generator.
* `below(n)` - integer in `0 .. n-1`. Returns `0` if `n <= 0`.
* `randint(a, b)` - integer in `a .. b` inclusive. Raises `ValueError` if `b < a`.
* `random()` - float in `[0.0, 1.0)`.
* `chance(p)` - `True` with probability `p` (where `p` is `0..1`).
* `choice(seq)` - one element of `seq`. Raises `ValueError` on an empty sequence.
* `shuffle(lst)` - Fisher-Yates shuffle of `lst`, in place (returns `None`).
* `weighted(weights)` - return an index `0..len-1` picked proportionally to `weights`. Raises `ValueError` if the total is `<= 0`. No streak control (independent draws).
`Bag(items, rng)`:
* A shuffle-bag / “7-bag”: yields every item once per cycle in shuffled order, so no long streaks or droughts. Fairer than independent picks for spawns and pieces.
* `next()` - return the next item, reshuffling automatically at the start of each cycle. Raises `ValueError` at construction if `items` is empty.
Example (one seeded RNG for the whole game, plus an anti-streak spawn bag):
```python
import picogame_rand
rng = picogame_rand.Rand(0x1234) # seeded -> reproducible
x = rng.randint(40, W - 40) # 40 .. W-40 inclusive
if rng.chance(0.25):
spawn_powerup(x)
kind = rng.weighted([5, 3, 1]) # index 0 most likely
bag = picogame_rand.Bag([0, 1, 2, 3, 4, 5, 6], rng)
piece = bag.next() # every value once per cycle
```
Gotchas
* Reach for `picogame_rand` (or plain `random.randint`) instead of `random.shuffle`, `random.sample`, or `random.choices`: those exist only in desktop CPython, so a game using them runs in the [simulator](/simulator/) but crashes with `AttributeError: module 'random' has no attribute 'shuffle'` on the board and in the browser playground (both are MicroPython). `Rand.shuffle` is a drop-in replacement.
* `shuffle` mutates the list in place and returns `None` - do not write `lst = rng.shuffle(lst)`.
* `Bag` takes ownership of a copy of `items`; `next()` reshuffles that internal list, so the order you passed in is not preserved.
* `weighted` returns an index, not the value - index into your own list with it.
* Same seed plus same call sequence equals same results: that is the point, but it also means an accidentally shared `rng` couples two systems’ randomness.
## Sprite collision
[Section titled “Sprite collision”](#sprite-collision)
Every `Sprite` has box and radius collision methods. They use the drawn bounds after anchor, scale, and rotation without allocating a result object. Use `overlaps()` for sprite or rectangular intersections and `near()` for a circular distance check.
API (methods on any `Sprite`):
* `a.overlaps(b, inset=0)` - inclusive AABB box overlap (they collide the moment they touch). `b` may be another `Sprite`, a point `(x, y)`, or a rect `(x1, y1, x2, y2)` - e.g. a trigger zone, or `(0, 0, W, H)` to test whether the sprite is still on screen. `inset` shrinks THIS sprite’s box by N px on each side, for a hitbox smaller than the art. Returns a bool.
* `a.near(b, r)` - circular test: is this sprite’s centre within `r` px of `b`’s centre? Uses squared distance, so no `sqrt`. `b` may be a `Sprite` or a point `(x, y)`.
Boxes and centres come from the sprite’s drawn rectangle, so both methods are anchor/scale/rotation aware - correct for any anchor (unlike a hand-rolled `x`-based test). See [/scene-format/](/scene-format/) for anchors.
For arbitrary boxes with no sprite (two computed regions), drop to the raw primitive `pg.collide(x1, y1, x2, y2, ax1, ay1[, ax2, ay2])`. For tile-grid walls/terrain, probe `picogame_tiles` flags rather than overlapping every tile.
Example (bullets vs rocks circular, player vs enemy boxed - from asteroids and a platformer):
```python
for b in bullets:
for r in rocks:
if b.visible and b.near(r, 18): # circular, no sqrt
kill(b, r)
if player.overlaps(enemy): # box overlap, anchor-correct
take_damage()
if not ship.overlaps((0, 0, W, H)): # off-screen? despawn it
pool.free(ship)
```
Gotchas
* These read live sprite positions. If you track motion in floats (`data["x"]`), call `sprite.move(int(x), int(y))` before testing, or the collision lags a frame behind the visible sprite.
* `overlaps` is a box test, not pixel-perfect - use `inset` (often a few px) so art corners do not register false hits.
* Guard with `if sprite.visible` (and any “alive” flag) yourself - the methods test geometry only, not whether an entity is active. See [/memory/](/memory/) on pooling freed entities.
# Pseudo-3D (Mode-7 & raycasting)
> Fake-3D ground planes and wall corridors drawn into a buffer-less StripDraw view - a perspective floor via the C Canvas.mode7 primitive, and a Python DDA raycaster.
Two ways to get a 3D-looking world out of a 2D engine, both rendered into a **buffer-less `StripDraw` view** so they cost **zero retained RAM**. `picogame_mode7` gives you a receding **ground plane** (a racer track, a flying-carpet floor); `picogame_ray` gives you **walls and corridors** (a dungeon, a maze). See [/reference/](/reference/) for the signatures.
| You want | Reach for | How it draws |
| -------------------------------------------- | ----------------------------------------------------- | ------------------------------------ |
| A ground / floor that recedes to the horizon | `picogame_mode7.Camera` (drives the C `Canvas.mode7`) | C primitive, per-scanline - fast |
| Walls / a first-person corridor | `picogame_ray.Raycaster` | native DDA caster + temporal repaint |
Both draw into the below-horizon rows and leave the sky to you; you fill the rows above the horizon yourself (a flat colour, a gradient, or [`fx.Sky`](/helpers/effects/)).
## picogame\_mode7
[Section titled “picogame\_mode7”](#picogame_mode7)

A **Mode-7 perspective floor**: each screen row below the horizon samples one distance into a texture, so a flat top-down image reads as a ground plane stretching to the horizon. All the maths lives in this Python helper; the per-scanline fill is the C engine primitive `Canvas.mode7`, so it is cheap.
`import picogame_mode7 as m7`
### `m7.Camera` - perspective ground plane
[Section titled “m7.Camera - perspective ground plane”](#m7camera---perspective-ground-plane)
* `Camera(fov=0.66)` - holds the field of view (higher = wider, more fish-eye). Reuse one camera; pass the pose to `draw()` each frame.
* `.draw(canvas, texture, x, y, angle, horizon, height, y_off=0)` - fill `canvas` (a `Canvas` **or** a `StripDraw` view) below `horizon` with a receding view of `texture`. `x`/`y` are the camera position in **world (tile) units**, `angle` is the heading in radians, `horizon` is the screen row of the horizon line, and `height` is how high the camera sits (bigger = the ground recedes slower, so you see further). In a `StripDraw` callback pass `y_off=vy` so the perspective divide uses the absolute screen row.
`texture` must have **power-of-2 width and height**, and **one world unit = one full texture tile**. A texture that tiles seamlessly (grass, a road with rumble stripes) can use a large `height` and wrap forever; a single non-tiling image (one closed circuit) needs a small `height` or the far distance repeats it.
```python
import picogame as pg
import picogame_mode7 as m7
cam = m7.Camera(fov=0.9)
def ground(view, vx, vy, vw, vh):
for r in range(vh): # sky: fill rows above the horizon yourself
if vy + r < HORIZON:
view.fill_rect(0, r, vw, 1, SKY)
cam.draw(view, TRACK, car.x, car.y, car.heading, HORIZON, 5.0, y_off=vy)
scene.add(pg.StripDraw(ground, 0, 0, W, H)) # 0 retained bytes
# ...each frame: move car.x/y/heading, then scene.refresh()
```
Gotchas
Draw into a **`StripDraw` view**, not a full-screen `Canvas` - a 320×240 `Canvas` is \~150 KB and won’t fit on RP2040, while a `StripDraw` view is 0 retained RAM. Always pass `y_off=vy` in the callback or the horizon lands in the wrong place per strip. The texture dims must be powers of two. For the lowest-level control you can call `Canvas.mode7(...)` directly (10 fixed-point args); the `Camera` helper just computes them from a friendly pose.
## picogame\_ray
[Section titled “picogame\_ray”](#picogame_ray)

A **Wolfenstein-style raycaster**: one DDA ray per screen column finds the nearest wall, and each column is drawn as a distance-shaded vertical bar. The per-column DDA is the native engine caster `pg.raycast` (integer 16.16 C on device, a Python version in the sim); the lib does the trig, paint and dirty-band bookkeeping, and the walls are solid `fill_rect` columns into a `StripDraw` view.
`import picogame_ray`
### `picogame_ray.Raycaster` - first-person wall caster
[Section titled “picogame\_ray.Raycaster - first-person wall caster”](#picogame_rayraycaster---first-person-wall-caster)
* `Raycaster(world, wall_colors, sky, floor, fov=0.66, stride=2)` - `world` is a list of equal-length strings (`'0'` = empty, `'1'`..`'9'` = wall types); `wall_colors` maps each wall type to a `(face_colour, side_colour)` pair (the side colour a touch darker = a free depth cue); `sky`/`floor` are wire-RGB565 backgrounds. `stride` casts one ray per N columns - the **perf/quality knob** (see below).
* `.cast(px, py, ang, sw, sh)` - cast the rays for camera position `(px, py)` and heading `ang`, caching each column’s wall span. Call once per frame **before** `scene.refresh()`.
* `.draw(view, vx, vy, vw, vh)` - the `StripDraw` callback: paints the sky/floor bands and the wall columns. Adjacent identical columns are merged into one `fill_rect`.
* `.solid(x, y)` - is the map cell at integer `(x, y)` a wall? Use it for movement collision (out of bounds counts as a wall).
* `.attach(stripdraw)` - opt into **temporal rendering**: pass the `StripDraw` (created `always_dirty=False`) that draws this raycaster, and `cast()` invalidates only the column band that changed since the previous frame (a still camera repaints nothing). Big win when standing / moving slowly.
* `.zbuf` - after `cast()`, each column’s wall distance (16.16 fixed-point; the depth buffer `project_sprite` tests against).
* `.project_sprite(sx, sy, margin=0.2)` - project a world-space point `(sx, sy)` onto the screen for the last `cast()`. Returns `(screen_x, size, depth)`, or `None` if the point is behind the camera or hidden by a nearer wall. `size` is the on-screen height in px at the wall scale - set `sprite.scale = size / bitmap_height`; sort your sprites by `depth` far-to-near so nearer ones draw on top. `margin` is z-test slack so a sprite flush against a wall is not culled.
```python
import picogame as pg
import picogame_ray
MAP = ["1111111111", "1000000001", "1011100201", "1000000001", "1111111111"]
WALLS = {1: (pg.rgb565(150, 150, 160), pg.rgb565(95, 95, 110)),
2: (pg.rgb565(170, 90, 60), pg.rgb565(110, 55, 35))}
rc = picogame_ray.Raycaster(MAP, WALLS, pg.rgb565(30, 30, 48), pg.rgb565(40, 34, 30), stride=2)
scene.add(pg.StripDraw(rc.draw, 0, 0, W, H))
# ...each frame:
rc.cast(px, py, ang, W, H) # cast, then paint
scene.refresh()
# ...to move without walking through walls:
if not rc.solid(int(nx), int(py)):
px = nx
```
### Enemies & pickups - billboard sprites
[Section titled “Enemies & pickups - billboard sprites”](#enemies--pickups---billboard-sprites)
The raycaster draws only walls; enemies and pickups are ordinary `Sprite`s scaled and placed each frame from `project_sprite`, depth-tested against the walls so they hide behind corners. Add the sprites to the Scene **after** the `StripDraw` so they layer on top, and reuse a [`picogame_pool.Pool`](/helpers/math/) rather than creating them per frame.
```python
GUYS = [Enemy(3.5, 2.5), Enemy(6.5, 3.5)] # world (tile) positions
for g in GUYS:
g.spr = pg.Sprite(DEMON_BMP, -40, -40) # DEMON_BMP is 8 px tall
g.spr.anchor = (0.5, 0.5)
scene.add(g.spr) # AFTER the StripDraw -> on top of walls
def frame():
rc.cast(px, py, ang, W, H) # cast walls (fills rc.zbuf)
GUYS.sort(key=lambda g: -((g.x - px) ** 2 + (g.y - py) ** 2)) # far-to-near
for g in GUYS:
p = rc.project_sprite(g.x, g.y)
if p:
sx, size, _ = p
g.spr.move(sx, HORIZON) # centre on the horizon row
g.spr.scale = size / 8.0 # bitmap is 8 px tall
g.spr.visible = True
else:
g.spr.visible = False # off-screen or behind a wall
scene.refresh()
```
Gotchas
The per-column DDA is the **native `pg.raycast` caster** (C on device, integer 16.16 - no FPU; a Python version in the desktop sim), so a full-screen raycaster runs about **22-30 fps** on RP2040. Two Python-side levers help further: **temporal rendering** - create the `StripDraw` with `always_dirty=False` and call `rc.attach(sd)`; `cast()` then repaints only the column band that changed since the last frame, and a still camera re-casts nothing (pose-cache), so standing / moving slowly is \~30 fps (great for grid-step dungeon crawlers). And **`stride`** (1 = sharpest walls; 3 a good RP2040 balance; 6 fastest) trades crispness for speed; a larger `picogame_game.setup(strip_h=…)` also cuts the repaint. Occasional single-column “teeth” show at grazing angles (inherent to DDA). `project_sprite` depth-tests at the sprite’s **centre column**, so a billboard is shown or hidden as a whole - fine for one sprite, but it is not clipped half-behind a wall edge.
# Text & UI
> Bitmap text, HUD labels, dialog boxes, cursor menus, and editable options.
These modules render bitmap text and provide HUD, dialog, menu, grid-cursor, and options controls. See the [reference](/reference/) for signatures and the tutorials for complete examples.
## picogame\_font
[Section titled “picogame\_font”](#picogame_font)
This module renders a `fontio` font, commonly `terminalio.FONT`, into a PAL8 `picogame.Bitmap`. Use it for text that needs to become a sprite or an immediate label.
If you just want a score in a corner, `Label` is the simplest choice; the fuller widget picture (scene layers vs. immediate widgets) is explained below under [picogame\_ui](#picogame_ui).
* `render_text(pg, font, text, fg, bg=None)` - composes `text` into a `PAL8` bitmap and returns the tuple `(bmp, w, h)` (bitmap plus pixel size). `fg`/`bg` are wire colours from `pg.rgb565(...)`. `bg=None` leaves the background transparent (palette index 0); an opaque `bg` means a redraw fully overwrites the old text, so HUD updates need no separate clear.
* `render_text_pal(pg, font, text, fg, bg=None)` - same as above but returns `(bmp, w, h, palette)`. Keep the `palette` (an `array('H')`) and mutate `palette[1]` (the fg colour) for a live colour shimmer without rebuilding the bitmap - the C `Bitmap` reads the same buffer.
* `Label(pg, font, x, y, fg, bg)` - a positioned label drawn immediately (good for a HUD over a screen you render yourself).
* `.set(text)` - re-renders only if the text changed; returns `True` if it did, `False` if skipped. Coerces non-strings via `str()`.
* `.move(x, y)` - repositions and forces a re-render at the new spot on the next `set`/`draw`.
* `.draw(display, buffer)` - repaints just the label’s rectangle via `pg.render` (a single present).
* `.w`, `.h` - pixel size of the last rendered text.
```python
import picogame_font, terminalio
hud = picogame_font.Label(pg, terminalio.FONT, 4, 4,
pg.rgb565(255, 255, 255), BG)
shown_score = -1 # shadow int: last value the label shows
# each frame, after you draw the screen:
if score != shown_score: # only format when the number changes
shown_score = score
hud.set("SCORE %06d" % score)
hud.draw(board.DISPLAY, bufA) # repaints just its rect
```

Gotchas
after changing `bmp.palette` or the array returned by `render_text_pal()`, the new colour appears on the next repaint. Use `picogame_ui.SceneLabel` over a live scene; an immediate `Label` is not tracked by `scene.refresh()`.
### Extra glyphs: `ExtraFont`
[Section titled “Extra glyphs: ExtraFont”](#extra-glyphs-extrafont)
`terminalio.FONT` is ASCII only. `picogame_font.ExtraFont` extends it with glyphs from one or more small BDF files, looked up as **fallbacks** — the built-in font first, then each BDF in order, so extra files only ever *add* glyphs and blend seamlessly with normal text. Two subsets ship in `lib/fonts/` (cut from CircuitPython’s own Terminus build, the same one `terminalio.FONT` comes from):
* **`picogame_cz.bdf`** — Czech diacritics (á č ď é ě í ň ó ř š ť ú ů ý ž and capitals).
* **`picogame_symbols.bdf`** — game symbols: arrows, hearts, block/shade fills, triangles, ✓/✗, ♥ ♫ ☼, ° ½ × ÷ and more:

```python
import picogame_font
font = picogame_font.ExtraFont("/lib/fonts/picogame_cz.bdf", "/lib/fonts/picogame_symbols.bdf")
bmp, w, h = picogame_font.render_text(pg, font, "Život 3 ♥♥♥ →", fg)
```
Pass the `ExtraFont` anywhere this module takes a font (`render_text`, `render_text_pal`, `Label`, and the `picogame_ui` widgets built on them). Glyphs load eagerly (\~20 B each; a 30-glyph set is under 1 KB).
**Limitation:** `ExtraFont` is a *Python-side* font for this module’s render paths only. The **native C text path** (`picogame.Canvas.text`, and therefore `picogame_ui.SceneLabel` / `HudBar` and a `StripDraw` `view.text`) validates a `fontio.BuiltinFont` in firmware and will **not** accept an `ExtraFont` — use the `render_text`/`Label` path when you need the extra glyphs. To make your own subset, `tools/make_bdf_subset.py`.
## picogame\_bitfont
[Section titled “picogame\_bitfont”](#picogame_bitfont)
This 8×8 bitmap font uses four shades and includes arrows, hearts, a star, a note, and box-drawing symbols in codes 0–31; codes 32 and above cover ASCII. Its outline can keep transparent text legible over the game world.
* `render_text(pg, text, fg=None, outline=None, mid=None, bg=None)` - renders `text` to a `PAL8` bitmap and returns `(bitmap, w, h)`. The four shades map to: `0 -> bg`/transparent, `1 -> outline`, `2 -> mid`, `3 -> fg`. Colour defaults: `fg` white, `outline` black, `mid` mid-grey; all are `rgb565` wire colours. Supports `\n` for multi-line. Pass `bg` for an opaque background (else index 0 is transparent).
* Symbol constants (1-char strings you concatenate into text): `ARROW_U`, `ARROW_D`, `ARROW_R`, `ARROW_L`, `BOXX`, `STAR`, `HEART`, `BALL`, `NOTE`.
* `GLYPH_W`, `GLYPH_H` - both `8`, the per-glyph cell size.
```python
import picogame_bitfont as bf
bmp, w, h = bf.render_text(pg, "LIVES " + bf.HEART * 3) # white, outlined, transparent
spr = pg.Sprite(bmp, x, y) # place anywhere
spr.scale = 2 # scale up for big text
```

Gotchas
the module returns a bitmap but does not provide a label class. Create and update its `Sprite` yourself. Each rendered string occupies its own PAL8 pixel buffer; see [memory](/memory/) when choosing between persistent text sprites and immediate text.
## picogame\_ui
[Section titled “picogame\_ui”](#picogame_ui)
Choose widgets by who owns the affected pixels:
* `SceneLabel`, `SceneBox`, and `SceneMenu` are fixed scene layers. `scene.refresh()` repaints them when needed, so use them inside a live or scrolling scene.
* `picogame_font.Label`, `TextBox`, and `Menu` draw immediately through `pg.render()`. Use them on a screen whose redraw you control. `HudBar` is also immediate, but belongs in a border reserved outside the scene.
Pick by what owns the pixels:
| Situation | Class |
| ----------------------------------------------------------------------- | ------------ |
| Static screen you redraw yourself (title, game-over, a HUD you repaint) | `Label` |
| A live, scrolling scene where the HUD must **not** scroll | `SceneLabel` |
| A reserved edge bar / status strip | `HudBar` |
| A transient dialog / message box over the live world | `SceneBox` |
| A dialog / battle / menu box on a static screen | `TextBox` |
`tick()`-based widgets return: a chosen index/cell on **A** (confirm), `ui.CANCEL` (`-2`) on **B** (back), or `None` while navigating. See [scene-format](/scene-format/) for the `fixed` layer and [hardware](/hardware/) for the buttons.
**`SceneLabel(scene, pg, font, x, y, fg, bg)`** - one line of text pinned over a scrolling world.
* `.set(text)` - re-renders only on change (swaps the sprite’s bitmap; dirty-rect handles old/new bounds). A blank/empty string hides the sprite, leaving no leftover bg patch.
* `.reserve(chars)` - reserve the label’s text buffer **now**, on the fresh startup heap, for up to `chars` characters, so a long line first shown *later* (e.g. a game-over banner) isn’t allocated on a fragmented heap (a `MemoryError`). Renders nothing visible. See [memory](/memory/).
**`SceneBox(scene, pg, font, x, y, w, h, fg, bg, nlines=3, key=None, border=None)`** - a multi-line dialog or status panel over a live scene. Its `StripDraw` callback composites the panel, border, and text without retaining a pixel surface. Pass `border` for a raised frame.
* `.show(lines)` - fill the panel and set text, then reveal. **Call once**, not per frame.
* `.hide()` - make the panel fully transparent and blank the rows.
* `.set_line(i, text)` - update one row in place (no Canvas/border redraw).

**`HudBar(pg, display, buffer, x, y, w, h, bg)`** - an immediate HUD drawn in a border reserved with `Scene(..., top=/bottom=)`. Call `draw()` only after its contents change. It stores label strings and icon references but no panel-sized pixel surface. `buffer` is the render buffer from setup on SPI targets and may be `None` on framebuffer targets.
* `.add(sprite)` - store an icon sprite (hearts, gauges) in the bar; returns it. It’s blitted at its own x/y on `draw()`.
* `.label(font, x, y, fg, text=" ")` - add a text field; returns a `_HudLabel` **handle** (not a sprite) which you update with `handle.set(text)` (the same `.set` verb as `SceneLabel`). The text is composited directly, no per-label sprite.
* `.draw()` - repaint the bar (flat bg + icons + text) and push it in one `pg.render`. Takes no arguments - the bar stores the display/buffer/geometry at construction. Call only on HUD changes.
```python
hud = ui.HudBar(pg, board.DISPLAY, bufA, 0, 0, W, BAR, pg.rgb565(10, 12, 24))
hud_l = hud.label(terminalio.FONT, 4, 3, INK, "SCORE 0 LIVES 3")
hud.draw()
# later, only when it changes:
hud_l.set("SCORE %d LIVES %d" % (score, lives))
hud.draw()
```

**`TextBox(pg, font, x, y, w, h, fg, bg, maxlines=6)`** - a screen-space multi-line box (filled rect + text rows) for static dialog/battle/menu screens.
* `.draw(display, buffer, lines, force=False)` - skips the repaint when `lines` are unchanged; when it does draw, the bg and every row go out in **one** `pg.render` (no blank-fill flash). Pass `force=True` after the screen under it was wiped (e.g. a full-screen `pg.render`).
* `.draw_line(display, buffer, i, text)` - repaint a single row in place, atomically.
**`Menu(pg, font, x, y, items, fg, bg, *, title=None, rows=None, width=None, paged=True)`** - an immediate cursor menu built on `TextBox`. UP and DOWN use auto-repeat. `rows=None` shows all items; a smaller value creates a scrolling window. With `paged=True`, crossing an edge moves by a page instead of one row. Arguments after `*` are keyword-only.
* `.tick(btn)` - returns the chosen index on A, `ui.CANCEL` on B, else `None`.
* `.draw(display, buffer, force=False)` - repaints only what changed (nothing / the 2 affected rows on a cursor move / the whole box on scroll). `force=True` repaints unconditionally after a wipe.
```python
bmenu = ui.Menu(pg, terminalio.FONT, 8, H - 72,
["ATTACK", "MAGIC", "HEAL", "FLEE"], WHITE, NAVY)
# each frame:
act = bmenu.tick(btn) # index on A, ui.CANCEL on B, else None
bmenu.draw(board.DISPLAY, bufA)
```
**`SceneMenu(scene, pg, font, x, y, items, fg, bg, title=None, rows=None, width=None, border=None, paged=True)`** - the same menu but built on `SceneBox`, for use **over a live scene** (battle actions, an in-game popup). Same navigation/paging as `Menu`.
* `.show(sel=0)` - reveal it (resets the cursor). The scene paints it from then on - no `draw()` call.
* `.hide()` - hide it.
* `.tick(btn)` - same return contract as `Menu`; repaints only the rows that changed.

**`GridCursor(cols, rows, tx=0, ty=0, wrap=False)`** - logic-only 2D cursor for a battlefield, tile inventory, or match-3. It owns movement (D-pad auto-repeat) and confirm/cancel; *you* draw the grid and a highlight at `(cursor.tx, cursor.ty)`. `wrap=True` wraps at edges, else it clamps.
* `.tick(btn)` - returns the `(tx, ty)` tuple on A, `ui.CANCEL` on B, else `None`.
* `.tx`, `.ty` - current cell.
* `.index` (property) - `ty * cols + tx`, handy for indexing a flat list.
```python
cur = ui.GridCursor(N, N) # N x N board
# each frame:
pick = cur.tick(btn) # (tx, ty) on A, ui.CANCEL on B, else None
# you draw the highlight yourself at (cur.tx, cur.ty)
```
Gotchas
an immediate `Menu` or `TextBox` is not part of the scene and can be overwritten by a later `scene.refresh()`. Use the corresponding `Scene*` widget over a live scene. The default menu width estimates about 11 pixels per character; pass `width=` when using a narrow font or long labels. Call `SceneBox.show()` when its contents change, not every frame.
## picogame\_options
[Section titled “picogame\_options”](#picogame_options)
`OptionsMenu` adds editable rows to a `SceneBox`. Use it for settings, shops, or selection screens that combine choices, numeric steps, toggles, and actions. It is a scene-layer widget, so `scene.refresh()` displays value changes.
* `OptionsMenu(scene, pg, font, x, y, w, rows, fg, bg, title=None, border=None)` - `rows` is a list of dicts, each with a `kind`:
* `choice` - `{"key", "label", "kind": "choice", "choices": [...]}`; cycles through the list. (A non-empty `choices` is required - it raises `ValueError` up front otherwise.)
* `stepper` - `{"key", "label", "kind": "stepper", "value", "min", "max"}`; also honours an optional `"step"` (default 1). Clamps to `min`/`max`.
* `toggle` - `{"key", "label", "kind": "toggle", "value": True/False}`.
* `action` - `{"key", "label", "kind": "action"}`; no value, just returns its key on A.
* `.show(sel=0)` - reveal and render (call once); `scene.refresh()` paints it after.
* `.hide()` - hide the panel.
* `.tick(btn)` - UP/DOWN move the cursor; LEFT/RIGHT change the selected row’s value live (steppers/choices auto-repeat while held; a toggle flips only on a fresh press, so it can’t oscillate). Returns the selected row’s `key` on **A**, `ui.CANCEL` on **B**, else `None`.
* `.value(key)` - read a row’s current value any time: a `choice` returns the chosen string, a `stepper` an int, a `toggle` a bool; `None` if no such key.
```python
import picogame_options as opt
menu = opt.OptionsMenu(scene, pg, font, 40, 40, 240, [
{"key": "diff", "label": "Difficulty", "kind": "choice", "choices": ["Easy", "Normal", "Hard"]},
{"key": "vol", "label": "Volume", "kind": "stepper", "value": 7, "min": 0, "max": 10},
{"key": "snd", "label": "Sound", "kind": "toggle", "value": True},
{"key": "done", "label": "Start", "kind": "action"},
], WHITE, NAVY, title="OPTIONS")
menu.show()
while True:
btn.poll()
k = menu.tick(btn)
if k == "done":
diff = menu.value("diff") # read live values on the action row
elif k == opt.CANCEL:
menu.hide()
scene.refresh() # paints the menu - no draw() call
```

Gotchas
it imports `CANCEL` from `picogame_ui`, so `opt.CANCEL` and `ui.CANCEL` are the same `-2`. Being a `SceneBox` widget, it needs a live `scene.refresh()` under it - it won’t paint on a static screen drawn purely with `pg.render`.
# The games menu (launcher)
> The launcher is the menu picogame boots into — pick a game with the D-pad. How it finds games, its controls, and how to add your own.
The launcher is picogame’s **games menu** — the official, and optional, way to keep several games on one board and switch between them. Copy games onto the drive and the launcher lists them; pick one with the D-pad and play, reset to come back.
It’s optional: the [quick-start packs](/start/quickstart/) boot into the launcher (their root `code.py` runs it), but a board whose `code.py` is a single game just runs that game — no menu. Use the launcher when you want more than one game on the same board.

## Controls
[Section titled “Controls”](#controls)
* **UP / DOWN** — move through the list.
* **A** — start the highlighted game.
* **RESET** (the board’s reset button) — return to the launcher from a game.
## How it finds games
[Section titled “How it finds games”](#how-it-finds-games)
By default the launcher scans the `demos/`, `games/` and `apps/` folders on the drive — a missing one is simply skipped. Each game is a **folder** with a `code.py` entry and its compiled `.mpy`:
```plaintext
games/
picotris/
code.py # 2-line stub that imports the game
picotris.mpy # the compiled game
metadata.json # title, icon, ... (optional)
icon.bmp # menu icon (optional)
```
A folder with a `code.py` but no metadata still shows up — the launcher falls back to the folder name and a letter placeholder icon.
A custom boot `code.py` can scan a different set of folders — just pass them: `picogame_launcher.run(roots=("mygames", "demos"))`.
## Add your own game
[Section titled “Add your own game”](#add-your-own-game)
1. Compile your game to `.mpy` (`mpy-cross yourgame.py`), or drop the `.py` in to compile on-device.
2. Make a folder in `apps/` — that’s where your own games go, next to the bundled `games/` and `demos/` — say `apps/yourgame/`, with a `code.py` stub that imports it:
```python
import yourgame
```
3. Optional — add a `metadata.json` beside it so it reads nicely in the menu, plus a small `icon.bmp` (a 48-pixel BMP works well):
```json
{
"title": "Your Game",
"author": "You",
"category": "arcade",
"players": 1,
"desc": "One line about it.",
"icon": "icon.bmp"
}
```
4. Reset the board — it appears in the menu.
## Two ways to describe a game
[Section titled “Two ways to describe a game”](#two-ways-to-describe-a-game)
A folder can carry a small manifest so it reads nicely in the menu. Two formats work:
* **`metadata.json`** — simple and **FruitJamOS-compatible** (`title` + `icon`, plus optional `author`, `category`, `players`, `desc`, `entry`). One game per folder — this is what the example above uses, so the same folder shows up in both menus.
* **`picogame.json`** — the richer form. Either a flat object (`title`, `entry`, `icon`, …) for one game, or an **`"apps"` list** to offer **several games from one folder** — handy for a collection or a game with variants:
```json
{
"apps": [
{ "title": "Game A", "entry": "a.py", "icon": "a.bmp" },
{ "title": "Game B", "entry": "b.py", "icon": "b.bmp" }
]
}
```
Each entry names its own `entry`, `title` and `icon` (and optional `author`/`category`/`players`/ `desc`). `picogame.json` is read before `metadata.json`.
# Managing RAM & avoiding heap fragmentation on CircuitPython
> A general CircuitPython / MicroPython memory note: how to fit a long-running program in RAM — know the budget, know what the big items cost, measure instead…
Seeing a `MemoryError`? Start here.
This page is the way out: budget your RAM, measure what’s eating it, and clear the error step by step — most fits are a few changes, not a rewrite. Build and debug in the [simulator](/simulator/) first; optimise later.
A general CircuitPython / MicroPython memory note: how to fit a long-running program in RAM — know the budget, know what the big items cost, measure instead of guessing — and how to avoid heap fragmentation. The technique at the end (a pre-allocated **arena**) is broadly reusable.
Applied the fix but nothing changed?
A stale `.mpy` in the board’s `/lib` **shadows** the matching `.py` at import, so a Python edit never runs — delete or rebuild it after any lib change (see [Run on hardware](/hardware/)).
MemoryError triage — start here
A `MemoryError` mid-game almost always means **no contiguous block big enough**, not “out of RAM”. Work down this list and stop at the first fix that sticks:
1. **Measure the largest *contiguous* block, not total free** — `micropython.mem_info(1)` or the [`largest_block()` helper below](#measure-dont-guess). That’s the number a big allocation has to fit into.
2. **Move HUD / text / panels off retained buffers** onto `StripDraw` (composite `Canvas.text` into a strip view) — see [Drawing paths](/concepts/drawing-paths/).
3. **Allocate big buffers once at boot; arena the churny ones** — [pre-allocated arena](#the-fix-for-churn-a-pre-allocated-arena).
4. **Pool per-frame spawns** instead of create/destroy churn — [`picogame_pool`](/helpers/building-scenes/).
5. **Freeze or stream large assets** rather than copying them onto the heap — [frozen vs file vs streaming](#where-assets-live-frozen-vs-file-in-ram-vs-streaming).
6. **`gc.collect()` at scene / level boundaries** to merge freed blocks.
7. **Still failing after a fix?** A stale `.mpy` may be **shadowing your `.py`** — see the note above.
## The budget, and what eats it
[Section titled “The budget, and what eats it”](#the-budget-and-what-eats-it)
The Python heap on a small board is the scarce resource, and **assets dominate it**. The recurring costs (bytes):
| Item | Cost | Notes |
| ---------------------------------- | -------------------------- | ----------------------------------------------------- |
| Retained `Canvas` surface | `w * h * 2` | a 320×80 panel = 51 200 B — the classic budget killer |
| PAL8 bitmap (sprites, backgrounds) | `w * h` (+ palette) | RGB565 bitmap costs double |
| Strip buffers (from `setup()`) | `2 × width × strip_h × 2` | e.g. 320×8 ≈ 10 KB for the pair |
| Sprite pool | \~sprite object × capacity | bitmaps are shared; the pool caps the worst case |
| Text label bitmap | text area × 1–2 B/px | or 0 retained via `Canvas.text` into a StripDraw view |
Totals differ per board and firmware build — don’t budget from a headline number; measure your own build (next section). As a rule of thumb, plan your biggest surfaces first: whatever the free heap is, one full-screen retained surface (`320*240*2` = 150 KB) will not fit on an RP2040-class board, and a couple of large panels can eat half of it.
## Where assets live: frozen vs file-in-RAM vs streaming
[Section titled “Where assets live: frozen vs file-in-RAM vs streaming”](#where-assets-live-frozen-vs-file-in-ram-vs-streaming)
A bitmap’s pixels have to be *somewhere*, and on a small heap the choice decides whether the game fits. The trap first: **CIRCUITPY is a FAT filesystem in flash, but it is NOT memory-mapped**, so importing a big `.mpy` or reading a file **copies it to the heap**. Only **frozen** data is read in place from flash, so “it’s on flash” ≠ “it’s free”. Three tiers:
| Approach | Heap cost | Swap art w/o reflash? | Best for |
| --------------------------------------------- | ------------------------------ | --------------------- | -------------------------------------------- |
| **Frozen** (`FROZEN_MPY_DIRS`) | \~0 (read in place from flash) | no | the bulk of resident art on a tight build |
| **File → RAM** (`readinto` once) | whole sheet `w*h*frames` | yes | sheets that fit + quick art iteration |
| **Streaming** (`picogame_stream.StreamSheet`) | \~one frame | yes | a few BIG sprites/backgrounds that won’t fit |
* **Frozen:** the art is a module with a `bytes` literal (`DATA = b'...'`) frozen into the firmware; `pg.Bitmap(DATA, ...)` references it in place. Changing the art means a reflash.
* **File → RAM:** ship a `.bin` on CIRCUITPY, `f.readinto(blob)` into ONE pre-sized `bytearray` at load (not `read()` — that fragments), slice the `memoryview` into Bitmaps.
* **Streaming:** `StreamSheet` keeps **one frame** in RAM; `use(i)` seeks + `readinto`s it on demand. A flash read per frame change — fine for a few big sprites at animation rates, wasteful for hundreds of tiny ones. The `.bin` must be frame-major (`tools/pack_sheet.py`).
Rule: **freeze what you always need, stream the few big things that don’t fit, keep small often-used sheets in RAM.** Mix all three in one game.
## Measure, don’t guess
[Section titled “Measure, don’t guess”](#measure-dont-guess)
* `gc.mem_free()` — total free heap. Take readings after `gc.collect()`, at fixed points (after imports, after `setup()`, in the game loop) so runs are comparable.
* **Largest contiguous block** — what a big allocation actually needs; there’s no built-in, binary-search it:
```python
import gc
def largest_block():
gc.collect()
lo, hi = 0, gc.mem_free()
while hi - lo > 256:
m = (lo + hi) // 2
try:
b = bytearray(m); del b; lo = m
except MemoryError:
hi = m
gc.collect()
return lo
```
* `import micropython; micropython.mem_info(1)` dumps the full heap map (what’s live and where) on firmware built with the diagnostics enabled — the tool for *why* it’s fragmented.
## Common optimizations (in the order to try them)
[Section titled “Common optimizations (in the order to try them)”](#common-optimizations-in-the-order-to-try-them)
1. **Don’t allocate the surface at all.** Text and HUD/panel content can composite straight into the render strip (`Canvas.text` into a `StripDraw` view; the `picogame_ui` widgets already work this way) — no retained pixel buffer, nothing on the heap to fragment. Which drawing path costs what, and when a retained `Canvas` *is* justified, is covered by [Drawing paths](/concepts/drawing-paths/).
2. **Store a full-screen background as a tilemap, not a bitmap.** A 320×240 PAL8 background is \~75 KB (RGB565 doubles it) — often too much on an RP2040. Cut the image into 8×8 tiles, keep only the *unique* tiles (a small tileset) plus a grid of indices, and draw it with a [`Tilemap`](/engine/) layer. Backgrounds repeat a lot, so the tileset + index grid is a fraction of the full bitmap. `png2picogame.py --dedup` merges identical (and rotated/mirrored) tiles for you; this is how the Fruit Jam MoonMiner port fits its full-screen scenes on an RP2040.
3. **Allocate big/long-lived buffers first, at boot**, and keep them; don’t free and re-create them per level/screen.
4. **Pre-size on-demand buffers to their WIDEST content at boot.** A text label created short and later set to a longer string re-allocates a bigger buffer *mid-run*; on a fragmented heap that’s a `MemoryError`. (Create HUD labels at their widest string; `SceneLabel.reserve(chars)` pre-sizes a banner shown only at game-over.)
5. **Object pools** for many small same-size objects (sprites, requests): reuse instead of alloc/free churn ([`picogame_pool`](/helpers/building-scenes/)).
6. **`recv_into` / `readinto`** (and other `*_into` APIs) read into an existing buffer instead of allocating a new bytes object each call.
7. **`gc.collect()` at natural boundaries** (end of a request/level) to merge adjacent free blocks; necessary but not sufficient (it can’t move live objects). `gc.threshold(n)` triggers GC earlier and keeps the heap tidier.
8. **Import everything up front, not lazily mid-run** — CircuitPython relocates import-time “long-lived” objects to the end of the heap on the first GC, keeping the low heap contiguous for working allocations.
## Fragmentation: total free is not the largest block
[Section titled “Fragmentation: total free is not the largest block”](#fragmentation-total-free-is-not-the-largest-block)
MicroPython/CircuitPython use a **non-moving** mark-and-sweep GC: it frees unreachable objects but **never moves live ones** (objects are referenced by raw pointers, and the C stack is scanned conservatively, so relocating them safely isn’t possible). Adjacent free blocks are merged on `gc.collect()`, but free space split by **live** objects stays split.
Consequence: after a program has allocated and freed many differently-sized buffers, the heap fragments. You can have **lots of total free RAM but no single contiguous block** big enough for the next large allocation:
```text
gc.mem_free() -> 90000 # 90 KB free...
bytearray(51200) # ...but this raises MemoryError (no 51 KB contiguous run)
```
`gc.mem_free()` reports total free; what a big allocation needs is the **largest contiguous free block**, which can be far smaller and which shrinks as a session fragments.
### When it bites
[Section titled “When it bites”](#when-it-bites)
Any pattern that **repeatedly allocates and frees a large buffer** during one run:
* **Networking / web:** reading an HTTP response, a JSON/MQTT payload, a TLS record, an image download, each request grabbing (and freeing) a fresh kilobyte-scale buffer.
* **File / stream processing:** reading a file in chunks, decompressing, parsing.
* **Audio:** per-clip sample buffers.
* **Graphics:** full-/large-screen drawing surfaces (e.g. a `displayio`/`picogame` Canvas) created per screen/level.
A single big buffer allocated **once at boot** and kept forever is fine (it gets a contiguous block while the heap is fresh). The problem is the **churn**.
## The fix for churn: a pre-allocated arena
[Section titled “The fix for churn: a pre-allocated arena”](#the-fix-for-churn-a-pre-allocated-arena)
Grab **one** big buffer **once, early** (when the heap is fresh and contiguous), then hand out slices of it for the large transient buffers. Those buffers then never alloc/free at runtime, so they can’t fragment anything. Reuse the same arena bytes for work that doesn’t overlap in time.
[`lib/picogame_arena.py`](/helpers/data/) is a tiny, general implementation (it’s in the picogame lib but the `Arena` class is not game-specific):
```python
import picogame_arena
AR = picogame_arena.Arena(4096) # 4096 bytes, grabbed up front (size = your max)
# --- networking example: reuse ONE response buffer instead of churning ---
buf = AR.alloc(4096) # a memoryview slice, no per-request alloc
while True:
AR.reset() # reuse the same bytes each request
n = sock.recv_into(buf) # read straight into the arena slice
process(buf[:n]) # parse without allocating another big buffer
```
```python
# --- graphics example (picogame): back big Canvases with arena memory ---
AR = picogame_arena.Arena(320 * 80) # pixels (x2 bytes); the biggest surface you need
AR.reset(); road = AR.canvas(320, 80) # one screen's big surface
# later, a different screen (not alive at the same time) reuses the same arena:
AR.reset(); shapes = AR.canvas(320, 44); btn = AR.canvas(160, 48)
```
API: `Arena(pixels)` (allocates `pixels*2` bytes), `alloc(nbytes) -> memoryview`, `canvas(w, h, transparent=None) -> Canvas` (needs the firmware `Canvas(..., buffer=)` arg), `reset()` (rewind the cursor, call at the start of each non-overlapping use), `free()`.
Key point: the arena makes the big allocation happen **once at startup** and the **slices never touch the heap**, so a session can run indefinitely without the “90 KB free but can’t allocate 51 KB” failure.
## Why not just defragment?
[Section titled “Why not just defragment?”](#why-not-just-defragment)
A true compacting/defragmenting GC isn’t feasible as an add-on: MicroPython objects reference each other by **raw pointers** (in Python, in C modules, in bytecode), and the GC scans the C stack **conservatively**, so it cannot safely move an object and rewrite every reference to it. That would require a different (precise / handle-based) object model in the VM core. The arena pattern is the practical answer: don’t let the big buffers churn in the first place.
See also the engine’s `Canvas(..., buffer=)` argument (back a drawing surface with [arena memory](/helpers/data/)) and the helper [`picogame_pool`](/helpers/building-scenes/) (object pools). Build and measure in the desktop simulator first; optimise only once you’ve measured where the RAM actually goes.
# Performance — keep your game fast
> A practical checklist for a steady frame rate on picogame — the game loop in a function, dirty-rect-friendly motion, zero-RAM layers, and no per-frame allocation.
picogame games run at a steady **30 FPS** when each frame fits in about **33 ms**. Most small games get there without effort — the rendering runs in native C, and the engine repaints only what moved. When a game does start to stutter, the fixes below are the ones that actually move the needle, in rough order of payoff. Every number here is measured on an RP2040.
## 1. Put the game loop in a function
[Section titled “1. Put the game loop in a function”](#1-put-the-game-loop-in-a-function)
This is the single biggest lever. In MicroPython, reading a **module-level global is a dictionary lookup** every time — and on the device that lookup is literally the hottest thing the interpreter does. Names inside a **function are locals**, which are far cheaper. So wrap your loop in a function and call it:
```python
def main():
x = W // 2 # locals — fast
while True:
buttons.poll()
if buttons.is_pressed(pi.RIGHT):
x += 2
ball.x = x
scene.refresh()
clock.tick()
main()
```
Measured on one real game, moving the loop into a function cut its Python time from **\~12 ms to \~8 ms per frame (−33 %)** — enough to turn a game that missed the cap into a solid 30 FPS.
## 2. Hoist lookups out of the hot loop
[Section titled “2. Hoist lookups out of the hot loop”](#2-hoist-lookups-out-of-the-hot-loop)
Same idea, one level down. If you touch `self.player.x` or `sprite.move` many times a frame, read it into a local once:
```python
def main():
px = ball.x # cache the attribute
poll = buttons.poll # cache the bound method
while True:
poll()
px += vx
ball.x = px
...
```
Repeated `obj.attr` and `obj.method()` each cost a lookup; a local costs almost nothing.
## 3. Move few things
[Section titled “3. Move few things”](#3-move-few-things)
picogame is **retained, dirty-rect** rendering: it redraws only the rectangles that changed, and on an SPI panel it only sends those pixels. A **static background with a small moving foreground** is the sweet spot. A change that touches most of the screen costs a full frame no matter what — so keep the moving-object count modest and let the background sit still. See [Drawing paths](/concepts/drawing-paths/).
## 4. Prefer zero-RAM layers
[Section titled “4. Prefer zero-RAM layers”](#4-prefer-zero-ram-layers)
* **StripDraw** draws full-screen effects (a road, a gradient sky, a scanline HUD) with **no pixel buffer** — zero extra RAM and nothing to keep in sync.
* **Tilemap** is **one byte per cell**, so a big scrolling world is cheap.
* Reach for a retained **Canvas** only for a small panel that rarely changes — a full-screen Canvas is a large buffer you usually don’t need. See [Fit it in RAM](/memory/).
## 5. Don’t allocate every frame
[Section titled “5. Don’t allocate every frame”](#5-dont-allocate-every-frame)
Creating objects in the loop feeds the garbage collector, and a `gc.collect()` can cost tens of milliseconds — a visible hitch. So:
* Spawn bullets, enemies and pickups from a fixed [`picogame_pool.Pool`](/helpers/data/), never `Sprite(...)` per frame.
* Reuse objects and buffers instead of rebuilding them; update a label’s text, don’t recreate it.
* Avoid building throwaway lists, tuples or strings inside the loop.
## 6. Ship `.mpy`, not big `.py`
[Section titled “6. Ship .mpy, not big .py”](#6-ship-mpy-not-big-py)
Pre-compile your game with `mpy-cross` (or let the packs do it). Compiled bytecode starts faster and avoids the heap churn of compiling a large source file on the device — which can itself `MemoryError`. See [Run on hardware](/hardware/).
## Measure, don’t guess
[Section titled “Measure, don’t guess”](#measure-dont-guess)
Some “obvious” tweaks do nothing — bumping the dirty-rectangle limit, for instance, was measured to make no difference, because a well-built scene isn’t rect-bound. Before optimising, find out where the time actually goes:
* In the **[desktop simulator](/simulator/)**, `python3 sim/run.py yourgame.py --profile` prints per- function call counts and per-frame allocation.
* On hardware, watch the frame time with an FPS readout (`picogame_debug`) and change one thing at a time.
Optimise the loop that the profile says is hot — not the one you guessed.
# Playground
> Try picogame in your browser — write Python and run it live, no install.
Write Python and run it **live in the browser** — the same `picogame` API as on the device, no install.
Pick an example from the dropdown (start with **first-game**, the companion to [Your first game](/start/first-game/)), edit the code, and press **Run**.
Audio here
`tone()` beeps and the `picogame_sfx` kit **do** play here (via WebAudio — press a key first to unlock sound). Custom `picogame_synth` voices don’t — the browser has no synthio backend — so preview those with `tools/synth_preview.py` and confirm on hardware. (The desktop simulator, by contrast, *does* play `picogame_synth` through its pygame window — see [Audio](/helpers/audio/) for what plays where.)
Screen:
Arrows/WASD move · `F`/`Ctrl`=A · `G`/`Space`=B · `R`/`Q`=X · `T`/`E`=Y
booting… 0 fps
🎮 Load example: —
▶ Run🔗 Share⛶ Fullscreen
```
```
Type `pg.` or `Ctrl-Space` for hints. Run = save & restart.
| Keys | |
| --------------- | ------------ |
| Arrows / `WASD` | move (D-pad) |
| `F` / `Ctrl` | A |
| `G` / `Space` | B |
| `R` / `Q` | X |
| `T` / `E` | Y |
Type `pg.` (or `Ctrl-Space`) for API hints.
# picogame — quick reference
> A one-page cheat sheet of the engine's everyday API: the native picogame C module and the pure-Python picogame_* helper libraries in lib/.
Cheat sheet
Every signature in one place. For explanations see the [full engine API](/engine/); to learn the engine, start with the [tutorials](/tutorials/).
A one-page cheat sheet of the engine’s everyday API: the native `picogame` C module and the pure-Python `picogame_*` helper libraries in `lib/`. Signatures show parameter names and defaults; `*` marks keyword-only arguments. Colours are wire-order RGB565 ints (build them with `rgb565`). For longer explanations see the [engine guide](/engine/).
**See also:** [Fit it in RAM](/memory/) · [Drawing paths](/concepts/drawing-paths/) · [Performance](/performance/) · [Run on hardware](/hardware/) · [Coming from another engine](/concepts/coming-from/).
***
## Native module: `picogame` (`import picogame as pg`)
[Section titled “Native module: picogame (import picogame as pg)”](#native-module-picogame-import-picogame-as-pg)
### Constants & colour
[Section titled “Constants & colour”](#constants--colour)
* `RGB565`, `PAL8` — bitmap pixel formats.
* `API_LEVEL` — `int`; engine API generation, bumped when the Python-visible surface grows. Libraries check `getattr(pg, "API_LEVEL", 0) >= N` to diagnose a too-old firmware up front instead of failing later on a missing attribute.
* `RGB444_SUPPORTED` — `bool`; whether this board’s panel can drive 12-bit RGB444 (lets one game opt into `Display(rgb444=True)` only where it works).
* `rgb565(r, g, b) -> int` — wire-order colour from 8-bit channels.
* `collide(x1, y1, x2, y2, ax1, ay1, ax2, ay2) -> bool` — AABB overlap (8 args = box vs box) or point-in-box (6 args: `collide(x1, y1, x2, y2, px, py)`). Inclusive AABB, so boxes collide when they touch (pass sprite boxes as `(x, y, x+w, y+h)`; fires on contact).
### `Bitmap(data, width, height, *, format=RGB565, palette=None, frames=1, stride=0, transparent=None)`
[Section titled “Bitmap(data, width, height, \*, format=RGB565, palette=None, frames=1, stride=0, transparent=None)”](#bitmapdata-width-height--formatrgb565-palettenone-frames1-stride0-transparentnone)
An image atlas of equal-size frames (any size). `data` is a buffer; `palette` (array of wire colours) is required for `PAL8`. `transparent` = the index/colour skipped when blitting.
* Read-only props: `width`, `height`, `frames`, `format`, [`stride`](/concepts/glossary/) (pixels per source row; leave `0` for tightly-packed data, set it only for a sub-window of a larger image), `palette` (the PAL8 palette buffer or `None`), `transparent` (the transparent value or `None`).
### `Sprite(bitmap, x=0, y=0, *, frame=0, visible=True, flip_x=False, flip_y=False)`
[Section titled “Sprite(bitmap, x=0, y=0, \*, frame=0, visible=True, flip\_x=False, flip\_y=False)”](#spritebitmap-x0-y0--frame0-visibletrue-flip_xfalse-flip_yfalse)
A positioned, animatable instance of a Bitmap.
* Position/anim props: `x`, `y` (int px) · `fx`, `fy` (float sub-pixel) · `frame` · `visible` · `flip_x`, `flip_y` · `bitmap` (swap) · `data` (your payload).
* Transform props (nearest-neighbour, about the anchor):
* `scale` — float draw scale; `1.0` = native (fast path), `2.0` = double size, fractional allowed (e.g. a pulse).
* `angle` — rotation in degrees; `0` = none (fast path). Combines with `scale`.
* `transpose` — bool; swaps X/Y axes. On its own that is a **diagonal mirror**, not a rotation; combine with a flip for a crisp, shimmer-free quarter-turn. With `flip_x`/`flip_y` it reaches all 8 orientations. Fast path only (scale 1, angle 0); footprint swaps w/h. Recipes (screen y-down): **90° CW** = `transpose+flip_y` · **180°** = `flip_x+flip_y` · **270° CW** = `transpose+flip_x`.
* `anchor` = `(fx, fy)` — pivot as fractions of the bitmap (0..1): `(0.5, 0.5)` = centre, `(0.5, 1.0)` = bottom-centre. `x`/`y` and rotation are about this point.
* Blit-effect props (one at a time; setting one clears the others; cheap, no extra bitmaps):
* `shadow` — bool; opaque pixels darken the destination (drop-shadow / dim overlay).
* `flash` — wire-RGB565 colour (or `0`/`None` = off); opaque pixels drawn as that flat colour (hit-flash). Pulse 1–3 frames.
* `tint` — wire-RGB565 colour (or `0` = off); opaque pixels *multiplied* by it, colouring the sprite while **keeping its shading** (damage-red, freeze-blue, glow).
* `dither` — `0` (opaque) .. `16` (invisible); Bayer-stipple translucency, no alpha (ghosts, fog, fade-in/out).
* `move(x, y)` — set position. · `touch()` — mark dirty after an in-place bitmap/palette edit.
* `overlaps(other, inset=0) -> bool` · `near(other, r) -> bool` — native collision tests (see **Sprite collision** below).
### `Display(busdisplay, *, rgb444=False)`
[Section titled “Display(busdisplay, \*, rgb444=False)”](#displaybusdisplay--rgb444false)
Fast DMA backend wrapping a board’s `busdisplay` (FourWire SPI). Pass to `Scene`. `rgb444=True` drives the panel in 12-bit RGB444 (\~25% less SPI traffic) on panels that support it; gate with `RGB444_SUPPORTED`.
### `Scene(display, buffer_a, buffer_b, *, background=0, top=0, bottom=0, left=0, right=0)`
[Section titled “Scene(display, buffer\_a, buffer\_b, \*, background=0, top=0, bottom=0, left=0, right=0)”](#scenedisplay-buffer_a-buffer_b--background0-top0-bottom0-left0-right0)
Retained-mode scene with dirty-rectangle rendering; `buffer_a/b` are strip buffers.
* `add(item, *, fixed=False) -> item` — add a Sprite/Tilemap/Particles/Canvas/StripDraw (insertion order = bottom→top) and return it (so `spr = scene.add(Sprite(...))` works). `fixed=True` (keyword-only) pins it to the screen (ignores the camera) for HUD/dialog.
* `add_all(items)` — add several (bottom→top).
* `remove(item)` — unlink a previously added item (no ghost — next refresh repaints over it, like `invalidate()`); the item survives and can be `add()`ed again. `ValueError` if not in the scene.
* `set_view(ox, oy)` — camera offset (screen position of the scene origin); changing it repaints all.
* `view` — read-only `(ox, oy)` camera offset.
* `invalidate()` — force a full repaint next refresh.
* `refresh() -> list | None` — diff & repaint changed regions; returns the dirty rect `[x1,y1,x2,y2]` (reused) or None.
### `Tilemap(tileset, cols, rows)`
[Section titled “Tilemap(tileset, cols, rows)”](#tilemaptileset-cols-rows)
A grid of tile indices into a tileset Bitmap (each frame = one tile); a Scene layer.
* `tile(tx, ty, value=None, *, flip_x=False, flip_y=False, transpose=False) -> int` — get tile, or set it (with optional keyword-only per-cell orientation: `flip_x`/`flip_y`/`transpose` give all 8 orientations of a tile; pair with a deduplicated tileset, see `png2picogame.py --dedup`). Out-of-range ignored. The orientation plane is allocated lazily (RAM only if a map uses it).
* `fill(value)` — set every tile (clears orientation).
* `move(x, y)` — position the map.
* Read-only props: `x`, `y`, `cols`, `rows`.
### `Particles(capacity, *, size=1, gravity=0.0, fade=False)`
[Section titled “Particles(capacity, \*, size=1, gravity=0.0, fade=False)”](#particlescapacity--size1-gravity00-fadefalse)
A pooled particle layer (small moving dots) drawn as one Scene layer.
* `emit(x, y, count, speed=1, life=30, color=0xFFFF)` — burst `count` dots, random velocity ≤ `speed` px/tick, living `life` ticks.
* `tick()` — advance one step (move, gravity, ageing). Call each frame.
* `clear()` — remove all.
### `Canvas(width, height, *, transparent=None, buffer=None)`
[Section titled “Canvas(width, height, \*, transparent=None, buffer=None)”](#canvaswidth-height--transparentnone-buffernone)
A RAM RGB565 drawing surface composited as a Scene layer (`width*height*2` bytes). `transparent` makes it a shaped overlay; `buffer` backs it with external memory (e.g. an arena slice). For *animated full-frame* surfaces prefer `StripDraw` (no buffer).
* `clear(color)` · `pixel(x, y, color)` · `fill_rect(x, y, w, h, color)` · `rect(x, y, w, h, color)`
* `line(x0, y0, x1, y1, color)` · `circle(cx, cy, r, color)` · `fill_circle(cx, cy, r, color)` · `ring(cx, cy, r, thickness, color)`
* `triangle(x0,y0, x1,y1, x2,y2, color)` · `fill_triangle(...)` · `ellipse(cx, cy, rx, ry, color)` · `fill_ellipse(...)`
* `fill_round_rect(x, y, w, h, r, color)` · `frame3d(x, y, w, h, light, dark)` (beveled box) · `move(x, y)`
* `blit(bitmap, x, y, frame=0, flip_x=False, flip_y=False)` — stamp a bitmap frame into the surface (honours its transparent key; the retained way to bake an icon/portrait/rendered text into a panel).
* `text(x, y, s, fg, font, bg=None)` — composite a string in C, rasterizing each glyph of `font` (a `fontio.BuiltinFont`) on the fly: no Python glyph cache and no per-call Bitmap/Sprite. `bg=None` → transparent glyph background. ASCII/built-in font only. Works on a Canvas or a `StripDraw` view; the latter does not retain a separate text surface.
* `mode7(texture, horizon, y_off, z, rx0, ry0, rsx, rsy, cam_x, cam_y)` — fill the rows below `horizon` with a **Mode-7 perspective floor** of `texture` (power-of-2 dims; one world unit = one tile). 10 fixed-point (16.16) args — you normally let `picogame_mode7.Camera` compute them from a camera pose. Draws into a Canvas or a 0-RAM `StripDraw` view (pass `y_off` = the strip top).
* Read-only props: `x`, `y`, `width`, `height`.
### `StripDraw(callback, x=0, y=0, width=0, height=0, *, always_dirty=True)`
[Section titled “StripDraw(callback, x=0, y=0, width=0, height=0, \*, always\_dirty=True)”](#stripdrawcallback-x0-y0-width0-height0--always_dirtytrue)
Immediate-mode layer with **no pixel buffer**: each refresh it calls `callback(view, vx, vy, vw, vh)` once per render strip inside its rect. `view` is a Canvas pointing at the live strip (use Canvas primitives, incl. `view.text`); view-local `(0,0)` = screen `(vx, vy)`. In a scrolling scene add it `fixed`.
* `always_dirty=True` (default) repaints every frame → for animated/scanline content (pseudo-3D, gradients). `always_dirty=False` repaints only when invalidated or overlapped by another change → for static/on-change panels (it still renders once on first refresh).
* `invalidate()` — mark it dirty so the next refresh repaints it (the way to update an `always_dirty=False` panel when its content changes).
* Read/write props: `x`, `y`, `width`, `height` — move or resize the layer (after shrinking, call `scene.invalidate()`) · `always_dirty`.
### Low-level draw functions
[Section titled “Low-level draw functions”](#low-level-draw-functions)
Most games never call these (`picogame_game.setup` + `Scene` use them internally), but they are exposed for hand-built render loops.
* `render(display, sprites, buffer, x0, y0, x1, y1, *, background=0)` — render a sprite list into the region `[x0,x1) × [y0,y1)` and push it to `display`. `buffer` is a reusable strip buffer (≥ region-width × 2 bytes). **Mixing with a retained scene:** the scene doesn’t know `render()` changed the pixels — if the region overlaps the scene’s play rect, call `scene.invalidate()` after (or use `picogame_game.overlay`, which does both); HUD bands outside the play rect don’t need it.
* `invert(display, on)` — toggle the panel’s hardware colour inversion. Changes the panel’s inversion state without sending pixel data, so a brief invert makes a full-screen negative flash (a 1-bit “hit” look) with no redraw. See `picogame_fx.InvertFlash`.
### Procedural noise (coherent value noise, 0..1)
[Section titled “Procedural noise (coherent value noise, 0..1)”](#procedural-noise-coherent-value-noise-01)
* `value2d(x, y, *, seed=0) -> float` · `value1d(x, *, seed=0) -> float`
* `fbm2d(x, y, *, octaves=4, seed=0, lacunarity=2.0, gain=0.5) -> float` · `fbm1d(x, *, octaves=4, seed=0, lacunarity=2.0, gain=0.5) -> float` — fractal (summed octaves).
***
## Helper libraries (`lib/picogame_*.py`, pure Python)
[Section titled “Helper libraries (lib/picogame\_\*.py, pure Python)”](#helper-libraries-libpicogame_py-pure-python)
### `picogame_game` — one-call boot
[Section titled “picogame\_game — one-call boot”](#picogame_game--one-call-boot)
* `setup(display=None, strip_h=None, background=0, fast=True, top=0, bottom=0, left=0, right=0, rgb444=False) -> (scene, buffer_a, buffer_b)` — take over the display, build a Scene + two strip buffers. `top/bottom/left/right` reserve fixed HUD margins; `rgb444=True` opts into 12-bit colour on a supporting SPI panel, and `rgb444="auto"` enables it only where the board reports `picogame.RGB444_SUPPORTED`.
* `overlay(scene, display, items, buffer, x0, y0, x1, y1, *, background=0)` — immediate-draw `items` over a live scene (pause / menu / cutscene / banner) = `pg.render` + `scene.invalidate()`, so the next `refresh()` repaints the full frame instead of leaving overlay fragments.
* `open_framebuffer(width, height, color_depth=None) -> display` — set the resolution from inside a game on a framebuffer board (Fruit Jam DVI), e.g. `open_framebuffer(640, 480)`; a no-op that returns `board.DISPLAY` on a fixed SPI panel. Pass the result to `setup(display=…)`.
* `resolve_display(display=None) -> (display, is_framebuffer)` — normalise a display/framebuffer handle (used by the HUD / immediate-render helpers).
### `picogame_clock` — frame pacing
[Section titled “picogame\_clock — frame pacing”](#picogame_clock--frame-pacing)
* `Clock(fps=30, max_dt=0.1)` · `.set_fps(fps)` · `.tick() -> dt` (sleep to frame, return seconds) · `.tick_async()` (the same, for `asyncio` loops).
* `FixedStep(step_fps=60, max_steps=5)` · `.steps()` — generator yielding a constant dt per fixed step · `.step_count()`.
### `picogame_input` — buttons
[Section titled “picogame\_input — buttons”](#picogame_input--buttons)
* Masks: `UP DOWN LEFT RIGHT A B X Y L1 L2 R1 R2 START SELECT ALL` (a superset; each board maps the subset it has); profile `PICOPAD`.
* `Buttons(profile=None, pull=None, prefer_keypad=True, debounce_s=0.02, matrix=None, usb=None, sources=None)` · `.poll() -> mask` · `.is_pressed(mask=ALL)` · `.just_pressed(mask=ALL)` · `.just_released(mask=ALL)` · `.has(mask=ALL)` (is the mask present in the profile) · `.repeat(button, delay=15, interval=4)` — PICO-8 `btnp` auto-repeat (menus / grid move) · `.clear()` (drop held state).
* `matrix=` — a scanned key-matrix source (also configured board-wide via the `PICOGAME_MATRIX_*` settings keys); `usb=` — one or more extra button **sources** (USB pad/keyboard, below). `Buttons` ORs every source together, so a game reads them all with no code change.
* `Timer(frames)` — input-leniency window (coyote time / jump buffering): `.feed(condition)` (recharge while true, else decay) · `.charge()` · `.is_active` · `.consume()` (true once, then clears).
### `picogame_usbpad` — USB HID gamepad source (USB-host boards, e.g. Fruit Jam)
[Section titled “picogame\_usbpad — USB HID gamepad source (USB-host boards, e.g. Fruit Jam)”](#picogame_usbpad--usb-hid-gamepad-source-usb-host-boards-eg-fruit-jam)
* `UsbPad(buttons=None)` — a button **source** for `Buttons(usb=…)` (auto-attached by default on a USB-host build). Reads a USB HID gamepad and ORs it into the button mask, so a plugged-in pad works with **zero game code changes**. Needs a USB-host CircuitPython build (`usb.core`); a no-op on boards without it.
* Default map = the ubiquitous DragonRise `081f:e401` SNES-style pad; remap per pad from `settings.toml` (`PICOGAME_USBPAD`, no reflash — see [Custom board](/custom-board/)). Discover a new pad’s report bytes with `tools/usbpad_probe.py`.
* `.mapped` — mask of buttons this pad can report; `VERSION`, `MAPPED` module constants.
### `picogame_usbkbd` — USB HID keyboard source (USB-host boards)
[Section titled “picogame\_usbkbd — USB HID keyboard source (USB-host boards)”](#picogame_usbkbd--usb-hid-keyboard-source-usb-host-boards)
* `UsbKbd(keys=None)` — the keyboard twin of `UsbPad`, a `Buttons(usb=…)` source. Found by its boot-keyboard HID interface (no fixed VID/PID); works with wired and 2.4 GHz-dongle keyboards (not Bluetooth).
* Default map: arrows + WASD → D-pad, Z/Space → A, X → B, C → X, V → Y, Q → L1, E → R1, Enter → START, Esc → SELECT. Remap from `settings.toml` (`PICOGAME_USBKBD`, `NAME=HID-keycode`). For a combo dongle whose real keystrokes flow on a sibling interface, point it at the right channel with `PICOGAME_USBKBD_EP = "iface:endpoint"` (find it with `tools/usbkbd_probe.py`).
### `picogame_font` — text bitmaps (external font module)
[Section titled “picogame\_font — text bitmaps (external font module)”](#picogame_font--text-bitmaps-external-font-module)
Which text path to use (`Canvas.text` vs a rendered Bitmap vs a StripDraw view — and what each costs): see the decision matrix in [Drawing paths](/concepts/drawing-paths/).
* `render_text(pg, font, text, fg, bg=None) -> (bitmap, w, h)` — render a string to a PAL8 Bitmap (`bg=None` → transparent).
* `render_text_pal(pg, font, text, fg, bg=None) -> (bitmap, w, h, palette)` — same, plus the palette array; mutate `palette[1]` to recolour the text in place (no rebuild).
* `Label(pg, font, x, y, fg, bg)` · `.move(x, y)` · `.set(text) -> changed` · `.draw(display, buffer)`.
### `picogame_bitfont` — built-in font (no font module needed)
[Section titled “picogame\_bitfont — built-in font (no font module needed)”](#picogame_bitfont--built-in-font-no-font-module-needed)
* `render_text(pg, text, fg=None, outline=None, mid=None, bg=None) -> (bitmap, w, h)` — render with the bundled bitmap font; optional `outline`/`mid` give a cheap 2-tone outlined look.
### `picogame_ui` — HUD & menu widgets (`LINE_H = 12`)
[Section titled “picogame\_ui — HUD & menu widgets (LINE\_H = 12)”](#picogame_ui--hud--menu-widgets-line_h--12)
* `SceneLabel(scene, pg, font, x, y, fg, bg)` · `.set(text)` · `.destroy()` — camera-independent text label (a fixed Scene layer); destroy() detaches a ONE-SHOT label so GC reclaims it (recurring HUD: build once + set/hide instead).
* `SceneBox(scene, pg, font, x, y, w, h, fg, bg, nlines=3, key=None, border=None)` · `.show(lines)` · `.hide()` · `.set_line(i, text)` · `.destroy()` — a multi-line in-scene panel (dialog/log); destroy() = one-shot teardown (needs firmware with `Scene.remove`).
* `HudBar(pg, display, buffer, x, y, w, h, bg)` · `.add(sprite)` (an icon Sprite) · `.label(font, x, y, fg, text=" ")` → a text handle; update it with `handle.set(text)` · `.draw()` (repaint the bar, call on HUD changes) — a fixed bar that composites sprites + labels (0 retained RAM).
* `TextBox(pg, font, x, y, w, h, fg, bg, maxlines=6)` · `.draw(display, buffer, lines, force=False)`.
* `Menu(pg, font, x, y, items, fg, bg, *, title=None, rows=None, width=None, paged=True)` · `.tick(btn)` → index ≥0 on A, `CANCEL` (= -2) on B, `None` while navigating · `.draw(display, buffer, force=False)`.
* `SceneMenu(scene, pg, font, x, y, items, fg, bg, title=None, rows=None, width=None, border=None, paged=True)` · `.show(sel=0)` · `.hide()` · `.tick(btn)` → index ≥0 on A, `CANCEL` (= -2) on B, `None` while navigating — the same menu as an in-scene layer.
* `GridCursor(cols, rows, tx=0, ty=0, wrap=False)` · `.index` · `.tick(btn)` — D-pad cursor over a grid (inventory / board).
### `picogame_options` — settings menu
[Section titled “picogame\_options — settings menu”](#picogame_options--settings-menu)
* `OptionsMenu(scene, pg, font, x, y, w, rows, fg, bg, title=None, border=None)` · `.value(key)` · `.show(sel=0)` · `.hide()` · `.tick(btn)` — an in-scene options screen of toggles/choices.
### `picogame_shapes` — single-colour bitmap generators
[Section titled “picogame\_shapes — single-colour bitmap generators”](#picogame_shapes--single-colour-bitmap-generators)
* `rect(w, h, color)` · `circle(d, color)` · `ring(d, color, thickness=2)`
* `from_mask(mask, color)` — Bitmap from a string mask (`'#'` = set).
* `atlas(frames_data, w, h, color)` — pack w×h buffers into a multi-frame Bitmap.
* `color_frames(w, h, colors)` — frame i = solid `colors[i]`.
* `tileset_colors(w, h, colors)` — tileset: frame 0 empty, frames 1..N coloured.
* `poly_frames(size, points, nframes, color, fill=True)` — bake `nframes` rotations of a polygon.
### `picogame_pool` — reusable sprite pool
[Section titled “picogame\_pool — reusable sprite pool”](#picogame_pool--reusable-sprite-pool)
* `Pool(scene, bitmap, capacity, anchor=None, fixed=False)` · `.spawn() -> sprite | None` · `.free(s)` · `.free_all()` · `.count() -> int`. (`.items` = all sprites.)
### Sprite collision (native methods)
[Section titled “Sprite collision (native methods)”](#sprite-collision-native-methods)
Collision lives on the `Sprite` itself: zero-alloc, anchor/scale/rotation aware (no separate module).
* `Sprite.overlaps(other, inset=0) -> bool` — inclusive AABB box overlap (touch = hit). `other` = another `Sprite`, a point `(x, y)`, or a rect `(x1, y1, x2, y2)` (trigger zone / screen-cull). `inset` shrinks THIS sprite’s box by N px per side for a fair hitbox.
* `Sprite.near(other, r) -> bool` — circular: this sprite’s centre within `r` px of `other`’s centre (squared distance, no sqrt). `other` = a `Sprite` or a point `(x, y)`.
* Raw primitive (any coords, no sprite): `pg.collide(x1, y1, x2, y2, ax1, ay1[, ax2, ay2])` — 8 args box-vs-box, 6 args box-vs-point.
* Tile-grid collision (walls/terrain): probe `picogame_tiles` flags (`at_px(tm, x, y, SOLID)`), not AABB.
### `picogame_math` — numeric helpers, vectors & turn-based trig
[Section titled “picogame\_math — numeric helpers, vectors & turn-based trig”](#picogame_math--numeric-helpers-vectors--turn-based-trig)
* `clamp(v, lo, hi)` · `mid(a, b, c)` · `lerp(a, b, t)` · `inv_lerp(a, b, v)` · `remap(v, a, b, c, d)` · `sgn(x)` · `approach(v, target, step)` · `wrap(v, lo, hi)`.
* `sin_t(turns)` · `cos_t(turns)` · `atan2_t(dy, dx) -> turns` — angles as 0..1 turns (standard, not PICO-8’s inverted sin).
* `length(dx, dy)` · `distance(x1, y1, x2, y2)` · `normalize(dx, dy)` · `angle_rad(dx, dy)` (radians) · `from_angle_rad(a, mag=1.0)` — vector helpers.
### `picogame_tiles` — per-tile metadata flags (PICO-8 `fget`/`fset`)
[Section titled “picogame\_tiles — per-tile metadata flags (PICO-8 fget/fset)”](#picogame_tiles--per-tile-metadata-flags-pico-8-fgetfset)
* Bits/masks: `B_SOLID B_HAZARD B_LADDER …` (indices) and `SOLID HAZARD LADDER …` (masks).
* `TileFlags(flags=None, tile_px=8)` — `flags` = `{tile_index: bitfield}` or a list. `.get(tile, bit=None)` · `.set(tile, bit, value=True)` · `.at(tilemap, tx, ty, bit)` · `.at_px(tilemap, px, py, bit)` (collision one-liner). Keyed by tile index (shared by all cells using it).
### `picogame_seq` — generator-driven sequences (coroutine pattern)
[Section titled “picogame\_seq — generator-driven sequences (coroutine pattern)”](#picogame_seq--generator-driven-sequences-coroutine-pattern)
* `wait(frames)` · `over(frames, fn)` (fn(t), t 0..1) · `move_over(sprite, x, y, frames)` — all are generators; compose with `yield from`.
* `Seq(gen=None)` · `.start(gen)` · `.tick() -> done` — advance one step per frame (cutscenes, “do X over N frames”).
### `picogame_anim` — frame animation over time
[Section titled “picogame\_anim — frame animation over time”](#picogame_anim--frame-animation-over-time)
* `FrameAnim(sprite, frames, *, fps=8, loop=True)` · `.configure(frames, fps=8, loop=True)` · `.reset()` · `.tick(dt)`.
* `AnimatedSprite(sprite, anims)` · `.play(name)` · `.tick(dt)`.
### `picogame_fx` — juice & raster effects
[Section titled “picogame\_fx — juice & raster effects”](#picogame_fx--juice--raster-effects)
* `Shake(scene, max_offset=6, decay=0.03, seed=0x9E37)` · `.add(amount)` (0.6 hit, 0.15 bump) · `.tick(cam_x=0, cam_y=0)` — trauma screen shake composed on top of the camera.
* `Fade(scene, width, height, x=0, y=0, color=0, cell=8)` · `.to(target, speed=2.0)` · `.out()/.into()/.set(level)/.dim(level=8)/.clear()/.pulse(level=12, speed=2.0)` · `.is_done` · `.tick() -> done` — dither fade / dim / flash, full-screen or a region. Uses `StripDraw` without a retained pixel surface.
* `Tween(value=0.0, speed=0.2)` · `.to(target, speed=None)` · `.set(value)` · `.tick() -> value` · `.is_done` — ease a scalar (UI/pop-ups).
* `Camera(scene, w, h, lerp=0.18, world_w=0, world_h=0)` · `.follow(tx, ty, snap=False)` · `.offset() -> (ox,oy)` · `.apply()` — smoothed follow + world clamp (compose with `Shake` via `shake.tick(*cam.offset())`).
* `Sky(scene, x, y, w, h, top, bottom)` — vertical gradient with a `2*h`-byte colour table. · `Scanlines(scene, x, y, w, h, step=2, dark=0)` — CRT overlay retaining one `w`-byte PAL8 row and its palette.
* `InvertFlash(display, frames=3, normal=None)` · `.pulse(frames=None)` · `.tick()` — hardware-invert hit flash for a supported SPI panel. It does not redraw the scene and is not a framebuffer effect.
### `picogame_palette` — Game-Boy palette tricks on PAL8 art (call `sprite.touch()` after)
[Section titled “picogame\_palette — Game-Boy palette tricks on PAL8 art (call sprite.touch() after)”](#picogame_palette--game-boy-palette-tricks-on-pal8-art-call-spritetouch-after)
* `cycle(palette, lo, hi, step=1)` — rotate entries (animated water/lava/portals; \~0 extra art).
* `swap(dst_palette, src_palette)` — recolour a shared bitmap (GBC-style; cheaper than a 2nd bitmap).
* `fade(palette, base, t, target=0, skip=None)` — lerp toward a colour (smooth brightness fade; `base` = `snapshot()` of the original).
* `snapshot(palette)` / `restore(palette, base)`.
### `picogame_rand` — seedable RNG
[Section titled “picogame\_rand — seedable RNG”](#picogame_rand--seedable-rng)
* `Rand(seed=None)` (deterministic xorshift; `None` = time-seeded) · `.below(n)` · `.randint(a, b)` · `.random()` · `.chance(p)` · `.choice(seq)` · `.shuffle(lst)` · `.weighted(weights) -> index` · `.seed(s)`.
* `Bag(items, rng)` · `.next()` — shuffle-bag (7-bag) anti-streak randomizer.
### `picogame_save` — NVM persistence
[Section titled “picogame\_save — NVM persistence”](#picogame_save--nvm-persistence)
* `Save(key, schema, *, offset=0)` · `.defaults()` · `.load() -> dict` · `.save(values)` · `.reset()`. Survives reboot/filesystem wipe.
### `picogame_audioout` — one output device for any board
[Section titled “picogame\_audioout — one output device for any board”](#picogame_audioout--one-output-device-for-any-board)
* `make_output(sample_rate=22050, pin=None)` — returns this board’s audio output, chosen automatically: an I2S DAC (Fruit Jam TLV320) when the board has `I2S_BCLK`, else a PWM output on `pin` (or the board default). Used by both `picogame_audio` and `picogame_synth`, so a game needs no board-specific audio code. Raises `RuntimeError` if no output exists.
* The TLV320’s output select + the three volume trims are set from `settings.toml` (`PICOGAME_AUDIO_OUT`, `PICOGAME_DAC_VOLUME`, `PICOGAME_HP_VOLUME`, `PICOGAME_SPK_VOLUME` — see [Custom board](/custom-board/)); the driver’s defaults are deliberately quiet, so raise them toward 0 dB. `PICOGAME_DEBUG = 1` prints why a DAC failed to init.
### `picogame_audio` — sample playback (PWM or I2S DAC)
[Section titled “picogame\_audio — sample playback (PWM or I2S DAC)”](#picogame_audio--sample-playback-pwm-or-i2s-dac)
* `Audio(pin=None, voices=4, sample_rate=22050, channels=1, bits=16, signed=True)` · `.load(path)` · `.play(sample, *, voice=None, loop=False, volume=1.0)` · `.sfx(sample, volume=1.0)` · `.music(sample, loop=True, volume=1.0)` · `.stop(voice=None)` · `.stop_music()` · `.deinit()` · `.is_playing`.
* `tone(frequency=440, ms=120, sample_rate=22050, volume=0.6)` — square-wave beep sample.
### `picogame_synth` — synthio music & SFX
[Section titled “picogame\_synth — synthio music & SFX”](#picogame_synth--synthio-music--sfx)
* Waveforms: `sine()` · `saw()` · `triangle()` · `square()` · `noise()`.
* `note(midi, waveform=None, attack=0.005, decay=0.06, sustain=0.0, release=0.08, amplitude=0.6, bend=None, cutoff=None)` — build a reusable instrument note (`midi` 60 = middle C; `cutoff` = low-pass Hz).
* `pitch_bend(semitones, ms, waveform=None, once=True)` — an LFO for a note’s `bend` (slide / laser zap).
* `Synth(pin=None, sample_rate=22050, buffer_size=2048, music_level=0.4, sfx_level=0.7)` · `.sfx(n)` · `.press(n)` · `.release(n)` · `.music(midi_track)` · `.stop_music()` · `.set_levels(music=None, sfx=None)` · `.mute(on)` · `.available` — self-guarding init: on audio-less firmware **or** a failed init (tight heap, claimed pin) the instance runs as silent no-ops instead of raising; no try/except needed in games.
* `Drone(synth, waveform=None, amplitude=0.35, attack=0.03, release=0.12)` · `.start()` · `.set(frequency, amplitude=None)` · `.stop()` — a continuously-held note (engine/siren/drone): press once, then feed `set(freq, amp)` each frame so synthio tracks the live pitch/amplitude.
* `load_midi(path, sample_rate=22050, waveform=None, envelope=None, tempo=120, ppqn=240)` — load a MIDI file into a playable track.
### `picogame_sfx` — signature SFX kit (over `picogame_synth`)
[Section titled “picogame\_sfx — signature SFX kit (over picogame\_synth)”](#picogame_sfx--signature-sfx-kit-over-picogame_synth)
* `Kit(synth)` — build a ready-made, hardware-tuned SFX set once from a live `Synth` (silent no-op without audio). Fire by event: `.blip()` · `.coin()` · `.powerup()` · `.zap()` (your fire) · `.pew()` (enemy fire) · `.jump()` · `.hit(rotate=True)` (brightness rotates on rapid fire) · `.hurt()` · `.boom()` · `.explosion()`. Call `.tick()` once per frame — drives the coin/powerup arpeggios and the priority + protected-window arbitration through the single SFX voice. Volume via the `Synth`: `.set_levels()` / `.mute()`.
### `picogame_cutscene` — full-screen image / story-scene player
[Section titled “picogame\_cutscene — full-screen image / story-scene player”](#picogame_cutscene--full-screen-image--story-scene-player)
* `palette(pg, rgb)` — build the wire palette once (from a bake\_cutscene.py palette module, RGB triplets, or wire ints).
* `show(pg, display, buffer, path, pal=None, w=320, h=240, scale=None, band=24, bg=0)` — stream an image in row bands. The source band uses `w*band` bytes for PAL8 or `w*band*2` for RGB565, in addition to any render buffer passed in. `scale=None` derives an integer upscale from the display.
* `play(pg, display, buffer, btn, path, pal=None, ..., caption=None, caption_lines=None, auto_hold=0, clock=None)` — show it, overlay an optional caption bar, and wait for A/B (or auto-advance after `auto_hold` ticks).
### `picogame_stream` — stream sprite frames from flash
[Section titled “picogame\_stream — stream sprite frames from flash”](#picogame_stream--stream-sprite-frames-from-flash)
* `StreamSheet(pg, path, w, h, frames, palette, transparent=None)` · `.use(i)` (select a frame, loaded on demand) · `.close()` — keep big sheets on flash instead of RAM.
### `picogame_arena` — anti-fragmentation buffer
[Section titled “picogame\_arena — anti-fragmentation buffer”](#picogame_arena--anti-fragmentation-buffer)
* `Arena(pixels)` · `.alloc(nbytes, align=1) -> memoryview` · `.canvas(w, h, transparent=None) -> Canvas` · `.reset()` · `.mark() -> m` / `.release(m)` (nested LIFO lifetimes: mark on entering a mode, release on leaving — run-level buffers survive) · `.free() -> int`. Grab one big buffer up front, hand out slices.
### `picogame_debug` — RAM watermarks + FPS overlay (testing aid)
[Section titled “picogame\_debug — RAM watermarks + FPS overlay (testing aid)”](#picogame_debug--ram-watermarks--fps-overlay-testing-aid)
* `enabled` — module flag (default False: calls ship as no-ops; flip True while testing).
* `ram(tag)` — gc.collect() + print `[RAM] : free N alloc M` at a transition (boot/battle/menu) — the on-device leak/fit diagnostic.
* `Watch(scene, clock=None, every=30, x=2, y=2)` · `.step()` each frame · `.hide()/.show()` · `.remove()` — a corner `FPS 30 FREE 31k` overlay (one live text bitmap, re-rendered only on change). Pass your `Clock` as `clock=` for a true FPS reading; `every`/`x`/`y` are keyword args.
### `picogame_scene` — declarative level loader
[Section titled “picogame\_scene — declarative level loader”](#picogame_scene--declarative-level-loader)
* `load(pg, scene, display=None, strip_h=None, font=None, bank=None) -> View` — build a scene from a baked SCENE dict.
* `load_bank(pg, bank)` — build a shared asset bank once (reuse across levels).
* `View`: `.tile_xy(px, py)` · `.group(tag)` · `.point(name)` · `.in_zone(x, y, tag=None)` · `.is_solid(tx, ty)` · `.tile_has(tx, ty, prop)` · `.play(sound_id)` · `.tick(dt)`.
### `picogame_mode7` — Mode-7 perspective floor
[Section titled “picogame\_mode7 — Mode-7 perspective floor”](#picogame_mode7--mode-7-perspective-floor)
* `Camera(fov=0.66)` · `.draw(canvas, texture, x, y, angle, horizon, height, y_off=0)` — drive the C `Canvas.mode7` floor from a friendly camera pose (position in world/tile units, heading in radians, `height` = how high the camera sits). `texture` dims must be powers of two, one world unit = one tile. Draw into a 0-RAM `StripDraw` view. See [/helpers/pseudo-3d/](/helpers/pseudo-3d/).
### `picogame_ray` — first-person raycaster
[Section titled “picogame\_ray — first-person raycaster”](#picogame_ray--first-person-raycaster)
* `Raycaster(world, wall_colors, sky, floor, fov=0.66, stride=2)` · `.cast(px, py, ang, sw, sh)` (once/frame) · `.draw(view, vx, vy, vw, vh)` (StripDraw callback) · `.solid(x, y)` (wall test) · `.attach(sd)` (temporal repaint) · `.project_sprite(sx, sy)` (billboard) — DDA walls via the native `pg.raycast` caster (integer 16.16 C on device, Python in the sim) into a 0-RAM `StripDraw` view (\~22-30 fps). `stride` = perf/quality knob; `attach(sd)` + `always_dirty=False` repaints only the changed column band (still/slow \~30 fps). See [/helpers/pseudo-3d/](/helpers/pseudo-3d/).
# picogame scene format
> A scene describes a level or map as data shared by the device game, desktop simulator, and web editor.
For level authoring
The declarative scene format + loader. Use it once you’re hand-coding scenes and want to stop. See also the [web editor](/tools/editor/).
A scene describes a level or map as **data** shared by the device game, desktop simulator, and [web editor](/tools/editor/). It can contain assets, sprite placement, tilemaps, tile properties, layer order, HUD elements, and camera settings. Game logic such as movement, AI, and win conditions stays in Python.
## The pipeline
[Section titled “The pipeline”](#the-pipeline)
```text
*.scene.json ──tools/scene_build.py──▶ _scene.py ──mpy-cross──▶ _scene.mpy
(authoring: editor or hand) (baked runtime module) (ship to CIRCUITPY)
```
* **Authoring = JSON** (`*.scene.json`): diff-able, round-trippable by the editor or a human. Colours as `[r, g, b]`, maps as grids.
* **Runtime = a baked Python module** (`SCENE = {...}`): colours pre-converted to wire RGB565, the tilemap grid a `bytes` literal (1 byte/tile, one allocation), art pre-converted to PAL8 atlases. Import cost stays small; ship it as `.mpy`.
* **One loader for both targets:** `picogame_scene.load(pg, SCENE, ...)` builds the live `pg.Scene` using only public engine API, so the same file runs on hardware and in the simulator. Loader usage guide: [Building scenes](/helpers/building-scenes/).
Bake:
```bash
python3 tools/scene_build.py examples/levels/world1.scene.json
# -> examples/levels/world1_scene.py (module attribute SCENE)
tools/build_mpy.sh # or mpy-cross the module for the device
```
## Authoring schema (version 2 — the implemented set)
[Section titled “Authoring schema (version 2 — the implemented set)”](#authoring-schema-version-2--the-implemented-set)
```jsonc
{
"format": "picogame-scene", "version": 2,
"size": [320, 240],
"background": [8, 10, 24], // -> wire rgb565 at bake time
"assets": { // shared bank, referenced by id
"hero": { "type": "sprite", "src": "hero.png", "frames": 6, "transparent": 0,
"animations": { "walk": { "frames": [0,1,2,1], "fps": 8, "loop": true } } },
"tiles": { "type": "tileset", "src": "tiles.png", "tile": [16, 16], "frames": 5,
"props": { "1": {"solid": true}, "2": {"coin": true}, "3": {"goal": true} } },
"flag": { "type": "rect", "size": [8, 16], "color": [255, 220, 60] }
},
"sounds": { "jump": { "src": "jump.wav" } },
"layers": [ // ordered bottom -> top
{ "kind": "tilemap", "asset": "tiles", "cols": 80, "rows": 15, "pos": [0, 0],
"map": "rle:..." },
{ "kind": "sprite", "asset": "hero", "name": "player",
"pos": [40, 208], "anchor": [0.5, 1.0], "anim": "walk", "data": { "lives": 3 } },
{ "kind": "group", "asset": "goomba", "anchor": [0.5, 1.0],
"instances": [[224, 208], [480, 208], [704, 208]], "tag": "enemies" },
{ "kind": "tilemap", "asset": "tiles", "fg": true, "cols": 80, "rows": 15,
"map": "rle:..." }, // fg: true draws OVER the sprites
{ "kind": "particles", "capacity": 64, "size": 2, "gravity": 0.5, "fade": true,
"name": "fx" },
{ "kind": "hudlabel", "name": "score", "pos": [4, 4],
"fg": [255,255,255], "bg": [0,0,0] } // camera-independent (fixed implied)
],
"zones": [ { "tag": "door", "x": 300, "y": 180, "w": 20, "h": 40 } ],
"points": [ { "name": "spawn", "x": 40, "y": 208 } ],
"camera": { "mode": "follow", "target": "player", "axis": "x",
"bounds": [0, 0, 1280, 240] },
"music": "theme",
"meta": { "editor": { "grid": 16, "name": "World 1-1" } } // ignored by the runtime
}
```
Field notes:
* **assets** — kinds `sprite` / `tileset` / `bitmap` (`src` PNG + `frames`, `tile`, `transparent`), `rect`, `tileset_color`; a tileset may attach per-tile **props** (`solid`/`coin`/`goal`/`hazard`/your own) and a sprite may declare **animations** (`{name: {frames, fps, loop}}`).
* **layer kinds** — `tilemap` (several allowed; one may be `fg: true` to draw over sprites), `sprite` (`name`/`anchor`/`frame`/`anim`/`data`), `group` (many instances of one bitmap, addressable by `tag`), `particles`, `hudlabel` (camera-independent). Any layer may set `"fixed": true`.
* **zones / points** — named rectangles and positions the game queries at runtime (`view.in_zone`, `view.point`).
* **camera** is advisory data the game applies via `set_view`; games can drive the camera themselves.
* **meta** is free for the editor; the runtime loader ignores unknown keys (forward-compat).
### Two top-level shapes
[Section titled “Two top-level shapes”](#two-top-level-shapes)
* `"format": "picogame-scene"` — one self-contained scene (assets inline) → baked to one `_scene` module.
* `"format": "picogame-project"` — an assets **bank** + `levels[]` → baked to one `_bank` module plus one `_level` module per level; load with `bank = picogame_scene.load_bank(pg, BANK)` then `load(..., bank=bank)` so shared art isn’t rebuilt per level.
### Validation
[Section titled “Validation”](#validation)
The baker fails fast with a `ValueError` naming the offender on an unknown asset type or an unknown layer kind; asset conversion errors (missing file, bad PNG) surface as the underlying exception with the file in the message. The loader tolerates unknown *top-level* keys (so an older firmware can load a newer scene’s data it doesn’t use), but layer tuples are positional — a module baked by a newer `scene_build.py` needs the matching `picogame_scene` version.
## Baked runtime module (what the device imports)
[Section titled “Baked runtime module (what the device imports)”](#baked-runtime-module-what-the-device-imports)
```python
# world1_scene.py (then -> world1_scene.mpy)
SCENE = {
"bg": 0x2001, # pre-converted wire rgb565
"assets": {
"hero": ("pal8", "a1b2...", 12, 16, 6, 0, (0x0000, 0xF80F, ...)), # data(hex),w,h,frames,transp,palette
"tiles": ("pal8", "00ff...", 16, 16, 5, None, (...)),
},
"tileprops": { "tiles": { "solid": b"\x00\x01\x00\x00\x00",
"coin": b"\x00\x00\x01\x00\x00" } }, # indexed by tile value
"anims": { "hero": { "walk": ((0, 1, 2, 1), 8, True) } },
"layers": [
("tilemap", "tiles", 80, 15, 0, 0, b"\x01\x01..."), # cols,rows,ox,oy,grid bytes
("sprite", "hero", "player", 40, 208, 128, 256, 0, {"lives": 3}), # anchor in 1/256
("group", "goomba", "enemies", 128, 256, ((224,208), (480,208))),
("particles", "fx", 64, 2, 0.5, True),
("hudlabel", "score", 4, 4, 0xFFFF, 0x0000),
],
"camera": ("follow", "player", "x", 0, 0, 1280, 240),
}
```
Layers and assets are tuples (not dicts) to keep the `.mpy` small and parse-free; the loader unpacks positionally. The grid and tile-prop tables are `bytes` (one allocation each); asset pixel data is a hex string the loader decodes with `bytes.fromhex(...)`.
Why not JSON on the device? `json.load` of a tilemap builds a Python list of boxed ints (\~28 B each): a 28×18 map ≈ 14 KB for the list alone, plus the JSON text. The same grid as a `bytes` literal in a `.mpy` is \~500 B and one allocation.
## Runtime loader API
[Section titled “Runtime loader API”](#runtime-loader-api)
```python
import picogame_scene as pgs, terminalio
view = pgs.load(pg, world1_scene.SCENE, font=terminalio.FONT)
view.scene # the picogame.Scene (already populated + layered)
view.named["player"] # the Sprite
view.group("enemies") # list of Sprites
view.tick(dt) # advance auto-animated sprites (once per frame)
view.is_solid(tx, ty) # tile-property query (primary/first tilemap)
view.tile_has(tx, ty, "coin")
view.tile_xy(px, py) # world pixel -> (tx, ty) on the primary tilemap
view.in_zone(x, y, "door") # first zone containing (x, y), or None
view.point("spawn") # named point (x, y), or None
view.play("jump") # play a loaded sound by id
view.camera # (mode, target, axis, bounds) for the game to apply
```
See [Building scenes](/helpers/building-scenes/) for the complete loader behaviour and limits.
# Desktop simulator
> The web Playground lets you try picogame in a browser. The desktop simulator runs the same game-facing API on your PC and is better suited to local files…
The web [Playground](/playground/) lets you try picogame in a browser. The **desktop simulator** runs the same game-facing API on your PC and is better suited to local files, converted PNG assets, headless screenshots, and scripted command-line runs.
It ships inside the repo (`sim/`). Clone [picogame](https://github.com/MakerClassCZ/picogame) and you have everything: the simulator, the games, and the `picogame_*` helpers.
```sh
git clone https://github.com/MakerClassCZ/picogame
cd picogame
```
## Install
[Section titled “Install”](#install)
Headless mode (render frames, save a screenshot, no window) works out of the box. For a live, interactive window, install pygame:
```sh
pip install pygame
```
If it doesn’t work
* `pip` not found? Use `python3 -m pip install pygame` instead.
* Run every command from the cloned `picogame` folder, the one that holds `sim/` and `lib/`.
* Without pygame, use `--shot out.png` to run headlessly and save the final frame.
## Run a game
[Section titled “Run a game”](#run-a-game)
Play it in a window (the default when pygame is installed; it prints the controls on start):
```sh
python3 sim/run.py demos/picogame_flappy.py
```
Render a few frames headlessly and save a screenshot (handy for docs, tests, and CI):
```sh
python3 sim/run.py demos/picogame_flappy.py --frames 80 --shot shot.png
```
### Options
[Section titled “Options”](#options)
| Flag | What it does |
| -------------------------- | --------------------------------------------------------------------------------------------------------------------------------------- |
| `--backend pygame` / `pil` | force a live window / headless. Default: a window if pygame is installed, else headless (a `--shot` or `--profile` run stays headless). |
| `--frames N` | run N frames, then stop (default 150) |
| `--shot FILE` | save a PNG of the final frame |
| `--shot-at N` | save that PNG at frame N instead of at the end |
| `--hold RIGHT,A` | hold these buttons for the whole run, so you can drive it with no keyboard |
| `--profile` | print per-phase timing |
In the live window: arrows or **WASD** move; `F` (or `Ctrl`) = A, `G` (or `Space`) = B, `R`/`Q` = X, `T`/`E` = Y.
## Web or desktop?
[Section titled “Web or desktop?”](#web-or-desktop)
Both expose the same game-facing API, so the same game code runs in either. Under the hood they differ (the browser runs the native C engine compiled to WASM; the desktop simulator is a Python reference implementation), so timing, RAM behaviour, audio and panel effects are approximations - verify those on the device.
| | Web Playground | Desktop simulator |
| -------- | ------------------------------------------- | ------------------------------------------------------------------ |
| Setup | none, runs in the browser | clone the repo (plus pygame for a window) |
| Best for | trying an idea, sharing a link, first steps | asset files, headless screenshots, CLI automation, local iteration |
| Assets | code-generated shapes | your own PNGs and converted art |
Once a game runs well, copy it to the board and test its timing, controls, audio, and memory use. See [Run on hardware](/hardware/).
# Snippets — patterns ready to adapt
> A ready-to-run game skeleton plus short code fragments for common tasks — HUD updates, pools, restart, pause, shuffle, hit feedback, and input timing.
These are paste-ready fragments — the code for a specific task. For the *why* and the higher-level structure behind them, see [Game patterns](/concepts/patterns/). The skeleton below is a whole game in miniature; the fragments after it fill in the parts. Copy the relevant piece, adapt the names, and adjust the limits to your game. They use the same conventions as the bundled examples.
## The whole shape: a ready-to-run skeleton
[Section titled “The whole shape: a ready-to-run skeleton”](#the-whole-shape-a-ready-to-run-skeleton)
Start here. All mutable game state lives in one **`State`** object (`st`), and the per-frame loop lives in a **`main()`** function — inside a function its names resolve as fast locals instead of globals-dict lookups, a measured win on device. Every fragment further down slots into this shape. Copy it, rename the `State` fields, and fill in the `play` branch.
```python
# Ready-to-use picogame skeleton: a TITLE -> PLAY -> GAME-OVER state machine, with ALL game state
# in one State object and the per-frame loop in a function (main). Copy it, rename the State fields,
# and fill in the PLAY branch. Runs as-is here in the browser and on a device.
import board
import terminalio
import picogame as pg
import picogame_game
import picogame_input
import picogame_clock
import picogame_shapes as shapes
import picogame_ui as ui
W, H = board.DISPLAY.width, board.DISPLAY.height # size-independent: never hardcode 320x240
BAR = 16 # reserved top HUD strip
scene, bufA, _ = picogame_game.setup(background=pg.rgb565(16, 20, 34), top=BAR)
btn = picogame_input.Buttons()
clock = picogame_clock.Clock(30)
hud = ui.HudBar(pg, board.DISPLAY, bufA, 0, 0, W, BAR, pg.rgb565(10, 12, 22))
label = hud.label(terminalio.FONT, 4, 3, pg.rgb565(235, 240, 255), "")
# The player: a generated shape now; swap in a Bitmap (png2picogame) later.
player = pg.Sprite(shapes.circle(14, pg.rgb565(240, 90, 90)), W // 2, H // 2)
player.anchor = (0.5, 0.5)
scene.add(player)
class State:
"""ALL mutable game state in ONE object, created once and never reassigned. reset() re-inits it
in place, so main() can hold `st` and every helper sees the same state. Add your fields here;
keep engine objects (sprites, pools, clock) as module globals, not in State."""
def __init__(self):
self.reset()
def reset(self):
self.mode = "title" # "title" -> "play" -> "over"
self.score = 0
st = State()
def show(text): # set the HUD text and repaint the bar
label.set(text)
hud.draw()
def new_game():
st.reset()
st.mode = "play"
player.move(W // 2, H // 2)
show("SCORE 0")
def main():
# The per-frame loop lives in a FUNCTION, not at module scope: here its names resolve as fast
# array-indexed locals instead of globals-dict lookups -- a measured win on device.
show("PRESS A TO START")
while True:
btn.poll()
if st.mode == "play":
# --- your game goes here: move, collide, score ---
player.x += (btn.is_pressed(btn.RIGHT) - btn.is_pressed(btn.LEFT)) * 3
if btn.just_pressed(btn.A):
st.score += 1
show("SCORE %d" % st.score) # set text where it CHANGES, not every frame
if btn.just_pressed(btn.B):
st.mode = "over"
show("GAME OVER - press A")
elif btn.just_pressed(btn.A): # title or game-over -> (re)start, no reload
new_game()
scene.refresh()
clock.tick()
main()
```
[▶ Try it in the browser](/playground/?ex=game-skeleton)
The [Game patterns](/concepts/patterns/) page explains the shape; the fragments below are the individual moves.
## Read the screen size instead of hardcoding it
[Section titled “Read the screen size instead of hardcoding it”](#read-the-screen-size-instead-of-hardcoding-it)
Derive positions from `W` and `H` when the layout should adapt to different supported screen sizes (for example 320×240 and 240×240).
```python
W, H = board.DISPLAY.width, board.DISPLAY.height
player = pg.Sprite(bm, W // 2, H - 40)
```
## HUD text: format on change, not per frame
[Section titled “HUD text: format on change, not per frame”](#hud-text-format-on-change-not-per-frame)
`label.set()` skips the redraw on unchanged text, but the `"%"`-format itself allocates a new string on every call. Doing that each frame creates avoidable garbage. Compare the integers first and format only when the displayed value changes:
```python
hud = picogame_font.Label(...) # or a picogame_ui.HudBar; built ONCE at load
if score != shown_score: # shadow int of what the label shows
shown_score = score
hud.set("SCORE %d" % score)
```
Full HUD/label options: [Text & UI](/helpers/text-ui/).
When possible, set the label where its value changes (in the hit handler or at the level transition) and keep the frame loop free of HUD code. Quantize continuous values to the displayed unit first:
```python
secs = int(time.monotonic() - t0) # whole seconds = what the label shows
if secs != shown_secs:
shown_secs = secs
timer_lbl.set("TIME %d" % secs)
```
## Bullets & spawns come from a Pool
[Section titled “Bullets & spawns come from a Pool”](#bullets--spawns-come-from-a-pool)
For frequently created objects such as bullets, avoid constructing a new `pg.Sprite(...)` each time. A `Pool` pre-allocates them once; `spawn()` and `free()` toggle visibility:
```python
bullets = Pool(scene, bullet_bm, 8, anchor=(0.5, 0.5)) # ONE allocation, at load
b = bullets.spawn() # None when all 8 fly -> fire rate self-limits
if b:
b.move(ship.x + 14, ship.y)
for b in bullets.items: # fixed list -> the loop allocates nothing
if not b.visible:
continue
b.x += 6
if b.x > W + 8:
bullets.free(b) # back to the pool for reuse
```
Fixed-count HUD icons (lives, ammo pips) don’t need a Pool — a plain list of sprites with `visible` toggles is right there.
## Instant restart: one `reset()`, one never-rebound `st`
[Section titled “Instant restart: one reset(), one never-rebound st”](#instant-restart-one-reset-one-never-rebound-st)
Keep all run-scoped values in one `State` class and re-init them **in place** with `reset()`. `st` is created once and never reassigned — a never-rebound singleton — so `main()` (and any helper) can hold it as a fast local with no risk of pointing at a stale copy after a restart. Engine objects and cross-run values (best score) stay module globals.
```python
class State:
def __init__(self): self.reset() # __init__ just calls reset -> one place for defaults
def reset(self):
self.score = 0
self.lives = 3
self.px = 60.0
st = State() # created ONCE, at load
def new_game():
st.reset() # every field back to its documented default, IN PLACE
bullets.free_all()
player.move(60, GROUND)
```
## Pause / menu over a live scene
[Section titled “Pause / menu over a live scene”](#pause--menu-over-a-live-scene)
`pg.render` paints behind the scene’s back — without `invalidate()` the next `refresh()` leaves stale overlay fragments. `overlay()` does both; draw once, freeze, resume clean:
```python
if btn.just_pressed(btn.START):
paused = not paused
if paused:
picogame_game.overlay(scene, board.DISPLAY, [pause_sd], bufA, 0, 0, W, H)
if paused:
clock.tick() # no updates, no refresh -> overlay stays put
continue
scene.refresh() # first refresh after unpause repaints fully
```
## Shuffle: there is no `random.shuffle` on the device
[Section titled “Shuffle: there is no random.shuffle on the device”](#shuffle-there-is-no-randomshuffle-on-the-device)
CircuitPython’s `random` lacks `shuffle()`/`sample()` (the desktop simulator has them — it runs CPython). Fisher-Yates over `randint` is the same algorithm:
```python
for i in range(len(deck) - 1, 0, -1):
j = random.randint(0, i)
deck[i], deck[j] = deck[j], deck[i]
```
## Hit flash: 1–3 frames, then clear
[Section titled “Hit flash: 1–3 frames, then clear”](#hit-flash-13-frames-then-clear)
The cheapest visual punch. Set `flash` on the impact, count it down in the loop:
```python
enemy.flash = WHITE # at the hit
st.flash_t = 3
if st.flash_t > 0: # in the frame loop
st.flash_t -= 1
if st.flash_t == 0:
enemy.flash = None
```
(On the device the blit effects `flash`/`tint`/`dither`/`shadow` share **one** slot — last set wins; the sim treats them as independent, so it won’t reproduce this. Re-assert a permanent `dither` after a flash ends. Fuller toolkit: [Effects](/helpers/effects/).)
## Beep on an event
[Section titled “Beep on an event”](#beep-on-an-event)
Pair the flash with a sound. Build the tone **once** at load, then fire it on the event. Guard everything behind `if audio:` so an audio-less board (or a failed init) just runs silent:
```python
audio = None
try:
import picogame_audio
audio = picogame_audio.Audio() # PWM out + mixer; may fail on audio-less boards
boom = picogame_audio.tone(140, 200) # low thud, built ONCE (a RawSample in RAM)
except Exception: # tight heap, no audio pin, ...
audio = None # -> run silent
if audio: # at the hit / pickup:
audio.sfx(boom) # fire-and-forget on a free voice
```
`tone()` beeps like this play in the browser playground (WebAudio). For where each audio path makes sound (playground / simulator / device) and a ready-made named-effect kit (`hit()`, `coin()`, `boom()`), see [Audio](/helpers/audio/).
## Buttons: one virtual pad, mapped in `settings.toml`
[Section titled “Buttons: one virtual pad, mapped in settings.toml”](#buttons-one-virtual-pad-mapped-in-settingstoml)
Code against the engine’s logical buttons (`UP DOWN LEFT RIGHT A B`, optional `X Y L1 L2 R1 R2 START SELECT`) — never against pins. The same `code.py` then runs on any board; only the mapping in `settings.toml` changes (no reflash):
```python
btn = picogame_input.Buttons() # reads GPIO + key matrix + USB, all OR'd
btn.poll() # once per frame, before any query
if btn.is_pressed(btn.LEFT): px -= 2
if btn.just_pressed(btn.A): jump()
if btn.has(btn.X): show_x_hint() # only if this board mapped X
```
```toml
# direct GPIO buttons (a Pico you wired yourself)
PICOGAME_BUTTONS = "UP=GP2 DOWN=GP3 LEFT=GP4 RIGHT=GP5 A=GP6 B=GP7"
# …or a scanned key matrix — NAME=row,col
PICOGAME_MATRIX_ROWS = "GP0 GP1 GP2 GP3"
PICOGAME_MATRIX_COLS = "GP4 GP5 GP6 GP7"
PICOGAME_MATRIX_MAP = "UP=0,1 DOWN=2,1 LEFT=1,0 RIGHT=1,2 A=3,3 B=3,2"
```
USB gamepad/keyboard (USB-host boards) attach automatically. Full guide + USB remap keys: [Input & controls](/helpers/input/).
## Input forgiveness: coyote time + jump buffer
[Section titled “Input forgiveness: coyote time + jump buffer”](#input-forgiveness-coyote-time--jump-buffer)
Both are `picogame_input.Timer` one-liners; together they make platforming feel fair:
```python
coyote = picogame_input.Timer(6) # jump up to 6 frames after leaving a ledge
jbuf = picogame_input.Timer(5) # honour a jump pressed 5 frames before landing
coyote.feed(on_ground) # in the frame loop
jbuf.feed(btn.just_pressed(btn.A))
if jbuf.consume() and coyote.is_active:
jump()
```
## A panel that repaints only when it changes
[Section titled “A panel that repaints only when it changes”](#a-panel-that-repaints-only-when-it-changes)
A `StripDraw` with `always_dirty=False` does not retain a pixel surface for the panel. It stays idle until you call `invalidate()`:
```python
panel = pg.StripDraw(draw_panel, x, y, w, h, always_dirty=False)
scene.add(panel, fixed=True)
lines[1] = "HP %d" % hp # when the content changes:
panel.invalidate() # repaints once on the next refresh
```
## Sub-pixel movement without float drift
[Section titled “Sub-pixel movement without float drift”](#sub-pixel-movement-without-float-drift)
Sprite `x`/`y` are ints; for smooth slow motion use the engine’s fixed-point accessors `fx`/`fy` (24.8) instead of keeping your own float position:
```python
ball.fx = ball.fx + 0.4 # fractional-pixel movement without integer jitter
ball.fy = ball.fy + vy * dt
```
# Your first game
> Get something moving on screen in five minutes, right in your browser. No install, no hardware.
**Goal:** a red ball you drive around the screen with the arrow keys. About five minutes, right in your browser - nothing to install. If you can read a dozen lines of Python, you can do this.
Tip
New to words like *sprite* or *scene*? Keep the [Glossary](/concepts/glossary/) open as you go.
## 1. Write it, press Try it
[Section titled “1. Write it, press Try it”](#1-write-it-press-try-it)
Here is the whole game, about a dozen lines. Press **Try it** to run it live in your browser, then drive the ball with the arrow keys.
```python
import picogame as pg
import picogame_game # one-call setup
import picogame_input # buttons
import picogame_clock # frame timing
import picogame_shapes as shapes # make simple bitmaps in code
# Take over the screen and get a scene to draw into.
scene, _, _ = picogame_game.setup(background=pg.rgb565(20, 24, 40))
buttons = picogame_input.Buttons()
clock = picogame_clock.Clock(30) # aim for 30 frames per second
# A red ball — a 24px circle drawn in code, so we need no art yet.
ball = pg.Sprite(shapes.circle(24, pg.rgb565(230, 80, 80)), 150, 110)
scene.add(ball)
# The game loop: read input, move, redraw — forever.
while True:
buttons.poll()
ball.x += (buttons.is_pressed(buttons.RIGHT) - buttons.is_pressed(buttons.LEFT)) * 3
ball.y += (buttons.is_pressed(buttons.DOWN) - buttons.is_pressed(buttons.UP)) * 3
scene.refresh()
clock.tick()
```
[▶ Try it in the browser](/playground/?ex=first-game)
That is the picogame engine (the native C module, compiled to WASM) running in your browser. Edit the code, press Run, and your change shows instantly. When you want more room to tinker, open it in the [Playground](/playground/).
## 2. What the code does
[Section titled “2. What the code does”](#2-what-the-code-does)
Only four ideas carry the whole game; the rest is detail you’ll meet later:
| Line | Idea |
| ------------------------------------------------- | ------------------------------------------------------------------------------------------------------------------------------------------------------------------------------- |
| [`picogame_game.setup(...)`](/helpers/boot-loop/) | Returns the **scene** you draw into (plus two helper buffers you don’t need yet, the `_, _` in `scene, _, _`). This one call hides all the display setup and clears the screen. |
| `pg.Sprite(shapes.circle(...), x, y)` | A **sprite** is a movable picture. Here the picture is a circle we generated in code; later it’ll be your own art. |
| `scene.add(ball)` | Put the sprite **in the scene** so it gets drawn. |
| the `while` loop | The **game loop**: every frame, read input, change things, then `scene.refresh()`. The engine redraws only what moved. |
Why colors look like \`rgb565(r, g, b)\`
The screen stores colors in a packed format. Build every color with `pg.rgb565(red, green, blue)` (each component 0–255) and picogame handles the representation.
## 3. Take it further
[Section titled “3. Take it further”](#3-take-it-further)
* **Build on your PC.** Want a faster local loop, or to work with your own art files? Run the same game in the [desktop simulator](/simulator/): one `git clone`, then `python3 sim/run.py`.
* **Learn step by step.** The [tutorials](/tutorials/) build a Breakout, then a shooter, then an RPG, one new idea per step.
* **Get the mental model.** [How picogame works](/concepts/how-it-works/) explains the engine in five minutes, so the next things you build make sense.
* **Put it on a device.** When you’re ready for hardware, see [Run on hardware](/hardware/).
# Get it on your device
> Flash the picogame firmware, then download the ready-made games pack for your board — a launcher boots so you can pick a game and play.
Two steps put a menu of ready-to-play games on your handheld: flash the firmware once, then copy the pack for your board onto the drive. No coding needed — a [launcher](/launcher/) boots and lets you pick a game with the D-pad.
## 1. Flash the firmware
[Section titled “1. Flash the firmware”](#1-flash-the-firmware)
The firmware **is** the picogame engine — a CircuitPython build with the native-C module baked in. You flash it once per board.
Download the `.uf2` for your board from [Supported hardware](/supported-hardware/#download-firmware), hold **BOOTSEL** while you plug the board in, and drag the `.uf2` onto the drive that appears. The board reboots and shows up as a **`CIRCUITPY`** drive.
## 2. Download the pack for your board
[Section titled “2. Download the pack for your board”](#2-download-the-pack-for-your-board)
Each pack is a ready `CIRCUITPY` layout — the launcher, the games and demos (compiled `.mpy`), the helper libraries and fonts. Pick the one for your board and **extract it onto the `CIRCUITPY` drive**.
* **[RP2040 — PicoPad, plain Pico](/download/picogame-rp2040.zip)** — a tight-RAM set (8 games + 10 demos) tuned to fit the RP2040. Start here on a PicoPad or a bare Pico.
* **[RP2350 — PicoPad 2, Pico 2](/download/picogame-rp2350.zip)** — the full portfolio (every game and demo) with intro splashes, for RP2350-class boards with RAM to spare.
* **[Fruit Jam](/download/picogame-fruitjam.zip)** — the full portfolio plus a `settings.toml` that sets the Fruit Jam audio levels and DVI display.
Not sure which chip your board has? See [Supported hardware](/supported-hardware/).
## 3. Play
[Section titled “3. Play”](#3-play)
Eject the drive and reset the board. The launcher lists the games — **UP/DOWN** to move, **A** to play, the board’s **RESET** button to come back to the menu.
## Next
[Section titled “Next”](#next)
* Add your own game to the menu, or see how the launcher finds games → [The games menu](/launcher/).
* Want to build a game rather than play the packs? → [Your first game](/start/first-game/) and [Run on hardware](/hardware/).
# What you can build
> The genres picogame is genuinely good at - platformers, scrolling shooters, top-down RPGs, even a pseudo-3D racer - with playable examples.
picogame is a retained-mode 2D engine: it redraws only what moved, so it shines where a mostly-still screen carries a few busy things on top. In practice that makes it strong at:
* **Tile-based worlds** — top-down RPGs and maze games: big boards for almost no RAM.
* **Scrolling shoot-’em-ups** — pooled bullets and enemies streaming across the screen.
* **Single-screen arcade & platformers** — a hero, platforms, animated art, a framed HUD.
* **Pseudo-3D racing** — a perspective road that bends as you steer, drawn by **StripDraw** with no extra RAM.

**Platformer** — hero on platforms, animated art.

**Pseudo-3D racer** — a StripDraw road that bends, ghost lap.

**Top-down RPG** — tilemap world, NPCs, encounters.

**Scrolling shooter** — pooled sprites, torpedoes to dodge.

**Maze chase** — tilemap board, ghost AI.

**Breakout** — paddle, brick wall, particles.
[▶ Open the full gallery & playany of them in your browser — Asteroids, Snake, Tetris, Flappy, soccer, pinball & more](/examples/)
Every title is downloadable from the [picogame repo](https://github.com/MakerClassCZ/picogame), and its header comment lists exactly what it uses — so the closest example doubles as your template.
## Small effects, clear feedback
[Section titled “Small effects, clear feedback”](#small-effects-clear-feedback)
The same engine gives you the juice that makes a game *feel* good — screen shake, particles, eased motion, palette tricks — each a couple of lines:

**Screenshake** — trauma-based, on every hit.

**Particles** — bursts and fountains.

**Tweens** — eased motion, no snapping.

**Palette tricks** — recolour with no extra art.
[Effects referencefor developers: the API and when to reach for each](/helpers/effects/)
**What it’s not:** picogame is 2D — not a 3D engine, no heavy physics, and on the RP2040 not full-screen 60 FPS. Design within those limits and lean into them.
## Ready to make one?
[Section titled “Ready to make one?”](#ready-to-make-one)
* **[Make your first game](/start/first-game/)** — five minutes to something moving.
* **[The tutorials](/tutorials/)** — build a Breakout, a shooter, and an RPG step by step.
# Supported hardware
> picogame is a native module inside a CircuitPython fork, so it runs on boards with a picogame firmware build - which needs an SPI display, a few buttons…
picogame is a native module inside a CircuitPython fork, so it runs on boards with **a picogame firmware build** - which needs an SPI display, a few buttons, and (optionally) a PWM speaker. Boards below have builds; other CircuitPython boards with an SPI display can be ported (see [Build your own board](/custom-board/)). The reference device everything is tuned and measured against is the PicoPad.
## Devices
[Section titled “Devices”](#devices)
| Device | MCU | Notes |
| ---------------------------------- | -------- | --------------------------------------------------------------------------------------------------------------------------------------- |
| **Pajenicko PicoPad** | RP2040 | **Primary / reference device.** 320×240 ST7789, D-pad + A/B/X/Y, speaker, SD, NVM. A prebuilt firmware and button profile are provided. |
| PicoPad 2 / RP2350 boards | RP2350 | Build-only (not yet verified on this hardware). Same layout and a larger heap than the RP2040 builds. |
| ESP32-S3 boards (e.g. Feather TFT) | ESP32-S3 | Build-only (not yet verified on this hardware). Wire the buttons for your board (see below). |
| Desktop simulator | your PC | A development tool rather than a hardware target. It runs the same game-facing API but does not reproduce device RAM limits or timing. |
The engine is a native C module in a CircuitPython fork. PicoPad has a **prebuilt firmware**; for other boards you build the fork for that board, see [The firmware build](/firmware/).
## Download firmware
[Section titled “Download firmware”](#download-firmware)
Each link below is a firmware build for one board. Flash it, then copy `code.py` and the required `lib/` modules from [picogame-libs](https://github.com/MakerClassCZ/picogame-libs).
Check the status of your board
The **PicoPad** firmware is the reference build and is tested on the device. Builds without a specific tested status in the table are experimental and may need board-specific work. For a reproducible release, build the CircuitPython fork for the exact board and commit you use (see [The firmware build](/firmware/)).
| Board | Firmware |
| ------------------------------------------------------------------------------------------------------------- | ------------------------------------------------ |
| **Pajenicko PicoPad** (RP2040) — *tested* | [`picopad.uf2`](/firmware/picopad.uf2) |
| PicoPad 2 (RP2350) — *DIY* | [`picopad2.uf2`](/firmware/picopad2.uf2) |
| PicoPad 2 W (RP2350) — *DIY* | [`picopad2w.uf2`](/firmware/picopad2w.uf2) |
| Pimoroni PicoSystem (RP2040) | [`picosystem.uf2`](/firmware/picosystem.uf2) |
| µGame22 (RP2040) | [`ugame22.uf2`](/firmware/ugame22.uf2) |
| Raspberry Pi Pico (RP2040) | [`pico.uf2`](/firmware/pico.uf2) |
| Raspberry Pi Pico W (RP2040) | [`pico_w.uf2`](/firmware/pico_w.uf2) |
| Raspberry Pi Pico 2 (RP2350) | [`pico2.uf2`](/firmware/pico2.uf2) |
| Raspberry Pi Pico 2 W (RP2350) | [`pico2_w.uf2`](/firmware/pico2_w.uf2) |
| TinyCircuits Thumby Color (RP2350) | [`thumby_color.uf2`](/firmware/thumby_color.uf2) |
| **Adafruit Fruit Jam** (RP2350B, **DVI/HDMI out**) — *tested: DVI display, TLV320 audio, USB input, launcher* | [`fruitjam.uf2`](/firmware/fruitjam.uf2) |
| ESP32-S3 — generic (Adafruit Feather TFT) | [`feather_s3.uf2`](/firmware/feather_s3.uf2) |
| µGame S3 (ESP32-S3) | [`ugame_s3.uf2`](/firmware/ugame_s3.uf2) |
| VIDI X (ESP32) | [`vidi_x.bin`](/firmware/vidi_x.bin) |
*The two **PicoPad 2** builds are **DIY / unofficial**, for a PicoPad whose Pico module has been swapped for a Pico 2 / Pico 2 W (RP2350). There is no official Pico 2 PicoPad product and no official CircuitPython for it: same PicoPad hardware, just more RAM (\~520 KB heap). Use at your own risk.*
*The **Fruit Jam** build renders through the DVI framebuffer instead of an SPI panel, and is a well-tested platform — DVI rendering, TLV320 audio, USB gamepad/keyboard input and the on-device launcher all run on hardware. Configure it in `settings.toml` (`CIRCUITPY_DISPLAY_WIDTH`/`_HEIGHT`/`_ROTATION`) with one of two colour depths — `setup()` handles either automatically: `CIRCUITPY_DISPLAY_COLOR_DEPTH=16` for full-colour RGB565 (e.g. 320×240), or `=8` for RGB332, the only depth picodvi offers at **640×480** (full resolution). See [Run on hardware](/hardware/) for the framebuffer/colour-depth details. **Audio** on the Fruit Jam is the I2S TLV320 DAC — install `adafruit_tlv320` + `adafruit_bus_device` in `CIRCUITPY/lib` (they aren’t bundled) and raise the volume keys, or it’s silent; `PICOGAME_DEBUG=1` prints why. **Input** is a USB gamepad or keyboard (the board has no game buttons) — see [Input & controls](/helpers/input/).*
### Experimental: ROMFS asset builds
[Section titled “Experimental: ROMFS asset builds”](#experimental-romfs-asset-builds)
Every RP2040/RP2350 board above also has a **`-romfs`** variant that reserves a **64 KB ROMFS asset region** in flash: `picogame.romfs_program("/assets.romfs")` writes game assets there once, and bitmaps can use their pixel data **from flash without copying it to the heap** (`romfs_mount` + `pg.Bitmap` over the file buffer). The ESP32 port doesn’t support the region yet.
| Board | Firmware |
| --------------------------------------------- | ------------------------------------------------------------ |
| **Pajenicko PicoPad** — *ROMFS device-tested* | [`picopad-romfs.uf2`](/firmware/picopad-romfs.uf2) |
| PicoPad 2 (DIY) | [`picopad2-romfs.uf2`](/firmware/picopad2-romfs.uf2) |
| PicoPad 2 W (DIY) | [`picopad2w-romfs.uf2`](/firmware/picopad2w-romfs.uf2) |
| Pimoroni PicoSystem | [`picosystem-romfs.uf2`](/firmware/picosystem-romfs.uf2) |
| µGame22 | [`ugame22-romfs.uf2`](/firmware/ugame22-romfs.uf2) |
| Raspberry Pi Pico | [`pico-romfs.uf2`](/firmware/pico-romfs.uf2) |
| Raspberry Pi Pico W | [`pico_w-romfs.uf2`](/firmware/pico_w-romfs.uf2) |
| Raspberry Pi Pico 2 | [`pico2-romfs.uf2`](/firmware/pico2-romfs.uf2) |
| Raspberry Pi Pico 2 W | [`pico2_w-romfs.uf2`](/firmware/pico2_w-romfs.uf2) |
| TinyCircuits Thumby Color | [`thumby_color-romfs.uf2`](/firmware/thumby_color-romfs.uf2) |
Switching between the two flavors reformats CIRCUITPY once
The `-romfs` variant moves the flash layout (the drive shifts to make room for the region), so the **first** flash across flavors — either direction — reformats the CIRCUITPY drive: copy your games, `lib/` and files off the device first, then copy them back. Staying within one flavor preserves files as usual, and NVM saves (`picogame_save`) are never affected. On the PicoPad the ROMFS feature is device-tested; treat the other boards’ variants as experimental.
**Flashing:** put the board in bootloader mode. Pico/PicoPad: hold **BOOTSEL** while connecting USB (or double-tap **RESET**) → an `RPI-RP2` USB drive appears → drag the `.uf2` onto it → it reboots as `CIRCUITPY`. Then copy your `code.py` + the `lib/` modules it imports. On a bare Pico, also wire a display + buttons and build the display in code (see *Build your own* below).
**About `.mpy` files:** a game folder may hold an **`mpy/`** subfolder. Those are **compiled MicroPython modules** (the game’s data/asset modules run through `mpy-cross`): they import faster, take less storage, and, most importantly on a tiny-RAM board, skip the parse-time RAM spike a large `.py` causes at import. **On hardware, copy the `mpy/` files next to `code.py`** (not the loose `.py` assets); the loose `.py` are the source the **simulator** runs directly. Same idea as the shipped `lib/*.mpy` engine helpers.
The **classic ESP32** (VIDI X) ships a `.bin` flashed with `esptool` (no UF2 bootloader); ESP32-**S3** boards still use drag-and-drop UF2.
Display, sound, and button setup
**Screen and sound auto-map** wherever the board firmware exposes them; picogame uses `board.DISPLAY` and the output picked by `picogame_audioout` (a PWM speaker pin, or an I2S DAC where the board has one), which the onboard-screen handhelds here (PicoSystem, µGame22, µGame S3, Thumby Color, VIDI X) define. So on those the screen lights up with no setup; sound works if the board names a speaker pin (otherwise pass one: `picogame_audio.Audio(pin)`). On an **I2S DAC board (Fruit Jam)** install `adafruit_tlv320` + `adafruit_bus_device` and set the volume keys, or it stays silent — see [Audio & music](/helpers/audio/).
**Buttons** map automatically on boards with a picogame profile: **PicoPad, PicoSystem, µGame22, µGame S3, and Thumby Color**. **VIDI X** needs separate handling because its D-pad uses an analog resistor ladder, and unlisted boards need an explicit map. On a **USB-host board (Fruit Jam)** a USB gamepad or keyboard is the input (auto-attached; see [Input & controls](/helpers/input/)). Set a GPIO map in `settings.toml` without rebuilding the firmware; `picogame_input.py` contains profiles you can use as examples:
```toml
PICOGAME_BUTTONS = "UP=GP4 DOWN=GP5 LEFT=GP3 RIGHT=GP2 A=GP7 B=GP6 X=GP9 Y=GP8"
```
On a board with **no onboard display** (a bare Pico), you also build the display in code. Both steps are shown in *Build your own → Bring-up* below.
## What a board needs
[Section titled “What a board needs”](#what-a-board-needs)
* **A CircuitPython-supported MCU** — RP2040, RP2350 or ESP32-S3 are the tested families.
* **RAM** usually sets the asset budget. The current measured builds provide about **190 KB** of heap on RP2040 and **520 KB** on RP2350; the largest contiguous block is smaller and varies with firmware configuration. Measure your build (see [Fit it in RAM](/memory/)).
* **An SPI display** driven by `displayio` (or a DVI/HSTX framebuffer on RP2350 boards like the Fruit Jam).
* **A few buttons** on GPIO — a D-pad + A/B is the baseline; X/Y are optional. Or a USB gamepad/keyboard on a USB-host board.
* **Optional: a PWM-capable pin** for a small speaker, **or an I2S DAC** (sound is opt-in).
## Displays
[Section titled “Displays”](#displays)
picogame uses the `displayio` SPI display stack. The controllers listed below are the current tested or supported targets; other `displayio` SPI displays may need verification.
* **Resolution is flexible, if the game reads it.** 320×240 is the reference size. The engine and `Scene` render to whatever size the display reports, but a game has to *lay itself out* from that size rather than hardcode 320×240: read `board.DISPLAY.width`/`height` and derive your layout from it. The `arkanoid` example does exactly that (brick width = display width ÷ columns), so the **same file runs on 240- and 320-px** screens. Less width/height just means a smaller play area.
* **Controllers:** **ST7789** is the reference (PicoPad). **ST7735** (smaller panels) and **ILI9341** also work, as do other `displayio`-supported SPI controllers.
* **12-bit colour (RGB444):** the firmware can send 12-bit instead of 16-bit to cut SPI traffic on transfer-bound scenes. It is an opt-in, compile-time capability: the default everywhere is RGB565, and a game enables 12-bit only where the board advertises it (`picogame.RGB444_SUPPORTED`, e.g. `rgb444="auto"` in `picogame_game.setup`). Requesting `rgb444=True` on a build without the support raises an error rather than mis-driving the panel (ST7789/ST7735 have COLMOD 12-bit, ILI9341 does not). Details in [Clocks, SPI & display limits](/hardware-limits/).
## Build your own on a breadboard
[Section titled “Build your own on a breadboard”](#build-your-own-on-a-breadboard)
No board from the list? A picogame console is cheap to build yourself. The minimum is:
* a **Raspberry Pi Pico** — Pico 1, Pico W or **Pico 2** all work;
* a **320×240 SPI display** with an **ST7789** or **ILI9341** controller;
* **at least 6 buttons** — a D-pad + A/B (add X/Y for two more);
* a small **piezo buzzer** for sound (optional).
That’s enough to play everything on this site. The full pin map, the three ways to get `board.DISPLAY`, the `settings.toml` button config, and orientation/colour troubleshooting are in **[Build your own board](/custom-board/)**.

Wire the display’s `vcc / gnd / cs / res / dc / mosi / sck / bl`, the six buttons and the piezo as shown. The exact GPIO pins and the matching `settings.toml` button map are on [Build your own board](/custom-board/); a build video is on the way.
# Web level editor
> A browser editor for picogame scenes — paint tilemaps, place sprites, build scrolling maps bigger than one screen, and export scene.json.
This **browser editor for picogame scenes and levels** lets you import sprite and tileset PNGs, paint tilemaps (with per-tile solid/coin/goal/hazard flags), place sprites, HUD labels, zones, spawn points and particles, set up a follow-camera, and export the `scene.json` that `tools/scene_build.py` bakes for the device/simulator.
The canvas is a window onto a world that can be larger than the device screen, so you can use the editor for both fixed-screen and scrolling levels.
▦**Open the level editor**full-screen · paint tiles, place sprites, build scrolling maps, export scene.json
The button above opens the editor full-screen (Esc closes). It also lives standalone at [`/editor/`](/editor/). On first run a short getting-started card appears; press **?** any time for the full shortcut list.
## Learn by loading a demo
[Section titled “Learn by loading a demo”](#learn-by-loading-a-demo)
The **Demos** menu in the top bar loads ready-made levels. Open one to see how its **Map size** and **Camera** are configured:
* **Sample (one screen)** — a compact one-screen level showing every feature.
* **Scrolling platformer (bounded)** — a 960×240 world (\~3 screens wide). Follow-camera on **axis x** with bounds = the finite world, so the camera **clamps** at the left/right ends (a level with definite ends).
* **Open world (bigger both ways)** — a 640×480 quest map, bigger than the screen in *both* dimensions. Follow-camera on **axis xy**, so you free-roam in x *and* y.
The getting-started card links to the same two scrolling demos.
## World size vs. device screen
[Section titled “World size vs. device screen”](#world-size-vs-device-screen)
Two sizes matter, and the editor shows them as a pair in the **Level** panel (Select tool, nothing selected):
* **World size** — how big the **whole level** is, in **pixels**. This is *where you set the size of your level*: it defines the world extent and drives the camera bounds, **Fit**, the minimap, and the size of new tilemap layers. A live readout shows “≈ N × M screens”.
* **Device screen** — one handheld view (320×240), drawn as the dashed **white box** on the canvas.
To make a level that **scrolls**, set a World size bigger than one screen.
## Make a level that scrolls
[Section titled “Make a level that scrolls”](#make-a-level-that-scrolls)
1. In the **Level** panel (Select tool, nothing selected), set **World size** bigger than one screen: type `world w×h` and **Apply world size**, or use a preset: **1 screen**, **3× wide** (platformer), **2×2 screens** (open world). The editor offers to grow/crop your tilemap layers to fill it.
2. Pick the **Paint** tool and a tileset (import a PNG, or **+ Colour tileset** for placeholders); a new layer already fills the whole world. Paint your ground across it. **Pan** with Space-drag / middle-drag / the Pan tool, use the **minimap** (top-right) to jump around, **Fit** to frame the whole world, **100%** for 1:1.
3. **Place** a sprite and name one `player` (Select tool → *name* field).
4. In **Select** set **Camera → follow → player**. Bounds default to the whole World size (*auto*); uncheck it to drag an explicit orange **camera-bounds** frame.
5. **Export → scene.json**, keep the PNGs next to it, and bake.
Changing World size (or a layer’s own size in the Paint panel) pads with empty tiles on grow, and crops with a confirm if painted tiles would be lost. Everything is undoable (Ctrl+Z). The per-layer **Layer size** control is for cases where a layer should be smaller than the world or offset for parallax. For most levels, change **World size**.
## Tools & controls
[Section titled “Tools & controls”](#tools--controls)
| Tool | Key | Does |
| ------ | --------- | --------------------------------------------------------------------------------------------- |
| Select | 1 / V | Pick + move objects (drag). Click a stacked spot again to cycle. Edit tile flags/colour. |
| Paint | 2 / B | Paint the active layer. Drag = brush, **Shift-drag = rectangle**, **Alt-click = flood fill**. |
| Place | 3 / P | Drop the chosen sprite. |
| HUD | 4 | Camera-fixed text label; also manages **particle layers**. |
| Zone | 5 | Drag a trigger rectangle, then tag it. |
| Point | 6 | Drop a named point (e.g. `spawn`). |
| Pan | H / Space | Pan the view (middle-drag also pans). |
Wheel scrolls, **Ctrl/⌘+wheel** zooms to the cursor, `+`/`−` zoom, `F` fits. Arrows nudge the selection (Shift = ×10) or pan when nothing is selected. `Ctrl+Z`/`Y` undo/redo, `Ctrl+C`/`V`/`D` copy/paste/duplicate, `Delete` deletes, `Esc` deselects. The panel on the right changes with the active tool, so you only see the controls that tool needs. Status messages do not interrupt your work with `prompt()` or `alert()` dialogs.
## Tile flags
[Section titled “Tile flags”](#tile-flags)
A flag gives a tile a **meaning the game reads**; it does not change how it looks. The loader builds fast lookup tables so the game asks the meaning instead of hardcoding tile numbers:
| flag | the game reads it as | typical use |
| ------ | --------------------------------- | -------------------------------------- |
| solid | `view.is_solid(tx, ty)` | walls / floor that block movement |
| coin | `view.tile_has(tx, ty, "coin")` | collectible the game removes on pickup |
| goal | `view.tile_has(tx, ty, "goal")` | level exit / win tile |
| hazard | `view.tile_has(tx, ty, "hazard")` | lava / spikes that hurt the player |
Toggle **Show flag badges on map** (Paint panel) to see coloured corner badges on flagged tiles. **Colour tilesets** (Paint → **+ Colour tileset**) make a placeholder set with no art; edit each colour with a picker, **+ add colour** for more.
## Bake and run on a device or in the simulator
[Section titled “Bake and run on a device or in the simulator”](#bake-and-run-on-a-device-or-in-the-simulator)
Keep the imported/exported PNGs next to the downloaded `scene.json`, then:
```sh
python3 tools/scene_build.py my.scene.json # -> my_scene.py (SCENE = {...})
python3 sim/run.py # preview in the simulator
tools/build_mpy.sh # optional: my_scene.mpy for the device
```
Load it in a game with `picogame_scene.load(pg, my_scene.SCENE, font=...)`. See `examples/picogame_scene_example.py` for a data-driven game built on a baked scene.
# picogame tutorials — learn the engine by building games
> These tutorials introduce the picogame engine one group of mechanics at a time. Every step is a complete, runnable program, and the next step builds on it.
These tutorials introduce the picogame engine **one group of mechanics at a time**. Every step is a complete, runnable program, and the next step builds on it. Compare `stepN` and `stepN+1` side by side to see the code added for the new concept.
Each tutorial ends with a small completed game:
| Tutorial | Genre | What it teaches |
| ------------------------------------------------------------------------------------------------------------------------------- | ---------------------- | ------------------------------------------------------------------------------------------------------------------------------------------------------------------------------------------------------------------------------------------------------------------------------------------------------------ |
| **[01-bounce](/tutorials/01-bounce/)** ([source](https://github.com/MakerClassCZ/picogame/tree/main/tutorials/01-bounce)) | Breakout / Arkanoid | the render loop, input, sub-pixel movement, wall and paddle bounces, box collision, a `Tilemap` brick wall, a HUD, particles, and sound. Placeholder shapes and imported art both use a `Bitmap` on the same `Sprite`, so replacing the artwork does not change the game logic. |
| **[02-starship](/tutorials/02-starship/)** ([source](https://github.com/MakerClassCZ/picogame/tree/main/tutorials/02-starship)) | top-down space shooter | rotation via pre-baked frames, vector thrust + screen wrap, **object pools** (bullets, enemies), circular collision + splitting, escalating waves, explosions/exhaust particles, audio, and a **title → play → game-over state machine**. |
| **[03-quest](/tutorials/03-quest/)** ([source](https://github.com/MakerClassCZ/picogame/tree/main/tutorials/03-quest)) | top-down RPG | a **world bigger than the screen** + a following **camera** (`set_view` with clamping), **tile-based wall collision**, a directional **walk animation**, collectible items + a fixed HUD, an **NPC + dialog**, bump **combat** (HP, i-frames), and a **quest** (objective → unlock a door → reach the goal). |
Do them **in order**: each assumes the fundamentals of the ones before it.
## How to run a step
[Section titled “How to run a step”](#how-to-run-a-step)
You can run each step in the browser with the **Try it** button. To run a step file locally, use the desktop simulator (no hardware needed; it can render headless, saves a PNG):
```bash
python3 sim/run.py tutorials/01-bounce/step3_ball.py --shot /tmp/out.png
```
Useful flags: `--frames N` (how long to run), `--hold RIGHT,B` (hold buttons for the whole run, so you can test input headlessly), `--backend pygame` (a live, playable window if you have pygame installed).
On the **PicoPad** (or any supported board): copy the step file plus the `lib/` helpers it imports to `CIRCUITPY/` and name it `code.py` (or import it). Each file’s header comment lists what it needs.
## How each step is structured
[Section titled “How each step is structured”](#how-each-step-is-structured)
* The **header comment** states *what you learn*, *what’s new vs the previous step*, and the exact run command.
* Inline comments mark the **new lines** so you can see the change at a glance.
* The README in each tutorial folder explains why each addition is useful and ends each step with a small **Try it** change.
## The engine pieces you’ll meet
[Section titled “The engine pieces you’ll meet”](#the-engine-pieces-youll-meet)
All the helpers live in `lib/` (pure Python, work on device and in the simulator):
| Helper | Role |
| --------------------------------- | ---------------------------------------------------------------------------------- |
| `picogame_game.setup()` | resolve the display and create a Scene; on SPI targets, also create render strips |
| `picogame` (C module) | `Sprite`, `Bitmap`, `Tilemap`, `Particles`, `Canvas`, `Scene`, `collide`, `rgb565` |
| `picogame_input` | buttons → bitmask, `is_pressed` / `just_pressed` |
| `picogame_clock` | frame-rate cap + `dt`; a fixed-timestep accumulator |
| `picogame_shapes` | generate solid/round/polygon bitmaps (rectangles, balls, ships) |
| `picogame_pool` | a fixed-size sprite pool for spawners (bullets, enemies) |
| `sprite.overlaps` / `sprite.near` | zero-alloc box / circular collision, built into Sprite |
| `picogame_ui` | `SceneLabel` (in-scene HUD text), text box, menu |
| `picogame_font` | render strings to bitmaps with the bundled font |
| `picogame_audio` | beeps (`tone()`) and `.wav` playback |
## After the tutorials: move to the scene editor
[Section titled “After the tutorials: move to the scene editor”](#after-the-tutorials-move-to-the-scene-editor)
Once you understand the mechanics, the **editor** (`editor/`) can replace hand-placing every tile and sprite in Python. It lets you paint maps, place sprites, and assign tile properties, then export a **scene** that the `picogame_scene` loader builds. The same data runs on device and in the simulator. See `examples/picogame_platformer_scene.py` for a full game whose level (tiles, collisions, coins, enemies, camera) is loaded from editor data, with only the gameplay left in Python. The tutorials teach the mechanics; the editor moves level layout into data.
## Next steps after the tutorials
[Section titled “Next steps after the tutorials”](#next-steps-after-the-tutorials)
After the tutorials, continue with:
* **[Game patterns](/concepts/patterns/)** + **[Snippets](/snippets/)** — the reusable game-loop + `State` shape every bigger game grows into, plus a ready-to-run **game skeleton** to start your own project from (open it in the [Playground](/playground/?ex=game-skeleton)). This is the natural next step now that you’ve built three games by hand.
* **[Feature guide](/features/)** — the task-oriented tour of everything the engine can do (which drawing surface to pick, sprite transforms, collision, HUDs, audio, RAM budgeting), with alternatives for each. Use it when choosing a tool for a task.
* **The helpers** (`lib/`) — the pure-Python modules you met above (`picogame_pool`, `picogame_ui`, `picogame_clock`, `picogame_anim`, …); the feature guide links each to its use.
* **[Glossary](/concepts/glossary/)** — short, plain-language definitions of any unfamiliar term such as sprite, tilemap, dirty region, AABB, or parallax.
# Tutorial 1 — Bounce
> Build a Breakout/Arkanoid game one mechanic at a time, then replace generated rectangles with finished bitmap art.
We build a complete brick-breaker, one mechanic per step. Each `stepN_*.py` runs on its own: read the code below and press **Try it** to run that step right in the browser, or run it locally with:
Run these from the cloned `picogame` folder (the one from [Your first game](/start/first-game/)).
```bash
python3 sim/run.py tutorials/01-bounce/stepN_name.py --shot /tmp/out.png
```
(add `--hold RIGHT` etc. to hold a button, or `--backend pygame` to play it live.)
The first eight steps use generated rectangles. The final step replaces their bitmaps without changing the game loop. Keeping art separate from mechanics also lets the editor change a scene’s graphics without changing its gameplay code.
***
### step 1 — `step1_hello.py` · the render loop
[Section titled “step 1 — step1\_hello.py · the render loop”](#step-1--step1_hellopy--the-render-loop)
 picogame uses [**retained mode**](/concepts/glossary/) (you add objects once and then just change what moved, instead of redrawing the screen yourself): you `scene.add()` objects once to the [`Scene`](/reference/), then each frame you change their state and call `scene.refresh()` and the engine redraws. A “paddle” is a [`Sprite`](/reference/) whose bitmap is a solid rectangle from [`picogame_shapes`](/reference/)’s `shp.rect(w, h, colour)`. [`picogame_game.setup()`](/helpers/boot-loop/) does the display boilerplate and returns `(scene, buffer_a, buffer_b)`. On SPI targets the last two values are reusable render strips; on framebuffer targets they are `None`. This step needs only the scene, so it uses `scene, _, _`. [`picogame_clock`](/reference/)’s `Clock(40)` caps the loop to 40 FPS. **You see:** a grey bar near the bottom. **Try it:** change the rectangle’s size/colour.
```diff
16 collapsed lines
# Bounce -- step 1: get ONE thing on screen.
#
# What you learn: the picogame render loop. A game is (a) a Scene you add objects
# to ONCE, then (b) a loop that moves things and calls scene.refresh(). The engine
# is retained-mode: you don't redraw by hand, you change object state and refresh.
#
# New in this step: picogame_game.setup(), picogame_shapes.rect(), pg.Sprite,
# scene.add(), scene.refresh(), the frame clock.
#
# Run it: python3 sim/run.py tutorials/01-bounce/step1_hello.py --shot /tmp/s1.png
# On device: copy this file + the lib/ helpers to CIRCUITPY.
import picogame as pg
import picogame_game
import picogame_clock
import picogame_shapes as shp
W, H = 320, 240
PADDLE_W, PADDLE_H = 44, 8
# setup() takes over the display and gives us a Scene + its two strip buffers.
+scene, _, _ = picogame_game.setup(background=pg.rgb565(8, 10, 24))
+clock = picogame_clock.Clock(40) # cap the loop to 40 FPS
# A "paddle" is just a Sprite whose bitmap is a solid rectangle. shp.rect(w,h,color)
# makes that bitmap -- a rectangle and an image sprite are the SAME kind of object
# (we'll prove that in step 9 by swapping the bitmap for art, with no other change).
+paddle = pg.Sprite(shp.rect(PADDLE_W, PADDLE_H, pg.rgb565(220, 220, 230)),
(W - PADDLE_W) // 2, H - 16)
+scene.add(paddle) # add it to the scene ONCE
+while True:
+ scene.refresh() # the engine draws the scene
+ clock.tick() # sleep to the next frame
```
[▶ Try it in the browser](/playground/?ex=01-bounce-step1_hello)
### step 2 — `step2_move.py` · input
[Section titled “step 2 — step2\_move.py · input”](#step-2--step2_movepy--input)
 [`picogame_input`](/reference/)’s `Buttons()` samples the buttons each `poll()`. `is_pressed(RIGHT) - is_pressed(LEFT)` is a tidy −1/0/+1 axis; we move the paddle and clamp it inside the screen. **You see:** the paddle slides with LEFT/RIGHT. **Try it:** change `SPEED`.
```diff
16 collapsed lines
# Bounce -- step 2: move the paddle with the buttons.
#
# What you learn: input. picogame_input.Buttons reads the board's buttons into a
# bitmask each frame; btn.is_pressed(btn.LEFT) is the held state. We move the paddle
# and clamp it to the screen so it can't leave.
#
# New vs step 1: picogame_input.Buttons, btn.poll()/btn.is_pressed(), sprite.move(),
# clamping with max()/min().
#
# Run: python3 sim/run.py tutorials/01-bounce/step2_move.py --hold RIGHT --shot /tmp/s2.png
import picogame as pg
import picogame_game
import picogame_input
import picogame_clock
import picogame_shapes as shp
W, H = 320, 240
PADDLE_W, PADDLE_H = 44, 8
SPEED = 5
scene, _, _ = picogame_game.setup(background=pg.rgb565(8, 10, 24))
+btn = picogame_input.Buttons() # NEW: the buttons
clock = picogame_clock.Clock(40)
paddle = pg.Sprite(shp.rect(PADDLE_W, PADDLE_H, pg.rgb565(220, 220, 230)),
(W - PADDLE_W) // 2, H - 16)
scene.add(paddle)
while True:
+ btn.poll() # sample the buttons once per frame
+# RIGHT minus LEFT gives -1 / 0 / +1 -- a tidy way to read a 1-axis control.
+ delta_x = btn.is_pressed(btn.RIGHT) - btn.is_pressed(btn.LEFT)
+if delta_x:
+ x = paddle.x + delta_x * SPEED
+ x = max(0, min(W - PADDLE_W, x)) # clamp inside the screen
+ paddle.move(x, paddle.y)
scene.refresh()
clock.tick()
```
[▶ Try it in the browser](/playground/?ex=01-bounce-step2_move)
### step 3 — `step3_ball.py` · velocity (whole pixels)
[Section titled “step 3 — step3\_ball.py · velocity (whole pixels)”](#step-3--step3_ballpy--velocity-whole-pixels)
 Velocity is just how many whole pixels a thing moves each frame: `velocity_x` across, `velocity_y` down. Add the velocity to the ball’s position every frame and it travels in a straight line. Here we keep it simple: integer velocity, integer position, whole-pixel steps. **You see:** the ball flies off-screen (we fix that next). **Try it:** change `velocity_x, velocity_y`.
```diff
17 collapsed lines
# Bounce -- step 3: a ball with velocity (whole-pixel movement).
#
# What you learn: velocity. Velocity is just how many pixels a thing moves each
# frame: velocity_x across, velocity_y down. Add the velocity to the ball's
# position every frame and it travels in a straight line. Here we move in WHOLE
# pixels -- integer velocity, integer position -- which is all this step needs.
#
# New vs step 2: a velocity (velocity_x, velocity_y) added to ball.x / ball.y each
# frame. The ball flies off-screen for now -- step 4 makes it bounce.
#
# Run: python3 sim/run.py tutorials/01-bounce/step3_ball.py --shot /tmp/s3.png
import picogame as pg
import picogame_game
import picogame_input
import picogame_clock
import picogame_shapes as shp
W, H = 320, 240
PADDLE_W, PADDLE_H = 44, 8
BALL = 6
scene, _, _ = picogame_game.setup(background=pg.rgb565(8, 10, 24))
btn = picogame_input.Buttons()
clock = picogame_clock.Clock(40)
paddle = pg.Sprite(shp.rect(PADDLE_W, PADDLE_H, pg.rgb565(220, 220, 230)),
(W - PADDLE_W) // 2, H - 16)
+ball = pg.Sprite(shp.rect(BALL, BALL, pg.rgb565(255, 240, 120)), W // 2, H // 2)
scene.add(paddle)
+scene.add(ball)
+velocity_x, velocity_y = 3, -3 # NEW: whole pixels moved per frame
while True:
btn.poll()
delta_x = btn.is_pressed(btn.RIGHT) - btn.is_pressed(btn.LEFT)
if delta_x:
paddle.move(max(0, min(W - PADDLE_W, paddle.x + delta_x * 5)), paddle.y)
+# move the ball by its velocity (whole pixels)
+ ball.move(ball.x + velocity_x, ball.y + velocity_y)
scene.refresh()
clock.tick()
```
[▶ Try it in the browser](/playground/?ex=01-bounce-step3_ball)
### step 4 — `step4_walls.py` · reflection
[Section titled “step 4 — step4\_walls.py · reflection”](#step-4--step4_wallspy--reflection)
 A bounce is just flipping the velocity component heading into a wall and pinning the ball to the edge so it can’t tunnel out. Left/right flip `velocity_x`, the top flips `velocity_y`. Still whole-pixel velocity here. The bottom stays open; falling past it is a “miss”. **You see:** the ball bounces around three walls forever. **Try it:** make the top open too and watch it escape.
```diff
17 collapsed lines
# Bounce -- step 4: bounce off the walls.
#
# What you learn: reflection. A bounce is just flipping the velocity component that
# points into the wall, and pinning the position back to the edge so the ball can't
# tunnel out. Left/right flip velocity_x; the top flips velocity_y. We're still
# moving in whole pixels (integer velocity). We leave the BOTTOM open -- a ball that
# falls past it is a missed ball (step 5 turns that into "lose a life").
#
# New vs step 3: edge tests against ball.x/.y, inverting velocity_x/velocity_y on contact.
#
# Run: python3 sim/run.py tutorials/01-bounce/step4_walls.py --shot /tmp/s4.png
import picogame as pg
import picogame_game
import picogame_input
import picogame_clock
import picogame_shapes as shp
W, H = 320, 240
PADDLE_W, PADDLE_H = 44, 8
BALL = 6
scene, _, _ = picogame_game.setup(background=pg.rgb565(8, 10, 24))
btn = picogame_input.Buttons()
clock = picogame_clock.Clock(40)
paddle = pg.Sprite(shp.rect(PADDLE_W, PADDLE_H, pg.rgb565(220, 220, 230)),
(W - PADDLE_W) // 2, H - 16)
ball = pg.Sprite(shp.rect(BALL, BALL, pg.rgb565(255, 240, 120)), W // 2, H // 2)
scene.add(paddle)
scene.add(ball)
velocity_x, velocity_y = 3, -3
while True:
btn.poll()
delta_x = btn.is_pressed(btn.RIGHT) - btn.is_pressed(btn.LEFT)
if delta_x:
paddle.move(max(0, min(W - PADDLE_W, paddle.x + delta_x * 5)), paddle.y)
ball.move(ball.x + velocity_x, ball.y + velocity_y)
+# walls: flip the component heading into the wall, and pin to the edge
+if ball.x < 0:
+ ball.move(0, ball.y)
+ velocity_x = -velocity_x
+elif ball.x > W - BALL:
+ ball.move(W - BALL, ball.y)
+ velocity_x = -velocity_x
+if ball.y < 0:
+ ball.move(ball.x, 0)
+ velocity_y = -velocity_y
scene.refresh()
clock.tick()
```
[▶ Try it in the browser](/playground/?ex=01-bounce-step4_walls)
### step 5 — `step5_paddle.py` · box collision + feel
[Section titled “step 5 — step5\_paddle.py · box collision + feel”](#step-5--step5_paddlepy--box-collision--feel)
 `pg.collide(ax1,ay1,ax2,ay2, bx1,by1,bx2,by2)` is a fast [box-overlap test](/concepts/glossary/) (AABB, axis-aligned bounding box): it just checks whether two upright rectangles overlap. On a paddle hit (only while moving down) we send the ball up and nudge `velocity_x` by *where* on the paddle it landed, so you can aim. That variable bounce angle is **why we now need sub-pixel movement**: a steered ball travels at speeds like 1.4 px/frame, *fractions* of a pixel that whole-pixel integers can’t express. So the ball now keeps a sub-pixel position in `ball.fx`/`ball.fy` (floats) with a float velocity; `ball.x`/`ball.y` are just those values rounded to whole pixels for drawing and collision. Falling past the bottom costs a life and re-serves. **You see:** a volley you can keep alive. **Try it:** change the `0.06` steering factor.
```diff
21 collapsed lines
# Bounce -- step 5: the paddle hits the ball, and you can miss.
#
# What you learn: box collision + a control-feel trick, and WHY we now need
# sub-pixel movement. pg.collide(ax1,ay1,ax2,ay2, bx1,by1,bx2,by2) is a fast
# axis-aligned overlap test. On a paddle hit we send the ball upward and steer it
# by WHERE on the paddle it landed -- so you can aim. That variable bounce angle
# means the ball must travel at speeds like 1.4 px/frame: FRACTIONS of a pixel,
# which whole-pixel integers can't express. So the ball now keeps a sub-pixel
# position in ball.fx / ball.fy (floats) and a float velocity; ball.x / ball.y are
# just those values rounded to whole pixels for drawing and collision.
#
# New vs step 4: ball.fx/.fy + float velocity, pg.collide, steering the bounce by
# hit offset, lives + reset.
#
# Run: python3 sim/run.py tutorials/01-bounce/step5_paddle.py --hold LEFT --shot /tmp/s5.png
import picogame as pg
import picogame_game
import picogame_input
import picogame_clock
import picogame_shapes as shp
W, H = 320, 240
PADDLE_W, PADDLE_H = 44, 8
BALL = 6
scene, _, _ = picogame_game.setup(background=pg.rgb565(8, 10, 24))
btn = picogame_input.Buttons()
clock = picogame_clock.Clock(40)
paddle = pg.Sprite(shp.rect(PADDLE_W, PADDLE_H, pg.rgb565(220, 220, 230)),
(W - PADDLE_W) // 2, H - 16)
ball = pg.Sprite(shp.rect(BALL, BALL, pg.rgb565(255, 240, 120)), W // 2, H // 2)
scene.add(paddle)
scene.add(ball)
velocity_x, velocity_y = 2.4, -2.6 # NEW: float velocity (fractions of a pixel)
lives = 3
+def serve():
+global velocity_x, velocity_y
+ ball.move(W // 2, H // 2)
+ velocity_x, velocity_y = 2.4, -2.6
while True:
btn.poll()
delta_x = btn.is_pressed(btn.RIGHT) - btn.is_pressed(btn.LEFT)
if delta_x:
paddle.move(max(0, min(W - PADDLE_W, paddle.x + delta_x * 5)), paddle.y)
+# integrate the float velocity into the ball's sub-pixel position
+ ball.fx += velocity_x
+ ball.fy += velocity_y
+if ball.fx < 0:
+ ball.fx = 0; velocity_x = -velocity_x
+elif ball.fx > W - BALL:
+ ball.fx = W - BALL; velocity_x = -velocity_x
+if ball.fy < 0:
+ ball.fy = 0; velocity_y = -velocity_y
+# paddle bounce: only when moving DOWN and the boxes overlap
+if velocity_y > 0 and pg.collide(ball.x, ball.y, ball.x + BALL, ball.y + BALL,
paddle.x, paddle.y, paddle.x + PADDLE_W, paddle.y + PADDLE_H):
+ velocity_y = -abs(velocity_y)
+# steer: distance of ball centre from paddle centre -> sideways speed
+ velocity_x += (ball.x + BALL / 2 - (paddle.x + PADDLE_W / 2)) * 0.06
+if ball.fy > H: # missed the ball
+ lives -= 1
+if lives <= 0:
+ lives = 3
+serve()
scene.refresh()
clock.tick()
```
[▶ Try it in the browser](/playground/?ex=01-bounce-step5_paddle)
### step 6 — `step6_bricks.py` · the Tilemap
[Section titled “step 6 — step6\_bricks.py · the Tilemap”](#step-6--step6_brickspy--the-tilemap)
 A [`Tilemap`](/reference/) is a grid of identical tiles that share one image, instead of one sprite per cell. It’s backed by one tileset bitmap, 1 byte per cell, far cheaper than a sprite per brick. `shp.tileset_colors(w, h, [colours])` builds a sheet where value 0 is empty and 1..N are colours. Map the ball’s pixel to a tile (`tile_x = pixel_x // BRICK_W`), read it, and set it to 0 to clear it. Clear the wall → rebuild. **You see:** a 10×6 wall you break. **Try it:** change `ROWS` or the brick colours.
```diff
17 collapsed lines
# Bounce -- step 6: a wall of bricks (a Tilemap).
#
# What you learn: the Tilemap. A grid of tiles backed by ONE bitmap (a tileset),
# stored as 1 byte per cell -- far cheaper than a Sprite per brick. We build the
# tileset with shp.tileset_colors (frame 0 = empty, 1..4 = colours), fill the grid,
# and on a ball hit we find the tile under the ball, read it, and set it to 0 to
# clear it. Map a pixel to a tile with tx = (px - origin_x) // tile_w.
#
# New vs step 5: pg.Tilemap, shp.tileset_colors, pixel->tile mapping, clearing a tile.
#
# Run: python3 sim/run.py tutorials/01-bounce/step6_bricks.py --shot /tmp/s6.png
import picogame as pg
import picogame_game
import picogame_input
import picogame_clock
import picogame_shapes as shp
W, H = 320, 240
PADDLE_W, PADDLE_H = 44, 8
BALL = 6
+BRICK_W, BRICK_H = 32, 16 # brick (tile) size
+COLS, ROWS = W // BRICK_W, 6 # 10 x 6 wall
+BRICK_Y = 28 # wall top (leaves a HUD strip)
scene, _, _ = picogame_game.setup(background=pg.rgb565(8, 10, 24))
btn = picogame_input.Buttons()
clock = picogame_clock.Clock(40)
# tileset: value 0 empty, 1..4 = four brick colours
+brick_colors = [pg.rgb565(220, 70, 70), pg.rgb565(230, 150, 50),
+ pg.rgb565(70, 200, 90), pg.rgb565(80, 150, 230)]
+bricks = pg.Tilemap(shp.tileset_colors(BRICK_W, BRICK_H, brick_colors), COLS, ROWS)
+bricks.move(0, BRICK_Y)
+def build_wall():
+global bricks_left
+for tile_y in range(ROWS):
+for tile_x in range(COLS):
+ bricks.tile(tile_x, tile_y, 1 + (tile_y % 4)) # row -> colour 1..4
+ bricks_left = COLS * ROWS
build_wall()
paddle = pg.Sprite(shp.rect(PADDLE_W, PADDLE_H, pg.rgb565(220, 220, 230)),
(W - PADDLE_W) // 2, H - 16)
ball = pg.Sprite(shp.rect(BALL, BALL, pg.rgb565(255, 240, 120)), W // 2, H // 2)
+scene.add(bricks) # add the wall first (drawn under the ball)
scene.add(paddle)
scene.add(ball)
velocity_x, velocity_y = 2.4, -2.6
lives = 3
def serve():
global velocity_x, velocity_y
ball.move(W // 2, H // 2)
velocity_x, velocity_y = 2.4, -2.6
20 collapsed lines
while True:
btn.poll()
delta_x = btn.is_pressed(btn.RIGHT) - btn.is_pressed(btn.LEFT)
if delta_x:
paddle.move(max(0, min(W - PADDLE_W, paddle.x + delta_x * 5)), paddle.y)
ball.fx += velocity_x
ball.fy += velocity_y
if ball.fx < 0:
ball.fx = 0; velocity_x = -velocity_x
elif ball.fx > W - BALL:
ball.fx = W - BALL; velocity_x = -velocity_x
if ball.fy < 0:
ball.fy = 0; velocity_y = -velocity_y
if velocity_y > 0 and pg.collide(ball.x, ball.y, ball.x + BALL, ball.y + BALL,
paddle.x, paddle.y, paddle.x + PADDLE_W, paddle.y + PADDLE_H):
velocity_y = -abs(velocity_y)
velocity_x += (ball.x + BALL / 2 - (paddle.x + PADDLE_W / 2)) * 0.06
+# brick hit: the tile under the ball's centre
+ center_x, center_y = ball.x + BALL // 2, ball.y + BALL // 2
+ tile_x = center_x // BRICK_W
+ tile_y = (center_y - BRICK_Y) // BRICK_H
+if 0 <= tile_x < COLS and 0 <= tile_y < ROWS and bricks.tile(tile_x, tile_y):
+ bricks.tile(tile_x, tile_y, 0) # clear the brick
+ bricks_left -= 1
+ velocity_y = -velocity_y
+if bricks_left == 0: # cleared the wall -> rebuild
+build_wall()
+serve()
if ball.fy > H:
lives -= 1
if lives <= 0:
lives = 3
build_wall()
serve()
scene.refresh()
clock.tick()
```
[▶ Try it in the browser](/playground/?ex=01-bounce-step6_bricks)
### step 7 — `step7_hud.py` · text / status bar
[Section titled “step 7 — step7\_hud.py · text / status bar”](#step-7--step7_hudpy--text--status-bar)
 [`picogame_ui`](/reference/)’s `SceneLabel` renders text into the scene as a **fixed** layer (drawn by `refresh()`, and camera-independent, handy once the world scrolls). It uses the bundled `terminalio.FONT`, so no font asset. `label.set(...)` re-renders only when the text changes. **You see:** `SCORE / LIVES` across the top. **Try it:** add the brick count.
```diff
21 collapsed lines
# Bounce -- step 7: a score + lives status bar.
#
# What you learn: text / HUD. picogame_ui.SceneLabel renders text into the scene as a
# "fixed" layer -- it's drawn by scene.refresh() like everything else, and (because
# it's fixed) it would stay put even if the world scrolled (it doesn't here, but
# you'll want that in a platformer). It uses the bundled terminalio.FONT, so no font
# asset is needed. Call label.set(...) each frame; it only re-renders when the text
# actually changes.
#
# New vs step 6: terminalio.FONT, picogame_ui.SceneLabel, a running score.
#
# Run: python3 sim/run.py tutorials/01-bounce/step7_hud.py --shot /tmp/s7.png
import terminalio
import picogame as pg
import picogame_game
import picogame_input
import picogame_clock
import picogame_shapes as shp
import picogame_ui as ui
W, H = 320, 240
PADDLE_W, PADDLE_H = 44, 8
BALL = 6
BRICK_W, BRICK_H = 32, 16
COLS, ROWS = W // BRICK_W, 6
BRICK_Y = 28
BACKGROUND = pg.rgb565(8, 10, 24)
scene, _, _ = picogame_game.setup(background=BACKGROUND)
btn = picogame_input.Buttons()
clock = picogame_clock.Clock(40)
brick_colors = [pg.rgb565(220, 70, 70), pg.rgb565(230, 150, 50),
pg.rgb565(70, 200, 90), pg.rgb565(80, 150, 230)]
bricks = pg.Tilemap(shp.tileset_colors(BRICK_W, BRICK_H, brick_colors), COLS, ROWS)
bricks.move(0, BRICK_Y)
def build_wall():
global bricks_left
for tile_y in range(ROWS):
for tile_x in range(COLS):
bricks.tile(tile_x, tile_y, 1 + (tile_y % 4))
bricks_left = COLS * ROWS
build_wall()
paddle = pg.Sprite(shp.rect(PADDLE_W, PADDLE_H, pg.rgb565(220, 220, 230)),
(W - PADDLE_W) // 2, H - 16)
ball = pg.Sprite(shp.rect(BALL, BALL, pg.rgb565(255, 240, 120)), W // 2, H // 2)
scene.add(bricks)
scene.add(paddle)
scene.add(ball)
# NEW: a HUD label. Adding it to the scene happens inside SceneLabel (as a fixed layer).
+hud = ui.SceneLabel(scene, pg, terminalio.FONT, 4, 2, pg.rgb565(255, 255, 255), BACKGROUND)
velocity_x, velocity_y = 2.4, -2.6
+score = 0
lives = 3
def serve():
global velocity_x, velocity_y
ball.move(W // 2, H // 2)
velocity_x, velocity_y = 2.4, -2.6
while True:
btn.poll()
delta_x = btn.is_pressed(btn.RIGHT) - btn.is_pressed(btn.LEFT)
if delta_x:
paddle.move(max(0, min(W - PADDLE_W, paddle.x + delta_x * 5)), paddle.y)
17 collapsed lines
ball.fx += velocity_x
ball.fy += velocity_y
if ball.fx < 0:
ball.fx = 0; velocity_x = -velocity_x
elif ball.fx > W - BALL:
ball.fx = W - BALL; velocity_x = -velocity_x
if ball.fy < 0:
ball.fy = 0; velocity_y = -velocity_y
if velocity_y > 0 and pg.collide(ball.x, ball.y, ball.x + BALL, ball.y + BALL,
paddle.x, paddle.y, paddle.x + PADDLE_W, paddle.y + PADDLE_H):
velocity_y = -abs(velocity_y)
velocity_x += (ball.x + BALL / 2 - (paddle.x + PADDLE_W / 2)) * 0.06
center_x, center_y = ball.x + BALL // 2, ball.y + BALL // 2
tile_x, tile_y = center_x // BRICK_W, (center_y - BRICK_Y) // BRICK_H
if 0 <= tile_x < COLS and 0 <= tile_y < ROWS and bricks.tile(tile_x, tile_y):
bricks.tile(tile_x, tile_y, 0)
bricks_left -= 1
+ score += 10 # NEW: score on a hit
velocity_y = -velocity_y
if bricks_left == 0:
build_wall()
serve()
if ball.fy > H:
lives -= 1
if lives <= 0:
lives = 3
score = 0
build_wall()
serve()
+ hud.set("SCORE %05d LIVES %d" % (score, lives)) # update text, then draw it
scene.refresh() # draws the scene incl. the HUD
clock.tick()
```
[▶ Try it in the browser](/playground/?ex=01-bounce-step7_hud)
### step 8 — `step8_particles.py` · juice (particles + sound)
[Section titled “step 8 — step8\_particles.py · juice (particles + sound)”](#step-8--step8_particlespy--juice-particles--sound)
 Now we add some [juice](/concepts/glossary/), the small touches that make a hit feel good. [`Particles`](/reference/) is a cheap burst system: `emit(x, y, count, speed, life, colour)` then `tick()` each frame. We burst in the brick’s colour on every break. `picogame_audio.tone()` makes a beep with no `.wav`, a blip per hit. (Audio is wrapped in `try/except`, so it’s silent but safe where there’s no audio output, like the simulator.) **You see:** coloured sparks + (on hardware) a blip. **Try it:** change the particle `count`/`gravity`.
```diff
22 collapsed lines
# Bounce -- step 8: juice (particles + sound).
#
# What you learn: feedback that makes a hit feel good. pg.Particles is a cheap
# burst system: emit(x, y, count, speed, life, colour) spawns particles, tick()
# advances them (with gravity), and the scene draws them. We burst on every brick
# break, in the brick's colour. And picogame_audio.tone() builds a short square-wave
# beep with no .wav file -- a tiny blip on each hit. (Audio is wrapped in try/except
# so it degrades gracefully where there's no audio output, e.g. the simulator.)
#
# New vs step 7: pg.Particles (emit/tick), picogame_audio.tone() + Audio().sfx()
# (a blip on each hit and a low tone when you miss the ball).
#
# Run: python3 sim/run.py tutorials/01-bounce/step8_particles.py --shot /tmp/s8.png
import terminalio
import picogame as pg
import picogame_game
import picogame_input
import picogame_clock
import picogame_shapes as shp
import picogame_ui as ui
W, H = 320, 240
PADDLE_W, PADDLE_H = 44, 8
BALL = 6
BRICK_W, BRICK_H = 32, 16
COLS, ROWS = W // BRICK_W, 6
BRICK_Y = 28
BACKGROUND = pg.rgb565(8, 10, 24)
scene, _, _ = picogame_game.setup(background=BACKGROUND)
btn = picogame_input.Buttons()
clock = picogame_clock.Clock(40)
+# optional audio: a beep on each hit (no asset needed). None if no audio backend.
+try:
+import picogame_audio
+ audio = picogame_audio.Audio()
+ blip = picogame_audio.tone(660, 35)
+ lose = picogame_audio.tone(150, 160) # low tone when a ball is missed
+except Exception:
+ audio = None
+ blip = lose = None
brick_colors = [pg.rgb565(220, 70, 70), pg.rgb565(230, 150, 50),
pg.rgb565(70, 200, 90), pg.rgb565(80, 150, 230)]
brick_ts = shp.tileset_colors(BRICK_W, BRICK_H, brick_colors)
bricks = pg.Tilemap(brick_ts, COLS, ROWS)
bricks.move(0, BRICK_Y)
def build_wall():
+global bricks_left
for tile_y in range(ROWS):
for tile_x in range(COLS):
bricks.tile(tile_x, tile_y, 1 + (tile_y % 4))
bricks_left = COLS * ROWS
build_wall()
paddle = pg.Sprite(shp.rect(PADDLE_W, PADDLE_H, pg.rgb565(220, 220, 230)),
(W - PADDLE_W) // 2, H - 16)
ball = pg.Sprite(shp.rect(BALL, BALL, pg.rgb565(255, 240, 120)), W // 2, H // 2)
particles = pg.Particles(96, size=2, gravity=0.12) # NEW
scene.add(bricks)
scene.add(particles) # behind paddle+ball
scene.add(paddle)
scene.add(ball)
35 collapsed lines
hud = ui.SceneLabel(scene, pg, terminalio.FONT, 4, 2, pg.rgb565(255, 255, 255), BACKGROUND)
velocity_x, velocity_y = 2.4, -2.6
score = 0
lives = 3
def serve():
global velocity_x, velocity_y
ball.move(W // 2, H // 2)
velocity_x, velocity_y = 2.4, -2.6
while True:
btn.poll()
delta_x = btn.is_pressed(btn.RIGHT) - btn.is_pressed(btn.LEFT)
if delta_x:
paddle.move(max(0, min(W - PADDLE_W, paddle.x + delta_x * 5)), paddle.y)
ball.fx += velocity_x
ball.fy += velocity_y
if ball.fx < 0:
ball.fx = 0; velocity_x = -velocity_x
elif ball.fx > W - BALL:
ball.fx = W - BALL; velocity_x = -velocity_x
if ball.fy < 0:
ball.fy = 0; velocity_y = -velocity_y
if velocity_y > 0 and pg.collide(ball.x, ball.y, ball.x + BALL, ball.y + BALL,
paddle.x, paddle.y, paddle.x + PADDLE_W, paddle.y + PADDLE_H):
velocity_y = -abs(velocity_y)
velocity_x += (ball.x + BALL / 2 - (paddle.x + PADDLE_W / 2)) * 0.06
center_x, center_y = ball.x + BALL // 2, ball.y + BALL // 2
tile_x, tile_y = center_x // BRICK_W, (center_y - BRICK_Y) // BRICK_H
if 0 <= tile_x < COLS and 0 <= tile_y < ROWS:
cell = bricks.tile(tile_x, tile_y)
if cell:
bricks.tile(tile_x, tile_y, 0)
bricks_left -= 1
score += 10
velocity_y = -velocity_y
+# burst in the brick's colour at the brick's centre
+ brick_x = tile_x * BRICK_W + BRICK_W // 2
+ brick_y = BRICK_Y + tile_y * BRICK_H + BRICK_H // 2
+ particles.emit(brick_x, brick_y, 14, 3, 22, brick_colors[cell - 1])
+if audio:
+ audio.sfx(blip)
if bricks_left == 0:
build_wall()
serve()
if ball.fy > H:
lives -= 1
if audio:
+ audio.sfx(lose) # low tone on a missed ball
if lives <= 0:
lives = 3
score = 0
build_wall()
serve()
+ particles.tick() # advance the burst each frame
hud.set("SCORE %05d LIVES %d" % (score, lives))
scene.refresh()
clock.tick()
```
[▶ Try it in the browser](/playground/?ex=01-bounce-step8_particles)
### step 9 — `step9_sprites.py` · rectangles → sprites
[Section titled “step 9 — step9\_sprites.py · rectangles → sprites”](#step-9--step9_spritespy--rectangles--sprites)
 The payoff. We change **only the two bitmaps**: the ball becomes a round disc (`shp.circle`) and the paddle gets a multi-colour [`Bitmap`](/reference/) with a highlight. Diff this file against step 8: the entire game loop is byte-for-byte identical. A `Sprite` doesn’t care whether its bitmap is a rectangle, a generated shape, or a PNG you imported in the editor. **You see:** the same game, now with a round ball and a shaded paddle. **Try it:** load a a PNG through the editor → scene pipeline (open it in the [web editor](/tools/editor/)) and assign it as the bitmap.
```diff
24 collapsed lines
# Bounce -- step 9: from rectangles to sprites (the orthogonality lesson).
#
# What you learn: art is independent of mechanics. We built a COMPLETE game out of
# coloured rectangles. To make it look like a real game we change ONLY the bitmaps:
# the ball becomes a round disc (shp.circle) and the paddle gets a multi-colour
# bitmap with a highlight stripe. Compare this file to step 8: the entire game loop
# -- movement, bouncing, collision, scoring, particles -- is byte-for-byte the same.
# A Sprite doesn't care whether its bitmap is a rectangle, a generated shape, or a
# PNG you imported in the editor. (To use real PNG art: draw/import it in the editor,
# export a scene, and load it with picogame_scene -- see tutorials/README.md.)
#
# New vs step 8: only the two bitmap definitions changed (ball + paddle art).
#
# Run: python3 sim/run.py tutorials/01-bounce/step9_sprites.py --shot /tmp/s9.png
import array
import terminalio
import picogame as pg
import picogame_game
import picogame_input
import picogame_clock
import picogame_shapes as shp
import picogame_ui as ui
W, H = 320, 240
PADDLE_W, PADDLE_H = 44, 8
BALL = 6
BRICK_W, BRICK_H = 32, 16
COLS, ROWS = W // BRICK_W, 6
BRICK_Y = 28
BACKGROUND = pg.rgb565(8, 10, 24)
scene, _, _ = picogame_game.setup(background=BACKGROUND)
btn = picogame_input.Buttons()
clock = picogame_clock.Clock(40)
try:
import picogame_audio
audio = picogame_audio.Audio()
blip = picogame_audio.tone(660, 35)
lose = picogame_audio.tone(150, 160) # low tone when a ball is missed
except Exception:
audio = None
blip = lose = None
+def paddle_art(w, h):
+"""A 2-colour paddle bitmap: blue body + a lighter highlight on the top row.
This is what 'real sprite art' is -- a PAL8 bitmap with more than one colour."""
+ palette = array.array("H", [pg.rgb565(0, 0, 0), pg.rgb565(70, 110, 210), pg.rgb565(150, 190, 255)])
+ data = bytearray(b"\x01" * (w * h)) # index 1 = body
+for x in range(w):
+ data[x] = 2 # index 2 = highlight on the top row
+return pg.Bitmap(data, w, h, format=pg.PAL8, palette=palette, frames=1, stride=w, transparent=0)
+brick_colors = [pg.rgb565(220, 70, 70), pg.rgb565(230, 150, 50),
+ pg.rgb565(70, 200, 90), pg.rgb565(80, 150, 230)]
14 collapsed lines
bricks = pg.Tilemap(shp.tileset_colors(BRICK_W, BRICK_H, brick_colors), COLS, ROWS)
bricks.move(0, BRICK_Y)
def build_wall():
global bricks_left
for tile_y in range(ROWS):
for tile_x in range(COLS):
bricks.tile(tile_x, tile_y, 1 + (tile_y % 4))
bricks_left = COLS * ROWS
build_wall()
# >>> the ONLY change from step 8: art instead of plain rectangles <<<
paddle = pg.Sprite(paddle_art(PADDLE_W, PADDLE_H), (W - PADDLE_W) // 2, H - 16)
ball = pg.Sprite(shp.circle(BALL, pg.rgb565(255, 240, 120)), W // 2, H // 2)
70 collapsed lines
# >>> everything below is identical to step 8 <<<
particles = pg.Particles(96, size=2, gravity=0.12)
scene.add(bricks)
scene.add(particles)
scene.add(paddle)
scene.add(ball)
hud = ui.SceneLabel(scene, pg, terminalio.FONT, 4, 2, pg.rgb565(255, 255, 255), BACKGROUND)
velocity_x, velocity_y = 2.4, -2.6
score = 0
lives = 3
def serve():
global velocity_x, velocity_y
ball.move(W // 2, H // 2)
velocity_x, velocity_y = 2.4, -2.6
while True:
btn.poll()
delta_x = btn.is_pressed(btn.RIGHT) - btn.is_pressed(btn.LEFT)
if delta_x:
paddle.move(max(0, min(W - PADDLE_W, paddle.x + delta_x * 5)), paddle.y)
ball.fx += velocity_x
ball.fy += velocity_y
if ball.fx < 0:
ball.fx = 0; velocity_x = -velocity_x
elif ball.fx > W - BALL:
ball.fx = W - BALL; velocity_x = -velocity_x
if ball.fy < 0:
ball.fy = 0; velocity_y = -velocity_y
if velocity_y > 0 and pg.collide(ball.x, ball.y, ball.x + BALL, ball.y + BALL,
paddle.x, paddle.y, paddle.x + PADDLE_W, paddle.y + PADDLE_H):
velocity_y = -abs(velocity_y)
velocity_x += (ball.x + BALL / 2 - (paddle.x + PADDLE_W / 2)) * 0.06
center_x, center_y = ball.x + BALL // 2, ball.y + BALL // 2
tile_x, tile_y = center_x // BRICK_W, (center_y - BRICK_Y) // BRICK_H
if 0 <= tile_x < COLS and 0 <= tile_y < ROWS:
cell = bricks.tile(tile_x, tile_y)
if cell:
bricks.tile(tile_x, tile_y, 0)
bricks_left -= 1
score += 10
velocity_y = -velocity_y
particles.emit(tile_x * BRICK_W + BRICK_W // 2, BRICK_Y + tile_y * BRICK_H + BRICK_H // 2,
14, 3, 22, brick_colors[cell - 1])
if audio:
audio.sfx(blip)
if bricks_left == 0:
build_wall()
serve()
if ball.fy > H:
lives -= 1
if audio:
audio.sfx(lose) # low tone on a missed ball
if lives <= 0:
lives = 3
score = 0
build_wall()
serve()
particles.tick()
hud.set("SCORE %05d LIVES %d" % (score, lives))
scene.refresh()
clock.tick()
```
[▶ Try it in the browser](/playground/?ex=01-bounce-step9_sprites)
***
**Where to go next:** [02-starship](/tutorials/02-starship/) (pools, rotation, shooting, state machine), or jump to the [web editor](/tools/editor/) and the [scene format](/scene-format/) to build levels as data instead of by hand. There’s also [03-quest](/tutorials/03-quest/) if you want a longer game to pull apart.
# Tutorial 2 — Starship
> Build a top-down Asteroids-style shooter in 8 steps with rotation, thrust, object pools, splitting enemies, and a game-state machine.
In this tutorial, you’ll build a small Asteroids-style shooter. It assumes you’ve completed **01-bounce** (render loop, input, sub-pixel movement, collision, HUD, and particles). This time you’ll add rotation, vector thrust, object pools, splitting enemies, and a game-state machine.
The full source for this tutorial lives on GitHub: [tutorials/02-starship](https://github.com/MakerClassCZ/picogame/tree/main/tutorials/02-starship).
Run any step:
```bash
python3 sim/run.py tutorials/02-starship/stepN_name.py --hold UP,B --shot /tmp/out.png
```
***
### step 1 — `step1_ship.py` · a shaped sprite
[Section titled “step 1 — step1\_ship.py · a shaped sprite”](#step-1--step1_shippy--a-shaped-sprite)
 [`picogame_game.setup`](/helpers/boot-loop/) prepares the display and returns `(scene, buffer_a, buffer_b)`. On an SPI display, the last two values are reusable strip buffers; on a framebuffer display, they are `None`. This step only needs the [`Scene`](/reference/), so it ignores the other two values (`scene, _, _`). [`picogame_shapes`](/reference/) (imported as `shp`) builds bitmaps: `shp.from_mask` turns an ASCII picture into a one-colour [`Bitmap`](/reference/). We wrap it in a [`Sprite`](/reference/) and `anchor=(0.5, 0.5)` puts the sprite’s reference point at its centre, the right choice for something that rotates and wraps. **You see:** a little ship in the middle. **Try it:** redraw the mask.
```diff
18 collapsed lines
# Starship -- step 1: a ship on screen (recap, with a shaped sprite).
#
# This second tutorial assumes you've done Bounce (01-bounce). It builds a top-down
# space shooter and covers what Bounce couldn't: rotation, vector thrust, object
# pools (bullets/enemies), circular collision, explosions, and game states.
#
# What you learn here (recap): a Sprite can be any shape. shp.from_mask turns an
# ASCII picture into a one-colour bitmap. anchor=(0.5, 0.5) puts the sprite's
# reference point at its CENTRE -- the natural choice for something that rotates.
#
# New: shp.from_mask, centre anchor.
#
# Run: python3 sim/run.py tutorials/02-starship/step1_ship.py --shot /tmp/p1.png
import picogame as pg
import picogame_game
import picogame_clock
import picogame_shapes as shp
W, H = 320, 240
BACKGROUND = pg.rgb565(0, 0, 8)
scene, _, _ = picogame_game.setup(background=BACKGROUND)
clock = picogame_clock.Clock(30)
+SHIP_MASK = [
+" # ",
+" # ",
+" ### ",
+" ### ",
+"#####",
+"## ##",
+]
+ship = pg.Sprite(shp.from_mask(SHIP_MASK, pg.rgb565(200, 220, 255)), W // 2, H // 2)
+ship.anchor = (0.5, 0.5) # rotate/position about the centre
+scene.add(ship)
while True:
scene.refresh()
clock.tick()
```
[▶ Try it in the browser](/playground/?ex=02-starship-step1_ship)
### step 2 — `step2_fly.py` · rotation, thrust, wrap
[Section titled “step 2 — step2\_fly.py · rotation, thrust, wrap”](#step-2--step2_flypy--rotation-thrust-wrap)
 For a ship that spins constantly, we bake the rotation into frames. This is sharper and cheaper than changing `sprite.angle` at runtime: `shp.poly_frames(size, points, N, colour)` renders a polygon at N angles into one multi-frame bitmap, and `ship.frame = angle` selects one of them. A `DIRS` table holds each angle’s unit vector; UP accelerates along the facing vector into the velocity, with a top-speed cap and gentle drag. `wrap()` teleports across the edges. **You see:** a ship you fly Asteroids-style. **Try it:** change the thrust `0.25` or the drag `0.99`.
```diff
22 collapsed lines
# Starship -- step 2: rotate, thrust, and wrap around the screen.
#
# What you learn: pre-baked rotation. For a ship that spins constantly, baking the
# rotations into frames is crisper and cheaper than rotating at runtime (sprite.angle).
# shp.poly_frames(size, points, N, colour) renders a polygon at N angles into
# one multi-frame bitmap; setting ship.frame = angle_index shows that rotation. A
# DIRS table holds the unit vector for each angle. UP thrusts along the facing
# vector into the sub-pixel velocity (velocity_x, velocity_y); we cap top speed and apply a little
# drag so it drifts like a spaceship. wrap() teleports across screen edges.
#
# New vs step 1: shp.poly_frames (pre-rotated frames), ship.frame, vector thrust
# into fx/fy, speed cap + drag, screen wrap.
#
# Run: python3 sim/run.py tutorials/02-starship/step2_fly.py --hold UP --shot /tmp/p2.png
import math
import picogame as pg
import picogame_game
import picogame_input
import picogame_clock
import picogame_shapes as shp
W, H = 320, 240
BACKGROUND = pg.rgb565(0, 0, 8)
FRAMES = 16 # number of baked rotation frames
scene, _, _ = picogame_game.setup(background=BACKGROUND)
btn = picogame_input.Buttons()
clock = picogame_clock.Clock(30)
# a ship polygon (points around the centre, +y is down), baked at FRAMES angles
+ship_bitmap = shp.poly_frames(18, [(0, -8), (6, 7), (0, 4), (-6, 7)], FRAMES, pg.rgb565(200, 220, 255))
# facing unit vector for each frame: frame 0 points up (-y)
+DIRS = [(math.sin(frame * 2 * math.pi / FRAMES), -math.cos(frame * 2 * math.pi / FRAMES)) for frame in range(FRAMES)]
ship = pg.Sprite(ship_bitmap, W // 2, H // 2)
ship.anchor = (0.5, 0.5)
scene.add(ship)
angle = 0 # current rotation frame
velocity_x = velocity_y = 0.0 # velocity
+def wrap(x, y):
+return x % W, y % H
while True:
+ btn.poll()
+if btn.is_pressed(btn.LEFT):
+ angle = (angle - 1) % FRAMES
+if btn.is_pressed(btn.RIGHT):
+ angle = (angle + 1) % FRAMES
+ delta_x, delta_y = DIRS[angle]
+if btn.is_pressed(btn.UP):
+ velocity_x += delta_x * 0.25 # accelerate along the facing vector
+ velocity_y += delta_y * 0.25
+ speed = math.sqrt(velocity_x * velocity_x + velocity_y * velocity_y) # cap top speed
+if speed > 5:
+ velocity_x *= 5 / speed
+ velocity_y *= 5 / speed
+ velocity_x *= 0.99 # gentle drag
+ velocity_y *= 0.99
+ ship.fx, ship.fy = wrap(ship.fx + velocity_x, ship.fy + velocity_y) # sub-pixel position + wrap
+ ship.frame = angle # show the matching rotation
scene.refresh()
clock.tick()
```
[▶ Try it in the browser](/playground/?ex=02-starship-step2_fly)
### step 3 — `step3_shoot.py` · object pools
[Section titled “step 3 — step3\_shoot.py · object pools”](#step-3--step3_shootpy--object-pools)
 Repeatedly creating and discarding sprites can fragment the heap. Instead, [`picogame_pool`](/reference/)’s `Pool(scene, bitmap, N)` pre-allocates N hidden sprites once; `spawn()` reveals a free one, `free()` hides it, and `sprite.visible` *is* the alive flag. Each bullet keeps its velocity + remaining life in `sprite.data`, and its position in `fx`/`fy`. A cooldown caps the fire rate; [`picogame_input`](/reference/)’s `just_pressed(B)` fires once when B is pressed. **You see:** a stream of bullets that expire. **Try it:** change the pool size or `fire_cooldown`.
```diff
22 collapsed lines
# Starship -- step 3: fire bullets from an object pool.
#
# What you learn: pooling. Spawning objects (bullets, enemies, sparks) by creating
# Sprites at runtime causes memory churn. Instead, pre-allocate a fixed pool ONCE:
# picogame_pool.Pool makes N hidden sprites in the scene, spawn() reveals the first
# free one, free() hides it, and sprite.visible IS the alive flag. We keep each
# bullet's velocity + remaining life in sprite.data, and its position in fx/fy.
# A cooldown limits the fire rate.
#
# New vs step 2: picogame_pool.Pool, spawn/free, btn.just_pressed (a fresh press),
# per-bullet state in sprite.data, a fire cooldown + bullet lifetime.
#
# Run: python3 sim/run.py tutorials/02-starship/step3_shoot.py --hold B --shot /tmp/p3.png
import math
import picogame as pg
import picogame_game
import picogame_input
import picogame_clock
import picogame_shapes as shp
import picogame_pool
W, H = 320, 240
BACKGROUND = pg.rgb565(0, 0, 8)
FRAMES = 16
scene, _, _ = picogame_game.setup(background=BACKGROUND)
btn = picogame_input.Buttons()
clock = picogame_clock.Clock(30)
ship_bitmap = shp.poly_frames(18, [(0, -8), (6, 7), (0, 4), (-6, 7)], FRAMES, pg.rgb565(200, 220, 255))
DIRS = [(math.sin(frame * 2 * math.pi / FRAMES), -math.cos(frame * 2 * math.pi / FRAMES)) for frame in range(FRAMES)]
+bullet_bitmap = shp.circle(4, pg.rgb565(255, 255, 120))
ship = pg.Sprite(ship_bitmap, W // 2, H // 2)
ship.anchor = (0.5, 0.5)
+bullets = picogame_pool.Pool(scene, bullet_bitmap, 6, anchor=(0.5, 0.5)) # NEW: 6-bullet pool
scene.add(ship) # add ship AFTER the pool so it draws on top
angle = 0
velocity_x = velocity_y = 0.0
+fire_cooldown = 0
def wrap(x, y):
return x % W, y % H
while True:
btn.poll()
fire_cooldown -= 1
if btn.is_pressed(btn.LEFT):
angle = (angle - 1) % FRAMES
if btn.is_pressed(btn.RIGHT):
angle = (angle + 1) % FRAMES
delta_x, delta_y = DIRS[angle]
if btn.is_pressed(btn.UP):
velocity_x += delta_x * 0.25
velocity_y += delta_y * 0.25
speed = math.sqrt(velocity_x * velocity_x + velocity_y * velocity_y)
if speed > 5:
velocity_x *= 5 / speed; velocity_y *= 5 / speed
velocity_x *= 0.99; velocity_y *= 0.99
ship.fx, ship.fy = wrap(ship.fx + velocity_x, ship.fy + velocity_y)
ship.frame = angle
+# fire: a fresh B press, if the cooldown has elapsed and a slot is free
+if btn.just_pressed(btn.B) and fire_cooldown <= 0:
+ bullet = bullets.spawn()
+if bullet:
+ bullet.data = {"velocity_x": delta_x * 7, "velocity_y": delta_y * 7, "life": 30}
+ bullet.move(ship.x, ship.y)
+ fire_cooldown = 6
+# advance live bullets; retire them when their life runs out
+for bullet in bullets.items:
+if not bullet.visible:
+continue
+ bullet.data["life"] -= 1
+if bullet.data["life"] <= 0:
+ bullets.free(bullet)
+continue
+ bullet.fx, bullet.fy = wrap(bullet.fx + bullet.data["velocity_x"], bullet.fy + bullet.data["velocity_y"])
scene.refresh()
clock.tick()
```
[▶ Try it in the browser](/playground/?ex=02-starship-step3_shoot)
### step 4 — `step4_rocks.py` · a second pool + waves
[Section titled “step 4 — step4\_rocks.py · a second pool + waves”](#step-4--step4_rockspy--a-second-pool--waves)
 Reuse the pool pattern for enemies. Rocks come in 3 sizes; we keep the size in `sprite.data` and pick the matching ring bitmap with `sprite.bitmap`. `new_wave(n)` spreads n rocks around the screen, each drifting. **You see:** drifting rock rings. **Try it:** change the wave count or rock speed.
```diff
20 collapsed lines
# Starship -- step 4: asteroids to dodge (a second pool + waves).
#
# What you learn: reuse the pool pattern for enemies, and spawn a "wave". Rocks come
# in 3 sizes (we keep the size in sprite.data and pick a matching ring bitmap with
# sprite.bitmap). A wave spreads N rocks around the screen, each drifting with its
# own velocity. shp.ring draws a hollow circle.
#
# New vs step 3: a rocks Pool with per-rock size/velocity, choosing a bitmap per
# rock (sprite.bitmap), spawning a wave.
#
# Run: python3 sim/run.py tutorials/02-starship/step4_rocks.py --shot /tmp/p4.png
import math
import picogame as pg
import picogame_game
import picogame_input
import picogame_clock
import picogame_shapes as shp
import picogame_pool
W, H = 320, 240
BACKGROUND = pg.rgb565(0, 0, 8)
FRAMES = 16
scene, _, _ = picogame_game.setup(background=BACKGROUND)
btn = picogame_input.Buttons()
clock = picogame_clock.Clock(30)
ship_bitmap = shp.poly_frames(18, [(0, -8), (6, 7), (0, 4), (-6, 7)], FRAMES, pg.rgb565(200, 220, 255))
DIRS = [(math.sin(frame * 2 * math.pi / FRAMES), -math.cos(frame * 2 * math.pi / FRAMES)) for frame in range(FRAMES)]
bullet_bitmap = shp.circle(4, pg.rgb565(255, 255, 120))
+ROCK_BITMAP = [shp.ring(40, pg.rgb565(170, 140, 100), 3), # size 0 = big
+ shp.ring(24, pg.rgb565(170, 140, 100), 3), # size 1 = medium
+ shp.ring(13, pg.rgb565(170, 140, 100), 2)] # size 2 = small
ship = pg.Sprite(ship_bitmap, W // 2, H // 2)
ship.anchor = (0.5, 0.5)
+rocks = picogame_pool.Pool(scene, ROCK_BITMAP[0], 16, anchor=(0.5, 0.5)) # NEW
bullets = picogame_pool.Pool(scene, bullet_bitmap, 6, anchor=(0.5, 0.5))
scene.add(ship)
angle = 0
velocity_x = velocity_y = 0.0
fire_cooldown = 0
wave = 3
def wrap(x, y):
return x % W, y % H
+def spawn_rock(size, x, y, velocity_x, velocity_y):
+ rock = rocks.spawn()
+if rock is None:
+return
+ rock.data = {"size": size, "velocity_x": velocity_x, "velocity_y": velocity_y}
+ rock.bitmap = ROCK_BITMAP[size] # pick the bitmap for this size
+ rock.fx, rock.fy = float(x), float(y)
+def new_wave(count):
+for i in range(count):
+ angle_rad = i * 2 * math.pi / count
+spawn_rock(0, (W // 2 + int(140 * math.cos(angle_rad))) % W,
(H // 2 + int(110 * math.sin(angle_rad))) % H,
math.cos(angle_rad) * 1.2, math.sin(angle_rad) * 1.2)
+new_wave(wave)
32 collapsed lines
while True:
btn.poll()
fire_cooldown -= 1
if btn.is_pressed(btn.LEFT):
angle = (angle - 1) % FRAMES
if btn.is_pressed(btn.RIGHT):
angle = (angle + 1) % FRAMES
delta_x, delta_y = DIRS[angle]
if btn.is_pressed(btn.UP):
velocity_x += delta_x * 0.25; velocity_y += delta_y * 0.25
speed = math.sqrt(velocity_x * velocity_x + velocity_y * velocity_y)
if speed > 5:
velocity_x *= 5 / speed; velocity_y *= 5 / speed
velocity_x *= 0.99; velocity_y *= 0.99
ship.fx, ship.fy = wrap(ship.fx + velocity_x, ship.fy + velocity_y)
ship.frame = angle
if btn.just_pressed(btn.B) and fire_cooldown <= 0:
bullet = bullets.spawn()
if bullet:
bullet.data = {"velocity_x": delta_x * 7, "velocity_y": delta_y * 7, "life": 30}
bullet.move(ship.x, ship.y)
fire_cooldown = 6
for bullet in bullets.items:
if not bullet.visible:
continue
bullet.data["life"] -= 1
if bullet.data["life"] <= 0:
bullets.free(bullet)
continue
bullet.fx, bullet.fy = wrap(bullet.fx + bullet.data["velocity_x"], bullet.fy + bullet.data["velocity_y"])
+# drift the rocks
+for rock in rocks.items:
+if not rock.visible:
+continue
+ rock.fx, rock.fy = wrap(rock.fx + rock.data["velocity_x"], rock.fy + rock.data["velocity_y"])
scene.refresh()
clock.tick()
```
[▶ Try it in the browser](/playground/?ex=02-starship-step4_rocks)
### step 5 — `step5_collide.py` · circular hits + splitting
[Section titled “step 5 — step5\_collide.py · circular hits + splitting”](#step-5--step5_collidepy--circular-hits--splitting)
 `a.near(b, r)` is a fast, no-sqrt distance test on the sprites’ centres, ideal for round things. A bullet that hits a rock frees both; a big/medium rock **splits** into two smaller ones flying apart. A rock reaching the ship costs a life, grants brief invulnerability (i-frames, shown by blinking `ship.visible`), and respawns. **You see:** you can shoot rocks apart and get hit. **Try it:** change `ROCK_RADIUS` or the split velocities.
```diff
21 collapsed lines
# Starship -- step 5: shooting rocks (and getting hit).
#
# What you learn: circular collision + spawning on destruction. sprite.near(other, r)
# (a, b, r) is a fast no-sqrt distance test reading sprite positions -- ideal for
# round things. A bullet that hits a rock frees both; a big/medium rock SPLITS into
# two smaller rocks flying apart. A rock that reaches the ship costs a life and
# triggers a brief invulnerability (i-frames) + respawn so you don't die instantly.
#
# New vs step 4: sprite.near (circular hit), splitting rocks, lives + i-frames + respawn,
# blinking the ship while invulnerable (ship.visible toggled).
#
# Run: python3 sim/run.py tutorials/02-starship/step5_collide.py --hold B --shot /tmp/p5.png
import math
import picogame as pg
import picogame_game
import picogame_input
import picogame_clock
import picogame_shapes as shp
import picogame_pool
W, H = 320, 240
BACKGROUND = pg.rgb565(0, 0, 8)
FRAMES = 16
scene, _, _ = picogame_game.setup(background=BACKGROUND)
btn = picogame_input.Buttons()
clock = picogame_clock.Clock(30)
ship_bitmap = shp.poly_frames(18, [(0, -8), (6, 7), (0, 4), (-6, 7)], FRAMES, pg.rgb565(200, 220, 255))
DIRS = [(math.sin(frame * 2 * math.pi / FRAMES), -math.cos(frame * 2 * math.pi / FRAMES)) for frame in range(FRAMES)]
bullet_bitmap = shp.circle(4, pg.rgb565(255, 255, 120))
ROCK_BITMAP = [shp.ring(40, pg.rgb565(170, 140, 100), 3),
shp.ring(24, pg.rgb565(170, 140, 100), 3),
shp.ring(13, pg.rgb565(170, 140, 100), 2)]
ROCK_RADIUS = [20, 12, 6] # collision radius per size
ship = pg.Sprite(ship_bitmap, W // 2, H // 2)
ship.anchor = (0.5, 0.5)
rocks = picogame_pool.Pool(scene, ROCK_BITMAP[0], 16, anchor=(0.5, 0.5))
bullets = picogame_pool.Pool(scene, bullet_bitmap, 6, anchor=(0.5, 0.5))
scene.add(ship)
angle = 0
velocity_x = velocity_y = 0.0
fire_cooldown = 0
+lives = 3
invincible = 60 # invincibility frames
wave = 3
+frame = 0
def wrap(x, y):
return x % W, y % H
def spawn_rock(size, x, y, velocity_x, velocity_y):
rock = rocks.spawn()
if rock is None:
return
rock.data = {"size": size, "velocity_x": velocity_x, "velocity_y": velocity_y}
rock.bitmap = ROCK_BITMAP[size]
rock.fx, rock.fy = float(x), float(y)
def new_wave(count):
for i in range(count):
angle_rad = i * 2 * math.pi / count
spawn_rock(0, (W // 2 + int(140 * math.cos(angle_rad))) % W,
(H // 2 + int(110 * math.sin(angle_rad))) % H,
math.cos(angle_rad) * 1.2, math.sin(angle_rad) * 1.2)
+def respawn():
+global velocity_x, velocity_y, invincible
+ ship.fx, ship.fy = float(W // 2), float(H // 2)
+ velocity_x = velocity_y = 0.0
+ invincible = 90
new_wave(wave)
while True:
btn.poll()
frame += 1
fire_cooldown -= 1
+if invincible > 0:
+ invincible -= 1
if btn.is_pressed(btn.LEFT):
33 collapsed lines
angle = (angle - 1) % FRAMES
if btn.is_pressed(btn.RIGHT):
angle = (angle + 1) % FRAMES
delta_x, delta_y = DIRS[angle]
if btn.is_pressed(btn.UP):
velocity_x += delta_x * 0.25; velocity_y += delta_y * 0.25
speed = math.sqrt(velocity_x * velocity_x + velocity_y * velocity_y)
if speed > 5:
velocity_x *= 5 / speed; velocity_y *= 5 / speed
velocity_x *= 0.99; velocity_y *= 0.99
ship.fx, ship.fy = wrap(ship.fx + velocity_x, ship.fy + velocity_y)
ship.frame = angle
ship.visible = (invincible <= 0) or (frame & 1) # blink while invincible
if btn.just_pressed(btn.B) and fire_cooldown <= 0:
bullet = bullets.spawn()
if bullet:
bullet.data = {"velocity_x": delta_x * 7, "velocity_y": delta_y * 7, "life": 30}
bullet.move(ship.x, ship.y)
fire_cooldown = 6
for bullet in bullets.items:
if not bullet.visible:
continue
bullet.data["life"] -= 1
if bullet.data["life"] <= 0:
bullets.free(bullet)
continue
bullet.fx, bullet.fy = wrap(bullet.fx + bullet.data["velocity_x"], bullet.fy + bullet.data["velocity_y"])
for rock in rocks.items:
if not rock.visible:
continue
rock.fx, rock.fy = wrap(rock.fx + rock.data["velocity_x"], rock.fy + rock.data["velocity_y"])
+ size = rock.data["size"]
+ radius = ROCK_RADIUS[size]
+# bullet hits this rock?
+for bullet in bullets.items:
+if not bullet.visible:
+continue
+if bullet.near(rock, radius):
+ bullets.free(bullet)
+ rocks.free(rock)
+if size < 2: # split into two smaller, flying apart
+for sign in (-1, 1):
+spawn_rock(size + 1, rock.fx, rock.fy,
rock.data["velocity_x"] + sign * 0.8, rock.data["velocity_y"] - sign * 0.8)
+break
+# rock reaches the ship?
+if invincible <= 0 and rock.visible and ship.near(rock, radius + 6):
+ lives -= 1
+respawn()
+if lives < 0:
+ lives = 3
+ rocks.free_all()
+new_wave(wave)
+break
scene.refresh()
clock.tick()
```
[▶ Try it in the browser](/playground/?ex=02-starship-step5_collide)
### step 6 — `step6_waves.py` · score + progression
[Section titled “step 6 — step6\_waves.py · score + progression”](#step-6--step6_wavespy--score--progression)
 Smaller rocks score more. [`picogame_ui`](/reference/)’s [`SceneLabel`](/reference/) shows score + ships. When `rocks.count() == 0` the field is clear, so we launch the next, bigger wave, and the game ramps up. **You see:** a score that climbs and waves that grow. **Try it:** change the scoring or wave growth.
```diff
21 collapsed lines
# Starship -- step 6: score, lives, and escalating waves.
#
# What you learn: a scoring/progression loop. Smaller rocks are worth more. A HUD
# shows score + ships. When the field is clear (rocks.count() == 0) we start the
# next, bigger wave -- the game keeps going and ramps up.
#
# New vs step 5: picogame_ui.SceneLabel, scoring, rocks.count() to detect a cleared
# field, growing waves.
#
# Run: python3 sim/run.py tutorials/02-starship/step6_waves.py --hold B --shot /tmp/p6.png
import math
import terminalio
import picogame as pg
import picogame_game
import picogame_input
import picogame_clock
import picogame_shapes as shp
import picogame_pool
import picogame_ui as ui
W, H = 320, 240
BACKGROUND = pg.rgb565(0, 0, 8)
FRAMES = 16
scene, _, _ = picogame_game.setup(background=BACKGROUND)
btn = picogame_input.Buttons()
clock = picogame_clock.Clock(30)
ship_bitmap = shp.poly_frames(18, [(0, -8), (6, 7), (0, 4), (-6, 7)], FRAMES, pg.rgb565(200, 220, 255))
DIRS = [(math.sin(frame * 2 * math.pi / FRAMES), -math.cos(frame * 2 * math.pi / FRAMES)) for frame in range(FRAMES)]
bullet_bitmap = shp.circle(4, pg.rgb565(255, 255, 120))
ROCK_BITMAP = [shp.ring(40, pg.rgb565(170, 140, 100), 3),
shp.ring(24, pg.rgb565(170, 140, 100), 3),
shp.ring(13, pg.rgb565(170, 140, 100), 2)]
ROCK_RADIUS = [20, 12, 6]
ship = pg.Sprite(ship_bitmap, W // 2, H // 2)
ship.anchor = (0.5, 0.5)
rocks = picogame_pool.Pool(scene, ROCK_BITMAP[0], 16, anchor=(0.5, 0.5))
bullets = picogame_pool.Pool(scene, bullet_bitmap, 6, anchor=(0.5, 0.5))
scene.add(ship)
hud = ui.SceneLabel(scene, pg, terminalio.FONT, 4, 4, pg.rgb565(255, 255, 255), BACKGROUND)
angle = 0
velocity_x = velocity_y = 0.0
fire_cooldown = 0
lives = 3
invincible = 60
wave = 3
+score = 0
frame = 0
79 collapsed lines
def wrap(x, y):
return x % W, y % H
def spawn_rock(size, x, y, velocity_x, velocity_y):
rock = rocks.spawn()
if rock is None:
return
rock.data = {"size": size, "velocity_x": velocity_x, "velocity_y": velocity_y}
rock.bitmap = ROCK_BITMAP[size]
rock.fx, rock.fy = float(x), float(y)
def new_wave(count):
for i in range(count):
angle_rad = i * 2 * math.pi / count
spawn_rock(0, (W // 2 + int(140 * math.cos(angle_rad))) % W,
(H // 2 + int(110 * math.sin(angle_rad))) % H,
math.cos(angle_rad) * 1.2, math.sin(angle_rad) * 1.2)
def respawn():
global velocity_x, velocity_y, invincible
ship.fx, ship.fy = float(W // 2), float(H // 2)
velocity_x = velocity_y = 0.0
invincible = 90
new_wave(wave)
while True:
btn.poll()
frame += 1
fire_cooldown -= 1
if invincible > 0:
invincible -= 1
if btn.is_pressed(btn.LEFT):
angle = (angle - 1) % FRAMES
if btn.is_pressed(btn.RIGHT):
angle = (angle + 1) % FRAMES
delta_x, delta_y = DIRS[angle]
if btn.is_pressed(btn.UP):
velocity_x += delta_x * 0.25; velocity_y += delta_y * 0.25
speed = math.sqrt(velocity_x * velocity_x + velocity_y * velocity_y)
if speed > 5:
velocity_x *= 5 / speed; velocity_y *= 5 / speed
velocity_x *= 0.99; velocity_y *= 0.99
ship.fx, ship.fy = wrap(ship.fx + velocity_x, ship.fy + velocity_y)
ship.frame = angle
ship.visible = (invincible <= 0) or (frame & 1)
if btn.just_pressed(btn.B) and fire_cooldown <= 0:
bullet = bullets.spawn()
if bullet:
bullet.data = {"velocity_x": delta_x * 7, "velocity_y": delta_y * 7, "life": 30}
bullet.move(ship.x, ship.y)
fire_cooldown = 6
for bullet in bullets.items:
if not bullet.visible:
continue
bullet.data["life"] -= 1
if bullet.data["life"] <= 0:
bullets.free(bullet)
continue
bullet.fx, bullet.fy = wrap(bullet.fx + bullet.data["velocity_x"], bullet.fy + bullet.data["velocity_y"])
for rock in rocks.items:
if not rock.visible:
continue
rock.fx, rock.fy = wrap(rock.fx + rock.data["velocity_x"], rock.fy + rock.data["velocity_y"])
size = rock.data["size"]
radius = ROCK_RADIUS[size]
for bullet in bullets.items:
if not bullet.visible:
continue
if bullet.near(rock, radius):
bullets.free(bullet)
rocks.free(rock)
+ score += (3 - size) * 20 # smaller rock -> more points
if size < 2:
for sign in (-1, 1):
spawn_rock(size + 1, rock.fx, rock.fy,
rock.data["velocity_x"] + sign * 0.8, rock.data["velocity_y"] - sign * 0.8)
break
if invincible <= 0 and rock.visible and ship.near(rock, radius + 6):
lives -= 1
respawn()
if lives < 0:
lives = 3
score = 0
rocks.free_all()
new_wave(wave)
break
+if rocks.count() == 0: # field cleared -> next, bigger wave
+ wave += 1
+new_wave(wave)
+ hud.set("SCORE %05d SHIPS %d" % (score, max(0, lives)))
scene.refresh()
clock.tick()
```
[▶ Try it in the browser](/playground/?ex=02-starship-step6_waves)
### step 7 — `step7_particles.py` · explosions, exhaust, sound
[Section titled “step 7 — step7\_particles.py · explosions, exhaust, sound”](#step-7--step7_particlespy--explosions-exhaust-sound)
 One [`Particles`](/reference/)`(fade=True)` system serves two effects: a burst when a rock is destroyed (many fast, fading sparks) and a thrust flame (a couple of short sparks behind the ship each frame while thrusting). `fade=True` dims particles as they age. `tone()` gives a fire beep and a lower boom. **You see:** explosions and an engine trail. **Try it:** change the explosion `count`/`life` or the beep frequencies.
```diff
24 collapsed lines
# Starship -- step 7: explosions, thrust flame, and sound.
#
# What you learn: particles for two different effects, plus audio. One Particles
# system gives us BOTH a burst on a rock's destruction (many fast, fading sparks)
# and a thrust flame (a few short-lived sparks behind the ship each frame while
# thrusting). fade=True dims particles as they age. tone() beeps for firing and a
# lower boom for explosions. Audio is optional (try/except) so it's silent but safe
# where there's no audio output.
#
# New vs step 6: pg.Particles(fade=True), emit for explosions AND exhaust,
# picogame_audio for fire/boom beeps.
#
# Run: python3 sim/run.py tutorials/02-starship/step7_particles.py --hold UP,B --shot /tmp/p7.png
import math
import terminalio
import picogame as pg
import picogame_game
import picogame_input
import picogame_clock
import picogame_shapes as shp
import picogame_pool
import picogame_ui as ui
W, H = 320, 240
BACKGROUND = pg.rgb565(0, 0, 8)
FRAMES = 16
scene, _, _ = picogame_game.setup(background=BACKGROUND)
btn = picogame_input.Buttons()
clock = picogame_clock.Clock(30)
+try:
+import picogame_audio
+ audio = picogame_audio.Audio()
+ snd_fire = picogame_audio.tone(880, 25)
+ snd_boom = picogame_audio.tone(160, 90)
+except Exception:
+ audio = None
ship_bitmap = shp.poly_frames(18, [(0, -8), (6, 7), (0, 4), (-6, 7)], FRAMES, pg.rgb565(200, 220, 255))
DIRS = [(math.sin(frame * 2 * math.pi / FRAMES), -math.cos(frame * 2 * math.pi / FRAMES)) for frame in range(FRAMES)]
bullet_bitmap = shp.circle(4, pg.rgb565(255, 255, 120))
ROCK_BITMAP = [shp.ring(40, pg.rgb565(170, 140, 100), 3),
shp.ring(24, pg.rgb565(170, 140, 100), 3),
shp.ring(13, pg.rgb565(170, 140, 100), 2)]
ROCK_RADIUS = [20, 12, 6]
ship = pg.Sprite(ship_bitmap, W // 2, H // 2)
ship.anchor = (0.5, 0.5)
rocks = picogame_pool.Pool(scene, ROCK_BITMAP[0], 16, anchor=(0.5, 0.5))
bullets = picogame_pool.Pool(scene, bullet_bitmap, 6, anchor=(0.5, 0.5))
sparks = pg.Particles(160, size=2, fade=True) # NEW
+scene.add(sparks)
+scene.add(ship)
55 collapsed lines
hud = ui.SceneLabel(scene, pg, terminalio.FONT, 4, 4, pg.rgb565(255, 255, 255), BACKGROUND)
angle = 0
velocity_x = velocity_y = 0.0
fire_cooldown = 0
lives = 3
invincible = 60
wave = 3
score = 0
frame = 0
def wrap(x, y):
return x % W, y % H
def spawn_rock(size, x, y, velocity_x, velocity_y):
rock = rocks.spawn()
if rock is None:
return
rock.data = {"size": size, "velocity_x": velocity_x, "velocity_y": velocity_y}
rock.bitmap = ROCK_BITMAP[size]
rock.fx, rock.fy = float(x), float(y)
def new_wave(count):
for i in range(count):
angle_rad = i * 2 * math.pi / count
spawn_rock(0, (W // 2 + int(140 * math.cos(angle_rad))) % W,
(H // 2 + int(110 * math.sin(angle_rad))) % H,
math.cos(angle_rad) * 1.2, math.sin(angle_rad) * 1.2)
def respawn():
global velocity_x, velocity_y, invincible
ship.fx, ship.fy = float(W // 2), float(H // 2)
velocity_x = velocity_y = 0.0
invincible = 90
new_wave(wave)
while True:
btn.poll()
frame += 1
fire_cooldown -= 1
if invincible > 0:
invincible -= 1
if btn.is_pressed(btn.LEFT):
angle = (angle - 1) % FRAMES
if btn.is_pressed(btn.RIGHT):
angle = (angle + 1) % FRAMES
delta_x, delta_y = DIRS[angle]
if btn.is_pressed(btn.UP):
velocity_x += delta_x * 0.25; velocity_y += delta_y * 0.25
+# thrust flame: a couple of orange sparks shot out the back
+ sparks.emit(ship.x - int(delta_x * 8), ship.y - int(delta_y * 8), 2, 2, 10, pg.rgb565(255, 150, 40))
speed = math.sqrt(velocity_x * velocity_x + velocity_y * velocity_y)
if speed > 5:
velocity_x *= 5 / speed; velocity_y *= 5 / speed
velocity_x *= 0.99; velocity_y *= 0.99
ship.fx, ship.fy = wrap(ship.fx + velocity_x, ship.fy + velocity_y)
ship.frame = angle
ship.visible = (invincible <= 0) or (frame & 1)
if btn.just_pressed(btn.B) and fire_cooldown <= 0:
bullet = bullets.spawn()
if bullet:
bullet.data = {"velocity_x": delta_x * 7, "velocity_y": delta_y * 7, "life": 30}
bullet.move(ship.x, ship.y)
fire_cooldown = 6
+if audio:
+ audio.sfx(snd_fire)
for bullet in bullets.items:
if not bullet.visible:
continue
bullet.data["life"] -= 1
if bullet.data["life"] <= 0:
bullets.free(bullet)
continue
bullet.fx, bullet.fy = wrap(bullet.fx + bullet.data["velocity_x"], bullet.fy + bullet.data["velocity_y"])
for rock in rocks.items:
if not rock.visible:
continue
rock.fx, rock.fy = wrap(rock.fx + rock.data["velocity_x"], rock.fy + rock.data["velocity_y"])
size = rock.data["size"]
radius = ROCK_RADIUS[size]
for bullet in bullets.items:
if not bullet.visible:
continue
if bullet.near(rock, radius):
bullets.free(bullet)
rocks.free(rock)
score += (3 - size) * 20
+ sparks.emit(rock.x, rock.y, 18, 3, 26, pg.rgb565(255, 200, 120)) # explosion
+if audio:
+ audio.sfx(snd_boom)
if size < 2:
for sign in (-1, 1):
spawn_rock(size + 1, rock.fx, rock.fy,
rock.data["velocity_x"] + sign * 0.8, rock.data["velocity_y"] - sign * 0.8)
break
if invincible <= 0 and rock.visible and ship.near(rock, radius + 6):
lives -= 1
+ sparks.emit(ship.x, ship.y, 24, 4, 30, pg.rgb565(120, 200, 255))
respawn()
if lives < 0:
lives = 3
score = 0
rocks.free_all()
new_wave(wave)
break
if rocks.count() == 0:
wave += 1
new_wave(wave)
+ sparks.tick() # advance all particles
hud.set("SCORE %05d SHIPS %d" % (score, max(0, lives)))
scene.refresh()
clock.tick()
```
[▶ Try it in the browser](/playground/?ex=02-starship-step7_particles)
### step 8 — `step8_states.py` · the state machine (capstone)
[Section titled “step 8 — step8\_states.py · the state machine (capstone)”](#step-8--step8_statespy--the-state-machine-capstone)
 A finished game needs more than one mode — and it’s worth tidying the code as it grows. All the run’s mutable values move into one `State` object (`st`), re-initialised **in place** by `reset()`, and the whole loop moves into a `main()` function (inside a function its names resolve as fast locals — a small measured win on device). `st.mode` runs TITLE → PLAY → GAMEOVER; `new_game()` calls `st.reset()` to restart; one centred `SceneLabel` shows the message for the non-play states; death ends the run instead of silently restarting. This is the `State` + `main()` shape every bigger game grows into — see [Game patterns](/concepts/patterns/) and the ready-to-run [skeleton](/snippets/). **You see:** title → play → game over → title. **Try it:** add a high score that survives across games (keep it a module global, not in `State`; see [`picogame_save`](/reference/) for NVM persistence).
```diff
27 collapsed lines
# Starship -- step 8: game states (title / playing / game over) + restart, tidied into State + main().
#
# What you learn: a state machine -- the backbone of a finished game -- built the way picogame
# recommends. All the run's mutable values live in ONE `class State` (st), re-initialised IN PLACE by
# reset() (st is created once and never reassigned). The per-frame loop lives in a main() function --
# inside a function its names resolve as fast locals instead of globals-dict lookups, a measured win on
# device. st.mode runs TITLE -> PLAY -> GAMEOVER; new_game() calls st.reset() to restart. This is the
# difference between a mechanic and a game, in the shape every bigger game grows into
# (see /concepts/patterns/).
#
# New vs step 7: a State object + a mode machine (TITLE/PLAY/GAMEOVER), the loop moved into main(),
# new_game() reset, a centred message label, ending the run on death instead of silently restarting,
# plus a confirm blip on start/menu and a low boom on game over.
#
# Run: python3 sim/run.py tutorials/02-starship/step8_states.py --hold B --shot /tmp/p8.png
import math
import terminalio
import picogame as pg
import picogame_game
import picogame_input
import picogame_clock
import picogame_shapes as shp
import picogame_pool
import picogame_ui as ui
W, H = 320, 240
BACKGROUND = pg.rgb565(0, 0, 8)
FRAMES = 16
+TITLE, PLAY, GAMEOVER = 0, 1, 2
scene, _, _ = picogame_game.setup(background=BACKGROUND)
6 collapsed lines
btn = picogame_input.Buttons()
clock = picogame_clock.Clock(30)
try:
import picogame_audio
audio = picogame_audio.Audio()
snd_fire = picogame_audio.tone(880, 25)
snd_boom = picogame_audio.tone(160, 90)
+ snd_start = picogame_audio.tone(660, 40) # bright blip: start / menu confirm
+ snd_die = picogame_audio.tone(120, 260) # low boom: game over (descending = lose)
except Exception:
audio = None
11 collapsed lines
ship_bitmap = shp.poly_frames(18, [(0, -8), (6, 7), (0, 4), (-6, 7)], FRAMES, pg.rgb565(200, 220, 255))
DIRS = [(math.sin(frame * 2 * math.pi / FRAMES), -math.cos(frame * 2 * math.pi / FRAMES)) for frame in range(FRAMES)]
bullet_bitmap = shp.circle(4, pg.rgb565(255, 255, 120))
ROCK_BITMAP = [shp.ring(40, pg.rgb565(170, 140, 100), 3),
shp.ring(24, pg.rgb565(170, 140, 100), 3),
shp.ring(13, pg.rgb565(170, 140, 100), 2)]
ROCK_RADIUS = [20, 12, 6]
ship = pg.Sprite(ship_bitmap, W // 2, H // 2)
ship.anchor = (0.5, 0.5)
rocks = picogame_pool.Pool(scene, ROCK_BITMAP[0], 16, anchor=(0.5, 0.5))
bullets = picogame_pool.Pool(scene, bullet_bitmap, 6, anchor=(0.5, 0.5))
sparks = pg.Particles(160, size=2, fade=True)
scene.add(sparks)
scene.add(ship)
hud = ui.SceneLabel(scene, pg, terminalio.FONT, 4, 4, pg.rgb565(255, 255, 255), BACKGROUND)
+msg = ui.SceneLabel(scene, pg, terminalio.FONT, 96, 112, pg.rgb565(255, 255, 255), BACKGROUND)
+# ALL the run's mutable values in ONE object. reset() lists every field's default in one place, so a
+# restart is st.reset() -- and st is created ONCE below and never reassigned (a never-rebound singleton),
+# which is what lets main() and new_game() just mutate st.* with no `global`. Engine objects (ship, the
+# pools, sparks, clock, the labels) stay module-level names, NOT in State.
+class State:
+def __init__(self):
+self.reset()
+def reset(self):
+self.mode = TITLE # TITLE -> PLAY -> GAMEOVER
+self.angle = 0
+self.vx = self.vy = 0.0
+self.fire_cooldown = 0
+self.lives = 3
+self.invincible = 0
+self.wave = 3
+self.score = 0
+st = State()
def wrap(x, y):
return x % W, y % H
17 collapsed lines
def spawn_rock(size, x, y, velocity_x, velocity_y):
rock = rocks.spawn()
if rock is None:
return
rock.data = {"size": size, "velocity_x": velocity_x, "velocity_y": velocity_y}
rock.bitmap = ROCK_BITMAP[size]
rock.fx, rock.fy = float(x), float(y)
def new_wave(count):
for i in range(count):
angle_rad = i * 2 * math.pi / count
spawn_rock(0, (W // 2 + int(140 * math.cos(angle_rad))) % W,
(H // 2 + int(110 * math.sin(angle_rad))) % H,
math.cos(angle_rad) * 1.2, math.sin(angle_rad) * 1.2)
+def new_game():
+ st.reset() # every field back to its default, IN PLACE
+ st.mode = PLAY
+ st.invincible = 60 # a mercy window on the fresh run
ship.fx, ship.fy = float(W // 2), float(H // 2)
+ rocks.free_all()
+ bullets.free_all()
+ sparks.clear()
+new_wave(st.wave)
+def main():
# The per-frame loop lives in a FUNCTION: its names (st, the helpers, the loop's own frame counter)
+# resolve as fast array-indexed locals instead of globals-dict lookups.
+ frame = 0
+while True:
+ btn.poll()
+ frame += 1
+if st.mode == TITLE:
+ ship.visible = False
+ msg.set("STARSHIP PRESS A")
+if btn.just_pressed(btn.A):
if audio:
audio.sfx(snd_start) # confirm blip on start
+new_game()
+ scene.refresh()
+ clock.tick()
continue
+if st.mode == GAMEOVER:
+ msg.set("GAME OVER %05d A=MENU" % st.score)
+if btn.just_pressed(btn.A):
if audio:
audio.sfx(snd_start) # confirm blip back to menu
+ st.mode = TITLE
+ sparks.tick()
+ scene.refresh()
+ clock.tick()
+continue
+if st.mode == PLAY:
+ msg.set(" ")
+ st.fire_cooldown -= 1
+if st.invincible > 0:
+ st.invincible -= 1
+if btn.is_pressed(btn.LEFT):
+ st.angle = (st.angle - 1) % FRAMES
+if btn.is_pressed(btn.RIGHT):
+ st.angle = (st.angle + 1) % FRAMES
+ delta_x, delta_y = DIRS[st.angle]
+if btn.is_pressed(btn.UP):
+ st.vx += delta_x * 0.25; st.vy += delta_y * 0.25
+ sparks.emit(ship.x - int(delta_x * 8), ship.y - int(delta_y * 8), 2, 2, 10, pg.rgb565(255, 150, 40))
+ speed = math.sqrt(st.vx * st.vx + st.vy * st.vy)
+if speed > 5:
+ st.vx *= 5 / speed; st.vy *= 5 / speed
+ st.vx *= 0.99; st.vy *= 0.99
+ ship.fx, ship.fy = wrap(ship.fx + st.vx, ship.fy + st.vy)
+ ship.frame = st.angle
+ ship.visible = (st.invincible <= 0) or (frame & 1)
+if btn.just_pressed(btn.B) and st.fire_cooldown <= 0:
+ bullet = bullets.spawn()
+if bullet:
+ bullet.data = {"velocity_x": delta_x * 7, "velocity_y": delta_y * 7, "life": 30}
+ bullet.move(ship.x, ship.y)
+ st.fire_cooldown = 6
+if audio:
+ audio.sfx(snd_fire)
+for bullet in bullets.items:
+if not bullet.visible:
+continue
+ bullet.data["life"] -= 1
+if bullet.data["life"] <= 0:
+ bullets.free(bullet)
+continue
+ bullet.fx, bullet.fy = wrap(bullet.fx + bullet.data["velocity_x"], bullet.fy + bullet.data["velocity_y"])
+for rock in rocks.items:
+if not rock.visible:
+continue
+ rock.fx, rock.fy = wrap(rock.fx + rock.data["velocity_x"], rock.fy + rock.data["velocity_y"])
+ size = rock.data["size"]
+ radius = ROCK_RADIUS[size]
+for bullet in bullets.items:
+if not bullet.visible:
+continue
+if bullet.near(rock, radius):
+ bullets.free(bullet)
+ rocks.free(rock)
+ st.score += (3 - size) * 20
+ sparks.emit(rock.x, rock.y, 18, 3, 26, pg.rgb565(255, 200, 120))
+if audio:
+ audio.sfx(snd_boom)
+if size < 2:
+for sign in (-1, 1):
+spawn_rock(size + 1, rock.fx, rock.fy,
rock.data["velocity_x"] + sign * 0.8, rock.data["velocity_y"] - sign * 0.8)
+break
+if st.invincible <= 0 and rock.visible and ship.near(rock, radius + 6):
+ st.lives -= 1
+ sparks.emit(ship.x, ship.y, 24, 4, 30, pg.rgb565(120, 200, 255))
+ ship.fx, ship.fy = float(W // 2), float(H // 2)
+ st.vx = st.vy = 0.0
+ st.invincible = 90
+if st.lives < 0:
+if audio:
+ audio.sfx(snd_die) # low boom on game over
+ st.mode = GAMEOVER
+break
+if rocks.count() == 0:
+ st.wave += 1
+new_wave(st.wave)
sparks.tick()
hud.set("SCORE %05d SHIPS %d" % (st.score, max(0, st.lives)))
scene.refresh()
clock.tick()
+main()
```
[▶ Try it in the browser](/playground/?ex=02-starship-step8_states)
***
**Where to go next:** the [web editor](/tools/editor/) + `picogame_scene`, to design levels as data and load them, instead of hand-coding placement. See the [scene format](/scene-format/) for how that data is structured, and try the sibling tutorials: [01-bounce](/tutorials/01-bounce/) and [03-quest](/tutorials/03-quest/).
# Tutorial 3 — Quest
> Build a top-down RPG in 8 steps — a scrolling map, camera, items, an NPC, combat, and a complete quest.
In this tutorial, you’ll build a small top-down RPG: walk through a scrolling map, collect coins, talk to an NPC, fight slimes, and complete a quest. It assumes you’ve completed [01-bounce](/tutorials/01-bounce/) and [02-starship](/tutorials/02-starship/). The main new ideas are the **camera** and using a **tilemap as the world**.
The full source for this tutorial lives on GitHub: [tutorials/03-quest](https://github.com/MakerClassCZ/picogame/tree/main/tutorials/03-quest).
Run any step:
```bash
python3 sim/run.py tutorials/03-quest/stepN_name.py --hold DOWN --shot /tmp/out.png
```
**Tip:** use `--backend pygame` for steps 6–8 if you want to interact with the dialog and quest.
***
### step 1 — `step1_world.py` · a world bigger than the screen
[Section titled “step 1 — step1\_world.py · a world bigger than the screen”](#step-1--step1_worldpy--a-world-bigger-than-the-screen)
 [`picogame_game.setup(...)`](/helpers/boot-loop/) returns `(scene, buffer_a, buffer_b)`. On an SPI display, the last two values are reusable strip buffers; on a framebuffer display, they are `None`. Early steps only need the [`Scene`](/reference/) and ignore the other two values (`scene, _, _`). Later dialog steps pass `buffer_a` to an immediate-mode helper; the framebuffer renderer does not need it. An ASCII map becomes a [`Tilemap`](/reference/) (30×20 tiles = 480×320 px, larger than the 320×240 screen). `shp.tileset_colors` builds the tileset (grass/path/water/tree/wall/door/goal). The hero is a [`Sprite`](/reference/) whose look comes from a [`Bitmap`](/reference/) — for now a **placeholder**: a red square with a brighter *facing edge* so you can see which way it points. Step 4 replaces it with a character assembled from ASCII masks. [`scene.set_view(offset_x, offset_y)`](/reference/) chooses the visible window; that’s the camera. The hero lives in **world** coordinates; the view offset decides where it lands on screen. **You see:** a patch of world with the hero centred. **Try it:** edit the `MAP` strings.
```python
# Quest -- step 1: a world bigger than the screen.
#
# This third tutorial builds a top-down RPG. It teaches what Bounce and Starship
# couldn't: a scrolling world larger than the display, a camera that follows the
# hero, tile-based wall collision, a walk animation, items, an NPC you talk to, and
# light combat. Do 01-bounce and 02-starship first.
#
# What you learn here: a Tilemap can be a whole WORLD (30x20 tiles = 480x320 px,
# bigger than the 320x240 screen). scene.set_view(offset_x, offset_y) chooses which part of the
# world is on screen -- that's the camera. We centre it on the hero. The hero lives
# in WORLD coordinates; the view offset decides where that lands on screen.
#
# New: a large Tilemap from an ASCII map, shp.tileset_colors, scene.set_view, and a
# placeholder hero (a red square with a facing edge). Step 4 gives it real drawn art.
#
# Run: python3 sim/run.py tutorials/03-quest/step1_world.py --shot /tmp/q1.png
import array
import picogame as pg
import picogame_game
import picogame_clock
import picogame_shapes as shp
W, H = 320, 240
TILE = 16
38 collapsed lines
# . grass : path ~ water(solid) # tree(solid) W wall(solid) D door G goal
# P player N npc * coin E enemy
MAP = [
"##############################",
"#.....:......................#",
"#.....:........*.............#",
"#..##.:.............~~~~~~...#",
"#..##.:.............~~~~~~...#",
"#.....N.............~~~~~~...#",
"#.....:.......E.....~~~~~~...#",
"#.....:......................#",
"#.....:.....*.........*......#",
"#.....:......................#",
"#:::::::P:::::::::*::::::::::#",
"#.....:...................*..#",
"#.....:.............E........#",
"#.....:...WWWWWWW............#",
"#.....:...W.....W......##....#",
"#.....:.*.W..G..W......##....#",
"#.....:...W.....W........E...#",
"#.....:...WWWDWWW............#",
"#.....:......................#",
"##############################",
]
MAPCOLS, MAPROWS = 30, 20
# map char -> tile value (entities sit on grass; the tile under them is grass/path)
# tile values (frame index into the colour tileset; 0 = empty)
GRASS, PATH, WATER, TREE, WALL, DOOR, GOAL = 1, 2, 3, 4, 5, 6, 7
CHAR2TILE = {".": GRASS, "P": GRASS, "N": GRASS, "*": GRASS, "E": GRASS,
":": PATH, "~": WATER, "#": TREE, "W": WALL, "D": DOOR, "G": GOAL}
# tile colours for values 1..7 (value 0 is unused)
TILE_RGB = [(40, 120, 50), # GRASS
(180, 160, 110), # PATH
(40, 90, 200), # WATER
(20, 80, 30), # TREE
(120, 120, 130), # WALL
(150, 90, 40), # DOOR
(240, 210, 60)] # GOAL
scene, _, _ = picogame_game.setup(background=pg.rgb565(0, 0, 0))
clock = picogame_clock.Clock(30)
tileset = shp.tileset_colors(TILE, TILE, [pg.rgb565(*color) for color in TILE_RGB])
world = pg.Tilemap(tileset, MAPCOLS, MAPROWS)
hero_x, hero_y = TILE, TILE # world pixel position of the hero
# build the Tilemap cell by cell from the ASCII map above
for tile_y in range(MAPROWS):
row = MAP[tile_y]
for tile_x in range(MAPCOLS):
char = row[tile_x] if tile_x < len(row) else "." # rows are full width; "." is just a safety net
world.tile(tile_x, tile_y, CHAR2TILE.get(char, GRASS)) # unknown chars fall back to GRASS
if char == "P":
hero_x, hero_y = tile_x * TILE, tile_y * TILE
scene.add(world)
# a PLACEHOLDER hero: a plain red square with a brighter bar on the facing edge, so you
# can see which way it points. 4 frames = 4 directions (frame = facing). We prototype
# with a shape now and draw a real animated character in step 4.
RED = pg.rgb565(210, 80, 60)
EDGE = pg.rgb565(255, 225, 170)
def hero_bitmap():
palette = array.array("H", [pg.rgb565(0, 0, 0), RED, EDGE]) # index 0 = transparent
stride = TILE * 4 # 4 frames side by side, 1 byte/px
data = bytearray(stride * TILE)
for facing in range(4): # 0 down, 1 up, 2 left, 3 right
for y in range(TILE):
for x in range(TILE):
on_facing_edge = ((facing == 0 and y >= TILE - 3) or (facing == 1 and y < 3) or
(facing == 2 and x < 3) or (facing == 3 and x >= TILE - 3))
data[y * stride + facing * TILE + x] = 2 if on_facing_edge else 1
return pg.Bitmap(data, TILE, TILE, format=pg.PAL8, palette=palette, frames=4, stride=stride)
hero = pg.Sprite(hero_bitmap(), hero_x, hero_y, frame=0)
scene.add(hero)
def camera_follow():
# centre the camera on the hero, clamped so we never show past the world edges
# The view offset = how far the world is shifted left/up on screen: 0 (world edge
# at screen edge) down to negative as we scroll right/down.
offset_x = W // 2 - (hero.x + TILE // 2) # centre the hero...
offset_x = min(0, offset_x) # ...but never past the left edge
offset_x = max(W - MAPCOLS * TILE, offset_x) # ...nor past the right edge
offset_y = H // 2 - (hero.y + TILE // 2) # centre the hero...
offset_y = min(0, offset_y) # ...but never past the top edge
offset_y = max(H - MAPROWS * TILE, offset_y) # ...nor past the bottom edge
scene.set_view(int(offset_x), int(offset_y))
camera_follow()
while True:
scene.refresh()
clock.tick()
```
[▶ Try it in the browser](/playground/?ex=03-quest-step1_world)
### step 2 — `step2_walk.py` · walk, camera follows
[Section titled “step 2 — step2\_walk.py · walk, camera follows”](#step-2--step2_walkpy--walk-camera-follows)
 4-direction movement read with [`picogame_input`](/reference/); after each move `camera_follow()` re-centres the camera, **clamped** to the world so you never see past the edges (near an edge the hero walks toward the screen edge instead). The hero faces its movement direction — its `frame` picks down/up/left/right. No wall collision yet: you can walk over water. **You see:** the hero strides around with the camera following, clamped so the view never slips past the world’s edge. **Try it:** change `SPEED`.
```diff
14 collapsed lines
# Quest -- step 2: walk around, camera follows.
#
# What you learn: world vs screen coordinates. The hero moves in WORLD space; after
# each move we call camera_follow() to re-aim the camera. Near the world edges the clamp in
# camera_follow() stops the camera and the hero walks toward the screen edge instead -- the
# classic top-down feel. The hero also FACES the way it moves -- its `frame` picks the
# direction (0 down, 1 up, 2 left, 3 right). There's no wall collision yet, so you can
# walk over water and trees (step 3 fixes that).
#
# New vs step 1: 4-direction input, facing via sprite.frame, camera_follow() on move.
#
# Run: python3 sim/run.py tutorials/03-quest/step2_walk.py --hold DOWN --shot /tmp/q2.png
import array
import picogame as pg
import picogame_game
+import picogame_input
import picogame_clock
import picogame_shapes as shp
W, H = 320, 240
TILE = 16
+SPEED = 2
MAP = [
"##############################",
30 collapsed lines
"#.....:......................#",
"#.....:........*.............#",
"#..##.:.............~~~~~~...#",
"#..##.:.............~~~~~~...#",
"#.....N.............~~~~~~...#",
"#.....:.......E.....~~~~~~...#",
"#.....:......................#",
"#.....:.....*.........*......#",
"#.....:......................#",
"#:::::::P:::::::::*::::::::::#",
"#.....:...................*..#",
"#.....:.............E........#",
"#.....:...WWWWWWW............#",
"#.....:...W.....W......##....#",
"#.....:.*.W..G..W......##....#",
"#.....:...W.....W........E...#",
"#.....:...WWWDWWW............#",
"#.....:......................#",
"##############################",
]
MAPCOLS, MAPROWS = 30, 20
# tile values (frame index into the colour tileset; 0 = empty)
GRASS, PATH, WATER, TREE, WALL, DOOR, GOAL = 1, 2, 3, 4, 5, 6, 7
CHAR2TILE = {".": GRASS, "P": GRASS, "N": GRASS, "*": GRASS, "E": GRASS,
":": PATH, "~": WATER, "#": TREE, "W": WALL, "D": DOOR, "G": GOAL}
TILE_RGB = [(40, 120, 50), # GRASS
(180, 160, 110), # PATH
(40, 90, 200), # WATER
(20, 80, 30), # TREE
(120, 120, 130), # WALL
(150, 90, 40), # DOOR
(240, 210, 60)] # GOAL
+DOWN, UP, LEFT, RIGHT = 0, 1, 2, 3 # facing -> frame index
scene, _, _ = picogame_game.setup(background=pg.rgb565(0, 0, 0))
+btn = picogame_input.Buttons()
clock = picogame_clock.Clock(30)
tileset = shp.tileset_colors(TILE, TILE, [pg.rgb565(*color) for color in TILE_RGB])
world = pg.Tilemap(tileset, MAPCOLS, MAPROWS)
hero_x, hero_y = TILE, TILE
for tile_y in range(MAPROWS):
for tile_x in range(MAPCOLS):
char = MAP[tile_y][tile_x] if tile_x < len(MAP[tile_y]) else "."
world.tile(tile_x, tile_y, CHAR2TILE.get(char, GRASS))
if char == "P":
hero_x, hero_y = tile_x * TILE, tile_y * TILE
scene.add(world)
# a PLACEHOLDER hero: a plain red square with a brighter bar on the facing edge, so you
# can see which way it points. 4 frames = 4 directions (frame = facing). Step 4 replaces
# it with a real drawn character.
RED = pg.rgb565(210, 80, 60)
EDGE = pg.rgb565(255, 225, 170)
13 collapsed lines
def hero_bitmap():
palette = array.array("H", [pg.rgb565(0, 0, 0), RED, EDGE]) # index 0 = transparent
stride = TILE * 4 # 4 frames side by side, 1 byte/px
data = bytearray(stride * TILE)
for facing in range(4): # 0 down, 1 up, 2 left, 3 right
for y in range(TILE):
for x in range(TILE):
on_facing_edge = ((facing == 0 and y >= TILE - 3) or (facing == 1 and y < 3) or
(facing == 2 and x < 3) or (facing == 3 and x >= TILE - 3))
data[y * stride + facing * TILE + x] = 2 if on_facing_edge else 1
return pg.Bitmap(data, TILE, TILE, format=pg.PAL8, palette=palette, frames=4, stride=stride)
hero = pg.Sprite(hero_bitmap(), hero_x, hero_y, frame=DOWN)
scene.add(hero)
def camera_follow():
offset_x = max(W - MAPCOLS * TILE, min(0, W // 2 - (hero.x + TILE // 2)))
offset_y = max(H - MAPROWS * TILE, min(0, H // 2 - (hero.y + TILE // 2)))
scene.set_view(int(offset_x), int(offset_y))
camera_follow()
while True:
+ btn.poll()
+# True/False count as 1/0, so this is -1 (left), 0, or +1 (right)
+ delta_x = btn.is_pressed(btn.RIGHT) - btn.is_pressed(btn.LEFT)
+ delta_y = btn.is_pressed(btn.DOWN) - btn.is_pressed(btn.UP)
+if delta_x:
+ hero.frame = RIGHT if delta_x > 0 else LEFT # face horizontally
+elif delta_y:
+ hero.frame = DOWN if delta_y > 0 else UP # face vertically
+if delta_x or delta_y:
+ hero.move(hero.x + delta_x * SPEED, hero.y + delta_y * SPEED)
+camera_follow()
scene.refresh()
clock.tick()
```
[▶ Try it in the browser](/playground/?ex=03-quest-step2_walk)
### step 3 — `step3_walls.py` · tile collision
[Section titled “step 3 — step3\_walls.py · tile collision”](#step-3--step3_wallspy--tile-collision)
 `solid_at(pixel_x, pixel_y)` maps a world pixel to a tile and checks a `SOLID` set; `can_walk()` probes the hero’s four corners. We test the X and Y moves **separately**, so you slide along a wall instead of sticking when pushing diagonally into it. (The engine also ships [`picogame_tiles`](/reference/) with ready-made tile probing if you’d rather not hand-roll it.) **You see:** water, trees and walls now block you. **Try it:** add a tile value to `SOLID` (or remove one).
```diff
54 collapsed lines
# Quest -- step 3: walls (tile-based collision).
#
# What you learn: stop the hero walking through water/trees/walls. Convert a world
# pixel to a tile (tx = px // TILE), look the tile up, and treat some values as
# SOLID. can_walk() probes the hero's body (its four corners, inset a little) so it
# can't clip into a wall. We test the X and Y moves SEPARATELY, so the hero slides
# along a wall instead of sticking when you push diagonally into it.
#
# New vs step 2: solid_at()/can_walk() pixel->tile collision, per-axis movement.
#
# Run: python3 sim/run.py tutorials/03-quest/step3_walls.py --hold RIGHT --shot /tmp/q3.png
import array
import picogame as pg
import picogame_game
import picogame_input
import picogame_clock
import picogame_shapes as shp
W, H = 320, 240
TILE = 16
SPEED = 2
MAP = [
"##############################",
"#.....:......................#",
"#.....:........*.............#",
"#..##.:.............~~~~~~...#",
"#..##.:.............~~~~~~...#",
"#.....N.............~~~~~~...#",
"#.....:.......E.....~~~~~~...#",
"#.....:......................#",
"#.....:.....*.........*......#",
"#.....:......................#",
"#:::::::P:::::::::*::::::::::#",
"#.....:...................*..#",
"#.....:.............E........#",
"#.....:...WWWWWWW............#",
"#.....:...W.....W......##....#",
"#.....:.*.W..G..W......##....#",
"#.....:...W.....W........E...#",
"#.....:...WWWDWWW............#",
"#.....:......................#",
"##############################",
]
MAPCOLS, MAPROWS = 30, 20
# tile values (frame index into the colour tileset; 0 = empty)
GRASS, PATH, WATER, TREE, WALL, DOOR, GOAL = 1, 2, 3, 4, 5, 6, 7
CHAR2TILE = {".": GRASS, "P": GRASS, "N": GRASS, "*": GRASS, "E": GRASS,
":": PATH, "~": WATER, "#": TREE, "W": WALL, "D": DOOR, "G": GOAL}
TILE_RGB = [(40, 120, 50), # GRASS
(180, 160, 110), # PATH
(40, 90, 200), # WATER
(20, 80, 30), # TREE
(120, 120, 130), # WALL
(150, 90, 40), # DOOR
(240, 210, 60)] # GOAL
+SOLID = (WATER, TREE, WALL, DOOR) # these tiles block movement
DOWN, UP, LEFT, RIGHT = 0, 1, 2, 3 # facing -> frame index
scene, _, _ = picogame_game.setup(background=pg.rgb565(0, 0, 0))
37 collapsed lines
btn = picogame_input.Buttons()
clock = picogame_clock.Clock(30)
tileset = shp.tileset_colors(TILE, TILE, [pg.rgb565(*color) for color in TILE_RGB])
world = pg.Tilemap(tileset, MAPCOLS, MAPROWS)
hero_x, hero_y = TILE, TILE
for tile_y in range(MAPROWS):
for tile_x in range(MAPCOLS):
char = MAP[tile_y][tile_x] if tile_x < len(MAP[tile_y]) else "."
world.tile(tile_x, tile_y, CHAR2TILE.get(char, GRASS))
if char == "P":
hero_x, hero_y = tile_x * TILE, tile_y * TILE
scene.add(world)
# a PLACEHOLDER hero: a plain red square with a brighter bar on the facing edge, so you
# can see which way it points. 4 frames = 4 directions (frame = facing). Step 4 replaces
# it with a real drawn character.
RED = pg.rgb565(210, 80, 60)
EDGE = pg.rgb565(255, 225, 170)
def hero_bitmap():
palette = array.array("H", [pg.rgb565(0, 0, 0), RED, EDGE]) # index 0 = transparent
stride = TILE * 4 # 4 frames side by side, 1 byte/px
data = bytearray(stride * TILE)
for facing in range(4): # 0 down, 1 up, 2 left, 3 right
for y in range(TILE):
for x in range(TILE):
on_facing_edge = ((facing == 0 and y >= TILE - 3) or (facing == 1 and y < 3) or
(facing == 2 and x < 3) or (facing == 3 and x >= TILE - 3))
data[y * stride + facing * TILE + x] = 2 if on_facing_edge else 1
return pg.Bitmap(data, TILE, TILE, format=pg.PAL8, palette=palette, frames=4, stride=stride)
hero = pg.Sprite(hero_bitmap(), hero_x, hero_y, frame=DOWN)
scene.add(hero)
+def solid_at(pixel_x, pixel_y):
+ tile_x, tile_y = pixel_x // TILE, pixel_y // TILE
+if tile_x < 0 or tile_x >= MAPCOLS or tile_y < 0 or tile_y >= MAPROWS:
+return True
+return world.tile(tile_x, tile_y) in SOLID
+def can_walk(pixel_x, pixel_y):
+# probe the hero's body corners (inset 2px) -- all must be free
+return not (solid_at(pixel_x + 2, pixel_y + 2) or solid_at(pixel_x + TILE - 3, pixel_y + 2) or
+solid_at(pixel_x + 2, pixel_y + TILE - 3) or solid_at(pixel_x + TILE - 3, pixel_y + TILE - 3))
def camera_follow():
offset_x = max(W - MAPCOLS * TILE, min(0, W // 2 - (hero.x + TILE // 2)))
8 collapsed lines
offset_y = max(H - MAPROWS * TILE, min(0, H // 2 - (hero.y + TILE // 2)))
scene.set_view(int(offset_x), int(offset_y))
camera_follow()
while True:
btn.poll()
delta_x = btn.is_pressed(btn.RIGHT) - btn.is_pressed(btn.LEFT)
delta_y = btn.is_pressed(btn.DOWN) - btn.is_pressed(btn.UP)
if delta_x:
hero.frame = RIGHT if delta_x > 0 else LEFT
elif delta_y:
hero.frame = DOWN if delta_y > 0 else UP
+ moved = False
if delta_x and can_walk(hero.x + delta_x * SPEED, hero.y): # test X alone
+ hero.move(hero.x + delta_x * SPEED, hero.y); moved = True
+if delta_y and can_walk(hero.x, hero.y + delta_y * SPEED): # then Y alone -> slide
+ hero.move(hero.x, hero.y + delta_y * SPEED); moved = True
+if moved:
camera_follow()
scene.refresh()
clock.tick()
```
[▶ Try it in the browser](/playground/?ex=03-quest-step3_walls)
### step 4 — `step4_anim.py` · walk animation
[Section titled “step 4 — step4\_anim.py · walk animation”](#step-4--step4_animpy--walk-animation)
 Now we replace the placeholder square with a character drawn from ASCII masks (down/up/side, with LEFT the side view mirrored by `flip_x`), with two **poses** per facing, driven by [`picogame_anim`](/reference/)`.AnimatedSprite`: `play(name)` picks the facing’s animation, `tick(dt)` advances it using the real `dt` from `clock.tick()` (so the walk speed is frame-rate independent). **You see:** a walk cycle in your direction of travel, and the rest pose when you stand still. **Try it:** change the animation `fps`.

The frames here are hand-drawn ASCII **masks**, so you can focus on the animation code. For custom artwork, draw an image sprite sheet and bake it to a Bitmap with `tools/png2picogame.py`, then animate by frame index — the *same* `AnimatedSprite` drives that too. See the [assets guide](/tutorials/assets/) and each tutorial’s `bonus_art.py`.
```diff
22 collapsed lines
# Quest -- step 4: a walking animation.
#
# What you learn: time-based animation -- and giving the hero real art. We retire the
# placeholder square and draw a proper character from ASCII masks (down / up / side, with
# LEFT the side view mirrored by flip_x), with TWO poses per facing, then drive the walk
# with picogame_anim.AnimatedSprite: play(name) picks the facing's animation, tick(dt)
# advances it with the real dt from clock.tick() (so the walk speed is frame-rate
# independent); standing still we show the still pose.
#
# Here the frames are hand-drawn masks (no asset), so we animate by SWAPPING whole
# bitmaps. A REAL game usually loads a proper image sprite-sheet (a PNG baked with
# tools/png2picogame.py -> one multi-frame Bitmap) and animates by frame INDEX -- the
# same AnimatedSprite drives that too. See the bonus_art step / the assets guide.
#
# New vs step 3: the drawn masked hero (replacing the placeholder square) + sprite.flip_x
# for LEFT, two walk poses per facing, picogame_anim.AnimatedSprite over a bitmap list,
# play()/tick(dt), the dt from clock.tick().
#
# Run: python3 sim/run.py tutorials/03-quest/step4_anim.py --hold RIGHT --shot /tmp/q4.png
import picogame as pg
import picogame_game
import picogame_input
import picogame_clock
+import picogame_anim
import picogame_shapes as shp
36 collapsed lines
W, H = 320, 240
TILE = 16
SPEED = 2
MAP = [
"##############################",
"#.....:......................#",
"#.....:........*.............#",
"#..##.:.............~~~~~~...#",
"#..##.:.............~~~~~~...#",
"#.....N.............~~~~~~...#",
"#.....:.......E.....~~~~~~...#",
"#.....:......................#",
"#.....:.....*.........*......#",
"#.....:......................#",
"#:::::::P:::::::::*::::::::::#",
"#.....:...................*..#",
"#.....:.............E........#",
"#.....:...WWWWWWW............#",
"#.....:...W.....W......##....#",
"#.....:.*.W..G..W......##....#",
"#.....:...W.....W........E...#",
"#.....:...WWWDWWW............#",
"#.....:......................#",
"##############################",
]
MAPCOLS, MAPROWS = 30, 20
# tile values (frame index into the colour tileset; 0 = empty)
GRASS, PATH, WATER, TREE, WALL, DOOR, GOAL = 1, 2, 3, 4, 5, 6, 7
CHAR2TILE = {".": GRASS, "P": GRASS, "N": GRASS, "*": GRASS, "E": GRASS,
":": PATH, "~": WATER, "#": TREE, "W": WALL, "D": DOOR, "G": GOAL}
TILE_RGB = [(40, 120, 50), # GRASS
(180, 160, 110), # PATH
(40, 90, 200), # WATER
(20, 80, 30), # TREE
(120, 120, 130), # WALL
(150, 90, 40), # DOOR
(240, 210, 60)] # GOAL
SOLID = (WATER, TREE, WALL, DOOR) # these tiles block movement
DOWN, UP, LEFT, RIGHT = 0, 1, 2, 3
+FACING_ANIM = ("down", "up", "side", "side") # animation per facing (left/right share the side art)
+WALK_FPS = 8
scene, _, _ = picogame_game.setup(background=pg.rgb565(0, 0, 0))
13 collapsed lines
btn = picogame_input.Buttons()
clock = picogame_clock.Clock(30)
tileset = shp.tileset_colors(TILE, TILE, [pg.rgb565(*color) for color in TILE_RGB])
world = pg.Tilemap(tileset, MAPCOLS, MAPROWS)
hero_x, hero_y = TILE, TILE
for tile_y in range(MAPROWS):
for tile_x in range(MAPCOLS):
char = MAP[tile_y][tile_x] if tile_x < len(MAP[tile_y]) else "."
world.tile(tile_x, tile_y, CHAR2TILE.get(char, GRASS))
if char == "P":
hero_x, hero_y = tile_x * TILE, tile_y * TILE
scene.add(world)
# --- the hero: ASCII pixel art you can edit. '#' = a pixel, '.' = transparent. One
# colour = a 1-bit silhouette; the FACING reads from the shape: DOWN has eyes, UP is
# the back of the head, SIDE is a profile with a nose (LEFT = SIDE mirrored at runtime
# with flip_x). Two poses per facing make the walk -- the legs scissor between A and B.
+HERO_COLOR = pg.rgb565(235, 90, 70)
+DOWN_A = [
"................",
".....####.......",
+"....######......",
+"....######......",
+"....#.##.#......", # eye gaps -> the face
+"....######......",
+".....####.......",
+"...########.....",
+"..##########....",
+"..##########....",
+"..##########....",
+"...########.....",
+"....##..##......",
+"...###..##......",
+"..###...##......", # left foot forward
+"..##............",
+]
+DOWN_B = [
+"................",
+".....####.......",
+"....######......",
+"....######......",
+"....#.##.#......",
+"....######......",
+".....####.......",
+"...########.....",
+"..##########....",
+"..##########....",
+"..##########....",
+"...########.....",
+"....##..##......",
+"....##..###.....",
+"....##...###....", # right foot forward
+"..........##....",
+]
+UP_A = [
+"................",
+".....####.......",
+"....######......",
+"....######......",
+"....######......", # solid head = the hero's back
+"....######......",
+".....####.......",
+"...########.....",
+"..##########....",
+"..##########....",
+"..##########....",
+"...########.....",
+"....##..##......",
+"...###..##......",
+"..###...##......",
+"..##............",
+]
+UP_B = [
+"................",
+".....####.......",
+"....######......",
+"....######......",
+"....######......",
+"....######......",
+".....####.......",
+"...########.....",
+"..##########....",
+"..##########....",
+"..##########....",
+"...########.....",
+"....##..##......",
+"....##..###.....",
+"....##...###....",
+"..........##....",
+]
+SIDE_A = [
+"................",
+".....####.......",
+"....#####.......",
+"....######......",
+"....#####.#.....", # nose nub -> faces right (flip_x -> left)
+"....######......",
+".....####.......",
+"....######......",
+"....######.#....", # arm swung forward
+"....######.#....",
+"....######......",
+".....####.......",
+"...##....##.....", # legs split
+"..##......##....",
+"..##......##....",
+"..#........#....",
+]
+SIDE_B = [
+"................",
+".....####.......",
+"....#####.......",
+"....######......",
+"....#####.#.....",
+"....######......",
+".....####.......",
+"....######......",
+"....######......", # arm tucked in
+"....######......",
+"....######......",
+".....####.......",
+".....####.......", # legs pass under the body
+".....####.......",
+"....##..##......",
+"....#....#......",
+]
+BM = {"down": [shp.from_mask(DOWN_A, HERO_COLOR), shp.from_mask(DOWN_B, HERO_COLOR)],
+"up": [shp.from_mask(UP_A, HERO_COLOR), shp.from_mask(UP_B, HERO_COLOR)],
+"side": [shp.from_mask(SIDE_A, HERO_COLOR), shp.from_mask(SIDE_B, HERO_COLOR)]}
hero = pg.Sprite(BM["down"][0], hero_x, hero_y)
+# each entry: name: (bitmap list, frames-per-second, loop?) -- AnimatedSprite accepts
+# a list of Bitmaps to swap in, not only frame indices into one sheet
+walk = picogame_anim.AnimatedSprite(hero, {
+"down": (BM["down"], WALK_FPS, True),
+"up": (BM["up"], WALK_FPS, True),
+"side": (BM["side"], WALK_FPS, True)})
scene.add(hero)
+facing = DOWN
def solid_at(pixel_x, pixel_y):
tile_x, tile_y = pixel_x // TILE, pixel_y // TILE
15 collapsed lines
if tile_x < 0 or tile_x >= MAPCOLS or tile_y < 0 or tile_y >= MAPROWS:
return True
return world.tile(tile_x, tile_y) in SOLID
def can_walk(pixel_x, pixel_y):
return not (solid_at(pixel_x + 2, pixel_y + 2) or solid_at(pixel_x + TILE - 3, pixel_y + 2) or
solid_at(pixel_x + 2, pixel_y + TILE - 3) or solid_at(pixel_x + TILE - 3, pixel_y + TILE - 3))
def camera_follow():
offset_x = max(W - MAPCOLS * TILE, min(0, W // 2 - (hero.x + TILE // 2)))
offset_y = max(H - MAPROWS * TILE, min(0, H // 2 - (hero.y + TILE // 2)))
scene.set_view(int(offset_x), int(offset_y))
camera_follow()
+dt = 1 / 30 # assume one 30fps frame for the first tick; clock.tick() returns real dt after that
while True:
btn.poll()
+# True/False count as 1/0, so this is -1 (left), 0, or +1 (right)
delta_x = btn.is_pressed(btn.RIGHT) - btn.is_pressed(btn.LEFT)
delta_y = btn.is_pressed(btn.DOWN) - btn.is_pressed(btn.UP)
if delta_x:
facing = RIGHT if delta_x > 0 else LEFT
elif delta_y:
facing = DOWN if delta_y > 0 else UP
+ hero.flip_x = (facing == LEFT) # mirror the side art for LEFT
moved = False
if delta_x and can_walk(hero.x + delta_x * SPEED, hero.y):
hero.move(hero.x + delta_x * SPEED, hero.y); moved = True
if delta_y and can_walk(hero.x, hero.y + delta_y * SPEED):
hero.move(hero.x, hero.y + delta_y * SPEED); moved = True
if moved:
camera_follow()
+ walk.play(FACING_ANIM[facing]) # animate the walk while moving
+ walk.tick(dt)
+else:
+ hero.bitmap = BM[FACING_ANIM[facing]][0] # still: pose A of the current facing
scene.refresh()
dt = clock.tick()
```
[▶ Try it in the browser](/playground/?ex=03-quest-step4_anim)
### step 5 — `step5_items.py` · items + a fixed HUD
[Section titled “step 5 — step5\_items.py · items + a fixed HUD”](#step-5--step5_itemspy--items--a-fixed-hud)
 Coins are sprites placed from the map; being normal scene items, they **scroll with the world**. We collect one when the hero is close, hide it, and count it. [`picogame_ui`](/reference/)`.SceneLabel` is a **fixed** layer: it does NOT scroll, so the counter stays pinned to the corner. **You see:** coins dotted through the world that you scoop up close, and a counter pinned in the corner that doesn’t scroll. **Try it:** add more `*` coins to the map.
```diff
12 collapsed lines
# Quest -- step 5: collectible items + a HUD over the scrolling world.
#
# What you learn: world-space pickups and a camera-fixed HUD. Coins are sprites
# placed at map positions; because they're normal scene items they scroll with the
# world. We collect one when the hero is close enough (a simple distance test), hide
# it, and bump a counter. picogame_ui.SceneLabel is a FIXED scene layer -- it does NOT
# scroll, so the coin counter stays pinned to the corner while the world moves under
# it.
#
# New vs step 4: item sprites placed from the map, distance-based pickup, a fixed
# SceneLabel counter.
#
# Run: python3 sim/run.py tutorials/03-quest/step5_items.py --hold RIGHT --shot /tmp/q5.png
+import terminalio
import picogame as pg
import picogame_game
import picogame_input
import picogame_clock
import picogame_anim
import picogame_shapes as shp
+import picogame_ui as ui
W, H = 320, 240
38 collapsed lines
TILE = 16
SPEED = 2
MAP = [
"##############################",
"#.....:......................#",
"#.....:........*.............#",
"#..##.:.............~~~~~~...#",
"#..##.:.............~~~~~~...#",
"#.....N.............~~~~~~...#",
"#.....:.......E.....~~~~~~...#",
"#.....:......................#",
"#.....:.....*.........*......#",
"#.....:......................#",
"#:::::::P:::::::::*::::::::::#",
"#.....:...................*..#",
"#.....:.............E........#",
"#.....:...WWWWWWW............#",
"#.....:...W.....W......##....#",
"#.....:.*.W..G..W......##....#",
"#.....:...W.....W........E...#",
"#.....:...WWWDWWW............#",
"#.....:......................#",
"##############################",
]
MAPCOLS, MAPROWS = 30, 20
# tile values (frame index into the colour tileset; 0 = empty)
GRASS, PATH, WATER, TREE, WALL, DOOR, GOAL = 1, 2, 3, 4, 5, 6, 7
CHAR2TILE = {".": GRASS, "P": GRASS, "N": GRASS, "*": GRASS, "E": GRASS,
":": PATH, "~": WATER, "#": TREE, "W": WALL, "D": DOOR, "G": GOAL}
TILE_RGB = [(40, 120, 50), # GRASS
(180, 160, 110), # PATH
(40, 90, 200), # WATER
(20, 80, 30), # TREE
(120, 120, 130), # WALL
(150, 90, 40), # DOOR
(240, 210, 60)] # GOAL
SOLID = (WATER, TREE, WALL, DOOR) # these tiles block movement
DOWN, UP, LEFT, RIGHT = 0, 1, 2, 3
FACING_ANIM = ("down", "up", "side", "side") # animation per facing (left/right share the side art)
WALK_FPS = 8
+BACKGROUND = pg.rgb565(0, 0, 0)
scene, _, _ = picogame_game.setup(background=BACKGROUND)
btn = picogame_input.Buttons()
clock = picogame_clock.Clock(30)
tileset = shp.tileset_colors(TILE, TILE, [pg.rgb565(*color) for color in TILE_RGB])
world = pg.Tilemap(tileset, MAPCOLS, MAPROWS)
hero_x, hero_y = TILE, TILE
+coin_spots = []
for tile_y in range(MAPROWS):
for tile_x in range(MAPCOLS):
char = MAP[tile_y][tile_x] if tile_x < len(MAP[tile_y]) else "."
world.tile(tile_x, tile_y, CHAR2TILE.get(char, GRASS))
if char == "P":
hero_x, hero_y = tile_x * TILE, tile_y * TILE
+elif char == "*":
+ coin_spots.append((tile_x * TILE, tile_y * TILE))
scene.add(world)
+coin_bitmap = shp.circle(8, pg.rgb565(245, 215, 60))
+coins = [pg.Sprite(coin_bitmap, x + 4, y + 4) for (x, y) in coin_spots] # +4 to centre in tile
+for coin in coins:
+ scene.add(coin)
# --- the hero: ASCII pixel art you can edit. '#' = a pixel, '.' = transparent. One
# colour = a 1-bit silhouette; the FACING reads from the shape: DOWN has eyes, UP is
118 collapsed lines
# the back of the head, SIDE is a profile with a nose (LEFT = SIDE mirrored at runtime
# with flip_x). Two poses per facing make the walk -- the legs scissor between A and B.
HERO_COLOR = pg.rgb565(235, 90, 70)
DOWN_A = [
"................",
".....####.......",
"....######......",
"....######......",
"....#.##.#......", # eye gaps -> the face
"....######......",
".....####.......",
"...########.....",
"..##########....",
"..##########....",
"..##########....",
"...########.....",
"....##..##......",
"...###..##......",
"..###...##......", # left foot forward
"..##............",
]
DOWN_B = [
"................",
".....####.......",
"....######......",
"....######......",
"....#.##.#......",
"....######......",
".....####.......",
"...########.....",
"..##########....",
"..##########....",
"..##########....",
"...########.....",
"....##..##......",
"....##..###.....",
"....##...###....", # right foot forward
"..........##....",
]
UP_A = [
"................",
".....####.......",
"....######......",
"....######......",
"....######......", # solid head = the hero's back
"....######......",
".....####.......",
"...########.....",
"..##########....",
"..##########....",
"..##########....",
"...########.....",
"....##..##......",
"...###..##......",
"..###...##......",
"..##............",
]
UP_B = [
"................",
".....####.......",
"....######......",
"....######......",
"....######......",
"....######......",
".....####.......",
"...########.....",
"..##########....",
"..##########....",
"..##########....",
"...########.....",
"....##..##......",
"....##..###.....",
"....##...###....",
"..........##....",
]
SIDE_A = [
"................",
".....####.......",
"....#####.......",
"....######......",
"....#####.#.....", # nose nub -> faces right (flip_x -> left)
"....######......",
".....####.......",
"....######......",
"....######.#....", # arm swung forward
"....######.#....",
"....######......",
".....####.......",
"...##....##.....", # legs split
"..##......##....",
"..##......##....",
"..#........#....",
]
SIDE_B = [
"................",
".....####.......",
"....#####.......",
"....######......",
"....#####.#.....",
"....######......",
".....####.......",
"....######......",
"....######......", # arm tucked in
"....######......",
"....######......",
".....####.......",
".....####.......", # legs pass under the body
".....####.......",
"....##..##......",
"....#....#......",
]
BM = {"down": [shp.from_mask(DOWN_A, HERO_COLOR), shp.from_mask(DOWN_B, HERO_COLOR)],
"up": [shp.from_mask(UP_A, HERO_COLOR), shp.from_mask(UP_B, HERO_COLOR)],
"side": [shp.from_mask(SIDE_A, HERO_COLOR), shp.from_mask(SIDE_B, HERO_COLOR)]}
hero = pg.Sprite(BM["down"][0], hero_x, hero_y)
walk = picogame_anim.AnimatedSprite(hero, {
"down": (BM["down"], WALK_FPS, True),
"up": (BM["up"], WALK_FPS, True),
"side": (BM["side"], WALK_FPS, True)})
scene.add(hero)
+hud = ui.SceneLabel(scene, pg, terminalio.FONT, 4, 4, pg.rgb565(255, 255, 255), BACKGROUND)
facing = DOWN
+coins_collected = 0
17 collapsed lines
def solid_at(pixel_x, pixel_y):
tile_x, tile_y = pixel_x // TILE, pixel_y // TILE
if tile_x < 0 or tile_x >= MAPCOLS or tile_y < 0 or tile_y >= MAPROWS:
return True
return world.tile(tile_x, tile_y) in SOLID
def can_walk(pixel_x, pixel_y):
return not (solid_at(pixel_x + 2, pixel_y + 2) or solid_at(pixel_x + TILE - 3, pixel_y + 2) or
solid_at(pixel_x + 2, pixel_y + TILE - 3) or solid_at(pixel_x + TILE - 3, pixel_y + TILE - 3))
def camera_follow():
offset_x = max(W - MAPCOLS * TILE, min(0, W // 2 - (hero.x + TILE // 2)))
offset_y = max(H - MAPROWS * TILE, min(0, H // 2 - (hero.y + TILE // 2)))
scene.set_view(int(offset_x), int(offset_y))
camera_follow()
dt = 1 / 30
while True:
btn.poll()
14 collapsed lines
# True/False count as 1/0, so this is -1 (left), 0, or +1 (right)
delta_x = btn.is_pressed(btn.RIGHT) - btn.is_pressed(btn.LEFT)
delta_y = btn.is_pressed(btn.DOWN) - btn.is_pressed(btn.UP)
if delta_x:
facing = RIGHT if delta_x > 0 else LEFT
elif delta_y:
facing = DOWN if delta_y > 0 else UP
hero.flip_x = (facing == LEFT) # mirror the side art for LEFT
moved = False
if delta_x and can_walk(hero.x + delta_x * SPEED, hero.y):
hero.move(hero.x + delta_x * SPEED, hero.y); moved = True
if delta_y and can_walk(hero.x, hero.y + delta_y * SPEED):
hero.move(hero.x, hero.y + delta_y * SPEED); moved = True
if moved:
camera_follow()
walk.play(FACING_ANIM[facing]); walk.tick(dt)
else:
hero.bitmap = BM[FACING_ANIM[facing]][0] # still: pose A of the current facing
+# pick up any coin we're standing on (within ~12px on both axes = close enough)
+for coin in coins:
+if coin.visible and abs(hero.x - coin.x) < 12 and abs(hero.y - coin.y) < 12:
+ coin.visible = False
+ coins_collected += 1
+ hud.set("COINS %d/%d" % (coins_collected, len(coins)))
scene.refresh()
dt = clock.tick()
```
[▶ Try it in the browser](/playground/?ex=03-quest-step5_items)
### step 6 — `step6_npc.py` · talk to an NPC
[Section titled “step 6 — step6\_npc.py · talk to an NPC”](#step-6--step6_npcpy--talk-to-an-npc)
 Stand next to the NPC and press **A** to switch into a **dialog mode**: the world keeps drawing underneath while `picogame_ui.TextBox` overlays a message; movement is frozen until you press a button. **You see:** a “PRESS A” prompt near the NPC, then a dialog box. **Try it:** change the dialog `LINES`.
**A tidy-up: the `State` object.** The mutable variables are piling up, and as globals each needs a `global` line in every function that changes it. So we group them into one `class State` (`st.coins`, `st.mode`); objects that never change reference (the hero, the tilemap) stay module-level.
```diff
23 collapsed lines
# Quest -- step 6: an NPC you can talk to (and a State object + a main() loop to tidy up).
#
# What you learn: interaction + a simple state machine for dialog, AND how to keep
# the growing pile of game variables under control. An NPC is a sprite; when the hero
# stands next to it and presses A we switch to a DIALOG mode: the world keeps drawing
# underneath, and picogame_ui.TextBox draws a multi-line message box on top (a
# screen-space overlay, drawn after scene.refresh). While in dialog we DON'T process
# movement -- the game is paused on the box until you press a button to dismiss it.
#
# State object: the loose module variables have been piling up (facing, coins, a
# mode, a "dialog shown" flag...) and the next steps add HP, a cooldown, a quest
# stage. Instead of a scatter of globals (and a `global` in every function that
# touches them), we group them in ONE `class State` and make `st = State()`. Now it's
# `st.coins`, `st.mode`, with no `global` needed. Objects that never get REASSIGNED
# (the hero Sprite, the world Tilemap, the labels) stay plain module-level names;
# State holds only the mutable scalars. The game mode is a named INT constant
# (EXPLORE / DIALOG) rather than a magic string, so a branch reads `st.mode ==
# DIALOG`.
#
# New vs step 5: an NPC sprite, a State object, the loop moved into a main() function,
# a mode machine (EXPLORE/DIALOG), picogame_ui.TextBox, freezing the world during
# dialog, an adjacency "PRESS A" prompt.
#
# Run: python3 sim/run.py tutorials/03-quest/step6_npc.py --shot /tmp/q6.png
+import board
import terminalio
import picogame as pg
44 collapsed lines
import picogame_game
import picogame_input
import picogame_clock
import picogame_anim
import picogame_shapes as shp
import picogame_ui as ui
W, H = 320, 240
TILE = 16
SPEED = 2
MAP = [
"##############################",
"#.....:......................#",
"#.....:........*.............#",
"#..##.:.............~~~~~~...#",
"#..##.:.............~~~~~~...#",
"#.....N.............~~~~~~...#",
"#.....:.......E.....~~~~~~...#",
"#.....:......................#",
"#.....:.....*.........*......#",
"#.....:......................#",
"#:::::::P:::::::::*::::::::::#",
"#.....:...................*..#",
"#.....:.............E........#",
"#.....:...WWWWWWW............#",
"#.....:...W.....W......##....#",
"#.....:.*.W..G..W......##....#",
"#.....:...W.....W........E...#",
"#.....:...WWWDWWW............#",
"#.....:......................#",
"##############################",
]
MAPCOLS, MAPROWS = 30, 20
# tile values (frame index into the colour tileset; 0 = empty)
GRASS, PATH, WATER, TREE, WALL, DOOR, GOAL = 1, 2, 3, 4, 5, 6, 7
CHAR2TILE = {".": GRASS, "P": GRASS, "N": GRASS, "*": GRASS, "E": GRASS,
":": PATH, "~": WATER, "#": TREE, "W": WALL, "D": DOOR, "G": GOAL}
TILE_RGB = [(40, 120, 50), # GRASS
(180, 160, 110), # PATH
(40, 90, 200), # WATER
(20, 80, 30), # TREE
(120, 120, 130), # WALL
(150, 90, 40), # DOOR
(240, 210, 60)] # GOAL
SOLID = (WATER, TREE, WALL, DOOR) # these tiles block movement
DOWN, UP, LEFT, RIGHT = 0, 1, 2, 3
FACING_ANIM = ("down", "up", "side", "side") # animation per facing (left/right share the side art)
+EXPLORE, DIALOG = 0, 1 # game modes (int constants, not strings)
WALK_FPS = 8 # walk-animation speed (frames per second)
BACKGROUND = pg.rgb565(0, 0, 0)
+WHITE = pg.rgb565(255, 255, 255)
+NAVY = pg.rgb565(10, 10, 40)
+# buffer_a/buffer_b = the engine's two shared render strips; immediate-mode draws
+# (the dialog box below) paint straight into buffer_a
scene, buffer_a, buffer_b = picogame_game.setup(background=BACKGROUND)
btn = picogame_input.Buttons()
clock = picogame_clock.Clock(30)
tileset = shp.tileset_colors(TILE, TILE, [pg.rgb565(*color) for color in TILE_RGB])
world = pg.Tilemap(tileset, MAPCOLS, MAPROWS)
hero_x, hero_y = TILE, TILE
+npc_x, npc_y = TILE, TILE
coin_spots = []
for tile_y in range(MAPROWS):
for tile_x in range(MAPCOLS):
char = MAP[tile_y][tile_x] if tile_x < len(MAP[tile_y]) else "."
world.tile(tile_x, tile_y, CHAR2TILE.get(char, GRASS))
if char == "P":
hero_x, hero_y = tile_x * TILE, tile_y * TILE
+elif char == "N":
+ npc_x, npc_y = tile_x * TILE, tile_y * TILE
elif char == "*":
coin_spots.append((tile_x * TILE, tile_y * TILE))
scene.add(world)
coin_bitmap = shp.circle(8, pg.rgb565(245, 215, 60))
coins = [pg.Sprite(coin_bitmap, x + 4, y + 4) for (x, y) in coin_spots]
for coin in coins:
scene.add(coin)
+npc = pg.Sprite(shp.rect(TILE, TILE, pg.rgb565(230, 200, 60)), npc_x, npc_y)
+scene.add(npc)
120 collapsed lines
# --- the hero: ASCII pixel art you can edit. '#' = a pixel, '.' = transparent. One
# colour = a 1-bit silhouette; the FACING reads from the shape: DOWN has eyes, UP is
# the back of the head, SIDE is a profile with a nose (LEFT = SIDE mirrored at runtime
# with flip_x). Two poses per facing make the walk -- the legs scissor between A and B.
HERO_COLOR = pg.rgb565(235, 90, 70)
DOWN_A = [
"................",
".....####.......",
"....######......",
"....######......",
"....#.##.#......", # eye gaps -> the face
"....######......",
".....####.......",
"...########.....",
"..##########....",
"..##########....",
"..##########....",
"...########.....",
"....##..##......",
"...###..##......",
"..###...##......", # left foot forward
"..##............",
]
DOWN_B = [
"................",
".....####.......",
"....######......",
"....######......",
"....#.##.#......",
"....######......",
".....####.......",
"...########.....",
"..##########....",
"..##########....",
"..##########....",
"...########.....",
"....##..##......",
"....##..###.....",
"....##...###....", # right foot forward
"..........##....",
]
UP_A = [
"................",
".....####.......",
"....######......",
"....######......",
"....######......", # solid head = the hero's back
"....######......",
".....####.......",
"...########.....",
"..##########....",
"..##########....",
"..##########....",
"...########.....",
"....##..##......",
"...###..##......",
"..###...##......",
"..##............",
]
UP_B = [
"................",
".....####.......",
"....######......",
"....######......",
"....######......",
"....######......",
".....####.......",
"...########.....",
"..##########....",
"..##########....",
"..##########....",
"...########.....",
"....##..##......",
"....##..###.....",
"....##...###....",
"..........##....",
]
SIDE_A = [
"................",
".....####.......",
"....#####.......",
"....######......",
"....#####.#.....", # nose nub -> faces right (flip_x -> left)
"....######......",
".....####.......",
"....######......",
"....######.#....", # arm swung forward
"....######.#....",
"....######......",
".....####.......",
"...##....##.....", # legs split
"..##......##....",
"..##......##....",
"..#........#....",
]
SIDE_B = [
"................",
".....####.......",
"....#####.......",
"....######......",
"....#####.#.....",
"....######......",
".....####.......",
"....######......",
"....######......", # arm tucked in
"....######......",
"....######......",
".....####.......",
".....####.......", # legs pass under the body
".....####.......",
"....##..##......",
"....#....#......",
]
BM = {"down": [shp.from_mask(DOWN_A, HERO_COLOR), shp.from_mask(DOWN_B, HERO_COLOR)],
"up": [shp.from_mask(UP_A, HERO_COLOR), shp.from_mask(UP_B, HERO_COLOR)],
"side": [shp.from_mask(SIDE_A, HERO_COLOR), shp.from_mask(SIDE_B, HERO_COLOR)]}
hero = pg.Sprite(BM["down"][0], hero_x, hero_y)
walk = picogame_anim.AnimatedSprite(hero, {
"down": (BM["down"], WALK_FPS, True),
"up": (BM["up"], WALK_FPS, True),
"side": (BM["side"], WALK_FPS, True)})
scene.add(hero)
hud = ui.SceneLabel(scene, pg, terminalio.FONT, 4, 4, WHITE, BACKGROUND)
+dialog = ui.TextBox(pg, terminalio.FONT, 8, H - 64, W - 16, 58, WHITE, NAVY, maxlines=4)
+LINES = ["Villager:", "Beware the slimes in the", "tall grass, traveller.", "(press A)"]
+class State:
+"""All the mutable game variables in one place (was a pile of module globals). __init__ just calls
reset(), so every default lives in ONE spot and a restart would be a single call -- st.reset()."""
+def __init__(self):
+self.reset()
+def reset(self):
+self.facing = DOWN
+self.coins = 0
+self.mode = EXPLORE # EXPLORE = walking around, DIALOG = talking
+self.dlg_shown = False # draw the modal once, not every frame
+st = State()
def solid_at(pixel_x, pixel_y):
tile_x, tile_y = pixel_x // TILE, pixel_y // TILE
8 collapsed lines
if tile_x < 0 or tile_x >= MAPCOLS or tile_y < 0 or tile_y >= MAPROWS:
return True
return world.tile(tile_x, tile_y) in SOLID
def can_walk(pixel_x, pixel_y):
return not (solid_at(pixel_x + 2, pixel_y + 2) or solid_at(pixel_x + TILE - 3, pixel_y + 2) or
solid_at(pixel_x + 2, pixel_y + TILE - 3) or solid_at(pixel_x + TILE - 3, pixel_y + TILE - 3))
+def near_npc():
+return abs(hero.x - npc.x) <= TILE and abs(hero.y - npc.y) <= TILE
def camera_follow():
offset_x = max(W - MAPCOLS * TILE, min(0, W // 2 - (hero.x + TILE // 2)))
offset_y = max(H - MAPROWS * TILE, min(0, H // 2 - (hero.y + TILE // 2)))
scene.set_view(int(offset_x), int(offset_y))
camera_follow()
# The per-frame loop now lives in a FUNCTION (main), not at module scope. Inside a
+# function its names -- st, the loop's own delta_x/dt, the helpers -- resolve as fast
+# array-indexed locals instead of globals-dict lookups; on the device that's a
+# measured speed-up for the hot loop. It pairs naturally with the State tidy-up: one
+# st object + one main() is the shape every bigger game grows into.
+def main():
dt = 1 / 30 # seed the first frame; re-set from clock.tick() each loop
while True:
btn.poll()
+if st.mode == DIALOG:
+if not st.dlg_shown: # draw ONCE -> no per-frame flicker
+ scene.refresh() # world frozen under the box
+ dialog.draw(scene.display, buffer_a, LINES)
+ st.dlg_shown = True
+if btn.just_pressed(btn.A) or btn.just_pressed(btn.B):
+ st.mode = EXPLORE
+ scene.invalidate() # repaint over the box next frame
+ clock.tick()
+continue
+ delta_x = btn.is_pressed(btn.RIGHT) - btn.is_pressed(btn.LEFT)
+ delta_y = btn.is_pressed(btn.DOWN) - btn.is_pressed(btn.UP)
+if delta_x:
+ st.facing = RIGHT if delta_x > 0 else LEFT
+elif delta_y:
+ st.facing = DOWN if delta_y > 0 else UP
+ hero.flip_x = (st.facing == LEFT) # mirror the side art for LEFT
+ moved = False
+if delta_x and can_walk(hero.x + delta_x * SPEED, hero.y):
+ hero.move(hero.x + delta_x * SPEED, hero.y); moved = True
+if delta_y and can_walk(hero.x, hero.y + delta_y * SPEED):
+ hero.move(hero.x, hero.y + delta_y * SPEED); moved = True
+if moved:
+camera_follow()
+ walk.play(FACING_ANIM[st.facing]) # animate the walk while moving
walk.tick(dt)
+else:
+ hero.bitmap = BM[FACING_ANIM[st.facing]][0] # still: pose A of the current facing
+# pick up any coin we're standing on (within ~12px on both axes = close enough)
+for coin in coins:
+if coin.visible and abs(hero.x - coin.x) < 12 and abs(hero.y - coin.y) < 12:
+ coin.visible = False
+ st.coins += 1
+if near_npc():
hud.set("COINS %d/%d A: TALK" % (st.coins, len(coins)))
+if btn.just_pressed(btn.A):
+ st.mode = DIALOG
+ st.dlg_shown = False
+else:
+ hud.set("COINS %d/%d" % (st.coins, len(coins)))
scene.refresh()
+ dt = clock.tick()
+main()
```
[▶ Try it in the browser](/playground/?ex=03-quest-step6_npc)
### step 7 — `step7_combat.py` · enemies + bump combat
[Section titled “step 7 — step7\_combat.py · enemies + bump combat”](#step-7--step7_combatpy--enemies--bump-combat)
 Slimes chase the hero (slower than you, respecting walls). Touching one costs **HP** and briefly can’t be hurt again (a short cooldown); press **B** to swing at the tile you’re facing and defeat a slime. HP shows in the HUD; reaching 0 sends you back to start. **You see:** slimes converging on you, HP ticking down in the HUD on each hit, and a **B** swing that clears the tile you face. (A still talks.) **Try it:** change the slime speed or your starting HP.
```diff
64 collapsed lines
# Quest -- step 7: enemies and bump combat.
#
# What you learn: simple chasing AI, taking damage, and attacking. Slimes step
# toward the hero (slower than you, and they respect walls via can_walk). Touching
# one costs HP and starts a brief "can't be hurt again" cooldown (hurt_cooldown) so one touch doesn't
# drain you instantly. Press B to swing: we defeat any slime in the tile just ahead
# of the way you're facing. HP shows in the HUD; reaching 0 sends you back to start.
#
# The State object from step 6 keeps paying off: HP, the hurt cooldown and a frame
# counter just become more `st.` fields -- no new globals, no `global` soup.
#
# New vs step 6: enemy sprites with chase AI, player HP + a brief hurt cooldown + knock-back,
# a white hit-flash (sprite.flash) on damage, a B attack in the facing direction. (A still
# talks to the NPC.)
#
# Run: python3 sim/run.py tutorials/03-quest/step7_combat.py --hold B --shot /tmp/q7.png
import board
import terminalio
import picogame as pg
import picogame_game
import picogame_input
import picogame_clock
import picogame_anim
import picogame_shapes as shp
import picogame_ui as ui
W, H = 320, 240
TILE = 16
SPEED = 2
MAP = [
"##############################",
"#.....:......................#",
"#.....:........*.............#",
"#..##.:.............~~~~~~...#",
"#..##.:.............~~~~~~...#",
"#.....N.............~~~~~~...#",
"#.....:.......E.....~~~~~~...#",
"#.....:......................#",
"#.....:.....*.........*......#",
"#.....:......................#",
"#:::::::P:::::::::*::::::::::#",
"#.....:...................*..#",
"#.....:.............E........#",
"#.....:...WWWWWWW............#",
"#.....:...W.....W......##....#",
"#.....:.*.W..G..W......##....#",
"#.....:...W.....W........E...#",
"#.....:...WWWDWWW............#",
"#.....:......................#",
"##############################",
]
MAPCOLS, MAPROWS = 30, 20
# tile values (frame index into the colour tileset; 0 = empty)
GRASS, PATH, WATER, TREE, WALL, DOOR, GOAL = 1, 2, 3, 4, 5, 6, 7
CHAR2TILE = {".": GRASS, "P": GRASS, "N": GRASS, "*": GRASS, "E": GRASS,
":": PATH, "~": WATER, "#": TREE, "W": WALL, "D": DOOR, "G": GOAL}
TILE_RGB = [(40, 120, 50), # GRASS
(180, 160, 110), # PATH
(40, 90, 200), # WATER
(20, 80, 30), # TREE
(120, 120, 130), # WALL
(150, 90, 40), # DOOR
(240, 210, 60)] # GOAL
SOLID = (WATER, TREE, WALL, DOOR) # these tiles block movement
DOWN, UP, LEFT, RIGHT = 0, 1, 2, 3
+DIR = {DOWN: (0, 1), UP: (0, -1), LEFT: (-1, 0), RIGHT: (1, 0)} # facing -> (dx, dy) step
FACING_ANIM = ("down", "up", "side", "side") # animation per facing (left/right share the side art)
EXPLORE, DIALOG = 0, 1 # game modes (int constants, not strings)
WALK_FPS = 8 # walk-animation speed (frames per second)
+MAX_HP = 6
+HURT_FRAMES = 40 # ~1.3s of mercy after a hit (at 30 fps)
+FLASH_FRAMES = 3 # how long the white hit-flash shows
BACKGROUND = pg.rgb565(0, 0, 0)
WHITE = pg.rgb565(255, 255, 255)
8 collapsed lines
NAVY = pg.rgb565(10, 10, 40)
# buffer_a/buffer_b = the engine's two shared render strips; immediate-mode draws
# (the dialog box below) paint straight into buffer_a
scene, buffer_a, buffer_b = picogame_game.setup(background=BACKGROUND)
btn = picogame_input.Buttons()
clock = picogame_clock.Clock(30)
tileset = shp.tileset_colors(TILE, TILE, [pg.rgb565(*color) for color in TILE_RGB])
world = pg.Tilemap(tileset, MAPCOLS, MAPROWS)
+START = (TILE, TILE)
npc_x, npc_y = TILE, TILE
coin_spots, enemy_spots = [], []
for tile_y in range(MAPROWS):
for tile_x in range(MAPCOLS):
char = MAP[tile_y][tile_x] if tile_x < len(MAP[tile_y]) else "."
world.tile(tile_x, tile_y, CHAR2TILE.get(char, GRASS))
if char == "P":
START = (tile_x * TILE, tile_y * TILE)
elif char == "N":
npc_x, npc_y = tile_x * TILE, tile_y * TILE
elif char == "*":
coin_spots.append((tile_x * TILE, tile_y * TILE))
+elif char == "E":
+ enemy_spots.append((tile_x * TILE, tile_y * TILE))
scene.add(world)
coin_bitmap = shp.circle(8, pg.rgb565(245, 215, 60))
coins = [pg.Sprite(coin_bitmap, x + 4, y + 4) for (x, y) in coin_spots]
for coin in coins:
scene.add(coin)
+slime_bitmap = shp.circle(14, pg.rgb565(120, 200, 80))
+enemies = [pg.Sprite(slime_bitmap, x + 1, y + 1) for (x, y) in enemy_spots]
+for enemy in enemies:
+ scene.add(enemy)
npc = pg.Sprite(shp.rect(TILE, TILE, pg.rgb565(230, 200, 60)), npc_x, npc_y)
scene.add(npc)
116 collapsed lines
# --- the hero: ASCII pixel art you can edit. '#' = a pixel, '.' = transparent. One
# colour = a 1-bit silhouette; the FACING reads from the shape: DOWN has eyes, UP is
# the back of the head, SIDE is a profile with a nose (LEFT = SIDE mirrored at runtime
# with flip_x). Two poses per facing make the walk -- the legs scissor between A and B.
HERO_COLOR = pg.rgb565(235, 90, 70)
DOWN_A = [
"................",
".....####.......",
"....######......",
"....######......",
"....#.##.#......", # eye gaps -> the face
"....######......",
".....####.......",
"...########.....",
"..##########....",
"..##########....",
"..##########....",
"...########.....",
"....##..##......",
"...###..##......",
"..###...##......", # left foot forward
"..##............",
]
DOWN_B = [
"................",
".....####.......",
"....######......",
"....######......",
"....#.##.#......",
"....######......",
".....####.......",
"...########.....",
"..##########....",
"..##########....",
"..##########....",
"...########.....",
"....##..##......",
"....##..###.....",
"....##...###....", # right foot forward
"..........##....",
]
UP_A = [
"................",
".....####.......",
"....######......",
"....######......",
"....######......", # solid head = the hero's back
"....######......",
".....####.......",
"...########.....",
"..##########....",
"..##########....",
"..##########....",
"...########.....",
"....##..##......",
"...###..##......",
"..###...##......",
"..##............",
]
UP_B = [
"................",
".....####.......",
"....######......",
"....######......",
"....######......",
"....######......",
".....####.......",
"...########.....",
"..##########....",
"..##########....",
"..##########....",
"...########.....",
"....##..##......",
"....##..###.....",
"....##...###....",
"..........##....",
]
SIDE_A = [
"................",
".....####.......",
"....#####.......",
"....######......",
"....#####.#.....", # nose nub -> faces right (flip_x -> left)
"....######......",
".....####.......",
"....######......",
"....######.#....", # arm swung forward
"....######.#....",
"....######......",
".....####.......",
"...##....##.....", # legs split
"..##......##....",
"..##......##....",
"..#........#....",
]
SIDE_B = [
"................",
".....####.......",
"....#####.......",
"....######......",
"....#####.#.....",
"....######......",
".....####.......",
"....######......",
"....######......", # arm tucked in
"....######......",
"....######......",
".....####.......",
".....####.......", # legs pass under the body
".....####.......",
"....##..##......",
"....#....#......",
]
BM = {"down": [shp.from_mask(DOWN_A, HERO_COLOR), shp.from_mask(DOWN_B, HERO_COLOR)],
"up": [shp.from_mask(UP_A, HERO_COLOR), shp.from_mask(UP_B, HERO_COLOR)],
"side": [shp.from_mask(SIDE_A, HERO_COLOR), shp.from_mask(SIDE_B, HERO_COLOR)]}
hero = pg.Sprite(BM["down"][0], START[0], START[1])
walk = picogame_anim.AnimatedSprite(hero, {
"down": (BM["down"], WALK_FPS, True),
"up": (BM["up"], WALK_FPS, True),
"side": (BM["side"], WALK_FPS, True)})
scene.add(hero)
hud = ui.SceneLabel(scene, pg, terminalio.FONT, 4, 4, WHITE, BACKGROUND)
dialog = ui.TextBox(pg, terminalio.FONT, 8, H - 64, W - 16, 58, WHITE, NAVY, maxlines=4)
+LINES = ["Villager:", "Slimes ahead! Press B to", "swing at them.", "(press A)"]
class State:
+"""All the mutable game variables in one place (grows as the game does). __init__ calls reset()."""
def __init__(self):
self.reset()
def reset(self):
self.facing = DOWN
self.coins = 0
+self.hp = MAX_HP
+self.hurt_cooldown = 0 # frames of mercy after a hit (i-frames)
self.mode = EXPLORE # EXPLORE = walking around, DIALOG = talking
+self.frame_count = 0 # frames elapsed (slimes chase every other frame)
self.dlg_shown = False # draw the modal once, not every frame
13 collapsed lines
st = State()
def solid_at(pixel_x, pixel_y):
tile_x, tile_y = pixel_x // TILE, pixel_y // TILE
if tile_x < 0 or tile_x >= MAPCOLS or tile_y < 0 or tile_y >= MAPROWS:
return True
return world.tile(tile_x, tile_y) in SOLID
def can_walk(pixel_x, pixel_y):
return not (solid_at(pixel_x + 2, pixel_y + 2) or solid_at(pixel_x + TILE - 3, pixel_y + 2) or
solid_at(pixel_x + 2, pixel_y + TILE - 3) or solid_at(pixel_x + TILE - 3, pixel_y + TILE - 3))
+def near(a, bx, by, d=TILE):
+# True if sprite a is within d px of the point (bx, by) on both axes (a box test)
+return abs(a.x - bx) < d and abs(a.y - by) < d
5 collapsed lines
def camera_follow():
offset_x = max(W - MAPCOLS * TILE, min(0, W // 2 - (hero.x + TILE // 2)))
offset_y = max(H - MAPROWS * TILE, min(0, H // 2 - (hero.y + TILE // 2)))
scene.set_view(int(offset_x), int(offset_y))
camera_follow()
def main(): # loop in a function -> its names are fast locals (see step 6)
dt = 1 / 30 # seed the first frame; re-set from clock.tick() each loop
while True:
btn.poll()
+ st.frame_count += 1
if st.mode == DIALOG:
if not st.dlg_shown: # draw ONCE -> no per-frame flicker
scene.refresh()
dialog.draw(scene.display, buffer_a, LINES)
st.dlg_shown = True
if btn.just_pressed(btn.A) or btn.just_pressed(btn.B):
st.mode = EXPLORE
scene.invalidate()
clock.tick()
continue
13 collapsed lines
delta_x = btn.is_pressed(btn.RIGHT) - btn.is_pressed(btn.LEFT)
delta_y = btn.is_pressed(btn.DOWN) - btn.is_pressed(btn.UP)
if delta_x:
st.facing = RIGHT if delta_x > 0 else LEFT
elif delta_y:
st.facing = DOWN if delta_y > 0 else UP
hero.flip_x = (st.facing == LEFT) # mirror the side art for LEFT
moved = False
if delta_x and can_walk(hero.x + delta_x * SPEED, hero.y):
hero.move(hero.x + delta_x * SPEED, hero.y); moved = True
if delta_y and can_walk(hero.x, hero.y + delta_y * SPEED):
hero.move(hero.x, hero.y + delta_y * SPEED); moved = True
if moved:
camera_follow()
walk.play(FACING_ANIM[st.facing])
walk.tick(dt)
else:
hero.bitmap = BM[FACING_ANIM[st.facing]][0] # still: pose A of the current facing
+# attack: defeat a slime in the tile ahead of the facing
+if btn.just_pressed(btn.B):
+ ddx, ddy = DIR[st.facing]
+ ax, ay = hero.x + ddx * TILE, hero.y + ddy * TILE
+for enemy in enemies:
+if enemy.visible and abs(enemy.x - ax) < TILE and abs(enemy.y - ay) < TILE:
+ enemy.visible = False
+# slimes chase (slower: move every other frame) and respect walls
+if st.frame_count % 2 == 0:
+for enemy in enemies:
+if not enemy.visible:
+continue
+# which way to the hero: -1, 0 or +1 per axis (a compact sign())
+ chase_dx = (hero.x > enemy.x) - (hero.x < enemy.x)
+ chase_dy = (hero.y > enemy.y) - (hero.y < enemy.y)
+if chase_dx and can_walk(enemy.x + chase_dx, enemy.y):
+ enemy.move(enemy.x + chase_dx, enemy.y)
+if chase_dy and can_walk(enemy.x, enemy.y + chase_dy):
+ enemy.move(enemy.x, enemy.y + chase_dy)
+# take damage on contact (unless the cooldown from the last hit is still running)
+if st.hurt_cooldown > 0:
+ st.hurt_cooldown -= 1 # count the "safe" frames down
+if st.hurt_cooldown == HURT_FRAMES - FLASH_FRAMES: # ...and end the hit-flash after 3 frames
+ hero.flash = None
+else:
+for enemy in enemies:
+# 13px: slime radius (~7) + hero half-width (~8), i.e. they're touching
+if enemy.visible and near(enemy, hero.x, hero.y, 13):
+ st.hp -= 1
+ st.hurt_cooldown = HURT_FRAMES # frames where another touch can't hurt you
+ hero.flash = WHITE # white blit-flash for 3 frames: "I got hit"
+if st.hp <= 0: # down -> back to start, full HP
+ st.hp = MAX_HP
+ hero.move(START[0], START[1])
+camera_follow()
+break
# pick up any coin we're standing on (within ~12px on both axes = close enough)
for coin in coins:
if coin.visible and abs(hero.x - coin.x) < 12 and abs(hero.y - coin.y) < 12:
coin.visible = False
st.coins += 1
+if near(hero, npc.x, npc.y):
hud.set("HP %d COINS %d/%d A:TALK B:SWING" % (st.hp, st.coins, len(coins)))
if btn.just_pressed(btn.A):
st.mode = DIALOG
st.dlg_shown = False
else:
hud.set("HP %d COINS %d/%d" % (st.hp, st.coins, len(coins)))
scene.refresh()
dt = clock.tick()
main()
```
[▶ Try it in the browser](/playground/?ex=03-quest-step7_combat)
### step 8 — `step8_quest.py` · complete the quest
[Section titled “step 8 — step8\_quest.py · complete the quest”](#step-8--step8_questpy--complete-the-quest)
 Everything becomes a goal: the NPC asks for all the coins; once you have them, talking again **opens the door** (we rewrite those tiles from “door” to “path” so collision lets you through); stepping on the shrine tile **wins**. A `st.stage` field drives the dialog and the door, and the mode gains a third value (`WON`). Note `dialog_lines(st)` now *takes* the state object instead of reaching for globals — the payoff of keeping state in one place. **You see:** talk → collect → unlock → reach the shrine → “QUEST COMPLETE”. **Try it:** require defeating all slimes too before the door opens.
```diff
73 collapsed lines
# Quest -- step 8: a quest, a goal, and a win state (capstone).
#
# What you learn: tying the systems into an actual game. The NPC gives an objective
# (collect every coin); once you have them all, talking again OPENS the door (we
# rewrite those tiles from "door" to "path", so collision lets you through); stepping
# on the shrine tile wins. A small quest-stage variable drives the dialog text and
# the door. This is the whole loop: talk -> collect -> unlock -> reach the goal.
#
# The State object now carries the whole game: hp, coins, the quest stage, and the
# mode (EXPLORE/DIALOG/WON). dialog_lines() TAKES the state (dialog_lines(st)) instead
# of reaching for globals -- the tidy payoff of grouping state in one object.
#
# New vs step 7: a quest stage, objective-driven dialog, opening the door by editing
# tiles, a goal tile + WON state, and sound (a talk blip + a win chime).
#
# BIG PICTURE: you've now hand-built an RPG -- map, camera, collision, animation,
# items, NPC, combat, quest. You DON'T have to keep hand-coding maps like this: the
# editor (editor/) lets you paint the map, place the hero/NPC/coins, and FLAG tiles
# (solid/coin/goal) visually, then the picogame_scene loader builds the scene for
# you -- the exact things this file does by hand become data. See tutorials/README.md
# and examples/picogame_platformer_scene.py for a game whose level is loaded that way.
#
# Run: python3 sim/run.py tutorials/03-quest/step8_quest.py --shot /tmp/q8.png
import board
import terminalio
import picogame as pg
import picogame_game
import picogame_input
import picogame_clock
import picogame_anim
import picogame_shapes as shp
import picogame_ui as ui
W, H = 320, 240
TILE = 16
SPEED = 2
MAP = [
"##############################",
"#.....:......................#",
"#.....:........*.............#",
"#..##.:.............~~~~~~...#",
"#..##.:.............~~~~~~...#",
"#.....N.............~~~~~~...#",
"#.....:.......E.....~~~~~~...#",
"#.....:......................#",
"#.....:.....*.........*......#",
"#.....:......................#",
"#:::::::P:::::::::*::::::::::#",
"#.....:...................*..#",
"#.....:.............E........#",
"#.....:...WWWWWWW............#",
"#.....:...W.....W......##....#",
"#.....:.*.W..G..W......##....#",
"#.....:...W.....W........E...#",
"#.....:...WWWDWWW............#",
"#.....:......................#",
"##############################",
]
MAPCOLS, MAPROWS = 30, 20
# tile values (frame index into the colour tileset; 0 = empty)
GRASS, PATH, WATER, TREE, WALL, DOOR, GOAL = 1, 2, 3, 4, 5, 6, 7
CHAR2TILE = {".": GRASS, "P": GRASS, "N": GRASS, "*": GRASS, "E": GRASS,
":": PATH, "~": WATER, "#": TREE, "W": WALL, "D": DOOR, "G": GOAL}
TILE_RGB = [(40, 120, 50), # GRASS
(180, 160, 110), # PATH
(40, 90, 200), # WATER
(20, 80, 30), # TREE
(120, 120, 130), # WALL
(150, 90, 40), # DOOR
(240, 210, 60)] # GOAL
SOLID = (WATER, TREE, WALL, DOOR) # these tiles block movement
DOWN, UP, LEFT, RIGHT = 0, 1, 2, 3
DIR = {DOWN: (0, 1), UP: (0, -1), LEFT: (-1, 0), RIGHT: (1, 0)} # facing -> (dx, dy) step
FACING_ANIM = ("down", "up", "side", "side") # animation per facing (left/right share the side art)
EXPLORE, DIALOG, WON = 0, 1, 2 # game modes (int constants, not strings)
WALK_FPS = 8 # walk-animation speed (frames per second)
MAX_HP = 6
5 collapsed lines
HURT_FRAMES = 40 # ~1.3s of mercy after a hit (at 30 fps)
FLASH_FRAMES = 3 # how long the white hit-flash shows
BACKGROUND = pg.rgb565(0, 0, 0)
WHITE = pg.rgb565(255, 255, 255)
NAVY = pg.rgb565(10, 10, 40)
# buffer_a/buffer_b = the engine's two shared render strips; immediate-mode draws
# (the dialog/win box below) paint straight into buffer_a
scene, buffer_a, buffer_b = picogame_game.setup(background=BACKGROUND)
btn = picogame_input.Buttons()
clock = picogame_clock.Clock(30)
+# optional audio: a talk blip + a bright win chime (no asset needed). None if no backend.
+try:
+import picogame_audio
+ audio = picogame_audio.Audio()
+ snd_talk = picogame_audio.tone(520, 30) # short blip on dialog advance
+ snd_win = picogame_audio.tone(880, 220) # bright chime on QUEST COMPLETE
+except Exception:
+ audio = None
+ snd_talk = snd_win = None
tileset = shp.tileset_colors(TILE, TILE, [pg.rgb565(*color) for color in TILE_RGB])
world = pg.Tilemap(tileset, MAPCOLS, MAPROWS)
START = (TILE, TILE)
npc_x, npc_y = TILE, TILE
coin_spots, enemy_spots, door_tiles = [], [], []
for tile_y in range(MAPROWS):
for tile_x in range(MAPCOLS):
8 collapsed lines
char = MAP[tile_y][tile_x] if tile_x < len(MAP[tile_y]) else "."
world.tile(tile_x, tile_y, CHAR2TILE.get(char, GRASS))
if char == "P":
START = (tile_x * TILE, tile_y * TILE)
elif char == "N":
npc_x, npc_y = tile_x * TILE, tile_y * TILE
elif char == "*":
coin_spots.append((tile_x * TILE, tile_y * TILE))
elif char == "E":
enemy_spots.append((tile_x * TILE, tile_y * TILE))
+elif char == "D":
+ door_tiles.append((tile_x, tile_y))
scene.add(world)
134 collapsed lines
coin_bitmap = shp.circle(8, pg.rgb565(245, 215, 60))
coins = [pg.Sprite(coin_bitmap, x + 4, y + 4) for (x, y) in coin_spots]
for coin in coins:
scene.add(coin)
slime_bitmap = shp.circle(14, pg.rgb565(120, 200, 80))
enemies = [pg.Sprite(slime_bitmap, x + 1, y + 1) for (x, y) in enemy_spots]
for enemy in enemies:
scene.add(enemy)
npc = pg.Sprite(shp.rect(TILE, TILE, pg.rgb565(230, 200, 60)), npc_x, npc_y)
scene.add(npc)
# --- the hero: ASCII pixel art you can edit. '#' = a pixel, '.' = transparent. One
# colour = a 1-bit silhouette; the FACING reads from the shape: DOWN has eyes, UP is
# the back of the head, SIDE is a profile with a nose (LEFT = SIDE mirrored at runtime
# with flip_x). Two poses per facing make the walk -- the legs scissor between A and B.
HERO_COLOR = pg.rgb565(235, 90, 70)
DOWN_A = [
"................",
".....####.......",
"....######......",
"....######......",
"....#.##.#......", # eye gaps -> the face
"....######......",
".....####.......",
"...########.....",
"..##########....",
"..##########....",
"..##########....",
"...########.....",
"....##..##......",
"...###..##......",
"..###...##......", # left foot forward
"..##............",
]
DOWN_B = [
"................",
".....####.......",
"....######......",
"....######......",
"....#.##.#......",
"....######......",
".....####.......",
"...########.....",
"..##########....",
"..##########....",
"..##########....",
"...########.....",
"....##..##......",
"....##..###.....",
"....##...###....", # right foot forward
"..........##....",
]
UP_A = [
"................",
".....####.......",
"....######......",
"....######......",
"....######......", # solid head = the hero's back
"....######......",
".....####.......",
"...########.....",
"..##########....",
"..##########....",
"..##########....",
"...########.....",
"....##..##......",
"...###..##......",
"..###...##......",
"..##............",
]
UP_B = [
"................",
".....####.......",
"....######......",
"....######......",
"....######......",
"....######......",
".....####.......",
"...########.....",
"..##########....",
"..##########....",
"..##########....",
"...########.....",
"....##..##......",
"....##..###.....",
"....##...###....",
"..........##....",
]
SIDE_A = [
"................",
".....####.......",
"....#####.......",
"....######......",
"....#####.#.....", # nose nub -> faces right (flip_x -> left)
"....######......",
".....####.......",
"....######......",
"....######.#....", # arm swung forward
"....######.#....",
"....######......",
".....####.......",
"...##....##.....", # legs split
"..##......##....",
"..##......##....",
"..#........#....",
]
SIDE_B = [
"................",
".....####.......",
"....#####.......",
"....######......",
"....#####.#.....",
"....######......",
".....####.......",
"....######......",
"....######......", # arm tucked in
"....######......",
"....######......",
".....####.......",
".....####.......", # legs pass under the body
".....####.......",
"....##..##......",
"....#....#......",
]
BM = {"down": [shp.from_mask(DOWN_A, HERO_COLOR), shp.from_mask(DOWN_B, HERO_COLOR)],
"up": [shp.from_mask(UP_A, HERO_COLOR), shp.from_mask(UP_B, HERO_COLOR)],
"side": [shp.from_mask(SIDE_A, HERO_COLOR), shp.from_mask(SIDE_B, HERO_COLOR)]}
hero = pg.Sprite(BM["down"][0], START[0], START[1])
walk = picogame_anim.AnimatedSprite(hero, {
"down": (BM["down"], WALK_FPS, True),
"up": (BM["up"], WALK_FPS, True),
"side": (BM["side"], WALK_FPS, True)})
scene.add(hero)
hud = ui.SceneLabel(scene, pg, terminalio.FONT, 4, 4, WHITE, BACKGROUND)
dialog = ui.TextBox(pg, terminalio.FONT, 8, H - 64, W - 16, 58, WHITE, NAVY, maxlines=4)
+NUMCOINS = len(coins)
class State:
+"""The whole game's mutable state -- one object, passed where a function needs it. __init__ calls
reset()."""
def __init__(self):
self.reset()
def reset(self):
self.facing = DOWN
self.coins = 0
self.hp = MAX_HP
self.hurt_cooldown = 0
+self.stage = 0 # 0 not started, 1 collecting, 2 door open
self.mode = EXPLORE # EXPLORE / DIALOG / WON
self.frame_count = 0 # frames elapsed (slimes chase every other frame)
self.overlay_shown = False # draw dialog/win modal once, not every frame
24 collapsed lines
st = State()
def solid_at(pixel_x, pixel_y):
tile_x, tile_y = pixel_x // TILE, pixel_y // TILE
if tile_x < 0 or tile_x >= MAPCOLS or tile_y < 0 or tile_y >= MAPROWS:
return True
return world.tile(tile_x, tile_y) in SOLID
def can_walk(pixel_x, pixel_y):
return not (solid_at(pixel_x + 2, pixel_y + 2) or solid_at(pixel_x + TILE - 3, pixel_y + 2) or
solid_at(pixel_x + 2, pixel_y + TILE - 3) or solid_at(pixel_x + TILE - 3, pixel_y + TILE - 3))
def near(a, bx, by, d=TILE):
# True if sprite a is within d px of the point (bx, by) on both axes (a box test)
return abs(a.x - bx) < d and abs(a.y - by) < d
def camera_follow():
offset_x = max(W - MAPCOLS * TILE, min(0, W // 2 - (hero.x + TILE // 2)))
offset_y = max(H - MAPROWS * TILE, min(0, H // 2 - (hero.y + TILE // 2)))
scene.set_view(int(offset_x), int(offset_y))
+def dialog_lines(st):
+if st.stage == 0:
+return ["Villager:", "Bring me all %d coins and" % NUMCOINS,
+"I'll open the shrine door.", "(press A)"]
+if st.stage == 1 and st.coins < NUMCOINS:
+return ["Villager:", "You have %d of %d coins." % (st.coins, NUMCOINS),
+"Keep looking!", "(press A)"]
+return ["Villager:", "The door is open.",
+"Seek the shrine within.", "(press A)"]
+def open_door():
+for (tile_x, tile_y) in door_tiles:
+ world.tile(tile_x, tile_y, PATH) # door -> path (no longer SOLID)
+ scene.invalidate()
camera_follow()
def main(): # loop in a function -> its names are fast locals (see step 6)
dt = 1 / 30 # seed the first frame; re-set from clock.tick() each loop
while True:
btn.poll()
st.frame_count += 1
+if st.mode == WON:
+if not st.overlay_shown: # draw ONCE -> no per-frame flicker
+ scene.refresh()
+ dialog.draw(scene.display, buffer_a, ["You reached the shrine!", "", "QUEST COMPLETE", "(press A)"])
+if audio:
+ audio.sfx(snd_win) # bright chime on the win
+ st.overlay_shown = True
+if btn.just_pressed(btn.A):
+ st.mode = EXPLORE
+ scene.invalidate()
+ clock.tick()
+continue
if st.mode == DIALOG:
if not st.overlay_shown: # draw ONCE -> no per-frame flicker
scene.refresh()
dialog.draw(scene.display, buffer_a, dialog_lines(st))
st.overlay_shown = True
if btn.just_pressed(btn.A) or btn.just_pressed(btn.B):
+if audio:
+ audio.sfx(snd_talk) # blip on dialog advance
+if st.stage == 0:
+ st.stage = 1
+elif st.stage == 1 and st.coins >= NUMCOINS:
+ st.stage = 2
+open_door()
st.mode = EXPLORE
scene.invalidate()
40 collapsed lines
clock.tick()
continue
delta_x = btn.is_pressed(btn.RIGHT) - btn.is_pressed(btn.LEFT)
delta_y = btn.is_pressed(btn.DOWN) - btn.is_pressed(btn.UP)
if delta_x:
st.facing = RIGHT if delta_x > 0 else LEFT
elif delta_y:
st.facing = DOWN if delta_y > 0 else UP
hero.flip_x = (st.facing == LEFT) # mirror the side art for LEFT
moved = False
if delta_x and can_walk(hero.x + delta_x * SPEED, hero.y):
hero.move(hero.x + delta_x * SPEED, hero.y); moved = True
if delta_y and can_walk(hero.x, hero.y + delta_y * SPEED):
hero.move(hero.x, hero.y + delta_y * SPEED); moved = True
if moved:
camera_follow()
walk.play(FACING_ANIM[st.facing])
walk.tick(dt)
else:
hero.bitmap = BM[FACING_ANIM[st.facing]][0] # still: pose A of the current facing
if btn.just_pressed(btn.B):
ddx, ddy = DIR[st.facing]
ax, ay = hero.x + ddx * TILE, hero.y + ddy * TILE
for enemy in enemies:
if enemy.visible and abs(enemy.x - ax) < TILE and abs(enemy.y - ay) < TILE:
enemy.visible = False
if st.frame_count % 2 == 0:
for enemy in enemies:
if not enemy.visible:
continue
# which way to the hero: -1, 0 or +1 per axis (a compact sign())
chase_dx = (hero.x > enemy.x) - (hero.x < enemy.x)
chase_dy = (hero.y > enemy.y) - (hero.y < enemy.y)
if chase_dx and can_walk(enemy.x + chase_dx, enemy.y):
enemy.move(enemy.x + chase_dx, enemy.y)
if chase_dy and can_walk(enemy.x, enemy.y + chase_dy):
enemy.move(enemy.x, enemy.y + chase_dy)
if st.hurt_cooldown > 0:
st.hurt_cooldown -= 1
if st.hurt_cooldown == HURT_FRAMES - FLASH_FRAMES: # end the hit-flash after 3 frames
hero.flash = None
else:
for enemy in enemies:
# 13px: slime radius (~7) + hero half-width (~8), i.e. they're touching
if enemy.visible and near(enemy, hero.x, hero.y, 13):
st.hp -= 1
st.hurt_cooldown = HURT_FRAMES
hero.flash = WHITE # white hit-flash on damage
if st.hp <= 0:
st.hp = MAX_HP
hero.move(START[0], START[1])
7 collapsed lines
camera_follow()
break
# pick up any coin we're standing on (within ~12px on both axes = close enough)
for coin in coins:
if coin.visible and abs(hero.x - coin.x) < 12 and abs(hero.y - coin.y) < 12:
coin.visible = False
st.coins += 1
+# reach the shrine (goal tile) once the door is open
+if st.stage >= 2:
+# the tile under the hero's centre
+ center_tile_x = (hero.x + TILE // 2) // TILE
+ center_tile_y = (hero.y + TILE // 2) // TILE
+if world.tile(center_tile_x, center_tile_y) == GOAL:
+ st.mode = WON
+ st.overlay_shown = False
if near(hero, npc.x, npc.y):
hud.set("HP %d COINS %d/%d A:TALK" % (st.hp, st.coins, NUMCOINS))
if btn.just_pressed(btn.A):
st.mode = DIALOG
st.overlay_shown = False
else:
+if st.stage < 1 or st.coins < NUMCOINS:
+ objective = "FIND THE COINS"
+elif st.stage >= 2:
+ objective = "DOOR OPEN!"
+else:
+ objective = "RETURN TO NPC"
hud.set("HP %d COINS %d/%d %s" % (st.hp, st.coins, NUMCOINS, objective))
scene.refresh()
dt = clock.tick()
main()
```
[▶ Try it in the browser](/playground/?ex=03-quest-step8_quest)
***
You now have a small playable RPG. You don’t have to keep hand-coding maps: the [web editor](/tools/editor/) lets you paint this map, place the hero/NPC/coins, and flag tiles (solid/coin/goal) visually, and `picogame_scene` loads it. Everything `step8` does by hand becomes data. See the [scene format](/scene-format/) reference, and the bundled `examples/picogame_platformer_scene.py` example for a complete scene loaded from data.
***
**Start your own game from here.** You’ve built three games by hand — here’s the reusable shape to start every new one from: the **State + `main()` pattern** ([Game patterns](/concepts/patterns/)) and a ready-to-run **game skeleton** ([Snippets](/snippets/), or open it in the [Playground](/playground/?ex=game-skeleton)). Drop your own art, tiles, and rules into that frame and you’re off.
# Art & assets
> picogame keeps art separate from code: you can prototype with shapes generated in code, then swap in pixel art without changing the game logic.
picogame keeps **art separate from code**: you can prototype with shapes generated in code, then swap in pixel art without changing the game logic. This page shows how to bring your own art in, where to get it free, and how the tutorials do it.
Each tutorial ends with a **`bonus_art.py`**: the finished game re-skinned with free [CC0](https://creativecommons.org/publicdomain/zero/1.0/) pixel art. Compare it with `step8` or `step9`; the gameplay stays the same while the bitmap construction changes.
| Tutorial | bonus uses | from (CC0) |
| ----------- | --------------------------------------------------------------------------------------------------- | ----------------------- |
| 01-bounce | brick wall = a CC0 brick texture **recoloured** into the 4 row colours (ball/paddle stay generated) | Kenney **Tiny Dungeon** |
| 02-starship | ship (pre-rotated 16 frames) + laser bullet | Kenney **Pixel Shmup** |
| 03-quest | tileset (floor/lava/barrel/brick/door/chest) + hero + slime + coin | Kenney **Tiny Dungeon** |
Run one:
```bash
python3 sim/run.py tutorials/03-quest/bonus_art.py --shot /tmp/out.png
```
## The pipeline: any PNG → a picogame sprite
[Section titled “The pipeline: any PNG → a picogame sprite”](#the-pipeline-any-png--a-picogame-sprite)
`tools/png2picogame.py` turns a PNG into a Python module exposing `bitmap(pg)`:
```bash
python3 tools/png2picogame.py hero.png -o hero_art.py --frames 8
```
then in a game:
```python
import hero_art
hero = pg.Sprite(hero_art.bitmap(pg), x, y) # drop-in replacement for any shp.*()
```
Options:
* `--frames N` — the PNG is a **horizontal strip** of N equal-width frames (left→right).
* `--tile WxH` — the PNG is a **grid** of W×H tiles; repacks them into a horizontal atlas (use for grid sheets; output frame count = number of tiles).
* format is auto (PAL8 if ≤256 colours, else RGB565); transparency comes from the PNG’s **alpha** (alpha ≥128 = opaque); colours are emitted in ST7789 wire order.
### Check it before you ship
[Section titled “Check it before you ship”](#check-it-before-you-ship)
Before you flash anything, drop the new sprite into a throwaway test file and run it in the desktop simulator with a screenshot — that’s the fastest way to confirm the palette, scale, and transparency came out right:
```bash
python3 sim/run.py .py --frames 1 --shot /tmp/art.png
```
If it looks wrong or is too big, here’s why: soft/anti-aliased edges quantise badly (you’ll see fringe or speckle around the sprite — redraw with hard alpha), and a source with >256 colours silently falls back to RGB565, which doubles the RAM the bitmap costs (cut the palette to keep it PAL8).
## Layout rules
[Section titled “Layout rules”](#layout-rules)
* **Horizontal strip**, equal-width frames. (Grids: use `--tile WxH`, or in Aseprite export `Sheet Type: Horizontal`, Trim OFF.)
* **Transparency = the alpha channel** (one on/off key, no blending). Hard pixel edges; avoid soft/anti-aliased alpha — it quantises badly.
* **Tilesets:** the engine draws tile value `v` as frame `v`, so make **frame 0 empty/ transparent** and put your tiles at 1, 2, 3… (that’s how `bonus_art` maps map values to tile graphics).
* **Rotation:** for a constant stepped spin, you can bake rotations into frames; use `sprite.angle` for continuous or occasional runtime rotation. The Starship ship is the Kenney sprite rotated into 16 frames offline (see how `tools/`-side scripts build the strip), then `ship.frame = angle`.
## Using your own Aseprite art
[Section titled “Using your own Aseprite art”](#using-your-own-aseprite-art)
`File → Export Sprite Sheet → Sheet Type: Horizontal`, **Trim OFF**, Padding 0 → that’s exactly the strip `png2picogame` wants. Design in **Indexed** mode with a small palette (or RGBA with a transparent background). Animation **Frame Tags** can drive frame ranges.
## Where to get more (free)
[Section titled “Where to get more (free)”](#where-to-get-more-free)
* **[kenney.nl](https://kenney.nl)** — everything CC0, no attribution. (We used Pixel Shmup and Tiny Dungeon.)
* **[Pixellab.ai](https://www.pixellab.ai/)** — generate pixel-art sprites and tilesets from a text prompt, handy for quick placeholders or a custom look. Check its export terms before you ship.
* Recolouring CC0 art is allowed: the Bounce bricks use one grey Tiny Dungeon tile multiplied into four colours to match the game’s palette.
* **[itch.io](https://itch.io)** (CC0 filter) and **[OpenGameArt](https://opengameart.org)** (filter CC0). Avoid CC-BY-SA / GPL art.
## Ship assets as .mpy (faster load, less RAM)
[Section titled “Ship assets as .mpy (faster load, less RAM)”](#ship-assets-as-mpy-faster-load-less-ram)
A baked-asset module is just Python, so you can precompile it to `.mpy` bytecode exactly like the helper libs — the device skips parsing the source, so it loads faster and uses less RAM (the same win `tools/build_mpy.sh` gives the libs). How:
```bash
mpy-cross your_assets.py -o your_assets.mpy
```
then copy the `.mpy` to `CIRCUITPY/lib/`. The mpy-cross build **must match the board’s CircuitPython version** (see `tools/build_mpy.sh` for the version it uses). Gotcha: a stale `.mpy` **shadows the `.py`** at import, so re-generate it after any edit — otherwise the device keeps loading the old art.
## One file with all your assets
[Section titled “One file with all your assets”](#one-file-with-all-your-assets)
For a game with several shared assets, keep related baked bitmaps and palettes in a **single module** such as `assets.py` that the game imports once, rather than scattering them across many tiny files — fewer imports, one place to manage, and one `.mpy` to ship.
* `tools/pack_assets.py` does exactly this in one command: point it at a PNG glob (or a folder) and it packs them all into a single module with **one shared palette** reused by every bitmap (the RAM win), each exposed as a ready-to-use named `Bitmap`. Add `--mpy` to also ship the bytecode.
```bash
python3 tools/pack_assets.py art/*.png -o assets.py --mpy # then: import assets; pg.Sprite(assets.ship)
```
(If the combined colours overflow 255 it falls back to per-asset palettes, and any image with >255 of its own colours is emitted as RGB565 — same auto behaviour as `png2picogame`.)
* `tools/png2picogame.py` converts a single PNG into a bitmap module — use it when you want just one image (it also has `--frames`, `--tile`, `--rle`, dithering, dedup).
* For a whole tile/scene-based level, `tools/scene_build.py` bakes the assets **and** the layout into one `SCENE` file that `picogame_scene.load()` reads — one file for the entire level.
## Licensing / credits
[Section titled “Licensing / credits”](#licensing--credits)
All bundled art is **CC0** (public domain, no attribution required). The source PNGs we used live in `assets/kenney/` with `assets/kenney/CREDITS.txt`. Even for CC0 it’s good manners to keep a credits note when you publish a game.