Tutorial 1 — Bounce
We build a complete brick-breaker, one mechanic per step. Each stepN_*.py runs on its
own — read the code below and press Try it to run that step right in the browser, or run it
locally with:
python3 sim/run.py tutorials/01-bounce/stepN_name.py --shot /tmp/out.png(add --hold RIGHT etc. to hold a button, or --backend pygame to play it live.)
The point of the last step is a punchline: we built the whole game out of coloured rectangles, and turning it into “real” graphics is a one-line bitmap swap. Art is independent of mechanics — which is also why the editor can re-skin a game without touching its code.
step 1 — step1_hello.py · the render loop
Section titled “step 1 — step1_hello.py · the render loop” picogame is retained-mode: you
 scene.add() objects once, then each frame you change
their state and call scene.refresh() — the engine redraws. A “paddle” is a Sprite
whose bitmap is a solid rectangle from shp.rect(w, h, colour). picogame_game.setup()
does the display boilerplate; picogame_clock.Clock(40) caps the loop to 40 FPS.
You see: a grey bar near the bottom. Try it: change the rectangle’s size/colour.
11 collapsed lines
# Bounce -- step 1: get ONE thing on screen.## What you learn: the picogame render loop. A game is (a) a Scene you add objects# to ONCE, then (b) a loop that moves things and calls scene.refresh(). The engine# is retained-mode: you don't redraw by hand, you change object state and refresh.## New in this step: picogame_game.setup(), picogame_shapes.rect(), pg.Sprite,# scene.add(), scene.refresh(), the frame clock.## Run it: python3 sim/run.py tutorials/01-bounce/step1_hello.py --shot /tmp/s1.png# On device: copy this file + the lib/ helpers to CIRCUITPY.
import picogame as pgimport picogame_gameimport picogame_clockimport picogame_shapes as shp
W, H = 320, 240PADDLE_W, PADDLE_H = 44, 8
# setup() takes over the display and gives us a Scene + its two strip buffers.scene, bufA, bufB = picogame_game.setup(background=pg.rgb565(8, 10, 24))clock = picogame_clock.Clock(40) # cap the loop to 40 FPS
# A "paddle" is just a Sprite whose bitmap is a solid rectangle. shp.rect(w,h,color)# makes that bitmap -- a rectangle and an image sprite are the SAME kind of object# (we'll prove that in step 9 by swapping the bitmap for art, with no other change).paddle = pg.Sprite(shp.rect(PADDLE_W, PADDLE_H, pg.rgb565(220, 220, 230)), (W - PADDLE_W) // 2, H - 16)
scene.add(paddle) # add it to the scene ONCE
while True: scene.refresh() # the engine draws the scene clock.tick() # sleep to the next framestep 2 — step2_move.py · input
Section titled “step 2 — step2_move.py · input”
picogame_input.Buttons() samples the buttons each poll(). is_pressed(RIGHT) - is_pressed(LEFT) is a tidy −1/0/+1 axis; we move the paddle and clamp it inside the screen.
You see: the paddle slides with LEFT/RIGHT. Try it: change SPEED.
10 collapsed lines
# Bounce -- step 2: move the paddle with the buttons.## What you learn: input. picogame_input.Buttons reads the board's buttons into a# bitmask each frame; btn.is_pressed(btn.LEFT) is the held state. We move the paddle# and clamp it to the screen so it can't leave.## New vs step 1: picogame_input.Buttons, btn.poll()/btn.is_pressed(), sprite.move(),# clamping with max()/min().## Run: python3 sim/run.py tutorials/01-bounce/step2_move.py --hold RIGHT --shot /tmp/s2.png
import picogame as pgimport picogame_gameimport picogame_inputimport picogame_clockimport picogame_shapes as shp
W, H = 320, 240PADDLE_W, PADDLE_H = 44, 8SPEED = 5
scene, bufA, bufB = picogame_game.setup(background=pg.rgb565(8, 10, 24))btn = picogame_input.Buttons() # NEW: the buttonsclock = picogame_clock.Clock(40)
paddle = pg.Sprite(shp.rect(PADDLE_W, PADDLE_H, pg.rgb565(220, 220, 230)), (W - PADDLE_W) // 2, H - 16)scene.add(paddle)
while True: btn.poll() # sample the buttons once per frame # RIGHT minus LEFT gives -1 / 0 / +1 -- a tidy way to read a 1-axis control. dx = btn.is_pressed(btn.RIGHT) - btn.is_pressed(btn.LEFT) if dx: x = paddle.x + dx * SPEED x = max(0, min(W - PADDLE_W, x)) # clamp inside the screen paddle.move(x, paddle.y)
scene.refresh() clock.tick()step 3 — step3_ball.py · momentum (sub-pixel)
Section titled “step 3 — step3_ball.py · momentum (sub-pixel)”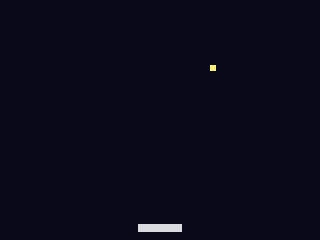 A
A Sprite stores its position as fixed-point, exposed as sprite.fx/sprite.fy
(floats). Add a velocity to fx/fy each frame and the ball drifts smoothly — even at
speeds under 1 px/frame, which integer coordinates can’t express. sprite.x/.y are the
rounded pixels the engine draws at. You see: the ball flies off-screen (we fix that
next). Try it: change vx, vy.
18 collapsed lines
# Bounce -- step 3: a ball with momentum (sub-pixel movement).## What you learn: velocity + sub-pixel position. A Sprite stores its position as# fixed-point, exposed as sprite.fx / sprite.fy (floats). Add a velocity to fx/fy# every frame and the ball drifts smoothly -- even at speeds below 1 px/frame,# which plain integer x/y could not represent. sprite.x / sprite.y are the rounded# pixel coordinates the engine draws at.## New vs step 2: sprite.fx/.fy (sub-pixel position), a velocity (vx, vy). The ball# flies off-screen for now -- step 4 makes it bounce.## Run: python3 sim/run.py tutorials/01-bounce/step3_ball.py --shot /tmp/s3.png
import picogame as pgimport picogame_gameimport picogame_inputimport picogame_clockimport picogame_shapes as shp
W, H = 320, 240PADDLE_W, PADDLE_H = 44, 8BALL = 6
scene, bufA, bufB = picogame_game.setup(background=pg.rgb565(8, 10, 24))btn = picogame_input.Buttons()clock = picogame_clock.Clock(40)
paddle = pg.Sprite(shp.rect(PADDLE_W, PADDLE_H, pg.rgb565(220, 220, 230)), (W - PADDLE_W) // 2, H - 16)ball = pg.Sprite(shp.rect(BALL, BALL, pg.rgb565(255, 240, 120)), W // 2, H // 2)scene.add(paddle)scene.add(ball)
vx, vy = 2.4, -2.6 # NEW: the ball's velocity (px per frame)
while True: btn.poll() dx = btn.is_pressed(btn.RIGHT) - btn.is_pressed(btn.LEFT) if dx: paddle.move(max(0, min(W - PADDLE_W, paddle.x + dx * 5)), paddle.y)
# integrate velocity into the ball's sub-pixel position ball.fx += vx ball.fy += vy
scene.refresh() clock.tick()step 4 — step4_walls.py · reflection
Section titled “step 4 — step4_walls.py · reflection”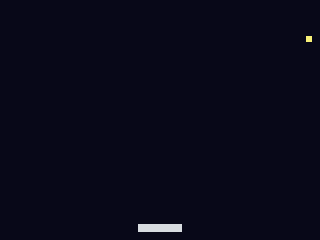 A bounce is just flipping the velocity component heading into a wall and pinning the ball
to the edge so it can’t tunnel out. Left/right flip
A bounce is just flipping the velocity component heading into a wall and pinning the ball
to the edge so it can’t tunnel out. Left/right flip vx, the top flips vy. The bottom
stays open — falling past it is a “miss”. You see: the ball bounces around three
walls forever. Try it: make the top open too and watch it escape.
16 collapsed lines
# Bounce -- step 4: bounce off the walls.## What you learn: reflection. A bounce is just flipping the velocity component that# points into the wall, and pinning the position back to the edge so the ball can't# tunnel out. Left/right flip vx; the top flips vy. We leave the BOTTOM open -- a# ball that falls past it is a missed ball (step 5 turns that into "lose a life").## New vs step 3: edge tests against ball.x/.y, inverting vx/vy on contact.## Run: python3 sim/run.py tutorials/01-bounce/step4_walls.py --shot /tmp/s4.png
import picogame as pgimport picogame_gameimport picogame_inputimport picogame_clockimport picogame_shapes as shp
W, H = 320, 240PADDLE_W, PADDLE_H = 44, 8BALL = 6
scene, bufA, bufB = picogame_game.setup(background=pg.rgb565(8, 10, 24))btn = picogame_input.Buttons()clock = picogame_clock.Clock(40)
paddle = pg.Sprite(shp.rect(PADDLE_W, PADDLE_H, pg.rgb565(220, 220, 230)), (W - PADDLE_W) // 2, H - 16)ball = pg.Sprite(shp.rect(BALL, BALL, pg.rgb565(255, 240, 120)), W // 2, H // 2)scene.add(paddle)scene.add(ball)
vx, vy = 2.4, -2.6
while True: btn.poll() dx = btn.is_pressed(btn.RIGHT) - btn.is_pressed(btn.LEFT) if dx: paddle.move(max(0, min(W - PADDLE_W, paddle.x + dx * 5)), paddle.y)
ball.fx += vx ball.fy += vy
# walls: flip the component heading into the wall, and pin to the edge if ball.fx < 0: ball.fx = 0 vx = -vx elif ball.fx > W - BALL: ball.fx = W - BALL vx = -vx if ball.fy < 0: ball.fy = 0 vy = -vy
scene.refresh() clock.tick()step 5 — step5_paddle.py · box collision + feel
Section titled “step 5 — step5_paddle.py · box collision + feel”
pg.collide(ax1,ay1,ax2,ay2, bx1,by1,bx2,by2) is a fast AABB overlap test. On a paddle
hit (only while moving down) we send the ball up and nudge vx by where on the paddle
it landed, so you can aim. Falling past the bottom costs a life and re-serves. You
see: a real volley you can keep alive. Try it: change the 0.06 steering factor.
16 collapsed lines
# Bounce -- step 5: the paddle hits the ball, and you can miss.## What you learn: box collision + a control feel trick. pg.collide(ax1,ay1,ax2,ay2,# bx1,by1,bx2,by2) is a fast axis-aligned overlap test. On a paddle hit we send the# ball upward, and nudge vx by WHERE on the paddle it landed -- so you can aim. If# the ball falls below the screen it's a miss: lose a life and re-serve.## New vs step 4: pg.collide, steering the bounce by hit offset, lives + reset.## Run: python3 sim/run.py tutorials/01-bounce/step5_paddle.py --hold LEFT --shot /tmp/s5.png
import picogame as pgimport picogame_gameimport picogame_inputimport picogame_clockimport picogame_shapes as shp
W, H = 320, 240PADDLE_W, PADDLE_H = 44, 8BALL = 6
scene, bufA, bufB = picogame_game.setup(background=pg.rgb565(8, 10, 24))btn = picogame_input.Buttons()clock = picogame_clock.Clock(40)
paddle = pg.Sprite(shp.rect(PADDLE_W, PADDLE_H, pg.rgb565(220, 220, 230)), (W - PADDLE_W) // 2, H - 16)ball = pg.Sprite(shp.rect(BALL, BALL, pg.rgb565(255, 240, 120)), W // 2, H // 2)scene.add(paddle)scene.add(ball)
vx, vy = 2.4, -2.6lives = 3
def serve(): global vx, vy ball.move(W // 2, H // 2) vx, vy = 2.4, -2.6
while True: btn.poll() dx = btn.is_pressed(btn.RIGHT) - btn.is_pressed(btn.LEFT) if dx: paddle.move(max(0, min(W - PADDLE_W, paddle.x + dx * 5)), paddle.y)
ball.fx += vx ball.fy += vy if ball.fx < 0: ball.fx = 0; vx = -vx elif ball.fx > W - BALL: ball.fx = W - BALL; vx = -vx if ball.fy < 0: ball.fy = 0; vy = -vy
# paddle bounce: only when moving DOWN and the boxes overlap if vy > 0 and pg.collide(ball.x, ball.y, ball.x + BALL, ball.y + BALL, paddle.x, paddle.y, paddle.x + PADDLE_W, paddle.y + PADDLE_H): vy = -abs(vy) # steer: distance of ball centre from paddle centre -> sideways speed vx += (ball.x + BALL / 2 - (paddle.x + PADDLE_W / 2)) * 0.06
if ball.fy > H: # missed the ball lives -= 1 if lives <= 0: lives = 3 serve()
scene.refresh() clock.tick()step 6 — step6_bricks.py · the Tilemap
Section titled “step 6 — step6_bricks.py · the Tilemap”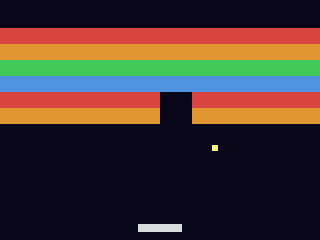 A
A Tilemap is a grid backed by one tileset bitmap, 1 byte per cell — far cheaper than a
sprite per brick. shp.tileset_colors(w, h, [colours]) builds a sheet where value 0 is
empty and 1..N are colours. Map the ball’s pixel to a tile (tx = px // BW), read it, and
set it to 0 to clear it. Clear the wall → rebuild. You see: a 10×6 wall you break.
Try it: change ROWS or the brick colours.
17 collapsed lines
# Bounce -- step 6: a wall of bricks (a Tilemap).## What you learn: the Tilemap. A grid of tiles backed by ONE bitmap (a tileset),# stored as 1 byte per cell -- far cheaper than a Sprite per brick. We build the# tileset with shp.tileset_colors (frame 0 = empty, 1..4 = colours), fill the grid,# and on a ball hit we find the tile under the ball, read it, and set it to 0 to# clear it. Map a pixel to a tile with tx = (px - origin_x) // tile_w.## New vs step 5: pg.Tilemap, shp.tileset_colors, pixel->tile mapping, clearing a tile.## Run: python3 sim/run.py tutorials/01-bounce/step6_bricks.py --shot /tmp/s6.png
import picogame as pgimport picogame_gameimport picogame_inputimport picogame_clockimport picogame_shapes as shp
W, H = 320, 240PADDLE_W, PADDLE_H = 44, 8BALL = 6BW, BH = 32, 16 # brick (tile) sizeCOLS, ROWS = W // BW, 6 # 10 x 6 wallBRICK_Y = 28 # wall top (leaves a HUD strip)
scene, bufA, bufB = picogame_game.setup(background=pg.rgb565(8, 10, 24))btn = picogame_input.Buttons()clock = picogame_clock.Clock(40)
# tileset: value 0 empty, 1..4 = four brick coloursbrick_colors = [pg.rgb565(220, 70, 70), pg.rgb565(230, 150, 50), pg.rgb565(70, 200, 90), pg.rgb565(80, 150, 230)]bricks = pg.Tilemap(shp.tileset_colors(BW, BH, brick_colors), COLS, ROWS)bricks.move(0, BRICK_Y)
def build_wall(): global bricks_left for ty in range(ROWS): for tx in range(COLS): bricks.tile(tx, ty, 1 + (ty % 4)) # row -> colour 1..4 bricks_left = COLS * ROWS
build_wall()paddle = pg.Sprite(shp.rect(PADDLE_W, PADDLE_H, pg.rgb565(220, 220, 230)), (W - PADDLE_W) // 2, H - 16)ball = pg.Sprite(shp.rect(BALL, BALL, pg.rgb565(255, 240, 120)), W // 2, H // 2)scene.add(bricks) # add the wall first (drawn under the ball)scene.add(paddle)scene.add(ball)
vx, vy = 2.4, -2.6lives = 3
def serve(): global vx, vy ball.move(W // 2, H // 2) vx, vy = 2.4, -2.6
while True: btn.poll() dx = btn.is_pressed(btn.RIGHT) - btn.is_pressed(btn.LEFT) if dx: paddle.move(max(0, min(W - PADDLE_W, paddle.x + dx * 5)), paddle.y)
ball.fx += vx ball.fy += vy if ball.fx < 0: ball.fx = 0; vx = -vx elif ball.fx > W - BALL: ball.fx = W - BALL; vx = -vx if ball.fy < 0: ball.fy = 0; vy = -vy
if vy > 0 and pg.collide(ball.x, ball.y, ball.x + BALL, ball.y + BALL, paddle.x, paddle.y, paddle.x + PADDLE_W, paddle.y + PADDLE_H): vy = -abs(vy) vx += (ball.x + BALL / 2 - (paddle.x + PADDLE_W / 2)) * 0.06
# brick hit: the tile under the ball's centre cx, cy = ball.x + BALL // 2, ball.y + BALL // 2 tx = cx // BW ty = (cy - BRICK_Y) // BH if 0 <= tx < COLS and 0 <= ty < ROWS and bricks.tile(tx, ty): bricks.tile(tx, ty, 0) # clear the brick bricks_left -= 1 vy = -vy if bricks_left == 0: # cleared the wall -> rebuild build_wall() serve()
if ball.fy > H: lives -= 1 if lives <= 0: lives = 3 build_wall() serve()
scene.refresh() clock.tick()step 7 — step7_hud.py · text / status bar
Section titled “step 7 — step7_hud.py · text / status bar”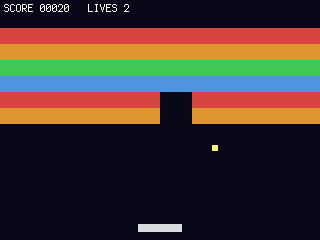
picogame_ui.SceneLabel renders text into the scene as a fixed layer (drawn by
refresh(), and camera-independent — handy once the world scrolls). It uses the bundled
terminalio.FONT, so no font asset. label.set(...) re-renders only when the text
changes. You see: SCORE / LIVES across the top. Try it: add the brick count.
20 collapsed lines
# Bounce -- step 7: a score + lives status bar.## What you learn: text / HUD. picogame_ui.SceneLabel renders text into the scene as a# "fixed" layer -- it's drawn by scene.refresh() like everything else, and (because# it's fixed) it would stay put even if the world scrolled (it doesn't here, but# you'll want that in a platformer). It uses the bundled terminalio.FONT, so no font# asset is needed. Call label.set(...) each frame; it only re-renders when the text# actually changes.## New vs step 6: terminalio.FONT, picogame_ui.SceneLabel, a running score.## Run: python3 sim/run.py tutorials/01-bounce/step7_hud.py --shot /tmp/s7.png
import terminalioimport picogame as pgimport picogame_gameimport picogame_inputimport picogame_clockimport picogame_shapes as shpimport picogame_ui as ui
W, H = 320, 240PADDLE_W, PADDLE_H = 44, 8BALL = 6BW, BH = 32, 16COLS, ROWS = W // BW, 6BRICK_Y = 28BG = pg.rgb565(8, 10, 24)
scene, bufA, bufB = picogame_game.setup(background=BG)btn = picogame_input.Buttons()clock = picogame_clock.Clock(40)
brick_colors = [pg.rgb565(220, 70, 70), pg.rgb565(230, 150, 50), pg.rgb565(70, 200, 90), pg.rgb565(80, 150, 230)]bricks = pg.Tilemap(shp.tileset_colors(BW, BH, brick_colors), COLS, ROWS)bricks.move(0, BRICK_Y)
def build_wall(): global bricks_left for ty in range(ROWS): for tx in range(COLS): bricks.tile(tx, ty, 1 + (ty % 4)) bricks_left = COLS * ROWS
build_wall()paddle = pg.Sprite(shp.rect(PADDLE_W, PADDLE_H, pg.rgb565(220, 220, 230)), (W - PADDLE_W) // 2, H - 16)ball = pg.Sprite(shp.rect(BALL, BALL, pg.rgb565(255, 240, 120)), W // 2, H // 2)scene.add(bricks)scene.add(paddle)scene.add(ball)# NEW: a HUD label. Adding it to the scene happens inside SceneLabel (as a fixed layer).hud = ui.SceneLabel(scene, pg, terminalio.FONT, 4, 2, pg.rgb565(255, 255, 255), BG)
vx, vy = 2.4, -2.6score = 0lives = 3
def serve(): global vx, vy ball.move(W // 2, H // 2) vx, vy = 2.4, -2.6
while True: btn.poll() dx = btn.is_pressed(btn.RIGHT) - btn.is_pressed(btn.LEFT) if dx: paddle.move(max(0, min(W - PADDLE_W, paddle.x + dx * 5)), paddle.y)
ball.fx += vx ball.fy += vy if ball.fx < 0: ball.fx = 0; vx = -vx elif ball.fx > W - BALL: ball.fx = W - BALL; vx = -vx if ball.fy < 0: ball.fy = 0; vy = -vy
if vy > 0 and pg.collide(ball.x, ball.y, ball.x + BALL, ball.y + BALL, paddle.x, paddle.y, paddle.x + PADDLE_W, paddle.y + PADDLE_H): vy = -abs(vy) vx += (ball.x + BALL / 2 - (paddle.x + PADDLE_W / 2)) * 0.06
cx, cy = ball.x + BALL // 2, ball.y + BALL // 2 tx, ty = cx // BW, (cy - BRICK_Y) // BH if 0 <= tx < COLS and 0 <= ty < ROWS and bricks.tile(tx, ty): bricks.tile(tx, ty, 0) bricks_left -= 1 score += 10 # NEW: score on a hit vy = -vy if bricks_left == 0: build_wall() serve()
if ball.fy > H: lives -= 1 if lives <= 0: lives = 3 score = 0 build_wall() serve()
hud.set("SCORE %05d LIVES %d" % (score, lives)) # update text, then draw it scene.refresh() # draws the scene incl. the HUD clock.tick()step 8 — step8_particles.py · juice (particles + sound)
Section titled “step 8 — step8_particles.py · juice (particles + sound)”
pg.Particles is a cheap burst system: emit(x, y, count, speed, life, colour) then
tick() each frame. We burst in the brick’s colour on every break. picogame_audio.tone()
makes a beep with no .wav — a blip per hit. (Audio is wrapped in try/except, so it’s
silent but safe where there’s no audio output, like the simulator.) You see: coloured
sparks + (on hardware) a blip. Try it: change the particle count/gravity.
20 collapsed lines
# Bounce -- step 8: juice (particles + sound).## What you learn: feedback that makes a hit feel good. pg.Particles is a cheap# burst system: emit(x, y, count, speed, life, colour) spawns particles, tick()# advances them (with gravity), and the scene draws them. We burst on every brick# break, in the brick's colour. And picogame_audio.tone() builds a short square-wave# beep with no .wav file -- a tiny blip on each hit. (Audio is wrapped in try/except# so it degrades gracefully where there's no audio output, e.g. the simulator.)## New vs step 7: pg.Particles (emit/tick), picogame_audio.tone() + Audio().sfx().## Run: python3 sim/run.py tutorials/01-bounce/step8_particles.py --shot /tmp/s8.png
import terminalioimport picogame as pgimport picogame_gameimport picogame_inputimport picogame_clockimport picogame_shapes as shpimport picogame_ui as ui
W, H = 320, 240PADDLE_W, PADDLE_H = 44, 8BALL = 6BW, BH = 32, 16COLS, ROWS = W // BW, 6BRICK_Y = 28BG = pg.rgb565(8, 10, 24)
scene, bufA, bufB = picogame_game.setup(background=BG)btn = picogame_input.Buttons()clock = picogame_clock.Clock(40)
# optional audio: a beep on each hit (no asset needed). None if no audio backend.try: import picogame_audio audio = picogame_audio.Audio() blip = picogame_audio.tone(660, 35)except Exception: audio = None blip = None
brick_colors = [pg.rgb565(220, 70, 70), pg.rgb565(230, 150, 50), pg.rgb565(70, 200, 90), pg.rgb565(80, 150, 230)]brick_ts = shp.tileset_colors(BW, BH, brick_colors)bricks = pg.Tilemap(brick_ts, COLS, ROWS)bricks.move(0, BRICK_Y)
def build_wall(): global bricks_left for ty in range(ROWS): for tx in range(COLS): bricks.tile(tx, ty, 1 + (ty % 4)) bricks_left = COLS * ROWS
build_wall()paddle = pg.Sprite(shp.rect(PADDLE_W, PADDLE_H, pg.rgb565(220, 220, 230)), (W - PADDLE_W) // 2, H - 16)ball = pg.Sprite(shp.rect(BALL, BALL, pg.rgb565(255, 240, 120)), W // 2, H // 2)particles = pg.Particles(96, size=2, gravity=0.12) # NEWscene.add(bricks)scene.add(particles) # behind paddle+ballscene.add(paddle)scene.add(ball)hud = ui.SceneLabel(scene, pg, terminalio.FONT, 4, 2, pg.rgb565(255, 255, 255), BG)
vx, vy = 2.4, -2.6score = 0lives = 3
def serve(): global vx, vy ball.move(W // 2, H // 2) vx, vy = 2.4, -2.6
while True: btn.poll() dx = btn.is_pressed(btn.RIGHT) - btn.is_pressed(btn.LEFT) if dx: paddle.move(max(0, min(W - PADDLE_W, paddle.x + dx * 5)), paddle.y)
ball.fx += vx ball.fy += vy if ball.fx < 0: ball.fx = 0; vx = -vx elif ball.fx > W - BALL: ball.fx = W - BALL; vx = -vx if ball.fy < 0: ball.fy = 0; vy = -vy
if vy > 0 and pg.collide(ball.x, ball.y, ball.x + BALL, ball.y + BALL, paddle.x, paddle.y, paddle.x + PADDLE_W, paddle.y + PADDLE_H): vy = -abs(vy) vx += (ball.x + BALL / 2 - (paddle.x + PADDLE_W / 2)) * 0.06
cx, cy = ball.x + BALL // 2, ball.y + BALL // 2 tx, ty = cx // BW, (cy - BRICK_Y) // BH if 0 <= tx < COLS and 0 <= ty < ROWS: cell = bricks.tile(tx, ty) if cell: bricks.tile(tx, ty, 0) bricks_left -= 1 score += 10 vy = -vy # burst in the brick's colour at the brick's centre bx_px = tx * BW + BW // 2 by_px = BRICK_Y + ty * BH + BH // 2 particles.emit(bx_px, by_px, 14, 3, 22, brick_colors[cell - 1]) if audio: audio.sfx(blip) if bricks_left == 0: build_wall() serve()
if ball.fy > H: lives -= 1 if lives <= 0: lives = 3 score = 0 build_wall() serve()
particles.tick() # advance the burst each frame hud.set("SCORE %05d LIVES %d" % (score, lives)) scene.refresh() clock.tick()step 9 — step9_sprites.py · rectangles → sprites
Section titled “step 9 — step9_sprites.py · rectangles → sprites”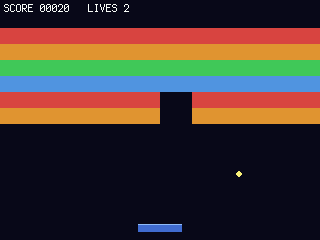 The payoff. We change only the two bitmaps: the ball becomes a round disc
(
The payoff. We change only the two bitmaps: the ball becomes a round disc
(shp.circle) and the paddle gets a multi-colour bitmap with a highlight. Diff this file
against step 8 — the entire game loop is byte-for-byte identical. A Sprite doesn’t care
whether its bitmap is a rectangle, a generated shape, or a PNG you imported in the editor.
You see: the same game, now with a round ball and a shaded paddle. Try it: load a
real PNG via the editor → scene pipeline (open it in the web editor) and
assign it as the bitmap.
23 collapsed lines
# Bounce -- step 9: from rectangles to sprites (the orthogonality lesson).## What you learn: art is independent of mechanics. We built a COMPLETE game out of# coloured rectangles. To make it look like a real game we change ONLY the bitmaps:# the ball becomes a round disc (shp.circle) and the paddle gets a multi-colour# bitmap with a highlight stripe. Compare this file to step 8: the entire game loop# -- movement, bouncing, collision, scoring, particles -- is byte-for-byte the same.# A Sprite doesn't care whether its bitmap is a rectangle, a generated shape, or a# PNG you imported in the editor. (To use real PNG art: draw/import it in the editor,# export a scene, and load it with picogame_scene -- see tutorials/README.md.)## New vs step 8: only the two bitmap definitions changed (ball + paddle art).## Run: python3 sim/run.py tutorials/01-bounce/step9_sprites.py --shot /tmp/s9.png
import arrayimport terminalioimport picogame as pgimport picogame_gameimport picogame_inputimport picogame_clockimport picogame_shapes as shpimport picogame_ui as ui
W, H = 320, 240PADDLE_W, PADDLE_H = 44, 8BALL = 6BW, BH = 32, 16COLS, ROWS = W // BW, 6BRICK_Y = 28BG = pg.rgb565(8, 10, 24)
scene, bufA, bufB = picogame_game.setup(background=BG)btn = picogame_input.Buttons()clock = picogame_clock.Clock(40)
try: import picogame_audio audio = picogame_audio.Audio() blip = picogame_audio.tone(660, 35)except Exception: audio = None blip = None
def paddle_art(w, h): """A 2-colour paddle bitmap: blue body + a lighter highlight on the top row. This is what 'real sprite art' is -- a PAL8 bitmap with more than one colour.""" pal = array.array("H", [pg.rgb565(0, 0, 0), pg.rgb565(70, 110, 210), pg.rgb565(150, 190, 255)]) data = bytearray(b"\x01" * (w * h)) # index 1 = body for x in range(w): data[x] = 2 # index 2 = highlight on the top row return pg.Bitmap(data, w, h, format=pg.PAL8, palette=pal, frames=1, stride=w, transparent=0)
brick_colors = [pg.rgb565(220, 70, 70), pg.rgb565(230, 150, 50), pg.rgb565(70, 200, 90), pg.rgb565(80, 150, 230)]bricks = pg.Tilemap(shp.tileset_colors(BW, BH, brick_colors), COLS, ROWS)bricks.move(0, BRICK_Y)
def build_wall(): global bricks_left for ty in range(ROWS): for tx in range(COLS): bricks.tile(tx, ty, 1 + (ty % 4)) bricks_left = COLS * ROWS
build_wall()# >>> the ONLY change from step 8: art instead of plain rectangles <<<paddle = pg.Sprite(paddle_art(PADDLE_W, PADDLE_H), (W - PADDLE_W) // 2, H - 16)ball = pg.Sprite(shp.circle(BALL, pg.rgb565(255, 240, 120)), W // 2, H // 2)# >>> everything below is identical to step 8 <<<particles = pg.Particles(96, size=2, gravity=0.12)scene.add(bricks)scene.add(particles)scene.add(paddle)scene.add(ball)hud = ui.SceneLabel(scene, pg, terminalio.FONT, 4, 2, pg.rgb565(255, 255, 255), BG)
vx, vy = 2.4, -2.6score = 0lives = 3
def serve(): global vx, vy ball.move(W // 2, H // 2) vx, vy = 2.4, -2.6
49 collapsed lines
while True: btn.poll() dx = btn.is_pressed(btn.RIGHT) - btn.is_pressed(btn.LEFT) if dx: paddle.move(max(0, min(W - PADDLE_W, paddle.x + dx * 5)), paddle.y)
ball.fx += vx ball.fy += vy if ball.fx < 0: ball.fx = 0; vx = -vx elif ball.fx > W - BALL: ball.fx = W - BALL; vx = -vx if ball.fy < 0: ball.fy = 0; vy = -vy
if vy > 0 and pg.collide(ball.x, ball.y, ball.x + BALL, ball.y + BALL, paddle.x, paddle.y, paddle.x + PADDLE_W, paddle.y + PADDLE_H): vy = -abs(vy) vx += (ball.x + BALL / 2 - (paddle.x + PADDLE_W / 2)) * 0.06
cx, cy = ball.x + BALL // 2, ball.y + BALL // 2 tx, ty = cx // BW, (cy - BRICK_Y) // BH if 0 <= tx < COLS and 0 <= ty < ROWS: cell = bricks.tile(tx, ty) if cell: bricks.tile(tx, ty, 0) bricks_left -= 1 score += 10 vy = -vy particles.emit(tx * BW + BW // 2, BRICK_Y + ty * BH + BH // 2, 14, 3, 22, brick_colors[cell - 1]) if audio: audio.sfx(blip) if bricks_left == 0: build_wall() serve()
if ball.fy > H: lives -= 1 if lives <= 0: lives = 3 score = 0 build_wall() serve()
particles.tick() hud.set("SCORE %05d LIVES %d" % (score, lives)) scene.refresh() clock.tick()Where to go next: 02-starship (pools, rotation, shooting, state machine), or jump to the web editor and the scene format to build levels as data instead of by hand. There’s also 03-quest if you want a longer game to pull apart.